Download to read offline

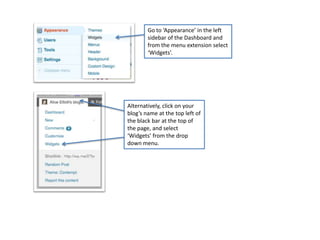
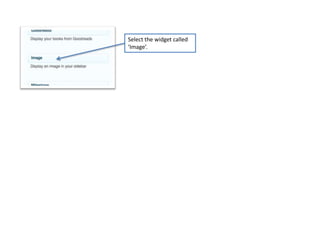
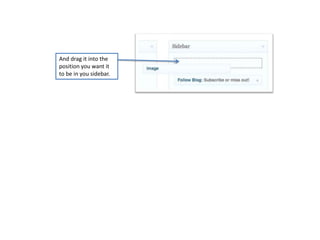
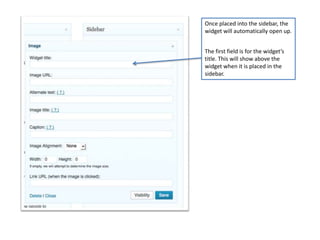
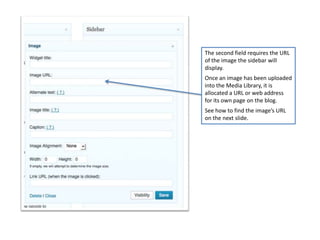
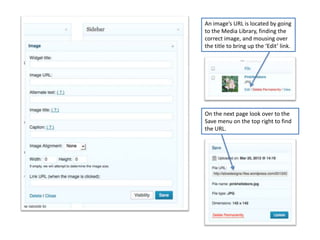
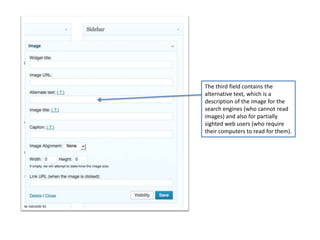
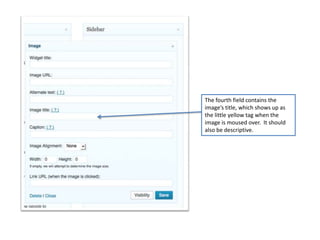
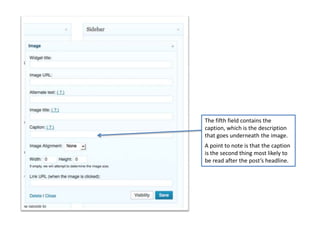

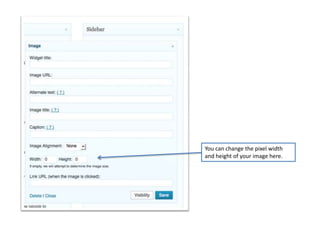
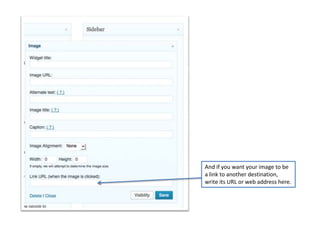
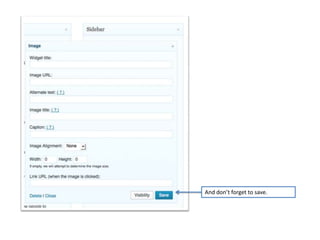
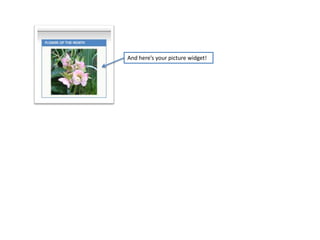
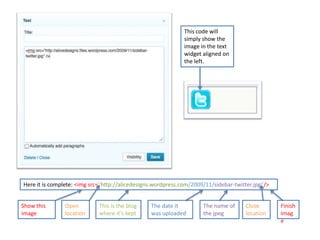
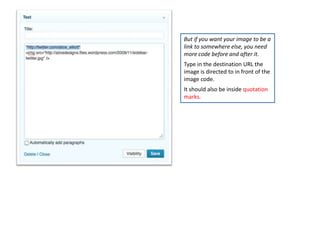
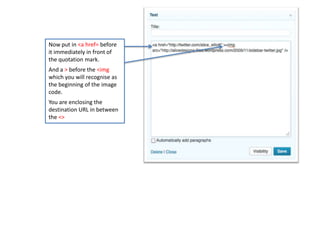
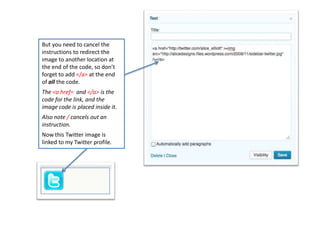

This document provides a step-by-step guide on how to place an image inside a widget on a blog sidebar using the dashboard's appearance setting. It explains various fields to fill out, such as the image URL, alternative text, title, caption, and links, including code examples for embedding images. Additionally, it offers tips on proper image sizing and linking images to external URLs.