Download to read offline
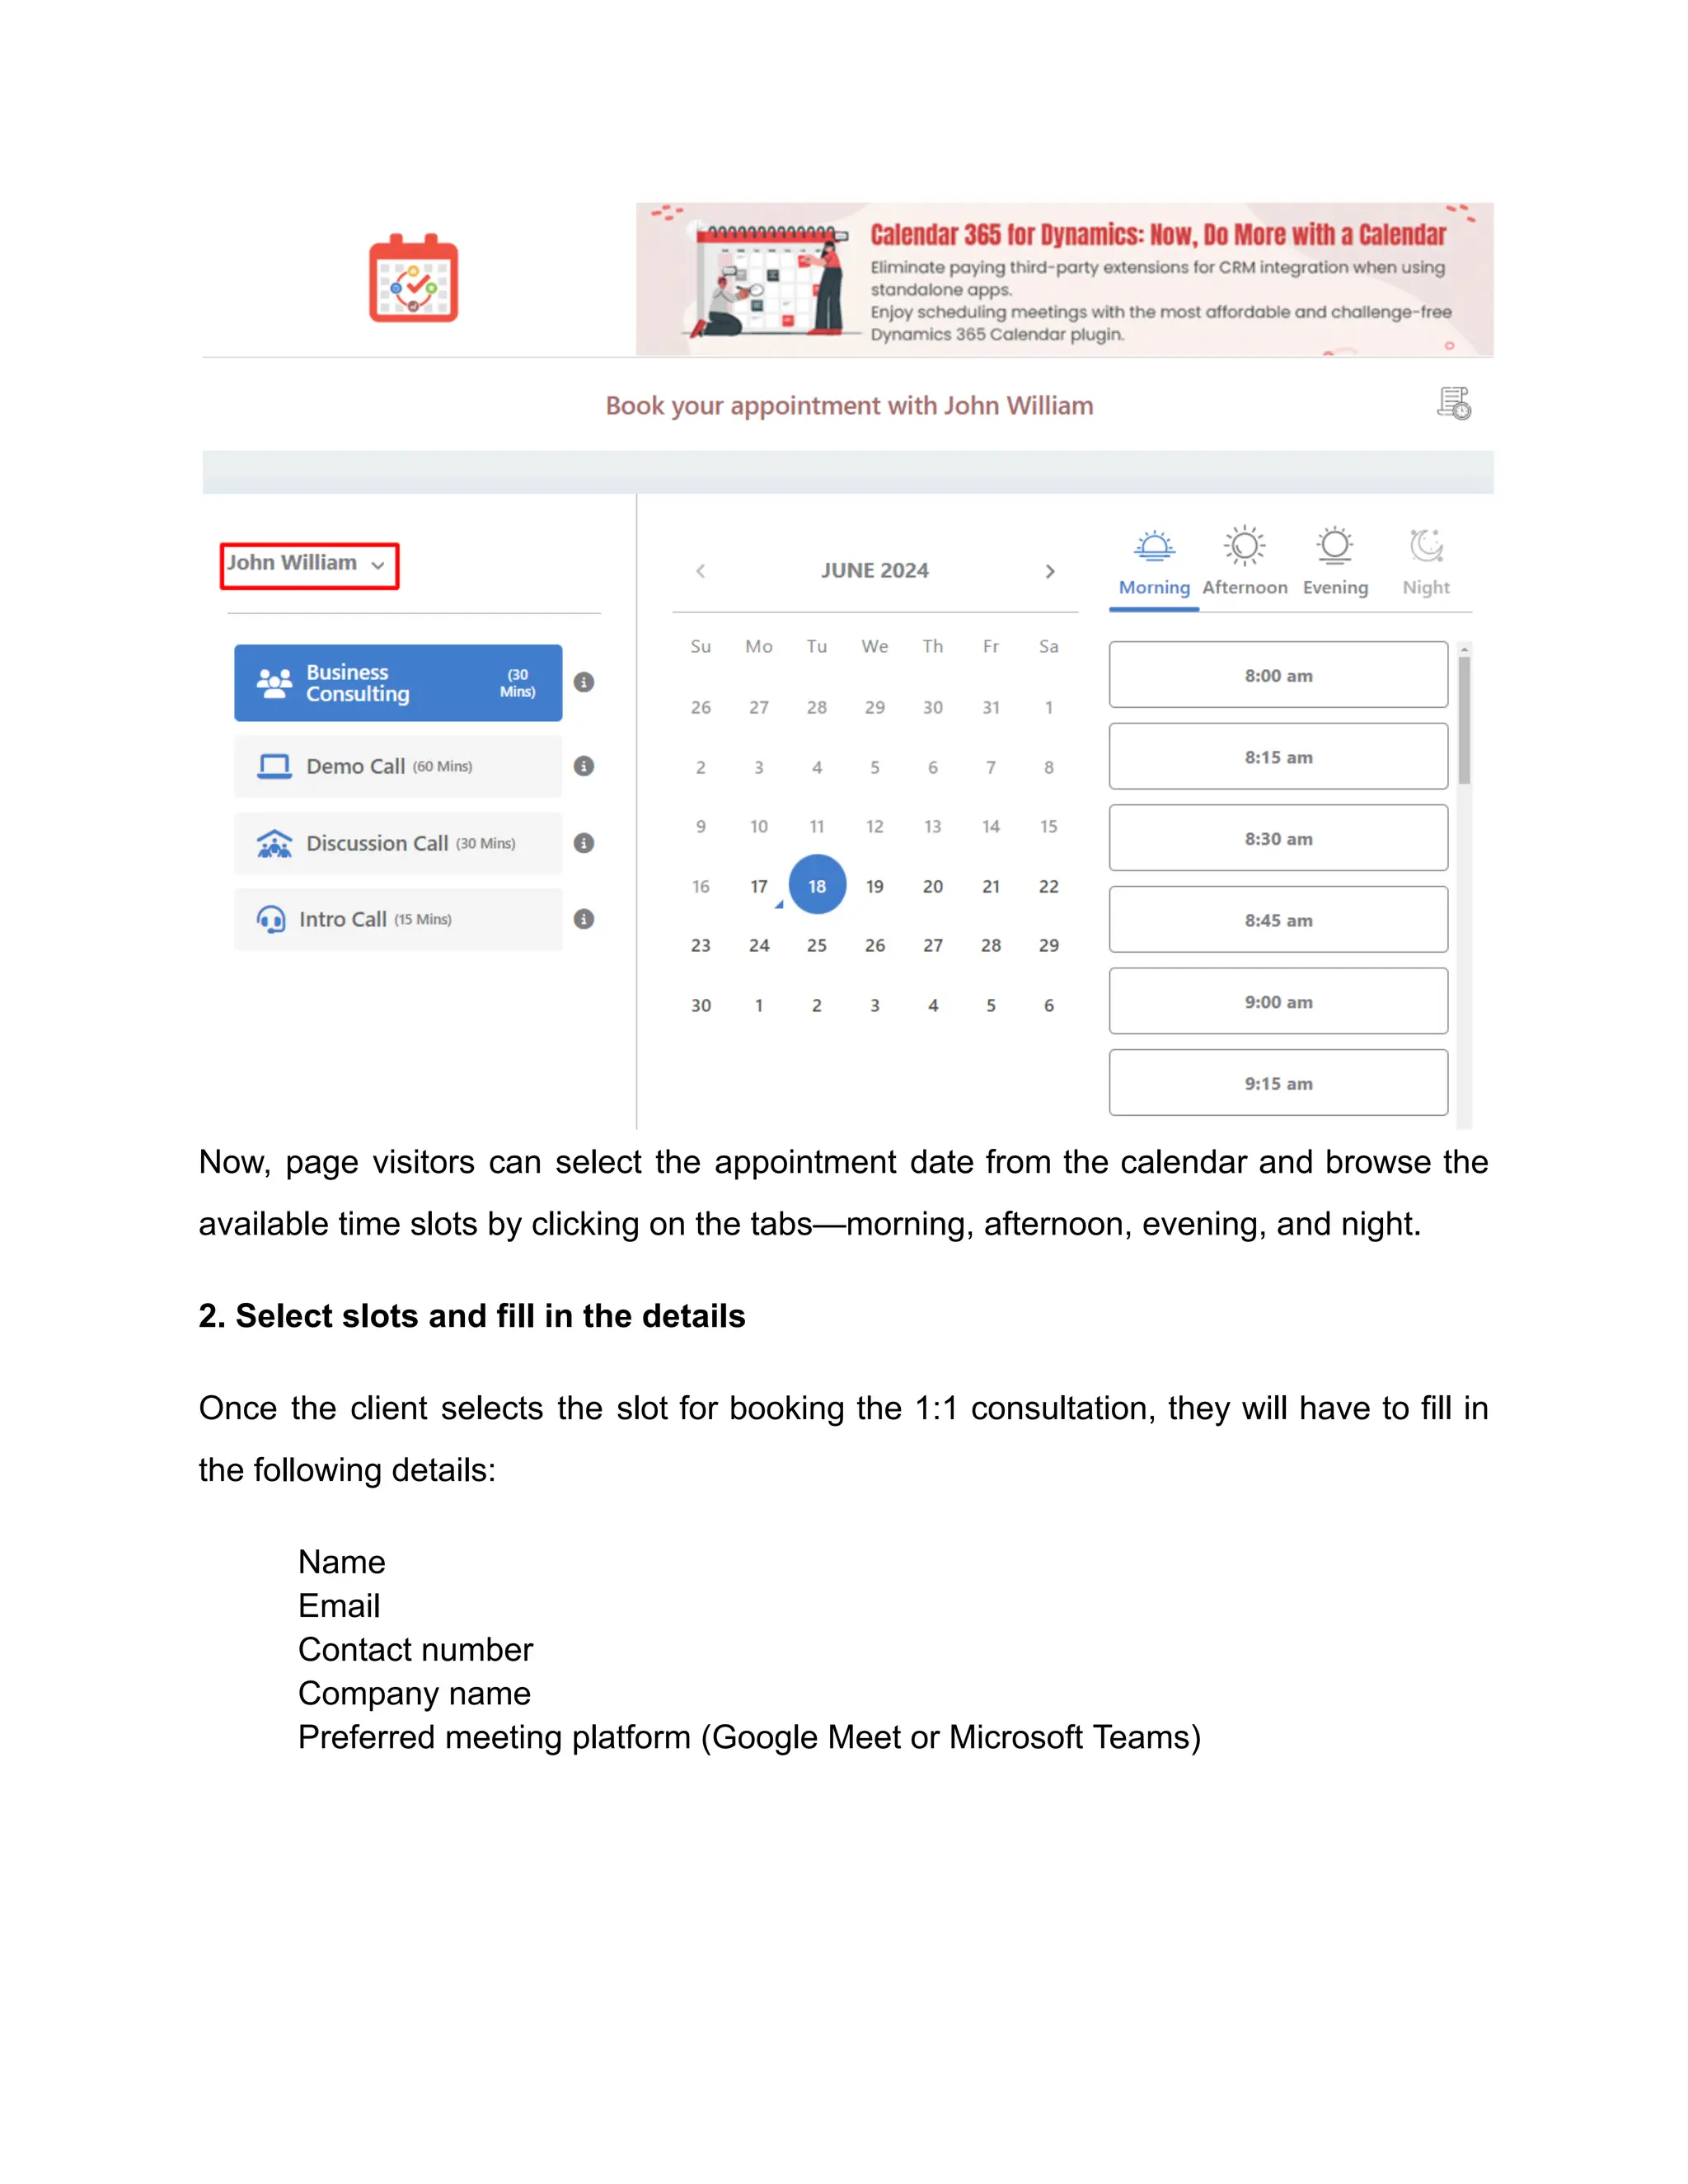


The document explains how Dynamics 365 CRM users can create and share global events using the Calendar 365 plugin, highlighting its advantages over tools like Calendly, including cost-effectiveness and customization. It provides a step-by-step guide for setting up events, sharing booking links, and managing appointments while emphasizing real-time updates and ease of integration with CRM systems. Overall, Calendar 365 simplifies the scheduling process, allowing businesses to efficiently organize and manage appointments across various platforms.