SlideShare a Scribd company logo
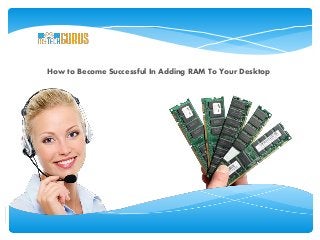
How to Become Successful In Adding RAM To Your Desktop
Steps to Add RAM To Your Computer
Turn off the PC and unplug the system from the power supply. Detach all the cables and move the computer to an
appropriate location.
Take out the side cover from your system. Different computers have different attachment. Some are attached via clips or
screws. Look at the manual in order to check how the cover comes off.
Touch the metal of the computer case or put on a ground strap which would keep you away from any kind of static. You
do this to save your computer components from any static shock.
Find out the RAM slots. If you find wires blocking the way, see if you can move them without detaching them. If in case
you need to unhook any of them, ensure you attach them appropriately once you put in the new memory.
Open the RAM which you purchased. Always remember that you should hold the RAM by the edges and not by the
surfaces or pins.
If you are replacing the old with the new one, look at the RAM slots in your desktop. You can notice little tabs on the
sides of the memory. Push the sides down allowing the memory to pop up and come loose. Take out the old RAM from
the machine and insert the new memory in the place where the previous one was. Push down on every side and notice
that the tabs rise up. Get it in place with the tabs clicked and you can see that the tabs are in the small groove holes of
the sides of the memory.
In case you are adding memory, find out a free slot. Take out the new RAM and put it into the free slot. Push down on
every side allowing the tabs to rise up. Get it in place with the tabs clicked and you can see that the tabs are in the small
groove of the sides of the memory.
Once you have placed the memory in its correct position, connect the cables that you have detached.
Take of the grounding strap and place the cover back on to the computer.
Connect all the cables and plug it back in. If you were successful in adding the memory, your computer should be able
to boot up normally. In order to see if the installation process you followed was correct, go to Start menu, click settings,
next click Control Panel. Then hit System and choose the General tab. You would be able to see the amount of RAM at
the very bottom of the page.
Thank YouContact :
888 258 8478
Follow us :
http://www.mytechgurus.com/
support@mytechgurus.com

More Related Content

Viewers also liked (6)

Internal components of the computer
Internal components of the computerInternal components of the computer
Internal components of the computer
 
Motherboard and its components
Motherboard and its componentsMotherboard and its components
Motherboard and its components
 
Introduction to Motherboard
Introduction to Motherboard Introduction to Motherboard
Introduction to Motherboard
 
Motherboard presentation it
Motherboard presentation itMotherboard presentation it
Motherboard presentation it
 
Motherboard Components
Motherboard ComponentsMotherboard Components
Motherboard Components
 
Computer Basics 101 Slide Show Presentation
Computer Basics 101 Slide Show PresentationComputer Basics 101 Slide Show Presentation
Computer Basics 101 Slide Show Presentation
 

Recently uploaded

Future Visions: Predictions to Guide and Time Tech Innovation, Peter Udo Diehl
Future Visions: Predictions to Guide and Time Tech Innovation, Peter Udo DiehlFuture Visions: Predictions to Guide and Time Tech Innovation, Peter Udo Diehl
Future Visions: Predictions to Guide and Time Tech Innovation, Peter Udo Diehl
Peter Udo Diehl
 
Structuring Teams and Portfolios for Success
Structuring Teams and Portfolios for SuccessStructuring Teams and Portfolios for Success
Structuring Teams and Portfolios for Success
UXDXConf
 

Recently uploaded (20)

ECS 2024 Teams Premium - Pretty Secure
ECS 2024   Teams Premium - Pretty SecureECS 2024   Teams Premium - Pretty Secure
ECS 2024 Teams Premium - Pretty Secure
 
WSO2CONMay2024OpenSourceConferenceDebrief.pptx
WSO2CONMay2024OpenSourceConferenceDebrief.pptxWSO2CONMay2024OpenSourceConferenceDebrief.pptx
WSO2CONMay2024OpenSourceConferenceDebrief.pptx
 
UiPath Test Automation using UiPath Test Suite series, part 1
UiPath Test Automation using UiPath Test Suite series, part 1UiPath Test Automation using UiPath Test Suite series, part 1
UiPath Test Automation using UiPath Test Suite series, part 1
 
Integrating Telephony Systems with Salesforce: Insights and Considerations, B...
Integrating Telephony Systems with Salesforce: Insights and Considerations, B...Integrating Telephony Systems with Salesforce: Insights and Considerations, B...
Integrating Telephony Systems with Salesforce: Insights and Considerations, B...
 
The architecture of Generative AI for enterprises.pdf
The architecture of Generative AI for enterprises.pdfThe architecture of Generative AI for enterprises.pdf
The architecture of Generative AI for enterprises.pdf
 
To Graph or Not to Graph Knowledge Graph Architectures and LLMs
To Graph or Not to Graph Knowledge Graph Architectures and LLMsTo Graph or Not to Graph Knowledge Graph Architectures and LLMs
To Graph or Not to Graph Knowledge Graph Architectures and LLMs
 
Kubernetes & AI - Beauty and the Beast !?! @KCD Istanbul 2024
Kubernetes & AI - Beauty and the Beast !?! @KCD Istanbul 2024Kubernetes & AI - Beauty and the Beast !?! @KCD Istanbul 2024
Kubernetes & AI - Beauty and the Beast !?! @KCD Istanbul 2024
 
Slack (or Teams) Automation for Bonterra Impact Management (fka Social Soluti...
Slack (or Teams) Automation for Bonterra Impact Management (fka Social Soluti...Slack (or Teams) Automation for Bonterra Impact Management (fka Social Soluti...
Slack (or Teams) Automation for Bonterra Impact Management (fka Social Soluti...
 
Future Visions: Predictions to Guide and Time Tech Innovation, Peter Udo Diehl
Future Visions: Predictions to Guide and Time Tech Innovation, Peter Udo DiehlFuture Visions: Predictions to Guide and Time Tech Innovation, Peter Udo Diehl
Future Visions: Predictions to Guide and Time Tech Innovation, Peter Udo Diehl
 
Structuring Teams and Portfolios for Success
Structuring Teams and Portfolios for SuccessStructuring Teams and Portfolios for Success
Structuring Teams and Portfolios for Success
 
UiPath Test Automation using UiPath Test Suite series, part 2
UiPath Test Automation using UiPath Test Suite series, part 2UiPath Test Automation using UiPath Test Suite series, part 2
UiPath Test Automation using UiPath Test Suite series, part 2
 
AI presentation and introduction - Retrieval Augmented Generation RAG 101
AI presentation and introduction - Retrieval Augmented Generation RAG 101AI presentation and introduction - Retrieval Augmented Generation RAG 101
AI presentation and introduction - Retrieval Augmented Generation RAG 101
 
Intro in Product Management - Коротко про професію продакт менеджера
Intro in Product Management - Коротко про професію продакт менеджераIntro in Product Management - Коротко про професію продакт менеджера
Intro in Product Management - Коротко про професію продакт менеджера
 
IESVE for Early Stage Design and Planning
IESVE for Early Stage Design and PlanningIESVE for Early Stage Design and Planning
IESVE for Early Stage Design and Planning
 
Agentic RAG What it is its types applications and implementation.pdf
Agentic RAG What it is its types applications and implementation.pdfAgentic RAG What it is its types applications and implementation.pdf
Agentic RAG What it is its types applications and implementation.pdf
 
JMeter webinar - integration with InfluxDB and Grafana
JMeter webinar - integration with InfluxDB and GrafanaJMeter webinar - integration with InfluxDB and Grafana
JMeter webinar - integration with InfluxDB and Grafana
 
Speed Wins: From Kafka to APIs in Minutes
Speed Wins: From Kafka to APIs in MinutesSpeed Wins: From Kafka to APIs in Minutes
Speed Wins: From Kafka to APIs in Minutes
 
Enterprise Security Monitoring, And Log Management.
Enterprise Security Monitoring, And Log Management.Enterprise Security Monitoring, And Log Management.
Enterprise Security Monitoring, And Log Management.
 
PLAI - Acceleration Program for Generative A.I. Startups
PLAI - Acceleration Program for Generative A.I. StartupsPLAI - Acceleration Program for Generative A.I. Startups
PLAI - Acceleration Program for Generative A.I. Startups
 
In-Depth Performance Testing Guide for IT Professionals
In-Depth Performance Testing Guide for IT ProfessionalsIn-Depth Performance Testing Guide for IT Professionals
In-Depth Performance Testing Guide for IT Professionals
 

How to Add RAM to your Desktop

  • 1. How to Become Successful In Adding RAM To Your Desktop
  • 2. Steps to Add RAM To Your Computer Turn off the PC and unplug the system from the power supply. Detach all the cables and move the computer to an appropriate location.
  • 3. Take out the side cover from your system. Different computers have different attachment. Some are attached via clips or screws. Look at the manual in order to check how the cover comes off.
  • 4. Touch the metal of the computer case or put on a ground strap which would keep you away from any kind of static. You do this to save your computer components from any static shock. Find out the RAM slots. If you find wires blocking the way, see if you can move them without detaching them. If in case you need to unhook any of them, ensure you attach them appropriately once you put in the new memory.
  • 5. Open the RAM which you purchased. Always remember that you should hold the RAM by the edges and not by the surfaces or pins.
  • 6. If you are replacing the old with the new one, look at the RAM slots in your desktop. You can notice little tabs on the sides of the memory. Push the sides down allowing the memory to pop up and come loose. Take out the old RAM from the machine and insert the new memory in the place where the previous one was. Push down on every side and notice that the tabs rise up. Get it in place with the tabs clicked and you can see that the tabs are in the small groove holes of the sides of the memory. In case you are adding memory, find out a free slot. Take out the new RAM and put it into the free slot. Push down on every side allowing the tabs to rise up. Get it in place with the tabs clicked and you can see that the tabs are in the small groove of the sides of the memory.
  • 7. Once you have placed the memory in its correct position, connect the cables that you have detached. Take of the grounding strap and place the cover back on to the computer. Connect all the cables and plug it back in. If you were successful in adding the memory, your computer should be able to boot up normally. In order to see if the installation process you followed was correct, go to Start menu, click settings, next click Control Panel. Then hit System and choose the General tab. You would be able to see the amount of RAM at the very bottom of the page.
  • 8. Thank YouContact : 888 258 8478 Follow us : http://www.mytechgurus.com/ support@mytechgurus.com