
Recommended
More Related Content
Similar to HI-workshop-202igchgcjhgcjhgchgcgcg4.ppt
Similar to HI-workshop-202igchgcjhgcjhgchgcgcg4.ppt (20)
More from AronMozart1
More from AronMozart1 (12)
Recently uploaded
Recently uploaded (20)
HI-workshop-202igchgcjhgcjhgchgcgcg4.ppt
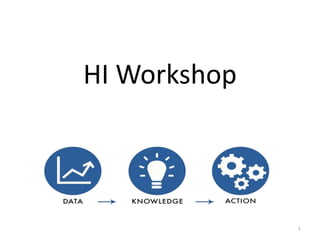
- 2. Data preparation Data Analysis Data interpretation Data collection Data Reporting Primary sources such as Questionnaire, Interview, … Problem solving To extract useful information & knowledge that helps us to pass informed decision To identify the finding of the study To clean/transform the data and make it ready for analysis Secondary sources like Database, Datawarehouse
- 3. Course coverage • Data collection • Google form • Data processing and analysis • Python, SPSS, WEKA, MS Excel • Report writing • MS Word, Latex • Reference organization • MS Word, Mendeley 3
- 4. Evaluation • Assignments (35%) • Presentation • Report writing • Project (30%) • Presentation • Report writing • Final Exam (35%)
- 5. Presentation Assignment Topic (present date) To Do Who? 1.Collect Data using Google form (Mon April 1) Creating questionnaire (with multiple question types) using Google form; save data; show results 2. Latex (Mon April 1) Document preparation; insert formats, equations, images, tables, references 3. Data analysis in MS Excel (Wed April 3) Data processing & data analysis such as filtering, pivot table, dashboard, regression analysis; data visualization 4. Explore Reference Tab of MS Word (Wed April 3) Creating table of content; list of tables & figures; Reference management 5. Mendeley (Thu April 4) Reference management by collecting from different sources; Citation 6. SPSS (Thu April 4) Create data set; data preprocessing; descriptive & inferential data analysis; generate plots 7. WEKA (Fri April 5) Data preprocessing; explore classification & clustering algorithms 8. Python Data preprocessing (Pandas); explore learning algorithms (sklearn); visualization (matplotlib)
- 6. Google Forms provides a customized, straightforward solution to help collect large amounts of data from various sources at the same time. What’s more, as part of the Google G Suite, Google Forms can easily be integrated with other Google tools, including Google Sheets.
- 7. Google Forms ● Data collection is the first step in any project, research activities, whether you’re investigating ○ course delivery, ○ student satisfaction, or ○ Customer need, etc. … ● You can design a questionnaire using Google forms ● Google Forms offer a range of features and settings. ○ These allow you to collect, manage and optimize large, complex data that will help you to conduct data analysis to find solution for a given problem.
- 8. Why use Google Forms? ● Data ○ Everyone wants data! ● Google Forms is a data gathering and tracking form that is free and easy to learn
- 9. Google Forms • Google Forms is an online form generator tool that you can use to collect a variety of data quickly. • You can create your own custom forms using the variety of question types (multiple choice, short or long answer, dropdown, linear scale, etc.) Google provides, as well as a variety of settings to make the form personalized to your research or project.
- 10. How to create a Google Form 1. Create a new form ● Open https://docs.google.com/forms/ or access the tool via Google Apps in Chrome. You can either start with a ready-made template by Google, or start from scratch. ● To start from scratch, let’s use the Blank option to begin.
- 11. Start creating Google Form ● Here, you can start by adding the form name and form description.
- 12. Add questions ● To add a new question to your form, click on the plus icon located on the right-hand side of your form. ● A new question box should appear. Here, you can use the dropdown menu on the right to choose your question type. Then, use the fields to write out your question, and (if applicable), write out your answer options. ● Google form supports different kinds of questions, such as ○ Short answer, Long answer, Multiple choice, Check boxes, Drop down menu, More... ● To make the question mandatory, activate the Required button located at the bottom of the question box. ● If you want to move your answer options around, you can drag and drop them by hovering over the left of each answer option. ● Continue adding all of your questions.
- 13. Add sections ● If your Google Form is quite long, you may want to section it off based on different categories. I ○ For example, you can divide the survey into sections, like student profile, course satisfaction, etc. ○ Click on the question before you want your section to start. Select the Add section icon from the menu on the right-hand side. ○ The section should appear below. Add a title and brief description. ● Customize your form ○ Click on the Customize theme button on the top right-hand side of the screen. Here, you can adjust the theme of your form: ○ Add a header image ○ Choose your theme color and background color ○ Adjust the font ● Under the Settings tab, you can further customize your form. ○ You can turn it into a quiz for example, and manage how your responses will be collected and analyzed. ○ Simply select a question and use the menu on the right-hand side to add an image, add a video, or import existing questions.
- 14. Collect responses ● With your Google Form ready, it’s time to determine where to send the responses. ○ Click on the Responses tab, then the More options (⋮) button. Choose Select responses destination from the dropdown. ● Here, choose whether to save your responses in a new or existing spreadsheet. ○ Let us create a new spreadsheet. Add the name of your new spreadsheet. ○ Once finished, click Create. ● There should now be a Google Sheets icon next to the More options (⋮) button. Click this to open the new spreadsheet. ● Send to user ○ Click the purple Share button located on the top right-hand side of the screen. ○ You can do the following: ■ Add email addresses individually. ■ Copy the Google Form link to add to a message. ■ Copy a HTML link to embed the form in an email or website page. ○ Once you’ve carried out your preferred method, click the Send or Copy button to finalize the process.
- 15. Mini Assignment () ● Use Google form as per your interest ○ create questionnaire (with at least four question types, with multiple sections), ○ send it to respondents for collecting data (ask the class or friends to fill it) ● Produce two pages report: ○ where you present summary of the response using bar chart, pie chart, line graph or any other ○ ○Download the collected data in .csv format and attach it with the report
- 16. Latex ● Document production tool
- 17. What is Latex? ● LATEX is a tool for typesetting professional-looking documents. ● Arguments in favor of LATEX include: ○ support for typesetting extremely complex mathematics, tables and technical content for the physical sciences; ○ facilities for footnotes, cross-referencing and management of bibliographies; ○ ease of producing complicated, or tedious, document elements such as table of contents, lists of figures; ○ being highly customizable for personalized document production due to its intrinsic programmability and extensibility through thousands of free add-on packages.
- 18. Writing your first piece of LATEX ● Let’s start with the simplest working example, which can be opened directly in Overleaf: documentclass{article} begin{document} First document. This is a simple example, with no extra details included. end{document}
- 19. Including title, author & date information documentclass[12pt, letterpaper]{article} title{My first LaTeX document} author{Million M } date{December 2023} begin{document} maketitle We have now added a title, author and date to our first LaTeX{} document! end{document}
- 20. Bold, italics and underlining ● text formatting commands: ○ Bold: bold text in LaTeX is typeset using the textbf{...} command. ○ Italics: italicised text is produced using the textit{...} command. ○ Underline: to underline text use the underline{...} command. documentclass[12pt, letterpaper]{article} title{My first LaTeX document} author{Million M } date{December 2023} begin{document} maketitle Some of the greatest emph{discoveries} in science were made by accident. textit{Some of the greatest emph{discoveries} in science were made by accident.} textbf{Some of the greatest emph{discoveries} in science were made by accident.} end{document}
- 21. Adding math to LATEX To typeset inline-mode math you can use one of these delimiter pairs: ( ... ), $ ... $ or begin{math} ... end{math}, as demonstrated in the following example: documentclass[12pt, letterpaper]{article} begin{document} In physics, the mass-energy equivalence is stated by the equation $E=mc^2$, discovered in 1905 by Albert Einstein. end{document} See the difference between; (i) ( ... ) and [ ... ] [sum_{n=0}^{n} x^2]
- 22. Chapters and sections ● Collectively, LaTeX document classes provide the following sectioning commands, with specific classes each supporting a relevant subset: ○ part{part} ○ chapter{chapter} ○ section{section} ○ subsection{subsection} ○ subsubsection{subsubsection} ○ paragraph{paragraph} ○ subparagraph{subparagraph} ● commands used to structure a document based on the book class: documentclass{book} begin{document} %tableofcontents chapter{First Chapter} section{Introduction} This is the first section. section{Literature} Second Section subsection{Related works} sub section section*{Unnumbered Section} to let you just note end{document}
- 23. Chapters and sections ● Creating tables ○ The following examples show how to create tables in LaTeX, including the addition of lines (rules) and captions. ● Creating a basic table in LATEX ○ We start with an example showing how to typeset a basic table: begin{table} caption{list of Books} label{book} begin{center} begin{tabular}{c c c c} cell1 & cell2 & cell3 cell4 & cell5 & cell6 cell7 & cell8 & cell9 end{tabular} end{center} end{table} I like table ref{book}
- 24. Example: Creating table begin{center} begin{tabular}{||c c c c||} hline Col1 & Col2 & Col2 & Col3 [0.5ex] hlinehline 1 & 6 & 87837 & 787 hline 2 & 7 & 78 & 5415 hline 3 & 545 & 778 & 7507 hline 4 & 545 & 18744 & 7560 hline 5 & 88 & 788 & 6344 [1ex] hline end{tabular} end{center}
- 25. Adding figures ● Make sure that the package (usepackage{graphicx}) is included as a header nextto document class documentclass{article} usepackage{graphicx} begin{document} First document. This is a simple example, with no extra details included. begin{figure} centering includegraphics{Penguins} caption{Caption} label{peng} end{figure} I like figure ref{peng} end{document}
- 26. Also… ● As a document production tool, Try to understand how to include in Latex ○ Table of content ○ List of figure and tables ○ References and citations
- 27. Reference Management ● Tools for reference management ○ Mendeley ○ Endnote ○ Zotero ○ Sciwheel ○ Citavi , etc….
- 28. Reference styles Discipline style(s) Business & Economics Harvard Engineering & IT IEEE Language & Humanities MLA; Chicago; Harvard; MHRA Law Bluebook; OSCOLA Medicine Vancouver; AMA; NLM Psychology APA Sciences ACS; Chicago; CSE; Harvard Social sciences AAA; APA; ASA; Chicago
- 29. Mendeley ● Mendeley is a desktop and web program for managing and sharing research papers, discovering research data and collaborating online ○ Mendeley is a free reference manager that can help you collect references, organize your citations, and create bibliographies. ○ The strength of Mendeley, however, is what it adds to that. Mendeley is also an academic social network that enables you to share your research with others.
- 30. Notable features of Mendeley ● Integrates with Word, OpenOffice and BibTeX. ● Multiple ways to import and create references. ● Unique options for organizing and annotating PDFs. ● Options to sync and collaborate across multiple computers and with multiple people. ● Mendeley Cite allows for quick and easy citation of materials that have been added into the Menedeley library and to generate a full reference
- 31. Steps to follow to install Mendeley ● Download “Mendeley desktop” ● Install it ● Register (if you have no account) and sign in ● Install plugin to MS word ● To easily add references to Mendeley, it is good practice to: ○ Create folder ○ Organize articles you need for the report ● To change the citation style in Mendeley desktop ○ Open the citation styles library by expanding the view menu and select one of the style. ○ If the style does not exist, choose ‘More styles…’ find the style you wish to modify and right click on it. Now choose the ‘Edit Style’ option
- 32. Citation and reference ● Add files to Mendeley ○ Check whether all details of the article extracted or not; otherwise manual intervention is required ● If details of the article is missing from the paper or if the article is not available in the folder ■ Search in Google Scholar ■ Click on Cite ■ Download the “RefMan” ■ Drag and drop to Mendley
- 33. To cite and refer in the report • To cite articles and generate reference in MS Word – Go to MS-Word reference tab click “Insert Citation” click “go to Mendeley” – Select reference and click “Cite” • Once all the articles referred in the paper are cited, • Generate references using “Insert Bibliography” – Make sure that the write style is selected
- 34. Mini Assignment (Due:____) ● Use Mendeley for reference management ○ Assume that you have at least five articles downloaded for reading; drag and add to mendeley ○ Assume two of the articles are not downloaded since they are not accessible for download, but you need them to include in the reference list. Use Google scholar to extract their citation information ○ Check for completeness of the information extracted by mendeley ○ Prepare one page report and cite at least six articles and finally list references at the end of the write up
- 35. SPSS ● Originally it is an acronym of Statistical Package for the Social Science ○ but now it stands for Statistical Product and Service Solutions
- 36. Overview of SPSS? ● One of the most popular statistical packages which can perform highly complex data manipulation and analysis with simple instructions. ● SPSS is a Windows based program that can be used ○ to perform data entry and analysis ○ to create tables and graphs.
- 37. Basic structure of SPSS There are two different windows in SPSS ● 1st Data Editor Window - shows data in two forms ○ Data view ○ Variable view ● 2nd Output viewer Window – shows results of data analysis ● You must save the data editor window and output viewer window separately. ○ Make sure to save both if you want to save your changes in data or analysis.
- 38. Data Editor Window ● Variable view ○ Rows define the variables Name, Type, Width, Decimals, Label, Missing, Columns, Align, Measure, Role ● Data view ○ Rows are cases and Columns are variables ● Data measure ○ Scale – numeric data on an interval or ratio scale, such as age, weight, income ○ Nominal – categories that cannot be ranked (ID number) ○ Ordinal – categories that can be ranked (level of satisfaction)
- 39. Descriptive statistics ● Descriptive statistics are statistics that summarizes or describe a variable’s ○ central tendency: compute the ‘middle’ or expected value ■ use mean, mode and median ○ Dispersion: measure the distribution or scatterness of the data around the mean. ■ Use standard deviation, variance and range ● Central Tendency ○ Mean is the summation of all data values divided by the number of data. ○ Median is the datum that is in the middle of the data when it is rank-ordered. ○ The mode is the value that occurs most frequently.
- 40. Descriptive statistics ● Central tendencies that are appropriate for different levels of measurement: ○ Nominal: Mode ■ Nominal Variables: To obtain descriptive statistics for nominal variables, click Analyze, Descriptive Statistics, Frequencies. Move the nominal variables that you want to examine into the Variables box. Then click on the Statistics button & Check “Mode” box ● E.g. sex variable ○ Ordinal: Median, Mode ■ Ordinal Variables: are ranked variables, like Likert scale responses. For obtaining descriptive statistics: click Analyze, Descriptive Statistics, Frequencies. Move the ordinal variables that you want to examine into the Variables box. Then click on the Statistics button. ○ Scale: Mean, Median, Mode ■ SPSS uses the term “Scale” for Interval and Ratio levels of measurement. ● To obtain descriptive statistics from continuous variables, ○ click Analyze, Descriptive Statistics, Descriptives. Move your variables into the Variable box. Click Options and make the following selections
- 41. Descriptive statistics ● Dispersion ○ measures how far the data spread out around the “center”. ○ Methods like range, standard deviation, variance are used for measuring dispersion ○ You can examine dispersion by using the following: ■ Scale: Range, Variance, Standard Deviation ■ Ordinal: Range ■ Nominal: None
- 42. Descriptive statistics ● Frequencies ○ Click ‘Analyze,’ ‘Descriptive statistics,’ then click ‘Frequencies’ ○ Click variable ‘gender’ and put it into the variable box. ○ Click ‘Charts.’ Then click ‘Bar charts’ and click ‘Continue.’ ○ Finally Click OK in the Frequencies box.
- 43. Descriptive statistics ● Descriptive analysis ○ Click ‘Analyze,’ ‘Descriptive statistics,’ then click ‘Descriptives…’ ○ Click ‘Educational level’ and ‘Beginning Salary,’ and put it into the variable box. Click Options Click ○ The options allows you to analyze other descriptive statistics besides the mean and Standard deviation. Click ‘variance’ and ‘kurtosis’ Finally click ‘Continue’ ○ Finally Click OK in the Descriptives box. You will be able to see the result of the analysis.
- 44. Inferential analysis: Correlation ● Correlation indicates the extent to which there is relationship between variables ○ The analysis may be focused on univariate (analysis of one variable), bivariate (analysis of relationships between two different variables) or multivariate correlation (analysis of relationships between more than two different variables) ● Correlation coefficients ○ Correlation coefficients provide a numerical summary of the direction and strength of the linear relationship between two variables. ○ The sign of the correlation coefficient ranges in between [-1 to 1] which indicates the direction of the correlation: ■ a positive correlation indicates that as one variable increases, so does the other; ■ a negative correlation indicates that as one variable increases, the other decreases. ● The strength of the relationship is given by the numeric value: ○ 1 indicates a perfect relationship; ○ 0 indicates no relationship between the variables.
- 45. Obtaining Correlation coefficients ● The main correlation coefficients are: ○ Pearson’s r is a measure of association for nominal and/or continuous variables. ○ Spearman rho & Kendall’s tau-b: for ordinal level or ranked data. ● To calculate Pearson’s r in SPSS, ○ go to Analyze, Correlate, Bivariate. Enter variables. ○ Where, ■ bivariate correlation determines the relationships between two different variables (i.e., X and Y). ■ Test of significance ● One-tailed tests allow for the possibility of an effect in one direction. ● Two-tailed tests test for the possibility of an effect in two directions—positive and negative
- 46. Result interpretation ● Note that the Pearson’s r value for comparing age to age is 1, suggesting perfect correlation. ○ On the other hand, the Pearson’s r value of the 2 different variables (in this case, the value is .139), suggests that age and watching TV are directly related; hence, someone ages, they watch more television.
- 47. Inferential analysis: Regression analysis ● Correlation measure the strength of relationship between variables, but not measure cause and effect ○ Regression analysis determines the effect of one or more independent variables on dependent variable. The most common form of regression analysis is linear regression, in which one finds the line that most closely fits the data according to a specific mathematical criterion. Y = a + bX + ϵ
- 48. Linear Regression Analysis ● SPSS provides three results ○ Model summary ■ R2: Coefficient of determination. It determines the effect/impact of independent variables on dependent variable ● The effect may be accounted for 99.5%, which means 99.5% variation in dependent variable can be explained due to independent variables ○ ANOVA (Analysis of Variance) ■ Tells model validity ● Based on sig. where if sig < 0.05 it is a good model ○ Coefficients ■ Take beta "B" value under the "Unstandardized Coefficients" column, to construct the equation ■ To accept and reject hypothesis ● t > 1.96 - +ve impact (accept hypothesis) ● t < -1.96 - -ve impact (reject hypothesis)
- 49. Linear Regression Analysis ● The first table of interest in the linear regression analysis is the Model Summary table ● This table provides the R and R2 values. ○ The R value represents the simple correlation and is 0.873, which indicates a high degree of correlation. ○ The R2 value indicates how much of the total variation in the dependent variable, Price, can be explained by the independent variable, Income. In this case, 76.2% variation in price can be explained due to income.
- 50. ANOVA ● The next table is the ANOVA table, which reports how well the regression equation fits the data (i.e., predicts the dependent variable): ● This table indicates that the regression model predicts the dependent variable significantly well. How do we know this? Look at the "Regression" row and go to the "Sig." column. ○ This indicates the statistical significance of the regression model that was run. Here, p < 0.0005, which is less than 0.05, and indicates that, overall, the regression model statistically significantly predicts the outcome variable (i.e., it is a good fit for the data).
- 51. Prediction ● The Coefficients table provides information to predict price from income, as well as determine whether income contributes statistically significantly to the model (by looking at the "Sig." column). ○ Furthermore, we can use the values in the "B" column under the "Unstandardized Coefficients" column, as shown below: ● to present the regression equation as: Price = 8287 + 0.564(Income)
- 52. Assignment (Due: ) ● Use SPSS for Data Analysis and prepare a report using the following template ○ Introduce SPSS ○ Describe the selected data for analysis using SPSS ■ You may use the data available with SPSS or any online data (but each student is expected to use different data) ○ First conduct descriptive analysis using central tendency and variations ■ Show the result and write what you understand from the result ○ Second conduct inferential analysis by applying correlation and linear regression analysis ■ Show the result and write what you understand from the result ○ Conclusion and one major recommendation ○ Reference
- 54. What is WEKA? • Waikato Environment for Knowledge Analysis – It’s a data mining/machine learning tool developed by Department of Computer Science, University of Waikato, New Zealand. – Weka is also a bird found only on the islands of New Zealand. • Download and Install WEKA from: http://www.cs.waikato.ac.nz/~ml/weka/index.html • Support multiple platforms (written in java): – Windows, Mac OS X and Linux
- 55. Main Features • Weka includes everything necessary for knowledge discovery and constructing models – Covers all major knowledge discovery tasks – Includes tools to preprocess and visualize data • 49 data preprocessing tools – classification/regression algorithms – clustering algorithms – association rules discovery algorithms – attribute/subset selection
- 56. Explorer: pre-processing the data • Data can be imported from a file in various formats: ARFF, CSV, C4.5, binary – Data can also be read from a URL or from an SQL database (using JDBC) • Pre-processing tools in WEKA are called “filters” • WEKA contains filters for: – Discretization, normalization, resampling, attribute selection, transformation and combining attributes, …
- 57. Clicking on this will bring up a list of all of the filters, organized into a hierarchy. Click on each folder to expand the list. There are dozens of choices
- 58. Explorer: Building “classifiers” • Weka supports all major classification and regression methods – Decision Trees, Rule learners, Nearest Neighbor, Naïve Bayes, support vector machines, Neural Networks, etc. • Also support ensemble classifiers: – It combines classifiers to work together, of course, will learn about these later • Classifiers in WEKA are models for predicting nominal or numeric quantities
- 59. Explorer: clustering data • WEKA contains “clusterers” for finding groups of similar instances in a dataset • Implemented schemes are: – k-Means, EM, Cobweb, X-means, FarthestFirst • Clusters can be visualized and compared to “true” clusters (if given) • Evaluation based on loglikelihood if clustering scheme produces a probability distribution
- 60. Explorer: finding associations • WEKA contains an implementation of the Apriori algorithm for learning association rules – Works only with discrete data • Can identify statistical dependencies between groups of attributes: – milk, butter bread, eggs (with confidence 0.9 and support 2000) • Apriori can compute all rules that have a given minimum support and exceed a given confidence
- 61. Python Python is a high-level, general-purpose programming language. Its design philosophy emphasizes code readability with the use of significant indentation
- 62. What software we need to use python for different tasks? • Anaconda • Jupyter Notebook • Different packages (Libraries), such as scikit- learn, opencv, numpy, pandas, etc.
- 63. Installing Anaconda on Windows • Anaconda is a package manager, an environment manager, and Python distribution that contains a collection of many open source packages. This is advantageous, when you are working on a project, you may need many different packages (scikit-learn, numpy, scipy, pandas to name a few), which an installation of Anaconda comes preinstalled with. • If you need additional packages after installing Anaconda, you can use Anaconda's package manager, conda, or pip to install those packages (pip install PACKAGE). This is highly advantageous as you don't have to manage dependencies between multiple packages yourself. Conda even makes it easy to switch between Python 2 and 3. • In fact, an installation of Anaconda is also the recommended way to install Jupyter Notebooks.
- 64. Download and Install Anaconda 1. Go to the Anaconda Website and choose a Python 3.x graphical installer (A) or a Python 2.x graphical installer (B). • If you aren't sure which Python version you want to install, choose Python 3. Do not choose both. 2. Locate your download and double click it. 3. This is an important part of the installation process. • The recommended approach is, to not check the box to add Anaconda to your path. This means you will have to use Anaconda Navigator or the Anaconda Command Prompt (located in the Start Menu under "Anaconda")
- 65. Python modules for machine learning, data mining and data analytics
- 66. Python modules for machine learning, data mining and data analytics • Scikit-learn is probably the most useful library for machine learning in Python. The sklearn library contains a lot of efficient tools for machine learning and statistical modeling including classification, regression, clustering and dimensionality reduction. • scikit-learn is a Python module for machine learning built on top of SciPy • scikit-learn requires: • Python (>= 3.6) • NumPy (>= 1.13.3) • SciPy (>= 0.19.1) • joblib (>= 0.11) • threadpoolctl (>= 2.0.0)
- 67. To experiment on data set available with sklearn https://archive.ics.uci.edu/ml/machine-learning-databases/ • Classifying iris flower data set: • The iris dataset is a classification task consisting in identifying 3 different types of irises (Setosa, Versicolour, and Virginica) from their petal and sepal length and width • The data set consists of 50 samples from each of three species of Iris (Iris setosa, Iris virginica and Iris versicolor). • Four features were measured from each sample: the length and the width of the sepals and petals, in centimeters
- 68. To experiment on data available with sklearn from sklearn import datasets from sklearn import metrics from sklearn.tree import DecisionTreeClassifier dataset = datasets.load_iris() model = DecisionTreeClassifier() model.fit(dataset.data, dataset.target) expected = dataset.target #target or class of the data predicted = model.predict(dataset.data) #predicting for the data with no target # for reporting accuracy, Precision, Recall print(metrics.classification_report(expected, predicted)) # to create confusion matrix print(metrics.confusion_matrix(expected, predicted))
- 69. Use all data for training and test with the supplied data import pandas as pd from sklearn.tree import DecisionTreeClassifier from sklearn.model_selection import train_test_split from sklearn.metrics import accuracy_score music_data = pd.read_csv('music.csv’) # to use all data for training X = music_data.drop(columns=['genre']) y = music_data['genre'] model = DecisionTreeClassifier() # to create the model # to train the classifier in all data model.fit(X,y) # to test using two instances, age 21 male (1) and age 22 Female (0) predictions = model.predict([ [21, 1],[22, 0] ]) predictions
- 70. Divide the dataset into training & test using percentage split import pandas as pd from sklearn.tree import DecisionTreeClassifier from sklearn.model_selection import train_test_split from sklearn.metrics import accuracy_score music_data = pd.read_csv('music.csv’) # to use all data for training X = music_data.drop(columns=['genre']) y = music_data['genre'] # to split the data for training & testing using 80:20 perecentage X_train, X_test, y_train, y_test = train_test_split(X,y,test_size=0.2) model = DecisionTreeClassifier() # to train the classifier using 80% train data set model.fit(X_train,y_train) # to test using 20% of the test set predictions = model.predict(X_test) score = accuracy_score(y_test, predictions) score
- 71. Constructing a model • Rather than training always for testing, we can follow two step; – First, train and save the model using ‘joblib’ package – Then use the constructed optimal model for prediction
- 72. Training step import pandas as pd from sklearn.tree import DecisionTreeClassifier from sklearn.model_selection import train_test_split from sklearn.metrics import accuracy_score # from sklearn.externals import joblib import joblib music_data = pd.read_csv('music.csv’) # to use all data for training X = music_data.drop(columns=['genre']) y = music_data['genre'] # to split the data for training & testing using 80:20 perecntage X_train, X_test, y_train, y_test = train_test_split(X,y,test_size=0.2) model = DecisionTreeClassifier() # create model # train the classifier using 80% train data set model.fit(X_train,y_train) # save the model using joblib dump joblib.dump(model,'decisionTree.model’)
- 73. Prediction and testing step import pandas as pd from sklearn.tree import DecisionTreeClassifier from sklearn.metrics import accuracy_score # from sklearn.externals import joblib import joblib # load the model using joblib load for testing joblib.load('decisionTree.model') # to test using two data set given in array form [age, gender], 1 represent M & 0 for F predictions = model.predict([ [21, 1],[22, 0] ]) predictions
- 74. from sklearn import datasets #from sklearn.svm import SVC from sklearn.neighbors import KNeighborsClassifier from sklearn import svm from sklearn import metrics dataset = datasets.load_iris() #print(iris_data) model = KNeighborsClassifier() model.fit(dataset.data, dataset.target) expected = dataset.target predicted = model.predict(dataset.data) print(metrics.classification_report(expected, predicted)) # to create confusion matrix print(metrics.confusion_matrix(expected, predicted))
- 75. Group Project • Requirement: –Form a group with at most 2-3 members & use the following classification algorithms. • Group 1: –Use: Decision tree, Naïve Bayes & select one more algorithm • Group 2: –Use: K-Nearest neighbor, Multilayer perceptron & select one more algorithm • Group 3: –Use: Linear regression, Support vector machine & select one more algorithm – Each group is expected to compare the performance of classification algorithms assigned to them using WEKA and Python – Use data set with at least 500 instances and 10 attributes •Project Report –Write a report with the following sections: • Abstract -- ½ page • Introduce problem and objective of the project -- 2 pages • Description of algorithms used for the experiment -- 3 pages • Discussion of experimental result --- 3 pages • Concluding remarks, with major recommendation --- 1 page • Reference (use IEEE referencing style) • Describe, in detail contribution of each member of the group
Editor's Notes
- 1