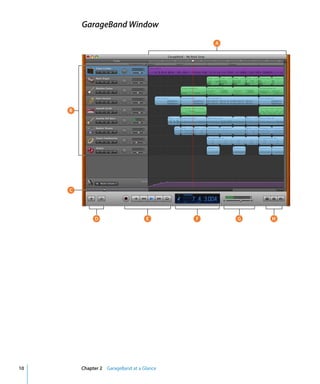
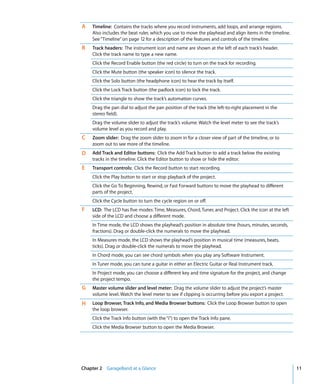
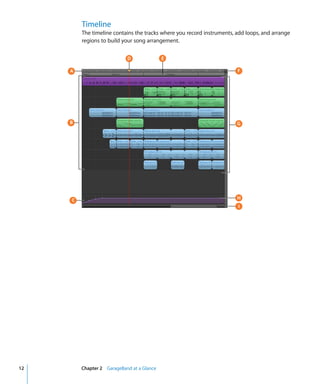
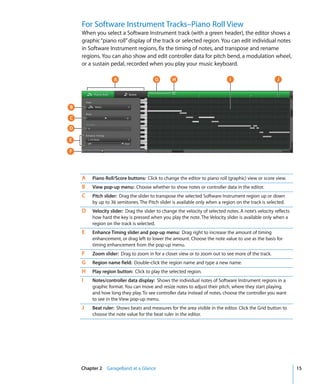
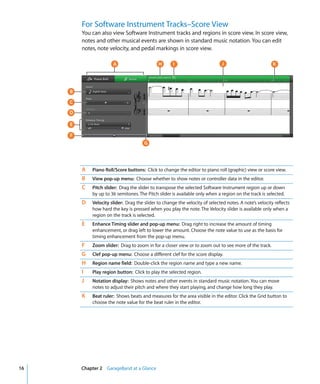
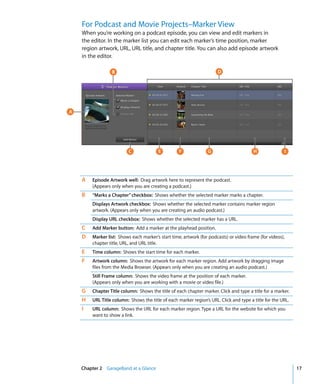
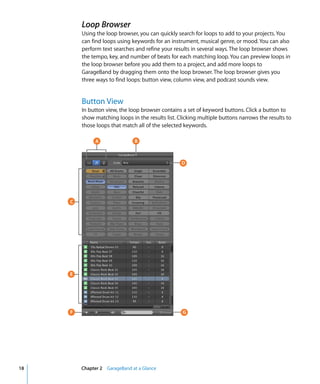
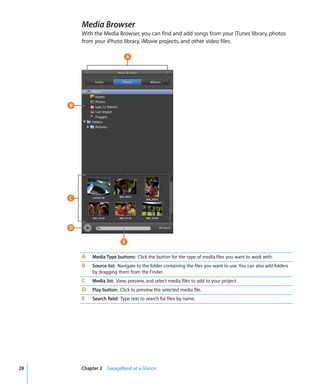
Downloaded 36 times


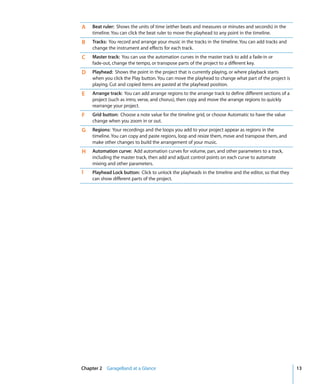


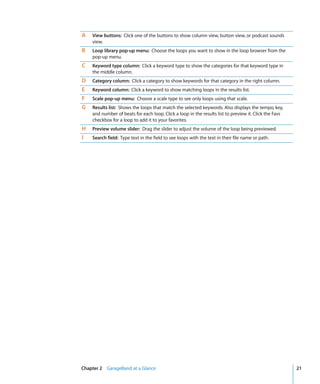

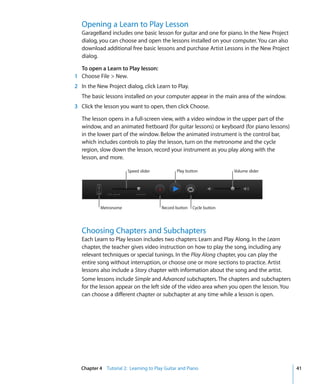
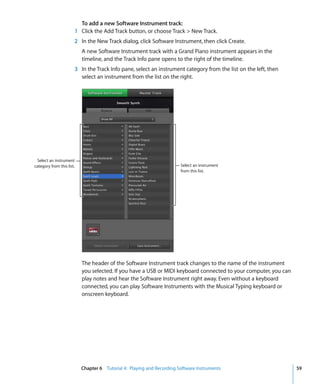
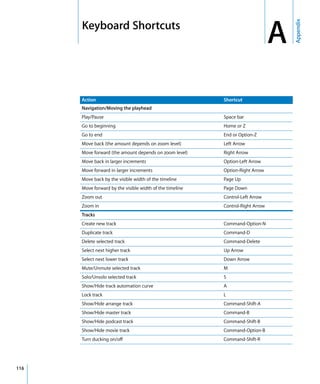
![To record multiple takes using the cycle region:
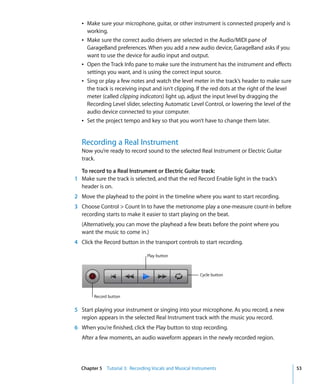
1 Select the Real Instrument track you want to record in.
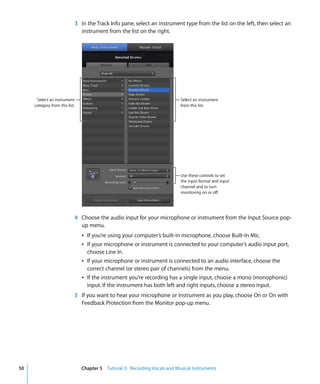
2 Click the Record button to start recording.
3 Play your musical instrument or sing into your microphone. As you record, a new
region appears in the selected Real Instrument track.
4 When you’re finished, click the Play button to stop recording.
5 If you want to record additional takes, click the Record button and play the part again.
6 When you’ve finished using the cycle region, click the Cycle button again to turn
it off.
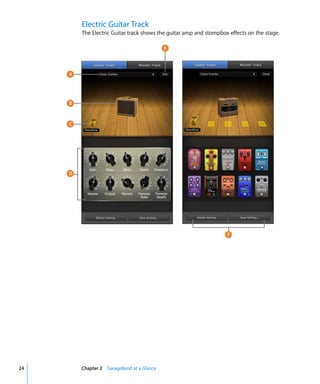
When you record multiple takes, the recorded region has a circle in its upper-left corner
showing the selected take (the one you hear when you play the project). You can
choose and listen to different takes to decide which one you like best.
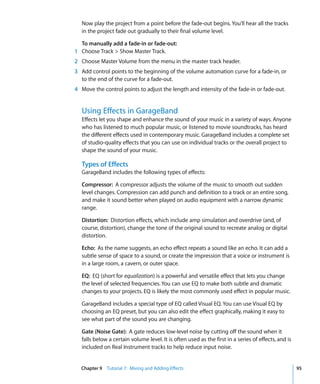
To choose a different take:
1 In the timeline, click the circled number in the upper-left corner of the loop.
A Takes menu appears showing the takes recorded in the region.
2 Choose a different take from the Takes menu.
When you choose a different take, the loop changes to show the waveform of the new
take.
To delete the selected take:
m Choose Delete [take name] from the Takes menu.
You can also delete all takes except the selected one.
To delete all unused takes:
m Choose Delete Unused Takes from the Takes menu.
Chapter 5 Tutorial 3: Recording Vocals and Musical Instruments 55](https://image.slidesharecdn.com/2938468/85/GarageBand_09_Getting_Started-55-320.jpg)


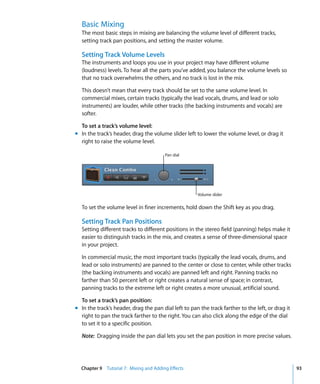


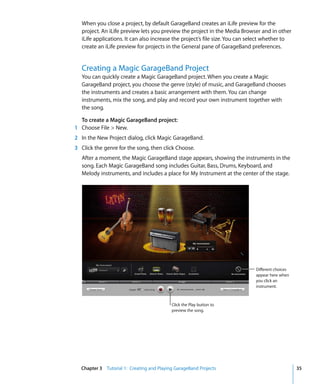
This document provides tutorials for using GarageBand to create music, podcasts, and other projects. It includes instructions on recording instruments and software instruments, editing recordings, arranging tracks, mixing audio, adding effects, and sharing finished projects. The tutorials assume no prior experience and guide the user through the GarageBand interface and core functionality.