2. _____________________________________________________________________
_____________________________________________________________________
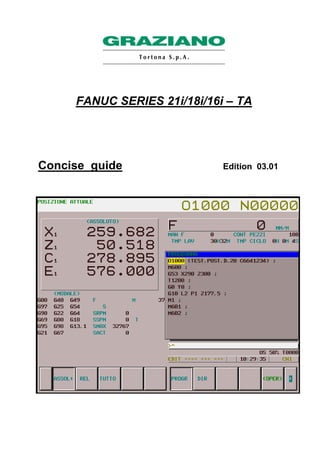
CONCISE GUIDE FANUC 2
0.1 GENERAL INDEX- CONCISE GUIDE FOR PROGRAMMER
PAGE PAR. CONTENTS
7 1.0 FOREWORD
8 2.0 NC MAIN FUNCTIONS AND ADDRESSES
8 2.1 O Program and sub-program number
8 2.2 N Block number
9 2.3 G Preparatory operations
9 2.4 X/Z/B/Y Movement absolute co-ordinates
10 2.5 U/W Movement incremental co-ordinates
12 2.6 F Work feed
12 2.7 S Spindle rotation speed
13 2.8 T Tool selection
15 2.9 M Auxiliary functions
18 2.10 M Other auxiliary functions
19 2.11 / Skipping a block
19 2.12 ( ) Notes and comments
20 3.0 ISO PROGRAMMING
20 3.1 G0 Linear axes rapid traverses
21 3.2 G1 Work linear interpolation
24 3.3 G1 A.. Programming with angles
28 3.4 G2/G3 Circular interpolations
30 3.5 G4 Axis pause time
31 3.6 G95 Feed in mm/rev
31 3.7 G94 Feed in mm/min
32 3.8 G97 Fixed revolutions spindle rotation
33 3.9 G96 Constant cutting speed
34 3.10 G92 Spindle revolution limitations
35 3.11 G33 Thread cutting movements
37 3.12 G41/G42/G40 Tool radius compensation
41 3.13 G54/G59 Workpiece origins
43 3.14 G52 Origin transfer by program
3. _____________________________________________________________________
_____________________________________________________________________
CONCISE GUIDE FANUC 3
PAGE PAR. CONTENTS
44 3.15 M134/M135 Precise stop
45 3.16 G List of main “G” preparatory functions
47 4.0 FIXED FANUC CYCLES
47 4.1 G71 Material removal by turning
53 4.2 G72 Material removal by facing
57 4.3 G73 Profile repetition
60 4.4 G70 Finishing cycle
63 4.5 G174 Radial grooves rough machining/pre-finishing cycle
67 4.6 G176 Axial grooves rough machining/pre-finishing cycle
72 4.7 G175/G177 Finishing cycle for radial/axial grooves
76 4.8 G76 Thread cutting cycle in several cuts
81 4.9 G83 Front drilling cycle
83 4.10 G84 Front tapping cycle
85 5.0 SUB-PROGRAMS / PARAMETRIC PROGRAMMING
85 5.1 M98 M99 Use of sub-programs
89 5.2 # Parametric programming
93 6.0 BACK SPINDLE MACHINING
93 6.1 Most important addresses used
94 6.2 M Auxiliary functions
95 6.3 Example of machining with back spindle
98 6.4 O9100 Workpiece change-over with parting off
101 6.5 O9101 Workpiece change-over with parting off without extraction
104 6.6 O9102 Workpiece change-over without parting off
106 7.0 AXIS C MACHINING AND MOTOR DRIVEN TOOLS
106 7.1 Motor driven tools
108 7.2 Motor driven tools reset
109 7.3 M37 Axis “C”
110 7.4 Programming in real co-ordinates
111 7.5 M20/M21 Use of spindle brake
112 7.6 G83 Front drilling cycle
115 7.7 G87 Radial drilling cycle
4. _____________________________________________________________________
_____________________________________________________________________
CONCISE GUIDE FANUC 4
PAGE PAR. CONTENTS
118 7.8 O9103 Front tapping sub-program
121 7.9 O9104 Radial tapping sub-program
124 7.10 G112 Programming in imaginary co-ordinates
127 7.11 G2/G3 Circular interpolation in G112
129 7.12 G41 G42 G40 Milling radius offset in G112
131 7.13 G107 Cylindrical interpolation
135 7.14 Programming with real Y axis
138 8.0 BAR MACHINING
138 8.1 Example of machine tool loader use with back spindle
140 8.2 Example of machine tool loader use without back spindle
142 8.3 Ex. of machine tool push-bar conveyor use with back spindle
143 8.4 Ex. of machine tool push-bar conveyor use without back spindle
144 8.5 Example of pull-bar conveyor use
OPERATOR READY REFERENCE GENERAL INDEX
146 12.0 MACHINE START UP
146 12.1 Power-on
146 12.2 Execution of axes reference
146 12.3 Write protection key
147 13.0 PROGRAMME MANAGEMENT
147 13.1 How to create a new programme
147 13.2 How to modify an existing programme
147 13.3 How to insert a code (or a block) in a programme
147 13.4 How to modify or replace a code
148 13.5 How to delete a code
148 13.6 How to delete a block
148 13.7 How to copy /paste part of a programme
148 13.8 How to copy a programme
149 13.9 How to delete a programme
149 13.10 How to rename a programme
149 13.11 Selection of a programme for machining
5. _____________________________________________________________________
_____________________________________________________________________
CONCISE GUIDE FANUC 5
PAGE PAR. CONTENTS
150 13.12 Creation of a new subprogram
150 13.13 Graphic simulation of a programme
151 13.14 Running of the programme in automatic cycle
151 13.15 Interruption of programme execution
151 13.16 How to start the programme from an intermediate stage
151 13.17 Background editing
152 14.0 TOOL RESET
152 14.1 Manual tool reset
153 14.2 Centre reset
153 14.3 Internal machining tools reset
153 14.4 Tool reset on subspindle
153 14.5 Tool reset with probe (optional)
154 14.6 Tool reset for TWIN machines
155 14.7 Tool table management
155 14.8 Tool fine correction
155 14.9 Entry of insert radius
156 14.10 Entry of tool orientation
156 14.11 Entry of cutter radius
157 15.0 ORIGIN MANAGEMENT
157 15.1 Origin measurement
157 15.2 Origin modification
158 16.0 MACHINE PARAMETERS
158 16.1 How to modify a machine parameter
159 17.0 SETTING OF CTX300 TAILSTOCK
159 17.1 Instructions to be inserted in the program
159 17.2 Tailstock double speed option
160 17.3 Tailstock repositioning
161 18.0 CTX SERIES TAILSTOCK AND REST
161 18.1 Manual movement of tailstock and rest
161 18.2 Instructions to insert in program
6. _____________________________________________________________________
_____________________________________________________________________
CONCISE GUIDE FANUC 6
PAGE PAR. CONTENTS
163 19.0 KEYBOARD AND OPERATOR’S PANEL
163 19.1 Description of keys on the operator’s panel
167 19.2 Description of keys on the MDI panel
170 19.3 Selector switch and keys below the operator’s panel
172 20.0 SERIAL PORT COMMUNICATION
172 20.1 Setting of data transfer parameters
172 20.2 Cable scheme
174 20.3 Transmission programs
176 20.4 How to copy a programme to the serial port
176 20.5 How to copy a programme from the serial port
176 20.6 How to copy a programme to memory card
177 20.7 How to copy a programme from memory card
7. _____________________________________________________________________
_____________________________________________________________________
CONCISE GUIDE FANUC 7
1.0 FOREWORD
On an NC machine tool the sequence of the instructions programmed to process a workpiece consists of
codes which are made up of functions or addresses with a relevant numeric value.
When preparing a part program the tool path is imagined referring to a system of co-ordinates, the origin
of which ( => zero point to which all the dimensions refer) can be chosen. In the specific case of
an NC lathe this co-ordinates system is composed of two or more axes:
• axis X (for diameters).
• axis Z (for lengths).
• axis C (for angle divisions on lathes
with controlled spindle).
• axis B (for the longitudinal position of the back spindle
on machines fitted with this option).
• axis A (for angle division on lathes with controlled
back spindle).
X+ X+
C+ A+
Z+ B-
The tool path is programmed with co-ordinated points written in the correct sequence and established
according to the workpiece profile. Each movement of the tool along this path is written as a separate
instruction (block) together with any technological data required. The group of blocks forms the “PART
PROGRAM”.
8. _____________________________________________________________________
_____________________________________________________________________
CONCISE GUIDE FANUC 8
2.0 NC MAIN FUNCTIONS AND ADDRESSES
The sequence of instructions that make up the program consists of letters and numbers, each of which
has a specific significance.
2.1 “O” PROGRAM AND SUB-PROGRAM NUMBER
The letter O followed by a number indicate the programs and the sub-programs. The number paired with
the letter O can range from 1 to 9999. To have better program management Graziano suggests that the
following values are paired :
From O1 to O8000 Main Programs available for the customer
From O8001 to O8999 Sub-programs available for the customer
From O9000 to O9999 Sub-programs available for GRAZIANO to create special macros that cannot be
modified by the customer since they are protected by a parameter.
The NC memory can contain a maximum of 63, between Programs and Sub-programs, or a maximum of
32000 characters.
2.2 “N” BLOCK NUMBER
A block is a group of words that identify the operation to be carried out.
Example:
N10 G0 X200 Z5 M8
Each block is identified by a sequential number N, from 0 to 9999 and must end with the end of block EOB
character ( ; )
The block number is entered automatically by the NC when an end of block EOB code is inserted ( ; ).
Through a machine datum (N. 3216) the increment value can be selected in the block numbering: unitary (
N1 N2 N3 etc.) or decimal (N10 N20 N30 etc.)
It is up to the programmer whether to use the block number or not.
To use the block number a value 1 has to be assigned to the setting datum SEQUENCE NO. in the
Prepare/Manual menu which can be entered by pressing the SETTING key on the MDI keyboard
Usually the block numbering is not enabled.
9. _____________________________________________________________________
_____________________________________________________________________
CONCISE GUIDE FANUC 9
2.3 “G” PREPARATORY OPERATIONS
The G code prepares the control to carry out certain operations that differ according to the number that
follows this code (e.g.: G0, G1, G3, etc.).
There are two types of preparatory functions: modal functions and self-deletion functions. The former
remain active until they are cancelled by other modal functions, the latter are only active in the block
where they are entered.
2.4 “X Z B Y” MOVEMENT ABSOLUTE CO-ORDINATES
Codes X and Z define the absolute co-ordinates referring to the workpiece zero. X determines diameters
(diametrical programming); Z determines the lengths; B determines the back spindle axis movements
(only on machines where this option is installed); Y determines the motor driven turret Y axis movements
(only on machines where this option is installed) .
These codes can be programmed with a positive or a negative sign. If no sign is programmed the value is
considered positive. Values can be programmed with up to three digits after the decimal point.
Example:
70
50
20
∅∅∅∅80
∅∅∅∅40
12
34
X +
Z +
10. _____________________________________________________________________
_____________________________________________________________________
CONCISE GUIDE FANUC 10
X / Z Co-ordinates Position
N5 X0 Z0
N6 X40 (1)
N7 Z-20 (2)
N8 X80 Z-50 (3)
N9 Z-70 (4)
2.5 “U and W” MOVEMENT INCREMENTAL CO-ORDINATES
Codes U and W define the incremental co-ordinates referring to the last programmed point. U defines a
movement on axis X (diametrical programming); W defines a movement on axis Z. These codes can be
programmed with a positive or a negative sign. If no sign is programmed the value is considered positive.
Values can be programmed with up to three digits after the decimal point.
Example:
U / W Co-ordinates Position
N5 X0 Z0
N6 U40 (1)
N7 W-20 (2)
N8 U40 W-30 (3)
N9 W-20 (4)
70
50
20
∅∅∅∅80
∅∅∅∅40
12
34
X ( U ) +
Z ( W ) +
12. _____________________________________________________________________
_____________________________________________________________________
CONCISE GUIDE FANUC 12
2.6 “F” WORK FEED
Function F (Feed) defines the work feed and can have two different significances, according to which
preparatory G function is active (G95 or G94 see par. 3.6 and par. 3.7):
•••• mm/rev (usually used for turning operations).
•••• mm/min (usually used for milling operations or for work movements with spindle stationary).
The programmed feed F can be modified through the axis trimmer with a variable value from 0% to 120%.
The programmed feed F remains active until another is selected.
2.7 “S” SPINDLE ROTATION SPEED
Function S (Speed) defines the rotation speed of the spindle. It can have two different significances,
according to which preparatory G function is active (G97 or G96 see par. 3.8 and par. 3.9):
•••• rpm (usually used for machining without wide diameter variations e.g.: drilling, tapping and
thread cutting).
•••• m/min (usually used for all turning operations).
The programmed speed can be changed through the spindle trimmer with a variable value from 50% to
120%.
13. _____________________________________________________________________
_____________________________________________________________________
CONCISE GUIDE FANUC 13
2.8 “T” TOOL SELECTION
Code T (Tool) defines the tool corrector and the position of the turret to be activated for machining. The
tool corrector contains information that identifies the characteristics (length, direction, radius etc.) of the
tool. When programming, the tool setting is always composed of 3 or 4 digits. The first number, or first
pair of numbers, defines the position of the tool in the turret; this number is therefore usually between 1
and 12.
The second pair of numbers, always composed of two digits, identifies the corrector matched to the tool.
The control memory usually has available 32 tool correctors; therefore the programmer has to select the
corrector to match to each individual tool.
For simpler operation it is suggested to match a tool number to the same corrector number.
Example:
N1 T101
N2 ……….
N3 ……….
N4 ……….
N5 ……….
N6 ……….
N7 T404
N8 ……….
N9 ……….
N10 ……….
N11 ……….
Under certain circumstances it is possible to match a tool with a different corrector, for example to move
the position of a tool in the turret without having to reset it again.
Example:
N4 T121 ; Tool selection T1 with corrector 21
N5 ……….
N6 ……….
N7 ……….
N8 ……….
Machining with tool T1 corrector 01
1
Machining with tool T4 corrector 04
Machining
14. _____________________________________________________________________
_____________________________________________________________________
CONCISE GUIDE FANUC 14
When a tool is called up, the turret rotates so as to follow the shortest path, whether clockwise or anti-
clockwise.
In the machines provided with hydraulic turrets, there are two functions to select the desired turret rotation
direction. These functions are M16 and M46.
M16 forces the clockwise rotation of the turret disk.
M46 forces the anti-clockwise rotation of the turret disk.
Example:
N3 ……….
N4 T101 ; Tool selection T1 shortest path
N5 ……….
N6 T303 M16 ; Tool selection T3 in clockwise rotation
N7 ……….
N8 T606 M46 ; Tool selection T6 in anti-clockwise rotation
N9 ……….
In some cases it may be useful to make movements without any corrector active or rather, without taking
into account the tool length, for example to bring the turret in the smallest overall dimension zone when
using automatic loaders or such like. The function that disables the tool correctors is T0. To reactivate the
correctors it is sufficient to call up a tool.
T0 does not rotate the turret disk.
15. _____________________________________________________________________
_____________________________________________________________________
CONCISE GUIDE FANUC 15
2.9 “M” AUXILIARY FUNCTIONS
Auxiliary functions are used to send commands to the control and to the machine tool and they are divided
between functions that become operational as soon as they are read, and functions that become operative
at the end of block (M0, M1, M3, M4)..
The list below indicates the most commonly used M auxiliary functions :
M0 => Stop program . Interrupts the program running and stands by until it receives consent to continue
from the operator (start cycle).
M1 => Stop program-optional. When active it interrupts the program running and stands by until it receives
consent to continue from the operator (start cycle).
To activate this command see paragraph 19.1
M3 => Clockwise spindle rotation. The spindle rotates clockwise at the previously set speed S.
M4 => Spindle anti-clockwise rotation. The spindle rotates anti-clockwise at the previously set speed S
M5 => Spindle rotation stop. This function stops the spindle rotation
M8 => Open coolant. This function activates the delivery of the coolant. The spindle rotation influences the
function activation: if the spindle is not rotating the coolant delivery is deactivated.
M9 => Stop coolant. This function stops the delivery of the coolant.
M13 => Spindle clockwise rotation at previously set speed S and coolant delivery activated.
M14 => Spindle anti-clockwise rotation at previously set speed S and coolant delivery activated.
M19 => Spindle orientation. This function stops the spindle in a defined angle position. M19 can be
programmed also with the spindle rotating. The stopping angle is programmed through the optional
address S. The M5 function must always be programmed after this function .
Example: N22 ……
N23 M19 S45
N24 M5
N25 ……
M30 => End of program. This function terminates the running of the program and sets the NC to start from
the first block.
16. _____________________________________________________________________
_____________________________________________________________________
CONCISE GUIDE FANUC 16
The M functions listed below are used for many specific applications. Details regarding the use of these
functions can be found in the machine documentation.
M0 ➪ stop program
M1 ➪ optional stop program
M2 ➪ end of program (without re-winding)
M3 ➪ spindle clockwise rotation
M4 ➪ spindle anti-clockwise rotation
M5 ➪ stop spindle
M7 ➪ coolant delivery not depending on spindle rotation
M8 ➪ coolant delivery depending on spindle rotation
M9 ➪ cut off coolant
M10 ➪ air blast activation to clean jaws (spindle rotation enabled with jaws open)
M11 ➪ deactivation of jaw cleaning air blast (spindle rotation disabled with jaws open)
M12 ➪ reduction of self-centring chuck locking pressure
M13 ➪ spindle clockwise rotation and coolant delivery
M14 ➪ spindle anti-clockwise rotation and coolant delivery
M16 ➪ force turret clockwise direction (only for hydraulic turrets)
M18 ➪ restore normal pressure to self-centring chuck lock
M19 ➪ spindle direction (M19 Sxx directs the spindle to xx degrees)
M20 ➪ spindle brake on
M21 ➪ spindle brake release
M22 ➪ tailstock sleeve forward feed with conditioning
M23 ➪ tailstock sleeve backward movement with conditioning
M24 ➪ tailstock sleeve forward feed without conditioning
M25 ➪ tailstock sleeve backward movement without conditioning
M26 ➪ automatic sliding guard opening
M27 ➪ automatic sliding guard closing
M30 ➪ end of program ( with winding)
M31 ➪ conditionings suspended on next tool change
M32 ➪ steady rest release from bench and hooking onto carriage
M33 ➪ steady rest release from carriage and hooking onto bench
M36 ➪ axis C disengagement
M37 ➪ axis C engagement
M38 ➪ tool reset sensor in working position
M39 ➪ tool reset sensor in home position
M46 ➪ force turret anti-clockwise direction (only for hydraulic turrets)
17. _____________________________________________________________________
_____________________________________________________________________
CONCISE GUIDE FANUC 17
M52 ➪ tailstock release from bench and hooking onto carriage
M53 ➪ tailstock release from carriage and hooking onto bench
M58 ➪ spindle and reset sensor orientation in work position
M62 ➪ workpiece counter increment on display (only active in automatic mode)
M63 ➪ external robot call to change workpiece (optional)
M64 ➪ workpiece released indication to external robot (optional)
M65 ➪ workpiece locked indication to external robot (optional)
M67 ➪ command / wait for bar change to loader (optional)
M68 ➪ self-centring chuck /collet chuck closure
M69 ➪ self-centring chuck /collet chuck opening
M74 ➪ second steady rest arms opening (optional)
M75 ➪ second steady rest arms closing (optional)
M78 ➪ bar measurement check (option) for Irco loader
M79 ➪ bar at end of stroke check (option) for Irco loader
M84 ➪ steady rest arms opening
M85 ➪ steady rest arms closing
M86 ➪ retractable steady rest in working position (up)
M87 ➪ retractable steady rest in home position (down)
M88 ➪ workpiece unloading arm in home position (down)
M89 ➪ workpiece unloading arm in working position (up)
M90 ➪ probe parameters memorisation at PMC ( from #812 to #822)
M100 ➪ temporary suspension of active S
18. _____________________________________________________________________
_____________________________________________________________________
CONCISE GUIDE FANUC 18
2.10 “M” OTHER AUXILIARY FUNCTIONS
The list below indicates other M functions used for many specific applications. Details regarding the use of
these functions can be found in the machine documentation.
M29 ➪ rigid tapping on spindles (cannot be used with motor driven tools)
M98 ➪ sub-program call up (M98 P…)
M99 ➪ return from sub-program
M127 ➪ deactivates M128/M129/M130 and immediately stops the conveyor
M128 ➪ conveyor pulsed movement in cycle (counter C11 in minutes)
M129 ➪ conveyor intermittent movement in cycle (counter C10/C11 in minutes)
M130 ➪ conveyor continuous movement in cycle
M131 ➪ turret pre-release
M922 ➪ sleeve thrust enabled
M923 ➪ sleeve thrust suspended (if thrust switch is set to 1)
M950 ➪ self-centring chuck pedal disabled
M951 ➪ self-centring chuck pedal re-enabled
M966 ➪ spintor feed suspend (for barfeeder IEMCA)
M967 ➪ spintor feed restart (for barfeeder IEMCA)
M968 barfeeder thrust suspend
M969 ➪ push-bar conveyor thrust restored
M970 ➪ push-bar conveyor use disabled
M971 ➪ push-bar conveyor use restored
M984 ➪ external workpiece pick-up (shafts)
M985 ➪ internal workpiece pick-up (flanges)
M995 ➪ emergency light on
M999 ➪ machine tool cut off by program (NC remains on)
19. _____________________________________________________________________
_____________________________________________________________________
CONCISE GUIDE FANUC 19
2.11 “ / “ SKIPPING A BLOCK
This function is used to run or exclude the marked block.
To activate or exclude this function use the relevant key on the operator panel (“see paragraph 19.1)
- With the key warning light off the barred blocks are run.
- With the key warning light on the barred blocks are skipped.
Example:
N10 /T101
N20 /G54
N30 /G92 S2000
N40 /G96 S180 M4
N50 /G0 X100 Z2 M8
N60 /G1 Z-40 F0.25
2.12 NOTES AND COMMENTS
For programming requirements comments and notes can be entered into the program, for example an
indication of the type of tool next to the block where that tool is selected.
These notes can be entered in round brackets (...)
• (…) a note written in round brackets can contain up to 30 characters, and is visible both during
programming and when the program is run
Example:
N10 T101 (EXTERNAL ROUGH MACHINING TOOL)
or
N18 M0 (TURN THE WORKPIECE)
20. _____________________________________________________________________
_____________________________________________________________________
CONCISE GUIDE FANUC 20
3.0 ISO PROGRAMMING
ISO language is a unified programming system common to many controls on different types of machine
tools of different nature.
3.1 “G0” LINEAR AXES RAPID TRAVERSES
The “G0” function controls rapid axis movement (at maximum speed). This function is used to separate
from or approach the workpiece at a safe distance. This block must contain one or more destination co-
ordinates (X e Z ).
Programming “G0 X… Z...” the tool starts from its current position and reaches that programmed in a
linear movement (thus following the route).
“G0” remains modularly active until another movement of the same group (G1, G2, G3) is performed.
The G0 function is therefore used to approach the workpiece at the beginning of machining and to
separate from it at the end of cycle.
Example:
N17 …….
N18 G0 X50 Z2 ; rapid traverse
N19 …….
N20 …….
N21 …….
N22 …….
N23 …….
N24 …….
N25 …….
N26 …….
N27 …….
N28 G0 X200 Z100 ; rapid return
N29 …….
MACHINING
21. _____________________________________________________________________
_____________________________________________________________________
CONCISE GUIDE FANUC 21
3.2 “G1” WORK LINEAR INTERPOLATION
The “G1” function controls a linear work movement (at a programmed speed). This function is used to
carry out machining on the workpiece.
With this function it is the programmer who decides the speed (feed “F”) at which the tool is to reach the
programmed point. The same block must also contain one or two destination co-ordinates (X and Z) and
the feed (F) if this has not been inserted beforehand.
Programming “G1 X… Z... F…” the tool starts from its current position and reaches that programmed in a
linear movement at the work speed.
Function “G1” and work feed “F” are modal functions.
Example:
N1 ……
N2 G0 X26 Z3 (0) Approach
N3 G1 Z0 F0.2 (1)
N4 X30 Z-2 (2)
N5 Z-30 (3)
N6 X50 Z-65 F0.1 (4)
N7 Z-95 (5)
N8 G0 X100 Z30 (6) Separation
N9 ……
95
65
30
∅∅∅∅50
∅∅∅∅30
1
2
0
3
4
5
2x45°°°°
6X
Z
Turning
22. _____________________________________________________________________
_____________________________________________________________________
CONCISE GUIDE FANUC 22
The linear movement programmed with G1 can be linked to the movement of the next block by a chamfer
(,C) or a connecting radius (R).
For two-axis machines (without the axis C option) the chamfer can be identified by just the letter C
followed by the value (and not by ,C)
Example:
These functions can only be programmed in a “G1” block. It is also important to underline that the block
following one containing “R” or “,C” must be a G1 work movement so that the chamfer or radius can be
calculated by the control.
,C
,C
Z
X
R
R
X
N12 …..
N13 G1 X… Z… ,C…
N14 …..
N12 …..
N13 G1 X… Z… R…
N14 …..
Z
24. _____________________________________________________________________
_____________________________________________________________________
CONCISE GUIDE FANUC 24
3.3 “G1 A…” PROGRAMMING WITH ANGLES
When using G1 instructions as well as the end of movement co-ordinates X and/or Z, besides radii or
chamfers on final points (R and ,C) the programmer can indicate the movement angle (A or ,A on
machines that have the motor driven back spindle option)
When programming the angle, value A can be positive or negative in a range from 0° to 360°. To define
the angle value, see the schematised figure imagining to position the “cross” with the centre on the first
point of the straight line. The angle of the line is determined by imagining to turn the cross zero (axis Z) in
the positive or negative direction to meet the straight line.
25. _____________________________________________________________________
_____________________________________________________________________
CONCISE GUIDE FANUC 25
The use of the A angle makes it possible to program just one final point matched to the movement angle
instead of two final points ( X e Z), or in certain conditions, to insert only the line angle without any final
co-ordinate.
Therefore there are two possibilities :
G1 X… A… (final point in X and angle) with any chamfers (,C) or radii (R) on the final point
G1 A… (angle only) with any chamfers (,C) or radii (R) on the final point
If only G1 A is used, the next block must absolutely contain both final co-ordinates (X, Z) and the angle
(A) with eventual chamfers (, C) or radius (R) on final point.
Example :
N48 G0 X0 Z2
N49 G1 Z0 F0.25
N50 G1 ,A90
N51 G1 X50 Z-20 A120
The value of angle A must be in centesimal degrees brought to the third decimal digit
Example :
N55 G1 ,A15.123
28. _____________________________________________________________________
_____________________________________________________________________
CONCISE GUIDE FANUC 28
3.4 “G2 / G3” CIRCULAR INTERPOLATIONS
Functions G2 and G3 are programmed to make circle arcs in clockwise or anti-clockwise direction as
shown in the figure:
The block with circular interpolation is programmed:
N24 G2 X… Z… R… ; Clockwise
N31 G3 X… Z… R… ; Anti-clockwise
Or:
N15 G2 X… Z… I… K… ; Clockwise
N18 G3 X… Z… I… K… ; Anti-clockwise
Where:
• G2 / G3 => Direction of circular interpolation
• X => Co-ordinate of final point along axis X
• Z => Co-ordinate of final point along axis Z
• R => Radius of circular interpolation
• I => Incremental distance of starting point at the radius centre
of the interpolation along axis X (radial value)
• K => Incremental distance of starting point radius at the centre
of the interpolation along axis Z
G3
G3
G2
30. _____________________________________________________________________
_____________________________________________________________________
CONCISE GUIDE FANUC 30
3.5 “G4” AXIS PAUSE TIME
The G4 function controls a machine axes pause during the running of a cycle for a time, indicated in
seconds, that can be programmed with address U.
The G4 can be thus programmed:
N12 …….
N13 G4 U1
N14 …….
Where :
• G4 => Activates the pause of the machine axes.
• U => Defines the time of the axes pause in seconds.
Minimum value 0.001 seconds, maximum value 9999.999 seconds.
Function G4 is self deleting therefore it automatically disables in the block following the one where it is
located.
Always indicating the pause in seconds, it is also possible to have the pause in number of revolutions by
using this formula :
Seconds of pause for one spindle revolution = 60 / S (spindle speed in rpm)
Example:
If the spindle rotates at 300 rpm, the pause time for one revolution will be 60 / 300 = 0.2 seconds
If a pause is required equal to 3 rpm, write : G4 U0.6 (0.2 seconds x 3 rpm)
31. _____________________________________________________________________
_____________________________________________________________________
CONCISE GUIDE FANUC 31
3.6 “G95” FEED IN MM/REV
The G95 function selects the feed F in mm/rev. When this function is active the feed values will be
programmed as follows: F0.05, F0.15, F0.3, F0.5 and so forth. G95 is automatically activated when the
machine is switched on, therefore it is not necessary to specify its activation in the program. It is a modal
function and can be cancelled by programming code G94.
N4 ……
N5 G1 Z-30 F0.3 ; Program with G95 (F= mm/rev.) present at power on
N6 ……
N7 ……
N8 ……
N9 G94 ; Program with G94 (F= mm/min)
N10 G1 Z50 F500
N11 ……
N12 G95 ; Program with G95 (F= mm/rev.)
N13 G1 Z-20 F0.2
N14 ……
3.7 “G94” FEED IN MM/MIN
The G94 function selects feed F in mm/min. When this function is active the feed values will be
programmed as follows: F50, F150, F500, F2000 and so forth. This function is used to perform
movements with work feed when the spindle is stationary, or when it is necessary to release the axis feed
from the spindle revolutions (e.g.: when milling with motor driven tools). G94 is a modal function and can
be cancelled by programming the code G95.
N5 G1 X… Z… F0.2 ; Feed mm/rev. (present at power on)
N6 ……
N7 ……
N8 G94 ; mm/min feed set
N9 G1 X… Z… F400
N10 ……
N11 ……
N12 G95 ; mm/rev feed set
N13 G1 X… Z… F0.12
N14 ……
32. _____________________________________________________________________
_____________________________________________________________________
CONCISE GUIDE FANUC 32
3.8 “G97” FIXED REVOLUTIONS SPINDLE ROTATION
Function G97 prepares the spindle speed in revs/min (fixed revs) set by the code S. When this function is
active the programmed S value represents the actual number of revolutions per minute of the spindle.
(e.g.: S50, S160, S500, S1200, S3200, S5000 etc.). G97 is automatically activated when the control is
switched on, therefore it is not necessary to specify its activation in the program. It is a modal function
and can be cancelled by programming G96 (cutting speed set Vt [m/min.]).
This function is recommended when drilling and thread cutting, and is necessary for tapping.
Programming an S value with G97 active, and knowing the working diameter, the cutting speed value can
be calculated using this formula:
To calculate the cutting speed for machining performed at 1500 rpm on a diameter of 40:
Vt = ? [m/min.]
π = 3.14
D = 40 mm
n = 1500 rpm.
A block containing G97 is programmed:
N4 T101
N5 G97 S1500 M4
N6 G0 X100 Z3 M8
Where:
• G97 => Spindle speed set in rpm
• S1500 => Number of spindle rpm
• M4 => Spindle direction of rotation
Vt =
π x D x n
1000
Where
Vt => cutting speed [m/min]
π => 3.14
D => work diameter
n => rpm
1000 => m to mm conversion
Vt =
3.14 x 40 x 1500
1000
= 188.4
33. _____________________________________________________________________
_____________________________________________________________________
CONCISE GUIDE FANUC 33
3.9 “G96” CONSTANT CUTTING SPEED
G96 sets the spindle rotation indicated by the code S as constant cutting speed (m/min). With this
function active the programmed S value is the surface speed in metres per minute (e.g.: S80, S100, S120,
S200, S350 etc.), this function continuously updates the actual spindle revolutions according to the work
diameter, keeping the cutting speed constant. It is a modal function and can be cancelled by
programming G97 (rpm set).
During the turning operations (rough machining, finishing,) it is recommended to always use G96; the S
values to be set depend on the type of material, the type of tool, the machining method and so forth.
Example:
N4 T303
N5 G96 S180 M4
N6 G0 X100 Z3 M8
Programming an S value with G96 active the number of revs can be calculated according to the work
diameter, using this formula:
To calculate the number of revs of machining performed at 150 m/min. on a diameter of 40:
Vt = 150 [m/min.]
π = 3.14
D = 40 mm
n = ? rpm.
n =
Vt x 1000
π x D
Dove:
Vt => cutting speed [m/min]
π => 3.14
D => work diameter
n => rpm
1000 => m to mm conversion
n =
150 x 1000
3.14 x 40
= 1194
34. _____________________________________________________________________
_____________________________________________________________________
CONCISE GUIDE FANUC 34
A block containing G96 is programmed:
N4 ……
N5 G96 S150 M4
N6 ……
Where:
• G96 => Spindle speed set Vt [m/min]
• S150 => Cutting speed Vt [m/min]
• M4 => Spindle direction of rotation
3.10 “G92” SPINDLE REVOLUTION LIMITATIONS
Using the constant cutting speed (function G96) it is often necessary for technical reasons and safety
(type of collet chuck, size of workpiece, unbalancing, etc.), to set a limit to the spindle maximum rpm. For
example when facing or parting off, up to the centre of the workpiece the spindle speed tends to reach an
infinite value. Programming “G92 S2500” the spindle rotates with a constant cutting speed without,
however, exceeding the threshold of 2500 rpm.
Example:
N2 ……
N3 T404
N4 G92 S2000 ; spindle revolutions limited to a maximum of 2000
N5 G96 S150 M4
N6 G0 X100 Z3 M8
N7 ……
The limit set by G92 remains active until it is modified by a new setting of the same function, or it can be
deactivated by programming “G92 S0”.
Programming G97 (fixed revs) the spindle speed limit set with G92 active is deactivated, if there is a new
programming of G96 the spindle speed limit becomes active again.
At power on, if no value is specified for G92 S the spindle rotation speed will not be limited.
35. _____________________________________________________________________
_____________________________________________________________________
CONCISE GUIDE FANUC 35
3.11 “G33” THREAD CUTTING MOVEMENTS
Function G33 is used for separate thread cutting movements.
In fact, G33 differs from G1 since the tool starts the working movement only when the control receives the
“spindle in position” signal from the encoder, which allows the tool to work in synchronisation with the
spindle (for this reason the NC offers the possibility to cut workpieces already threaded several times,
obviously without changing the gripping position).
The block with G33 may contain these instructions:
G33 final point (X or Z) feed (F) starting angle (Q)
The starting angle of the thread cutting can be programmed with address Q from 0° to 360000°
(thousandths value).With the programming of a thread cutting starting angle it is possible to machine
multi-start threads without moving the starting point along axis Z. If no starting angle is programmed, the
NC assumes an angle of 0° as the starting value .
When machining threads, the axis and spindle trimmers are “frozen” at 100% of the programmed speed.
Example:
N1 T1 (Thread cutting)
N2 G97 S1300 M3
N3 G0 X29.5 Z5 M8
N4 G33 Z-26 F1.25
N5 G0 X32
N6 Z5
N7 X29.2
N8 G33 Z-26 F1.25
N9 G0 X32
N10 Z5
N11 …..
Example of multi-thread machining :
M30x1.25
25
37. _____________________________________________________________________
_____________________________________________________________________
CONCISE GUIDE FANUC 37
3.12 “G41”-“G42”- “G40” TOOL RADIUS OFFSET
All inserts for turning have the cutter edge rounded to a pre-defined radius, specified by the insert
manufacturer (e.g. 0.4; 0.8; 1.2 etc.). With the tool measurement a point is determined for movements
that is not on the insert profile, but is the intersection of the horizontal and vertical lines tangent to the
insert radius, as can be seen in the figure that follows.
This difference has no influence when turning cylindrical parts at 90° but causes an error when machining
conical and /or spherical parts, creating a profile that is not the same as that programmed. The value of
this error is proportional to the insert radius and assumes the maximum value in the case of a conical
profile at 45°:
Error = 0.412 x Insert radius
La tool radius offset è attivata e disattivata nel programma mediante le
seguenti funzioni:
Insert
Turned
Profile
Programmed
profile
Insert
38. _____________________________________________________________________
_____________________________________________________________________
CONCISE GUIDE FANUC 38
To use the Tool Radius Offset therefore means to enable 3 functions from the program:
G41 ➨ Activate the Tool Radius Offset for a PIECE ON THE RIGHT as to the tool direction.
G42 ➨ Activate the Tool Radius Offset for a PIECE ON THE LEFT as to the tool direction.
G40 ➨ Deactivate the tool radius offset.
La Tool Radius Offset is usually only used in the finishing stages to obtain the correct profile. In fact, this
programming makes it possible to define exactly the profile specified on the drawing allowing the control to
automatically offset the errors caused by the insert position and radius. To work with offset the instructions
must be entered in the program to activate and deactivate the function and to supply the control with the
information regarding the insert (radius and orientation).
On machines fitted with the back spindle option the activation functions (G41 / G42) and deactivation
functions (G40), are applied as described in the previous diagram.
39. _____________________________________________________________________
_____________________________________________________________________
CONCISE GUIDE FANUC 39
When using the Tool Radius Offset it is also necessary to enter the value of the insert radius (R) and tool
orientation (T) in the tool table. The radius value is supplied by the insert manufacturer. For the tool
orientation see the figure below.
To make it simpler we can say that all the external left tools will have orientation T3 whereas all the
internal left tools will have orientation T2.
When assigning a tool orientation the insert geometry is not important.
At power on, after the RESET key has been pressed, or after function M30, G40 is automatically
activated, furthermore it is not possible to activate and deactivate the radius offset inserting the instruction
(G42 or G41) in a block with a circular interpolation movement.
41. _____________________________________________________________________
_____________________________________________________________________
CONCISE GUIDE FANUC 41
3.13 “G54 / G59” WORKPIECE ORIGINS
To be able to refer the tool movements to a fixed point on the workpiece to be machined. By means of a
certain operation procedure one or more fixed points are defined that allow the operator to have a
reference for the movements to be entered in the work program. These points are called “WORKPIECE
ORIGINS” (G54, G55, …G59). Usually these points are on the front of the workpiece near the spindle
rotating axis.
There is also a fixed reference point that cannot be modified , created by the machine manufacturer. This
point is called MACHINE ORIGIN (G53).
This point is used as a primary reference point and as a consequence to define the Workpiece Origins. In
other words, the Workpiece Origins are found as the distance between the fixed point of the machine
(G53) and our reference point on the workpiece. There is, in fact, a table where the distances from the
Machine Origin are entered for each Workpiece Origin. In the work program it is sufficient to enter the
call-up for the required origin to make it active (example: G54) without any value.
When programming, movements in relation to the machine origin G53 are only allowed in rapid traverse
(with G0 movements).
X
ZG54
G53
disk
turret
disk
origin
Machine axis
42. _____________________________________________________________________
_____________________________________________________________________
CONCISE GUIDE FANUC 42
Origin G53 cannot be written alone in the block. It must always be coupled to X or Z co-ordinates which
identify the movement referred to the machine zero. This movement will always be carried out in rapid
traverse.
In the case of a more “traditional” use of the machine origin it is recommended to use an origin that can be
modified (e.g. G59) having X0 Z0 as value in the table
Example:
N2 ……
N3 T101
N4 G54 ; Workpiece origin activation
N5 G92 S2000
N6 G96 S150 M4
N7 G0 X…. Z…. M8
N8 ……
For the operating procedure of “Origin Measurement” and “Origin Modification”, see Chapter 15 of the
Concise Guide for Operator.
NOTE.
- At power on the control automatically activates origin G54.
- In the program the storable origin (G54–G59) is called up but its value (X,Z,B,C,A) is to be entered
directly in the origins table.
43. _____________________________________________________________________
_____________________________________________________________________
CONCISE GUIDE FANUC 43
3.14 “G52” ORIGIN TRANSFER BY PROGRAM
An alternative to the origin transfer by table is the direct origin transfer by program using instruction G52.
With the G52 function it is possible to move the reference point by program (e.g.: G54, G55 etc.).
G52 operates in absolute mode in relation to the last workpiece origin selected, with the movement values
inserted in the characters of address X and/or Z (e.g.: G52 X5 Z-10).
To cancel the origin transfer by program there are three possibilities :
machine reset
end of program instruction M30
instruction G52 X0 Z0 written in the program (procedure usually used).
Other functions cannot be inserted in the block where instruction G52 is programmed.
Example:
N2 ……
N3 G54
N4 ……
N5 G52 Z-10 Absolute origin transfer
N6 ……
N7 ……
N8 G52 Z0 Cancel origin transfer
N9 ……
NOTE. If other storable origins (G54 – G59) are programmed with the G52 function active, the NC
transfers from the value programmed in G52 to the new origin activated.
It is not possible to move the active origin in incremental mode using the G52 instruction. To get round this
problem, the G52 function can be repeated several times with different values
Example:
N1 G54
N2 ……
N3 G52 Z-10 (active origin moved by 10 mm)
N4 ……
N5 G52 Z-20
N6 ……
N7 G52 Z-30
N8 ……
N9 G52 Z0 (active origin transfer cancelled)
44. _____________________________________________________________________
_____________________________________________________________________
CONCISE GUIDE FANUC 44
3.15 “M134 / M135” PRECISE STOP
The tool passage from a block to another may happen in two ways:
- in execution point to point
- in continuous execution
These two ways of passage from a block to another can be enabled by two functions M, which are:
M134 execution point to point with deceleration at end of block.
With this function axes between the blocks execute a deceleration to reach the quote and then
restart.
In this way you’ll obtain a “precise” profile with live angles.
M135 Execution in continuous without deceleration at end of block.
With this function axes between a block and another don’t decelerate an so, if feed is elevated, you
have an error with rounding of edge.
This function is automatically active at power on.
We advise the use of function M134 to work profiles where a precise tolerance even on chamfers, cones
and fitting is required.
When programmed this function is disabled by function M135, with the reset or with a stop program (M0,
M1 or M30).
We advice to disable function M134 before executing a movement in rapid (GO).
45. _____________________________________________________________________
_____________________________________________________________________
CONCISE GUIDE FANUC 45
3.16 LIST OF MAIN “G” PREPARATORY FUNCTIONS
The list below indicates the main G preparatory functions used to program the FANUC numeric control.
G0 ➪ rapid axis linear movement.
G1 ➪ axis linear movement in work mode.
G2 ➪ clockwise circular interpolation.
G3 ➪ anticlockwise circular interpolation.
G4 ➪ stand-by.
G10 ➪ data entry from program.
G11 ➪ deletes the data entry from program mode
G17 ➪ selection of working surface X Y.
G18 ➪ selection of working surface Z X.
G19 ➪ selection of working surface Y Z.
G28 ➪ return to reference point (with axis C and axis A option).
G33 ➪ thread cutting movement.
G40 ➪ radius offset disable.
G41 ➪ tool radius offset with workpiece on right of profile.
G42 ➪ tool radius offset with workpiece on left of profile.
G52 ➪ absolute programmable origin transfer.
G53 ➪ enables transfers referring to machine origin.
G54 ➪ modifiable origin transfer.
G55 ➪ modifiable origin transfer.
G56 ➪ modifiable origin transfer.
G57 ➪ modifiable origin transfer.
G58 ➪ modifiable origin transfer.
G59 ➪ modifiable origin transfer.
G65 ➪ single macro instruction call up.
G66 ➪ modal macro-instruction call-up.
G67 ➪ delete modal macro-instruction call-up.
G70 ➪ finishing cycle.
G71 ➪ material removal by turning.
G72 ➪ material removal by facing.
G73 ➪ profile repetition.
G76 ➪ thread cutting cycle with several cuts.
G80 ➪ delete fixed front drilling cycle.
G83 ➪ fixed front drilling cycle.
46. _____________________________________________________________________
_____________________________________________________________________
CONCISE GUIDE FANUC 46
G84 ➪ fixed front tapping cycle (cannot be used with rotating tools).
G85 ➪ fixed cycle of frontal boring.
G87 ➪ fixed side drilling cycle.
G89 ➪ fixed side of lateral boring.
G90 ➪ programming with absolute co-ordinates.
G91 ➪ programming with incremental co-ordinates.
G92 ➪ spindle speed limitation.
G94 ➪ feed programming in mm/min.
G95 ➪ feed programming in mm/rev..
G96 ➪ constant cutting speed programming in m/min.
G97 ➪ fixed revolution spindle rotation programming in rpm.
G107 ➪ cylindrical interpolation.
G112 ➪ polar co-ordinates interpolation
G113 ➪ delete polar co-ordinates interpolation.
G174 ➪ radial grooves rough machining/pre-finishing cycle.
G175 ➪ radial grooves finishing cycle.
G176 ➪ axial grooves rough machining/pre-finishing cycle.
G177 ➪ axial grooves finishing cycle
47. _____________________________________________________________________
_____________________________________________________________________
CONCISE GUIDE FANUC 47
4.0 FIXED FANUC CYCLES
Fixed cycles are functions that simplify the ISO programming.
The most commonly used fixed cycles are described below.
4.1 “G71” MATERIAL REMOVAL BY TURNING
The “G71” function activates the material removal by turning cycle.
With this function the tool makes increments on axis X and turning on axis Z.
The material removal cycle in turning is always composed of two program blocks.
Example:
N17 …….
N18 G0 X.. Z.. .
N19 G71 U… R…
N20 G71 P… Q… U… W… F…
N21 G0/G1 X… Z…
N22 …
N23 … description of finished profile
N24 …
Where:
• X => Start cycle co-ordinate along axis X
• Z => Start cycle co-ordinate along axis Z
1
st
BLOCK OF G71
• U => Depth of radial cut without sign.
• R => Tool separation in return path at 45° value without sign
2
nd
BLOCK OF G71
• P => Number of block where the rough machining profile starts
• Q => Number of block where rough machining profile finishes
48. _____________________________________________________________________
_____________________________________________________________________
CONCISE GUIDE FANUC 48
• U => Diametric machining allowance on axis X value indicated with sign
• W => Machining allowance on axis Z value indicated with sign
• F => Work feed in rough machining
In rapid traverse the tool reaches the X and Z values indicated in the block before the first G71 (these
values therefore determine the point where the tool will start to machine: X will be equal to the diameter of
the blank workpiece, Z will be the safety distance that facilitates the cut increment).
An increment takes place that is equal to the radial value indicated in parameter U of the first G71 block
(the increment can take place in rapid mode or work mode, depending on whether the profile description,
block after the second G71, starts with a G0 or a G1).
The tool performs the rough machining automatically making several cuts, going from the point indicated
in block P to the point indicated in block Q.
At the end of each cut the tool separates in rapid mode, by 45° by a radial value equal to that indicated in
parameter R and returns in rapid mode to the Z starting point.
After all the rough machining cuts have been made, the tool performs a pre-finishing cut to leave even
machining allowances (parameters U and W indicated with sign), and returns in rapid traverse to the
starting point. Value U (that determines the diametrical machining allowance along axis X) will be positive
for external machining and negative for internal machining. Parameter W (that determines the machining
allowance along axis Z) will be positive for machining from the tailstock toward the spindle and negative
for machining from the spindle toward the tailstock or for machining on the back spindle (on machines with
this option installed)
If the pre-finishing cut is not required, just program the block after the second G71, (block that starts the
finished profile) to contain both X and Z.
When running the cycle the tool works with the feed programmed in parameter F of the G71 cycle, any
feeds programmed in the profile description blocks are only activated during the finishing operation (see
G70 cycle further on).
NOTE. The G71 rough machining cycle does not use the tool radius offset (G41, G42, G40) which can, of
course, be activated in finishing (G70 cycle).
The finished profile of the workpiece cannot be managed in a sub-program, but only within the cycle itself.
53. _____________________________________________________________________
_____________________________________________________________________
CONCISE GUIDE FANUC 53
4.2 “G72” MATERIAL REMOVAL BY FACING
Function “G72” activates the material removal by facing cycle.
With this function the tool makes increments on axis Z and turning on axis X.
The material removal by facing cycle is always composed of two program blacks.
Example:
N17 …….
N18 G0 X.. Z.. .
N19 G72 W… R…
N20 G72 P… Q… U… W… F…
N21 G0/G1 X… Z…
N22 …
N23 … description of finished profile
N24 …
Where:
• X => Start cycle co-ordinate along axis X
• Z => Start cycle co-ordinate along axis Z
1
st
BLOCK OF G72
• W => Depth of radial cut without sign.
• R => Tool separation in return path at 45° value without sign
2
nd
BLOCK OF G72
• P => Number of block where the rough machining profile starts
• Q => Number of block where rough machining profile finishes
• U => Diametric machining allowance on axis X value indicated with sign
• W => Machining allowance on axis Z value indicated with sign
• F => Work feed
54. _____________________________________________________________________
_____________________________________________________________________
CONCISE GUIDE FANUC 54
The tool, in rapid traverse, reaches the X and Z values indicated in the block before the first G72 (these
values thus determine the point where the tool will start machining: X will be equal to the rough workpiece
diameter plus a small safety margin that facilitates the cut increment, Z will be 0 if the workpiece is
already faced, or 1 or 2 if there is a machining allowance).
The increment will be equal to the value indicated in parameter W of the first G72 block (the increment
may be in rapid mode or working mode – this depends on whether the profile description in the block after
the second G72, starts with G0 or G1).
The tool makes the rough machining automatically performing a series of cuts going from one point
indicated in block P up to the point indicated in block Q.
At the end of each cut the tool separates by 45°, in rapid mode, for a radial value equal to that set in
parameter R and returns in rapid traverse to the Z starting point.
When all the rough machining cuts have been performed the tool makes a pre-finishing cut to leave even
machining allowances (parameters U and W indicated with sign), and returns in rapid traverse to the
starting point. Value U (which determines the diametrical machining allowance along axis X) will be
positive for external machining and negative for internal machining, parameter W (that determines the
machining allowance along axis Z) will be positive for machining from the back spindle toward the spindle,
and negative for spindle machining toward the back spindle or for machining on the back spindle (on
machines that have this option)
If the pre-finishing cut is not required it is sufficient to program the block after the second G72, block from
which the finished profile starts, containing in it both X and Z.
When performing the cycle, the tool works with the feed programmed in parameter F of cycle G72, any
feeds set in profile description blocks are only activated during the finishing operations.
NOTE. The rough machining cycle G72 does not include the use of the tool radius offsets (G41, G42,
G40) which can. of course, be activated for finishing (cycle G70).
The finished profile of the part cannot be managed in a sub-program, but only within the cycle itself.
57. _____________________________________________________________________
_____________________________________________________________________
CONCISE GUIDE FANUC 57
4.3 “G73” PROFILE REPETITION
The “G73” function activates the profile repetition cycle.
With this function the defined profile can be repeated several times, moving it each time by a certain
distance. This cycle is most useful to work on workpieces coming from stamping, casting or a previous
rough machining.
The profile repetition cycle is always composed of two program blocks.
Example:
N17 …….
N18 G0 X.. Z.. .
N19 G73 U… W… R…
N20 G73 P… Q… U… W… F…
N21 G0/G1 X… Z…
N22 …
N23 … description of finished profile
N24 …
Where:
• X => Start cycle co-ordinate along axis X
• Z => Start cycle co-ordinate along axis Z
1
st
BLOCK OF G73
• U => material to remove on x axe, radial value expressed with sign, (difference between
rough and worked)
• W => material to remove on z axe, value expressed with sign, (difference between
rough and worked)
• R => Number of profile repetitions
2
nd
BLOCK OF G73
• P => Number of block where the rough machining profile starts
• Q => Number of block where the rough machining profile finishes
• U => Diametrical machining allowance on axis X , value with sign
W => Machining allowance on axis Z, value with sign
• F => Work feed
58. _____________________________________________________________________
_____________________________________________________________________
CONCISE GUIDE FANUC 58
In rapid traverse the tool reaches the values of X and Z set in the block before the first G73 (thus these
values determine the point where the tool will start to work).
An increment takes place which is equal to the values set in parameters U and W of the first G73 and the
number of profile repetitions expressed in parameter R.
The tool makes a series of cuts going from the point set in block P up to the point set in block Q.
At the end of all the rough machining cuts the tool makes a pre-finishing cut to leave even machining
allowances (parameters U and W , with sign), and returns in rapid traverse to the starting point. Value U
(that determines the diametrical machining allowance along axis X) will be positive for external machining
and negative for internal machining, parameter W (that determines the machining allowance along axis Z)
will be positive for machining from the back spindle toward the spindle and negative for machining from
the spindle to the back spindle or for machining on the back spindle in machines with this option)
When performing the cycle the tool works with the feed programmed in parameter F of the G73 cycle. Any
feeds programmed in the profile description blocks will be activated only during finishing operations.
NOTE. the rough machining cycle G73 does not use the tool radius offsets (G41, G42, G40) which can,
of course, be activated for finishing (cycle G70).
The finished profile of the part cannot be managed in a sub-program, but only inside the cycle itself.
60. _____________________________________________________________________
_____________________________________________________________________
CONCISE GUIDE FANUC 60
4.4 “G70” FINISHING CYCLE
The “G70” function activates the finishing cycle. This function can be used after the three rough machining
cycles G71, G72 and G73.
The finishing cycle consists of just one block and can contain these codes:
• P => Number of first block of the profile to be finished.
• Q => Number of the last block of the profile to be finished.
• F => Finish feed.
Before activating the finishing cycle G70 the tool must be positioned in the same point where the rough
machining cycle G71, G72 or G73 started.
At the end of the finishing cycle the tool returns to the starting point and the NC runs the next block
There are two possibilities for the feed used in the finishing stage:
- if the whole profile is to be machined with the same feed, just specify this value inside block G70 (with
parameter F)
- if various feeds are to be used on the profile, these must be specified in the profile rough machining
(these feeds will be ignored in the rough machining but activated in the finishing stage)
63. _____________________________________________________________________
_____________________________________________________________________
CONCISE GUIDE FANUC 63
4.5 “G174” RADIAL GROOVES ROUGH MACHINING/PRE-FINISHING CYCLE
Function G174 activates the rough machining and pre-finishing cycle for grooves on outer and inner
diameters, performed by a parting tool with less width at the bottom of the groove.
To run a G174 cycle the tool must be positioned with the reference edge on the start cycle point (tool
reset on left edge), at a distance of a diametrical millimetre from the part to be machined.
The feed speed used is that active when the operation is called up and must be specified in a block prior
to G174.
Figure 1
4 1
X
Z
3 2
4 3 2 1
0/8 0/4 0/2 0/1
D
H
64. _____________________________________________________________________
_____________________________________________________________________
CONCISE GUIDE FANUC 64
C
TOOL RESET
The insert radius of the tool used must be specified in the correctors table.
G174 must be programmed as follows:
N...G174 A.. B.. C.. U/X.. W/Z.. Y.. H.. K.. Q.. D.. (F..) (L..) (P..) (R..) (S..)
Where:
G174 = Activates the rough machining and pre-finishing cycle for the outer and inner radial
grooves.
A.. = Angle of groove right-hand wall (in positive direction of axis Z)
B.. = Angle of groove left-hand wall.
These angles are always positive and have a value from 0 to 89.999 degrees. When the
assigned value is 0, this means that the walls are vertical.
C.. = Tool width , always positive value,(radius R and orientation type 3 must be specified in
offset table as radius compensation is activated automatically).
U/X.. = U indicates the depth of the groove, X indicates the value of the bottom of the groove
- specify one or the other - :
If U < 0 = external groove
If U > 0 = internal groove
If X < value of starting point X = external groove
If X > value of starting point X = internal groove
R
65. _____________________________________________________________________
_____________________________________________________________________
CONCISE GUIDE FANUC 65
W/Z.. = W groove width, Z last point of groove – specify one or the other -:
If W<0 the groove machining is made from right to left of the workpiece.
If W>0 the groove machining is made from left to right of the workpiece.
If Z < the starting point value, machining is made from right to left of the workpiece
(toward Z negative).
If Z > the starting point value, machining is made from left to right of the workpiece
(toward Z positive).
Y*.. = Linking radius or dimension of chamfer 1 (upper external)
H*.. = Linking radius or dimension of chamfer 2 (upper internal)
K*.. = Linking radius or dimension of chamfer 3 (lower internal)
Q*.. = Linking radius or dimension of chamfer 4 (lower external)
If Y,H,K,Q, are omitted, the cycles considers them as 0.
This means that they will be eliminated from the machining (sharp edge).
D.. = Defines the type of profile (chamfer or radius) in points 1,2,3,4 (figure 1).
Bit 3 Bit 2 Bit 1 Bit 0
0/8 0/4 0/2 0/1 Binary example of number D
8 4 2 1
D can assume a value from 0 to 15 according to the elements (chamfers/radii) that constitute the groove
and how they are arranged.
First element : may assume value 0-1 (0= Chamfer, 1= Radius)
Second element : may assume value 0-2 (0= Chamfer, 2= Radius)
Third element : may assume value 0-4 (0= Chamfer, 4= Radius)
Fourth element : may assume value 0-8 (0= Chamfer, 8= Radius)
On the basis of the sum of the elements the value is calculated for parameter D (see figure 1).
F.. = overmetal on end of groove(vertical), radial value and expressed in mm.
66. _____________________________________________________________________
_____________________________________________________________________
CONCISE GUIDE FANUC 66
L.. = overmetal on groove’s sides value expressed in mm.
NOTE: if only one of the two variables (F or L) is specified, the other variable will be assigned the same
value. If they are omitted both are considered null.
P.. =Depth of cut (it must always be more than 0, radial value expressed in mm.).The distance
between on cut and another is 0.2 mm.If omitted the machining is executed in one cut.
R.. = Specifies how many grooves (cycle repetition); if omitted , default value is 1.
S.. = Specifies the centre distance for groove repetition. It can be omitted if only one groove is
programmed (R=1). The value is expressed in mm and may be positive or negative.
Example of rough machining and pre-finishing of a radial groove with a tool having a width of 3 mm:
N18 T303 (TOOL FOR RADIAL GROOVES)
N19 G54
N20 G92 S1500
N21 G96 S100 M4
N22 G0 X101 Z-30 M8 F0.12
N23 G174 A5 B8 C3 X60 Z-80 Y1 Q1 H1.5 K1.5 D6
N24 G0 X200 Z100 M5
N25 M30
67. _____________________________________________________________________
_____________________________________________________________________
CONCISE GUIDE FANUC 67
4.6 “G176” AXIAL GROOVES ROUGH MACHINING/PRE-FINISHING CYCLE
The G176 function activates the rough machining and pre-finishing cycle for axial grooves, working from
the right or the left (see fig. 1) with a parting tool having a width less than the bottom of the groove
To run a G176 cycle, position the tool with the reference edge (tool reset on the bottom edge)on the start
cycle point, at a distance of 0.5 millimetres from the workpiece.
The feed speed used is that which is active when the function is called up and must be specified in a block
prior to G176.
The G176 cycle disables the tool radius offset (G40)
Figure 1
1
2
X
Z 3
4
4 3 2 1
0/8 0/4 0/2 0/1
D
H
69. _____________________________________________________________________
_____________________________________________________________________
CONCISE GUIDE FANUC 69
A.. = Angle of groove high wall (in axis X positive direction)
B.. = Angle of groove low wall.
These angles are always positive and have a value from 0 to 89.999 degrees. When the
assigned value is 0 , this means the walls are horizontal.
C.. = Tool width, always positive value,(r radius and orientation T3 must be specified on table
offset as it’s automatically activated the radius compensation).
U/X.. = U width of groove, X last point of groove – specify one or the other - :
If U < 0 the groove machining takes place from top to bottom.
If U > 0 the groove machining takes place from bottom to top.
If X < of the start point value, machining takes place from top to bottom of the workpiece
(X negative direction).
If X > of the start point value, machining takes place from bottom to top of the workpiece
(X positive direction).
W/Z.. = W indicates the depth of the groove, Z indicates the groove bottom measurement
- specify one or the other - :
If W < 0 = concave groove to left (Z negative direction)
If W > 0 = concave groove to right(Z positive direction)
If Z < of X start point value = concave groove to left
If Z > of X start point value = concave groove to right
Y*.. = Linking radius or chamfer dimension 1 (upper external))
H*.. = Linking radius or chamfer dimension 2 (upper internal)
K*.. = Linking radius or chamfer dimension 3 (lower internal)
Q*.. = Linking radius or chamfer dimension 4 (lower external)
If Y,H,K,Q, are omitted, the cycle considers them as 0.
This means that they will be ignored when machining (sharp edge).
D.. = Defines the type of profile (if chamfer or radius) in points 1,2,3,4 (figure 1).
Bit 3 Bit 2 Bit 1 Bit 0
0/8 0/4 0/2 0/1 Binary example of number D
8 4 2 1
70. _____________________________________________________________________
_____________________________________________________________________
CONCISE GUIDE FANUC 70
D can have a value from 0 to 15 according to the elements (chamfers/radii) that constitute the groove, and
their arrangement.
First element : can have a value 0-1 (0= Chamfer, 1= Radius)
Second element : can have a value 0-2 (0= Chamfer, 2= Radius)
Third element : can have a value 0-4 (0= Chamfer, 4= Radius)
Fourth element : can have a value 0-8 (0= Chamfer, 8= Radius)
Based on the sum of the elements the value of parameter D is calculated D (see figure 1).
F.. = Overmetal on bottom (vertical), radial value expressed in mm.
L.. = Overmetal on sides (horizontal), value expressed in mm.
NOTE: if only one of the variables is specified (F or L) , the other variable will be assigned the same
value. If they are omitted both will be considered null.
P.. = Depth of cut (must always be greater than 0). Value expressed in mm.
The distance between one block and another is equal to 0.2 mm.
If this value is omitted the groove is executed in one cut.
R.. = Specifies the number of grooves (cycle repetition); if omitted, default value is 1.
S.. = Specifies the centre distance for groove repetition. It can be omitted if only one groove is
programmed (R=1). The value is radial and expressed in mm and can be positive or
negative.
72. _____________________________________________________________________
_____________________________________________________________________
CONCISE GUIDE FANUC 72
4.7 “G175” / “G177” FINISHING CYCLE FOR RADIAL/AXIAL GROOVES
Functions G175 and G177 activate the finishing cycle for radial grooves (on outer and inner diameters)
and axial grooves (cut from right to left of the workpiece).
Only function G175 is described here; the description is also valid for cycle G177 (for which the rough
machining cycle is G176).
The tool position and reset follows the rules already described for rough machining cycle G174 which
should be consulted for further details.
The feed speed used is that which is active when the function is called up, and must be specified in a
block prior to G175.
The G175 cycle disables the tool radius offset (G40).
The parameters used are the same as for cycle G174, except for parameters F, L, P which are not used.
To activate the finishing cycle there are two syntaxes that can be used:
N...G175 A.. B.. C.. U/X.. W/Z.. Y.. H.. K.. Q.. D.. (R..) (S..)
In this case all the parameters are specified (see cycle G174).
N...G175 (C..)
In this second case all the parameters indicated in the last rough machining cycle that was run are used
except, (if specified) parameter C (tool width).
In both cases the corrector and the radius of the cutter used by the cycle are those active when G175 is
run.
74. _____________________________________________________________________
_____________________________________________________________________
CONCISE GUIDE FANUC 74
If the grooves cycle is not programmed correctly, the following alarms may be generated:
All 3000: Parameter X or U missing: The value for parameter X or U has been omitted.
All 3001: Parameter Z or W missing: The value for parameter Z or W has been omitted.
All 3002: Parameter C not correct: The value for parameter C has been omitted or the value
is less than or equal to 0.
All 3003: Wrong tool data: The tool radius programmed is larger than the tool width
divided by 2.
*All 3004: Slot geometry error: The slot geometry is not correct.
All 3005: Lower right radius error: The tool radius programmed is larger than the lower right
radius (only for external grooves).
All 3006: Upper right radius error: The tool radius programmed is larger than the upper
right radius (only for internal grooves).
All 3007: Upper left radius error: The tool radius programmed is larger than the upper left
radius (right groove bore).
All 3008: Upper right radius error:: The tool radius programmed is larger than the upper right
radius (left groove bore).
All 3009: Lower left radius error: The tool radius programmed is larger than the lower left
radius (only for external grooves).
All 3010: Upper left radius error: The tool radius programmed is larger than the upper left
radius (only for internal grooves).
All 3011: Lower left radius error:: The tool radius programmed is larger than the lower left
radius (right groove bore)
All 3008: Upper right radius error:: The tool radius programmed is larger than the upper right
radius (left groove bore).
All 3012: Lower right radius error: The tool radius programmed is larger than the lower right
radius (left groove bore).
*All 3013: Lower right chamfer error: Lower right chamfer too small in relation to programmed
tool radius (only external grooves).
*All 3014: Upper right chamfer error: Upper right chamfer too small in relation to programmed
tool radius (only internal grooves).
75. _____________________________________________________________________
_____________________________________________________________________
CONCISE GUIDE FANUC 75
*All 3015: Upper left chamfer error: Upper left chamfer too small in relation to programmed
tool radius (right groove bore).
*All 3016: Upper right chamfer error: Upper right chamfer too small in relation to programmed
tool radius (left groove bore).
*All 3017: Lower left chamfer error: Lower left chamfer too small in relation to programmed
tool radius (only external grooves).
*All 3018: Upper left chamfer error: Upper left chamfer too small in relation to programmed
tool radius (only internal grooves).
*All 3019: Lower left chamfer error: Lower left chamfer too small in relation to programmed
tool radius (right groove bore).
*All 3020: Lower right chamfer error: Lower right chamfer too small in relation to programmed
tool radius (left groove bore).
*All 3021: Tool too big: Width of tool larger than the slot width or the tool base is larger than the
bottom of the slot or with the tool dimensions programmed it is not possible to reach the bottom of the slot.
All 3022: Parameter P error: A value has been programmed for parameter P which is negative or
equal to 0.
All 3023: Parameter F or L negative: A negative value has been programmed for parameter F or L
for machining allowance.
All 3024: Parameter Y H K Q negative A negative value has been programmed for one or more
of the parameters Y H K Q.
All 3025: Parameters A B error: A value has been programmed angle A and/or B which is less than 0
or greater than 90 degrees.
All 3026: Parameter R negative: A negative value has been programmed for the number of groove
repetitions (if this value is 0 no groove is cut).
All 3027: Parameter S error: A number of grooves have been programmed which is greater than one,
but no value (different from 0) has been set for the centre distance between grooves.
* These errors may be caused by an excessive machining allowance value in relation to the slot
dimensions.
76. _____________________________________________________________________
_____________________________________________________________________
CONCISE GUIDE FANUC 76
4.8 “G76” THREAD CUTTING CYCLE IN SEVERAL CUTS
Function “G76” activates the thread cutting cycle in several cuts.
This function can be used for external and internal thread cutting.
The thread cutting cycle in several cuts is always composed of two program blocks.
Example:
N17 …….
N18 G0 X.. Z.. .
N19 G76 P… Q… R…
N20 G76 X… Z… R… P… Q… F…
N21 G0 X… Z…
Where:
§ X => Cycle start co-ordinate along axis X (it is also the value reached by the tool in separation at the
end of each cut)
• Z => Cycle start co-ordinate along axis Z
1
st
BLOCK OF G76
• P => Parameter P always has 6 digits (3 pairs of numbers)
1
st
pair : number of finishing cuts (value from 00 to 99, always two digits)
E.g. 00 no finishing cut
01 one finishing cut
02 two finishing cuts
2
nd
pair : tapered exit from thread (value from 00 to 99, always two digits)
E.g. 00 vertical exit from thread
05 tapered exit from thread 0.5 times the cut (value equal to half the cut)
10 tapered exit from thread 1 time the cut (value equal to cut)
77. _____________________________________________________________________
_____________________________________________________________________
CONCISE GUIDE FANUC 77
3
rd
pair : thread cut angle (value of two digits, only 6 selections 00,29,30,55,60,80)
E.g. 00 for square thread cutting
55 for Whitworth thread cutting
60 for metric thread cutting
If threads are to be cut with an angle that differs from the 6 selections available, use value 00
In brief : P010060 (1 idle traverse, vertical exit at end of thread , thread with angle of 60°)
• Q => Minimum cut depth (in thousandths)
E.g. Q100=0.1mm.
• R => Depth of finishing cut (radial, in mm)
E.g. R0.02=0.02mm.
2
nd
BLOCK OF G76
• X => Bottom of thread diameter
• Z => End of thread absolute co-ordinate
• R => Taper of thread cut (radial difference between starting thread cut diameter and diameter at end
of thread cutting). The value must be indicated with a sign. For cylindrical thread cutting
parameter R is not indicated.
R=(START OF THREAD DIAMETER – END OF THREAD DIAMETER) / 2
• P => Radial height of thread (in thousandths and without sign)
The value set for P depends on the type of thread cut and can be:
P=613 for Cut for ISO metric thread
P=640 for Cut for Whitworth thread DIN 11
P=500 for Cut for square thread
Thus : P1226 (for an ISO metric thread pitch 2)
• Q => Radial depth of first cut (in thousandths)
E.g. Q250=0.25mm.
• F => Thread pitch (in mm.)
E.g. F1.5 for thread with 1.5 mm pitch.
80. _____________________________________________________________________
_____________________________________________________________________
CONCISE GUIDE FANUC 80
Example of external tapered thread cut 1” NPT (pitch 14 threads / inch) :
N17 T101 (Taper thread cut)
N18 G54
N19 G97 S800 M3
N20 G0 X33 Z6 M8
N21 G76 P010060 Q100 R0.02
N22 G76 X29.588 Z-17.343 P1161 Q250 F1.814 R-0..729
N23 G0 X150 Z100
To machine the tapered thread cut it is important to remember:
- Pitch F = 25.4 (comparison between mm and inches) / 14 (n° threads / inch) = 1.814 mm
- P is calculated by multiplying the pitch by 640 (1.814 x 640 = 1161)
- End of thread X refers to the final diameter 31.91 – [(0.64 x 1.814) x2] = 29.588
- The starting diameter to calculate R is that relating to the starting Z (in the example Z6); in this case
making the calculation with the aid of trigonometry, the result is X29.367,
- Therefore R Will be (30.451-31.91):2=-0.729
81. _____________________________________________________________________
_____________________________________________________________________
CONCISE GUIDE FANUC 81
4.9 “G83” FRONT DRILLING CYCLE
Function “G83” activates the front drilling cycle.
With this function the bit makes a series of cuts, of the required size, undercutting or breaking the chip
and returning, at the end of cycle, in rapid traverse to the starting point.
The front drilling cycle can contain these codes:
• Z => End of drilling absolute value
• F => Drilling feed ( in mm/rev.)
• Q => Depth of cut (in thousandths)
• P => Pause on bottom of hole (in thousandths of second)
Example:
N12 T303 (DRILLING)
N13 G54
N14 G97 S800 M3
N15 G0 X0 Z5 M8
N16 G83 Z-50 F0.12 Q1000
N17 G0 X200 Z200
Codes Q and P if not used, need not be written.
This cycle can be used to break or undercut chips according to the value of parameter 5101 bit 2 (RTR),
with value 0 chip breaking, with value 1 chip undercutting, by default this bit is set to 1 therefore for chip
undercutting.
82. _____________________________________________________________________
_____________________________________________________________________
CONCISE GUIDE FANUC 82
It should also be remembered that parameter 5114 determines:
- with chip undercutting: the distance at which the drill is to stop in relation to the last point reached,
when re-entering the hole after undercutting.
- with chip breakage: by how much the drill is to come backward between one drilling cut and the next
To cancel the drilling cycle it is necessary to program function G80 or any G function in group 01,
therefore G0, G1, G2, or G3.
NOTE: On all Graziano Spa machine models the axial tool resetting (tapping drills, cutters etc.) is made
only along axis Z but it is necessary to enter zero in the X location of the tool table for the tool used (See
Concise Guide for Operator, paragraph 3.2)
83. _____________________________________________________________________
_____________________________________________________________________
CONCISE GUIDE FANUC 83
4.10 “G84” FRONT TAPPING CYCLE
THIS CYCLE IS NOT VALID FOR TAPPING WITH MOTOR DRIVEN TOOLS
FOR TAPPING WITH MOTOR DRIVEN TOOLS SEE FUNCTIONS P9103 AND P9104
Function “G84” activates the front tapping cycle.
With this function the tapping drill enters with a feed equal to the tapping pitch, feed reduction and spindle
revs to reach the end point of the tapping simultaneously, reverse spindle rotation, simultaneous
acceleration of spindle and axis and return to starting point.
The front drilling cycle can contain these codes:
• Z => End of tapping absolute value
• F => Tapping pitch (in mm/rev.)
Example:
N12 T404 (TAPPING M10 x 1.5)
N13 G54
N14 G97 S300 M3
N15 G0 X0 Z5 M8
N16 G84 Z-35 F1.5
N17 G80
N18 G0 X200 Z200
84. _____________________________________________________________________
_____________________________________________________________________
CONCISE GUIDE FANUC 84
This cycle can only be used for right-hand tapping, therefore with entry in direction M3 and coming out in
direction M4. If a left-hand tapping is required, two parameter values have to be changed :parameter 5112
(entry direction of rotation, usually 3) and parameter 5113 (direction of rotation coming out, usually 4) To
execute a tapping on backspindle it’s necessary to change the value of two parameters: parameter 5112
(rotation direction in entry normally 204) and the parameter 5113 (rotation direction in exit normally 203).
At the end of this operation you need to recall the right values of the two parameters 5112 value 3 and
5113 value 4 already inserted by default.
To cancel the tapping cycle it is necessary to program function G80 or any G function in group 01,
therefore G0, G1, G2, or G3.
This cycle can be used both for tapping with offset and for tapping without offset (rigid).
When using rigid tapping, function M29 must be set in the block prior to the G84 cycle.
Example of rigid tapping:
N12 T404 (RIGID TAPPING M10 x 1.5)
N13 G54
N14 G97 S300 M3
N15 G0 X0 Z5 M8
N16 M29 (RIGID TAPPING ACTIVATION)
N17 G84 Z-35 F1.5
N18 G80
N19 G0 X200 Z200
To cancel the rigid tapping cycle, function G80 or any G function of group 01, therefore G0, G1, G2, or G3
must be programmed.
85. _____________________________________________________________________
_____________________________________________________________________
CONCISE GUIDE FANUC 85
5.0 SUB-PROGRAMS / PARAMETRIC PROGRAMMING
Sub-programs are useful to repeat the same operation several times, using inside the program the same
functions and co-ordinates already known to the operator
With parametric programming, variable values (parameters or variables #) can be attributed to the
program codes instead of fixed values (numeric values). A value can be assigned to a variable through
the program, from the MDI window, or inserting it in the variables table.
A variable is programmed with address # followed by a number
5.1 “M98” “M99” USE OF SUB-PROGRAMS
A program can be divided into main program and sub-programs.
Usually the NC operates under the control of the main program, but when an instruction is found that calls
up a sub-program the control passes over to the sub-program. When an instruction to return to the main
program is found, the control returns to the main program.
Sub-programs can be used when there are fixed repetitive sequences, simplifying the programming. A
sub-program can be called up by the main program. A sub-program that has been called can, in its turn,
call up another sub-program. Sub-program call-ups can be nested in up to four levels, as shown on the
next page:
86. _____________________________________________________________________
_____________________________________________________________________
CONCISE GUIDE FANUC 86
MAIN
PROGRAM
SUB-
PROGRAM
SUB-
PROGRAM
SUB-
PROGRAM
O1
…
…
…
…
…
M98 P8001
…
…
…
…
M30
O8001
…
…
…
…
…
M98 P8002
…
…
…
…
M99
O8002
…
…
…
…
…
M98 P8003
…
…
…
…
M99
O8003
…
…
…
…
…
…
…
…
…
…
M99
Level 1 Level 2 Level 3
A sub-program is a normal program that ends with function M99. The same functions can be used inside
the sub-program as used in main programs (e.g. fixed cycles, geometric functions etc.)
To simplify their use, we suggest that sub-programs are given names from O8001 to O8999 (main
programs go from O1 to O8000)
A sub-program is run when it is called by the main program or by another sub-program.
To call up a sub-program, write:
M98 P OOOO OOOO
Number name of
Repetition sub-program
(max 9999)
When the number of repetitions is omitted the NC assumes a value of 1
Example : sub-program 8003 is to be repeated 6 times consecutively
M98 P68003
Instruction “M99” that closes the sub-program is used to return to the main program (or to the sub-
program) in the block that immediately follows the running of the sub-program.
87. _____________________________________________________________________
_____________________________________________________________________
CONCISE GUIDE FANUC 87
If it is required to return from the sub-program to a pre-defined block and not to the block that immediately
follows the one in which it has been run, add the pre-defined block to M99, preceded by the letter P.
MAIN
PROGRAM
SUB-
PROGRAM
N10
N20
N30
N40
N50
N60
M98P8003
N70
N80
N90
N100
N110 M30
O8003
N10
N20
N30
N40
N50
N60
N70
N80
N90
N100 M99P80
M30
After the sub-program has run, the NC returns in the main program at block N80
Function M99 (which usually closes a sub-program) can be used also in the main program as an
unconditioned skip (to skip always to a pre-defined block)
O1 (MAIN PROGRAM)
N10
N20
N30 /M99 P70 (USED TO OPTIONALLY SKIP THE PARTS OF THE PROGRAM FROM BLOCK 30 TO
BLOCK 70, SEE USE OF BARRED BLOCK)
N40
N50
N60
N70
N80
N90
N100 M30
89. _____________________________________________________________________
_____________________________________________________________________
CONCISE GUIDE FANUC 89
5.2 PARAMETRIC PROGRAMMING
Parametric programming uses variables, arithmetical instructions and conditioned skip instructions. In this
way programs for general use can be developed, or they can be personalised for specific customer
requirements.
VARIABLES
There are four types of variables:
From #1 to #33 LOCAL VARIABLES These can only be used inside a macro and not
shared with other macros. At power on the
content of these macros is nil because they are
volatile.
From #100 to #149 COMMON VARIABLES These can be shared with other
macros. At power on the content of these
macros is nil because they are volatile
From #500 to #999 COMMON VARIABLES These are like the variables from #100 to #149
with the difference that they are stable, they
hold their content even with the machine
switched off.
From #1000 to #…. SYSTEM VARIABLES Used to read and write NC data, such as
position of tool, of the axis and the tool
correction values etc.
Since genuary 2001 common variables “fixed” by the customers, for parametric programming, are
those which range from #510 to #699; as the others are used by Graziano SPA for specific
operations.
91. _____________________________________________________________________
_____________________________________________________________________
CONCISE GUIDE FANUC 91
7 sine
Example :
#101=SIN[#110] or #101=SIN[30]
8 cosine
Example:
#101=COS[#110] or #101=COS[30]
9 tangent
Example:
#101=TAN[#110] or #101=TAN[30]
10 arc. cot.
Example:
#101=ATAN[#110]/ [#103]
CONDITIONED AND UNCONDITIONED SKIP INSTRUCTIONS
There are seven types of conditioned and unconditioned skip instructions:
1 unconditioned skip
Example:
GOTO1000 (skip to block N1000)
2 conditioned skip if the same
Example:
IF[#101 EQ #102] GOTO1000 (skip to block N1000 if parameter #101 is the same as
parameter #102, if the two parameters are different
the program passes to the next block)
92. _____________________________________________________________________
_____________________________________________________________________
CONCISE GUIDE FANUC 92
3 conditioned skip if different
Example:
IF[#101 NE #102] GOTO1000 (skip to block N1000 if parameter #101 is different from
parameter #102, if the two parameters are the same
the program passes to the next block)
4 conditioned skip if greater than
Example:
IF[#101 GT #102] GOTO1000 (skips to block N1000 if parameter #101 is greater than
parameter #102, if parameter #102 is greater or equal to
parameter #101 the program continues with the next block)
5 conditioned skip if less than
Example:
IF[#101 LT #102] GOTO1000 (skips to block N1000 if parameter #101 is less than
parameter #102, if parameter #102 is less than or equal to
parameter #101 the program continues with the next block)
6 conditioned skip if greater than or equal to
Example:
IF[#101 GE #102] GOTO1000 (skips to block N1000 if parameter #101 is greater than or
equal to parameter #102, if parameter #102 is greater than
parameter #101 the program continues with the next block)
7 conditioned skip if less than or equal to
Example:
IF[#101 LE #102] GOTO1000 (skips to block N1000 if parameter #101 is less than or
equal to parameter #102, if parameter #102 is less than
parameter #101 the program continues with the next block