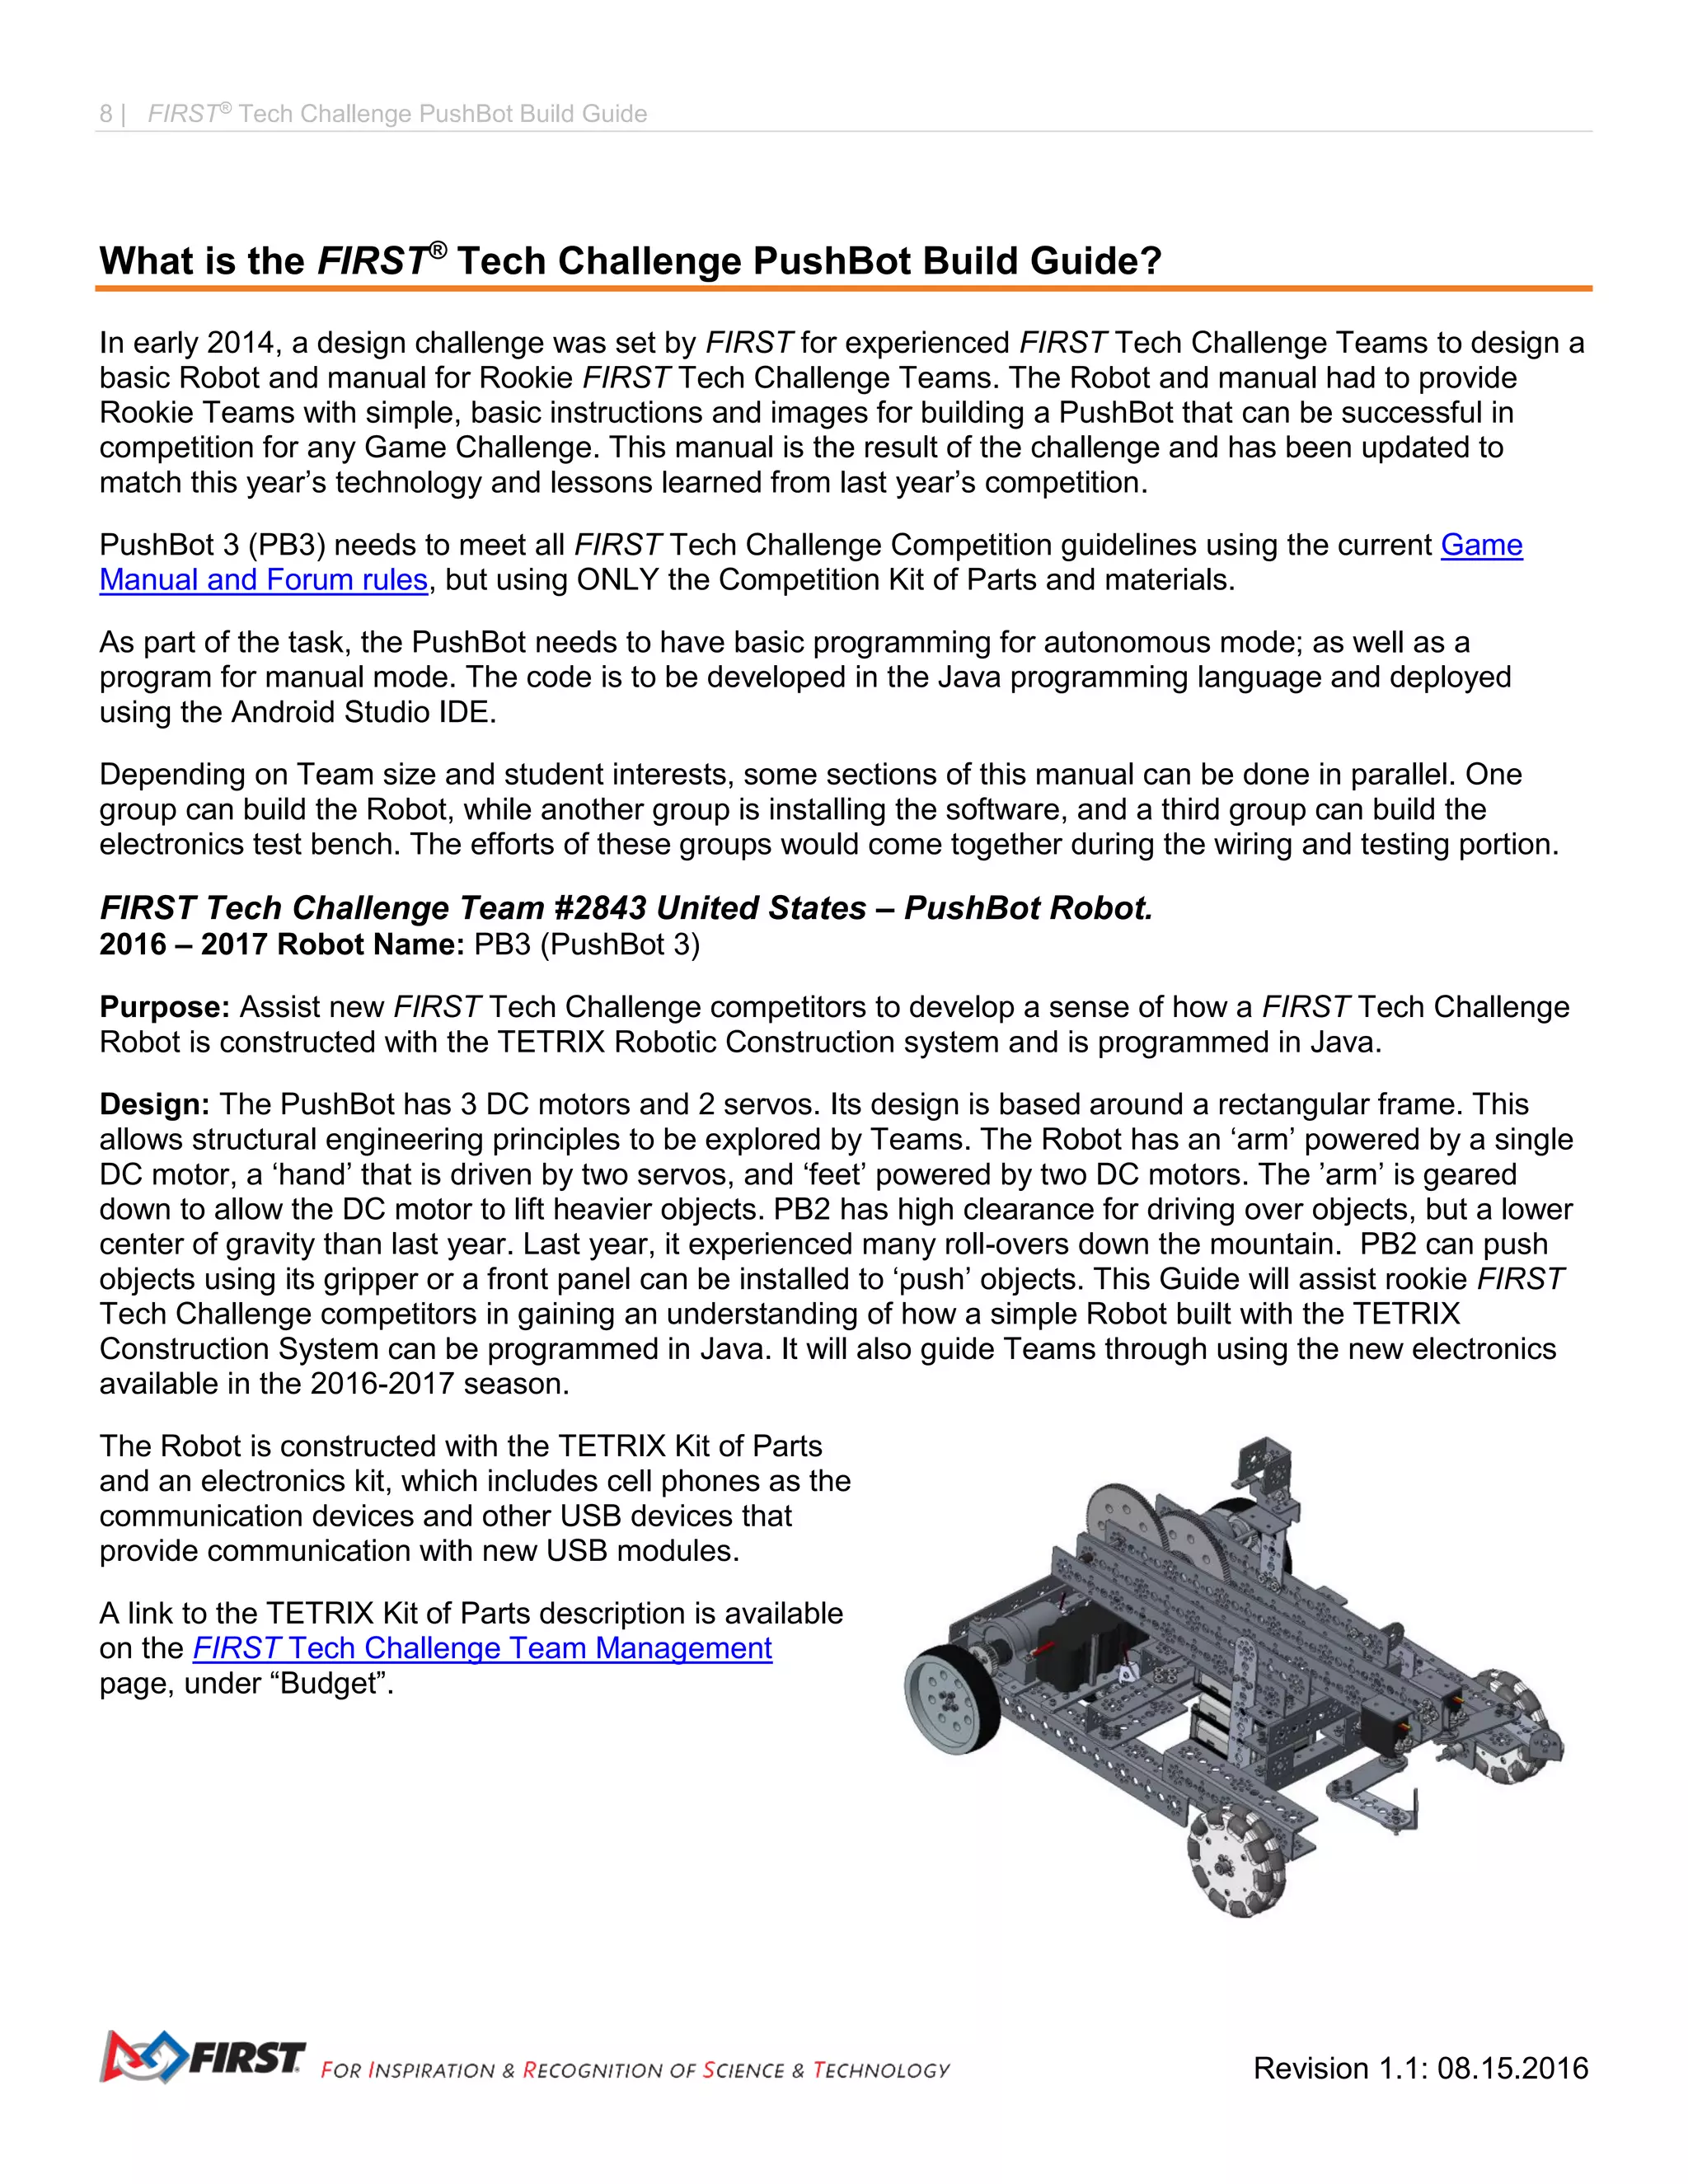
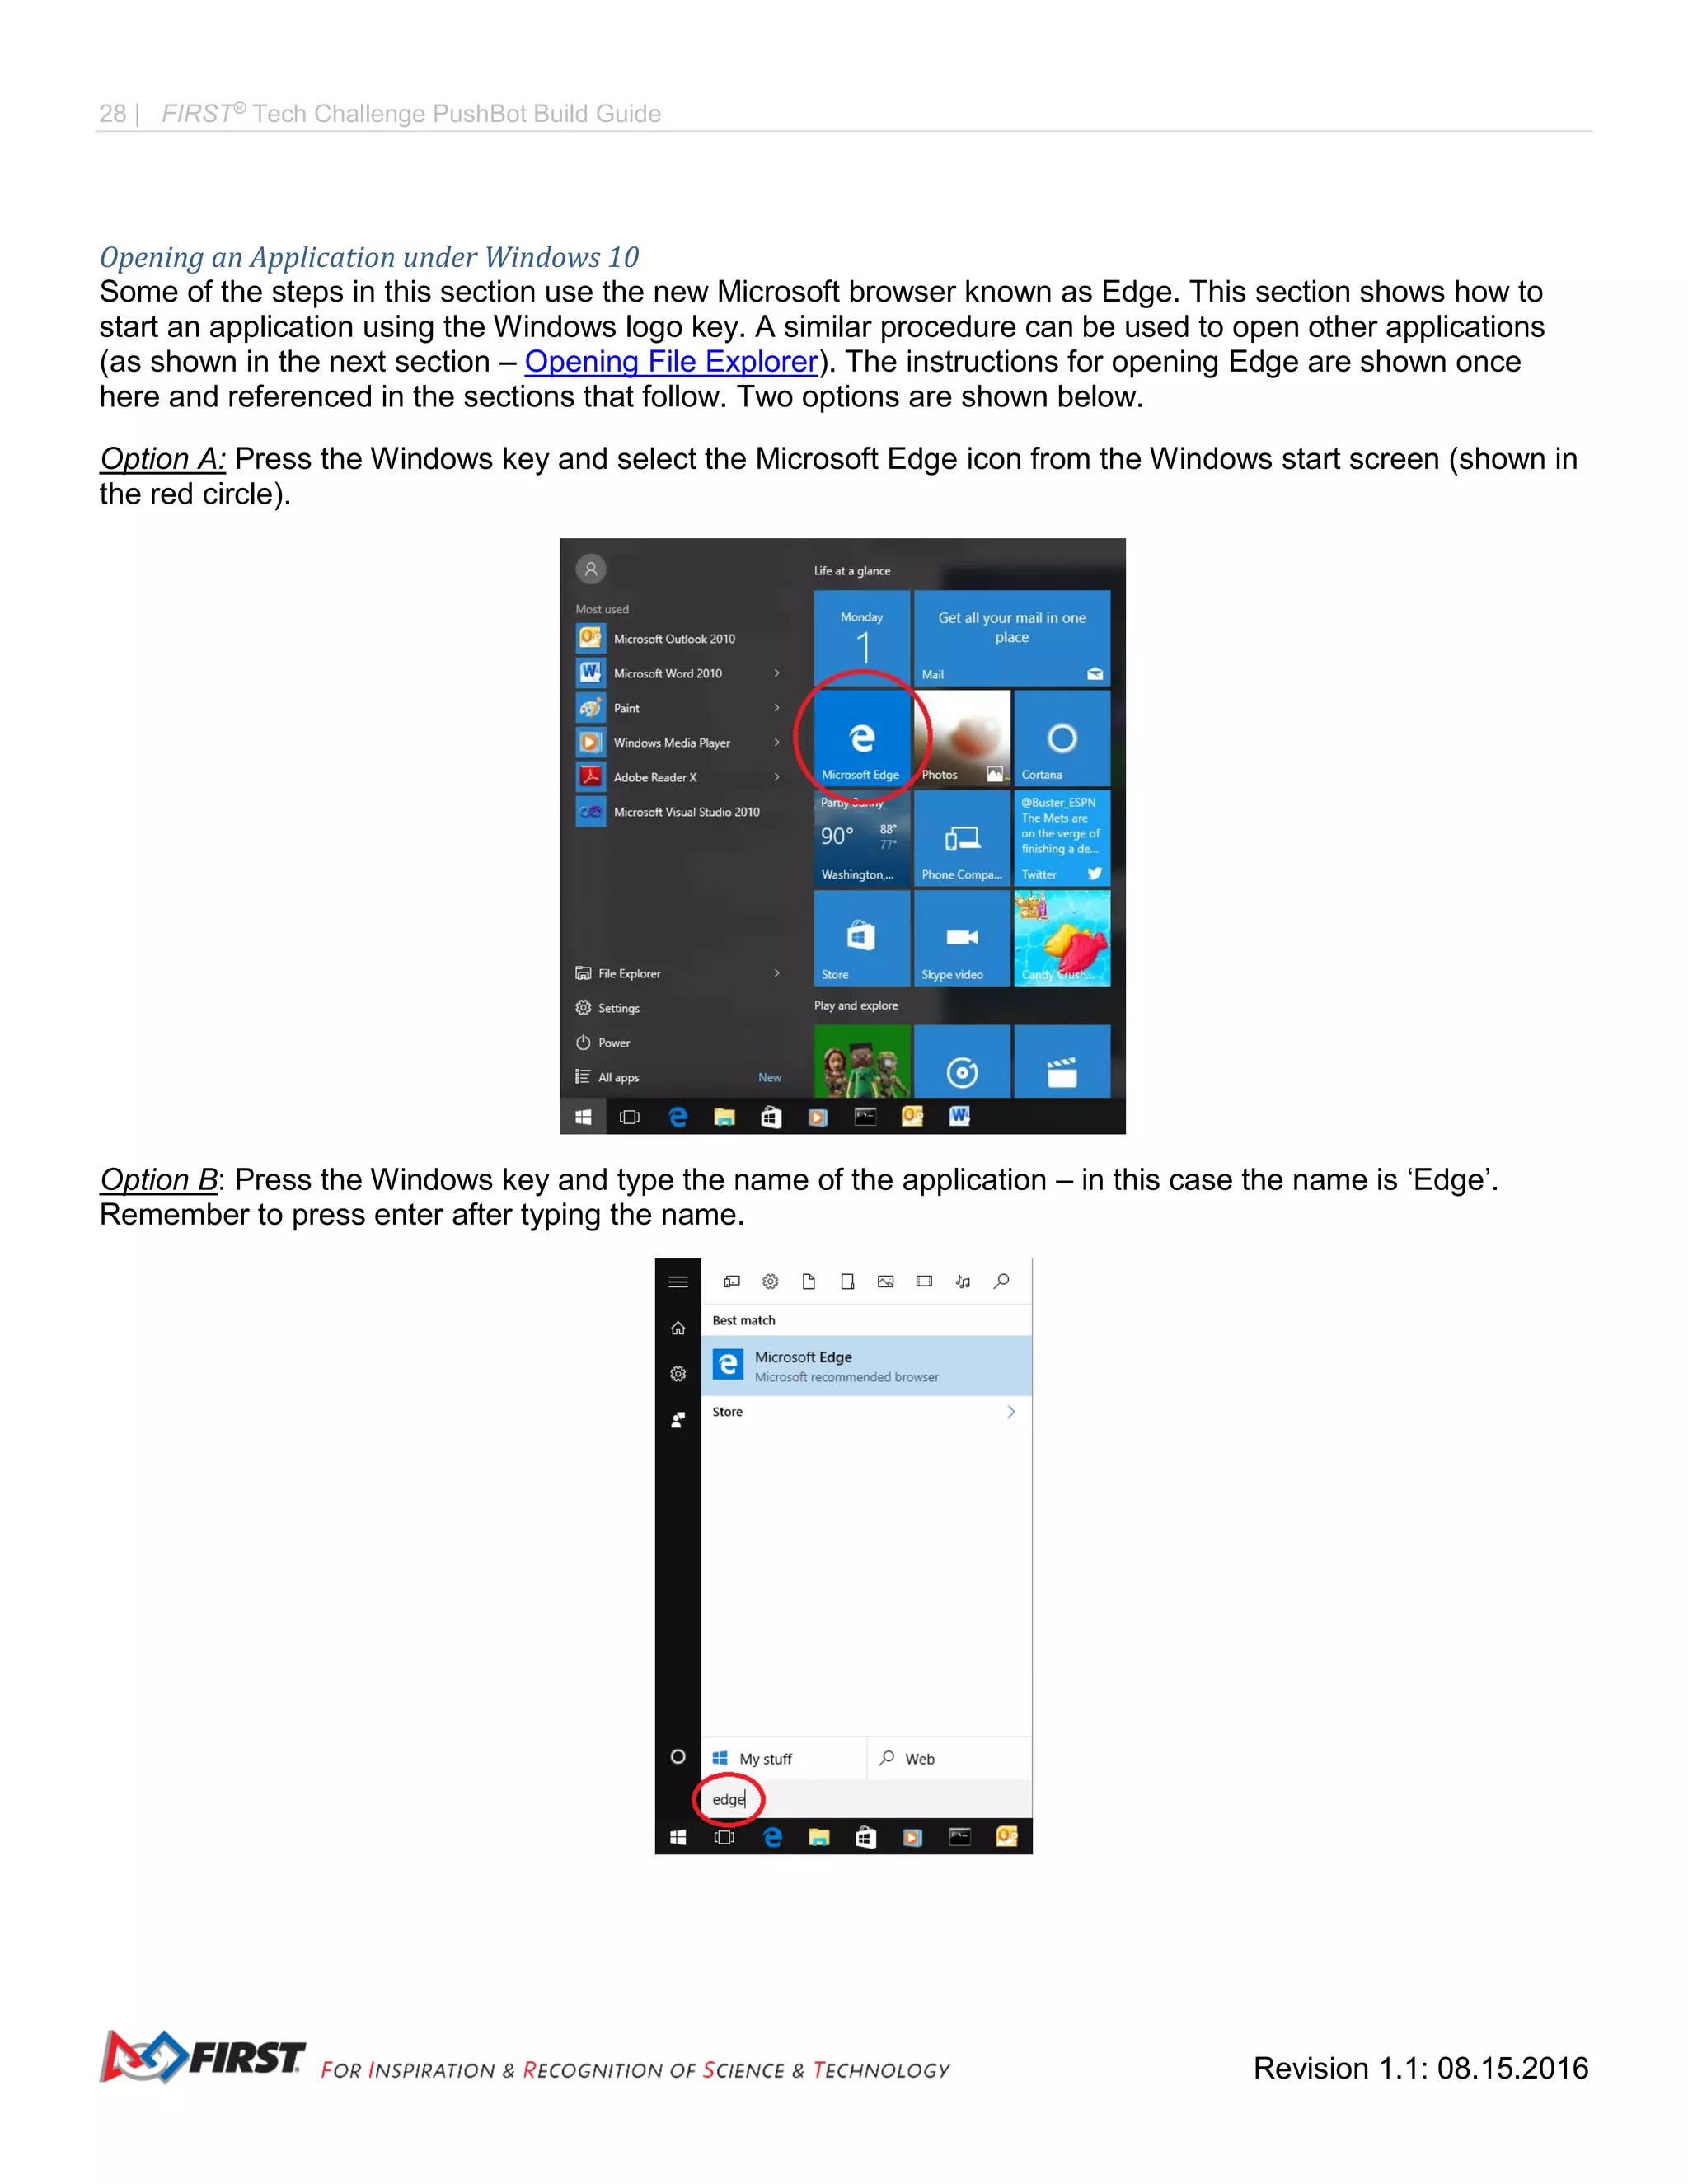
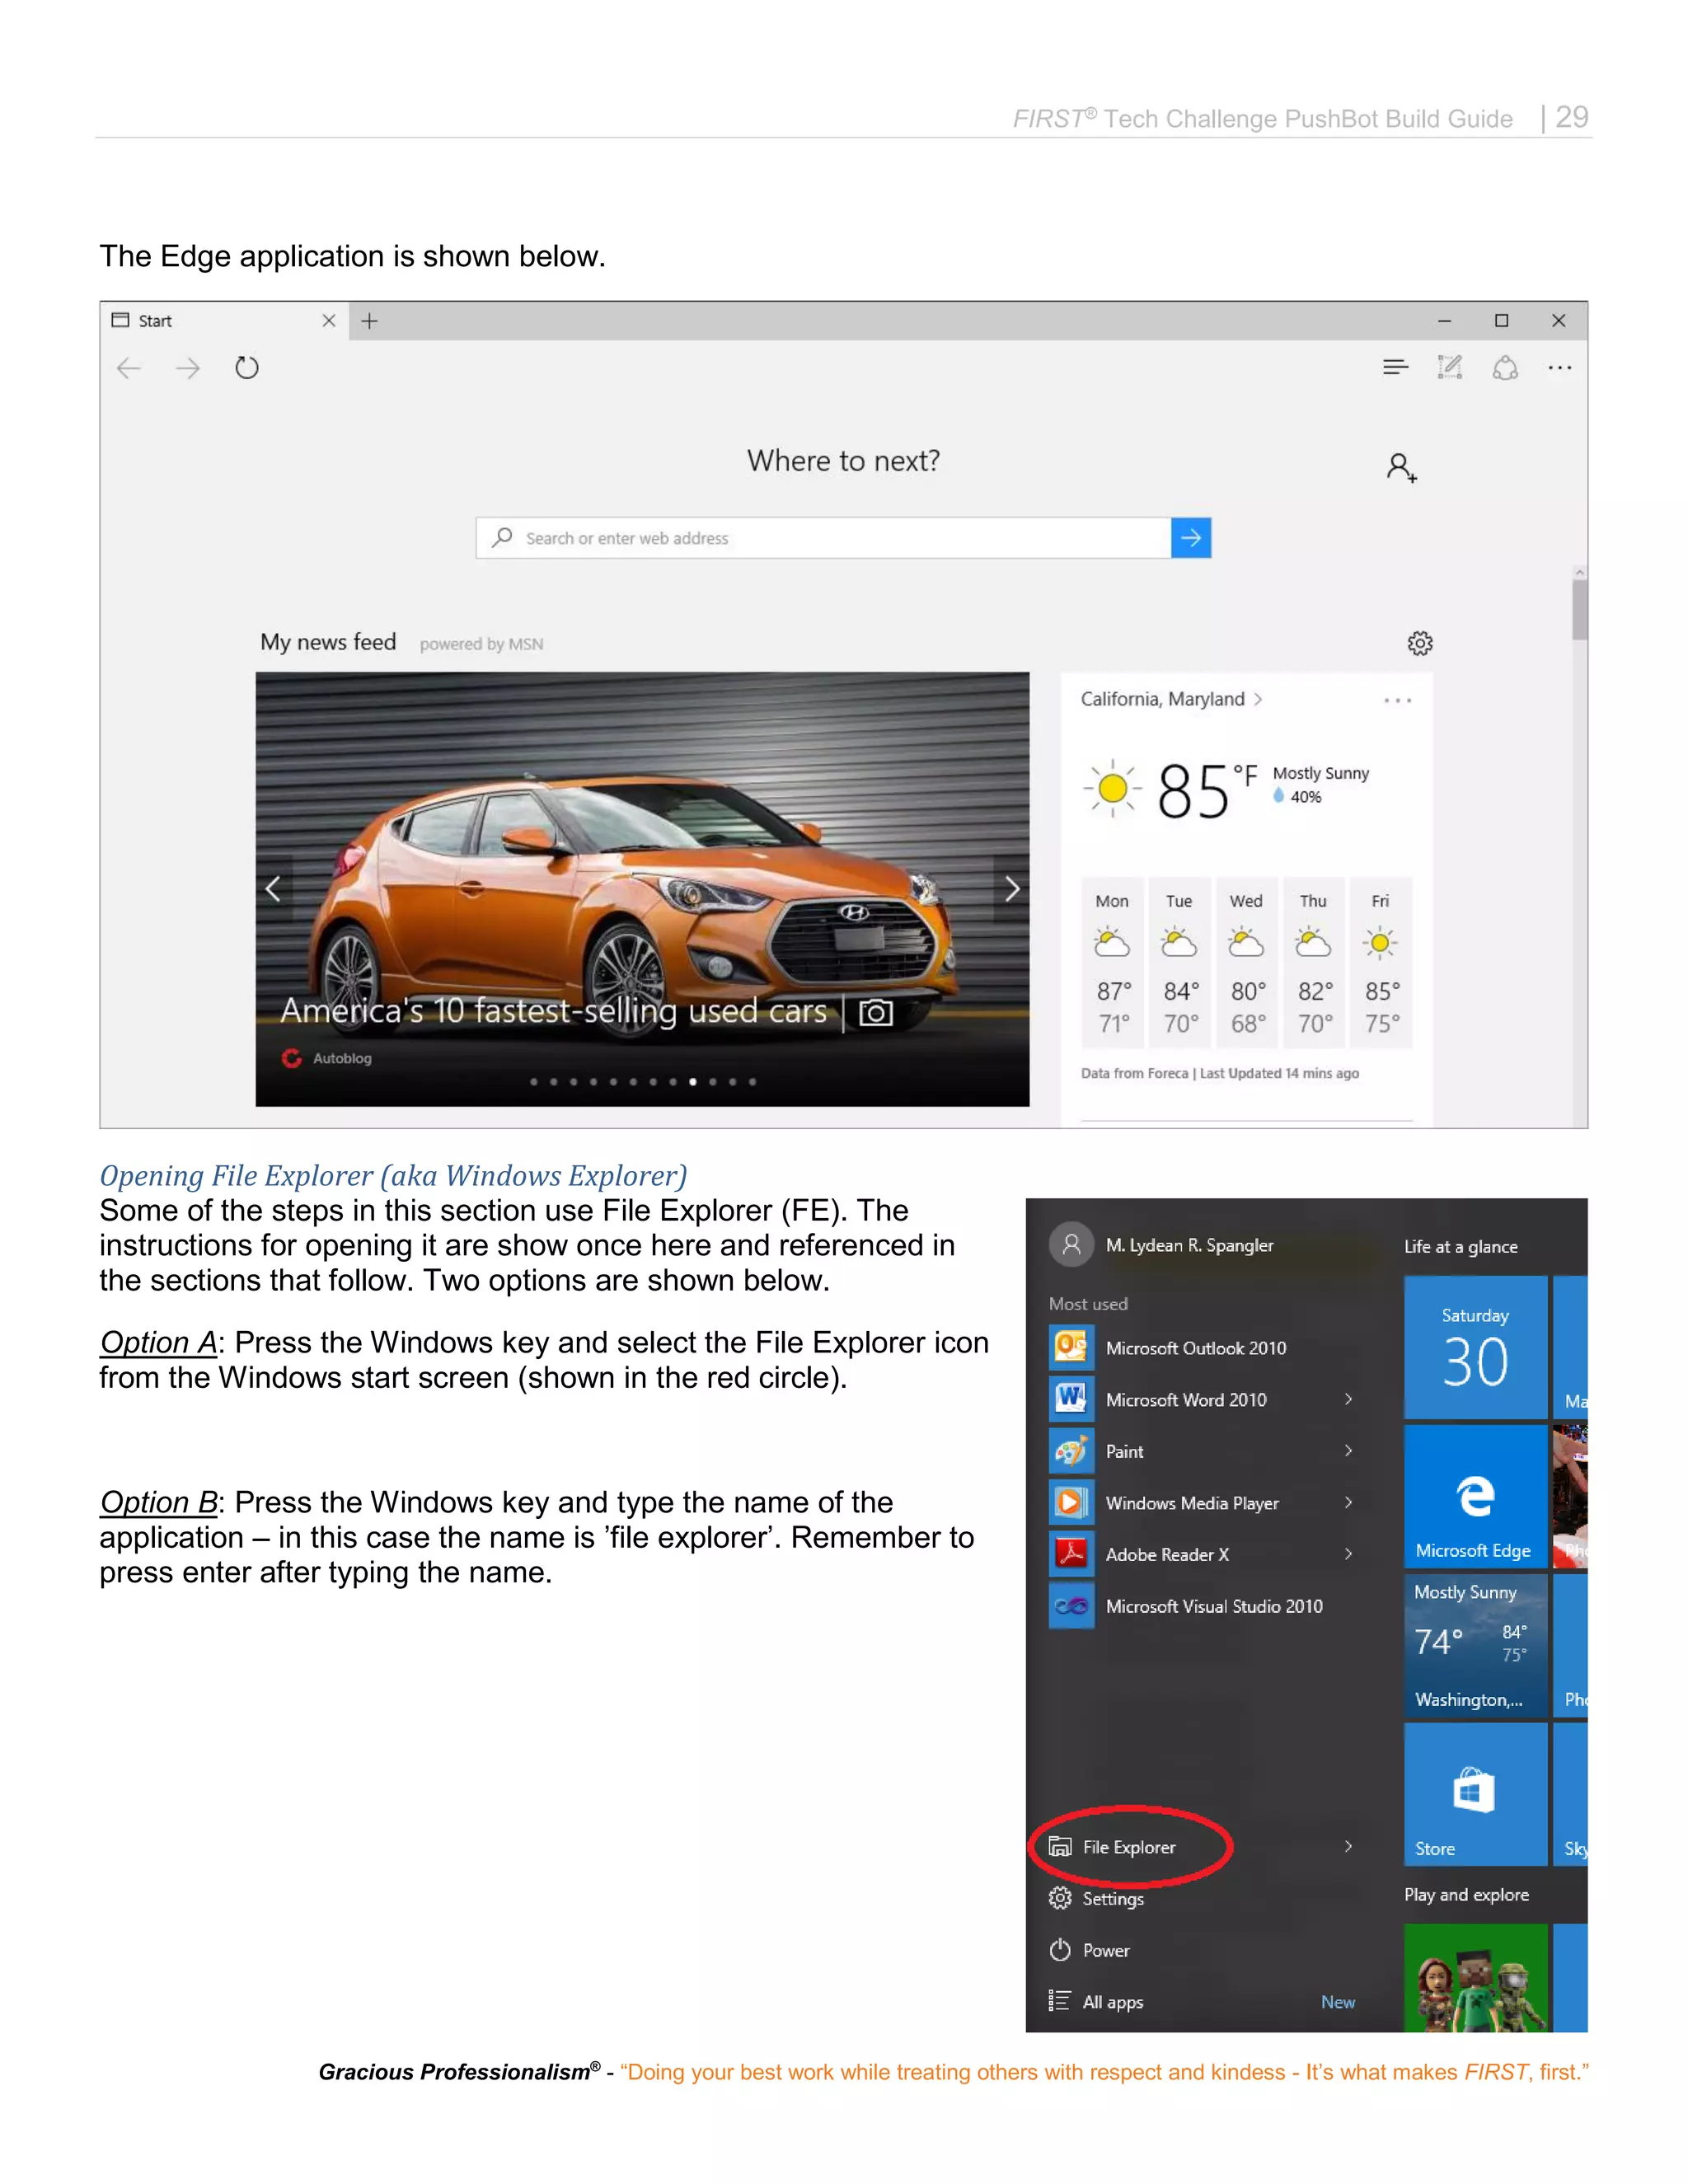
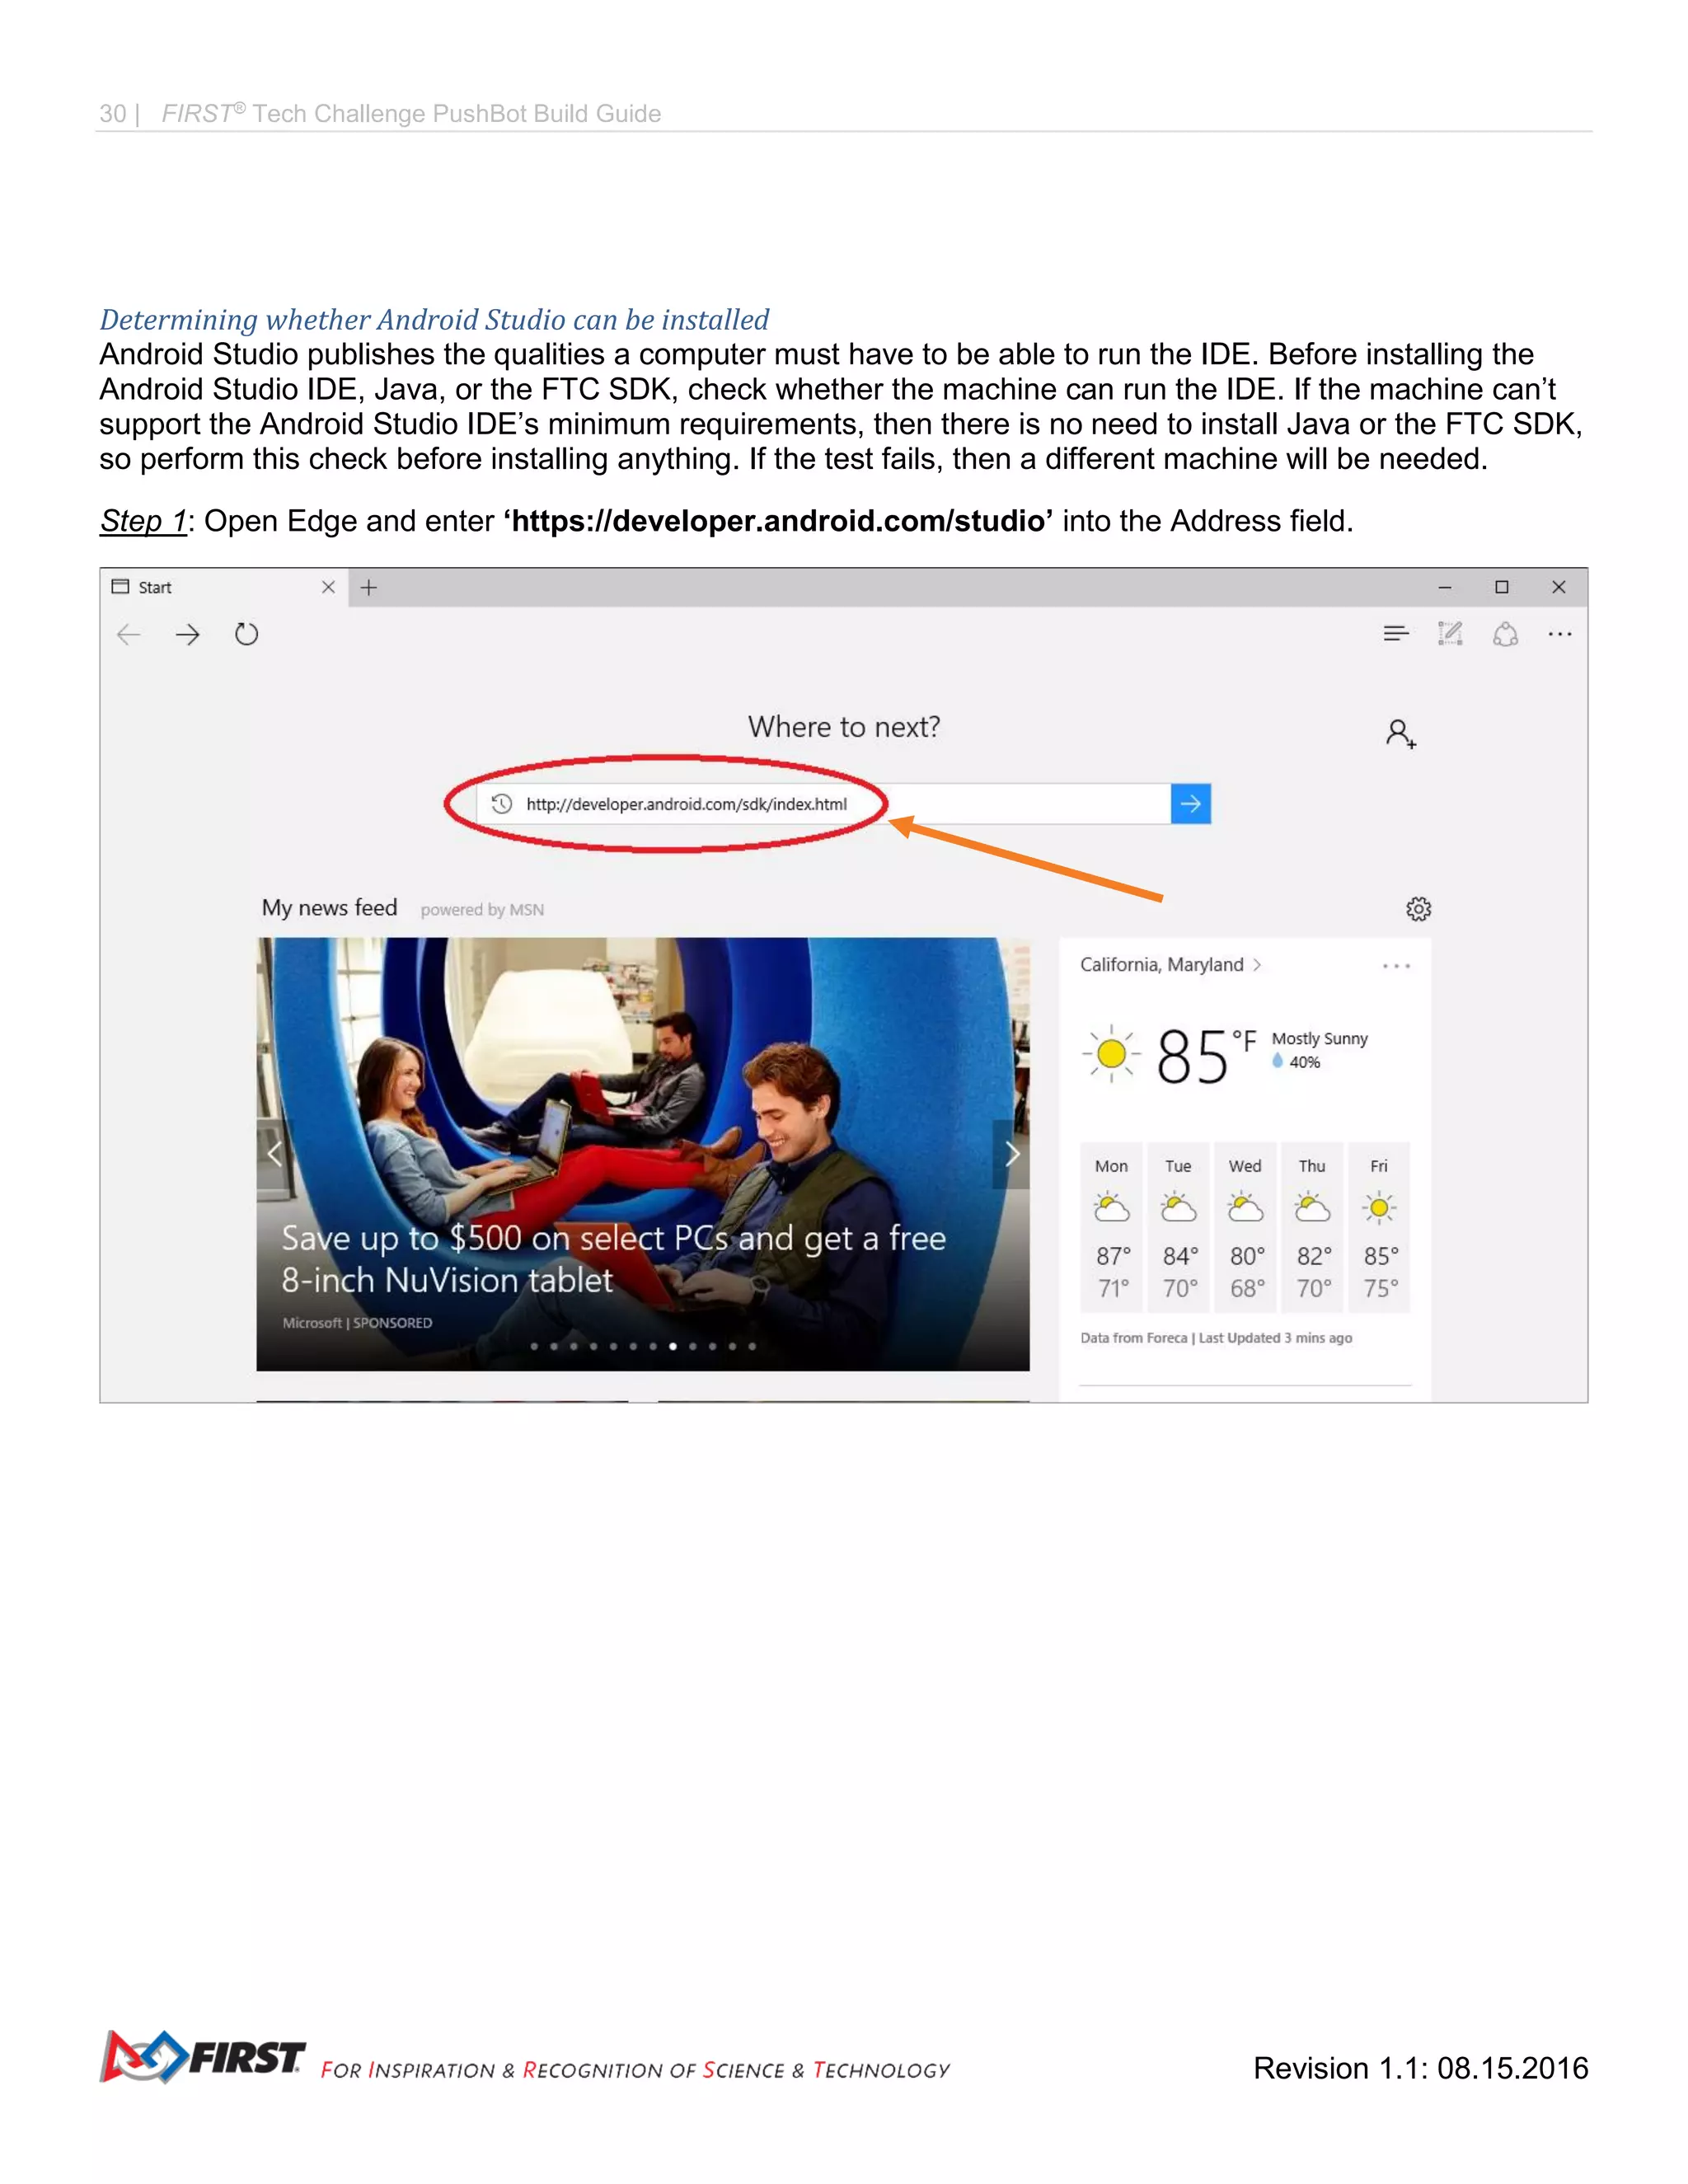
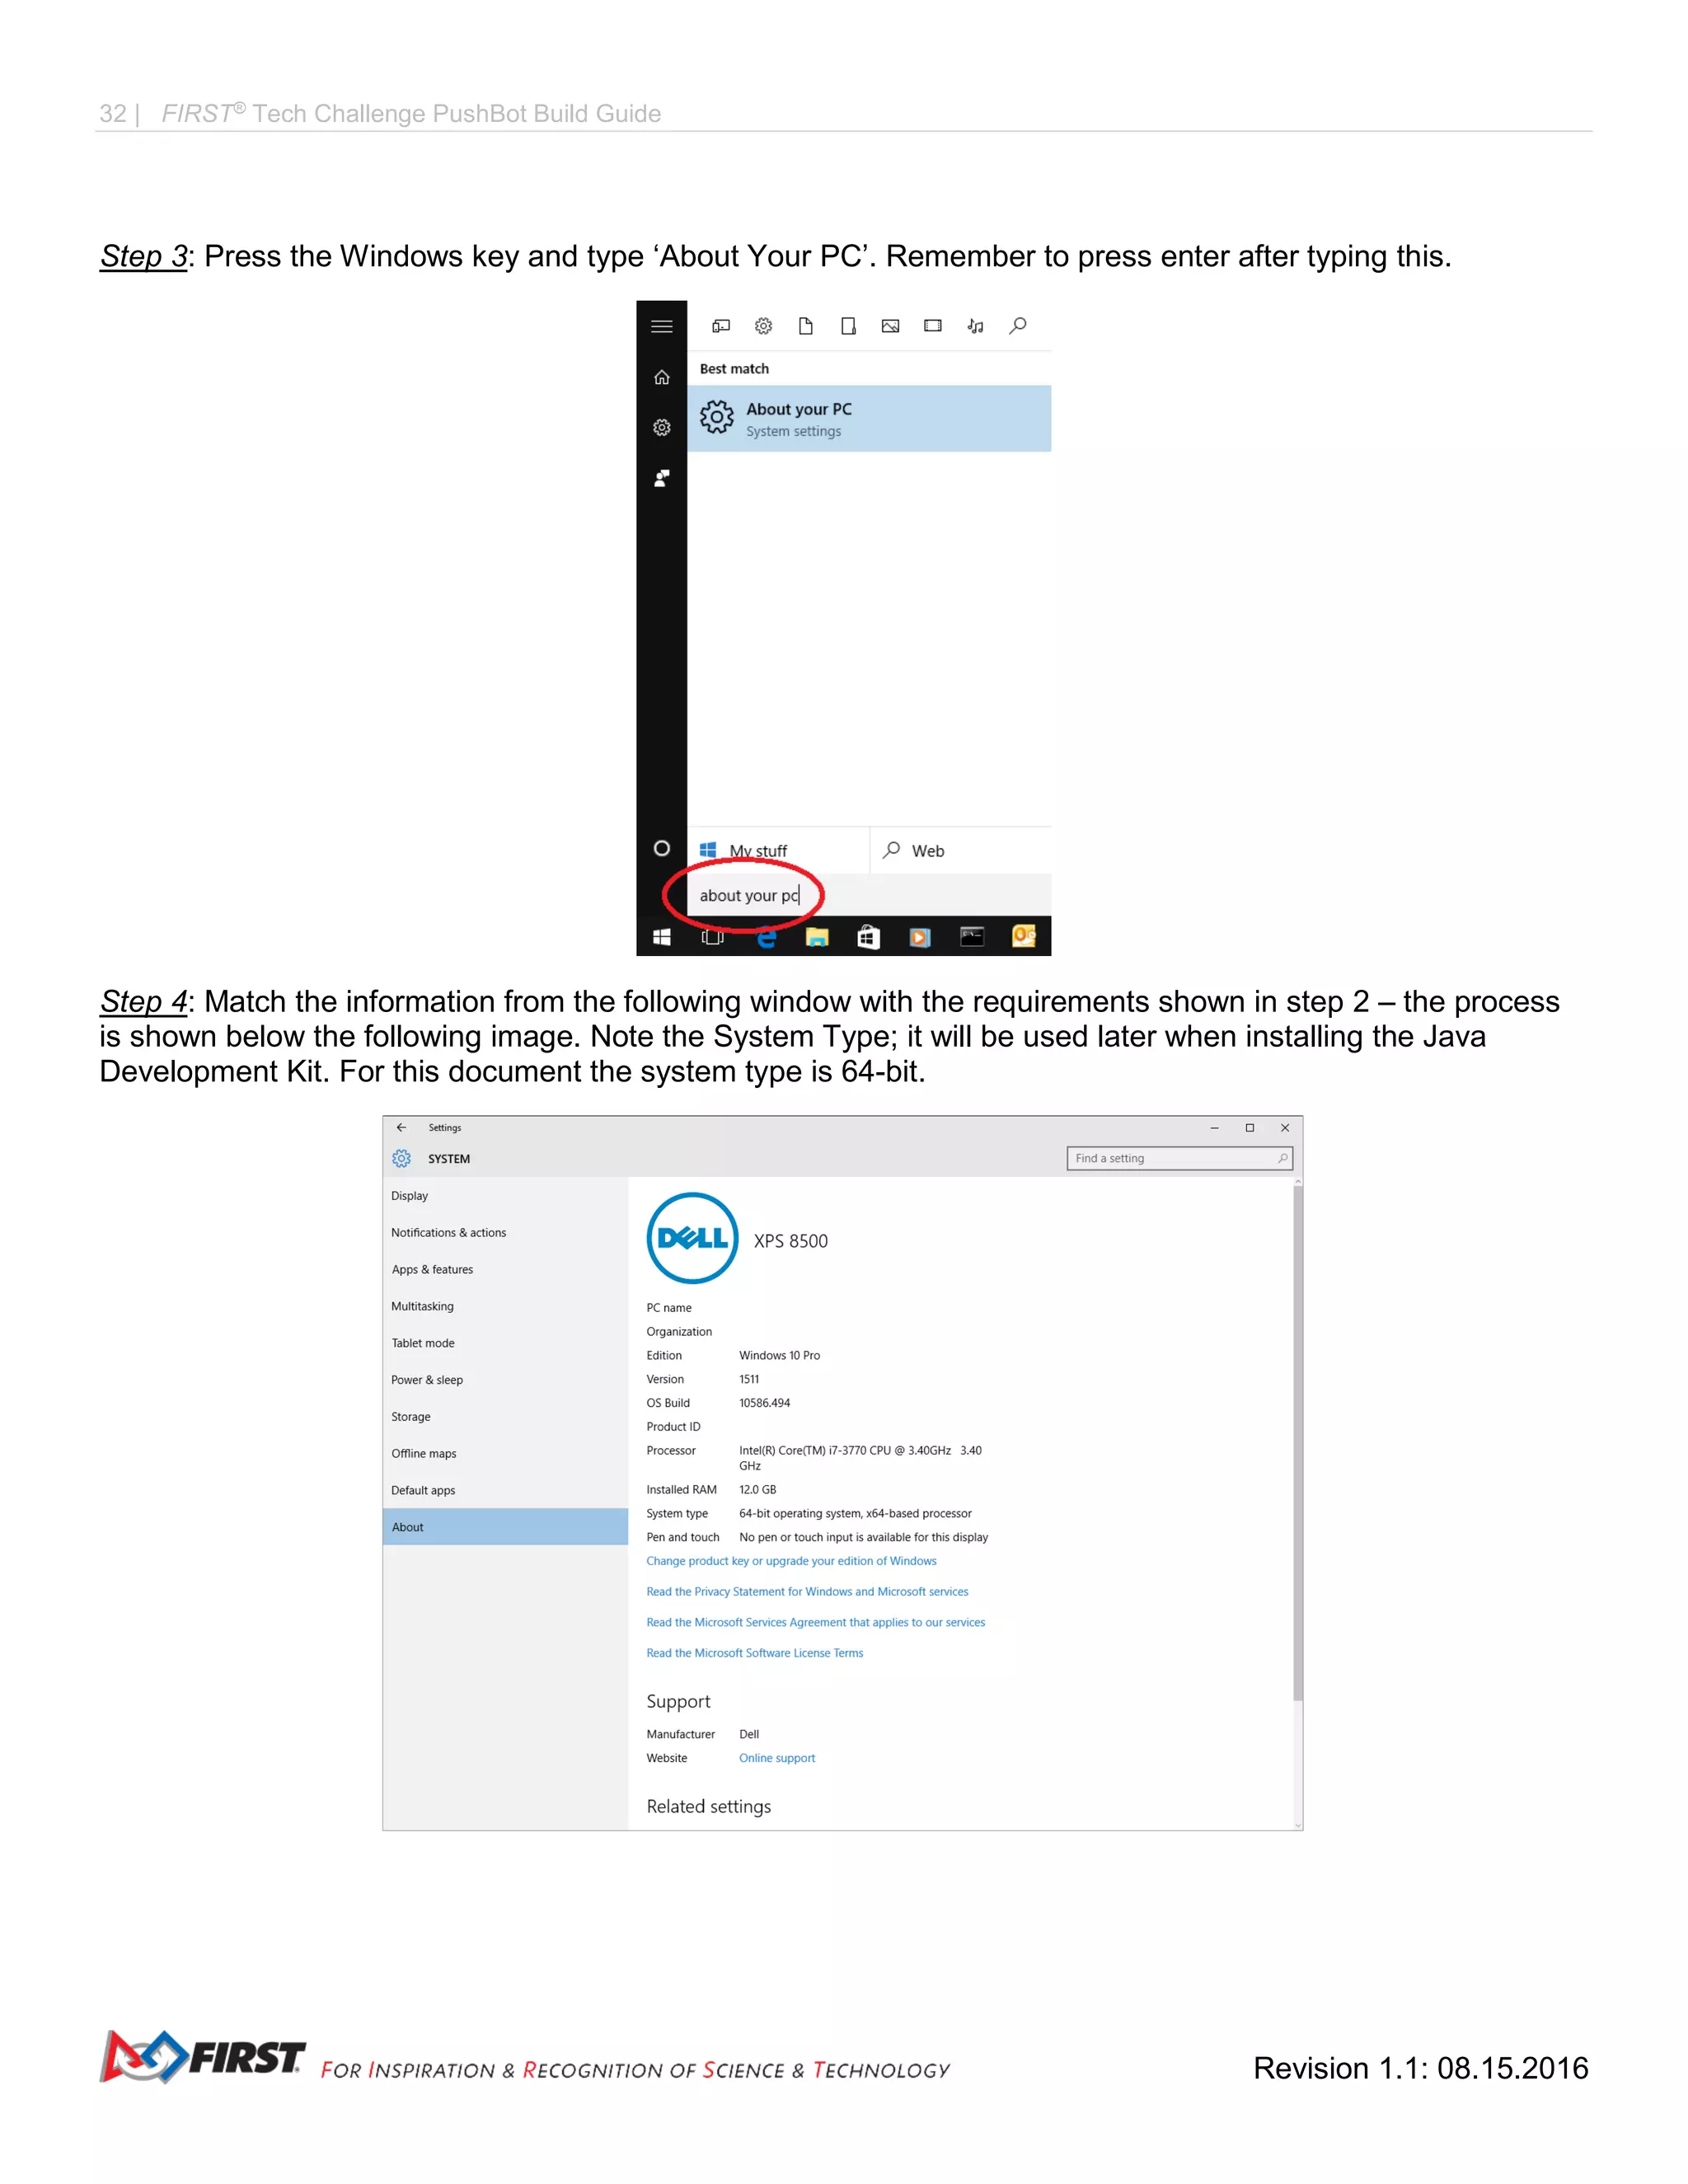
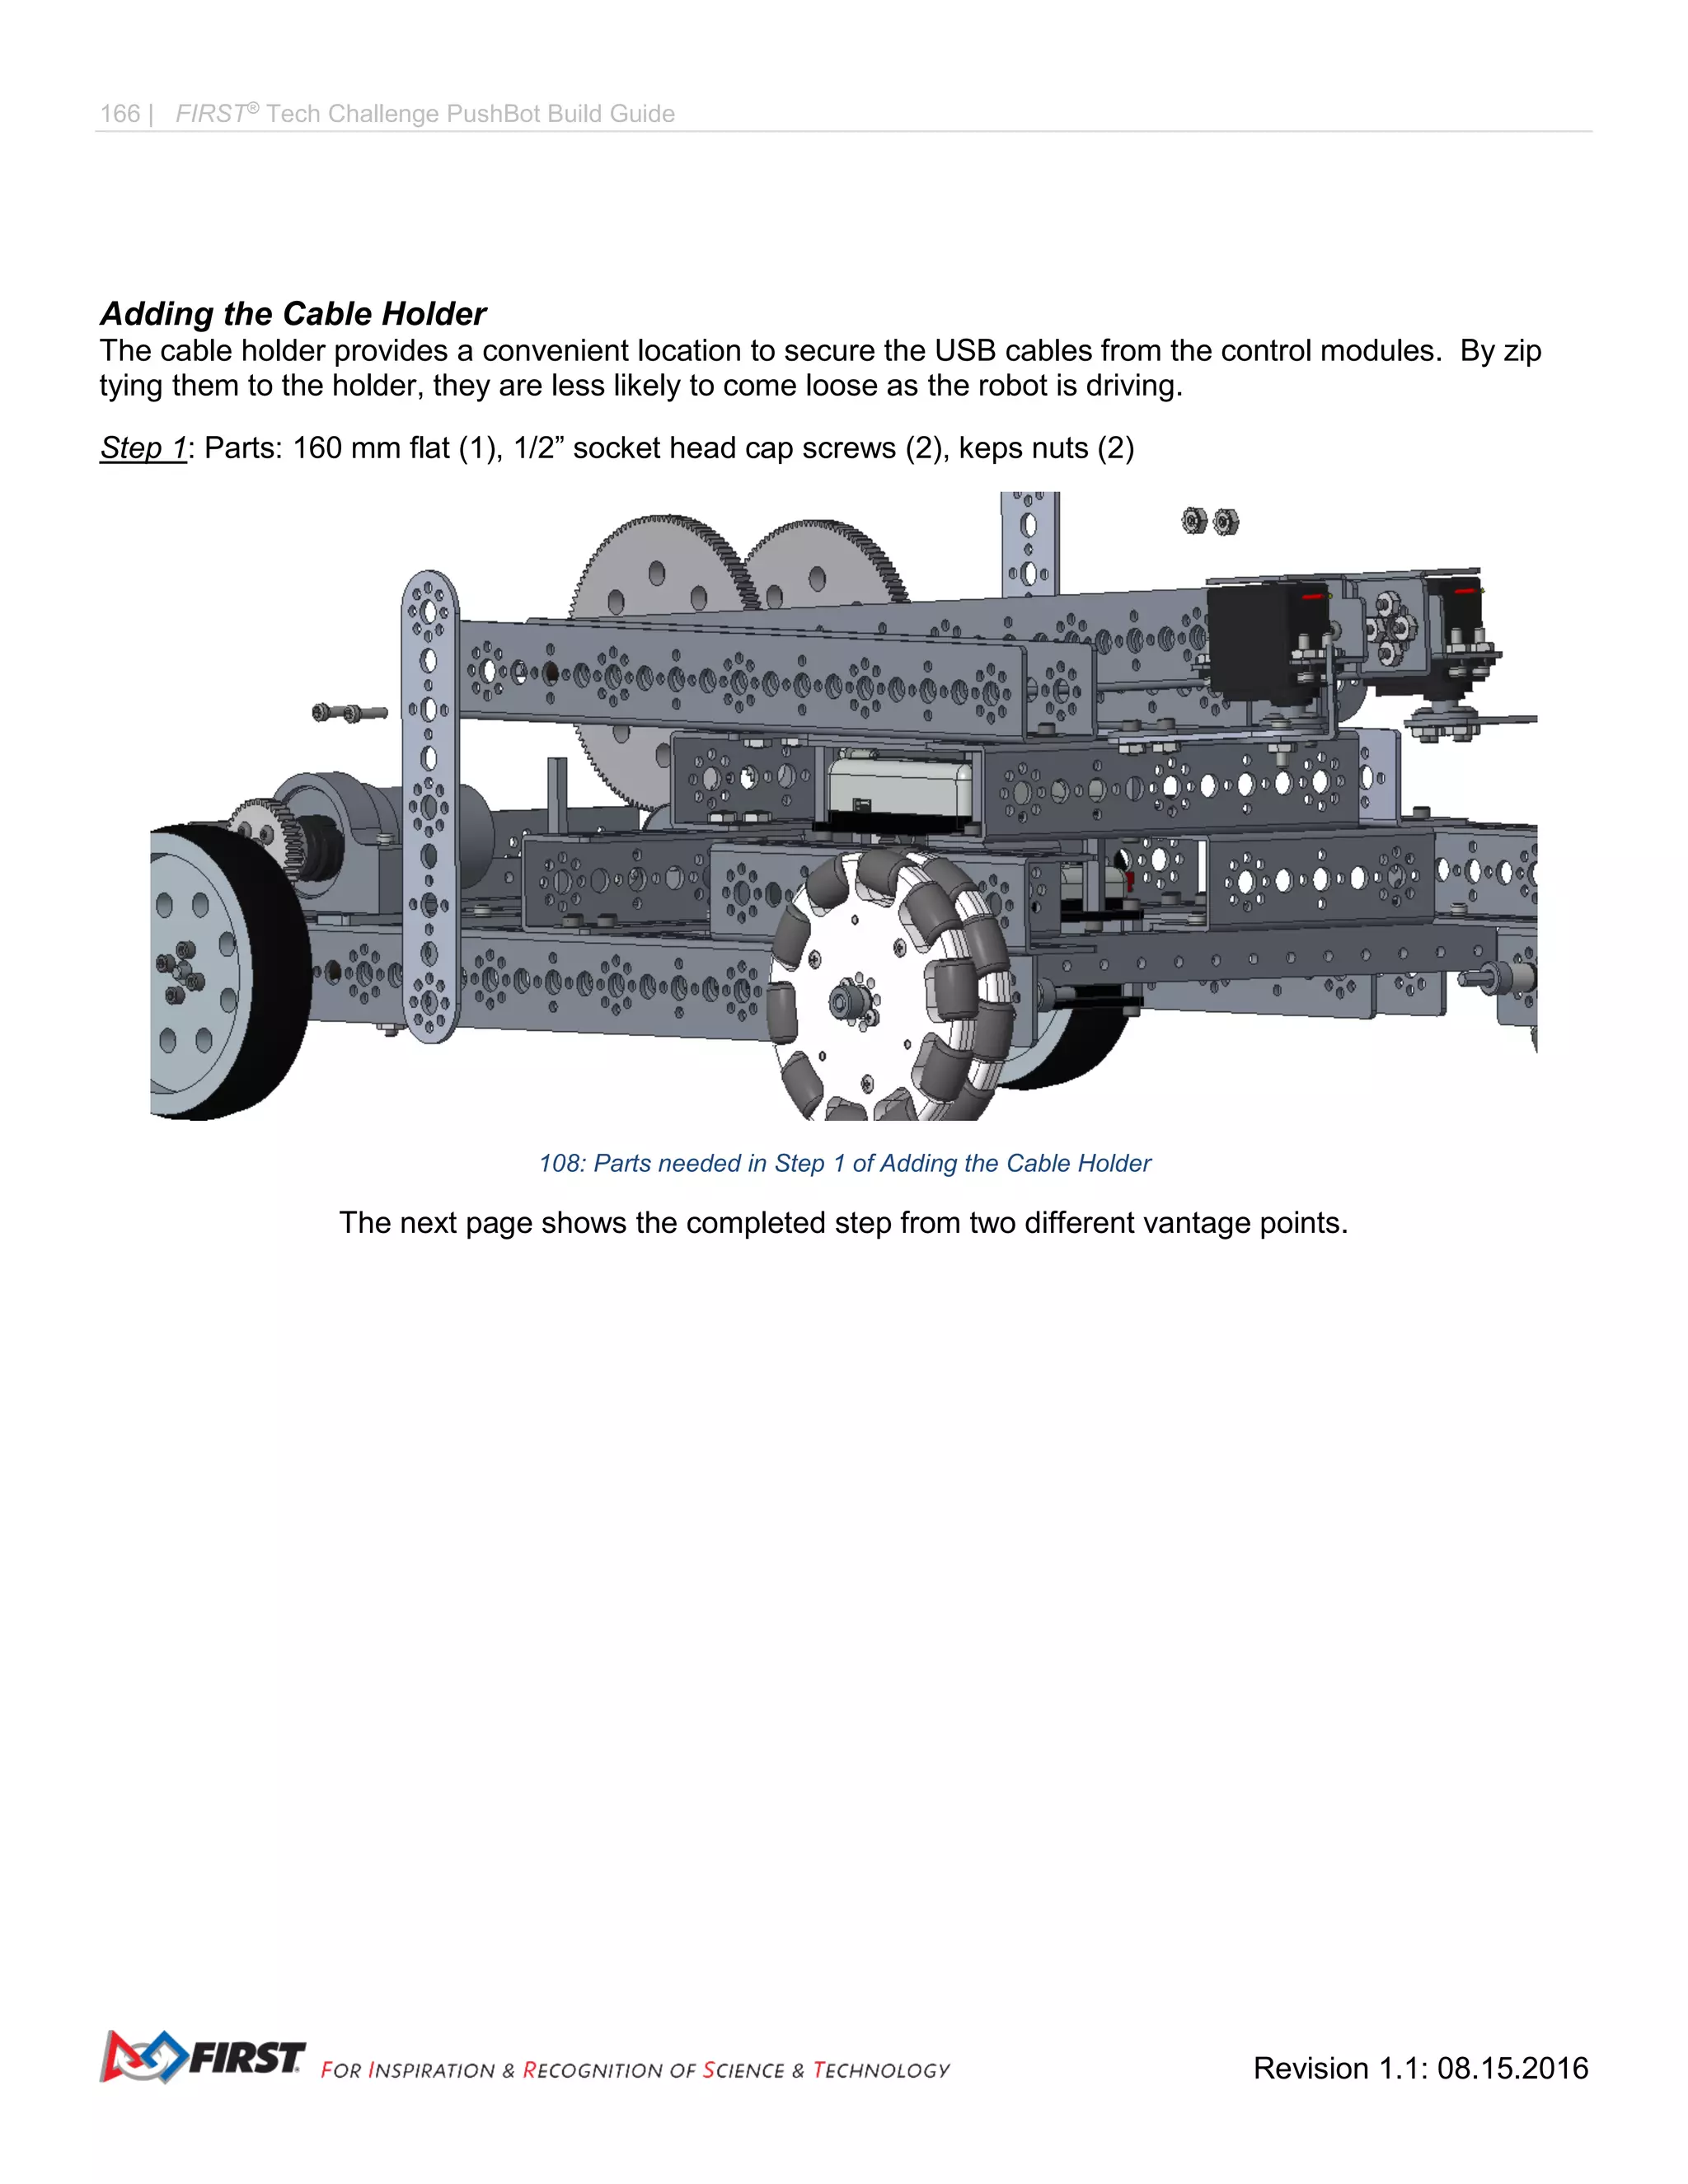
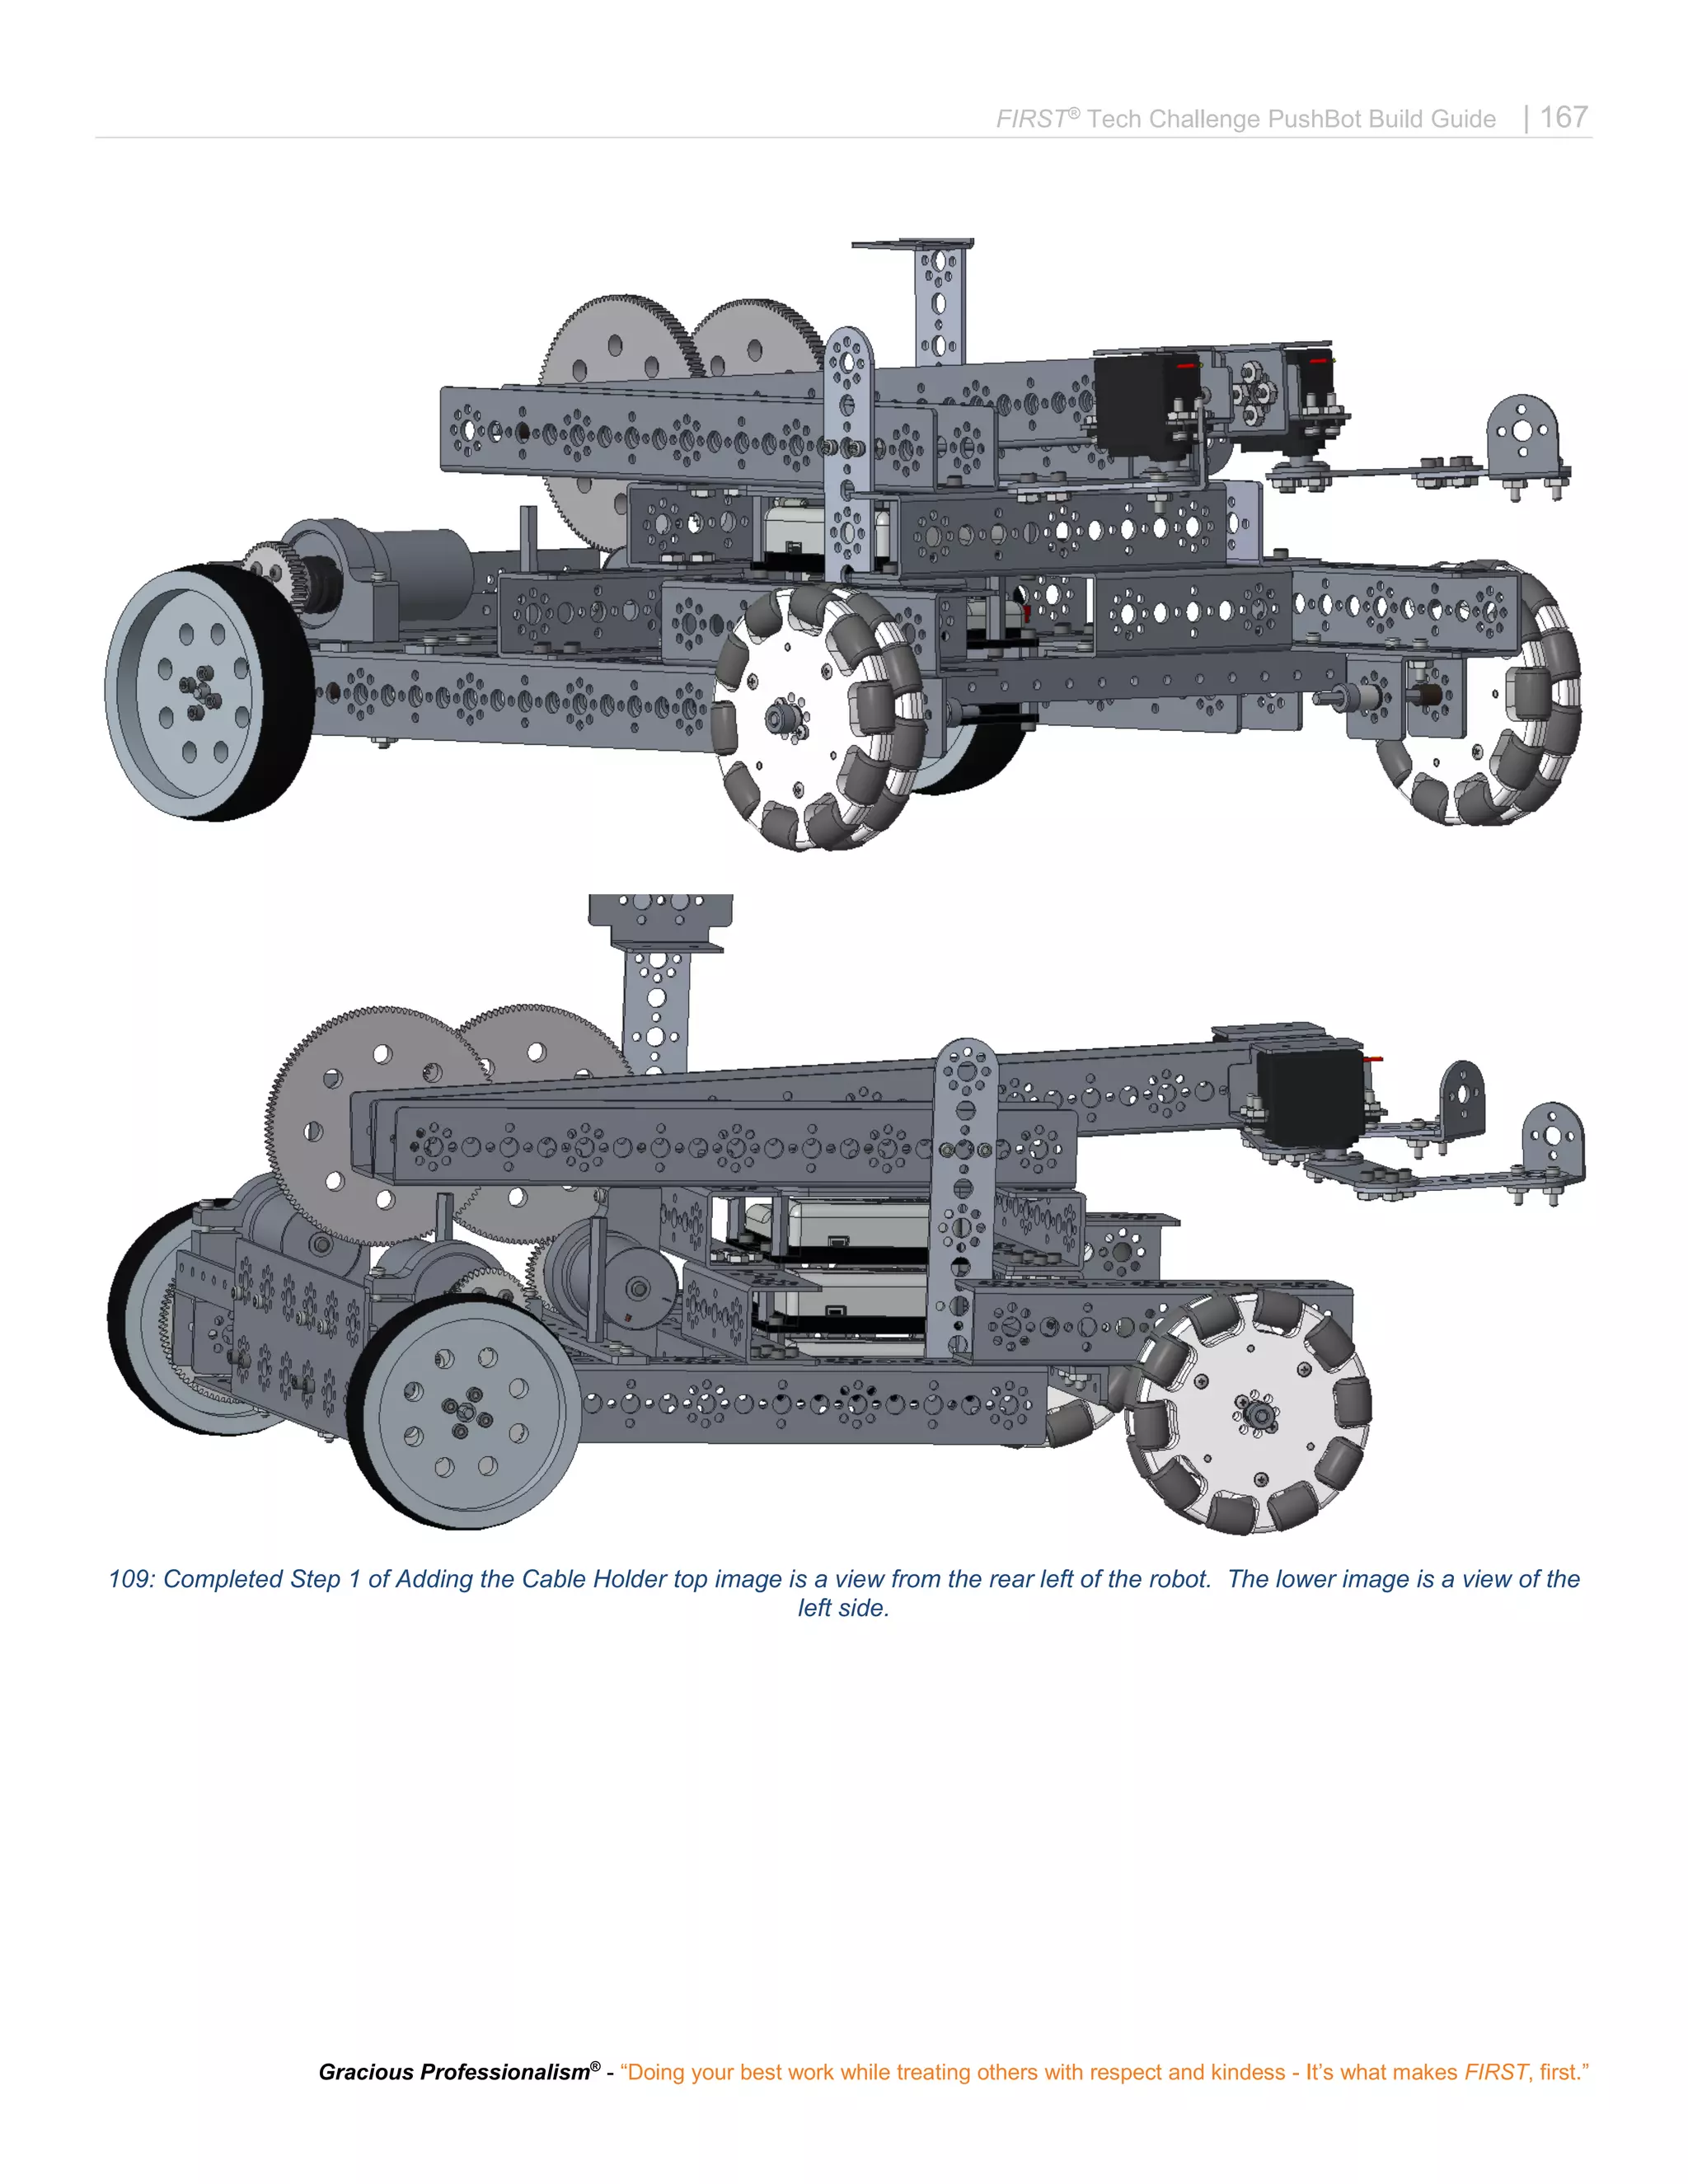
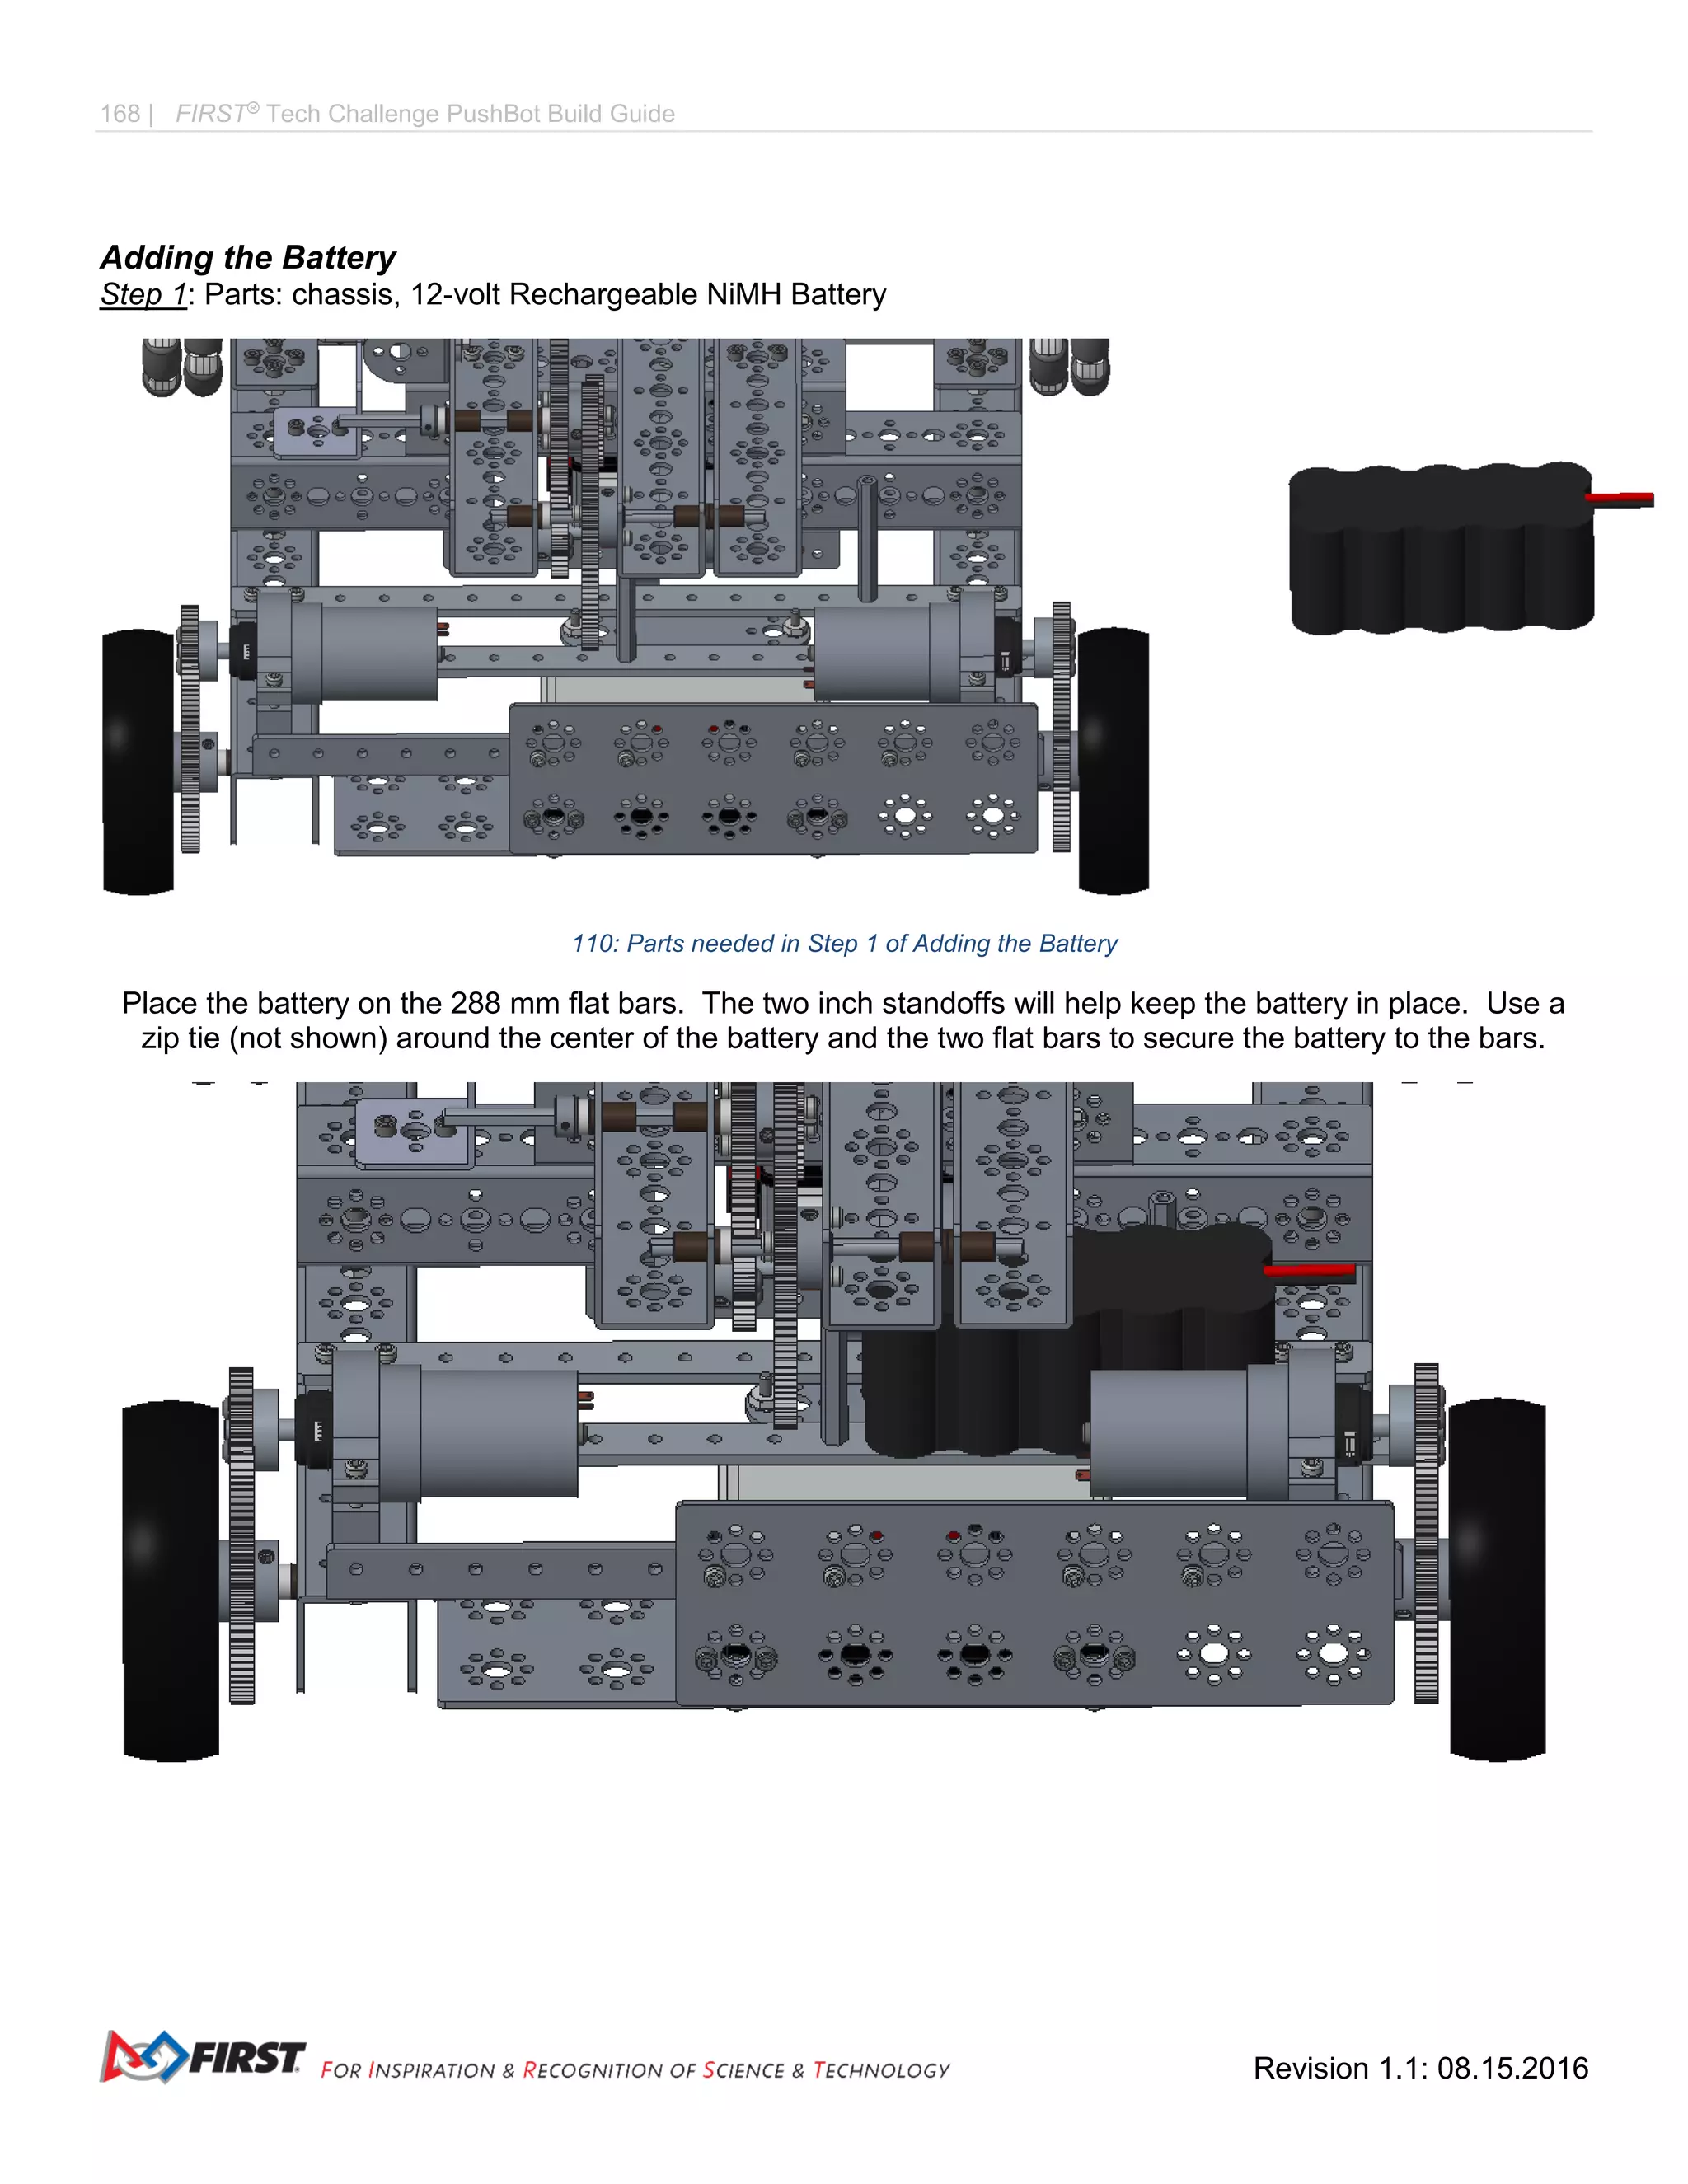
The FIRST Tech Challenge Pushbot Build Guide provides essential instructions for rookie teams on how to construct and program a pushbot robot for competition. It emphasizes the importance of volunteers, gracious professionalism, and youth protection, while detailing the design, components, and assembly processes of the robot. The guide aims to assist teams in developing technical skills and understanding robotics within the framework of the FIRST Tech Challenge experience.


![104 | FIRST®
Tech Challenge PushBot Build Guide
Revision 1.1: 08.15.2016
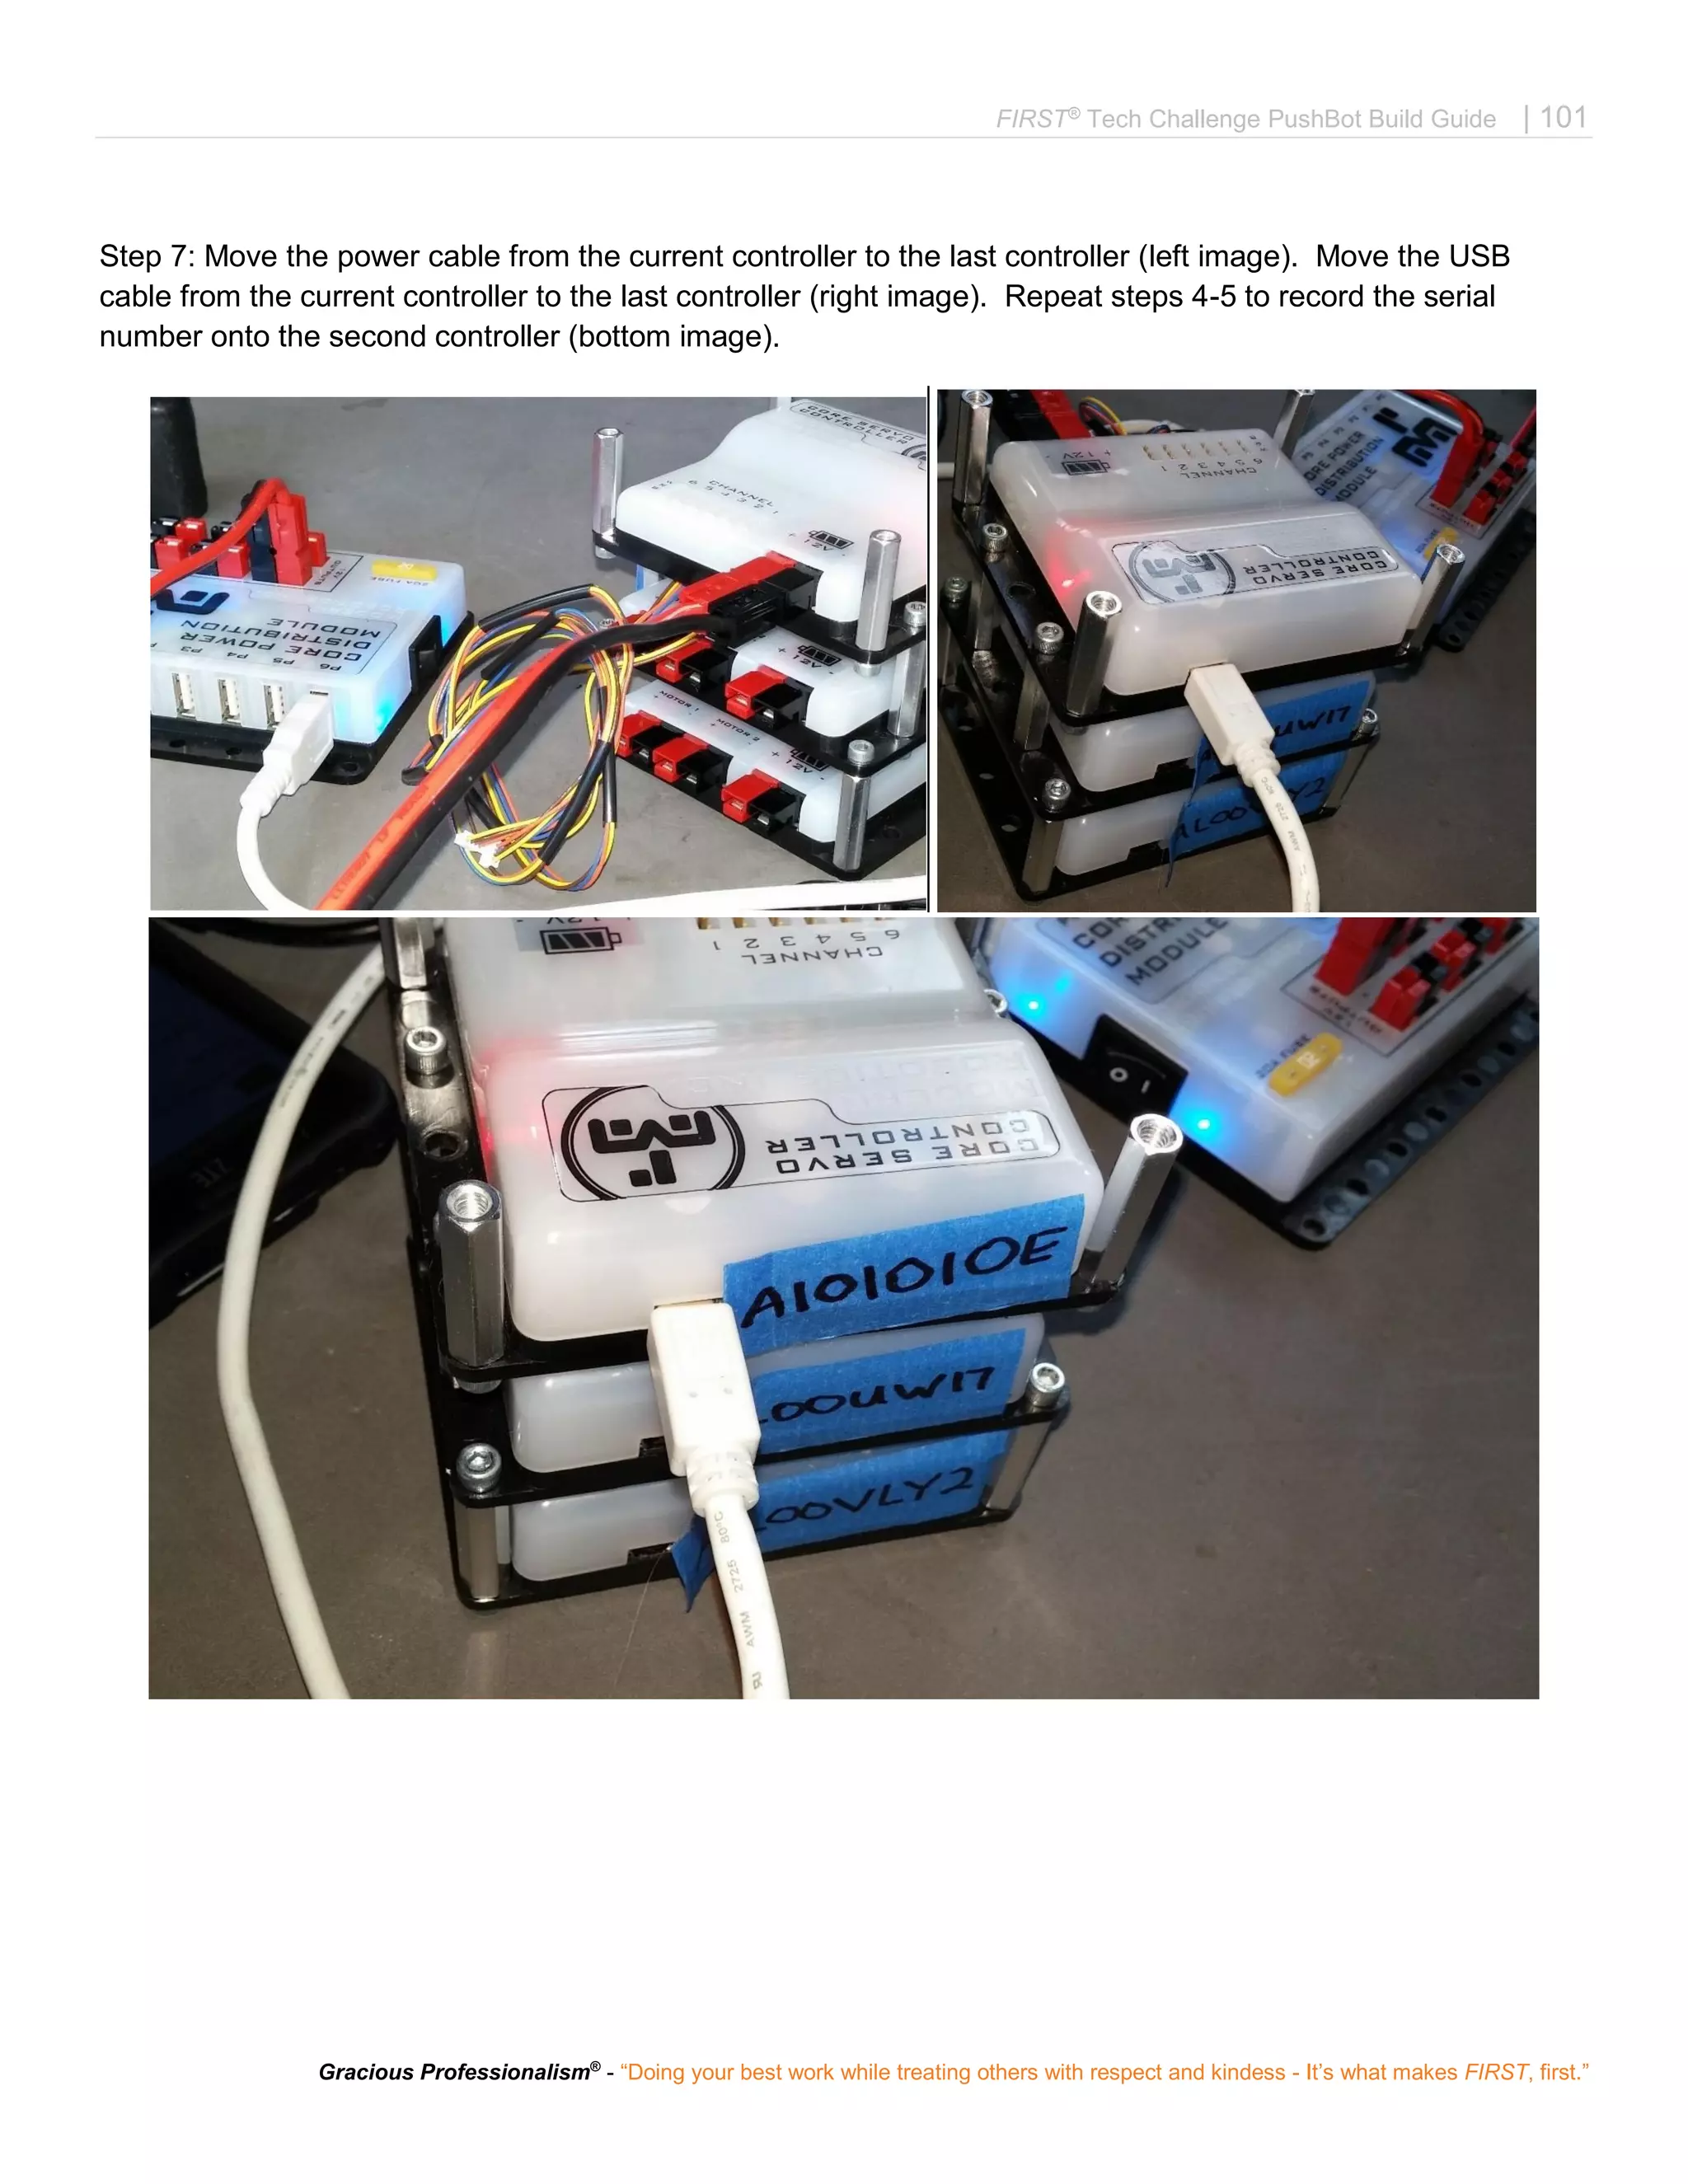
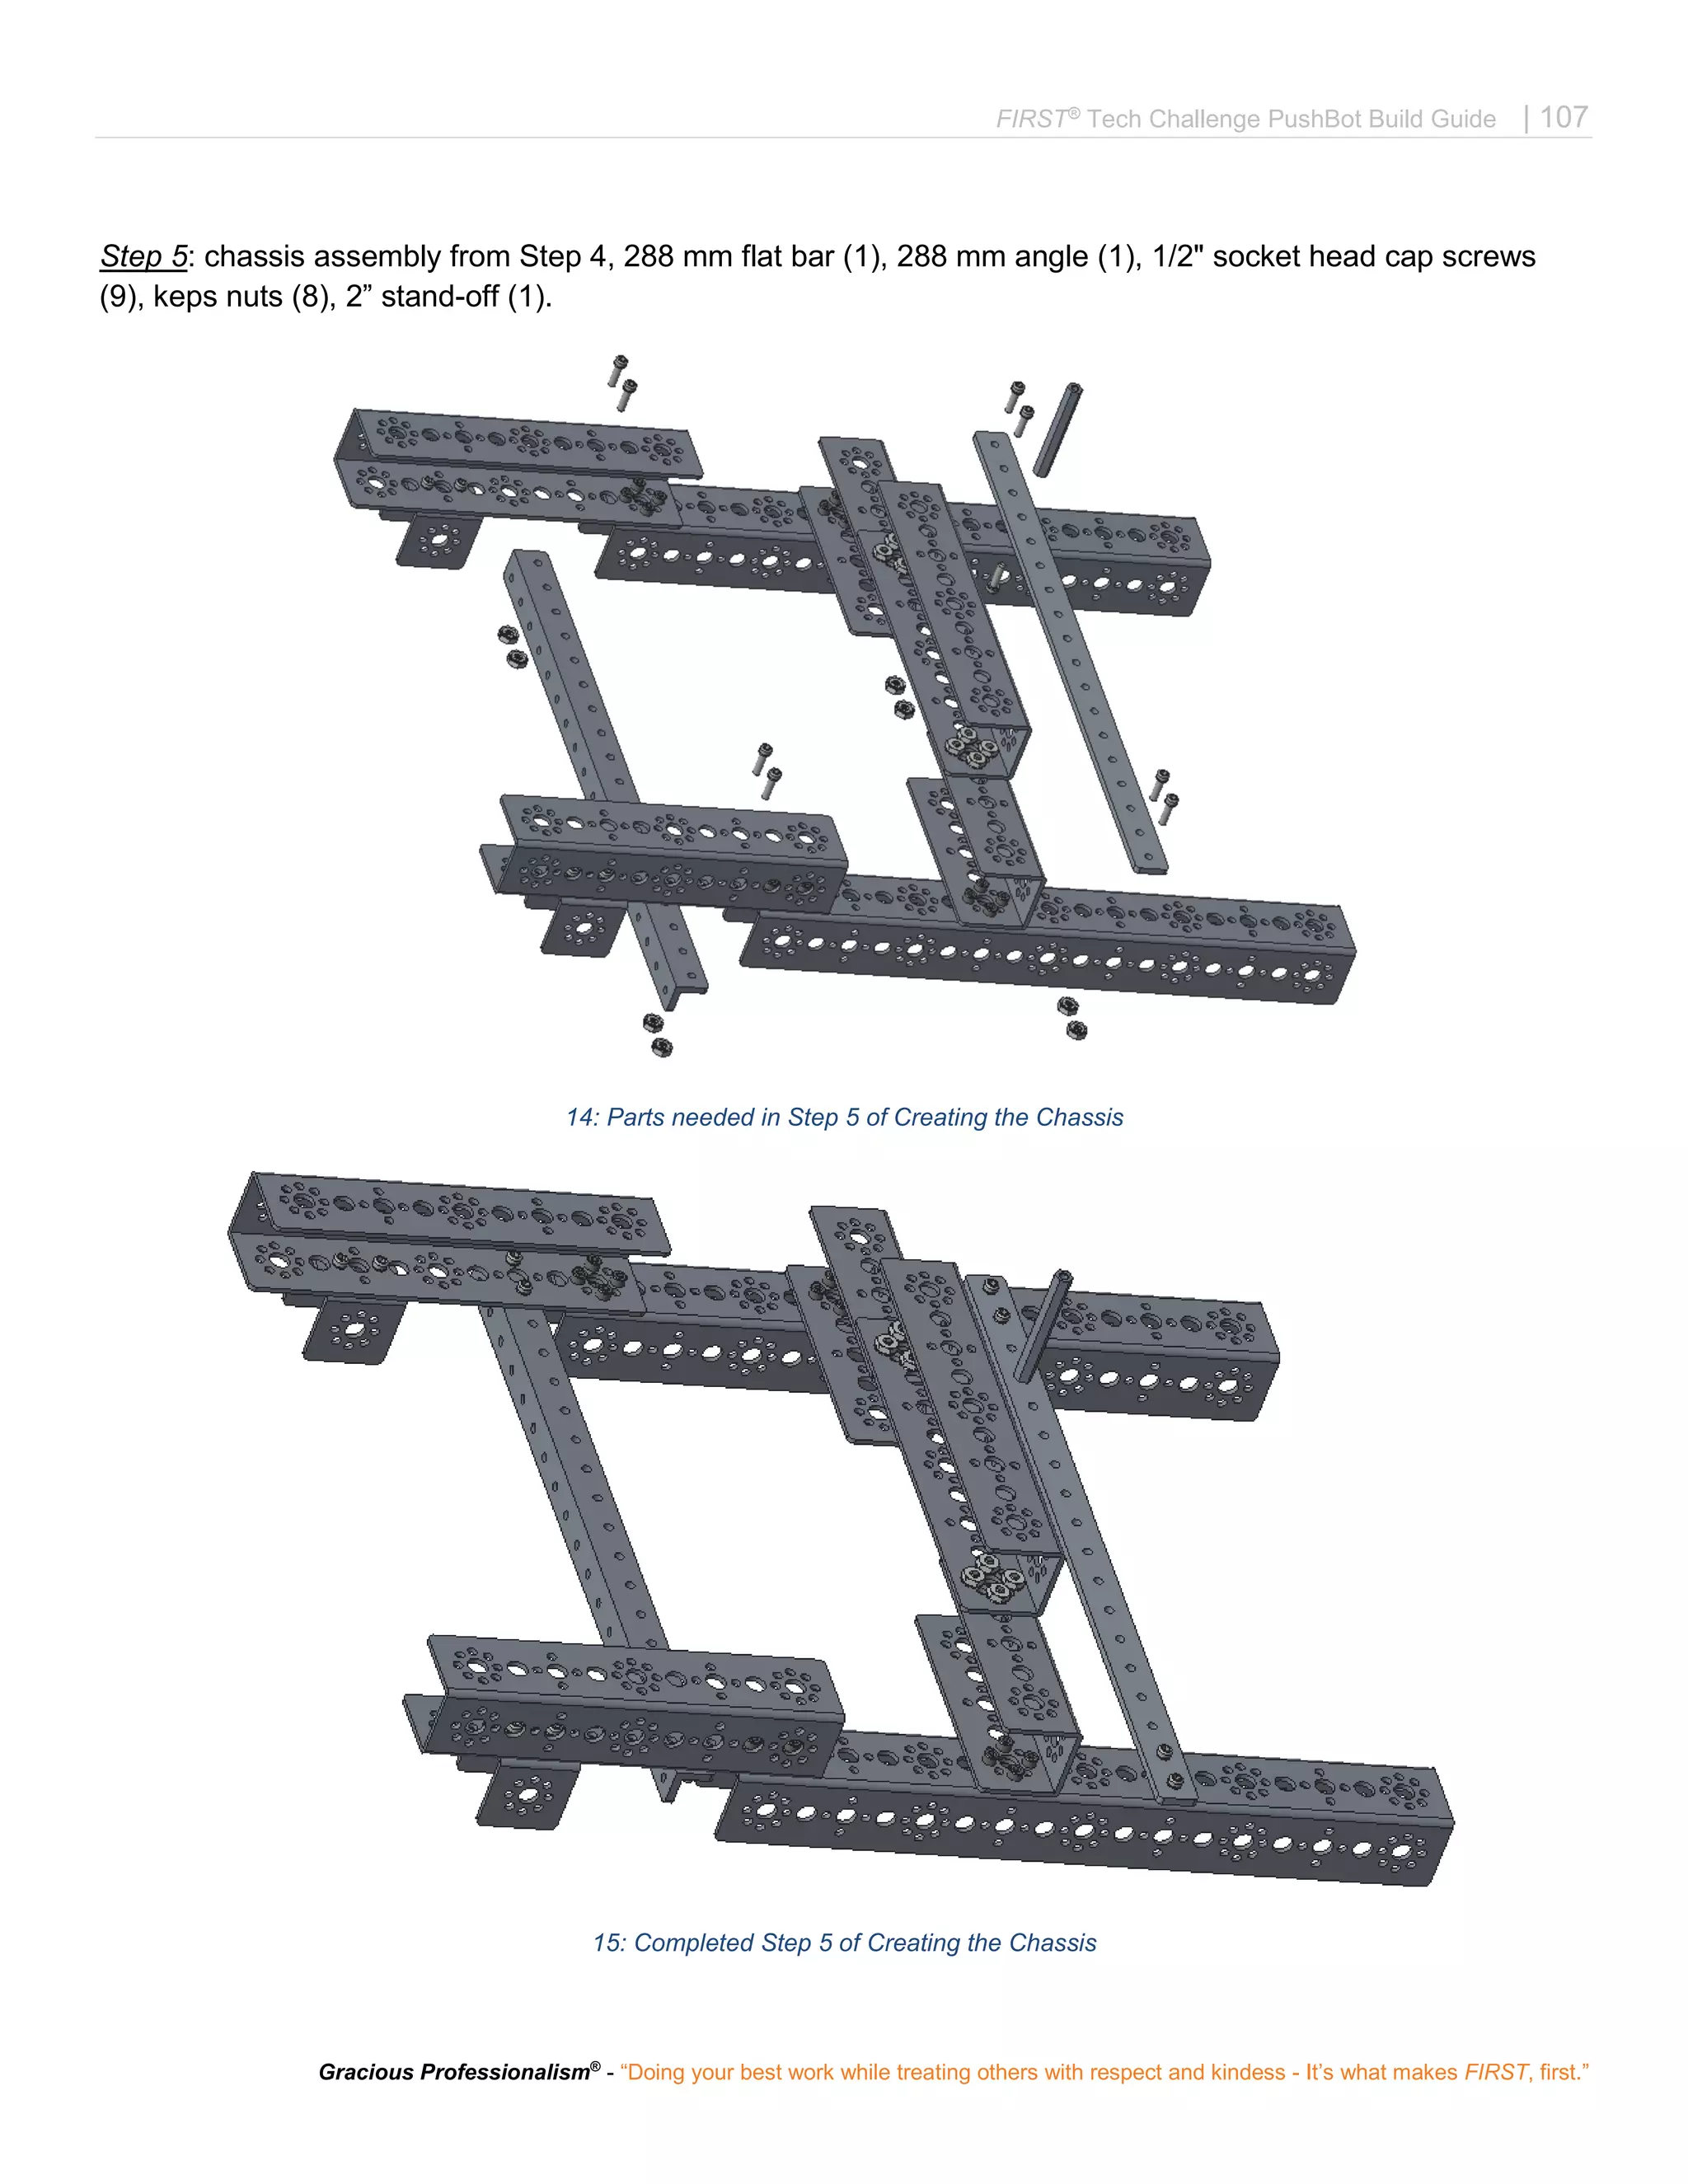
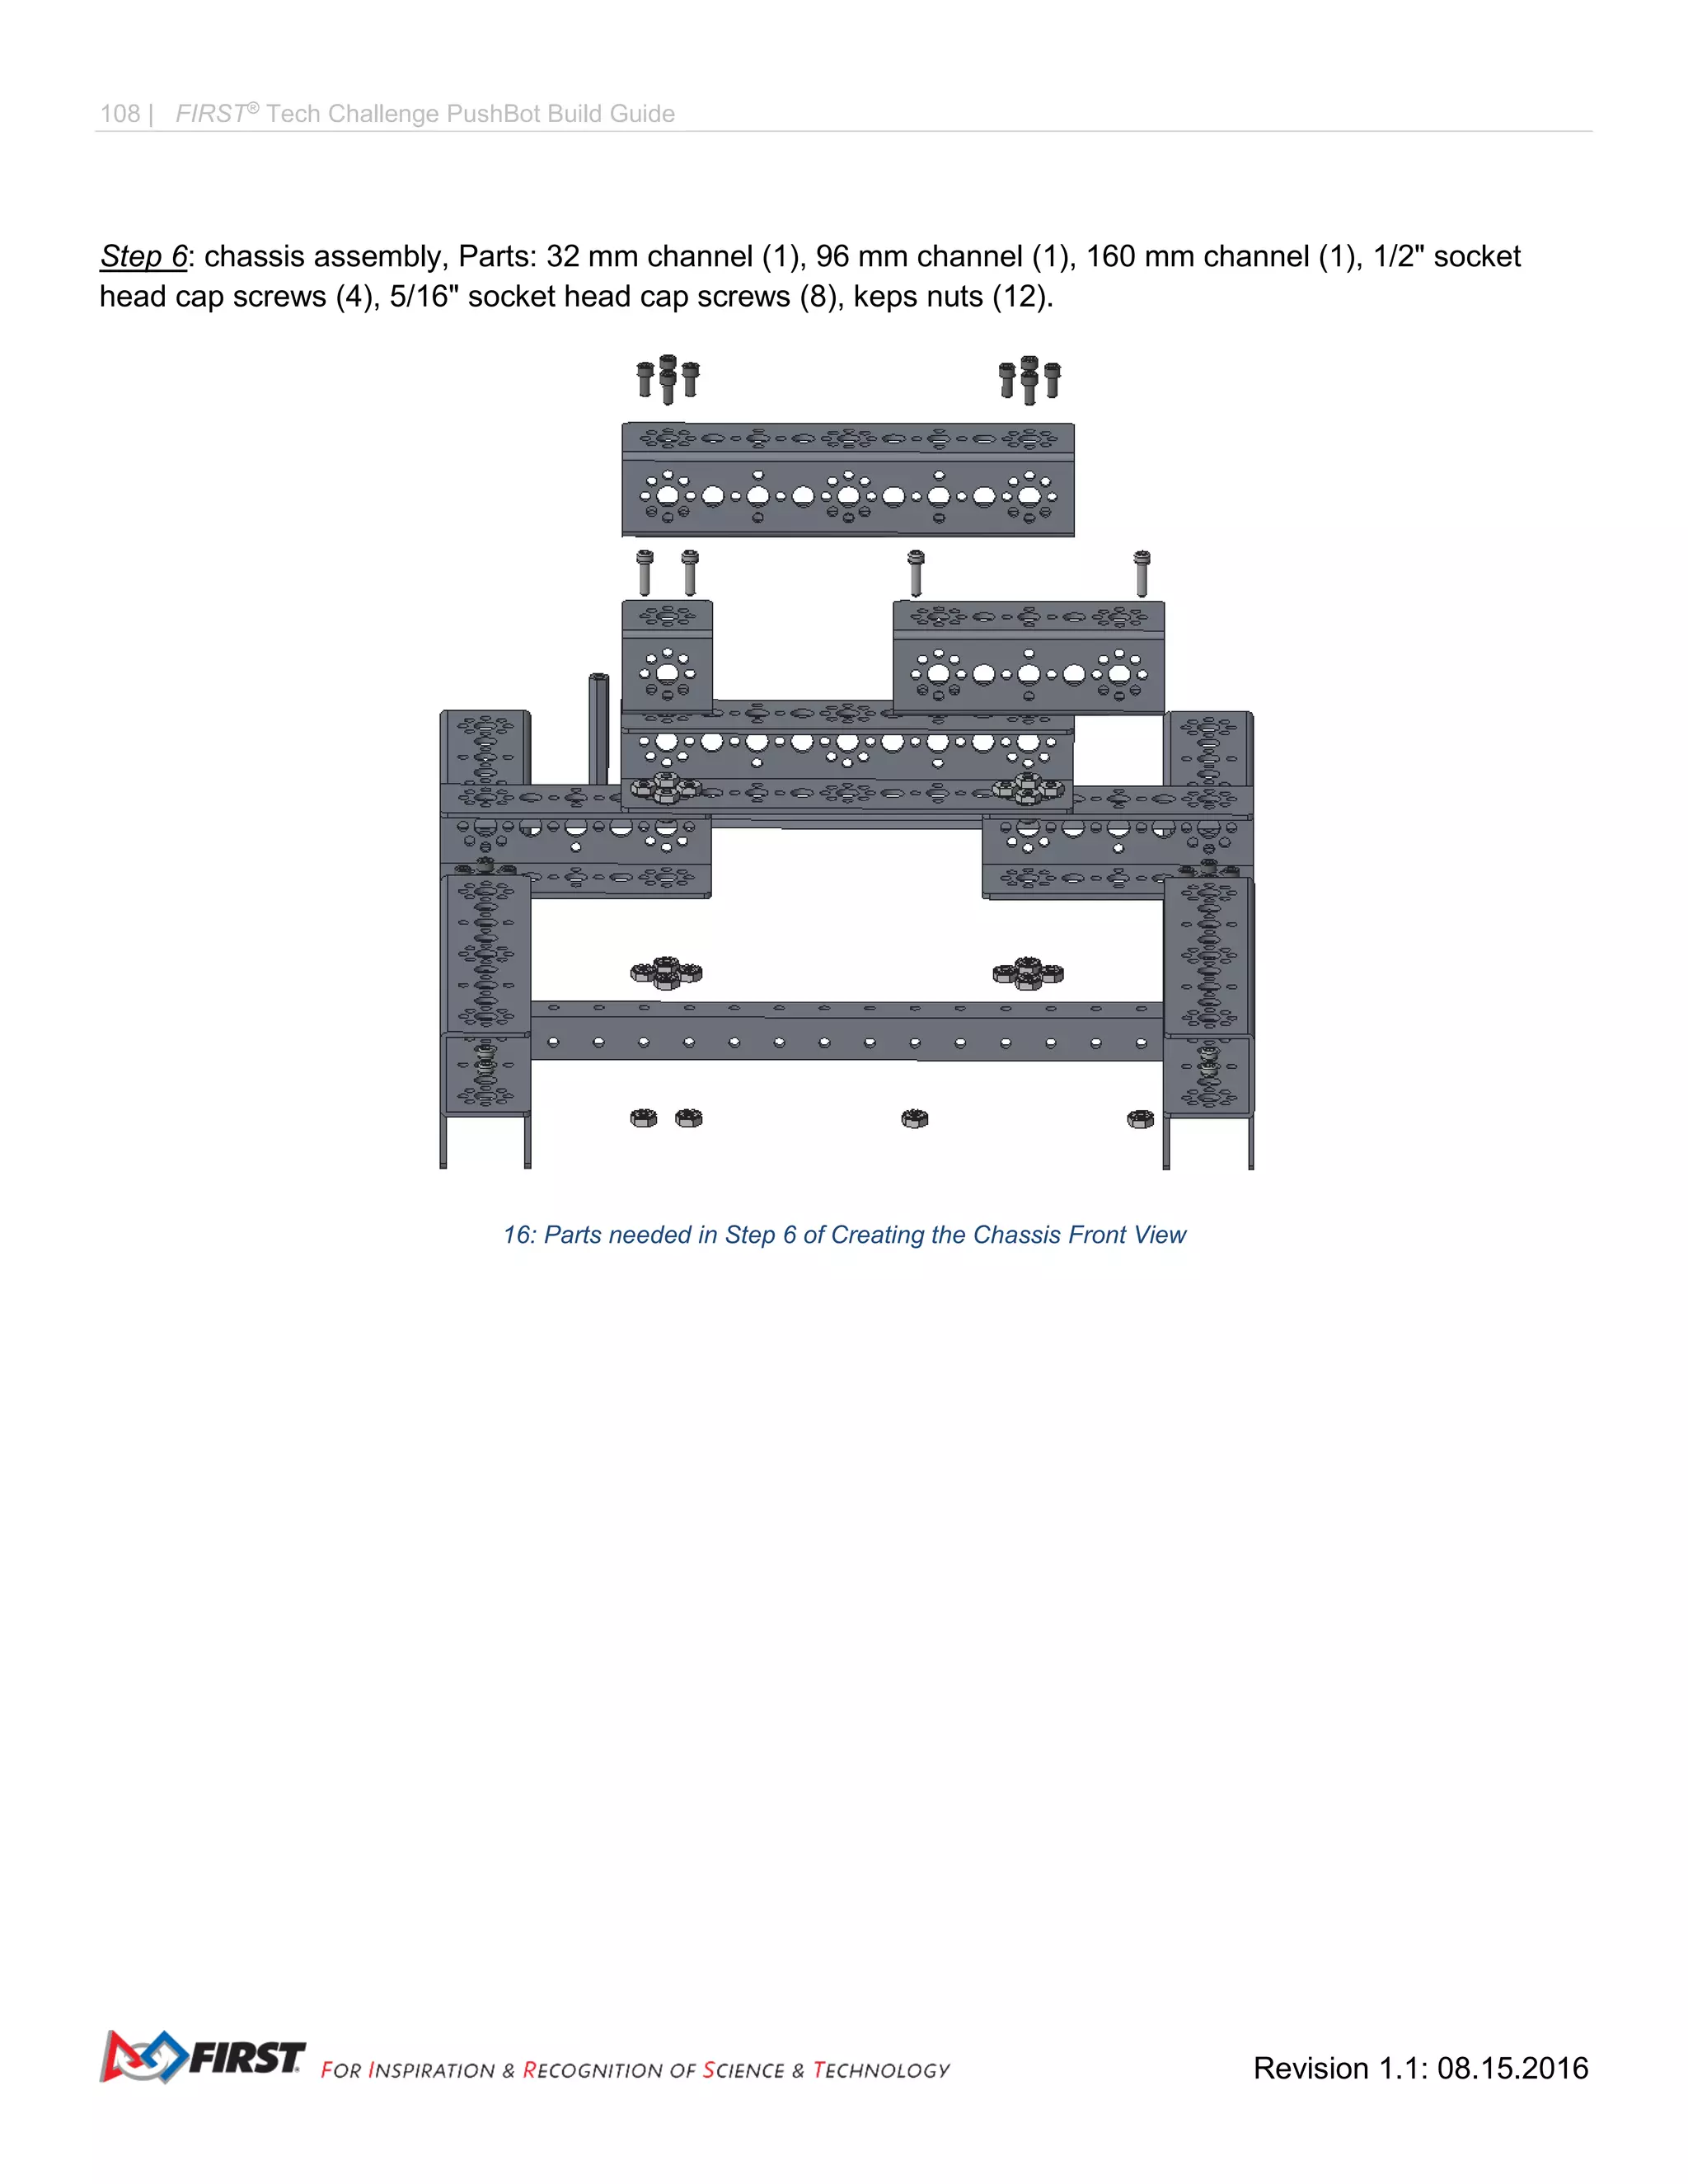
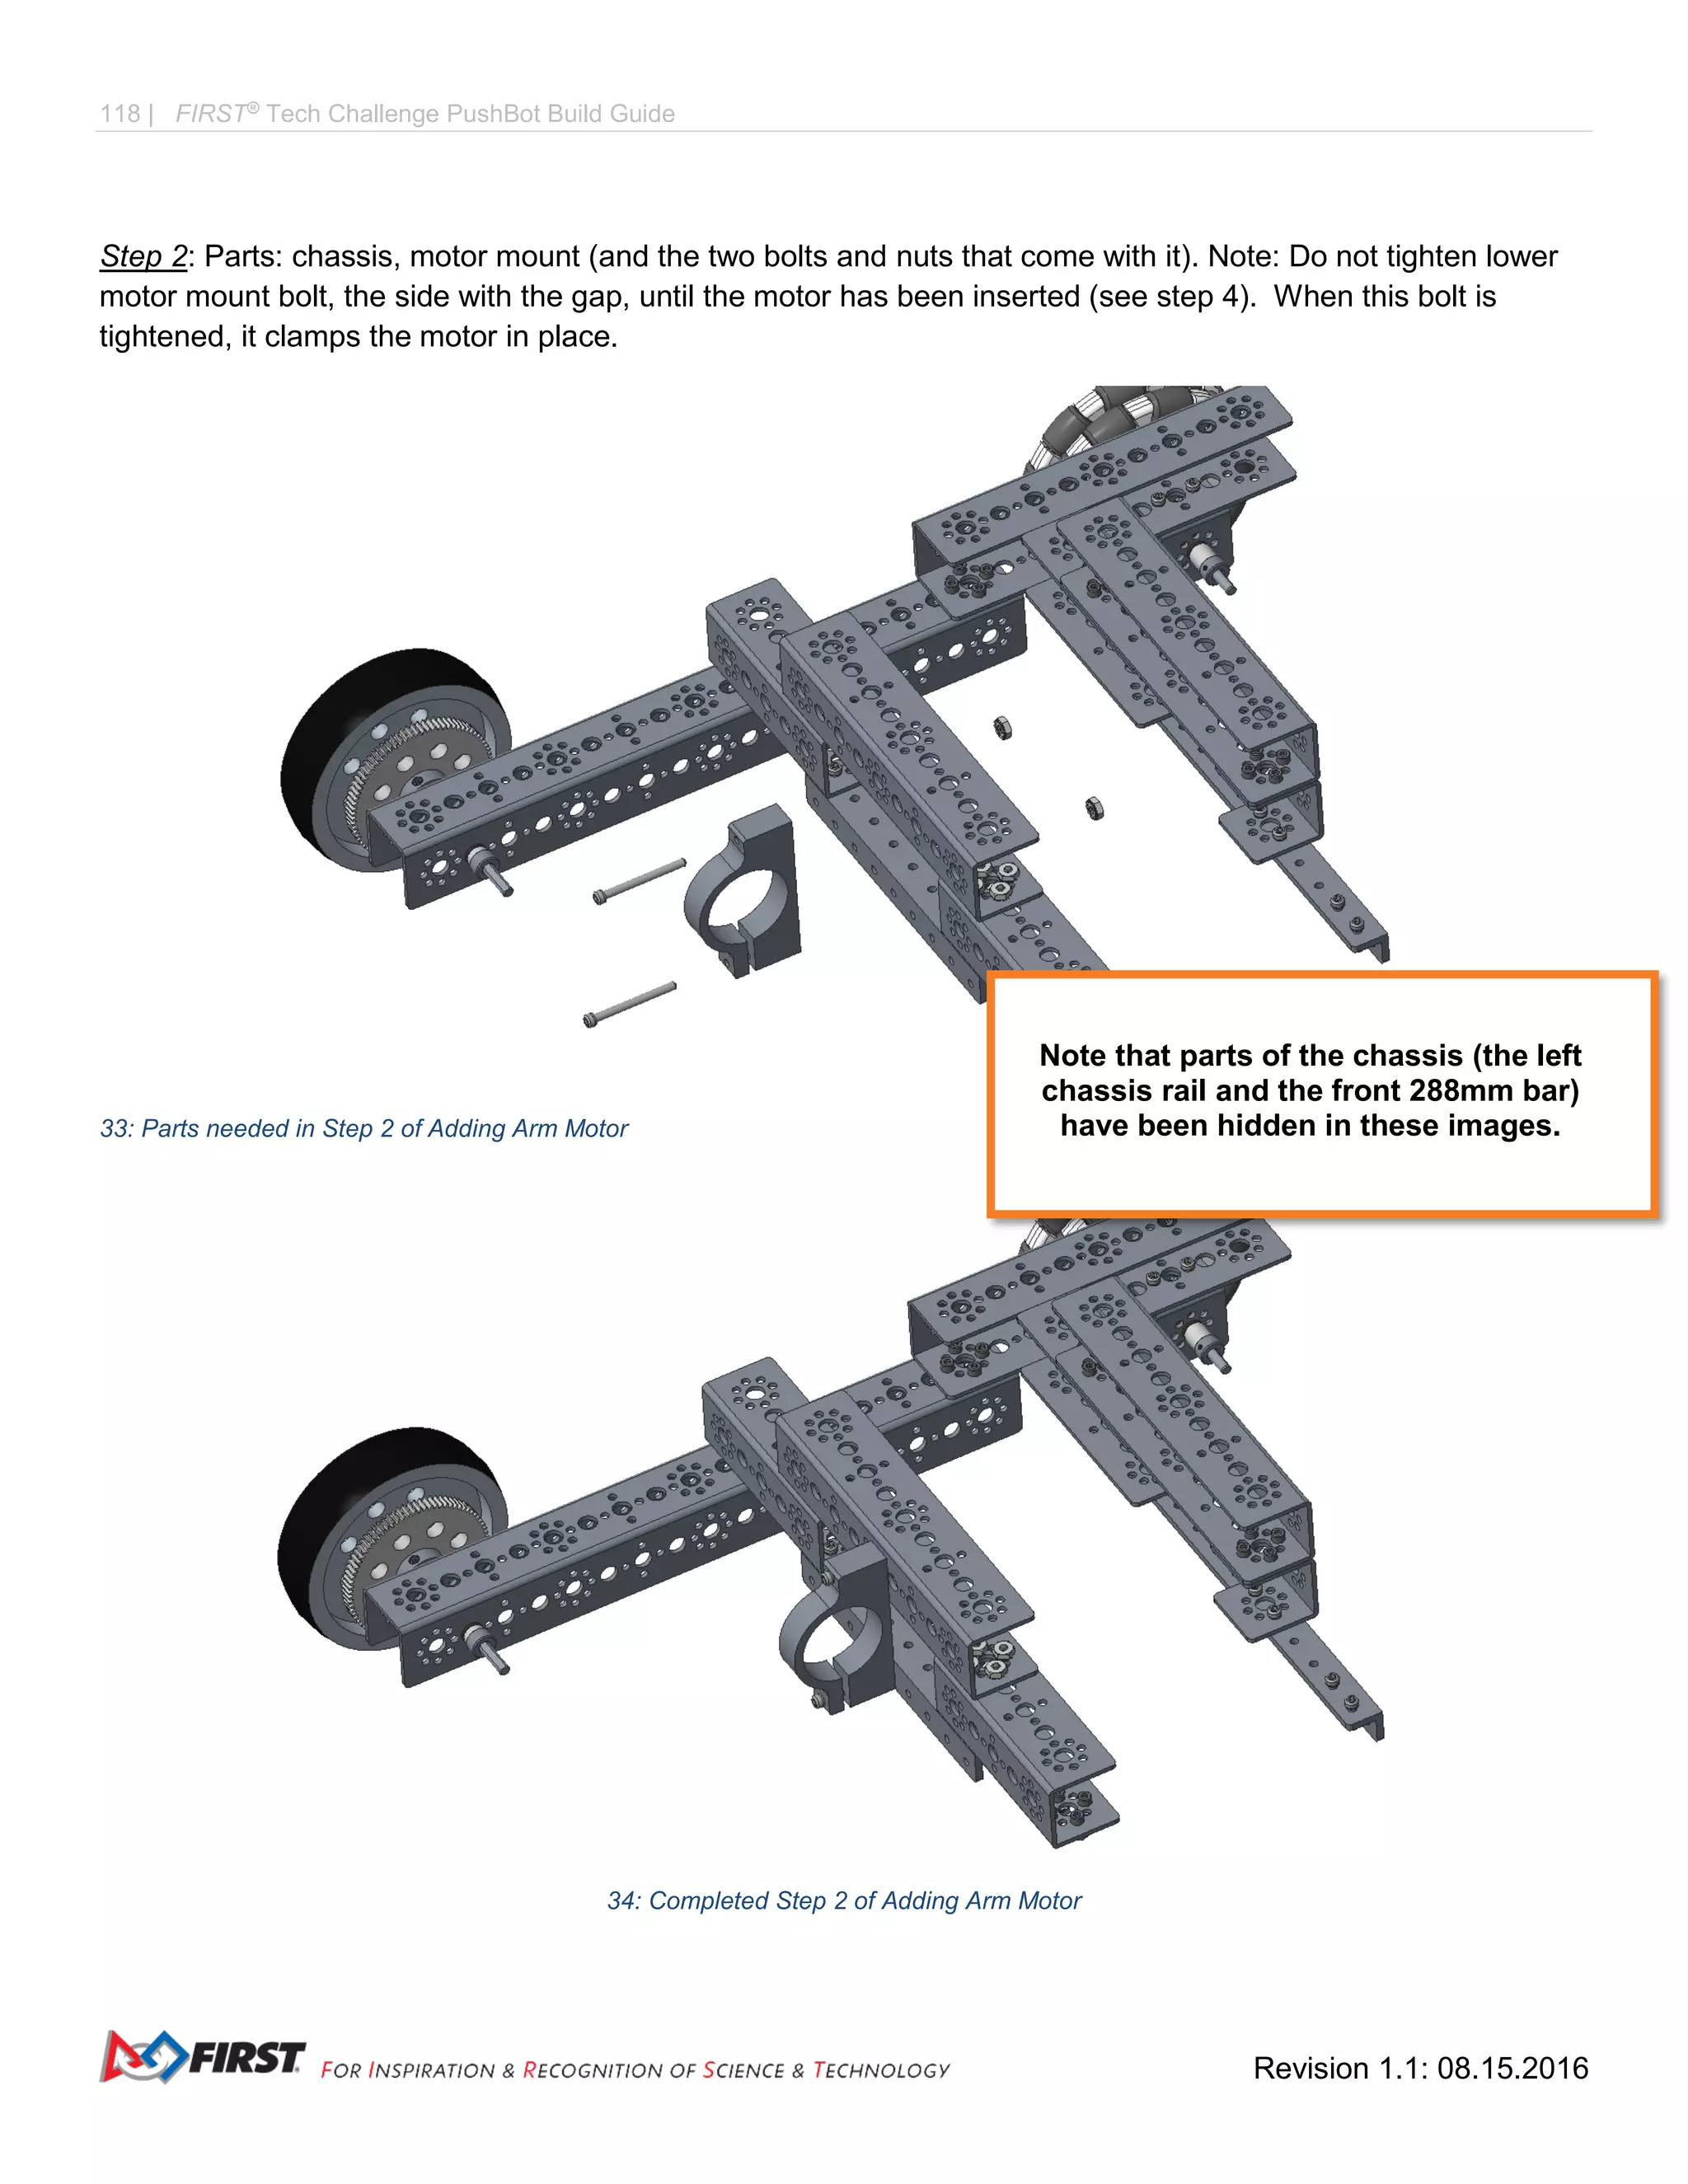
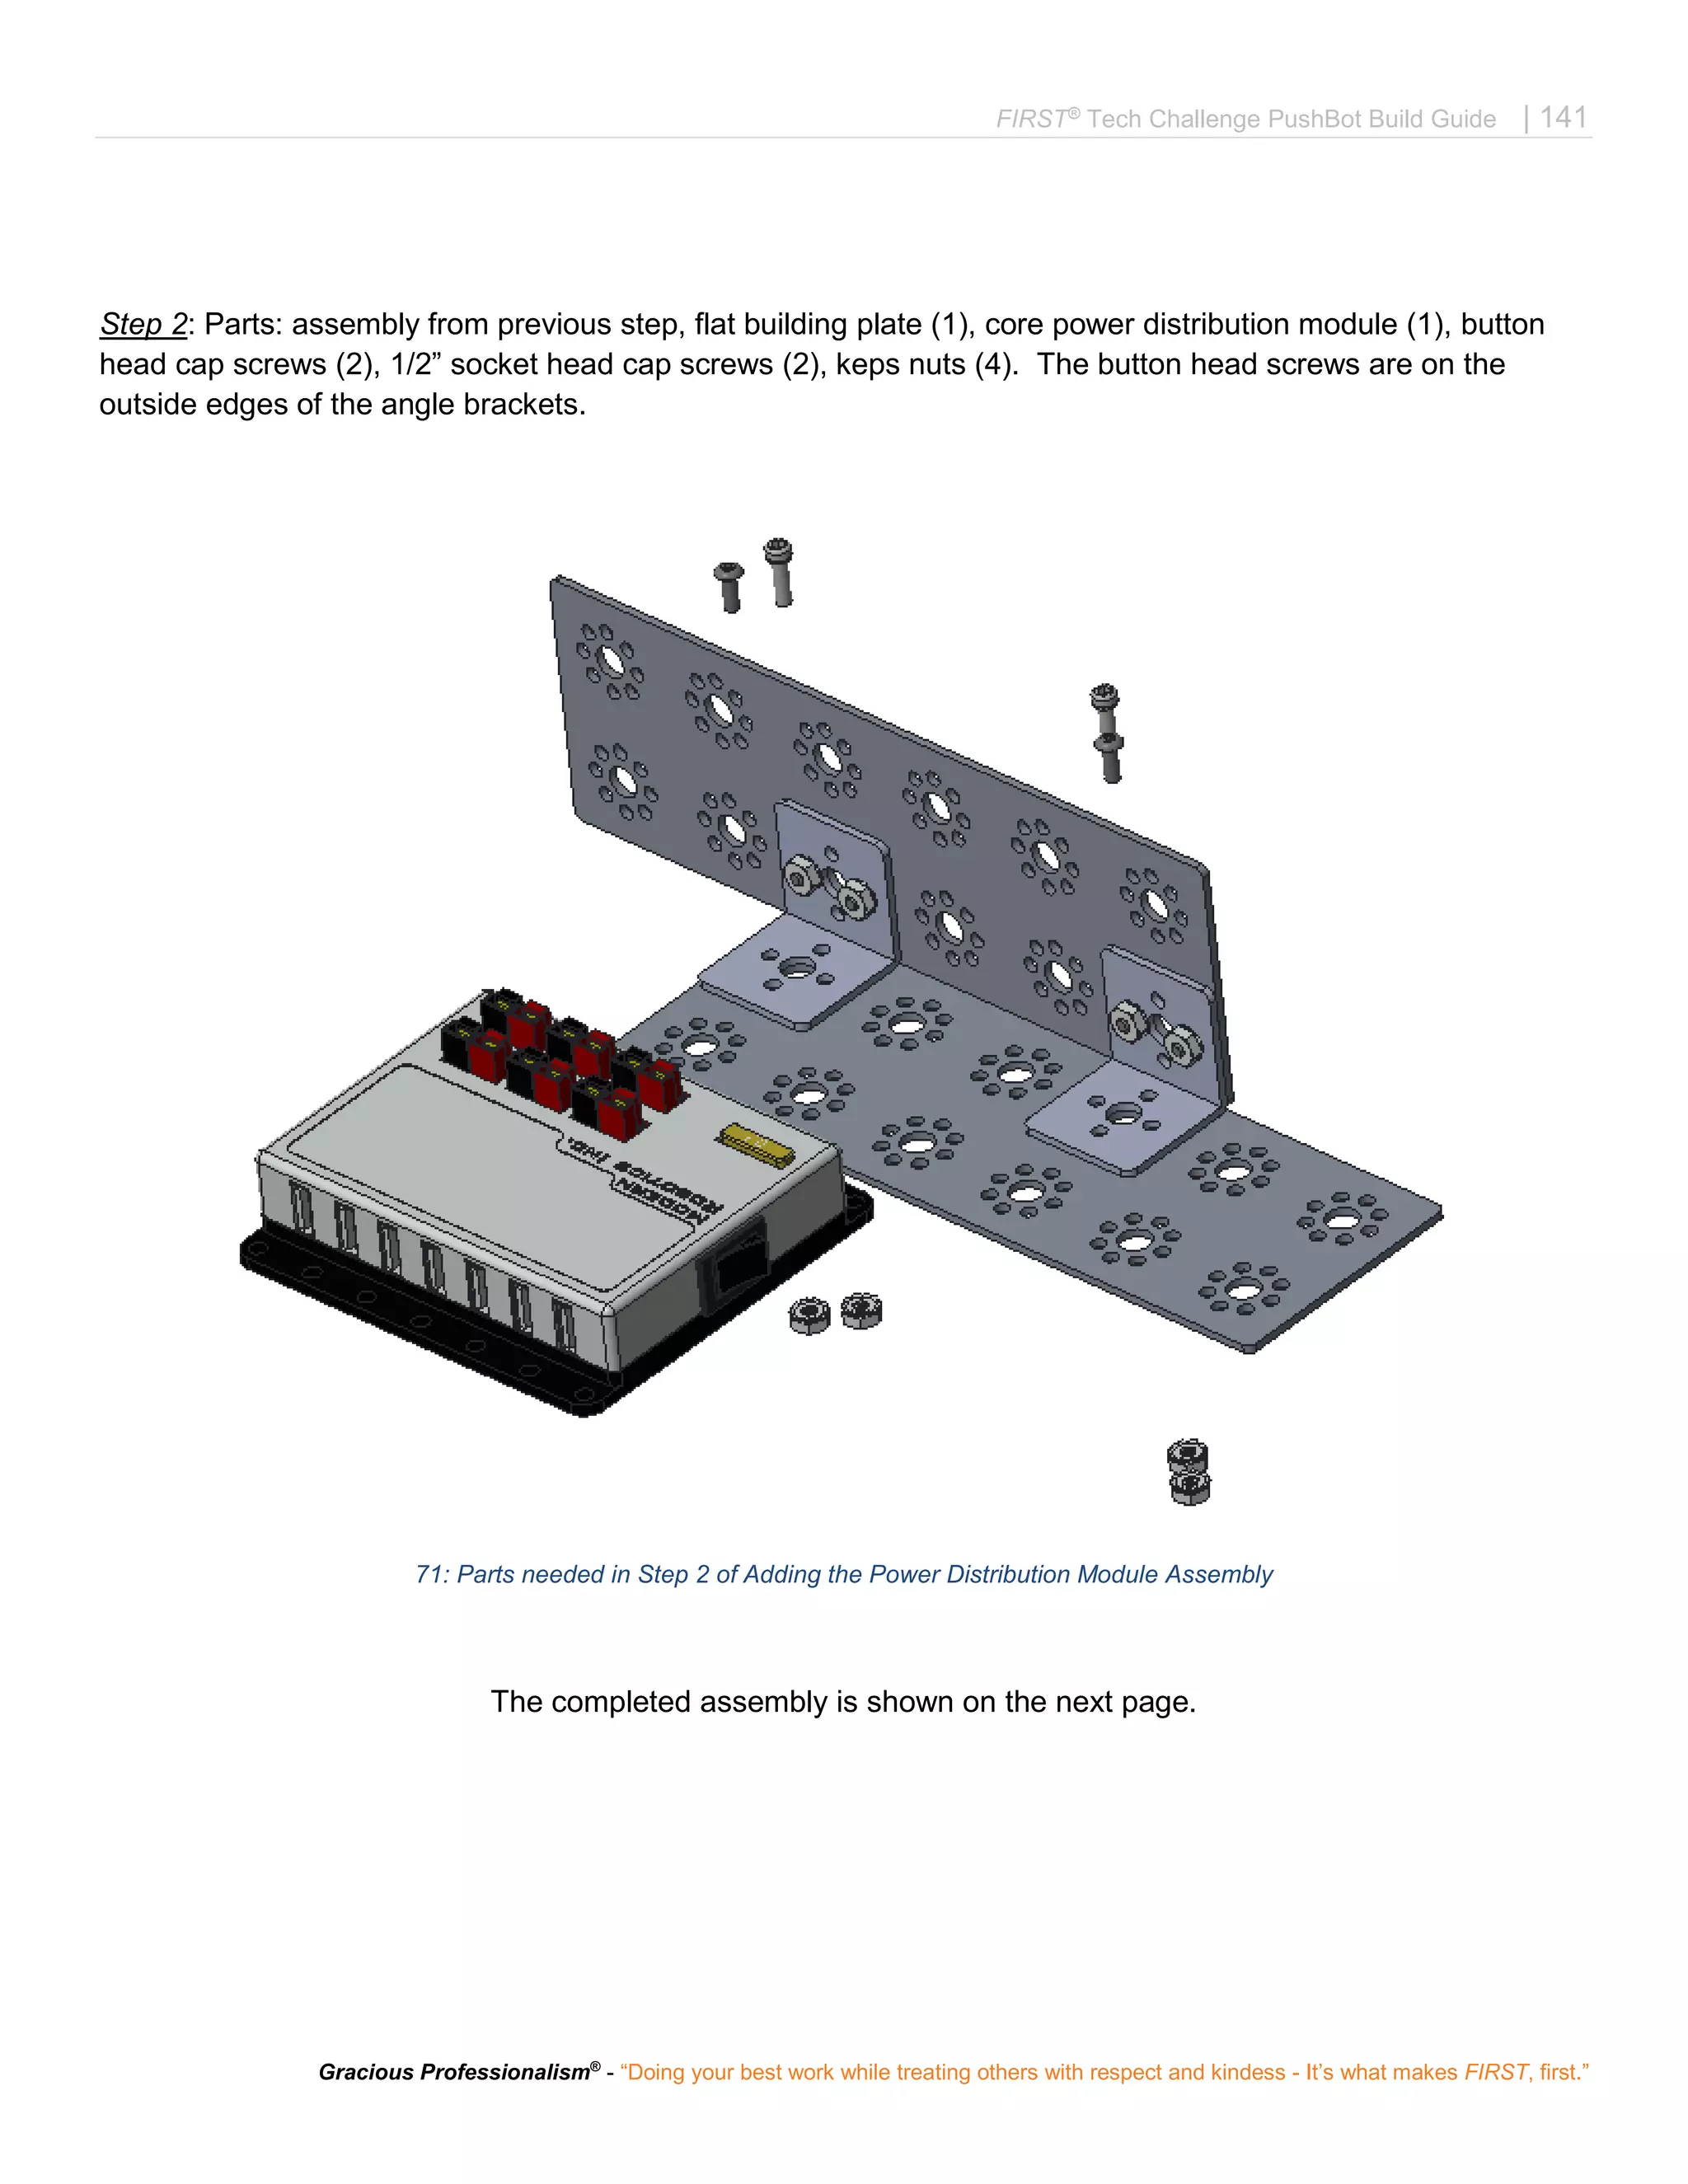
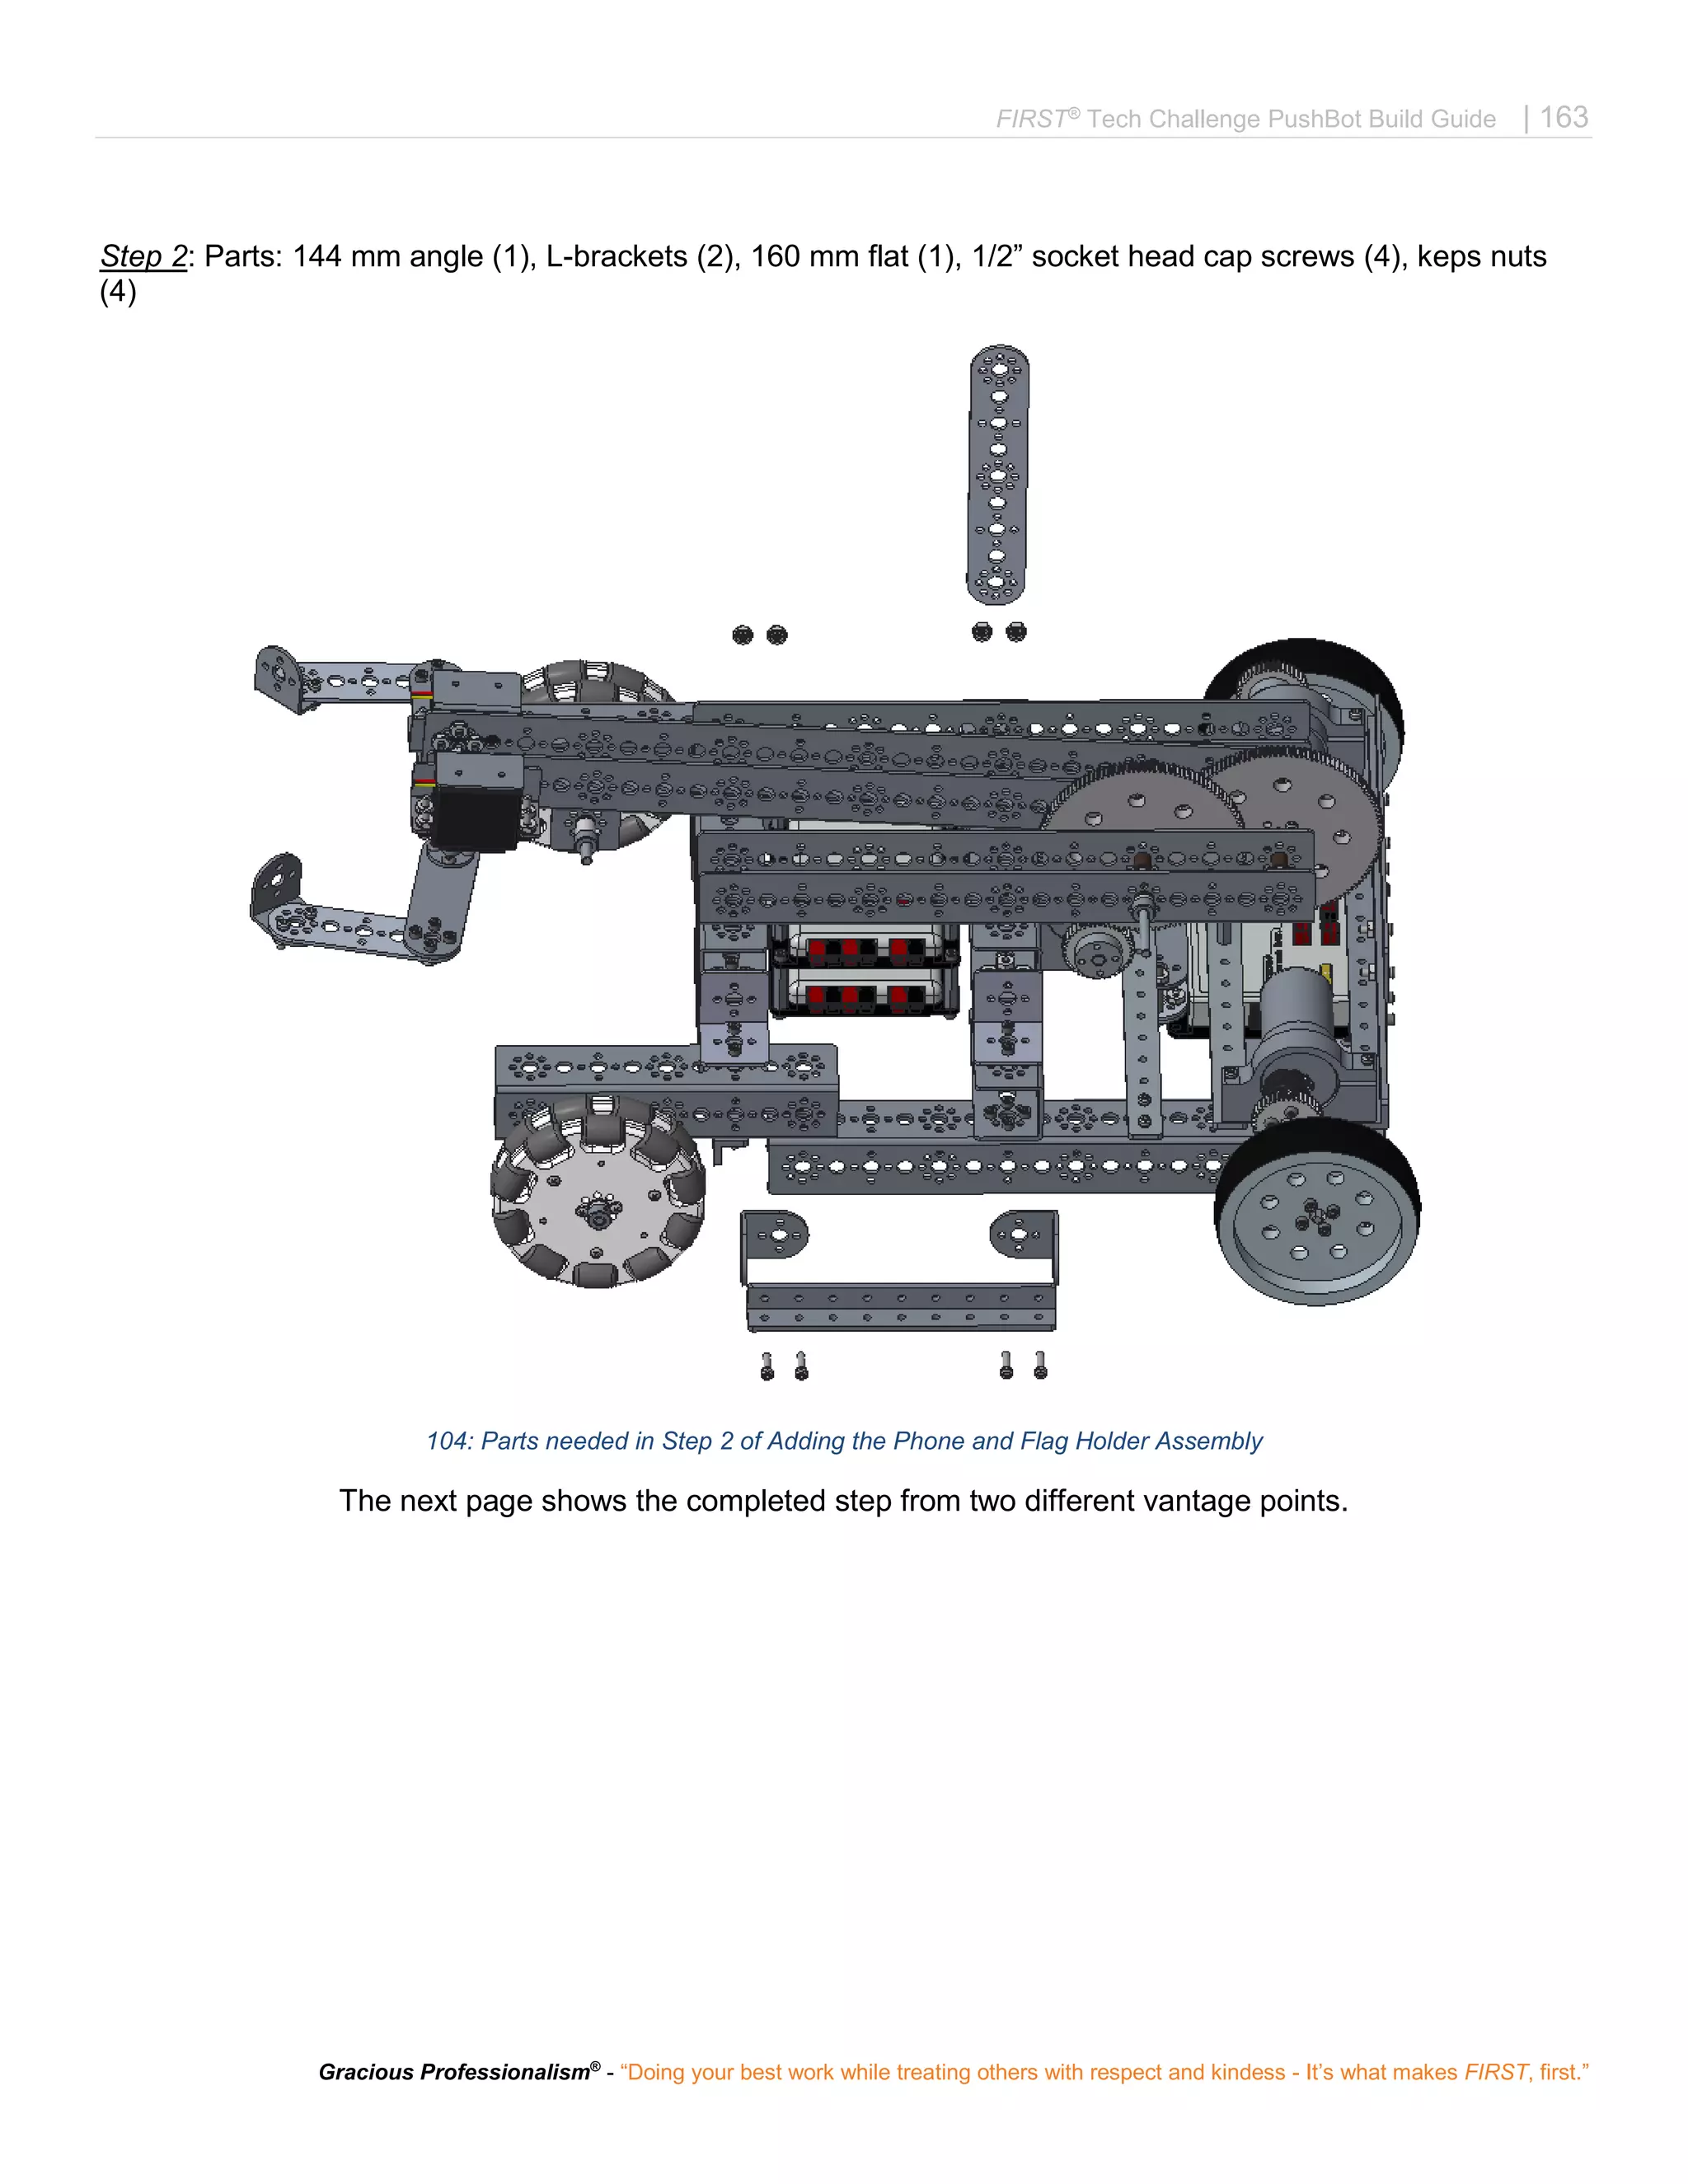
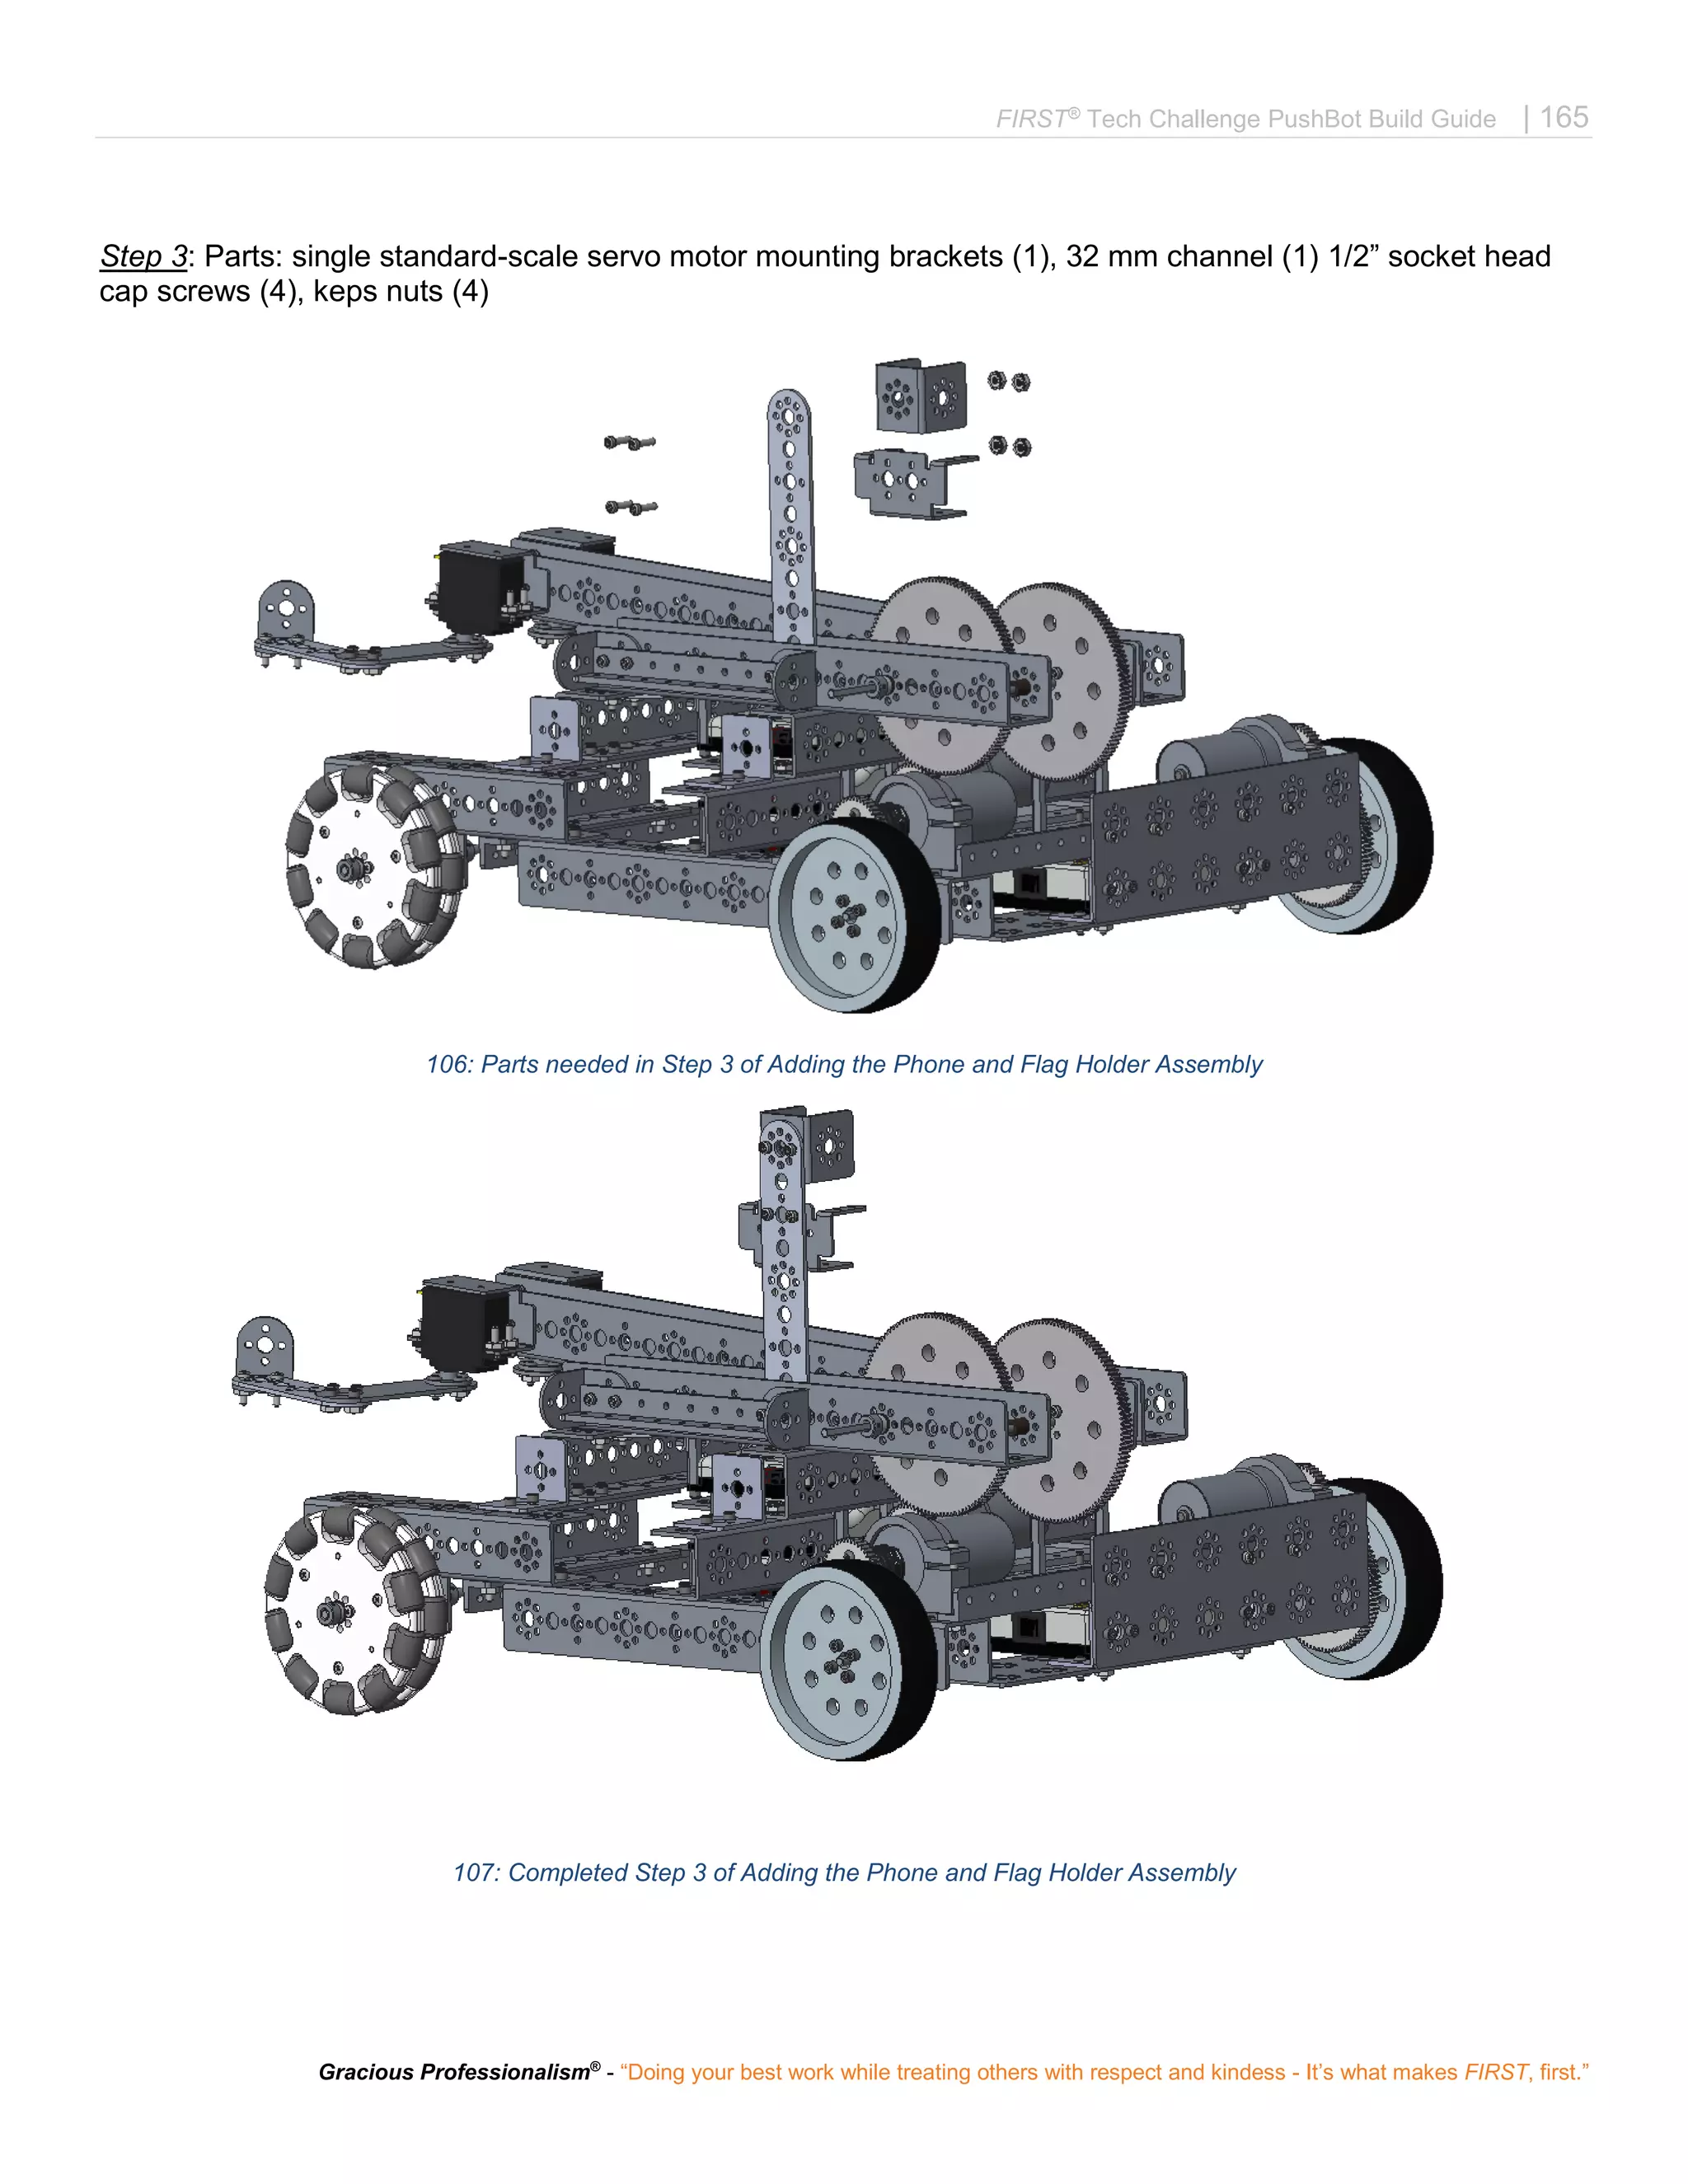
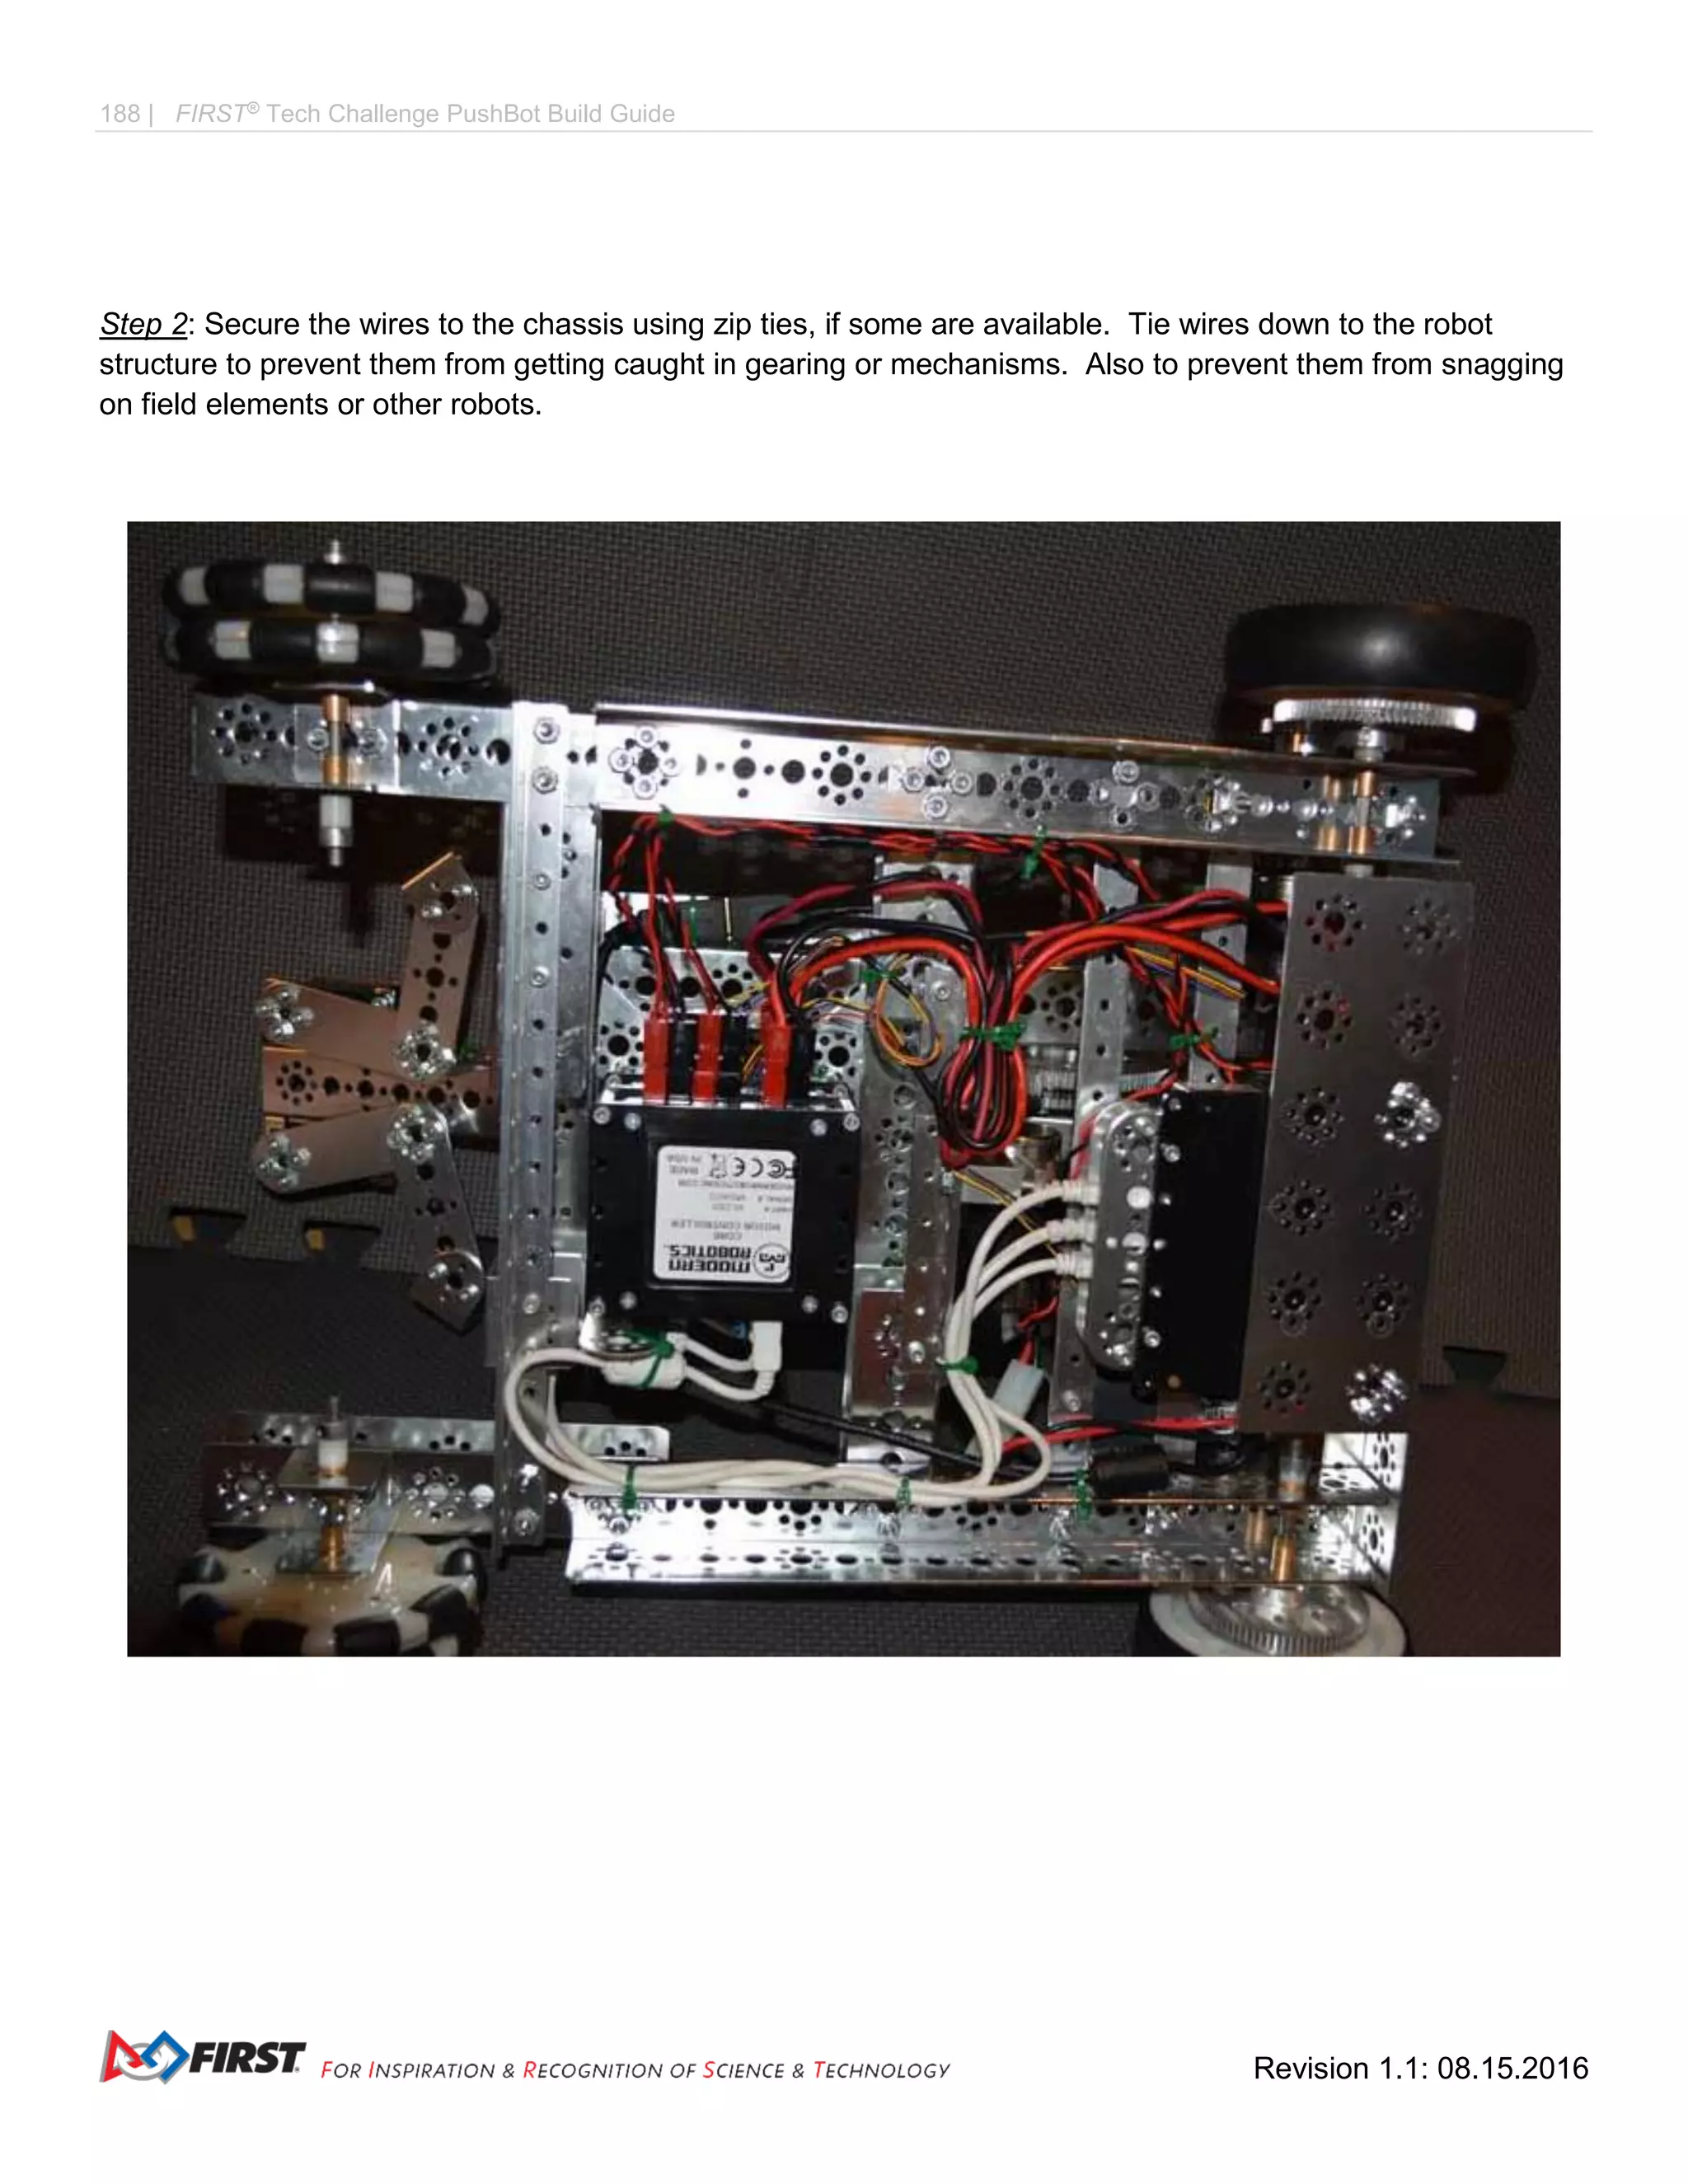
Step 2: [a mirror image of the left chassis rail assembly built in the previous step] Right Chassis Rail. Parts: 32
mm channel (1), 160 mm channel (1), 288 mm channel (1), 5/16" socket head cap screws (4), 1/2" socket
head cap screws (2), keps nuts (6).
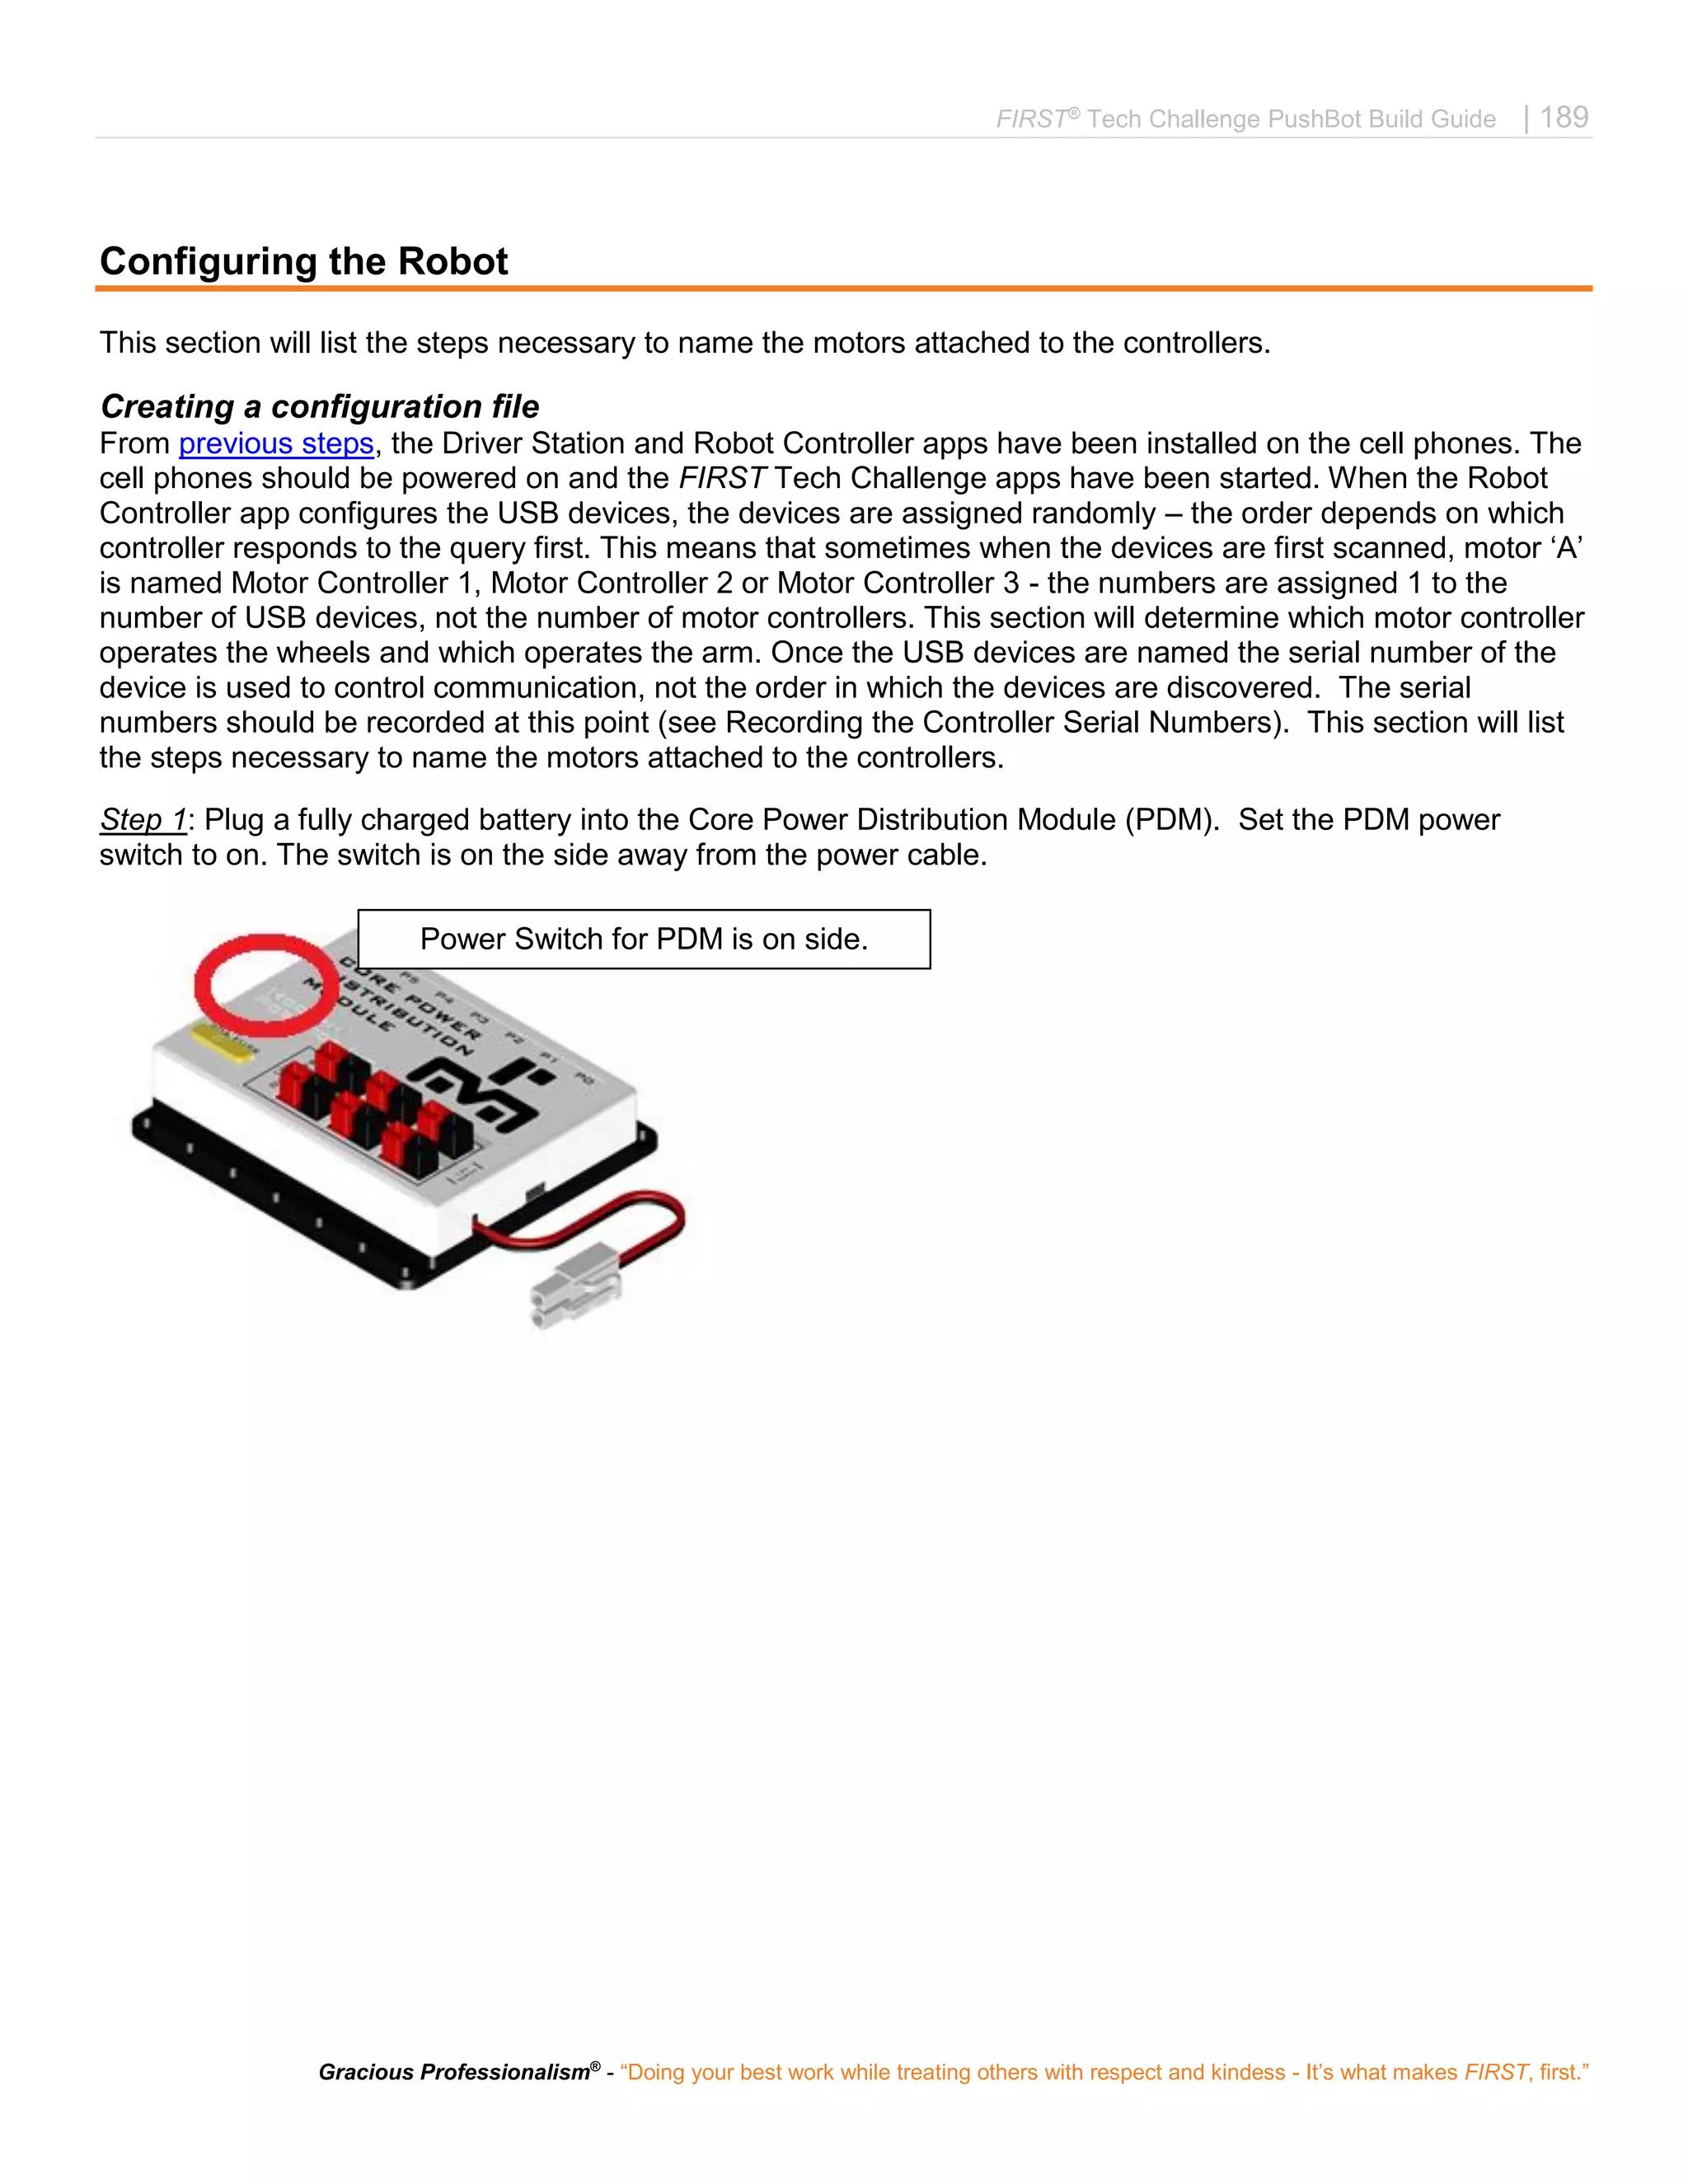
7: Parts needed in Step 2 of Creating the Chassis
8: Completed Step 2 of Creating the Chassis
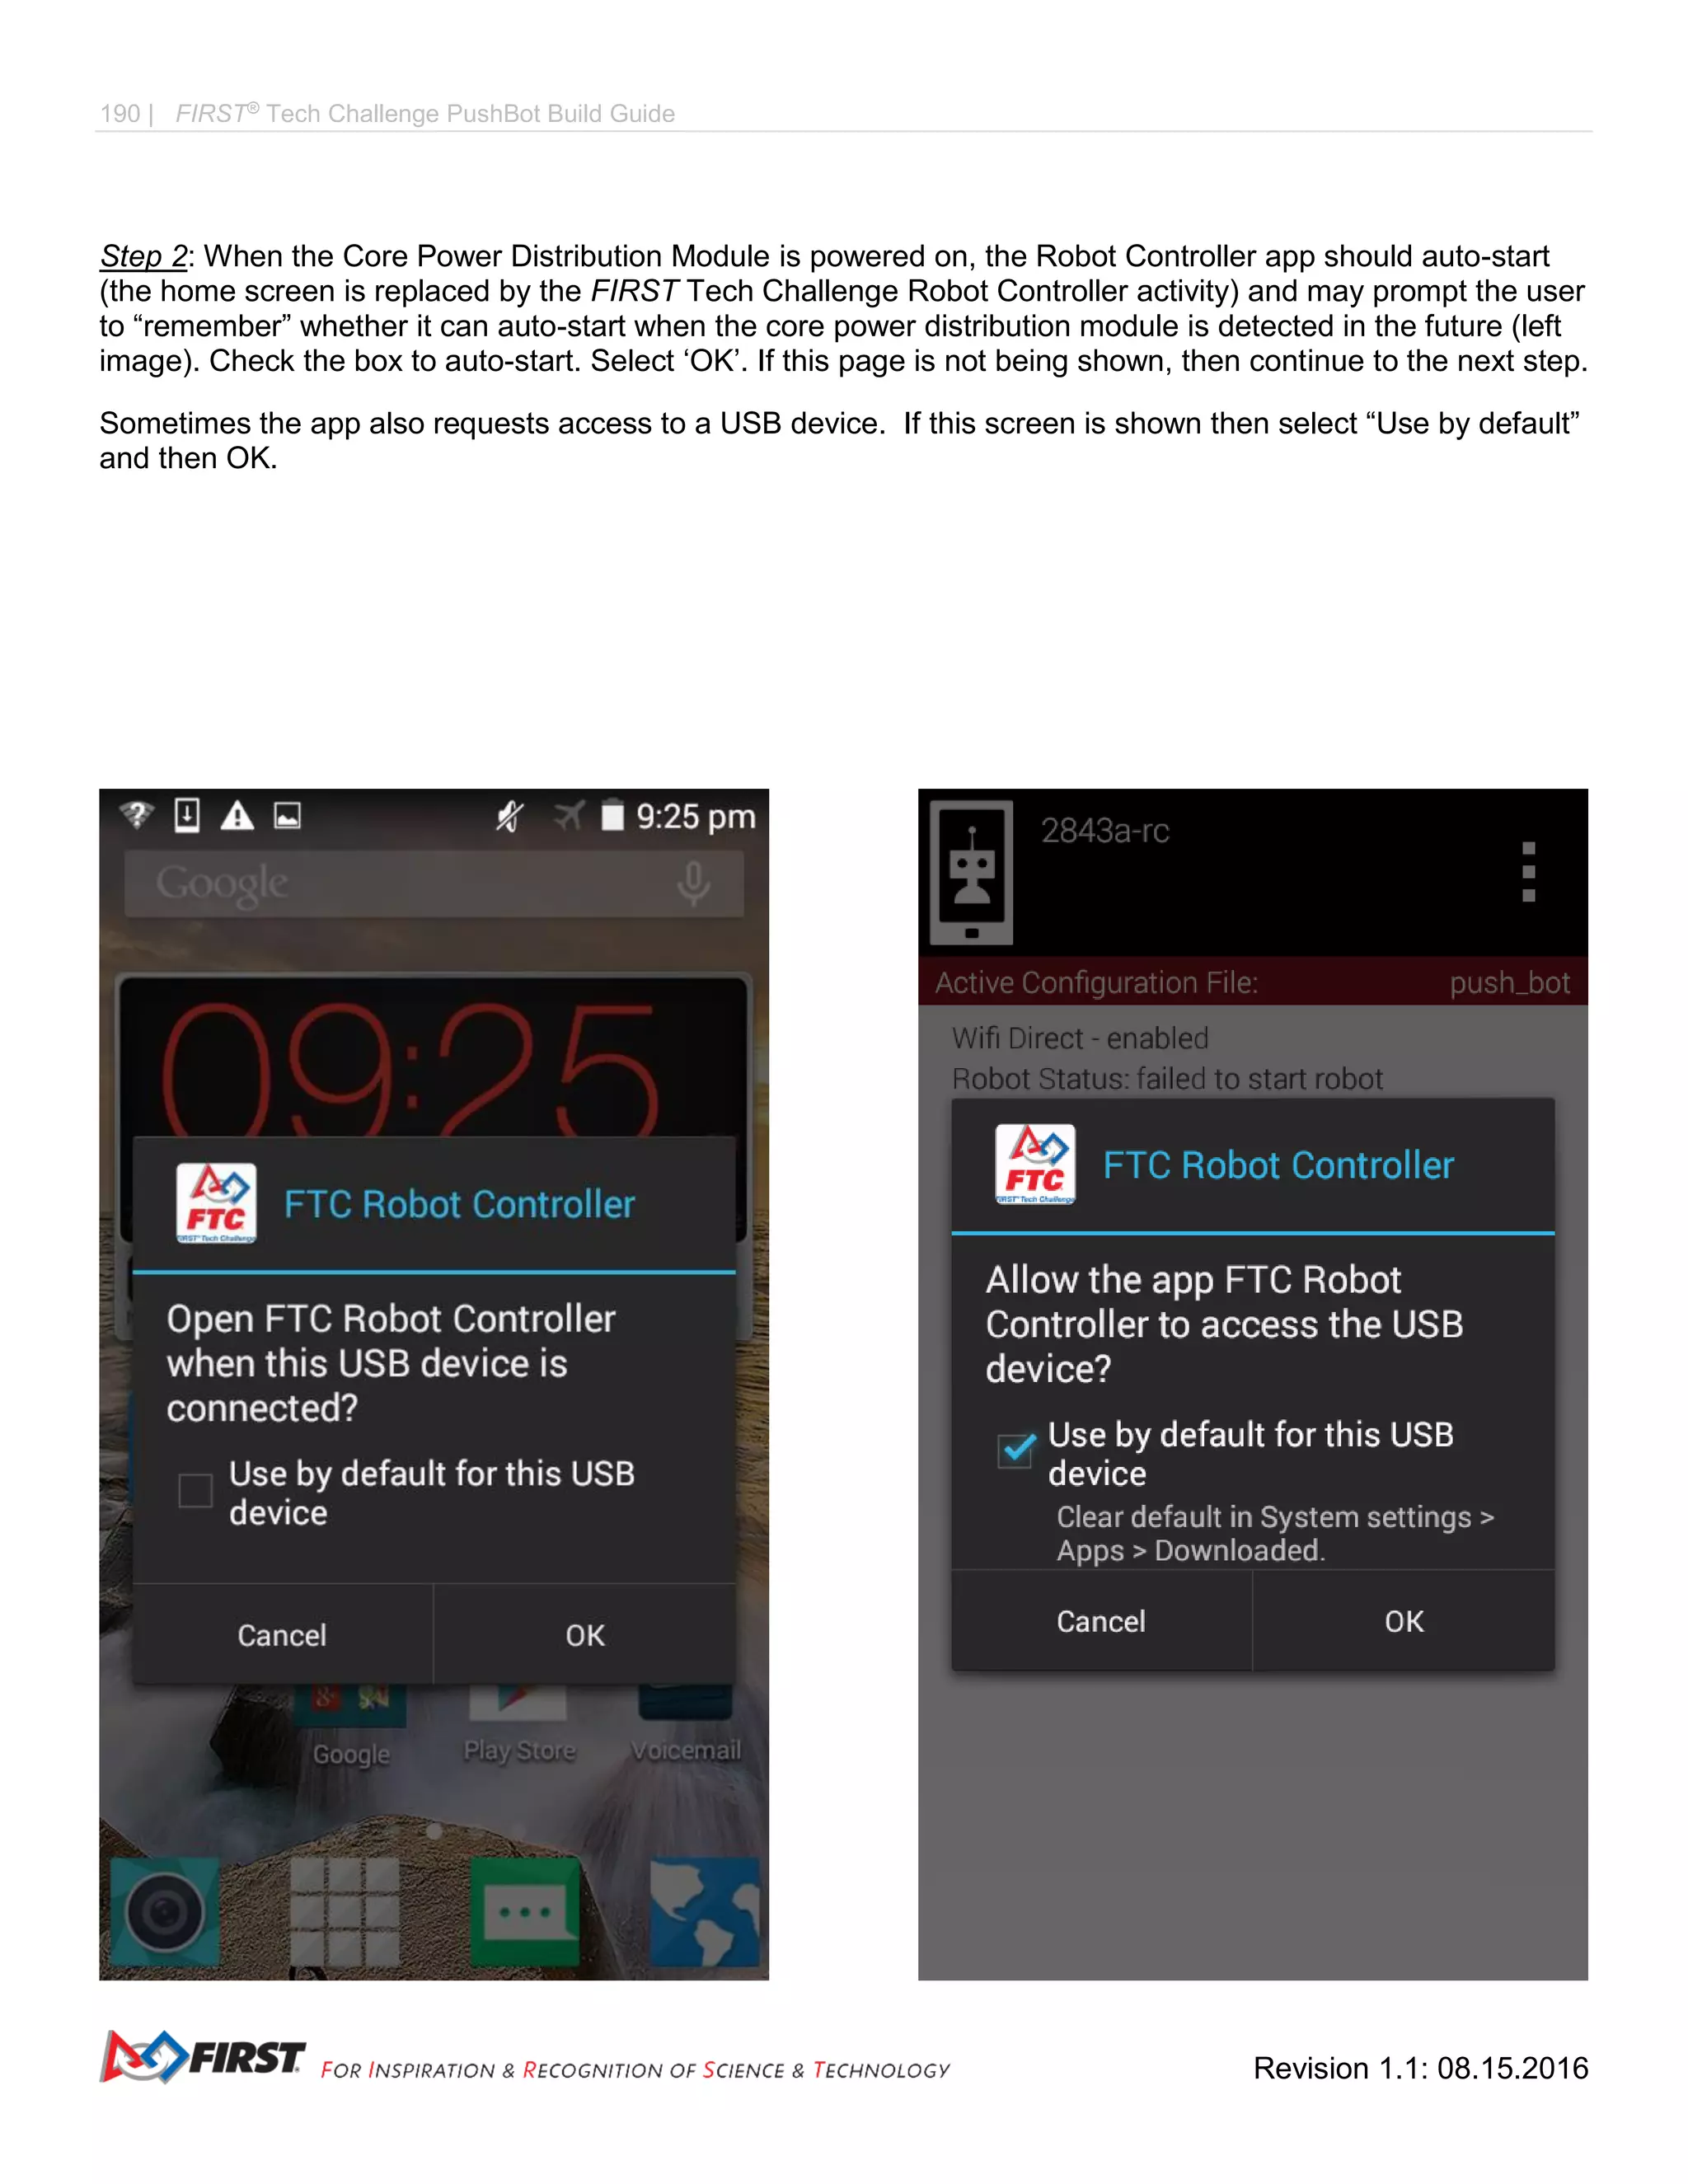
9: Detail View of Step 2 of Creating the Chassis](https://image.slidesharecdn.com/pushbot-build-guide-170705193132/75/FTC-PushBot-Build-Guide-104-2048.jpg)
![FIRST®
Tech Challenge PushBot Build Guide | 105
Gracious Professionalism®
- “Doing your best work while treating others with respect and kindess - It’s what makes FIRST, first.”
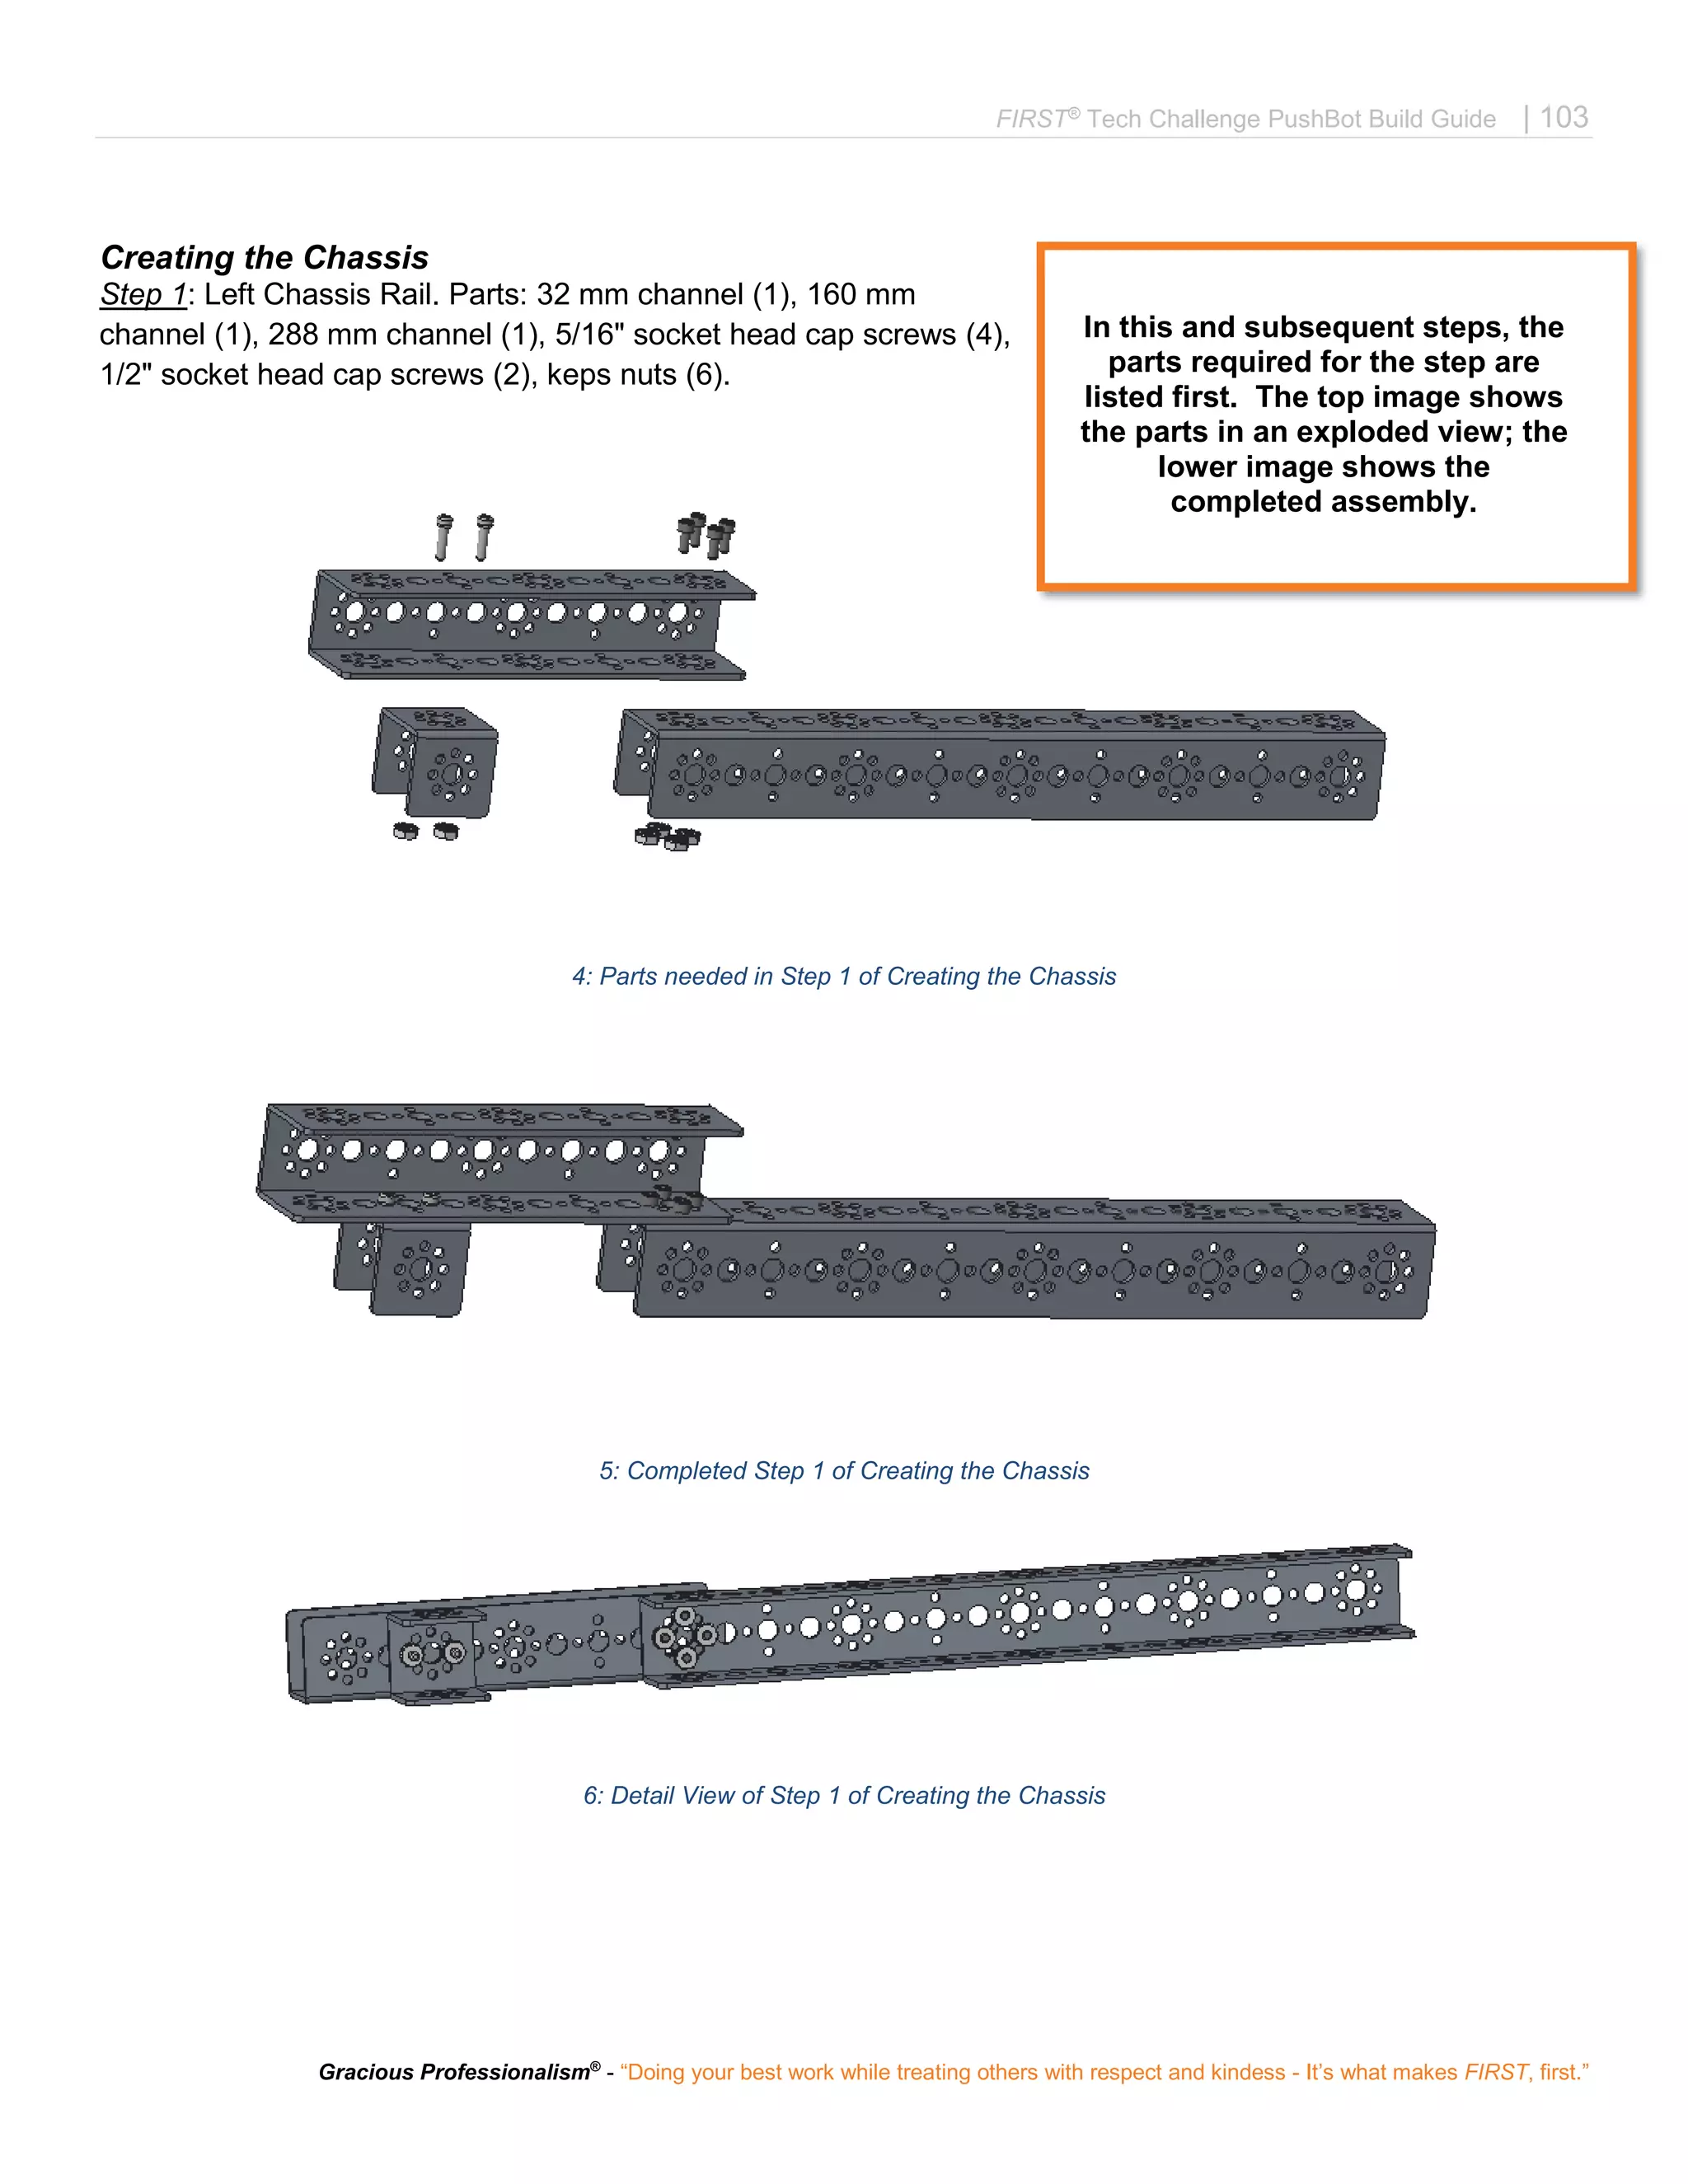
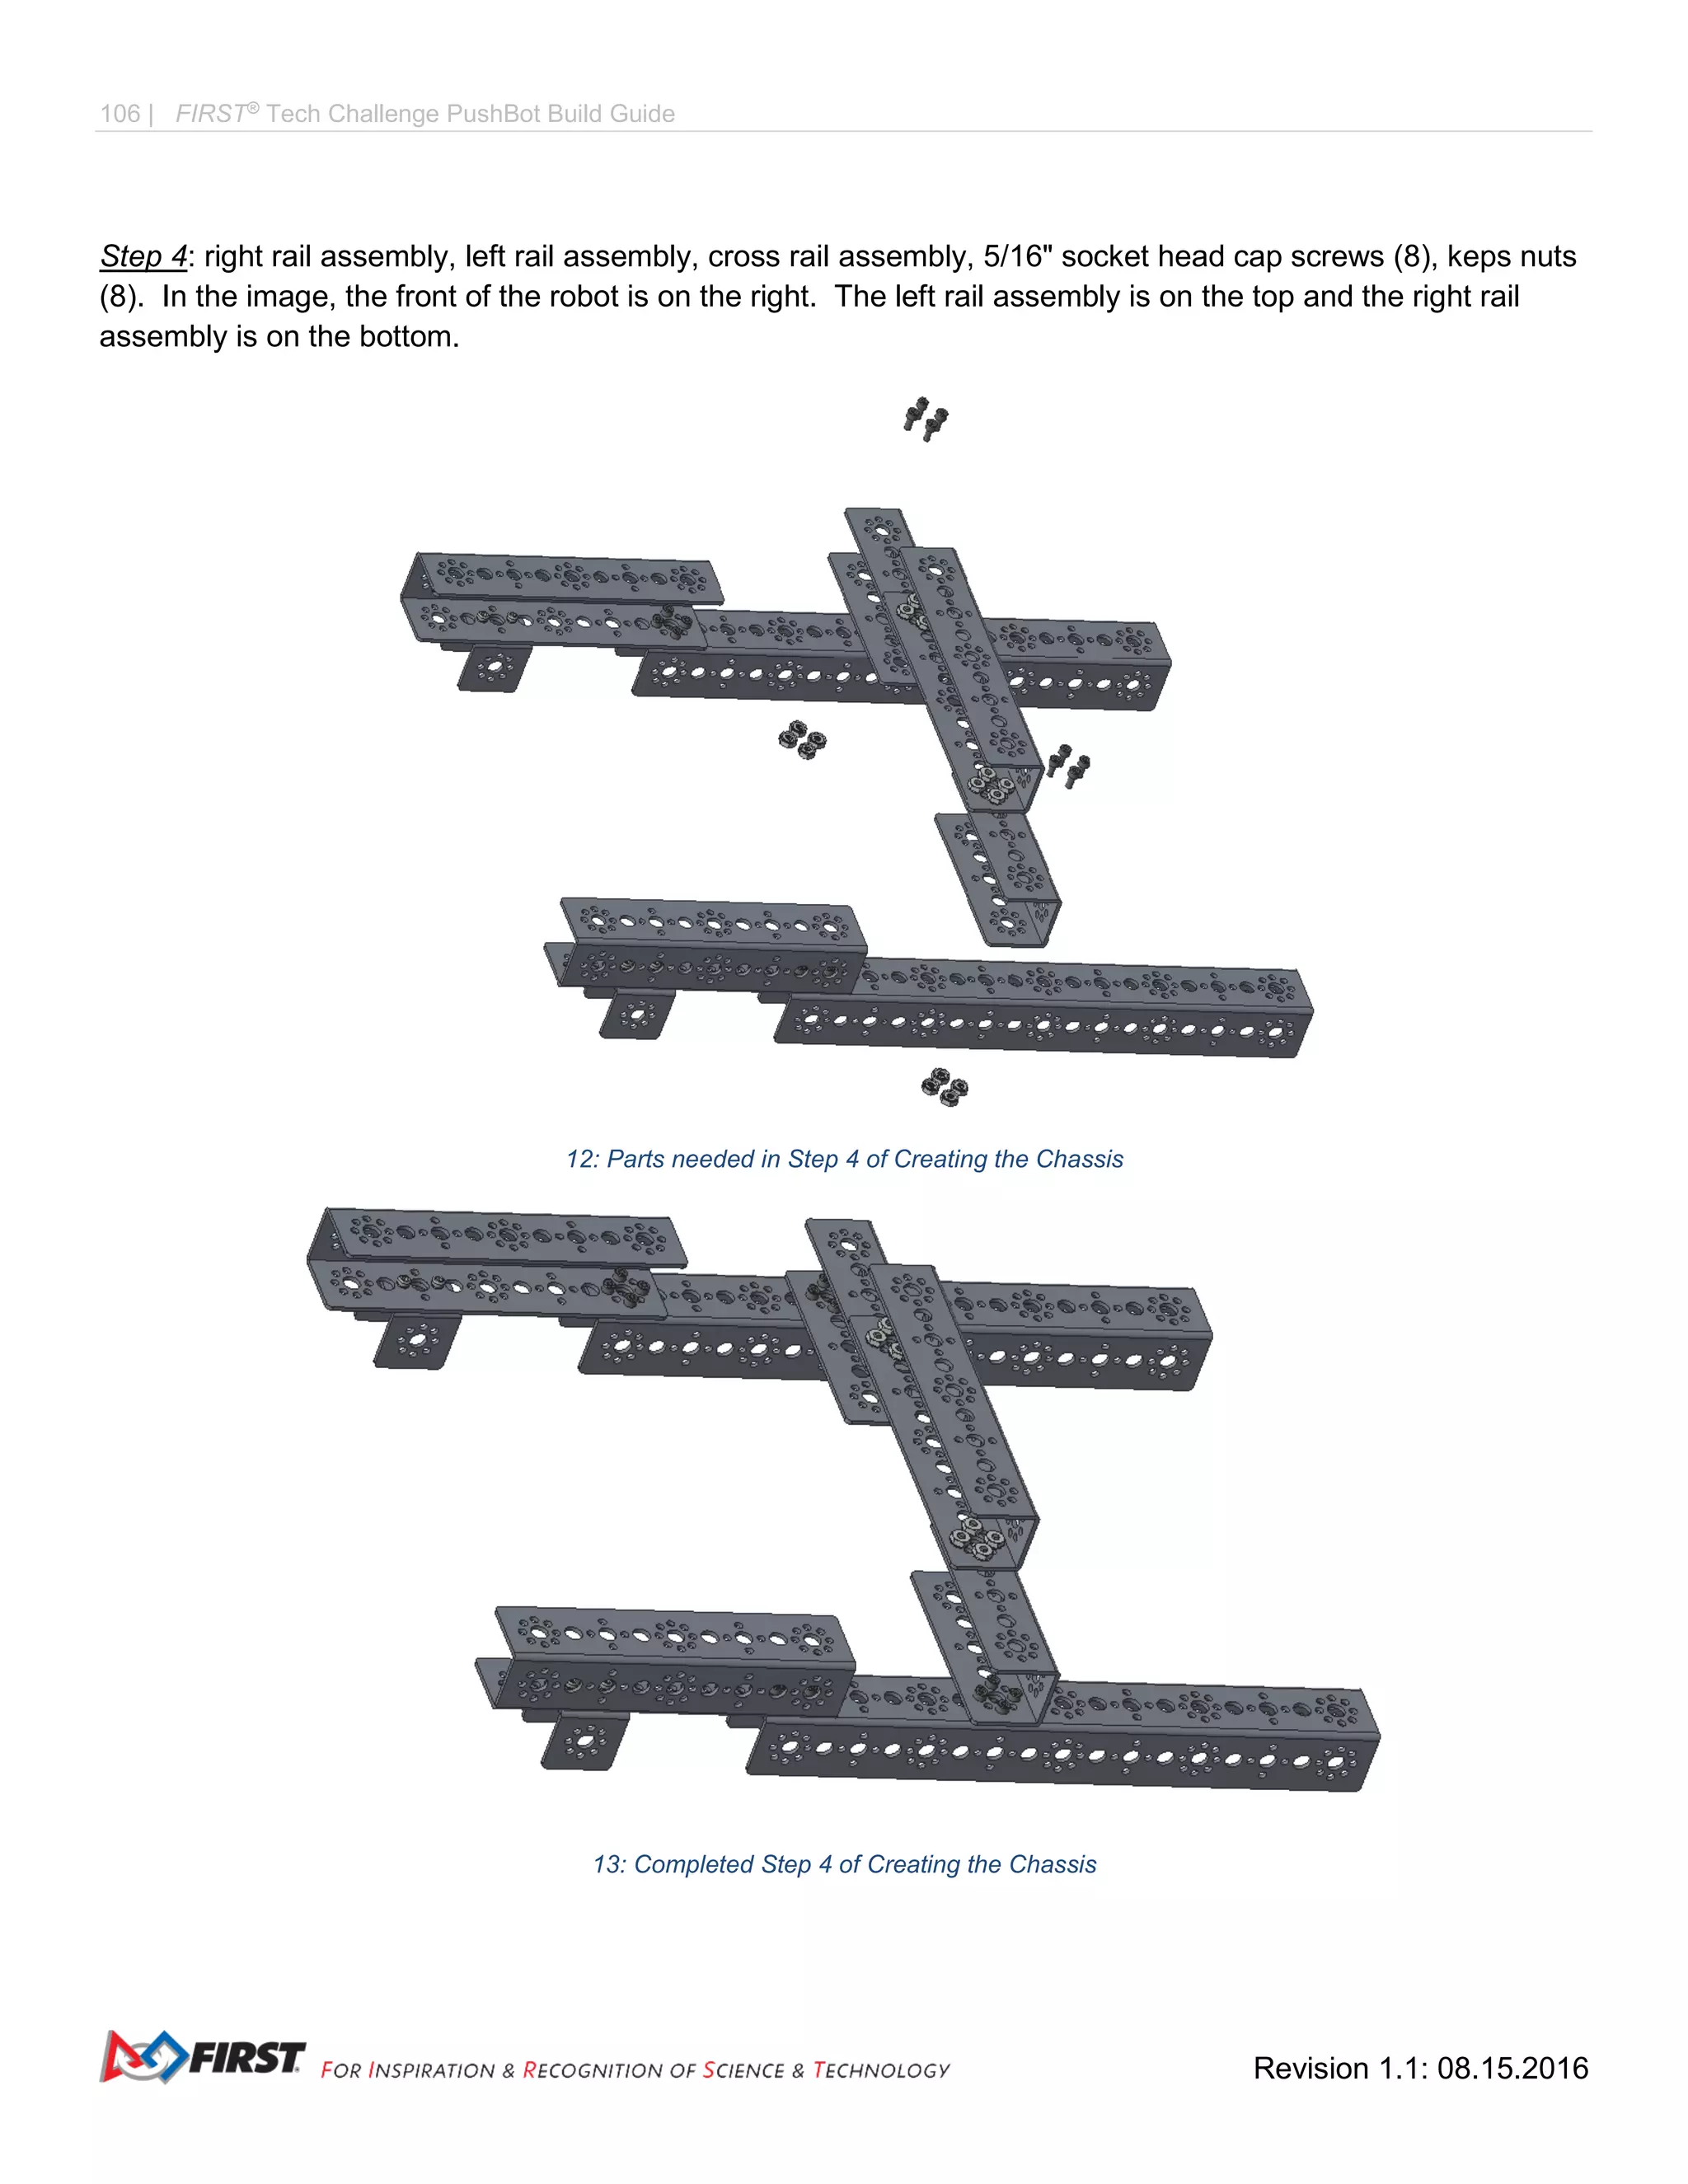
Step 3: Cross Bar Assembly. Parts: 160 mm channel (1), 96 mm channels (2), 5/16" socket head cap screws
(8), keps nuts (8).
10: Parts needed in Step 3 of Creating the Chassis
11: Completed Step 3 of Creating the Chassis [Note that there are two copies]](https://image.slidesharecdn.com/pushbot-build-guide-170705193132/75/FTC-PushBot-Build-Guide-105-2048.jpg)
![110 | FIRST®
Tech Challenge PushBot Build Guide
Revision 1.1: 08.15.2016
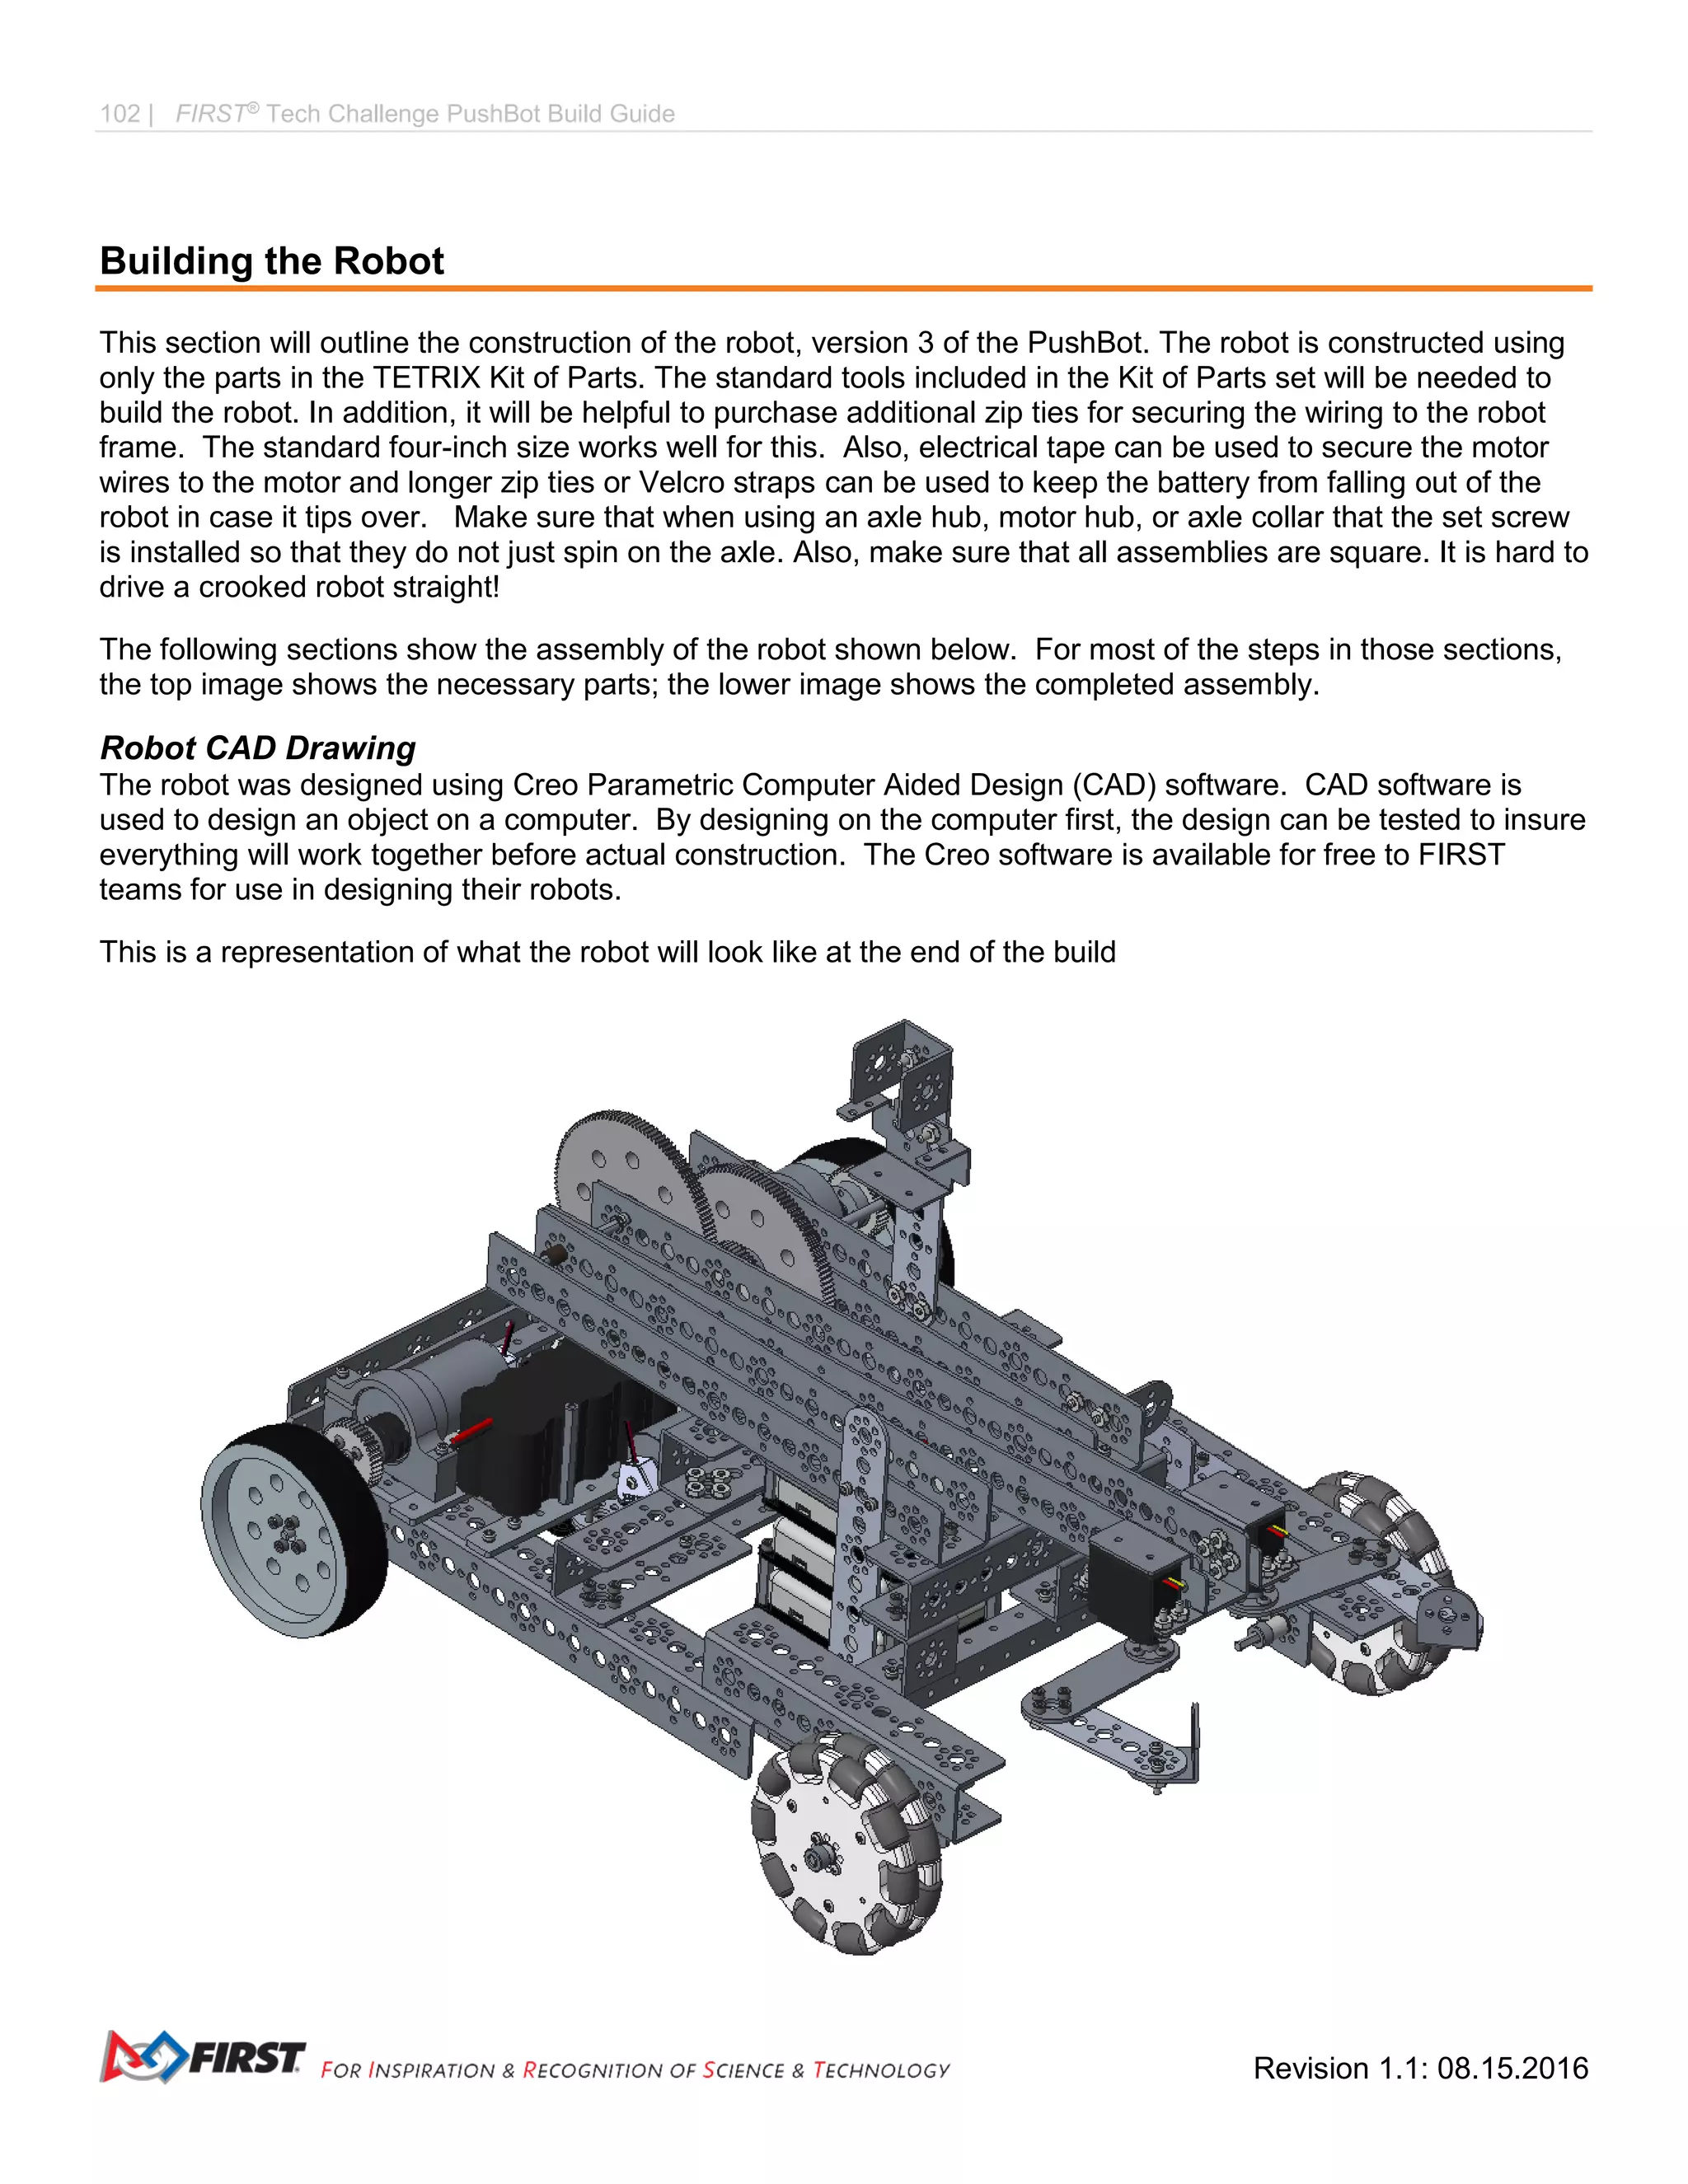
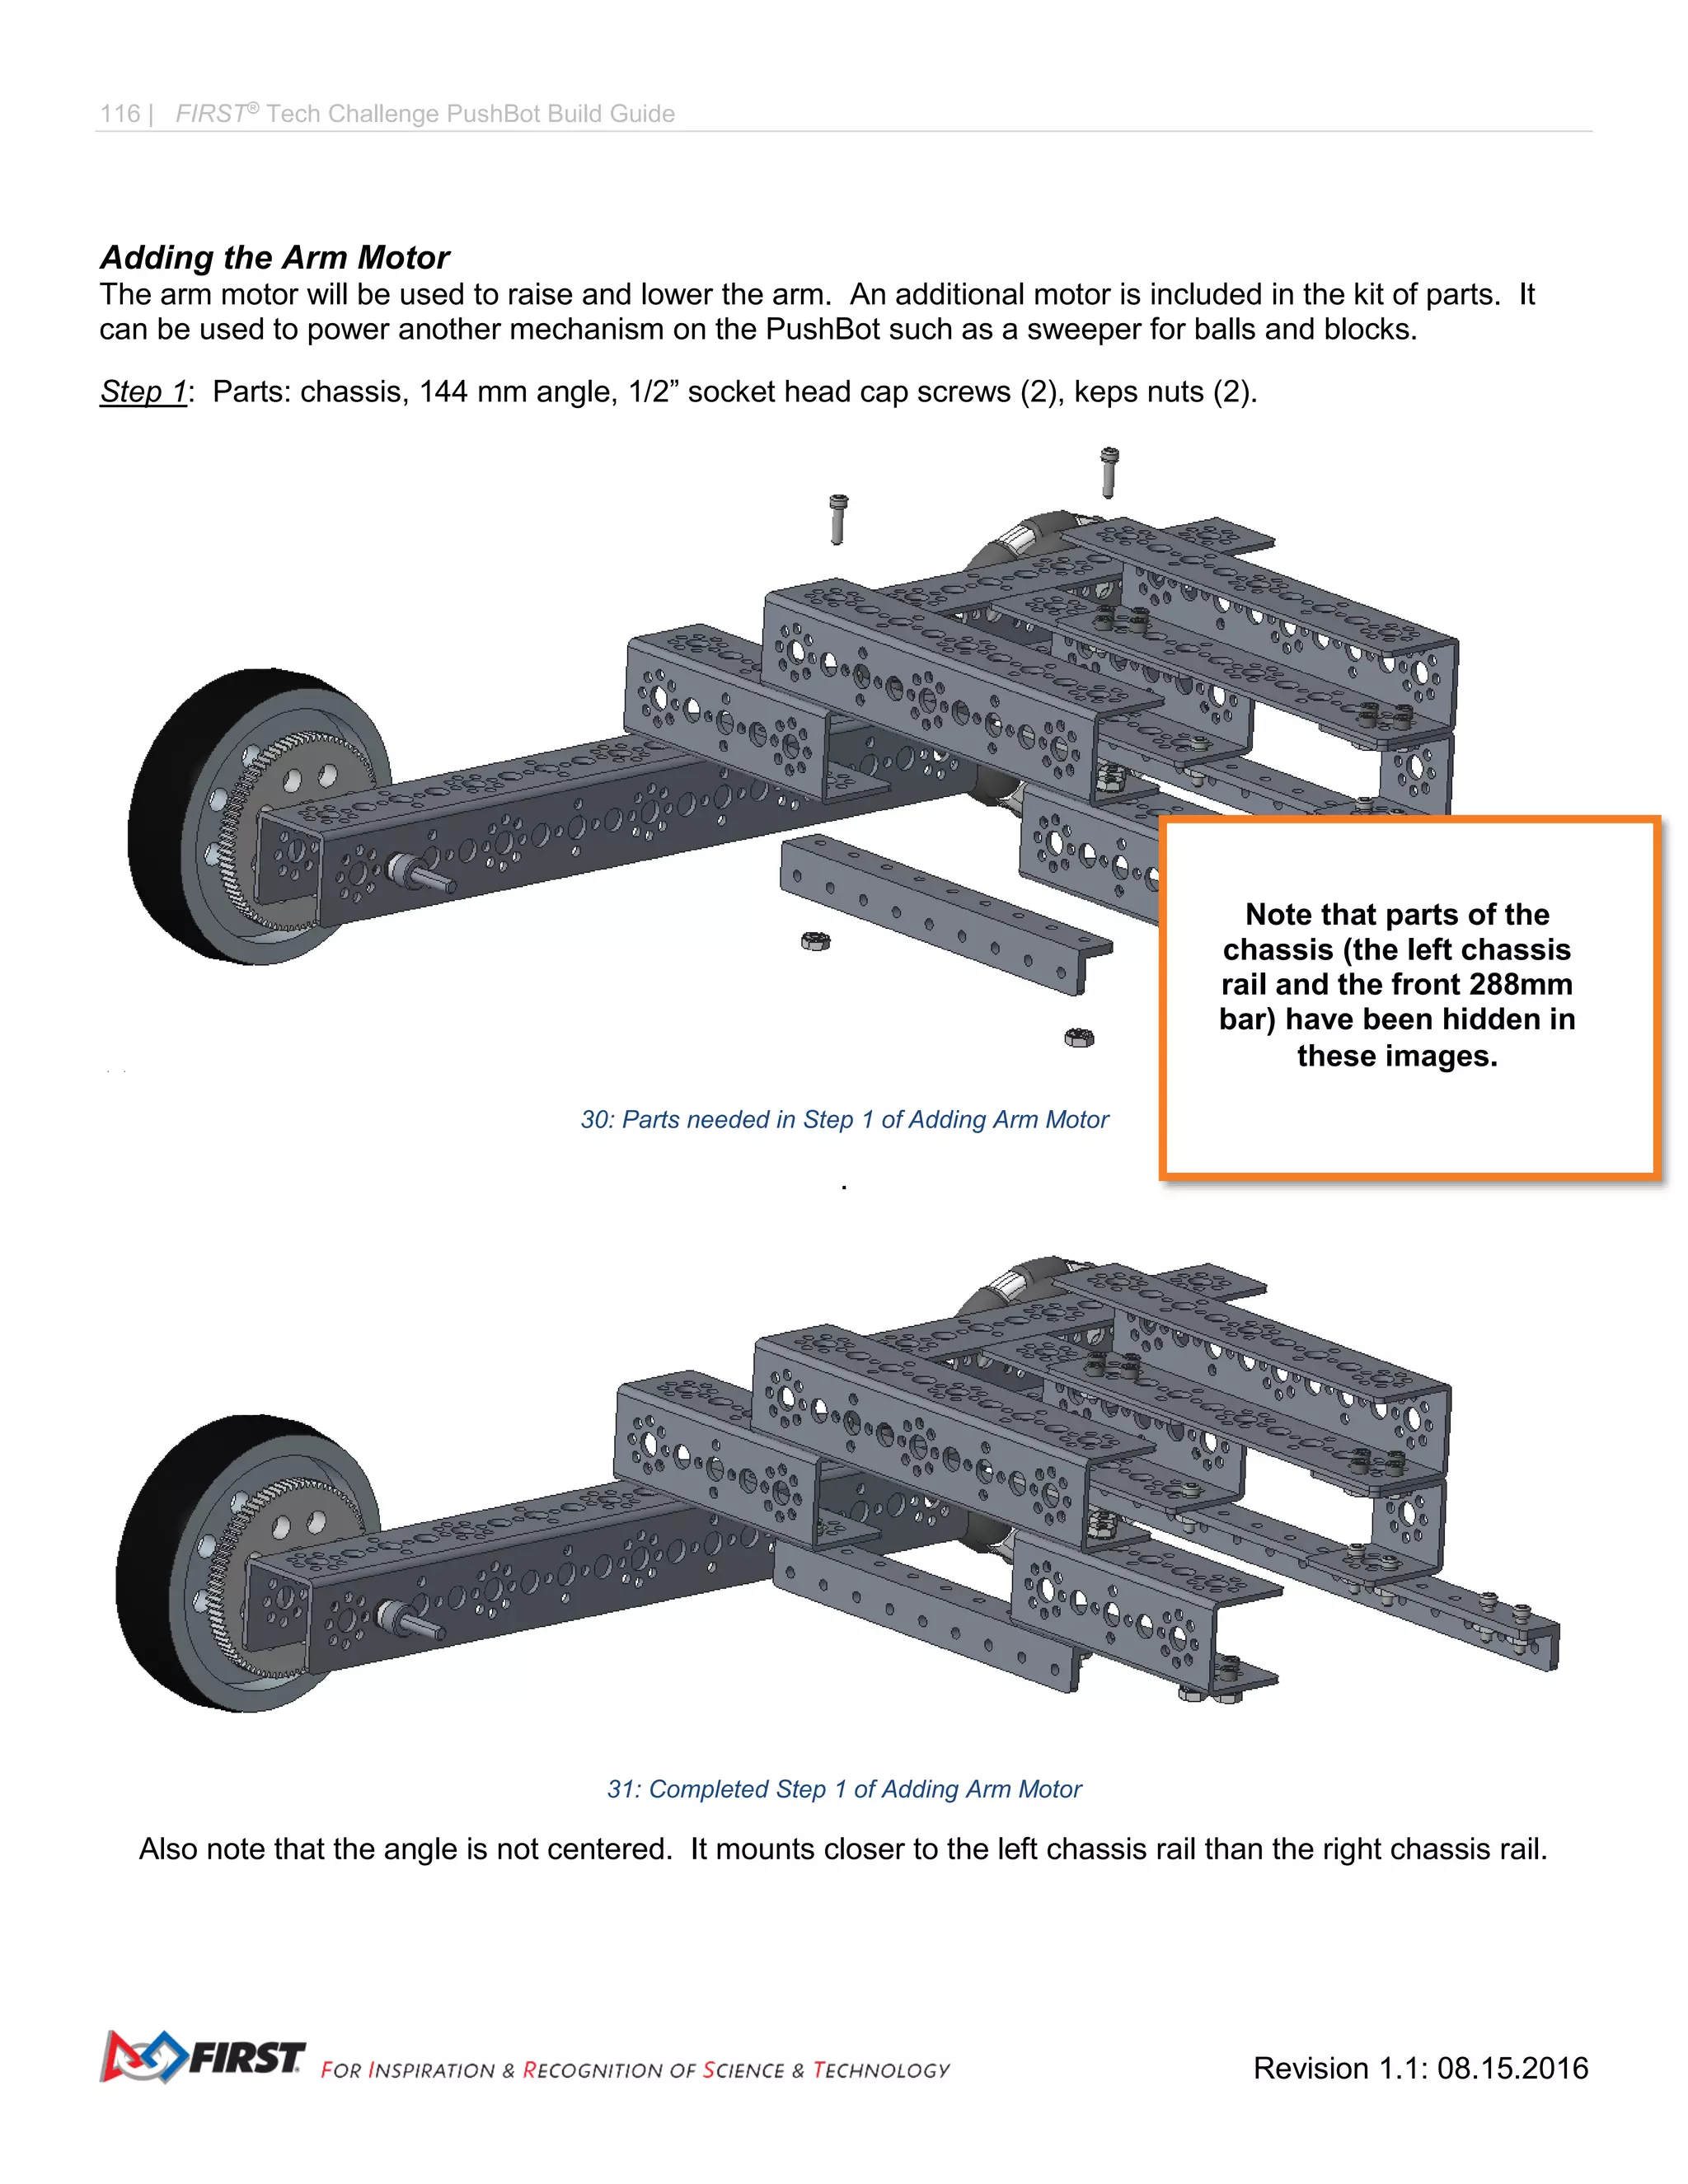
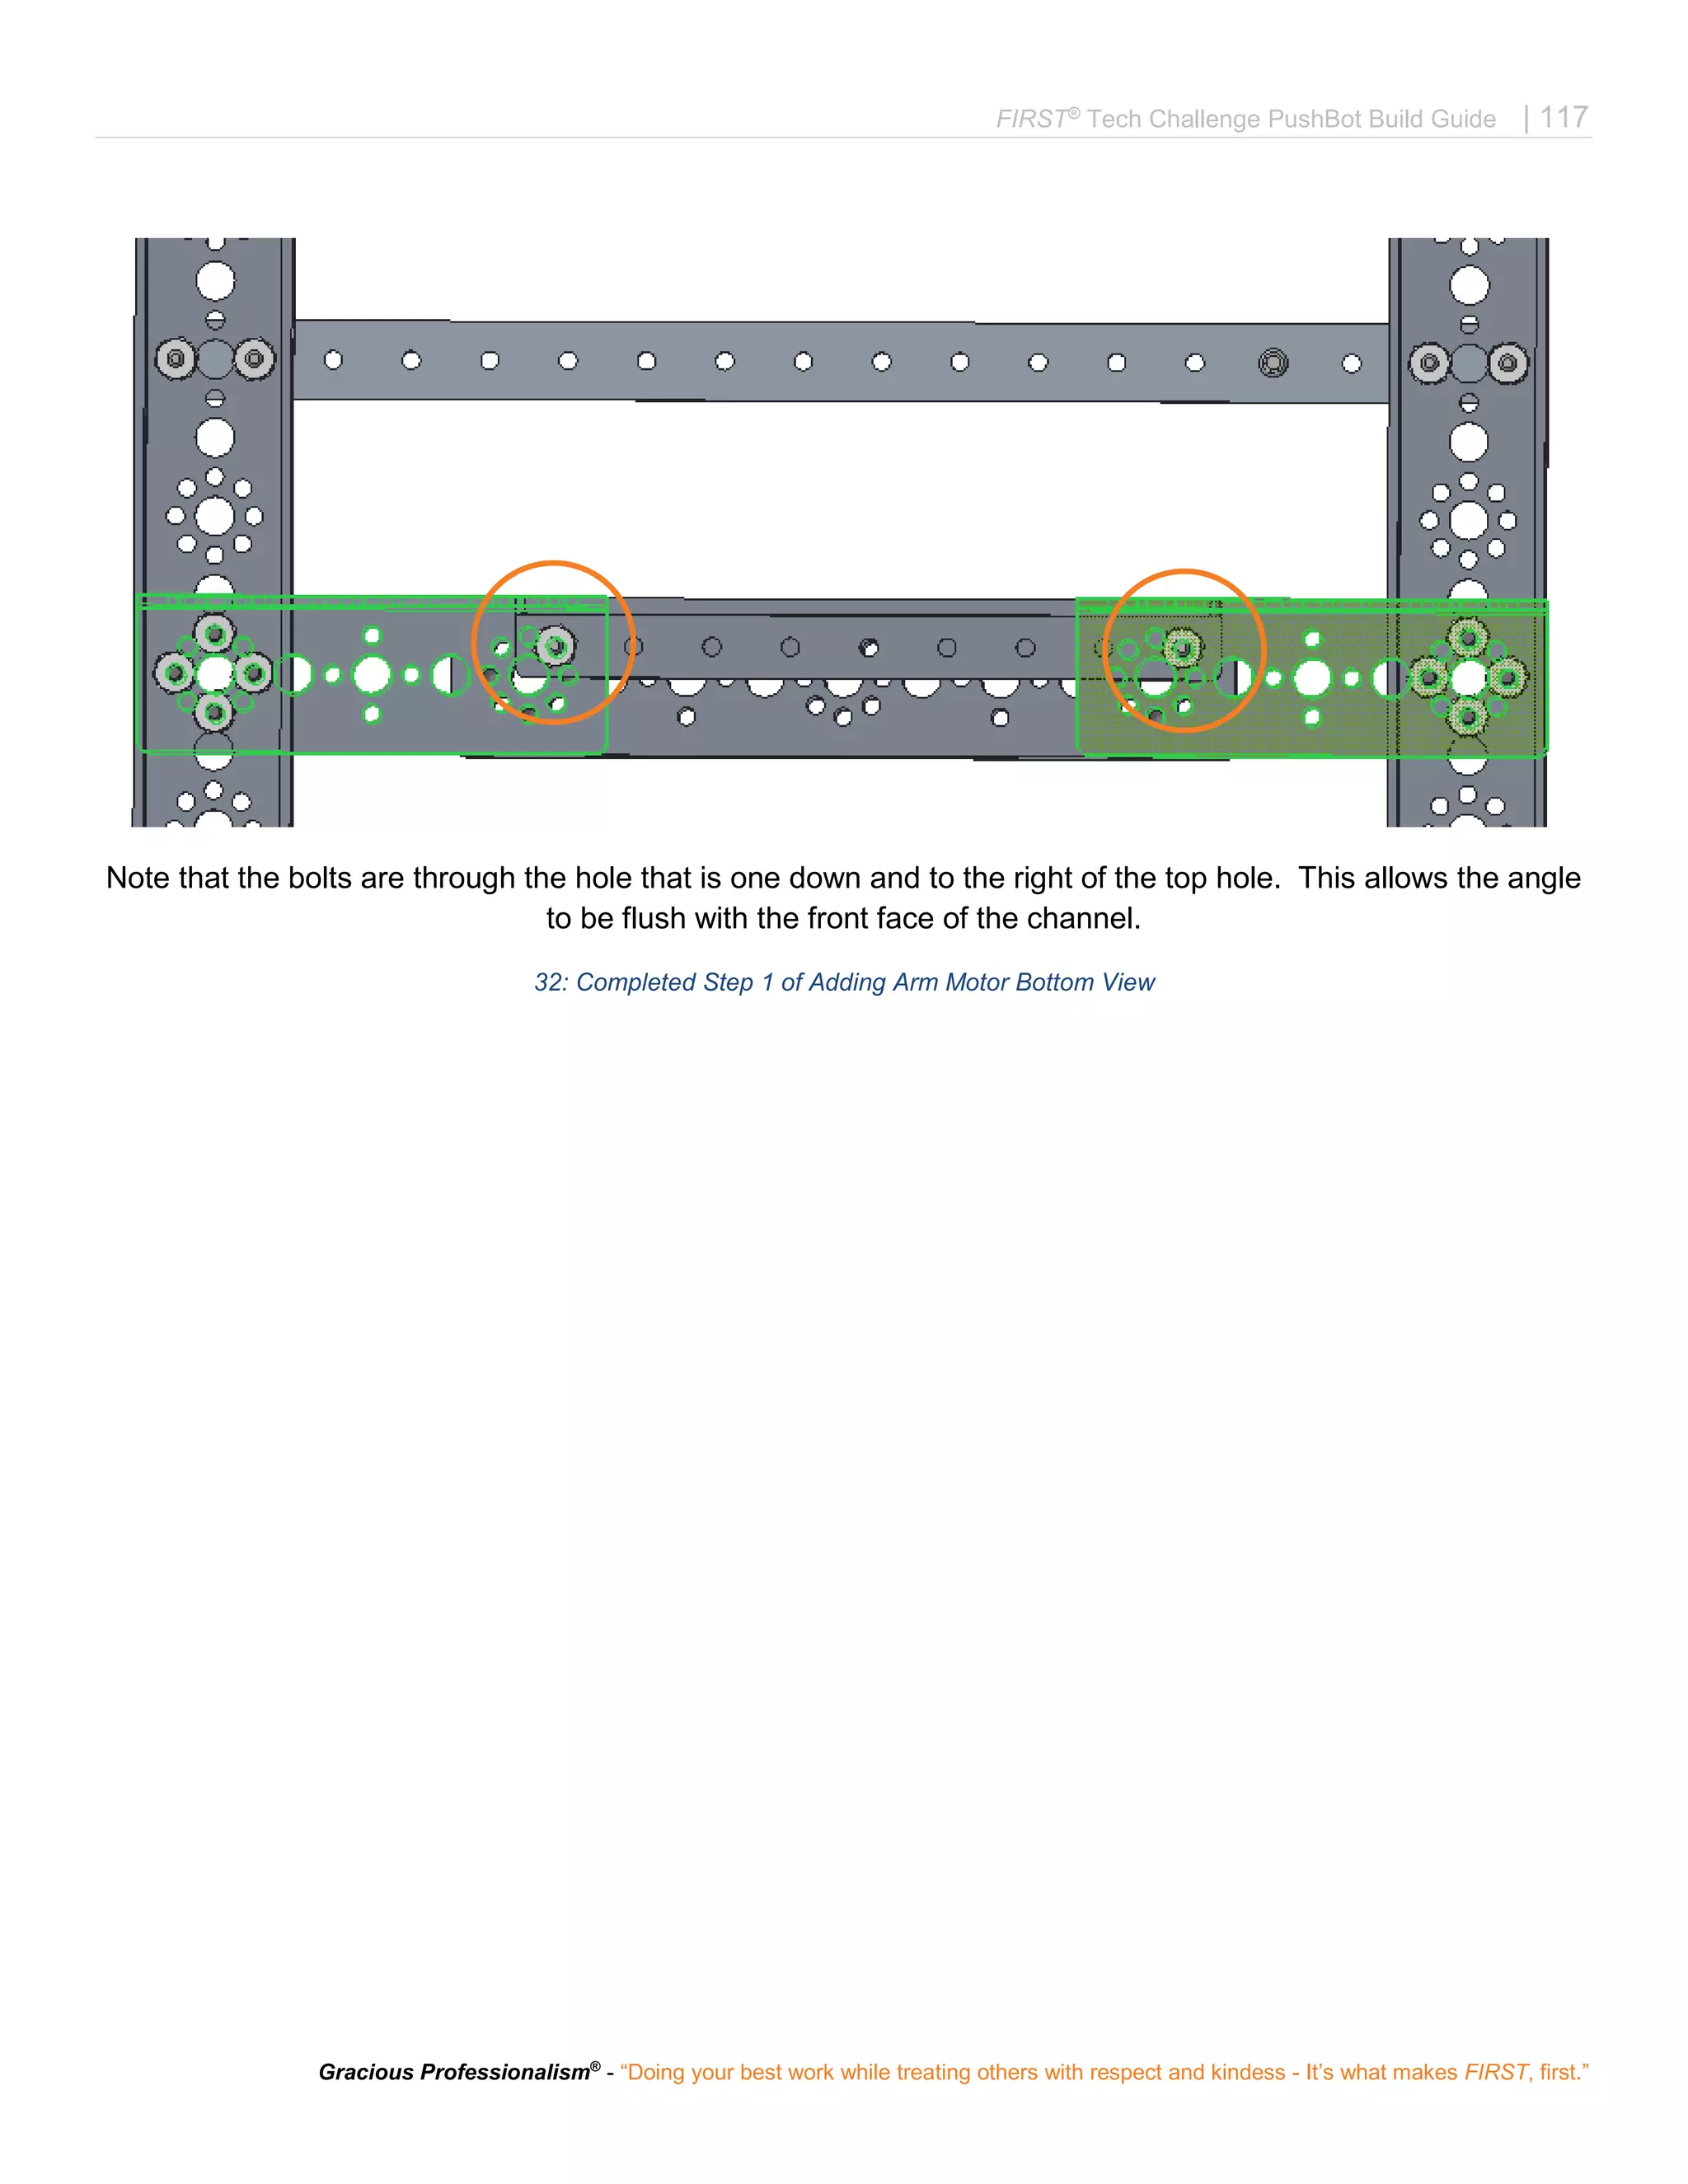
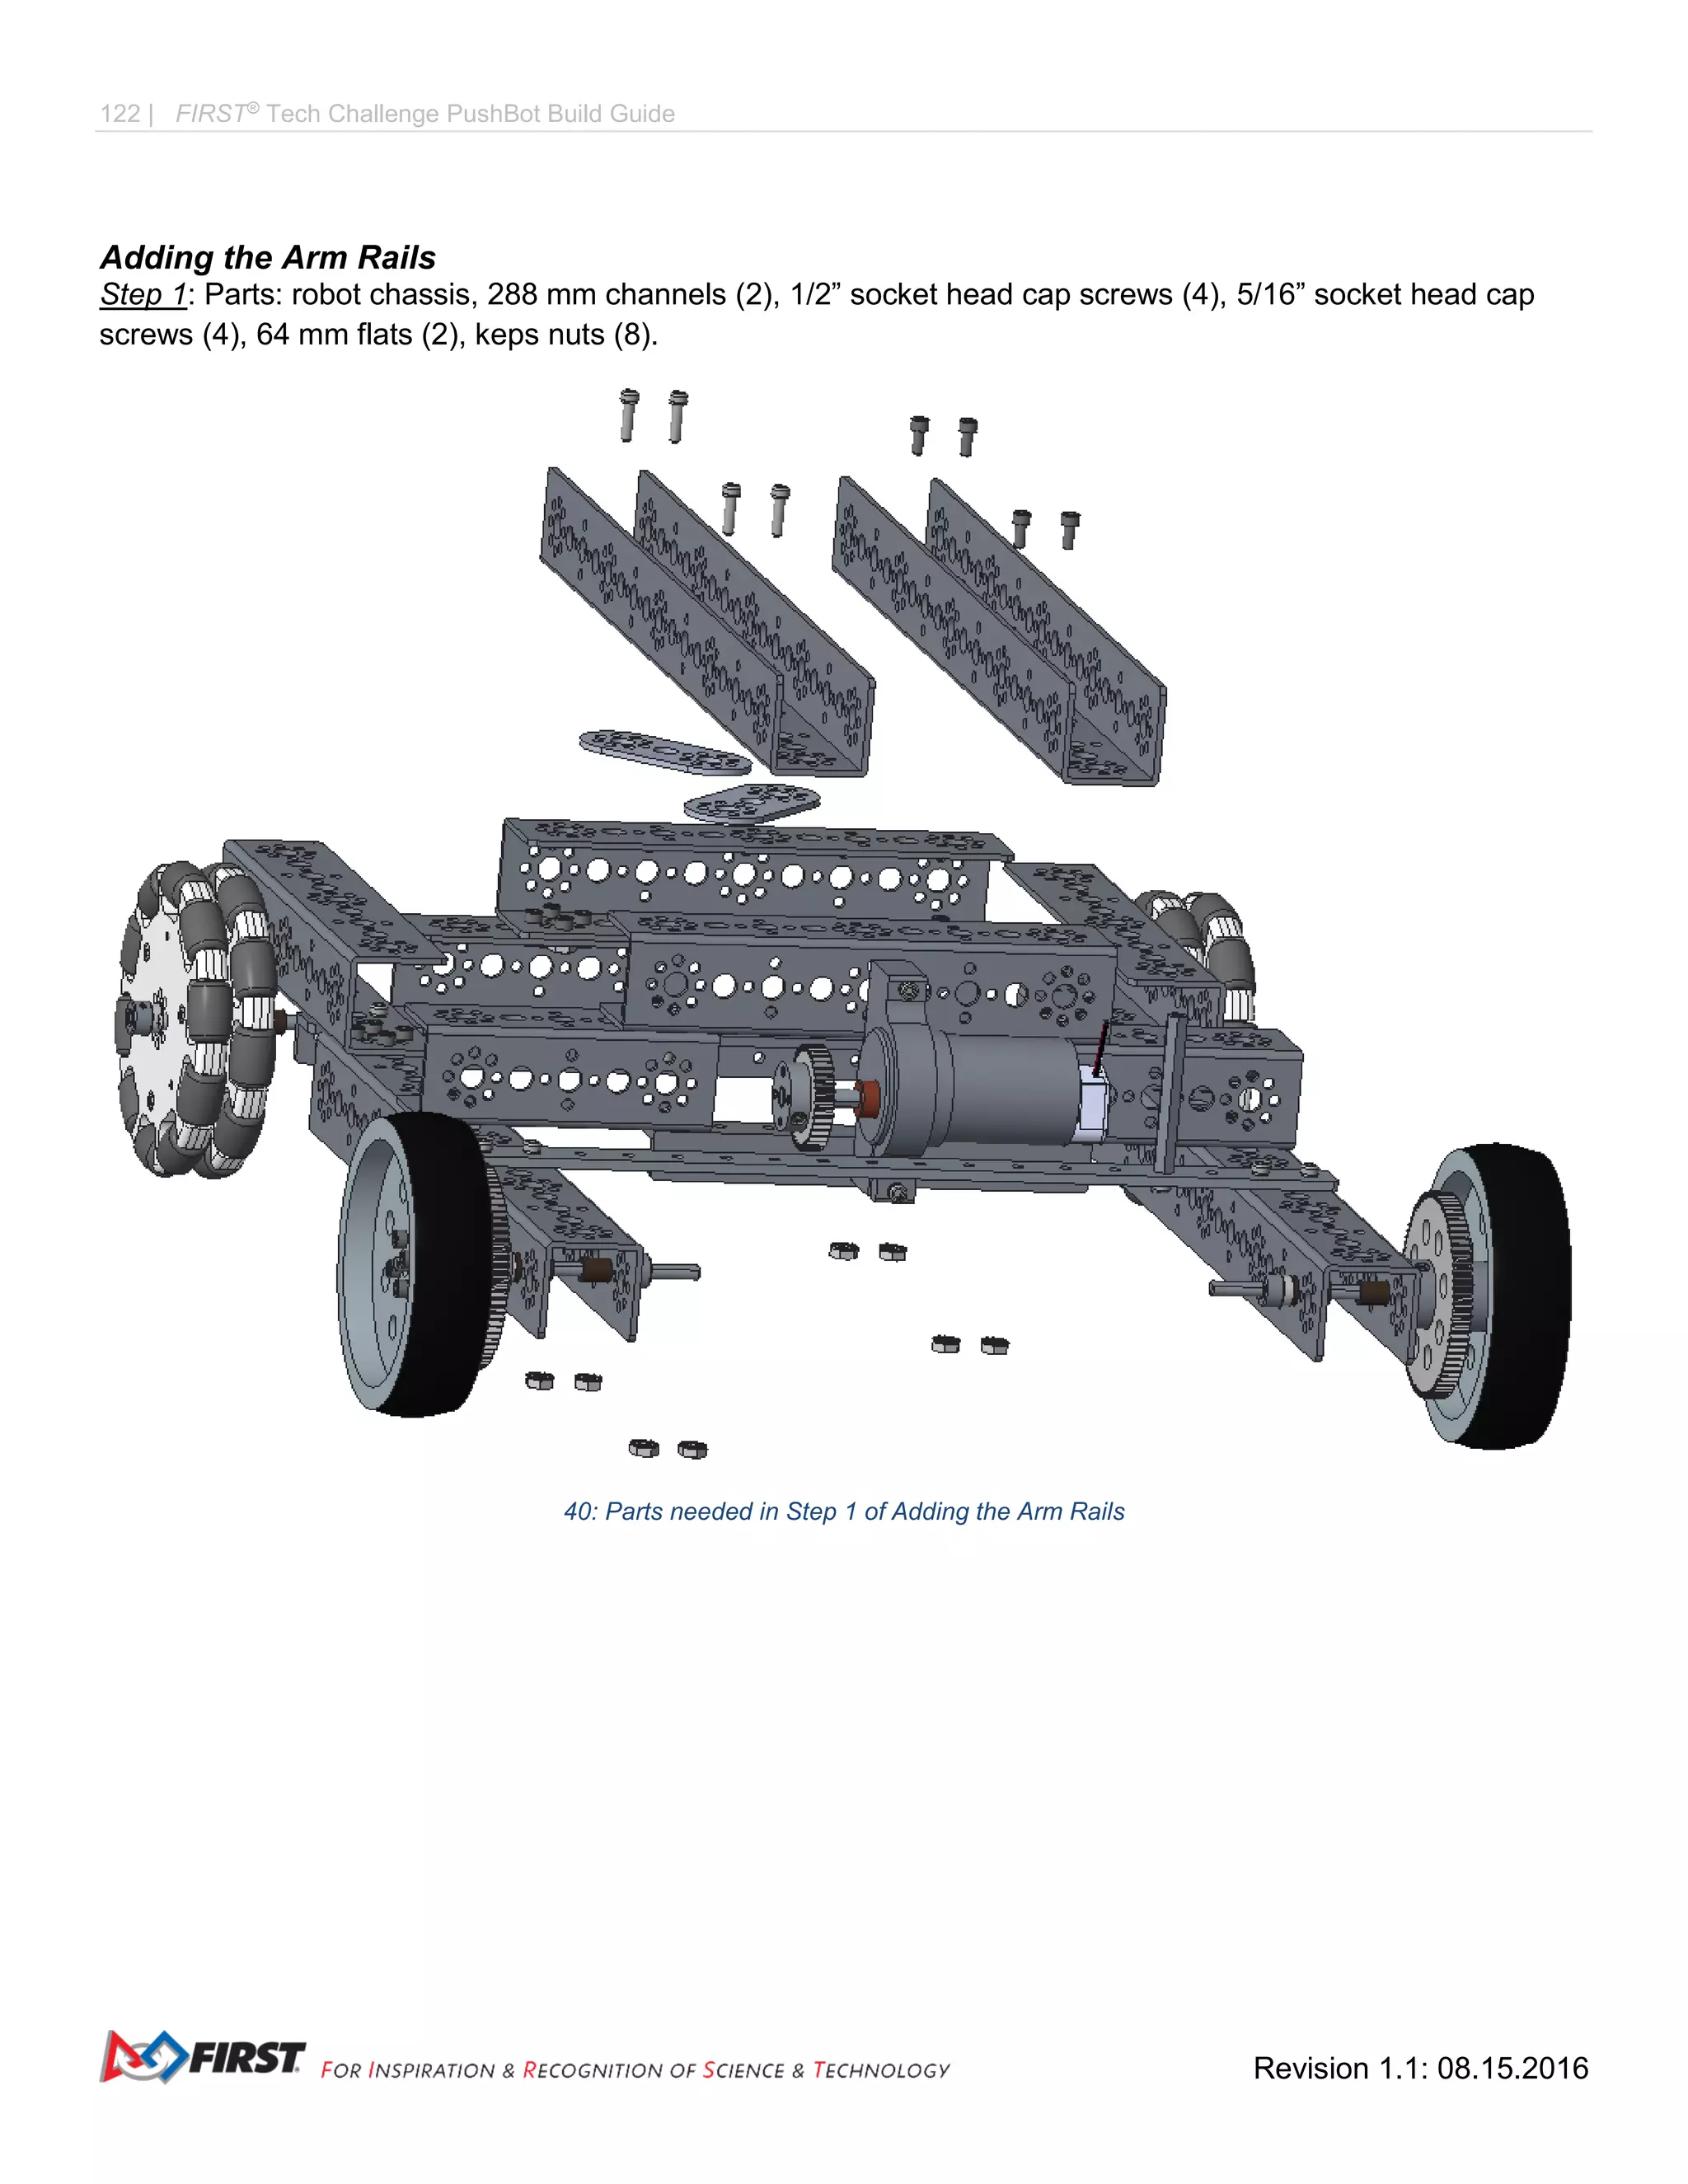
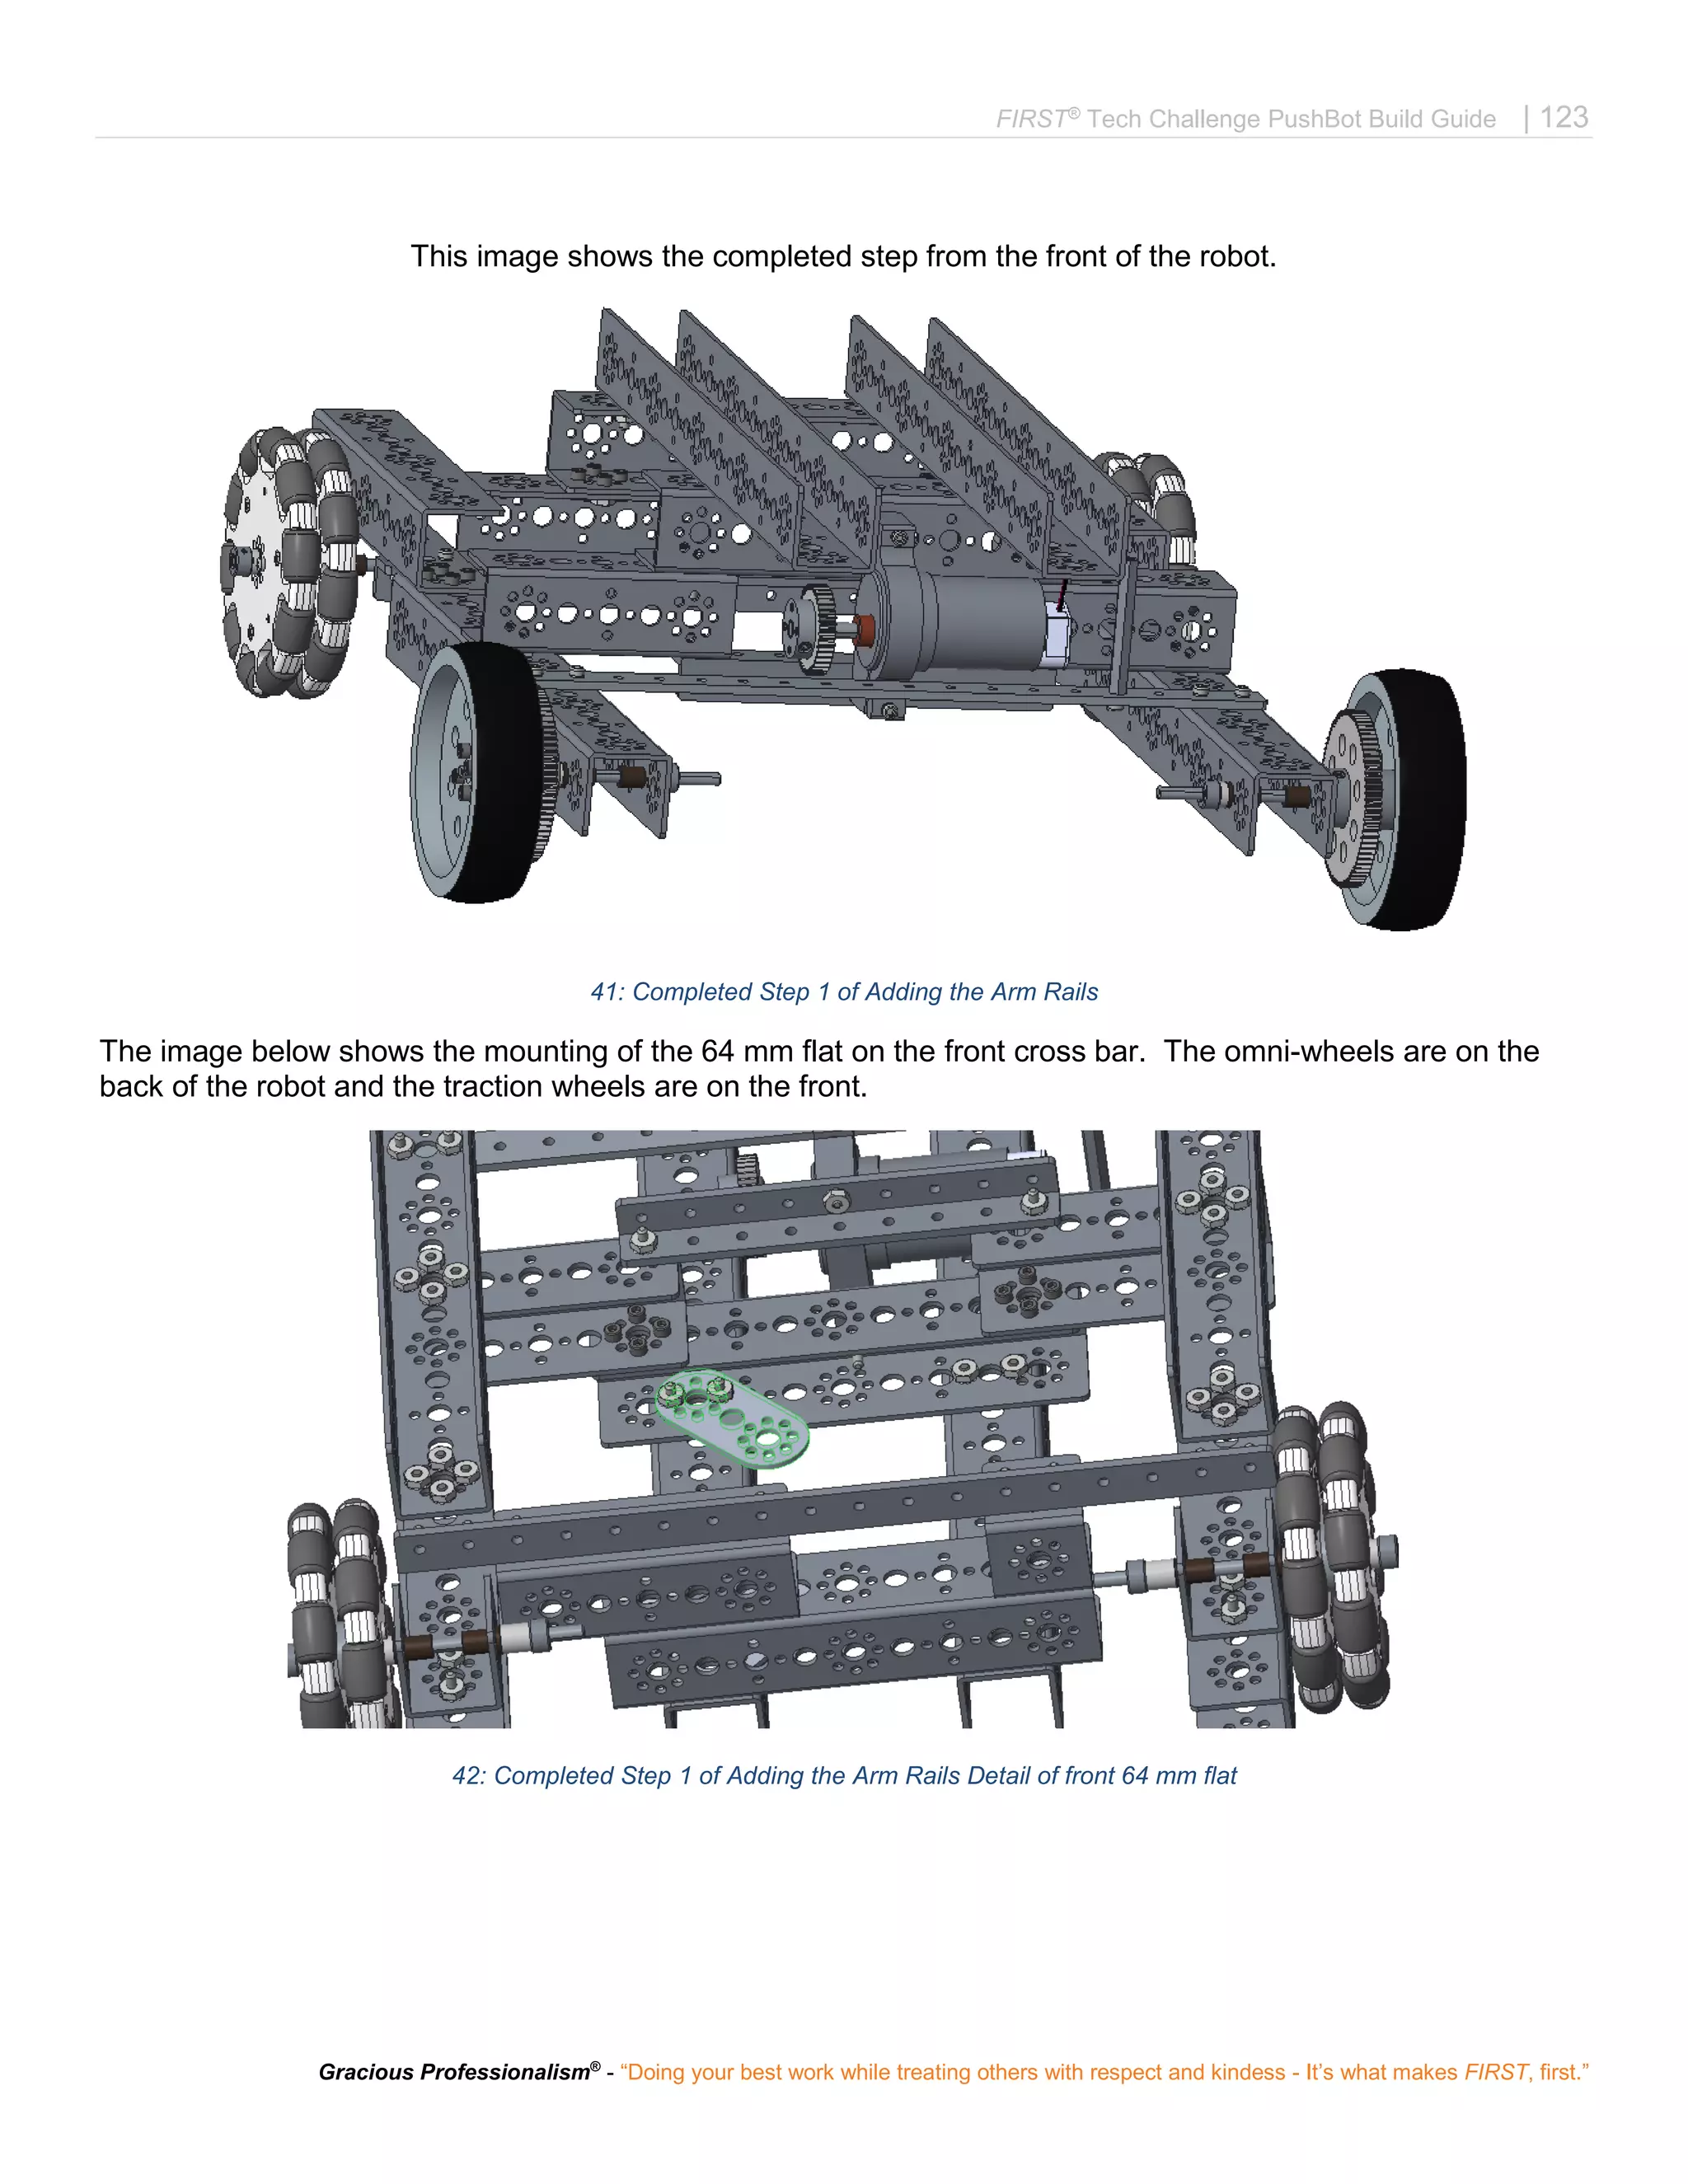
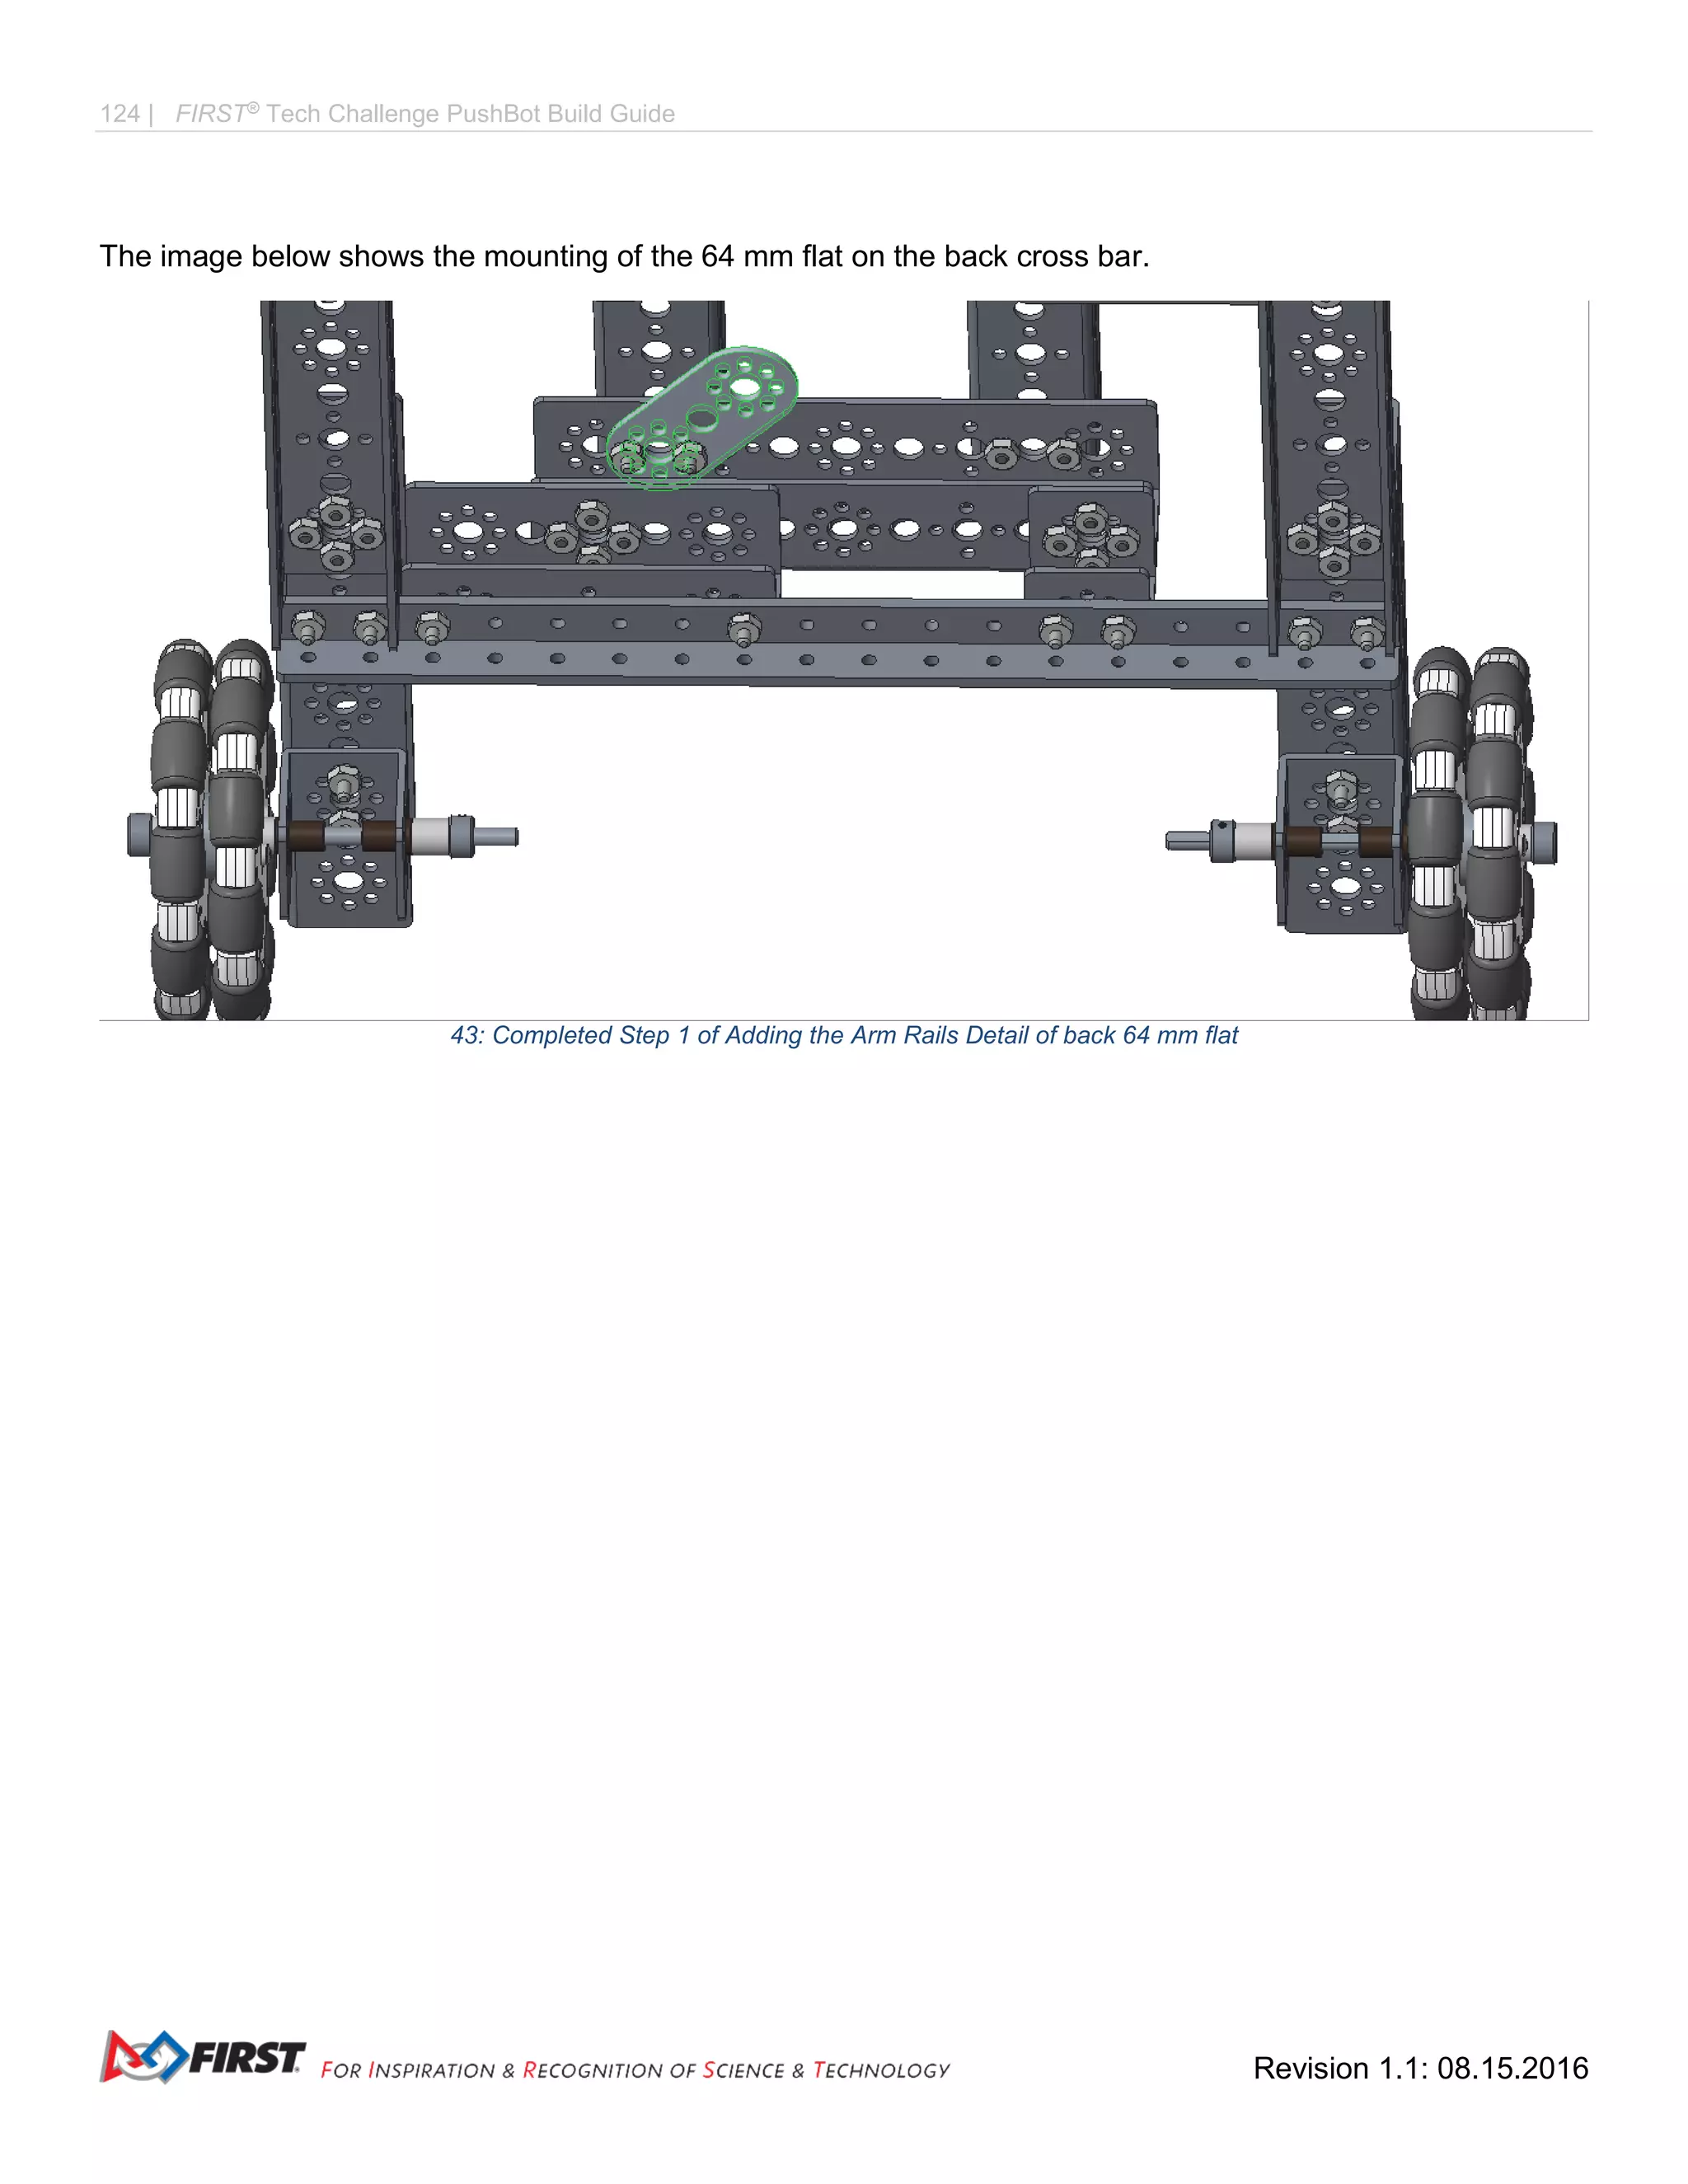
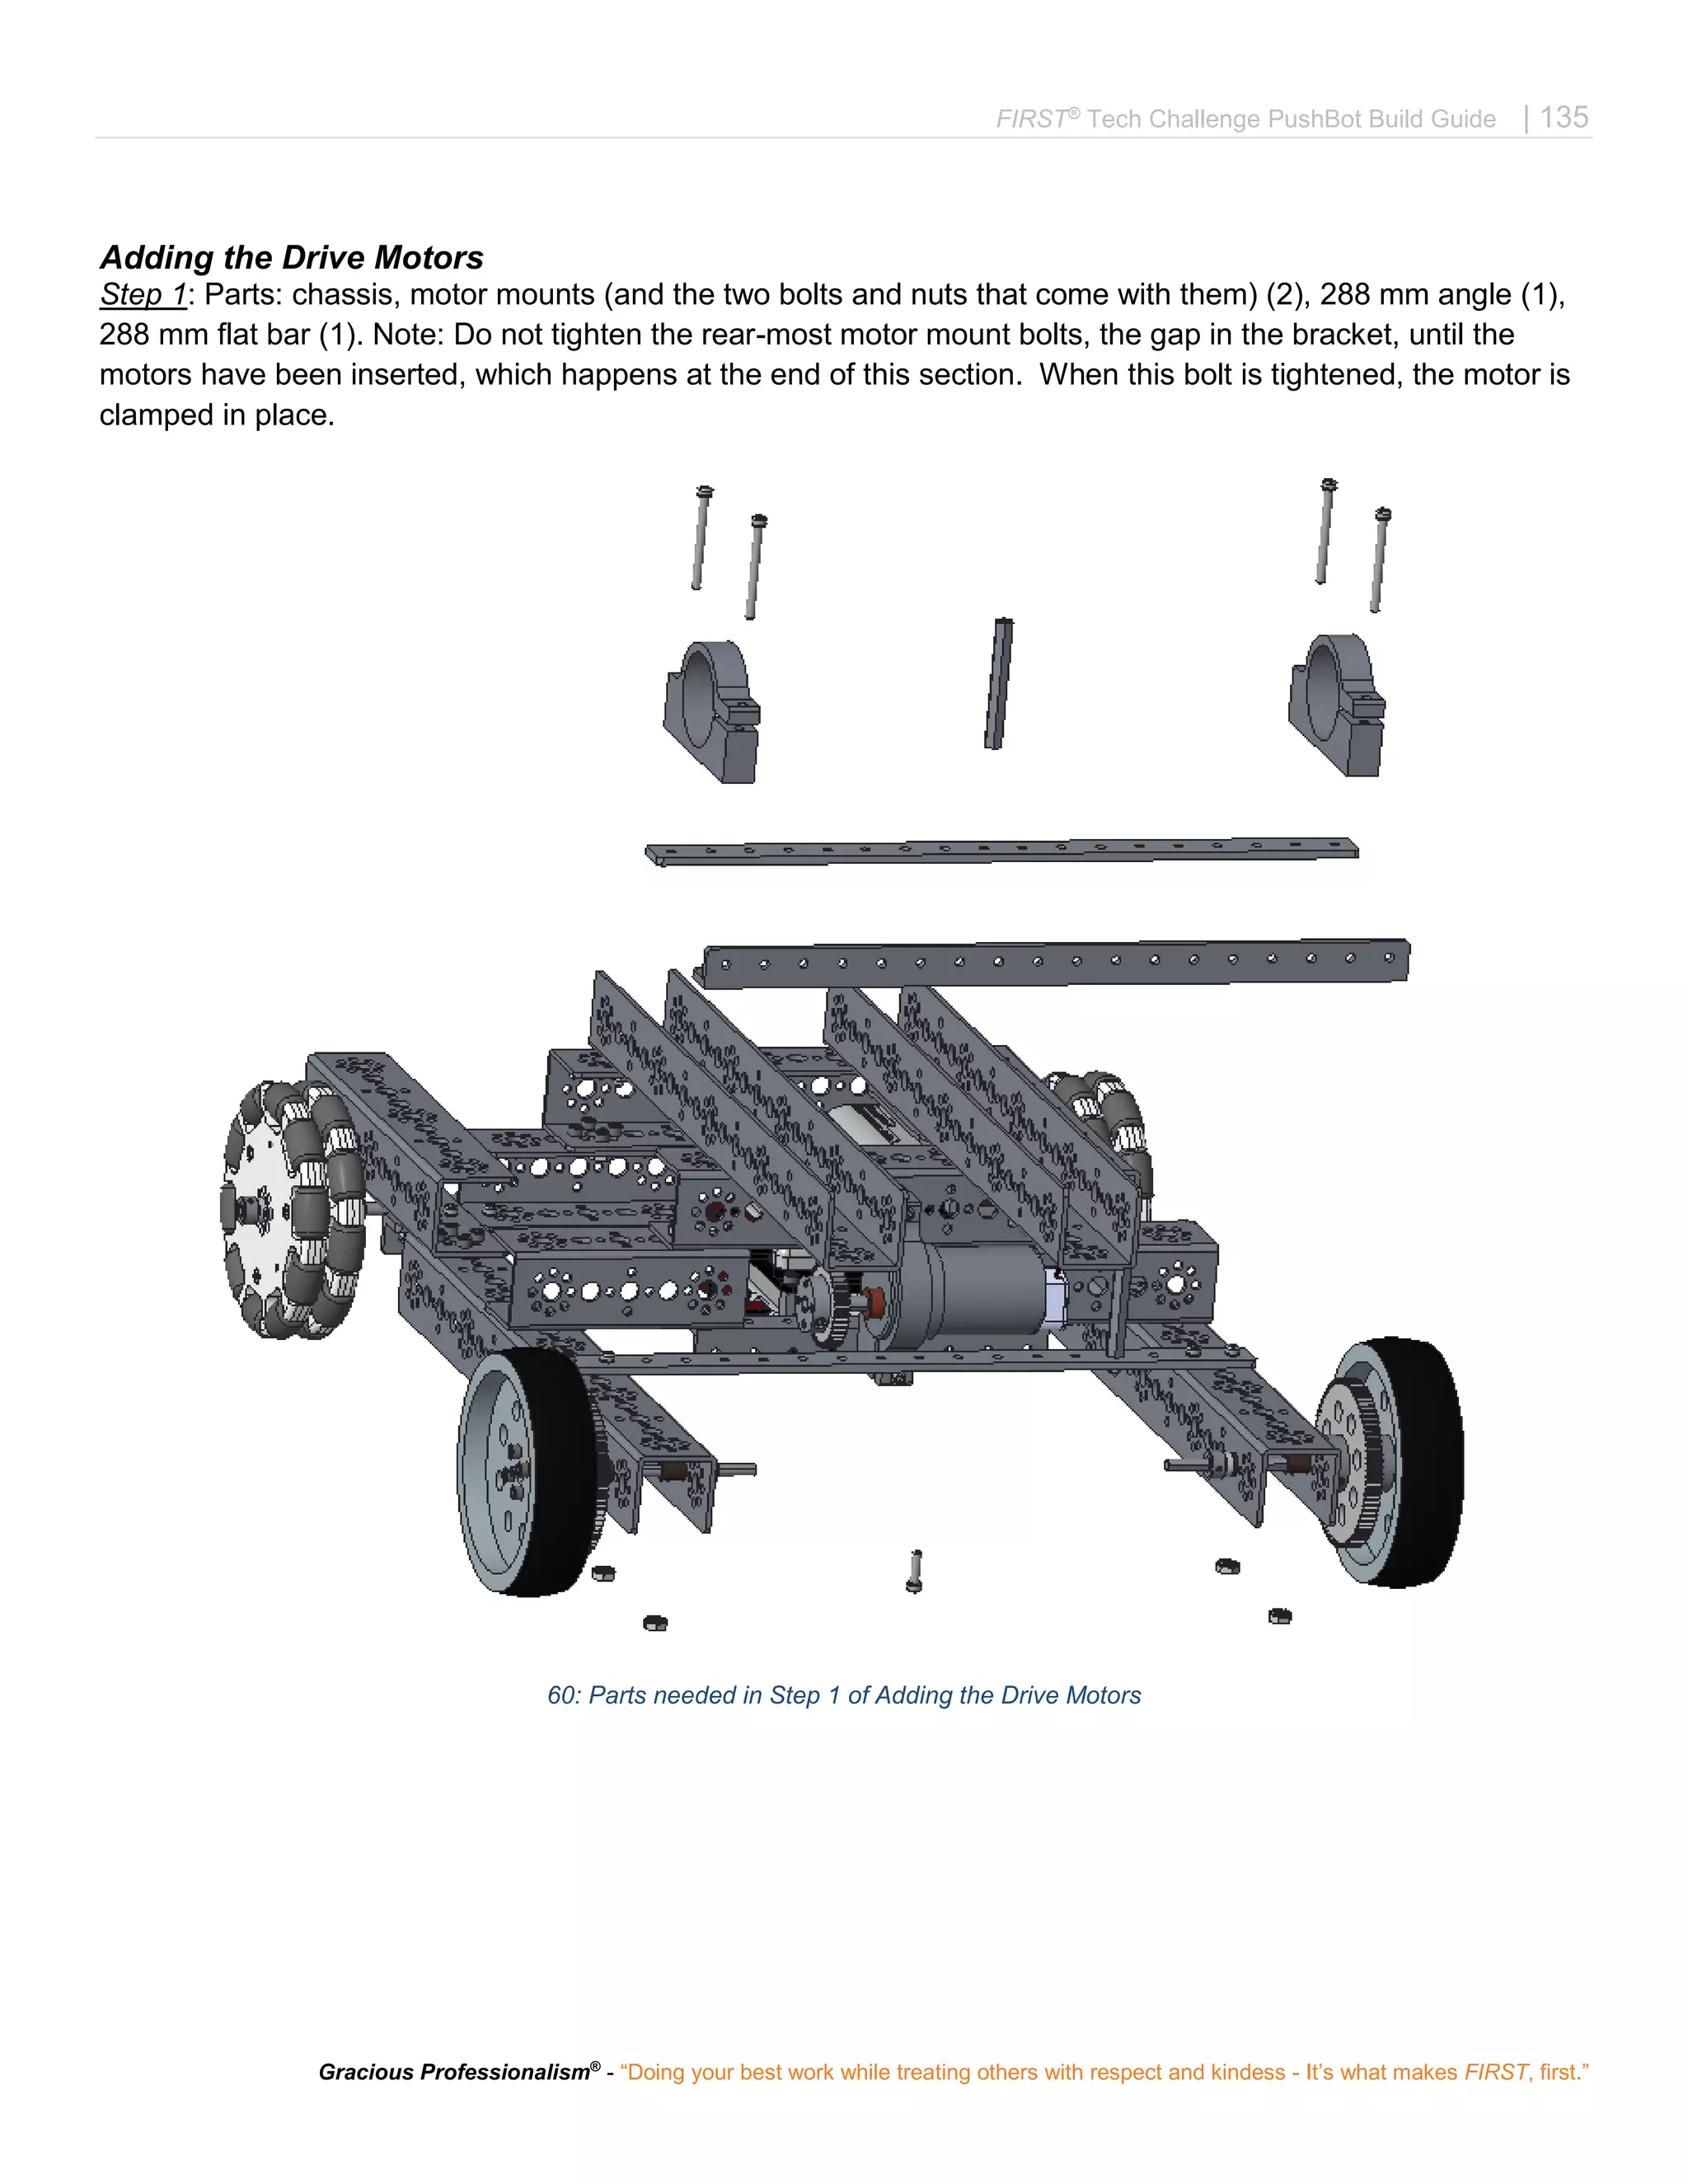
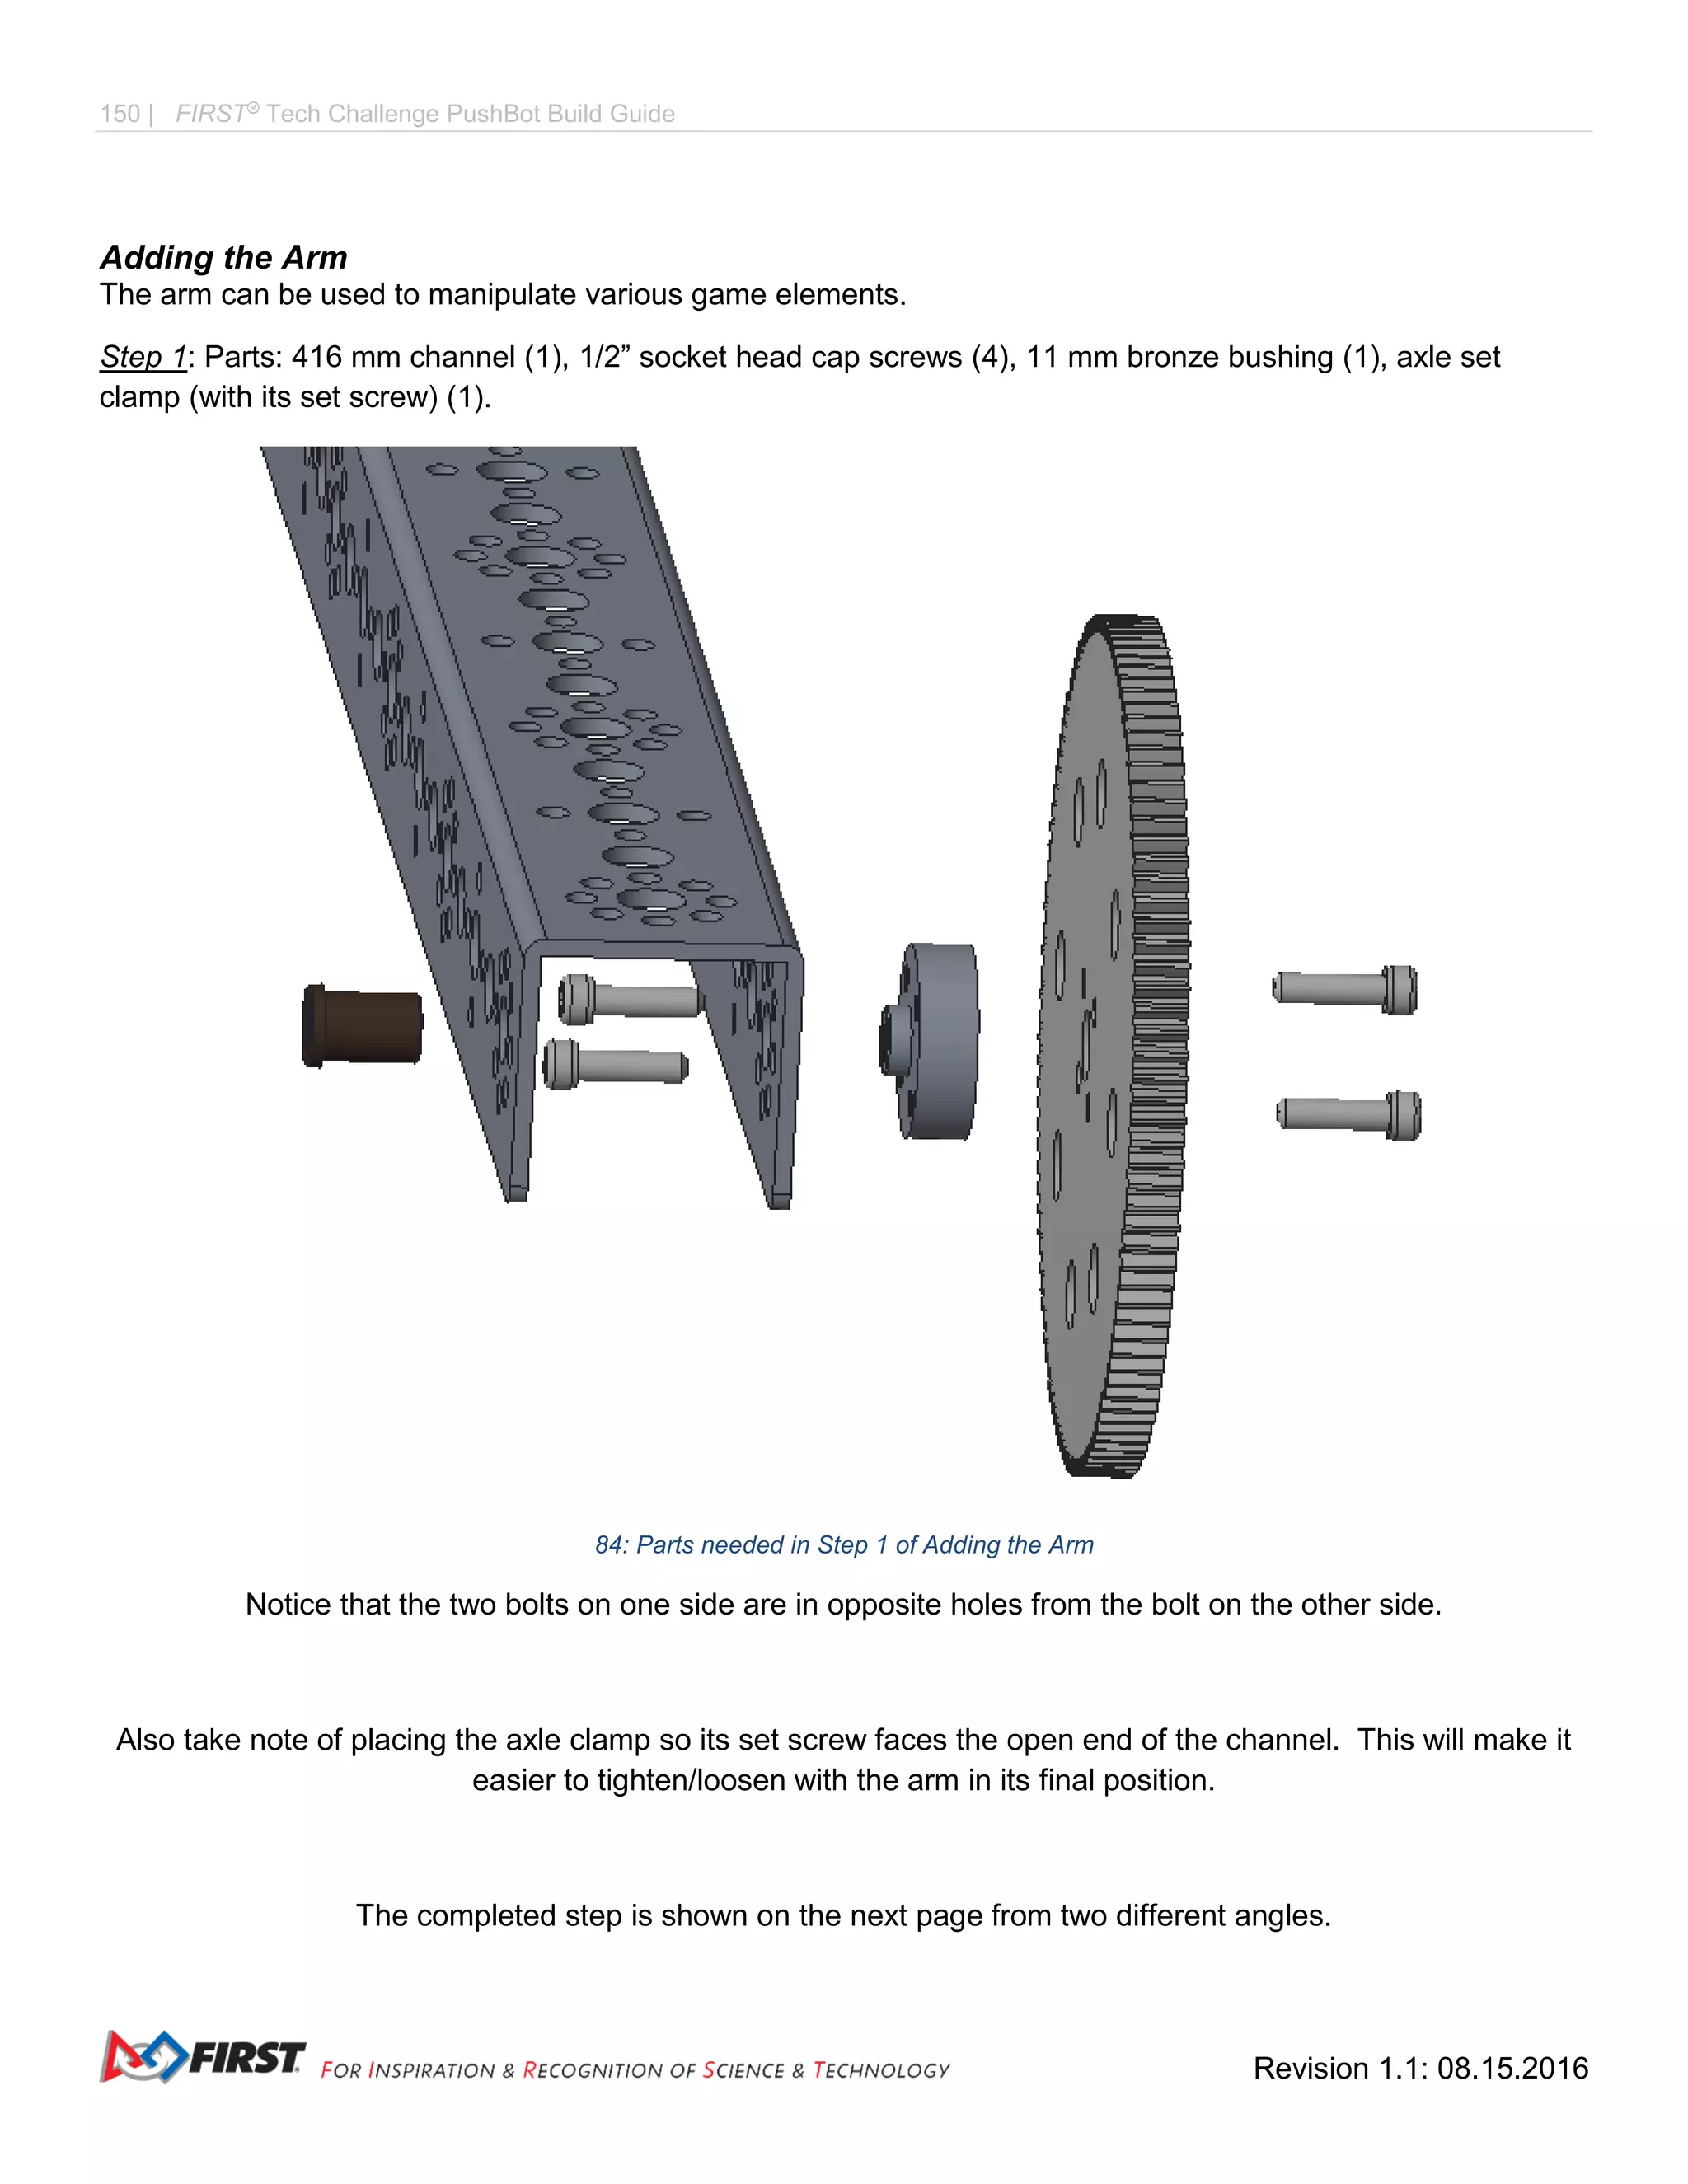
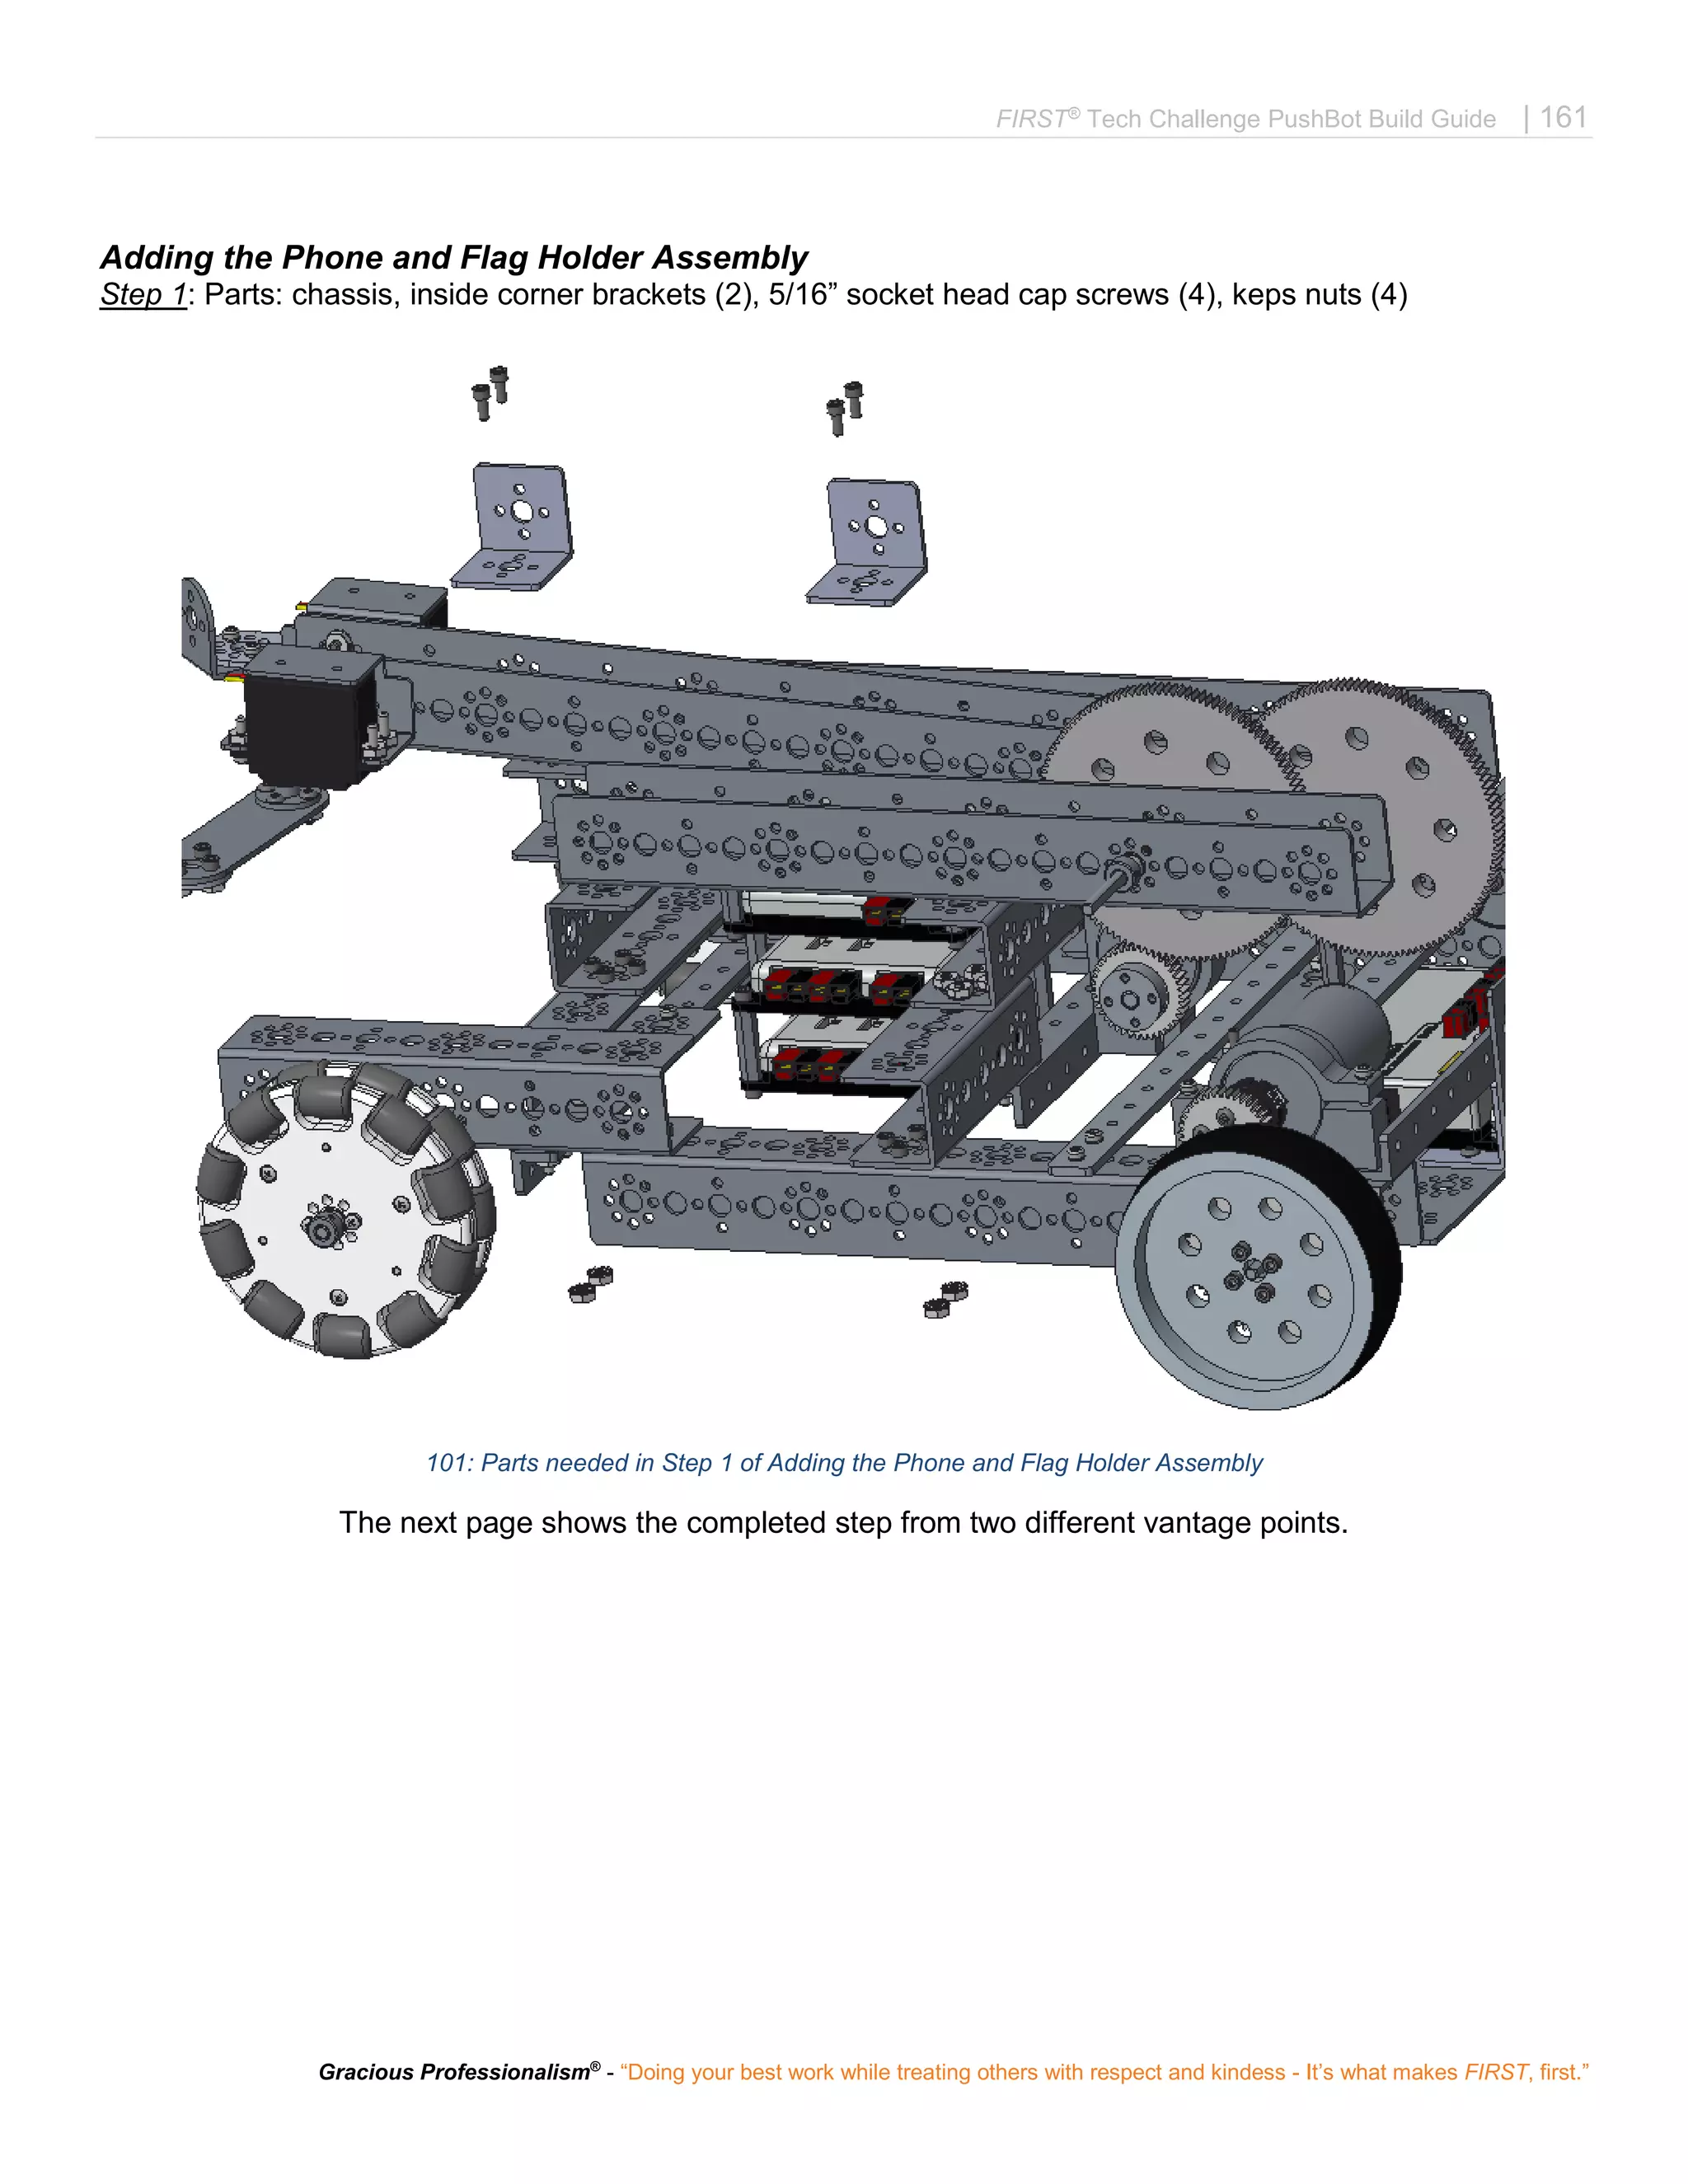
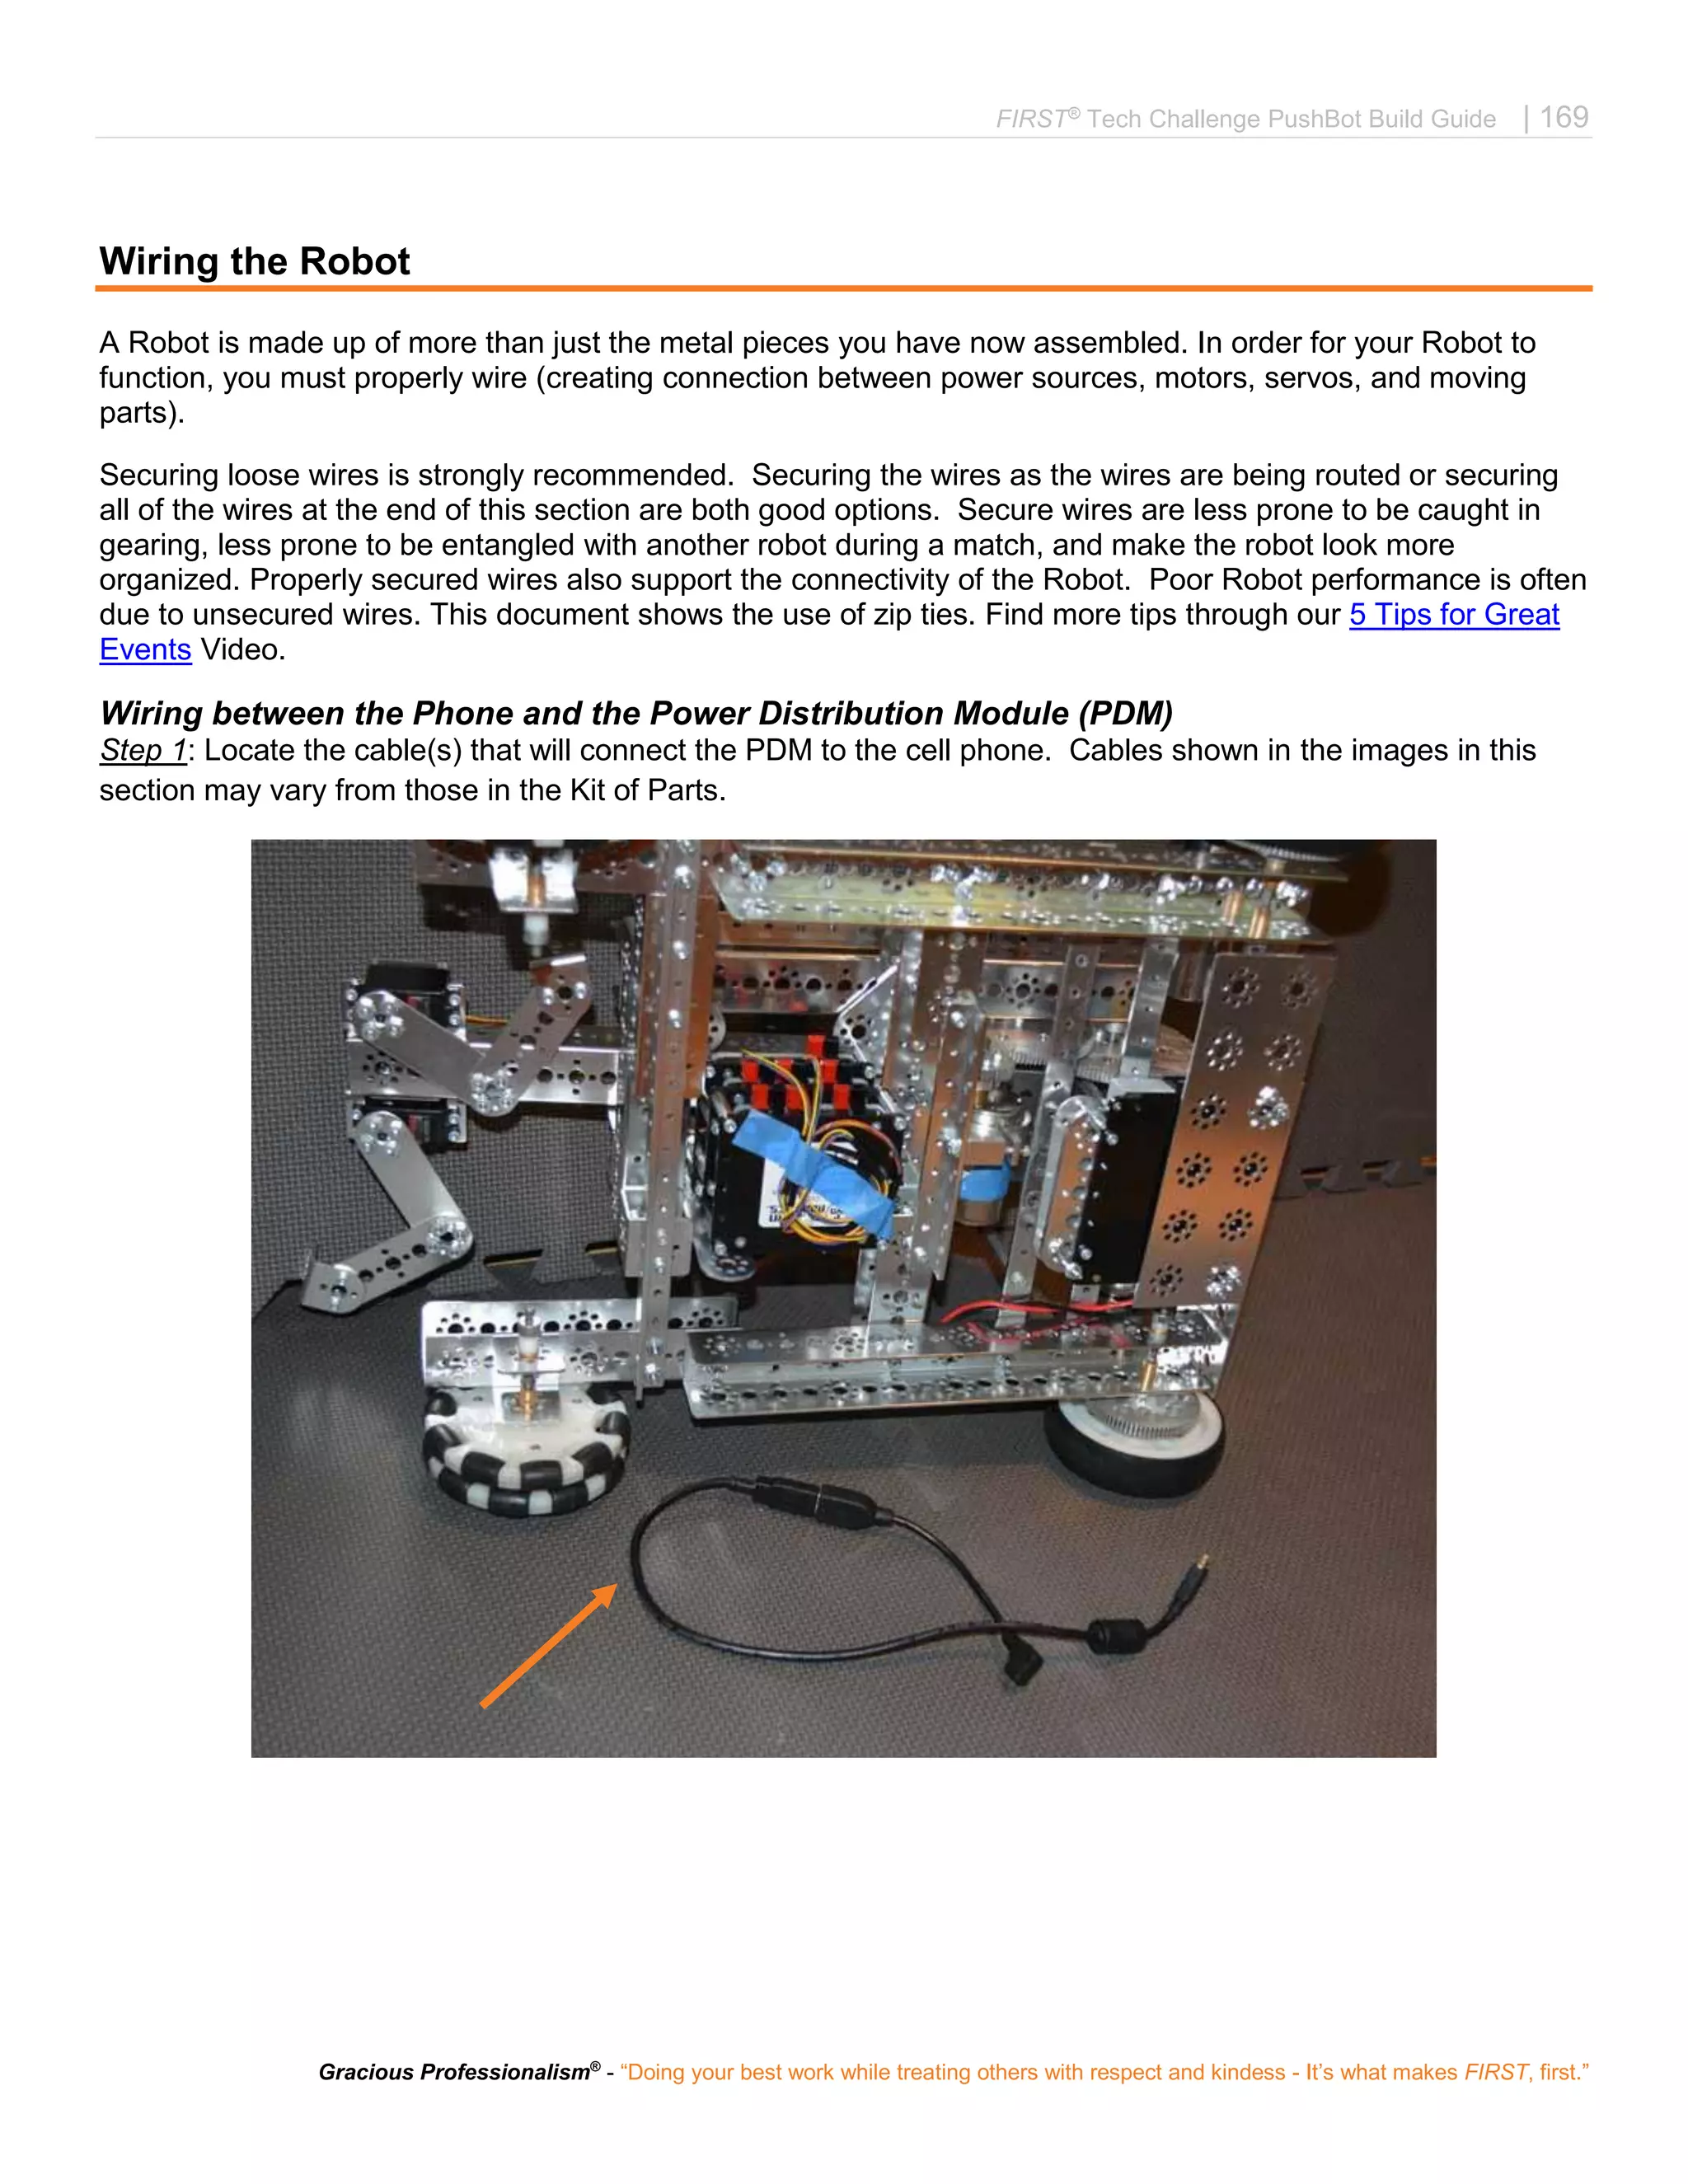
Adding Drive Wheels
[Make 2 copies]
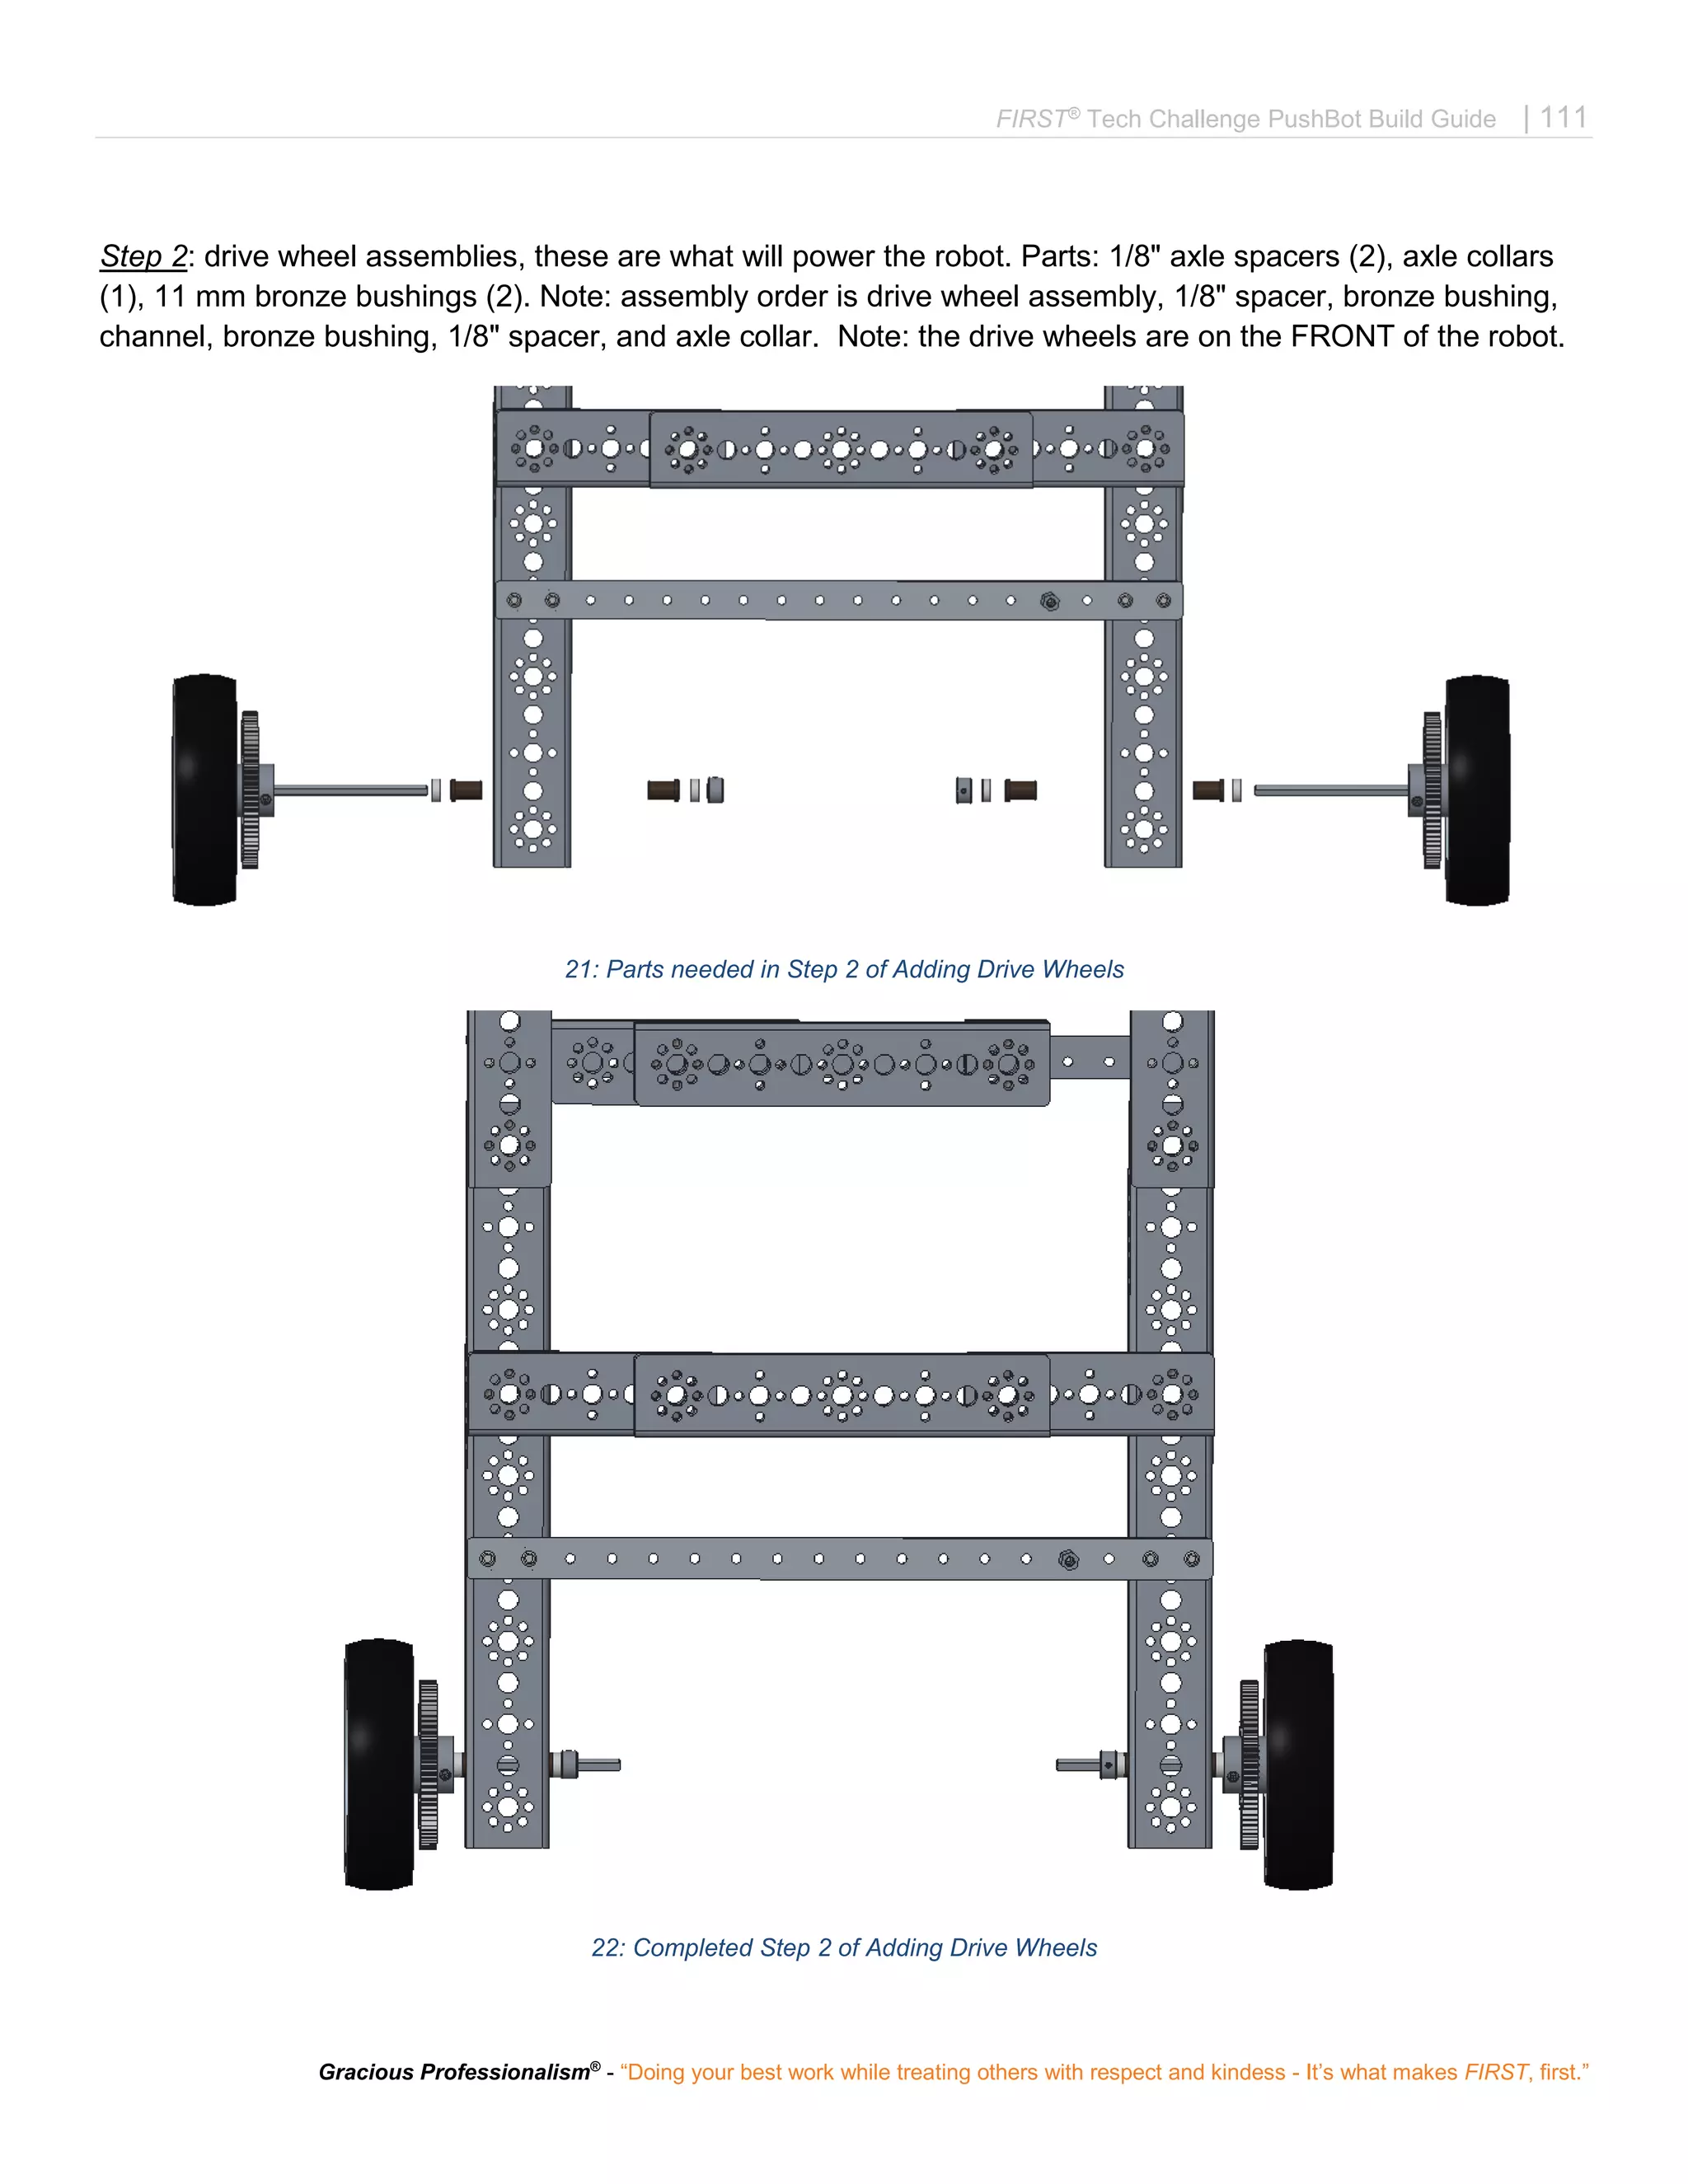
Step 1: Parts: 4" wheel (1), gear hub spacer (1) with included screws (4), axle hub (1), and 100 mm axle (1).
The order is wheel, gear hub spacer, gear and then axle hub.
19: Parts needed in Step 1 of Adding Drive Wheels
20: Completed Step 1 of Adding Drive Wheels](https://image.slidesharecdn.com/pushbot-build-guide-170705193132/75/FTC-PushBot-Build-Guide-110-2048.jpg)
![112 | FIRST®
Tech Challenge PushBot Build Guide
Revision 1.1: 08.15.2016
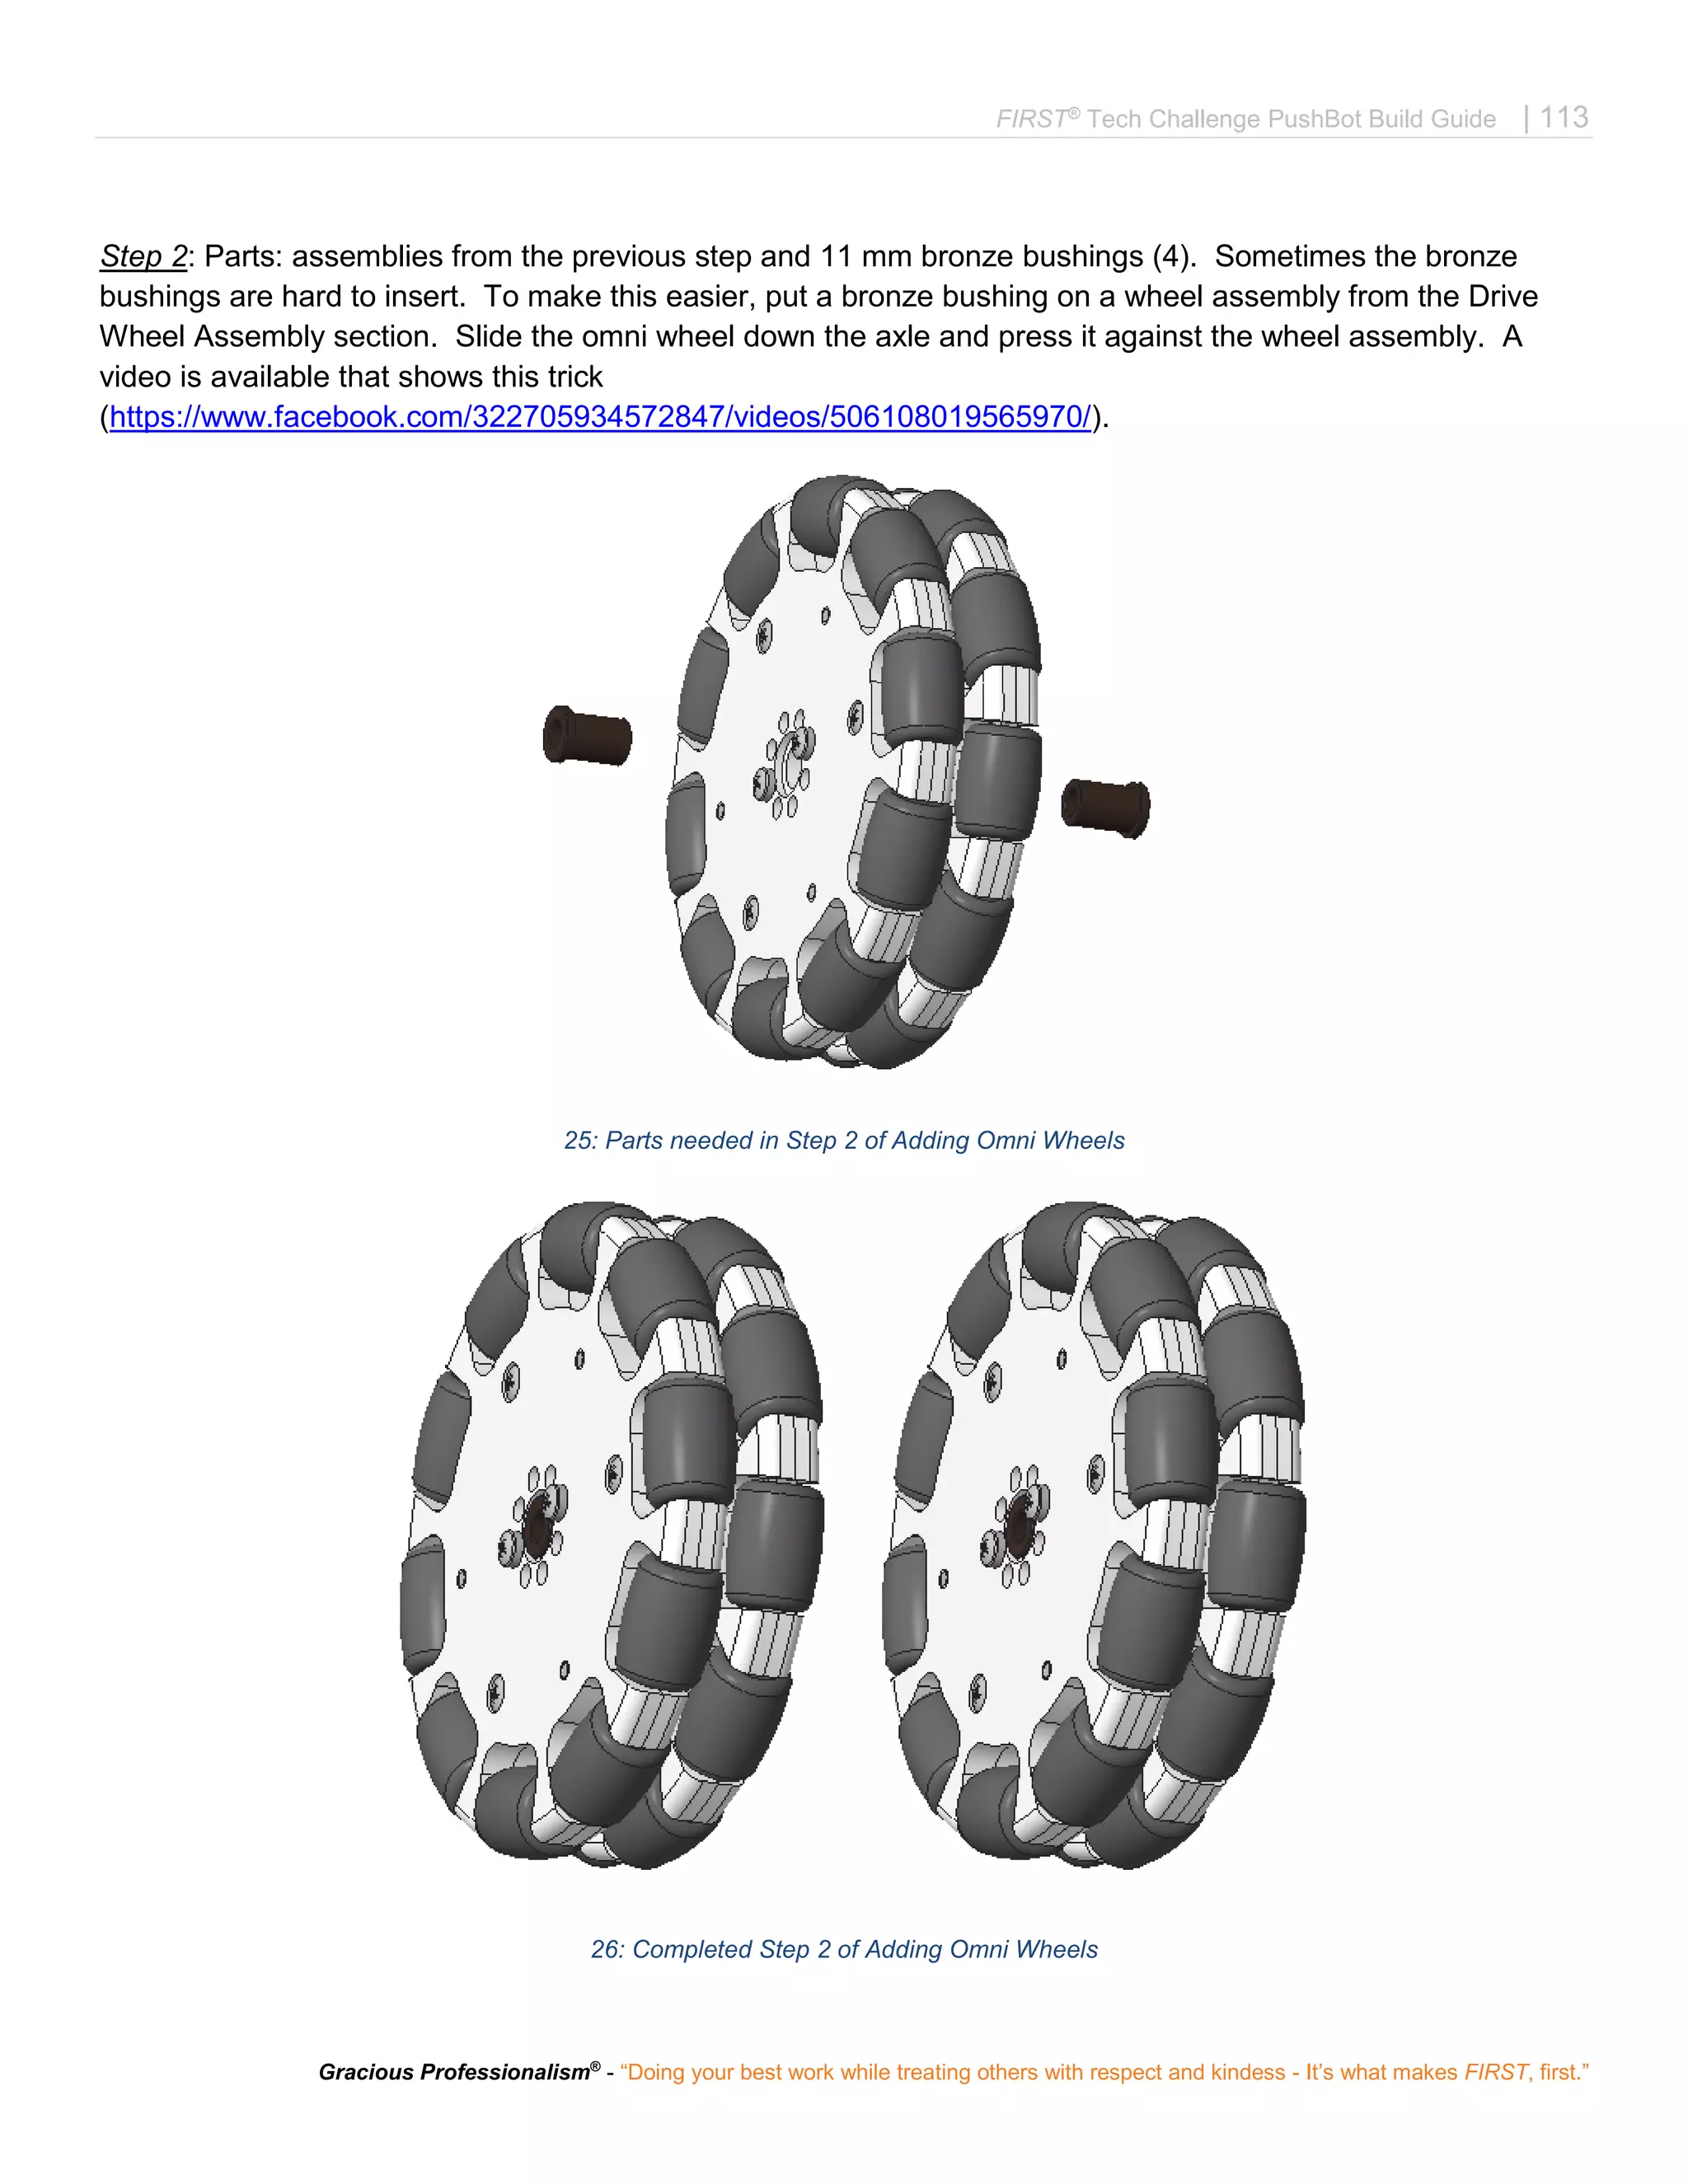
Adding Omni Wheels
[Make 2 copies]
Step 1: The omni wheels on the back of the robot make it easier for the robot to turn. They can slide sideways
with very little friction due to the rollers. Parts: 4" omni wheel half (2), joining ring (1) with included screws (4).
The order is omni wheel, joining ring, omni wheel. These are assembled according to the instructions that
come in the omni wheel pack. Note the screws on one wheel are in opposite holes from the screws on the
other wheel.
23: Parts needed in Step 1 of Adding Omni Wheels
24: Completed Step 1 of Adding Omni Wheels](https://image.slidesharecdn.com/pushbot-build-guide-170705193132/75/FTC-PushBot-Build-Guide-112-2048.jpg)
![114 | FIRST®
Tech Challenge PushBot Build Guide
Revision 1.1: 08.15.2016
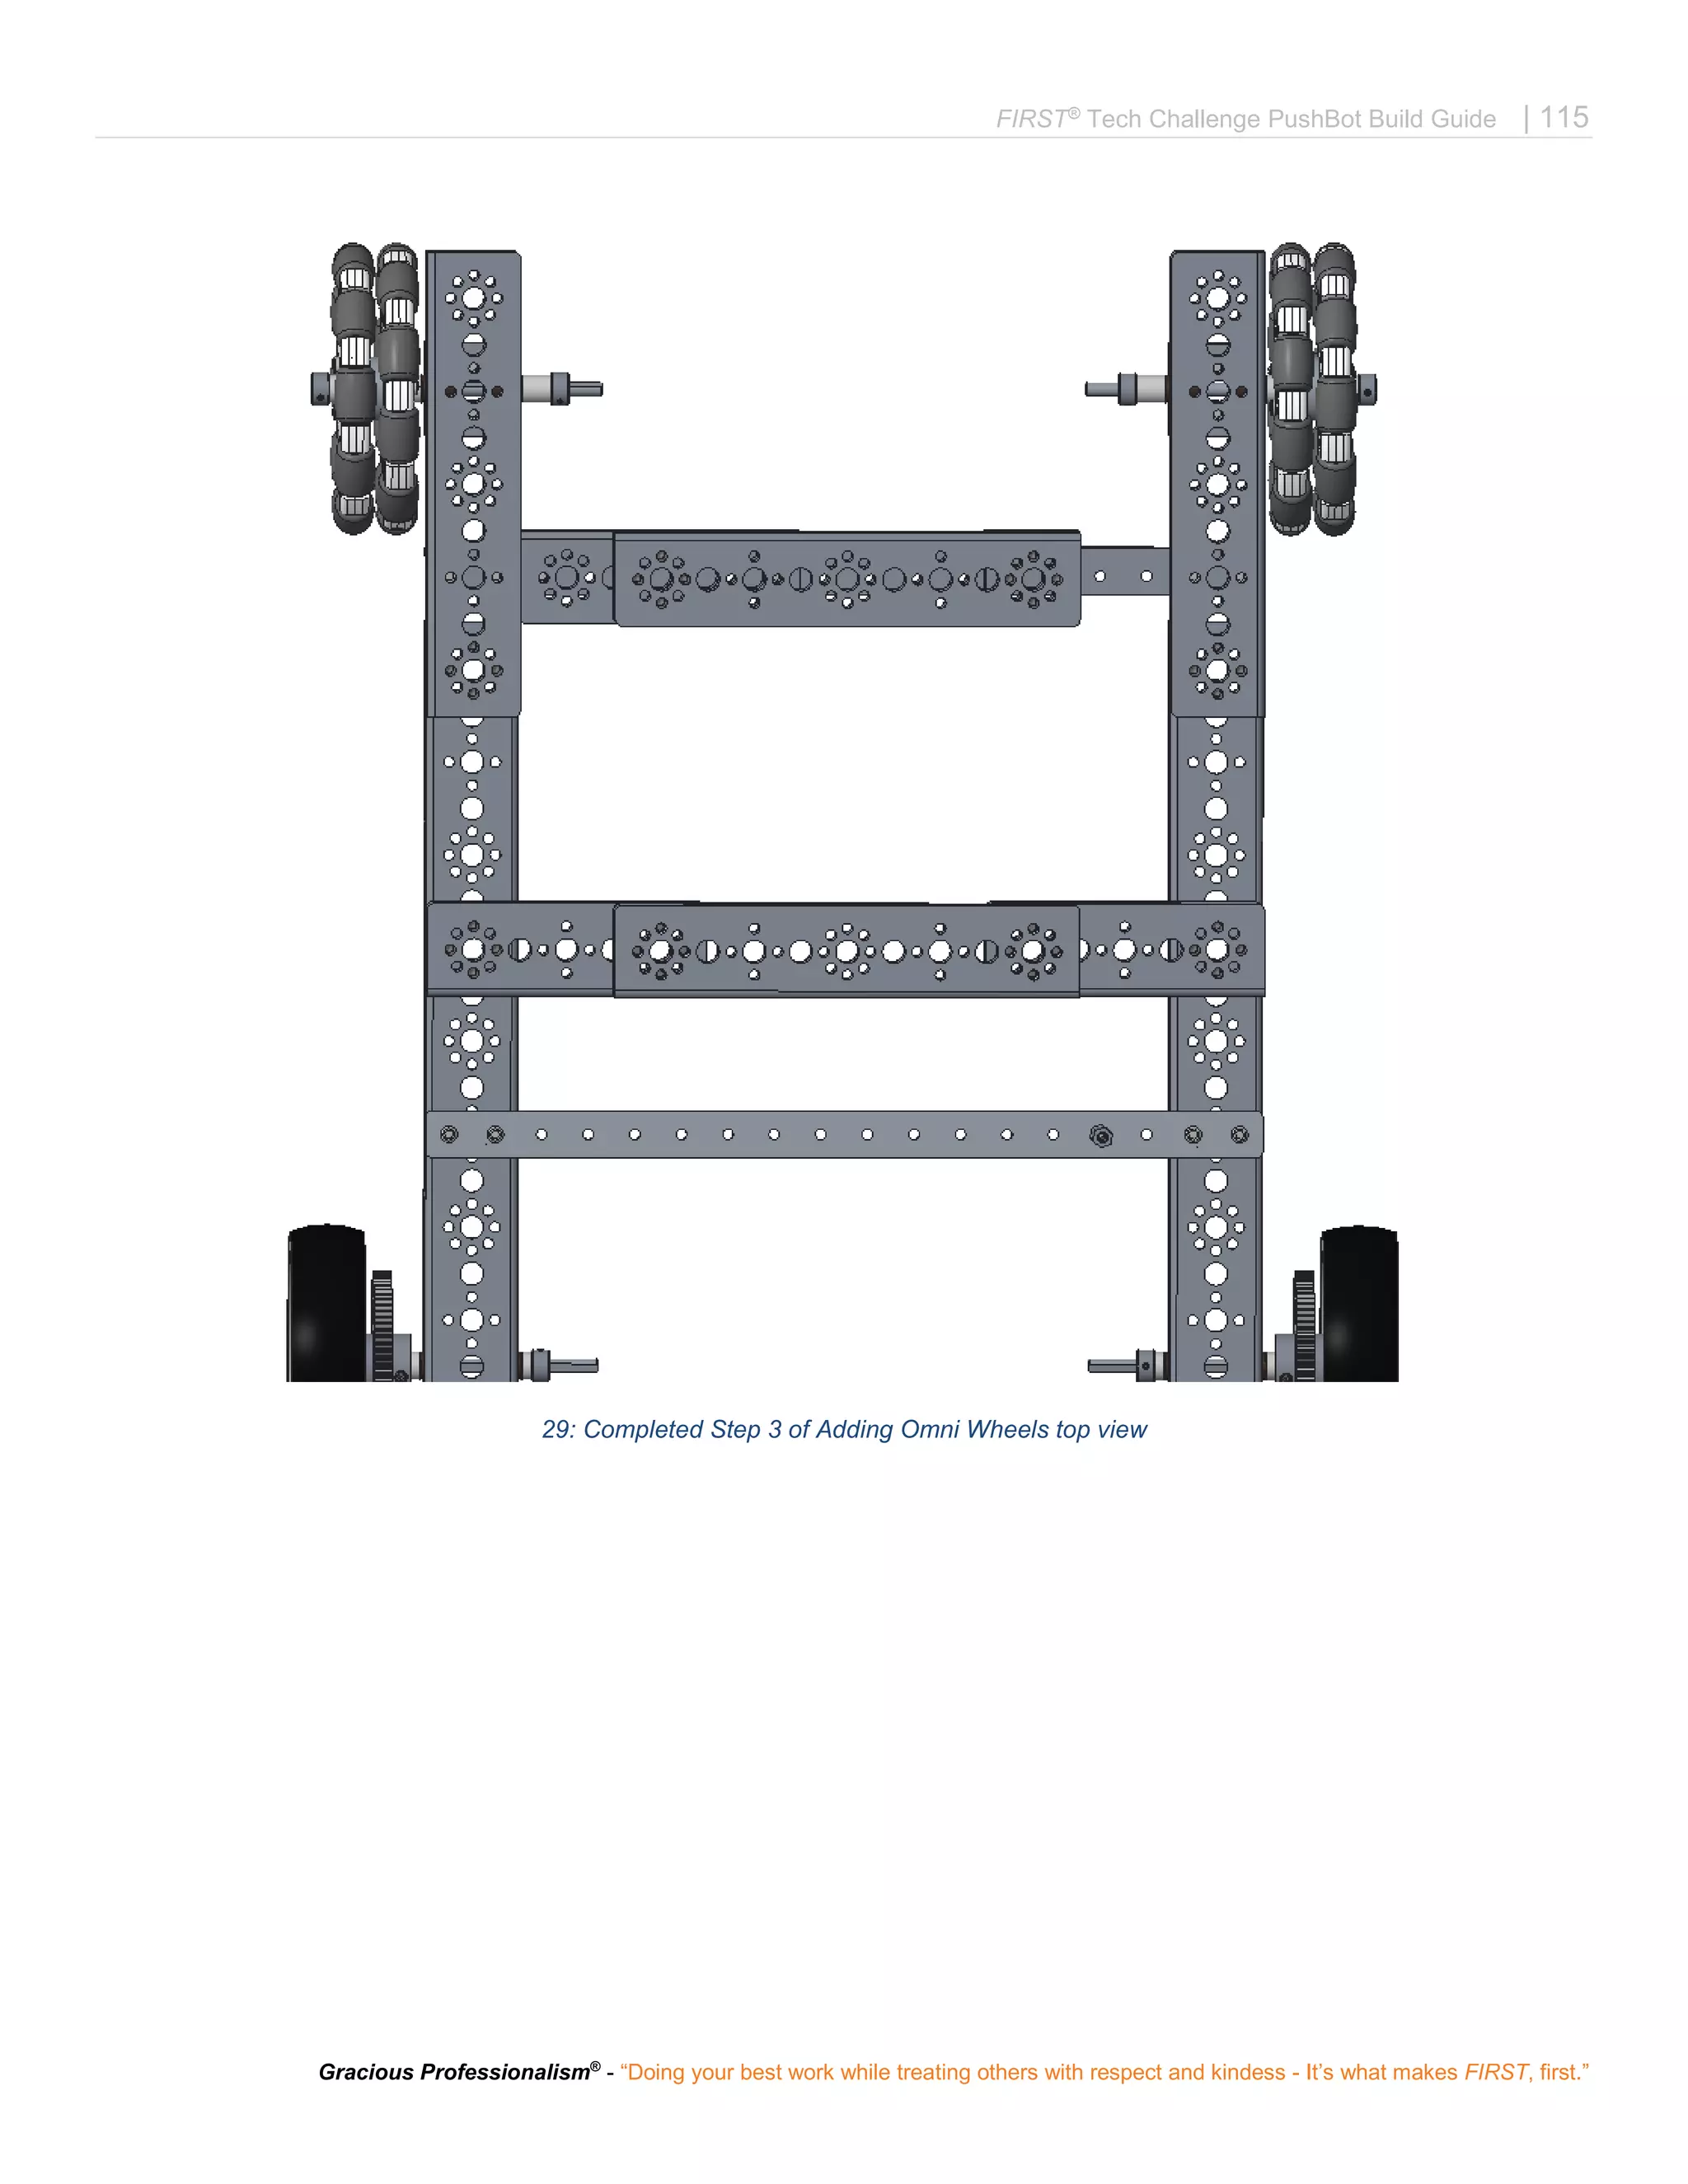
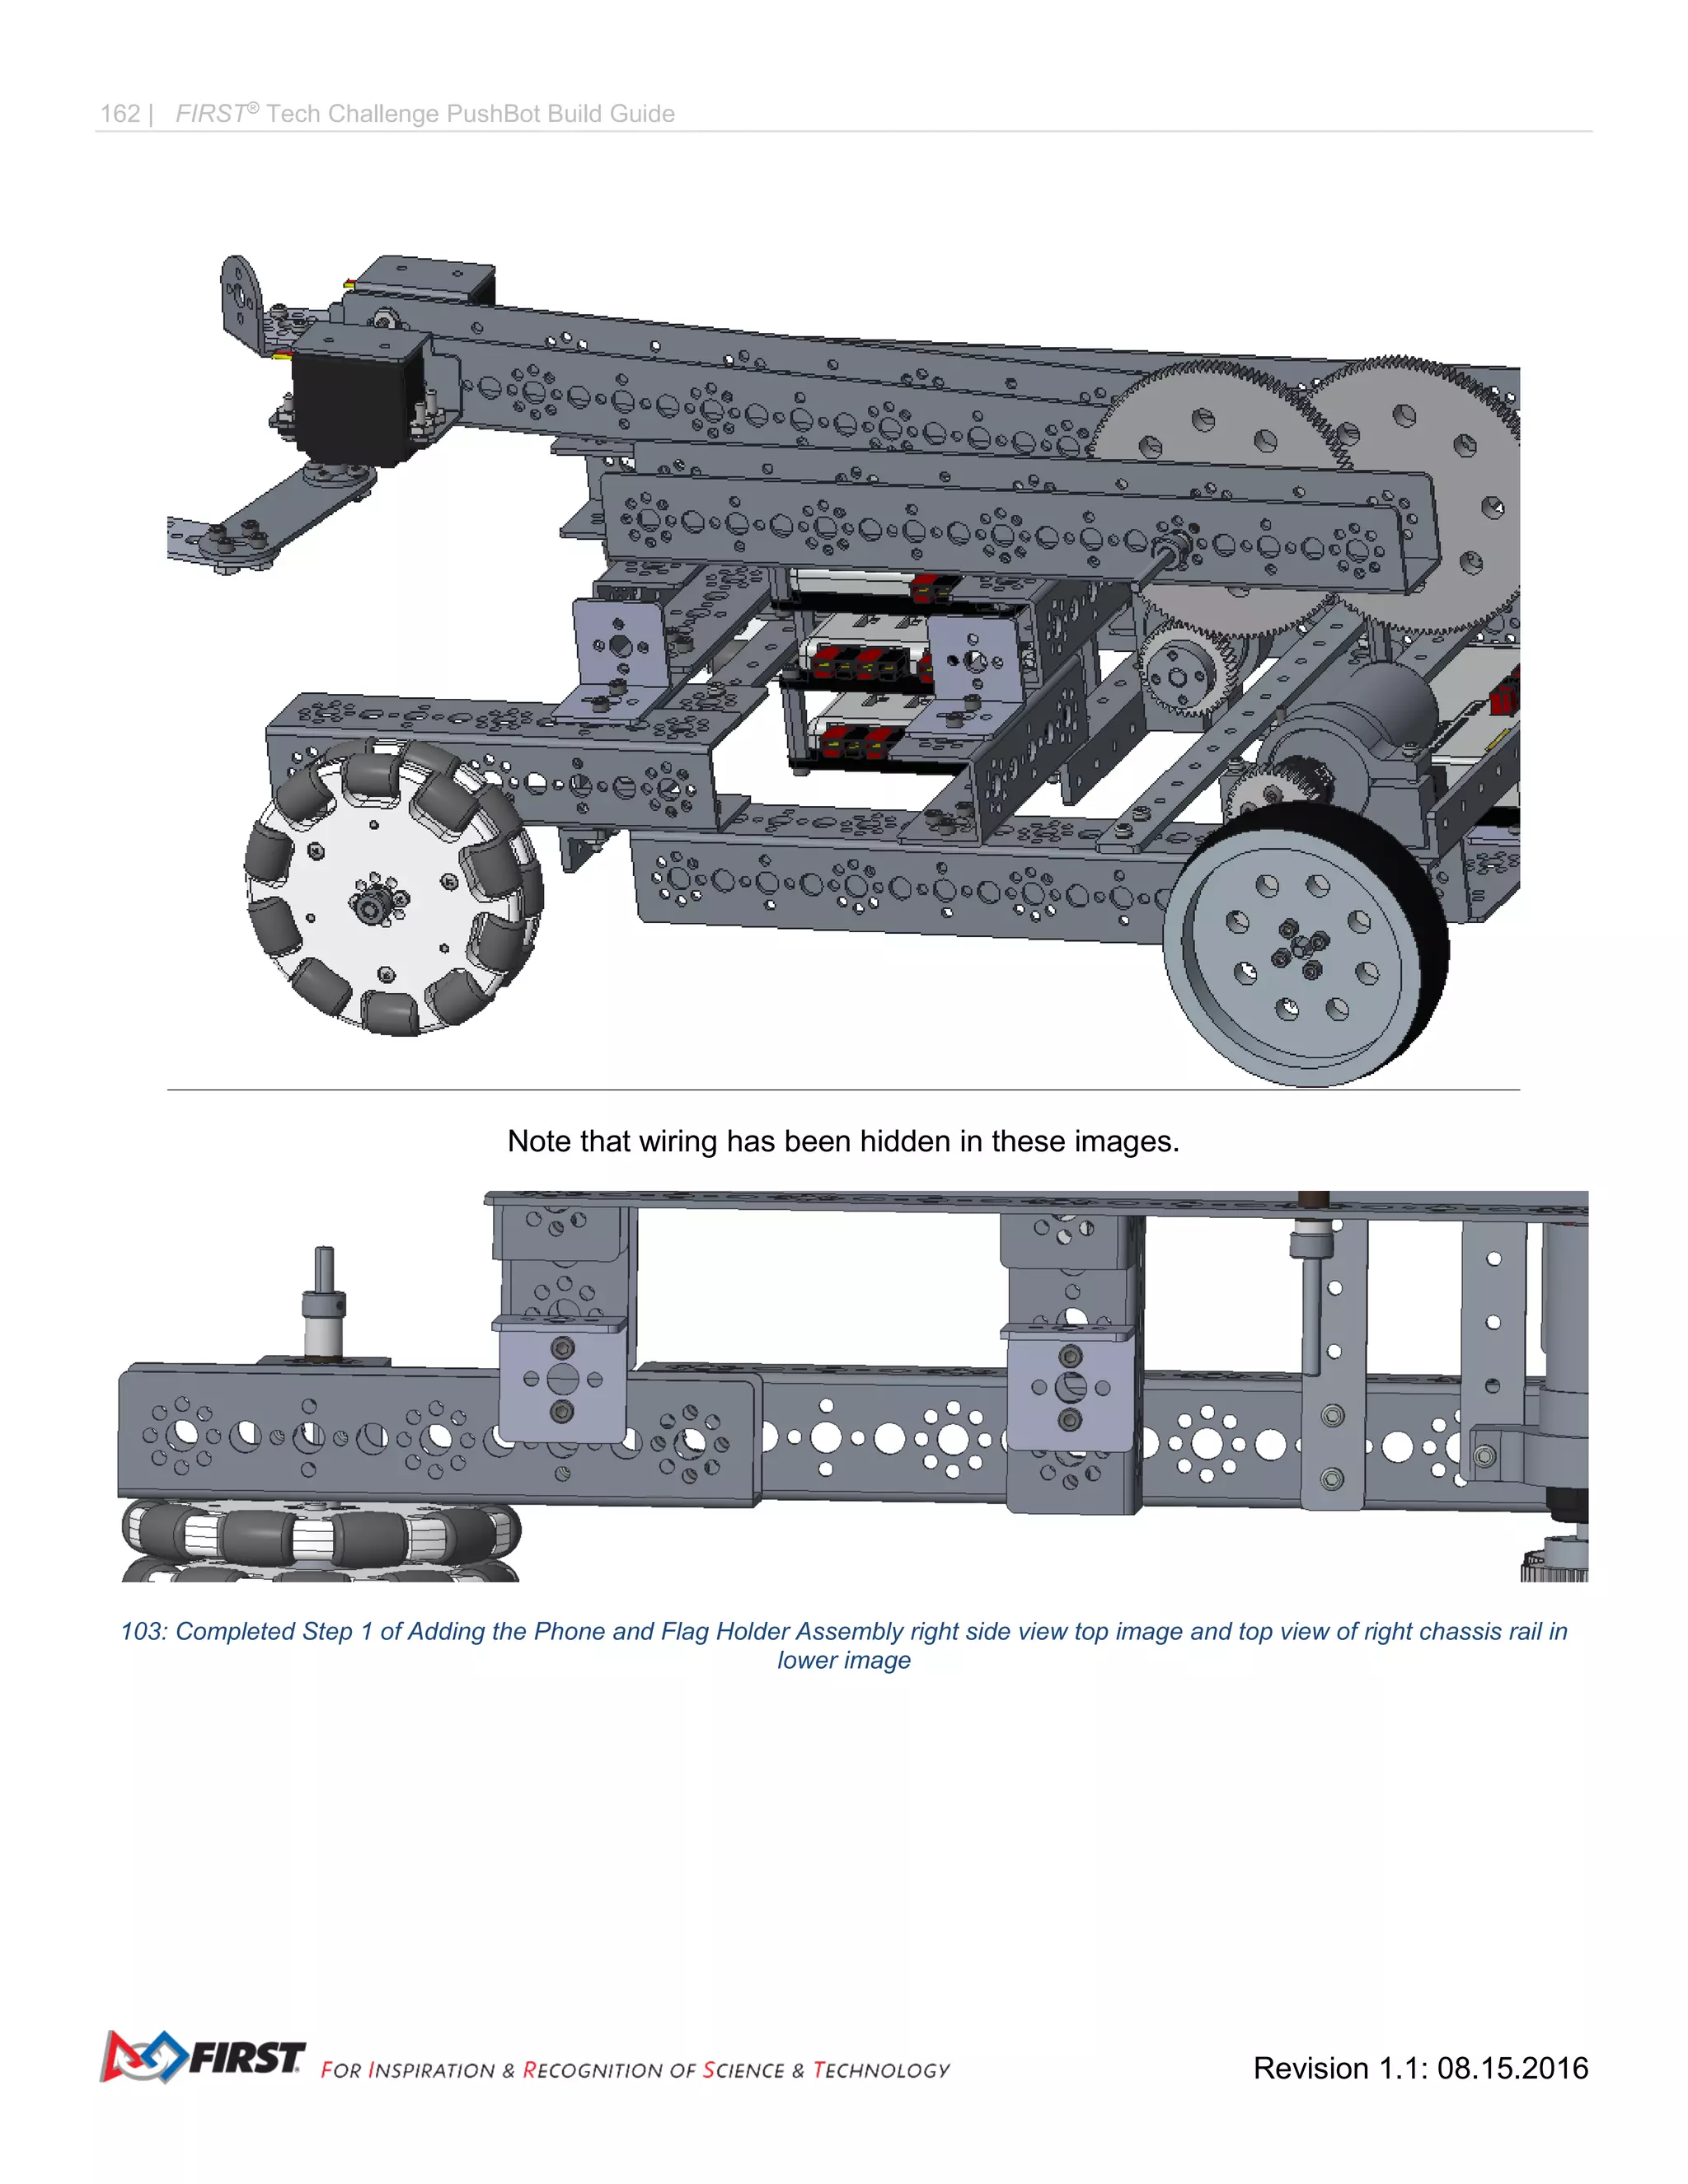
Step 3: Adding omni wheels to chassis. Parts: chassis, omni wheel assemblies, 1/8" axle spacers (4), 3/8" axle
spacers (2), axle collars (4), 11mm bronze bushings (4), 100 mm axles (2). Note: assembly order is axle collar,
1/8” axle spacer, omni wheel assembly, 1/8" axle spacer, 11mm bronze bushing, channel, 11mm bronze
bushing, 3/8" spacer, and axle collar. The bottom image shows the step completed for one wheel. The image
on the following page shows both wheels. Note: The omni wheels are mounted to the back of the robot.
27: Parts needed in Step 3 of Adding Omni Wheels top view of back of robot.
28: Completed Step 3 of Adding Omni Wheels [close up] bottomview](https://image.slidesharecdn.com/pushbot-build-guide-170705193132/75/FTC-PushBot-Build-Guide-114-2048.jpg)

![FIRST®
Tech Challenge PushBot Build Guide | 137
Gracious Professionalism®
- “Doing your best work while treating others with respect and kindess - It’s what makes FIRST, first.”
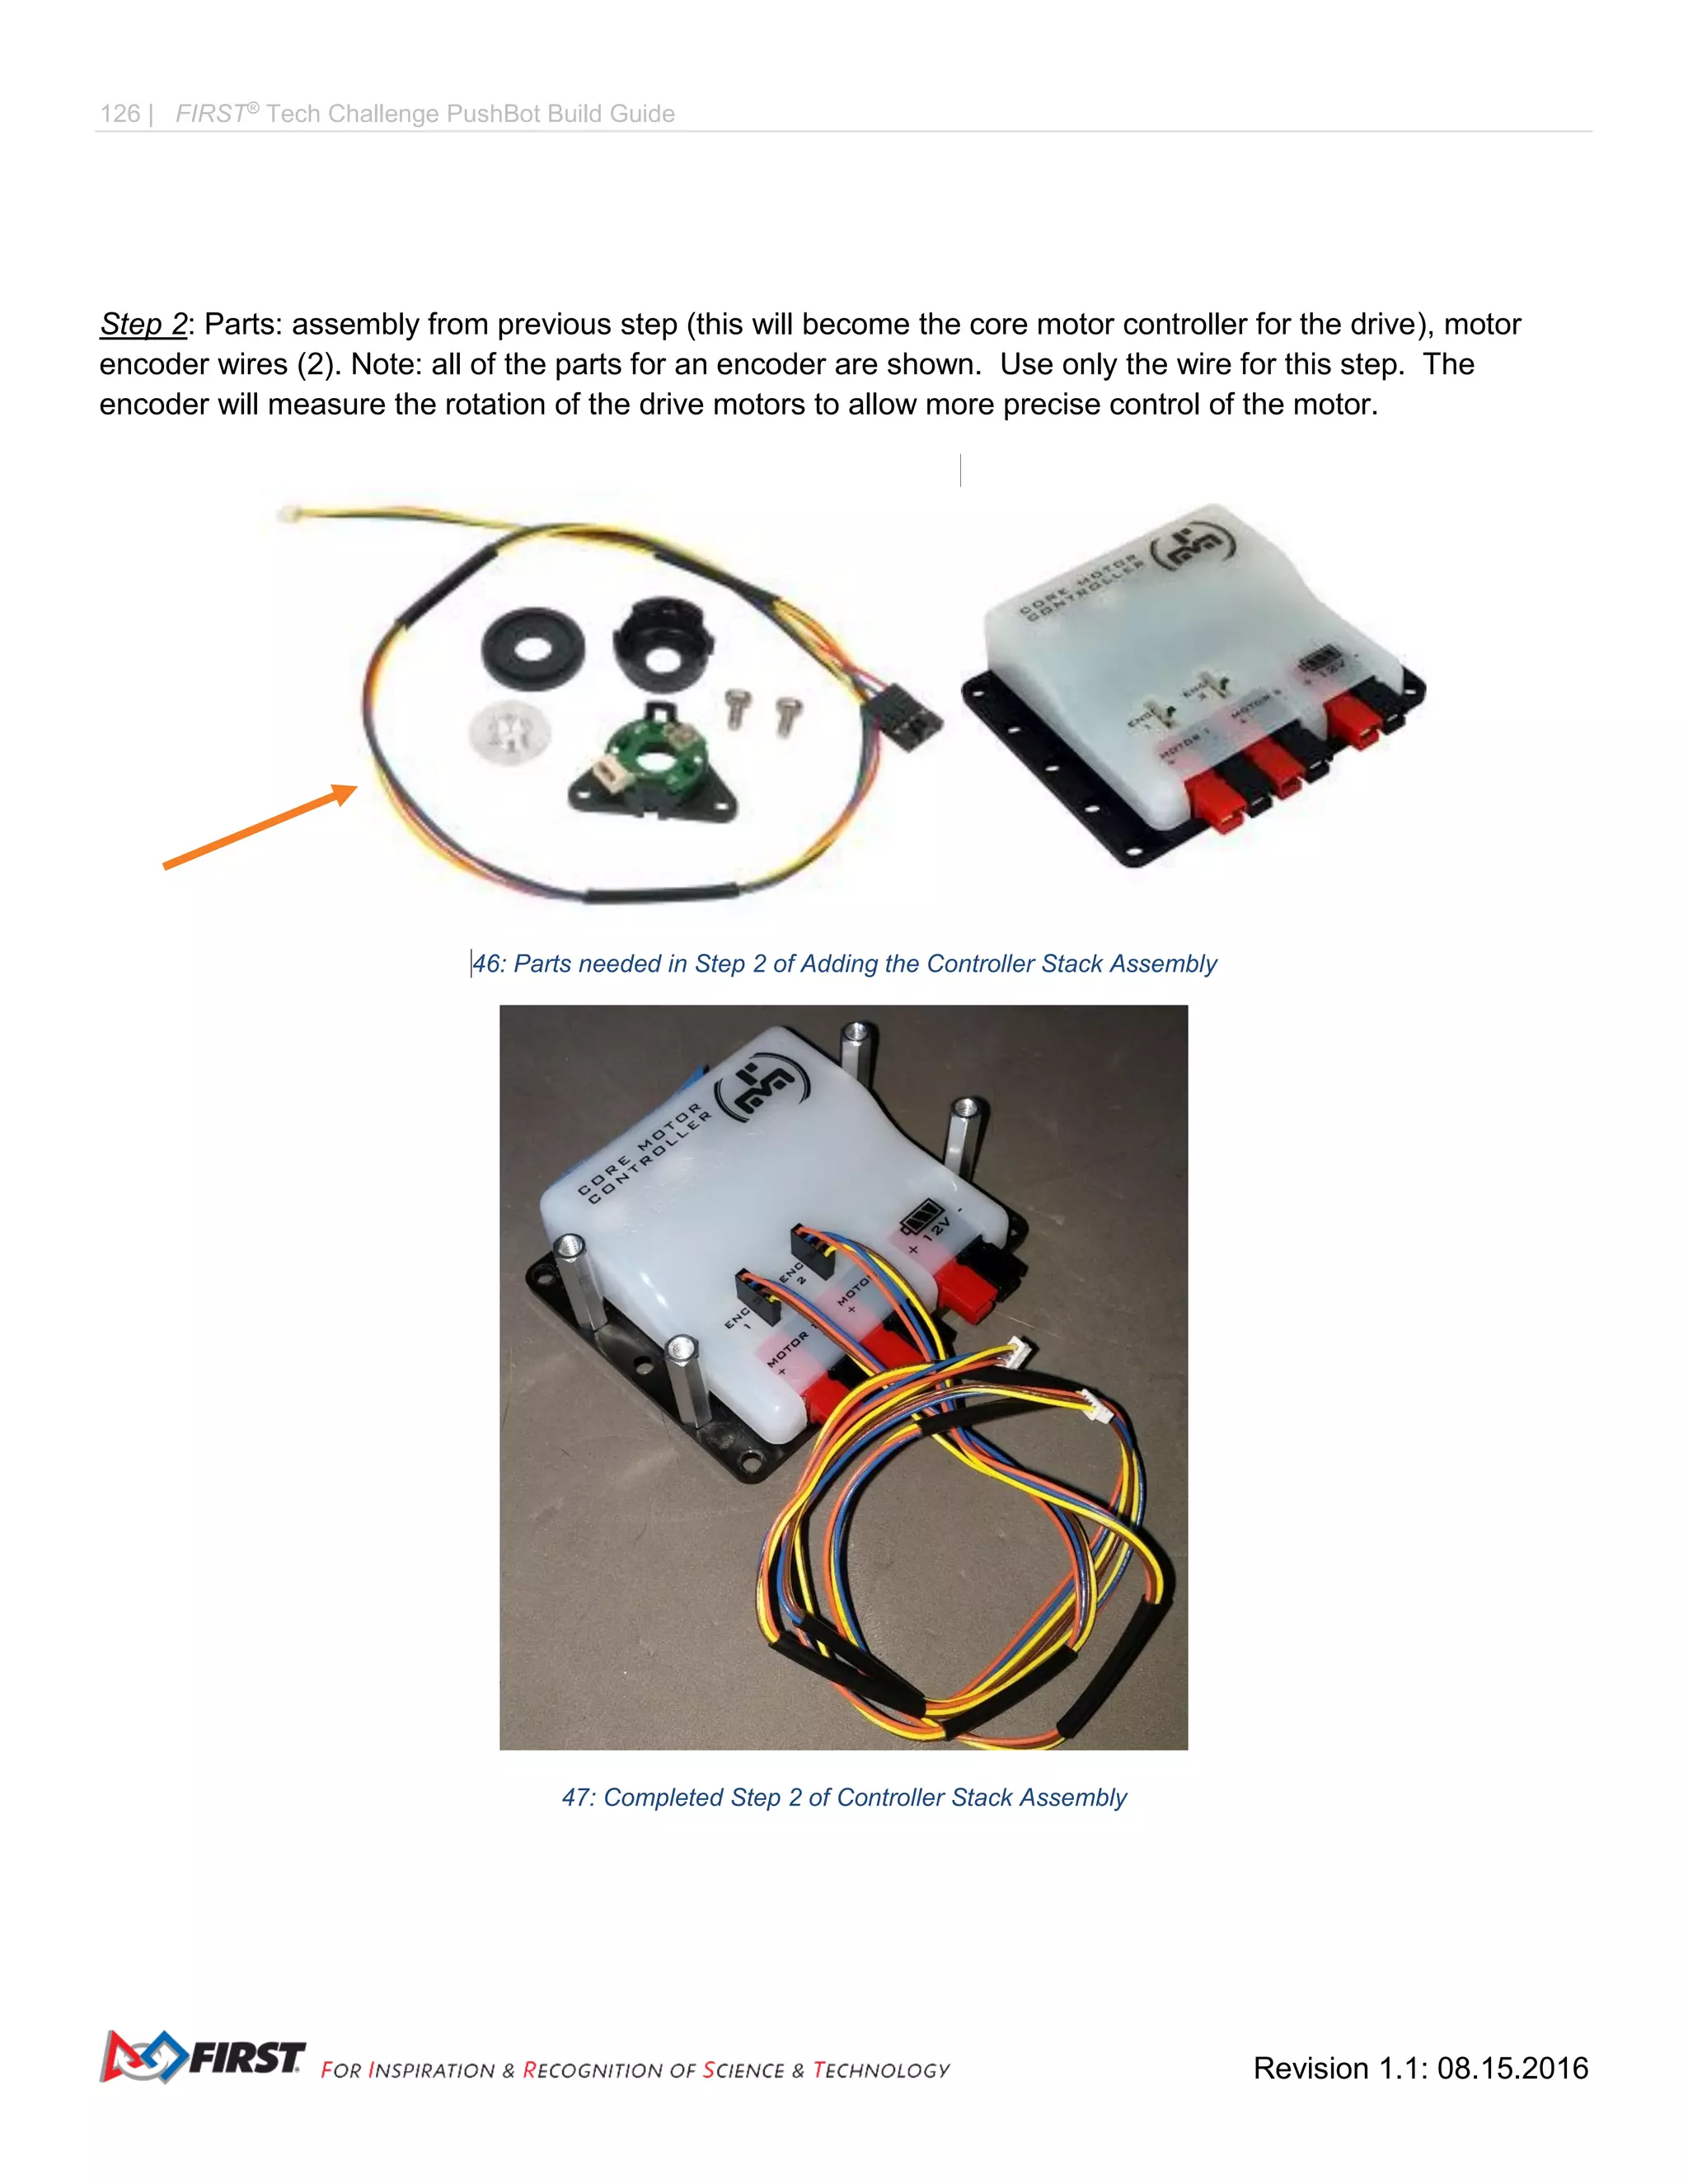
Step 2: [make two] Parts: DC gear motor (1), encoder (1). Refer to the instructions from the encoder package
to install the encoder onto the motor. Encoder styles vary, so the one in the kit of parts may not look like the
one in this document.
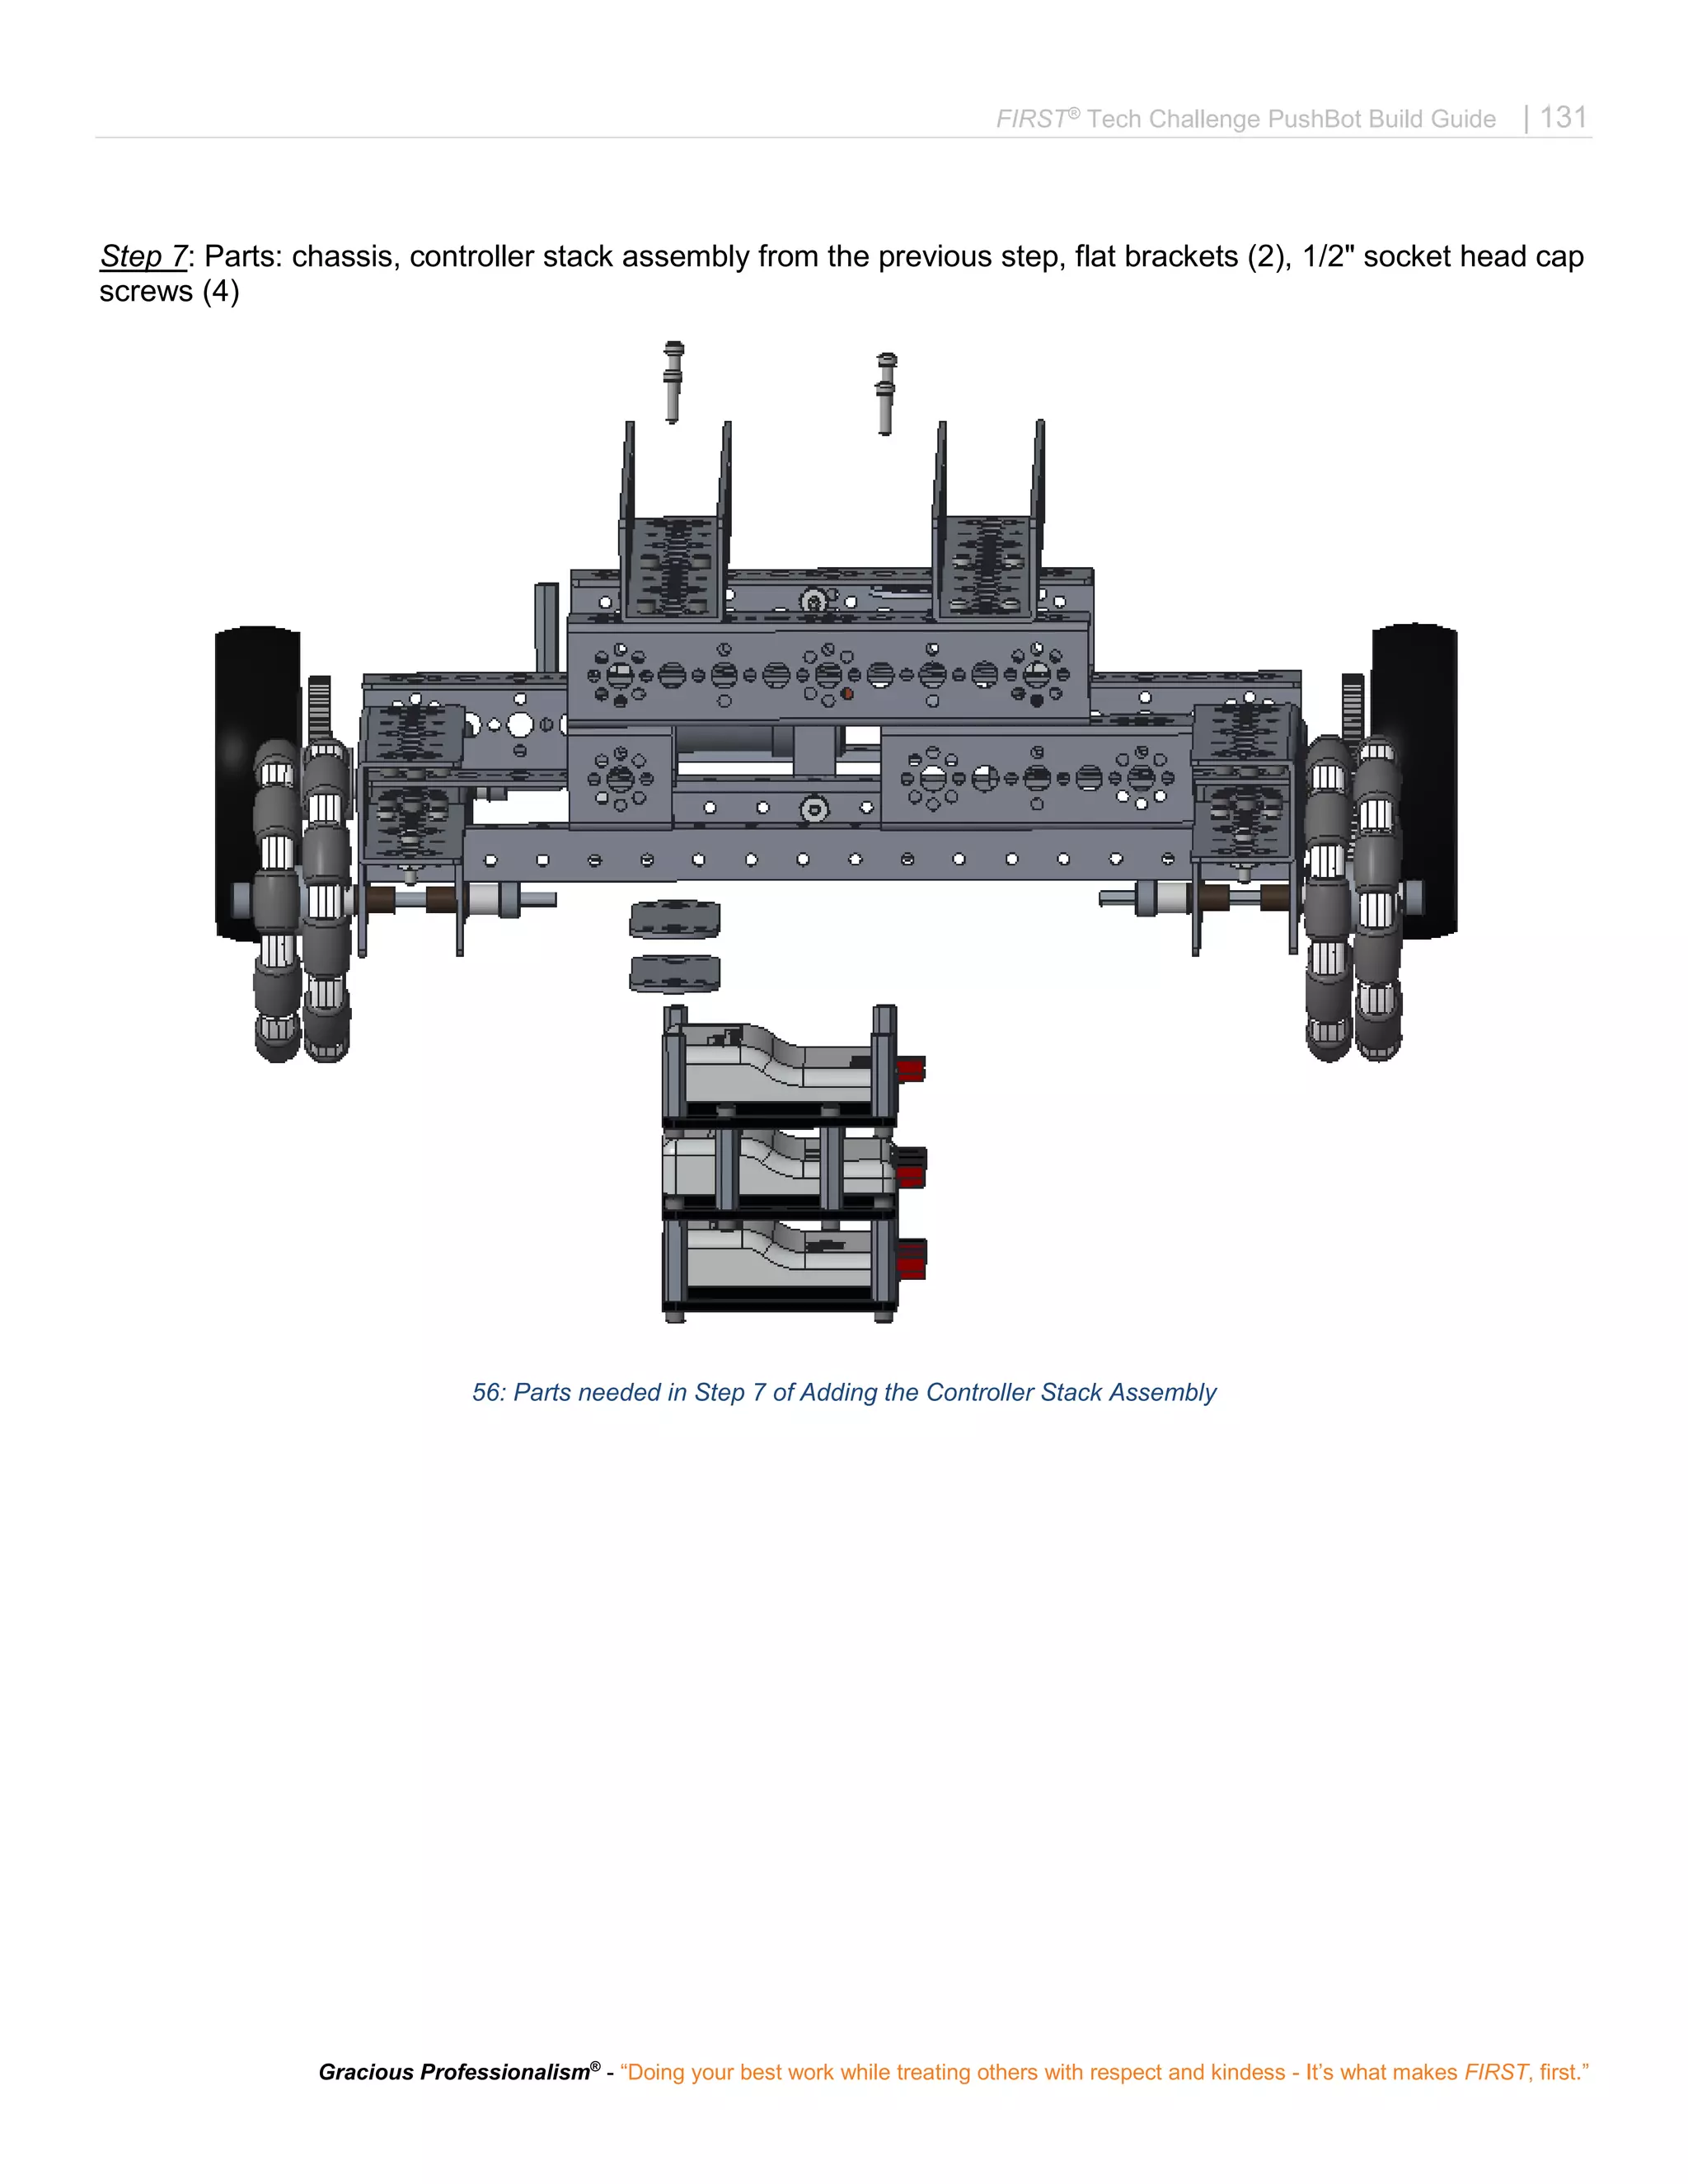
63: Parts needed in Step 2 of Adding the Drive Motors
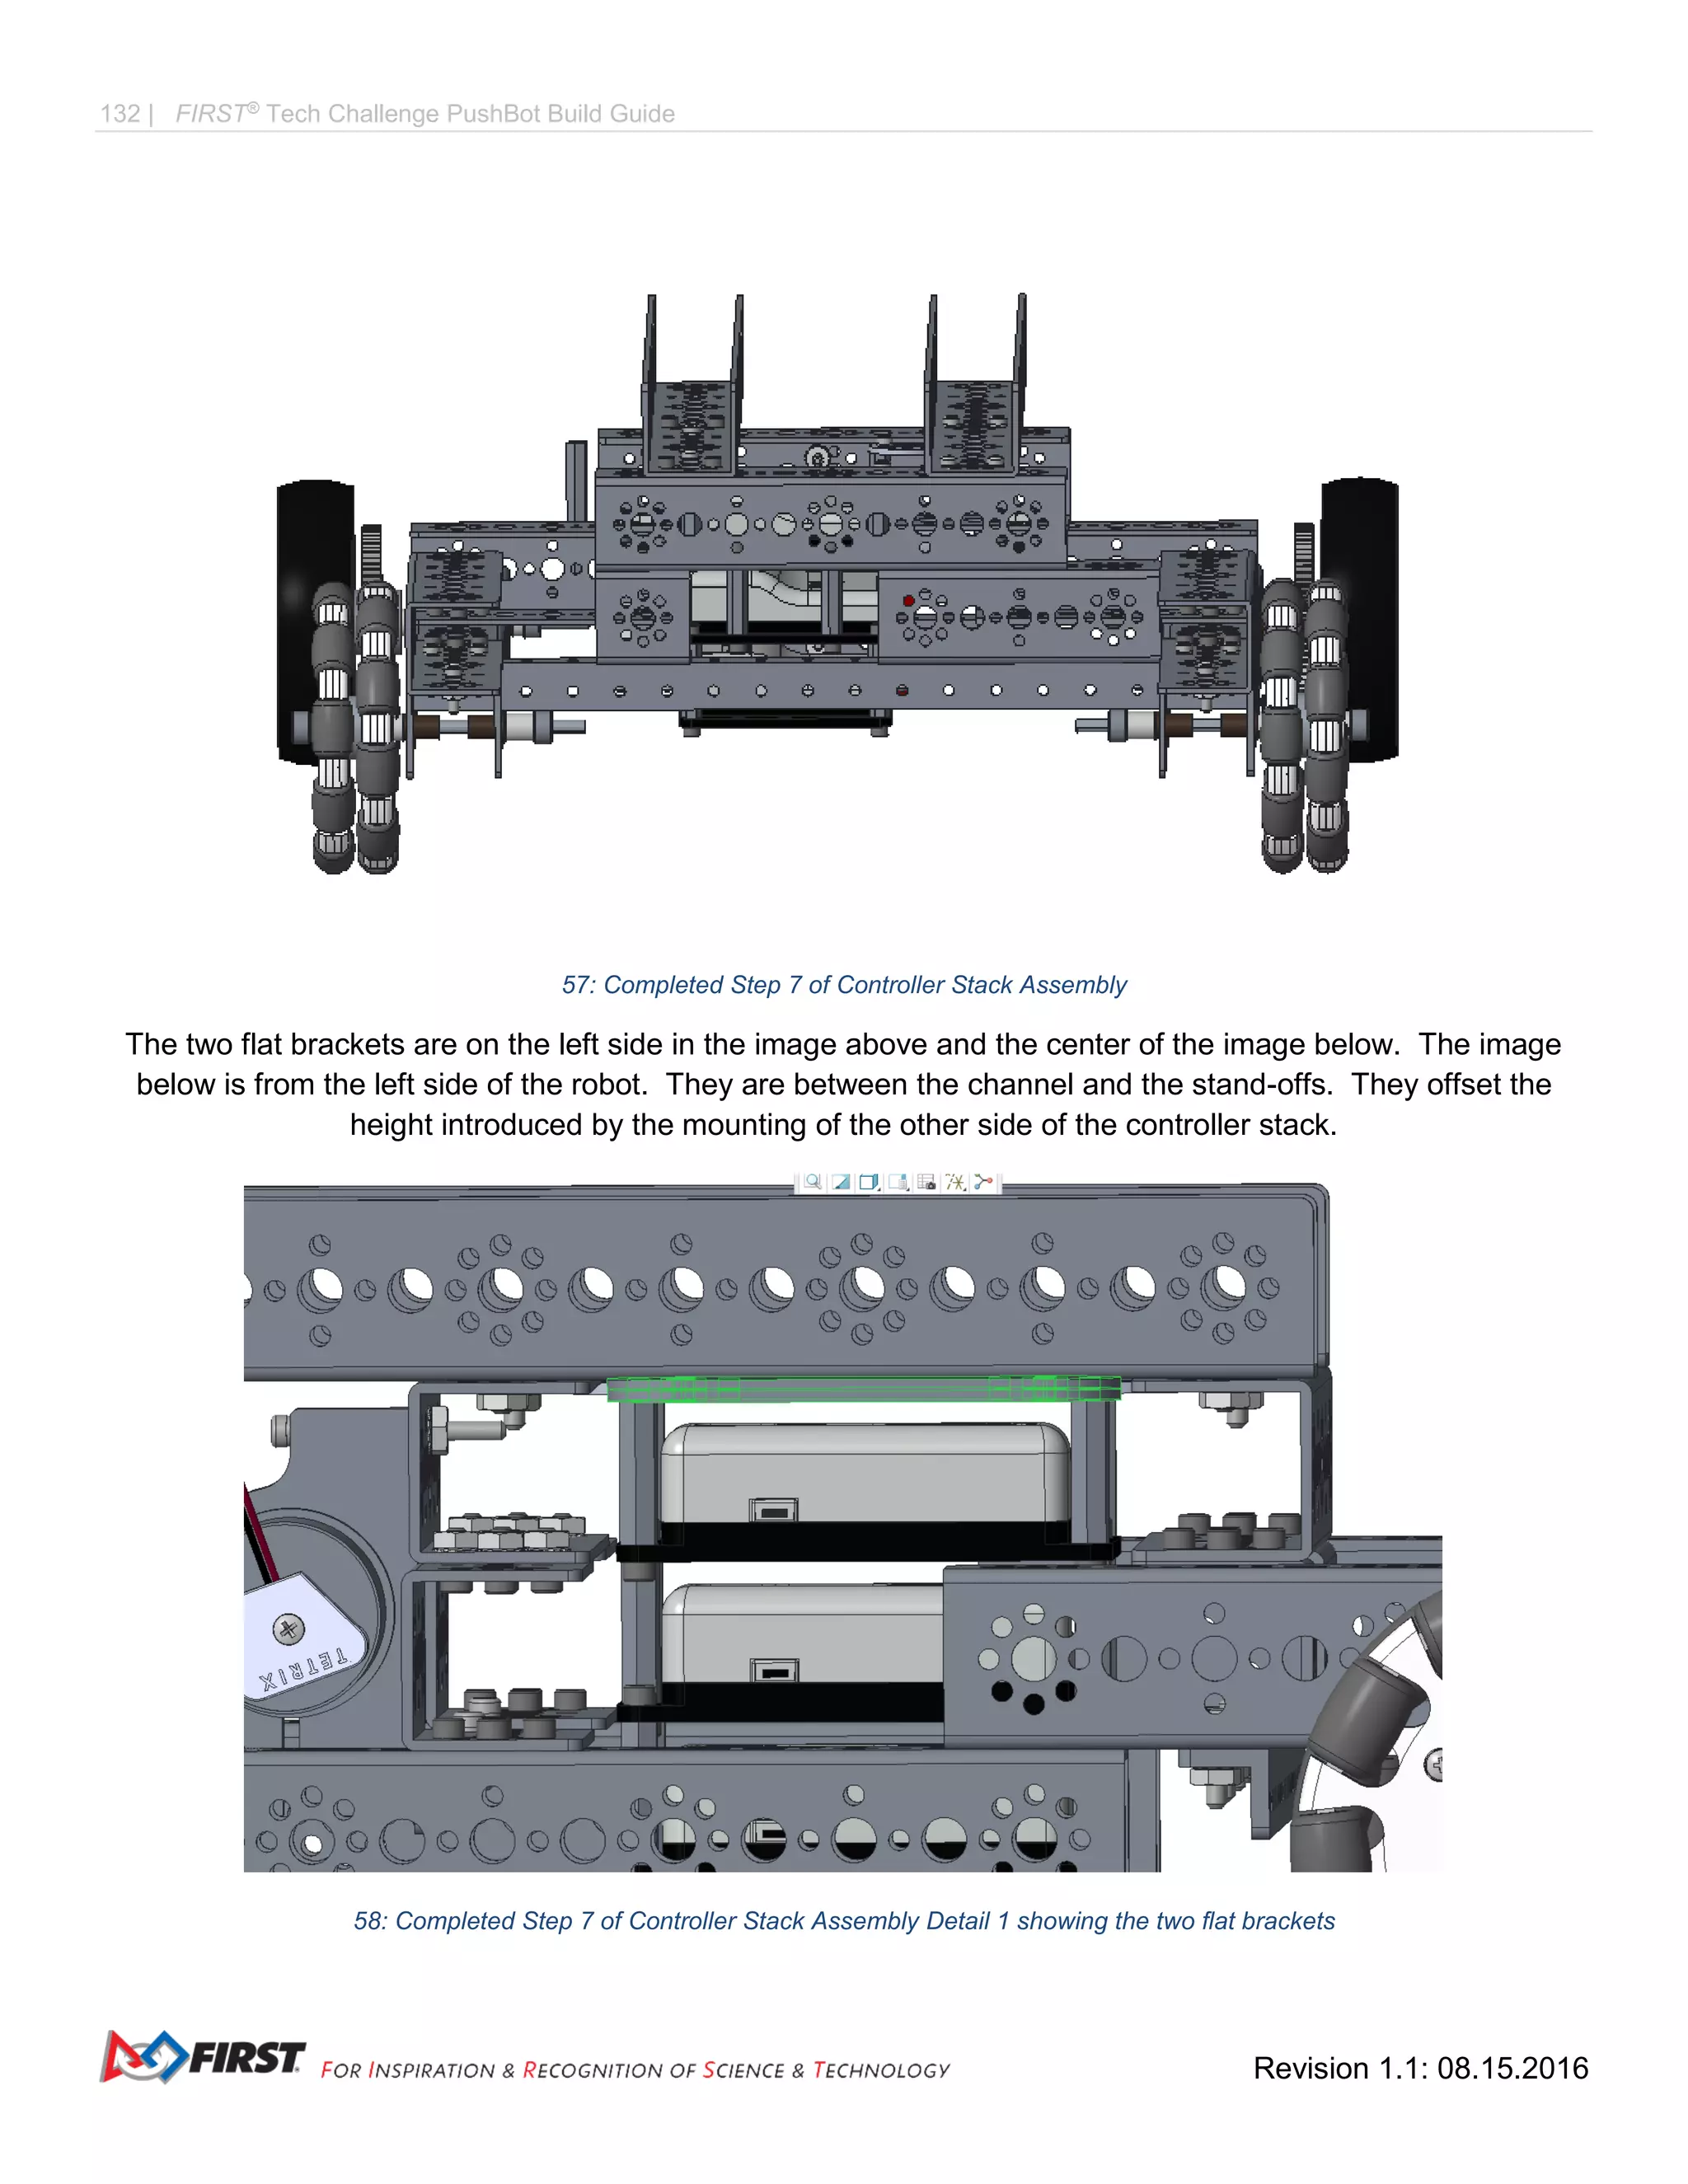
64: Completed Step 2 of Adding the Drive Motors](https://image.slidesharecdn.com/pushbot-build-guide-170705193132/75/FTC-PushBot-Build-Guide-137-2048.jpg)
![138 | FIRST®
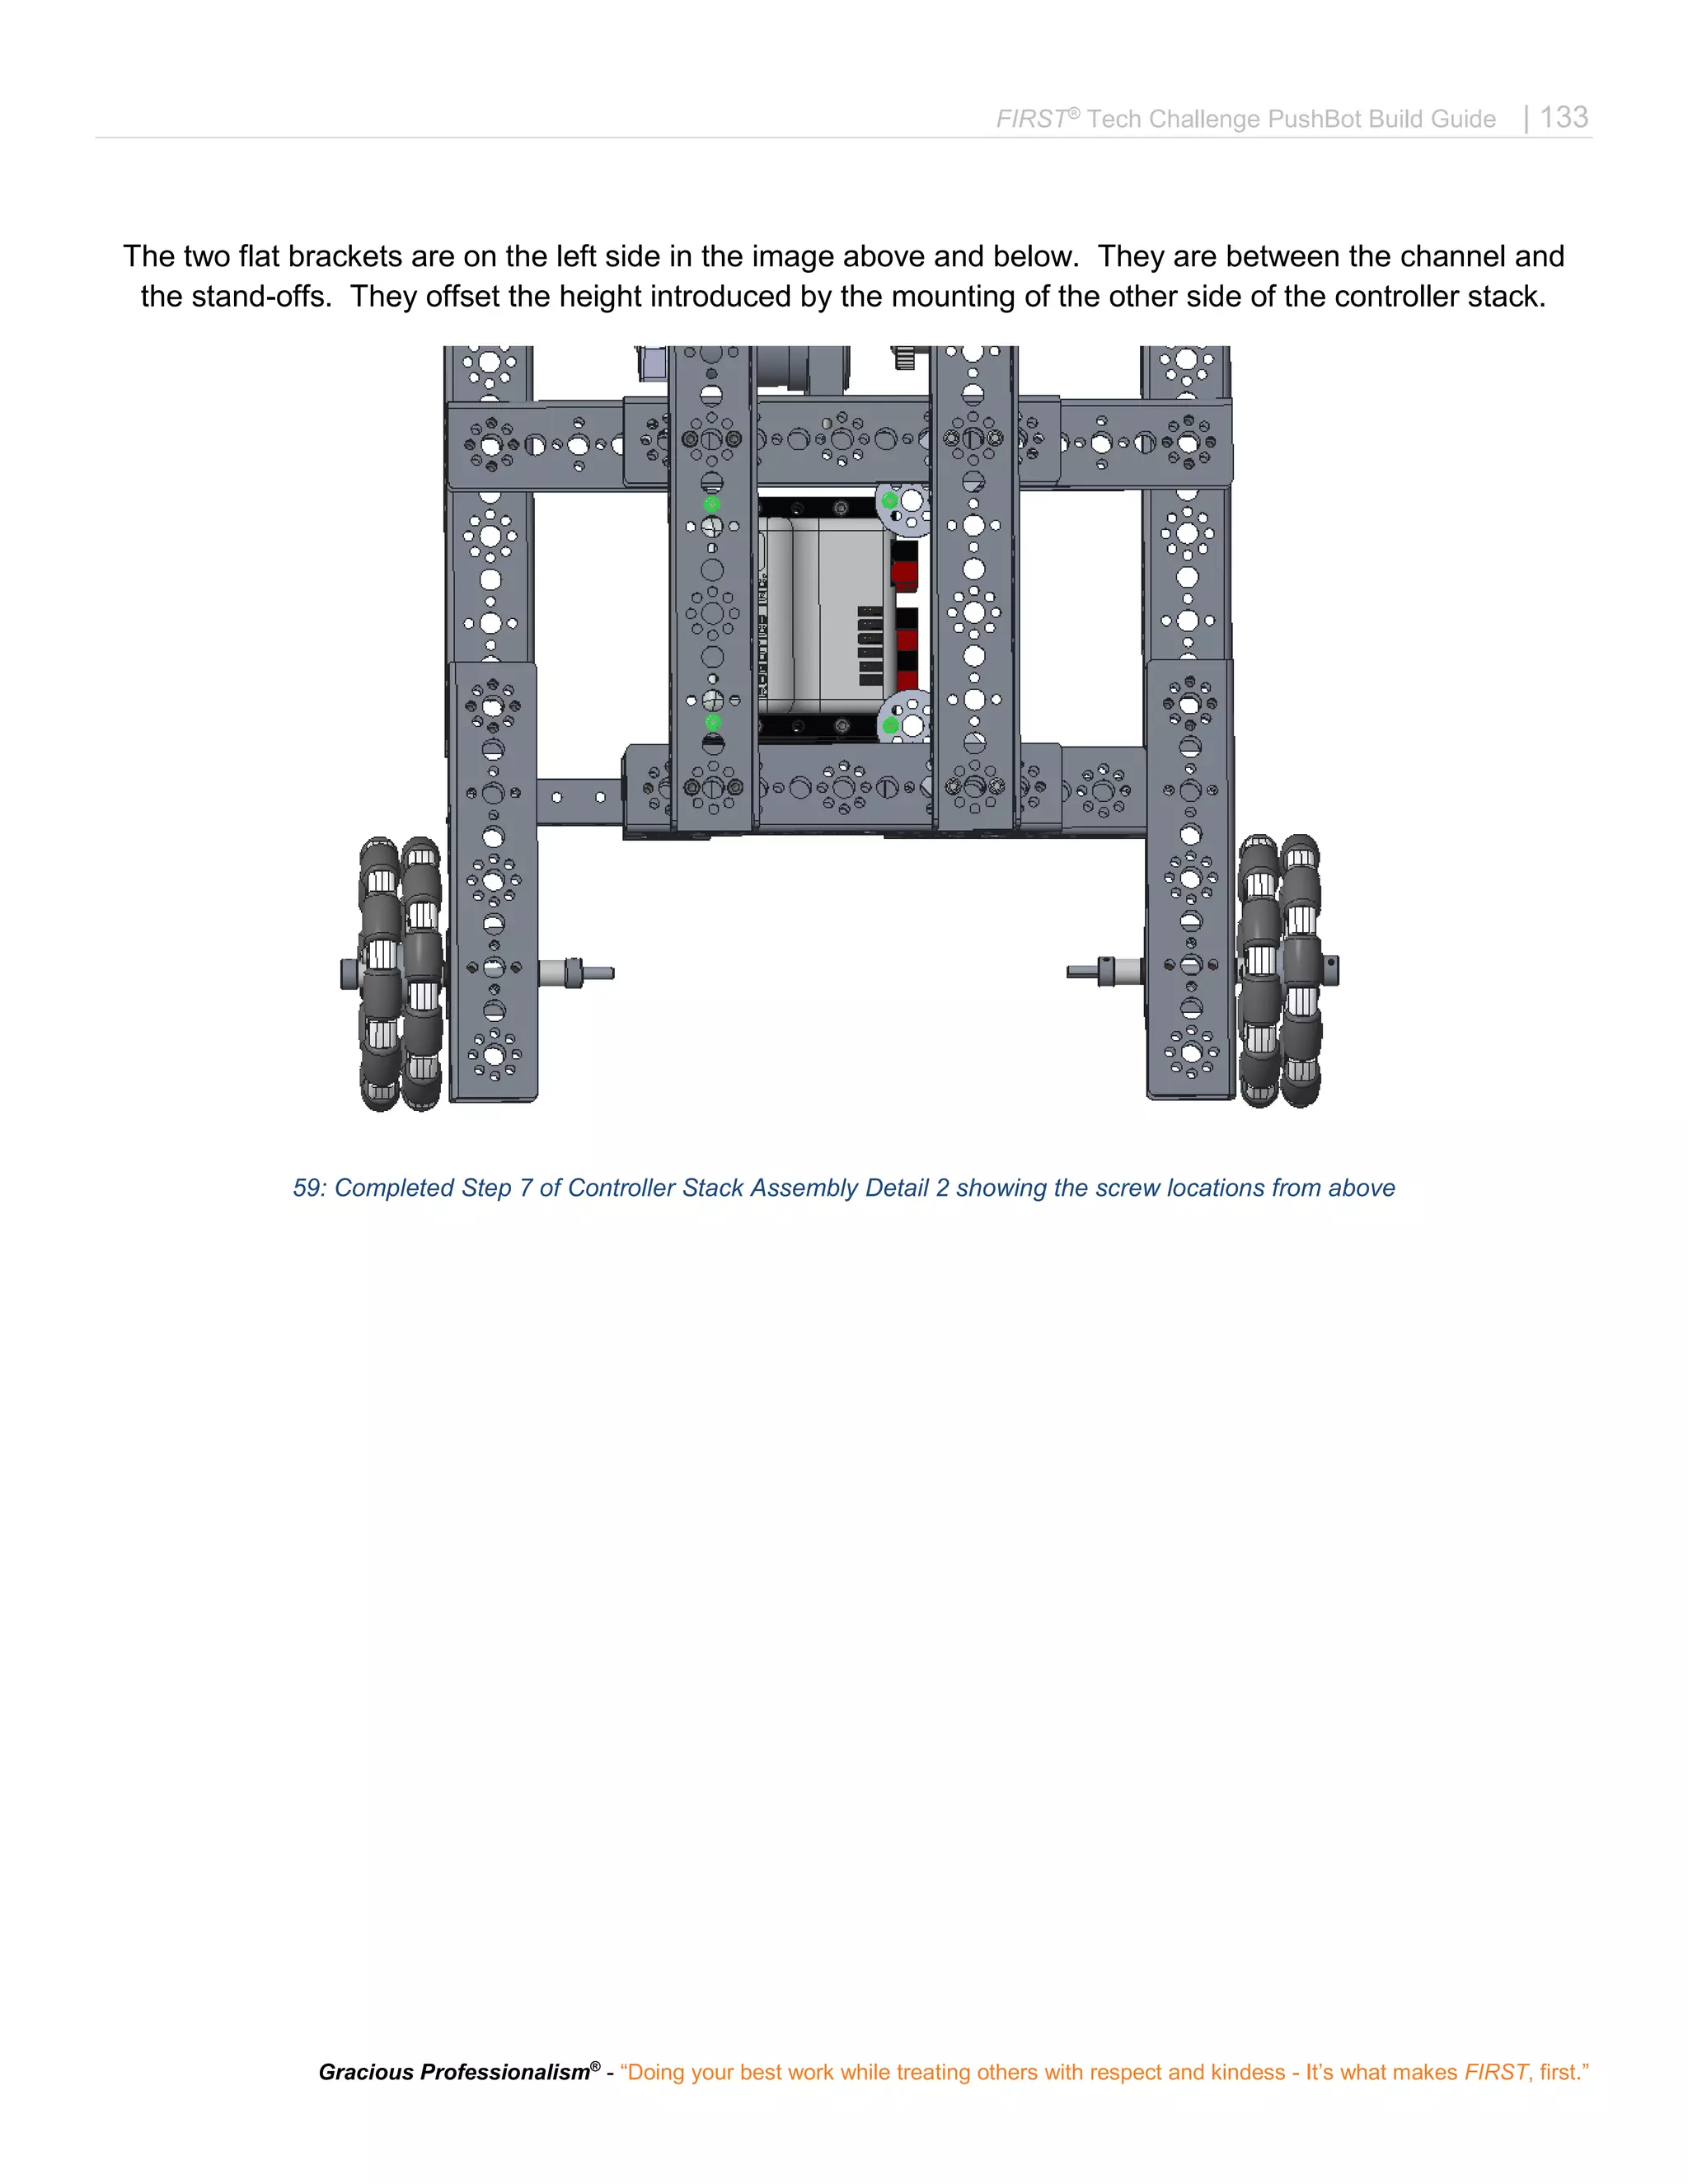
Tech Challenge PushBot Build Guide
Revision 1.1: 08.15.2016
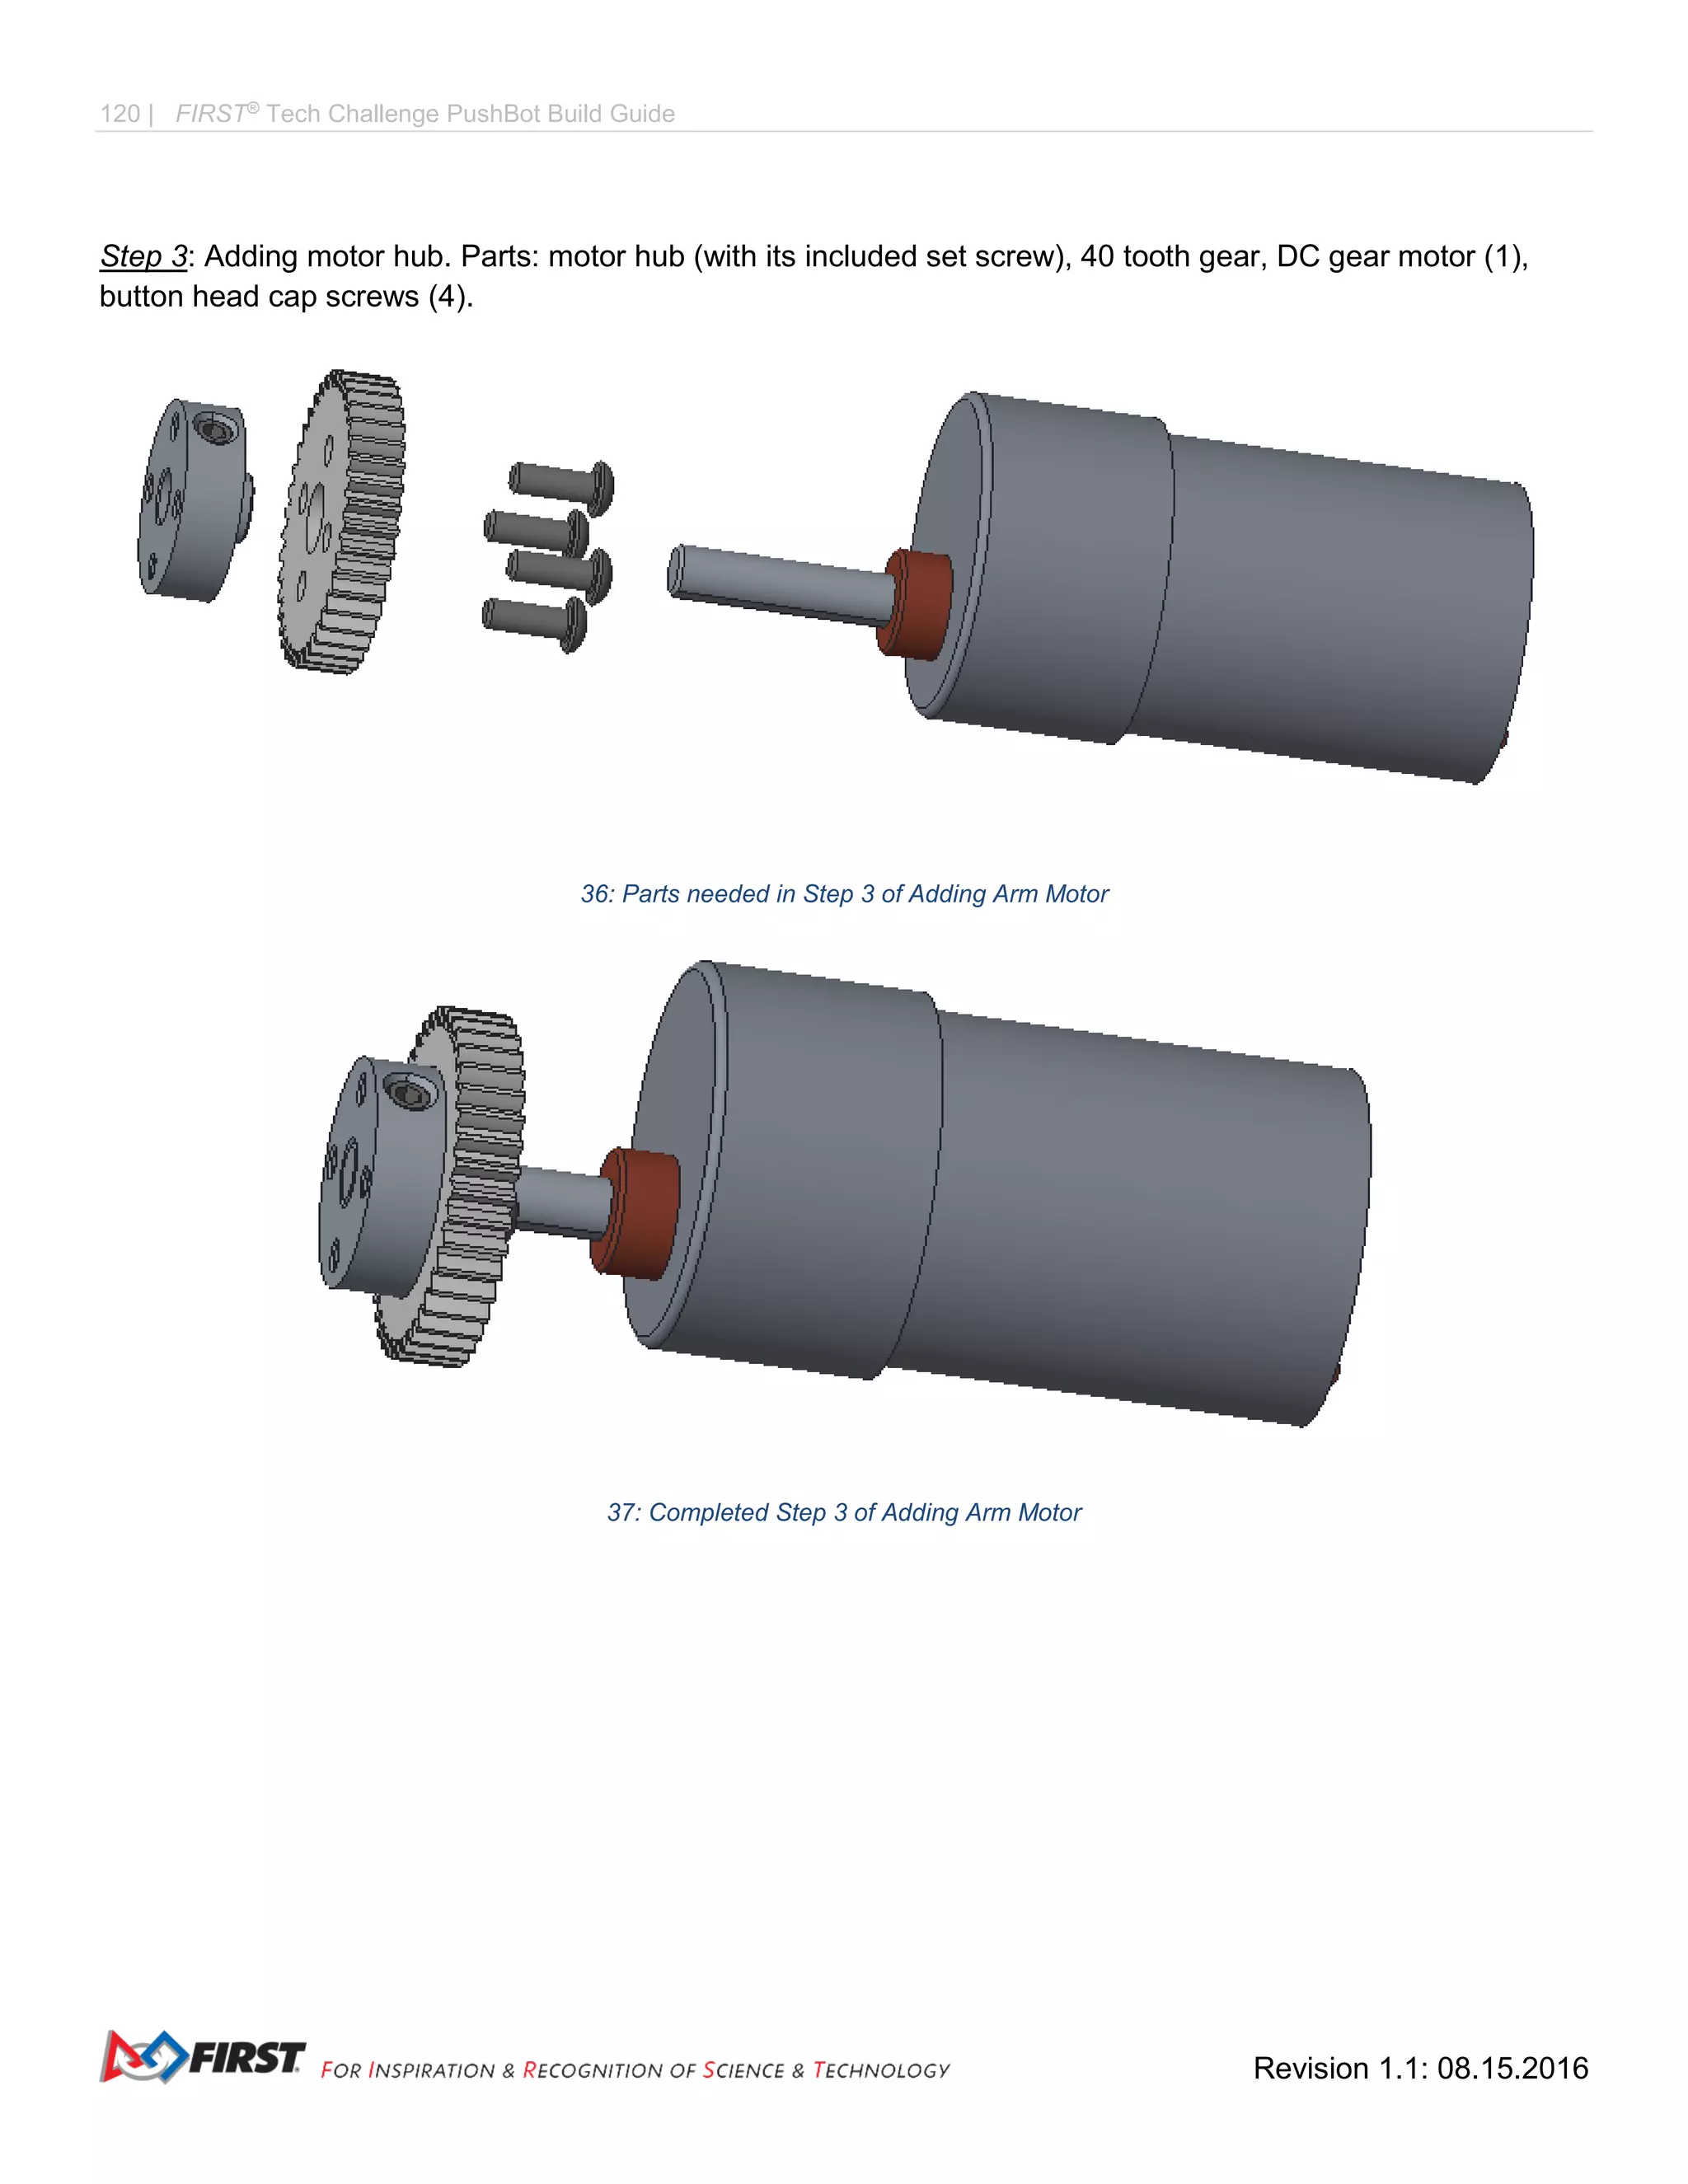
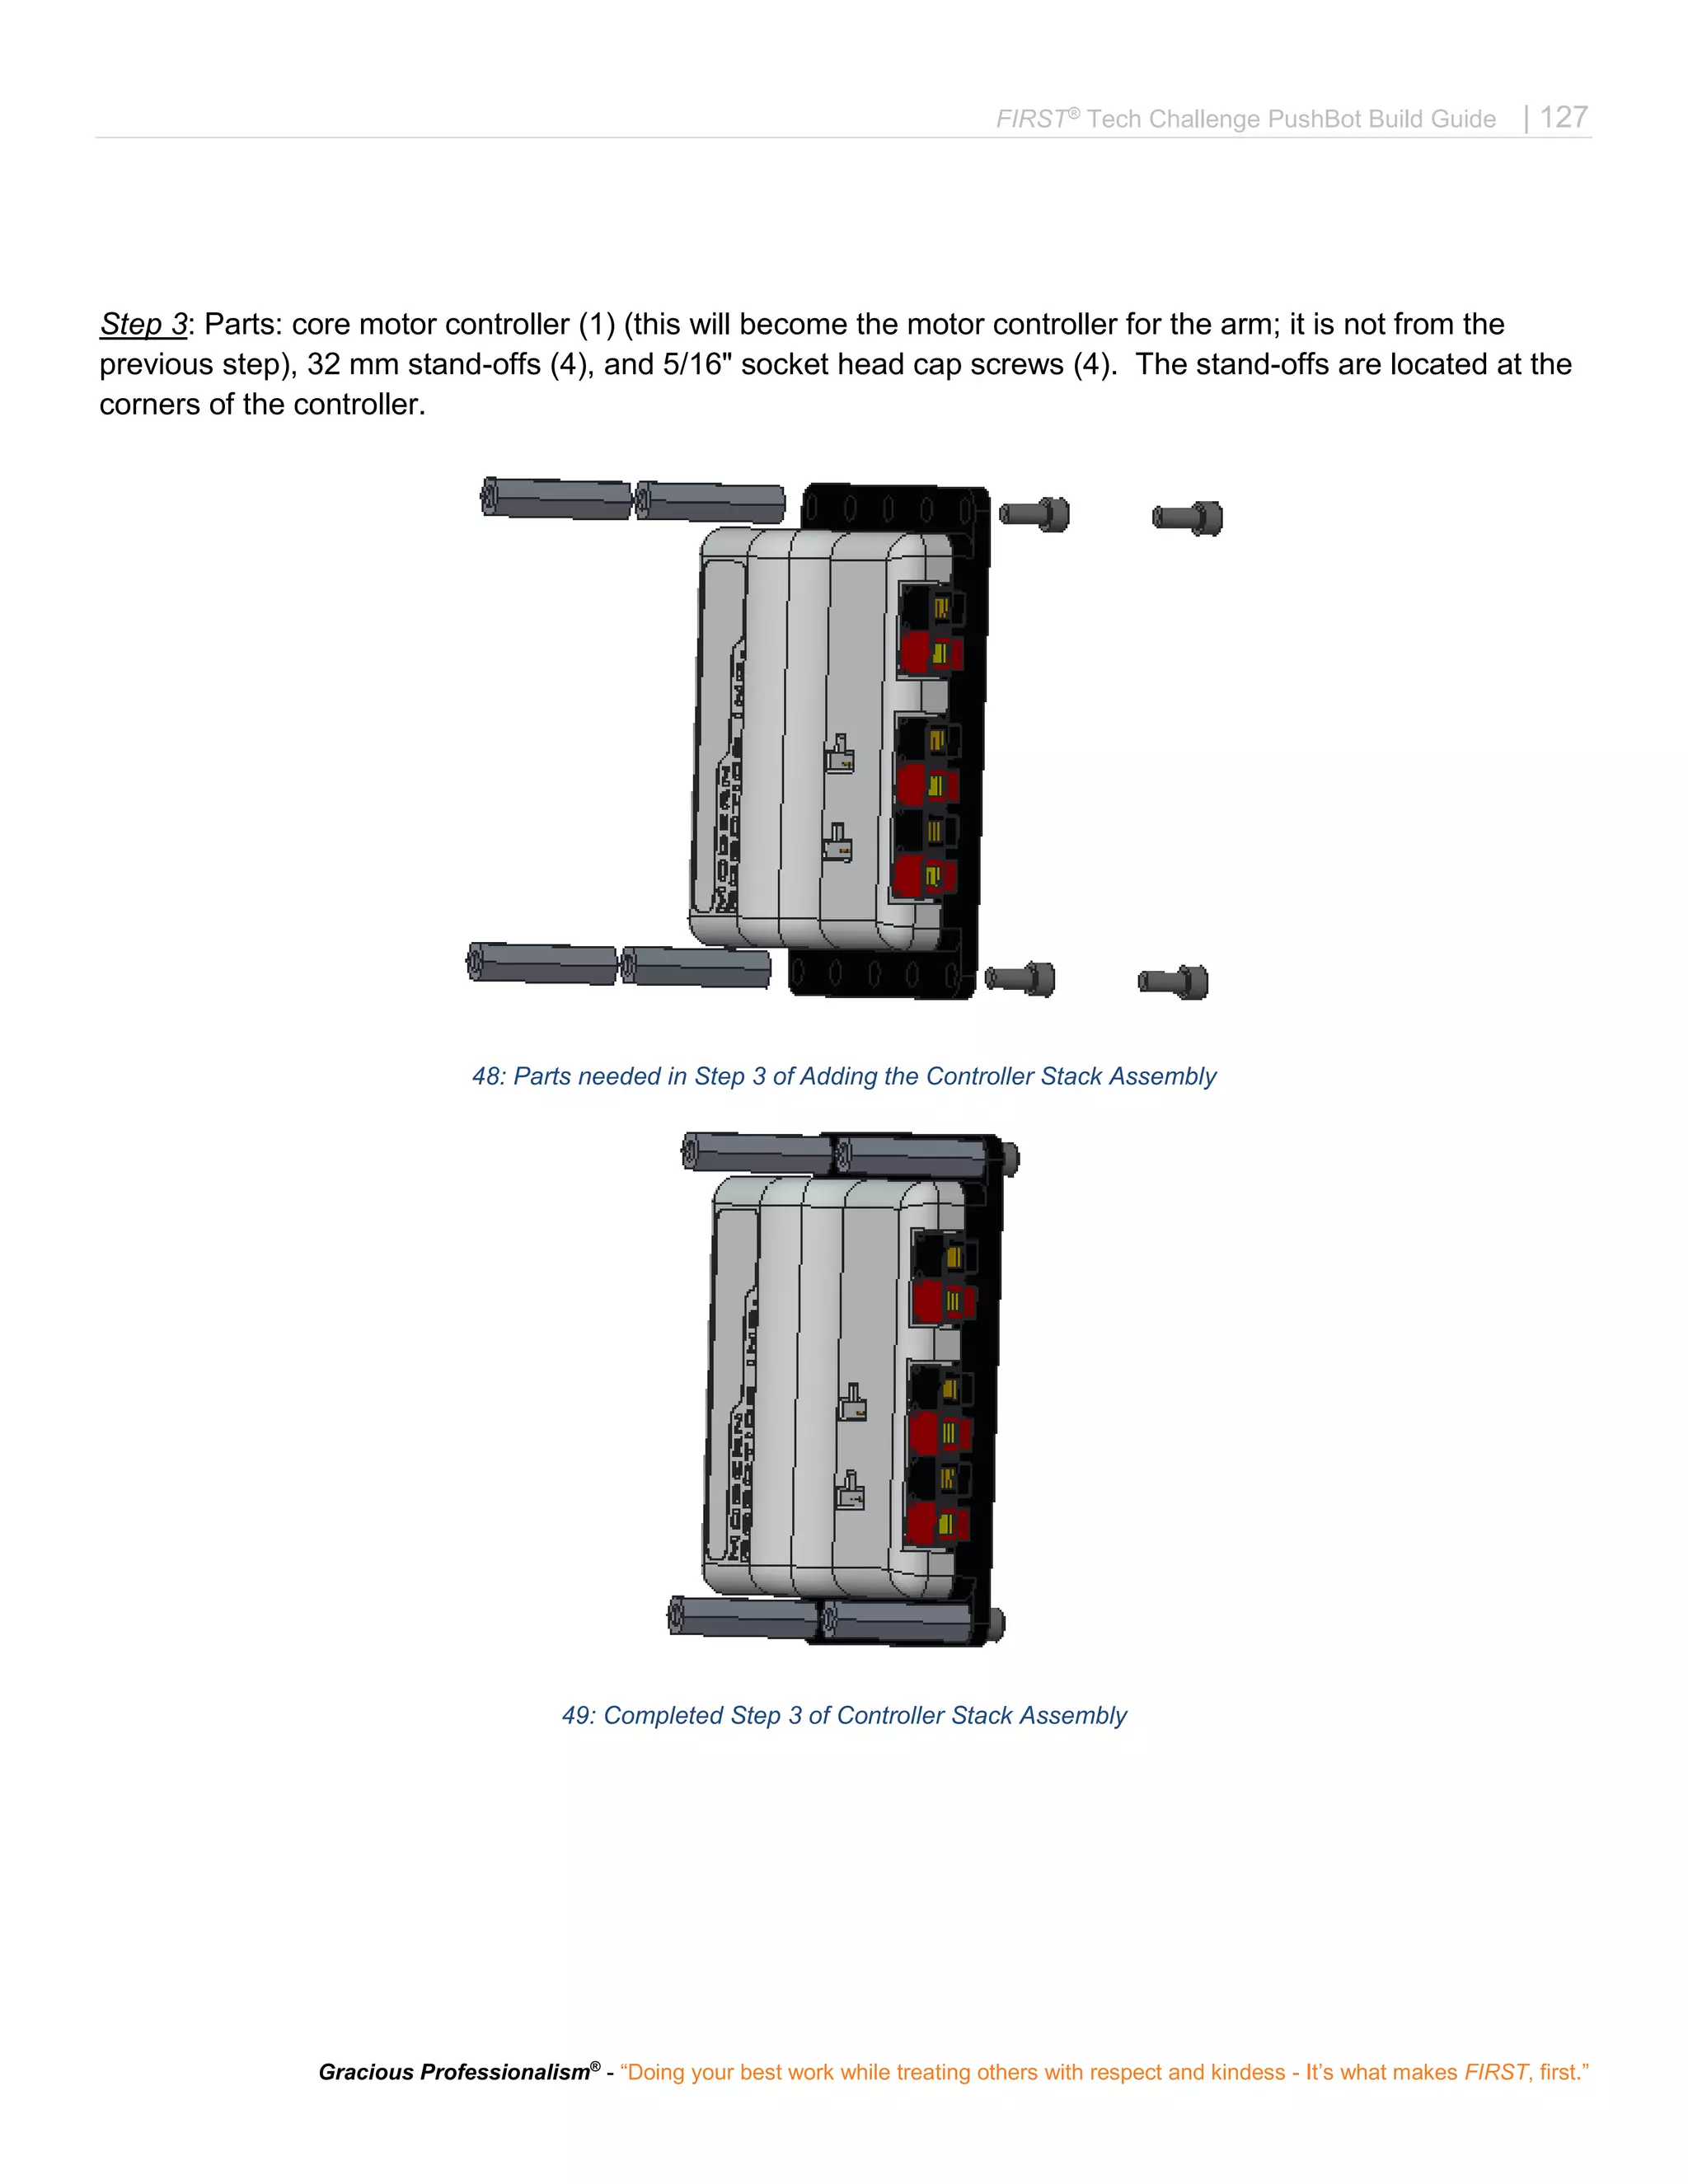
Step 3: [make two] Parts: motor assembly from the previous step, motor shaft hub (and its included set screw)
(1), 40-tooth gear (1), button head cap screws (4)
65: Parts needed in Step 3 of Adding the Drive
66: Completed Step 3 of Adding the Drive Motors](https://image.slidesharecdn.com/pushbot-build-guide-170705193132/75/FTC-PushBot-Build-Guide-138-2048.jpg)

![152 | FIRST®
Tech Challenge PushBot Build Guide
Revision 1.1: 08.15.2016
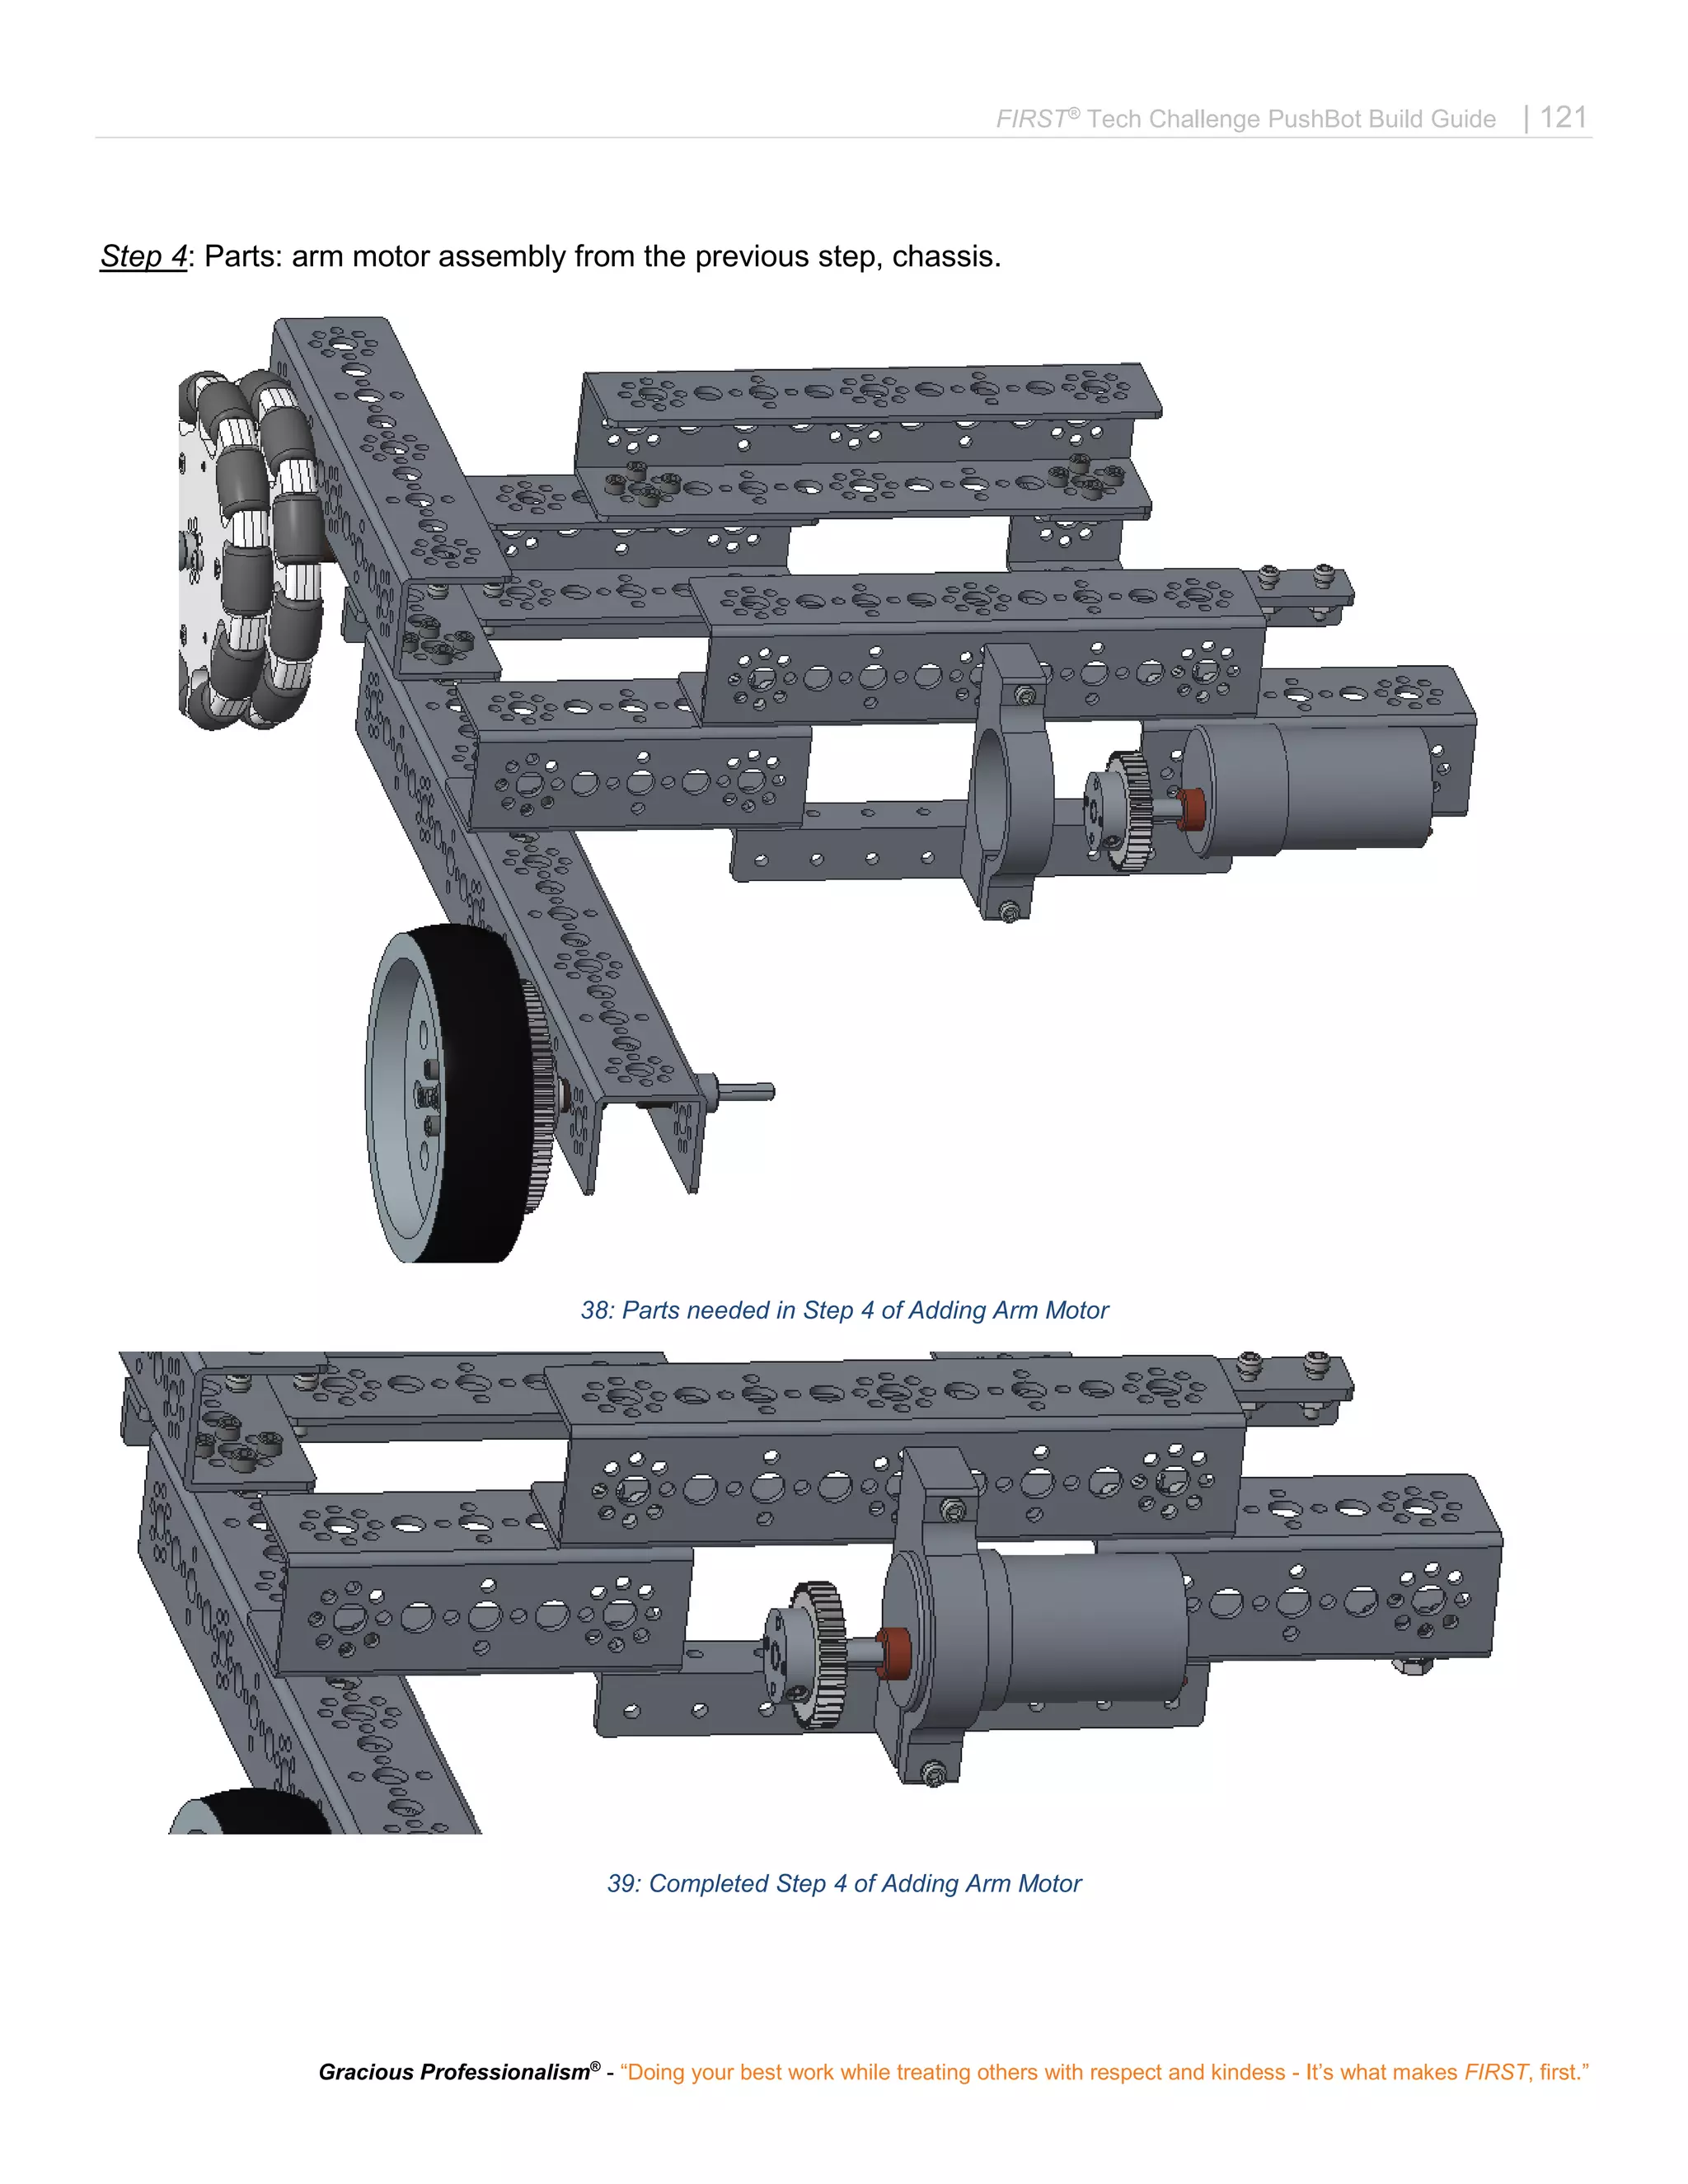
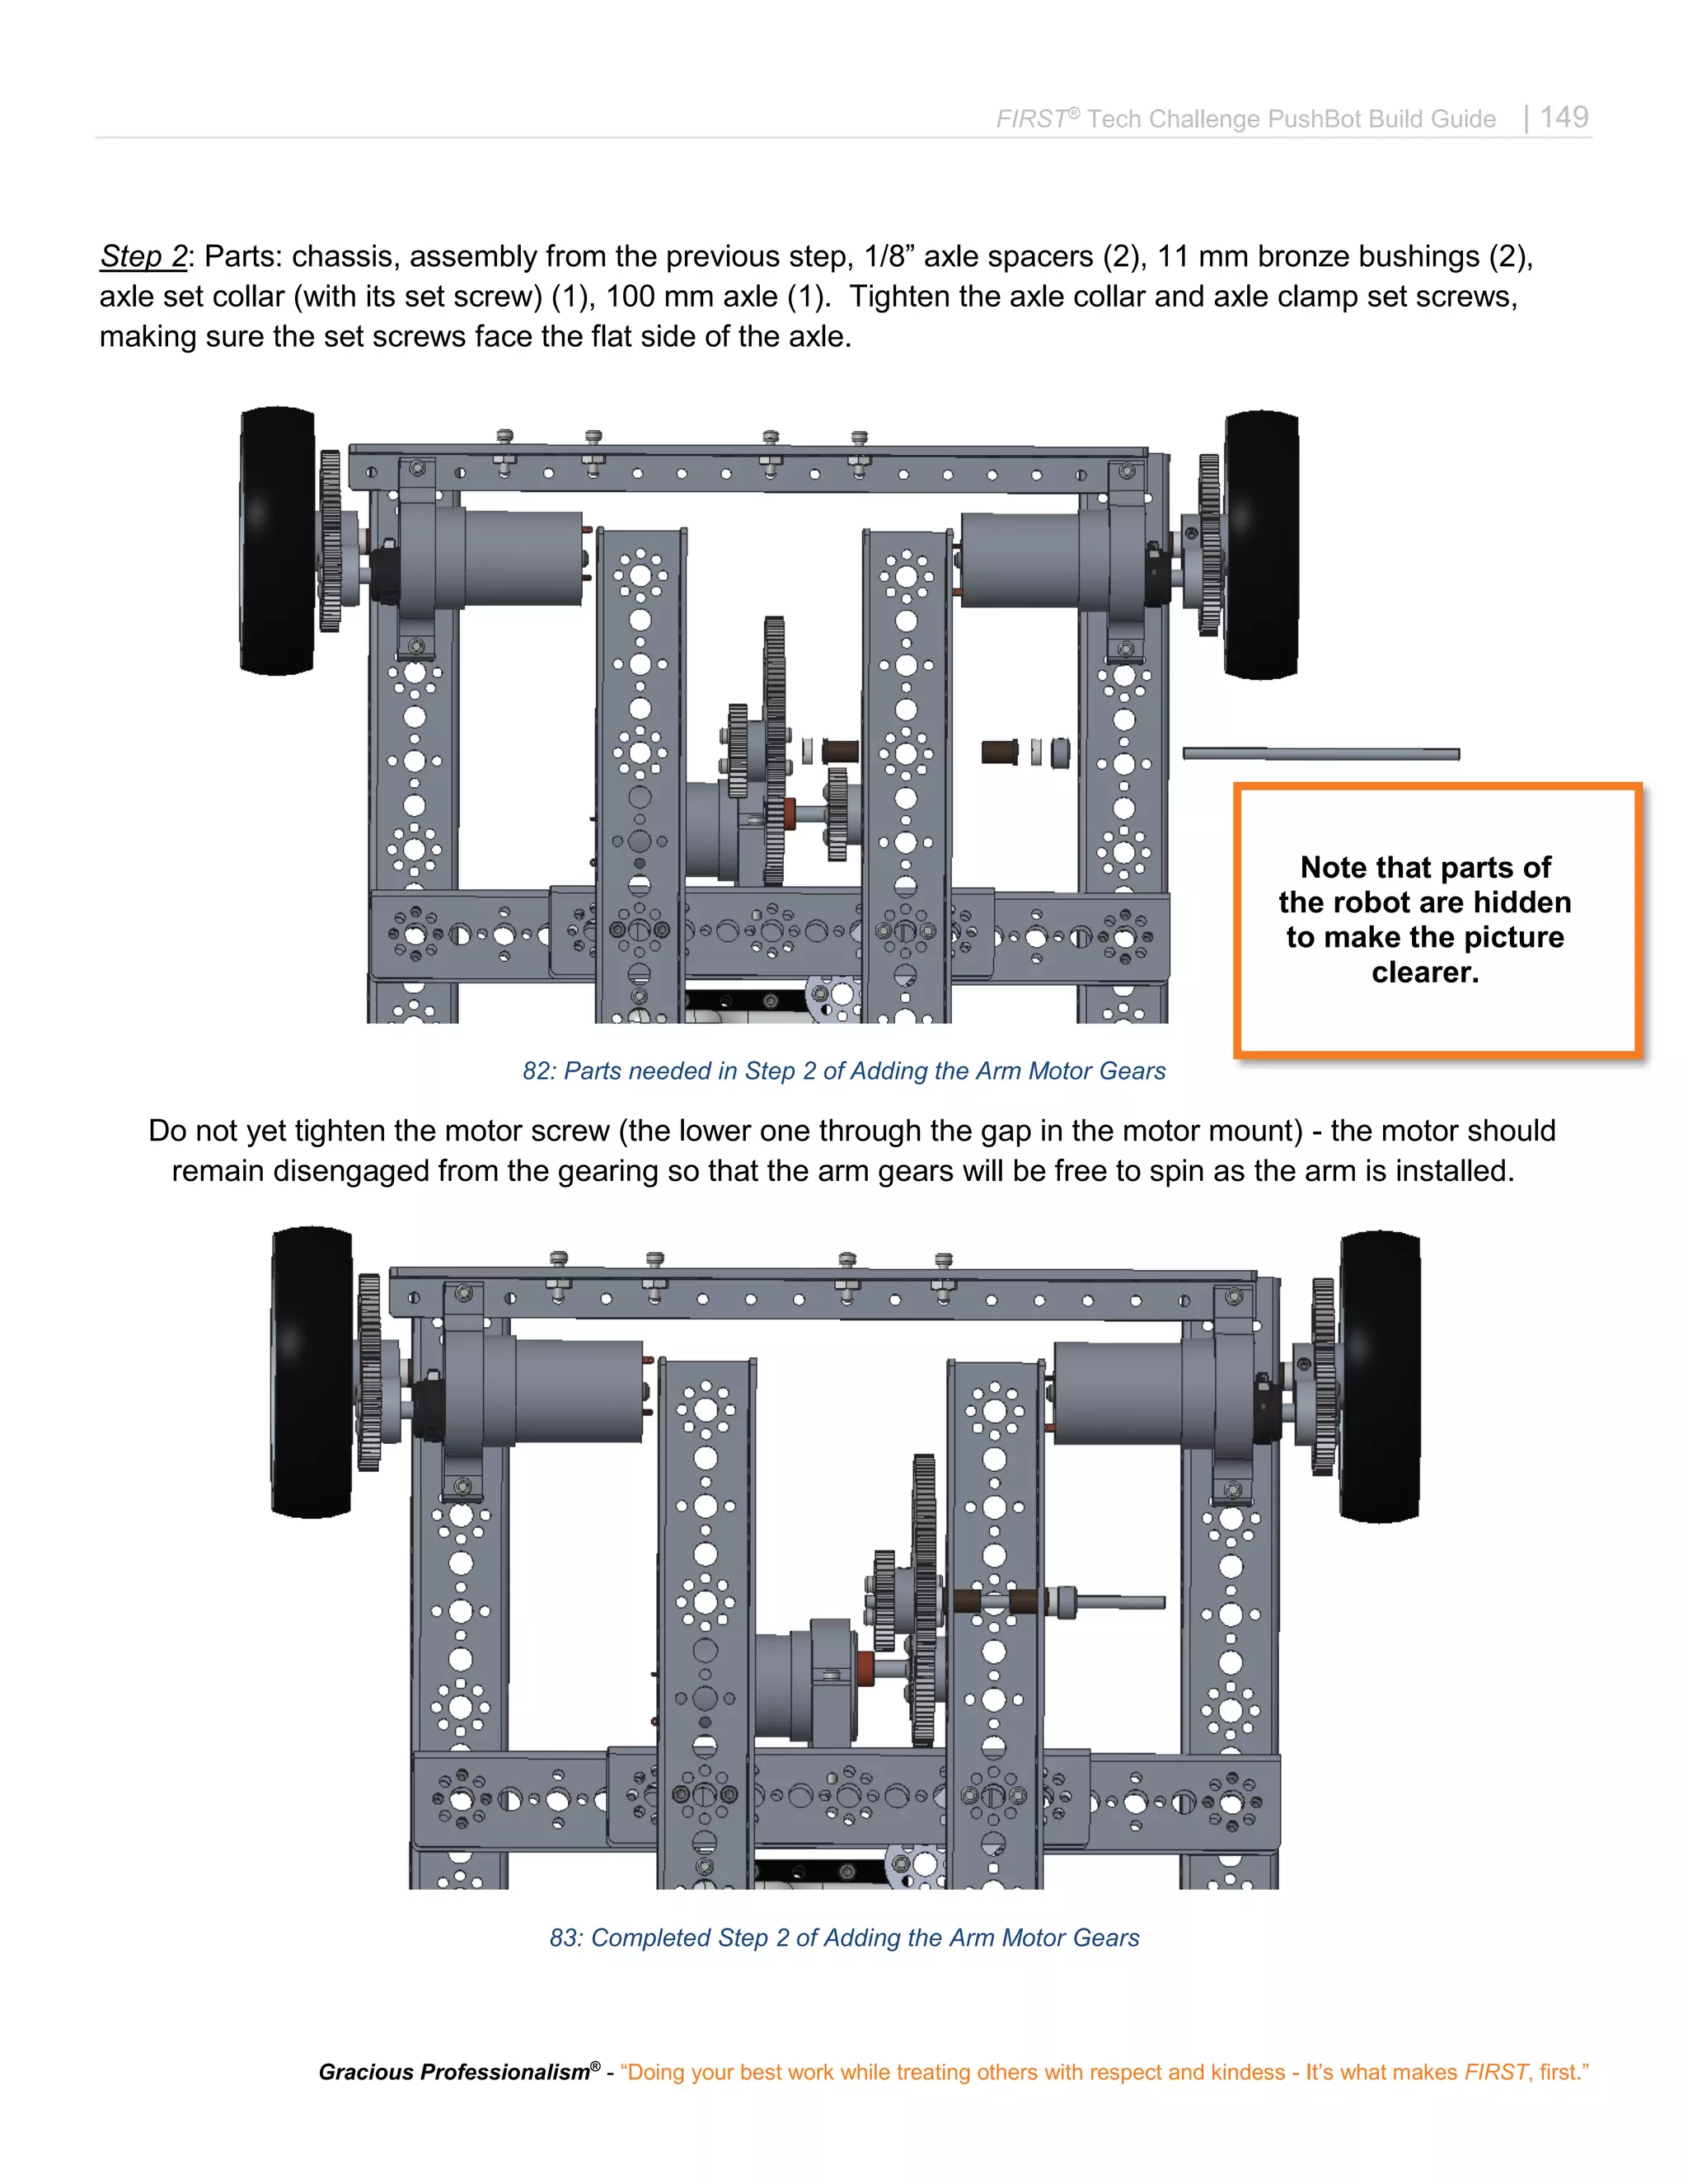
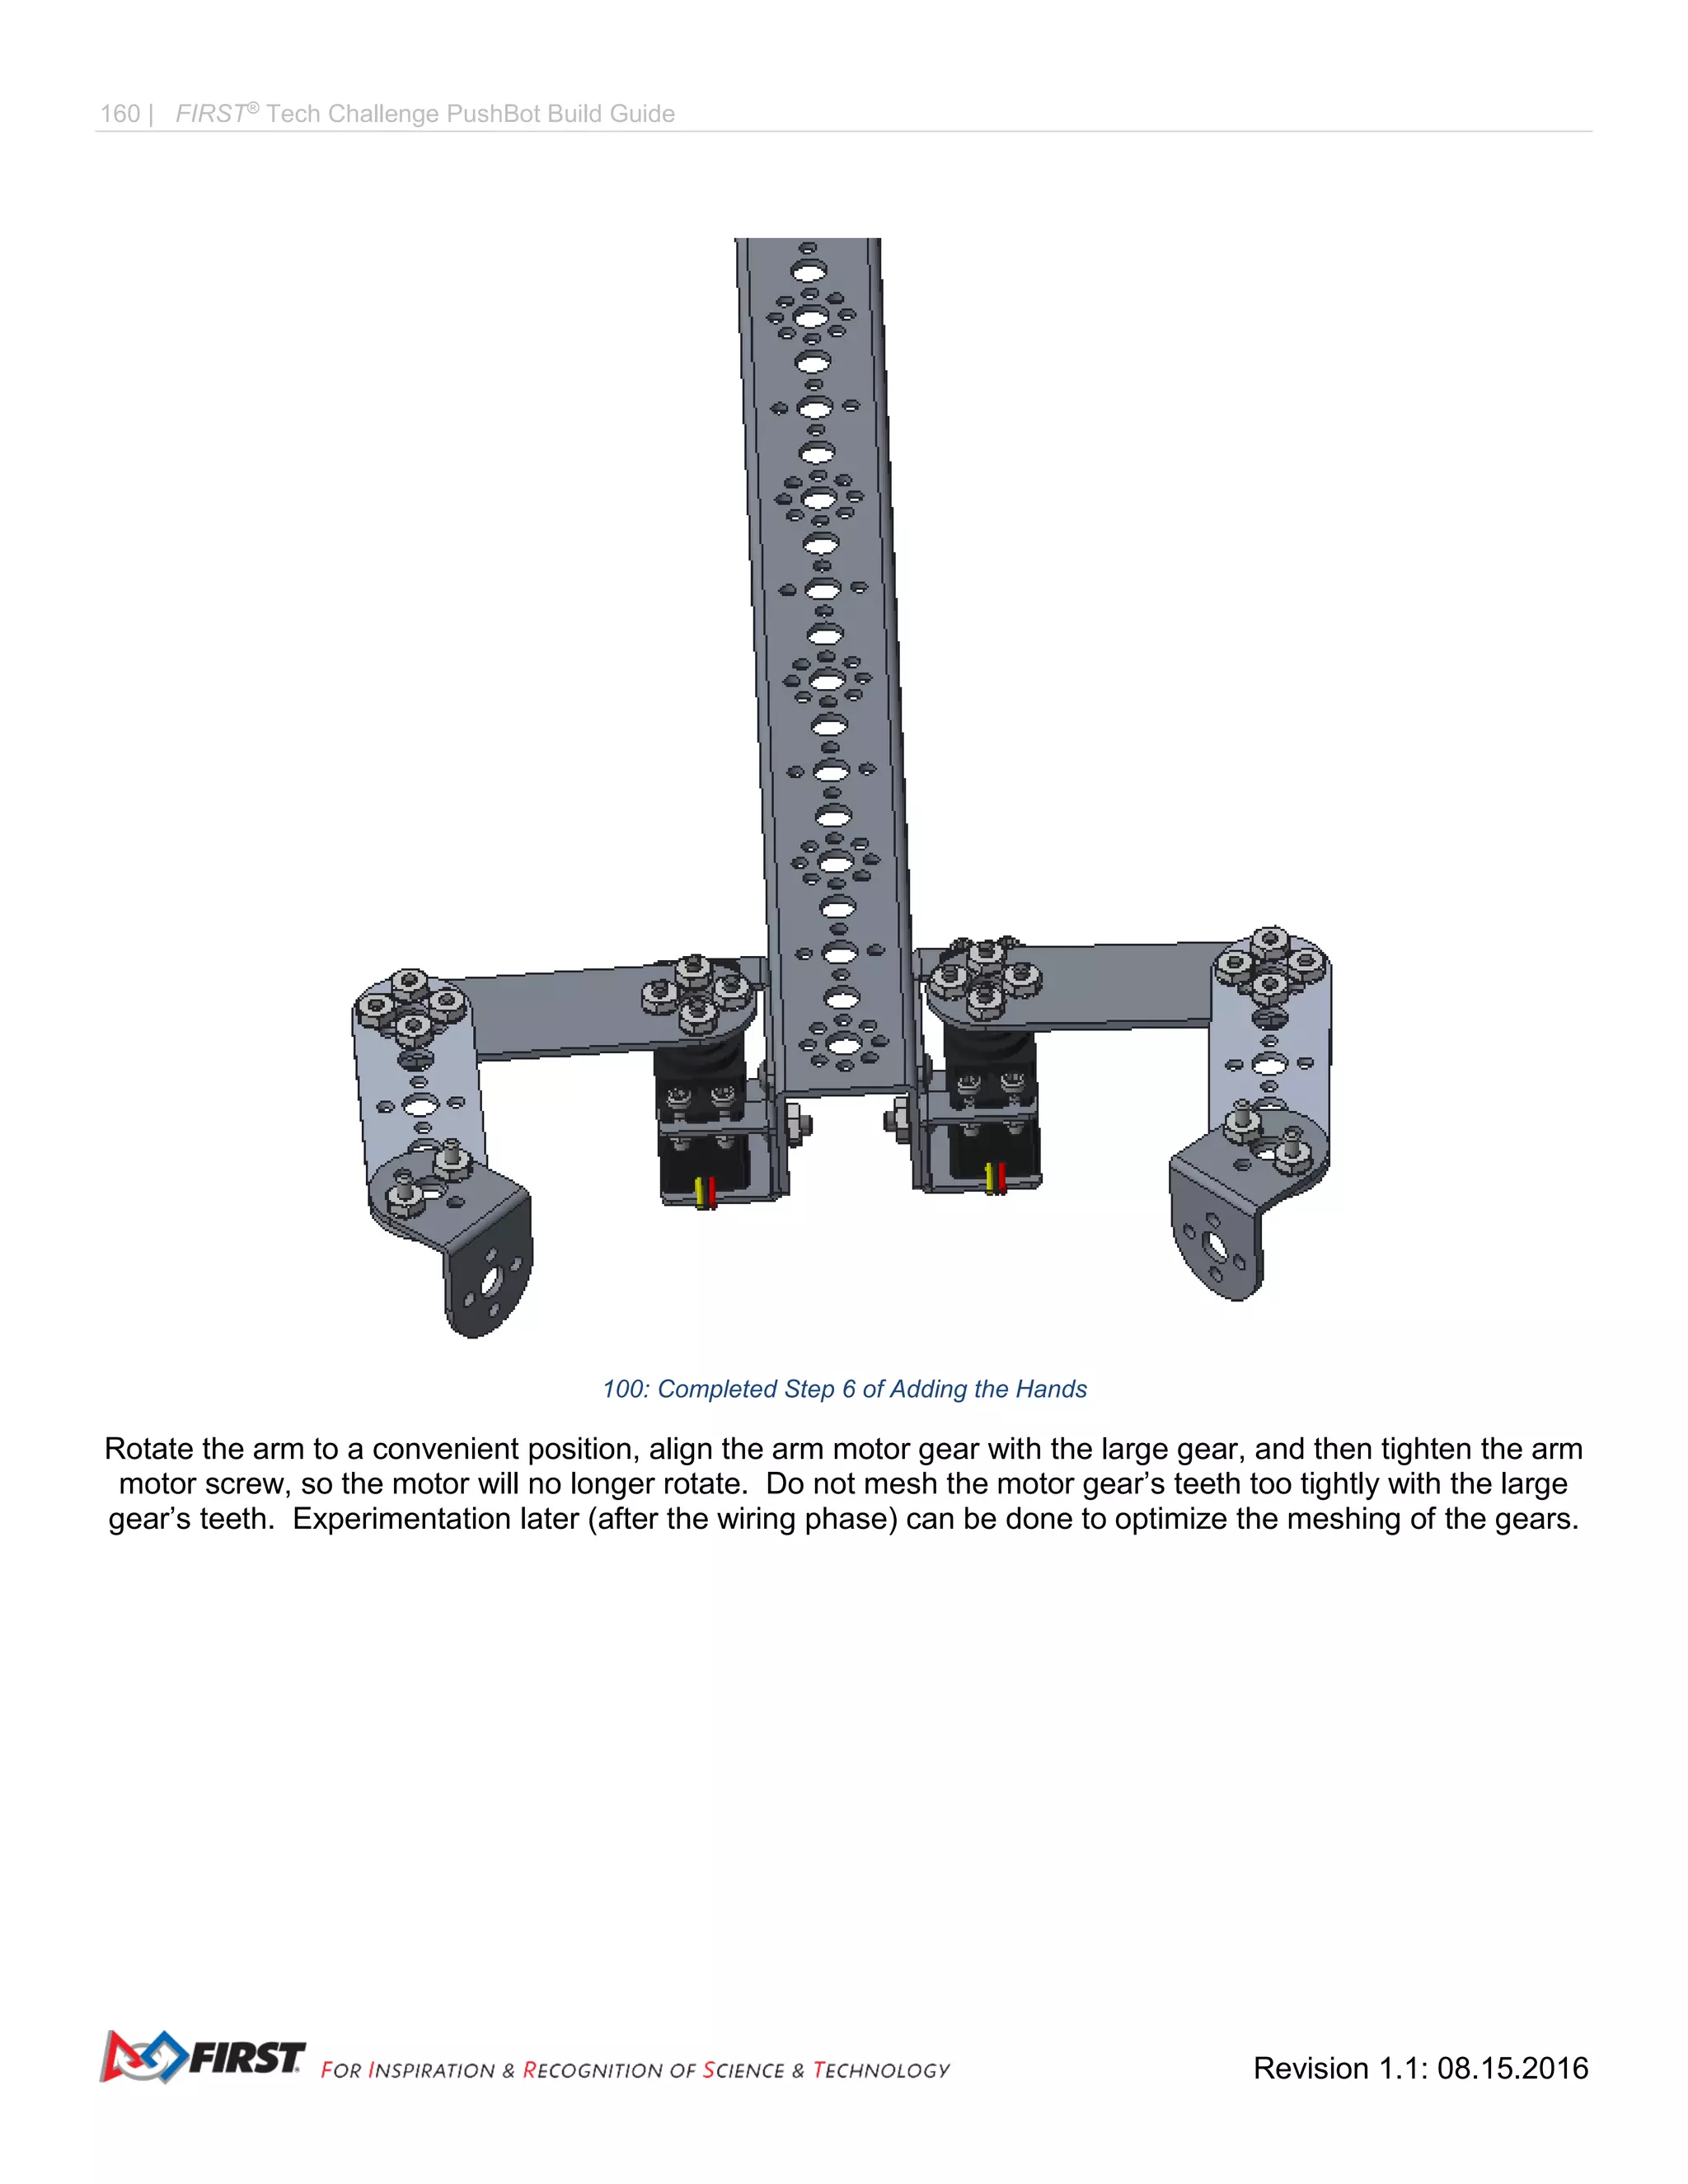
Step 2: Parts: chassis, arm assembly from the previous step, axle collar (with its set screw), 11 mm bronze
bushings (3), 100 mm axle, 1/8” axle spacer (1).
86: Parts needed in Step 2 of Adding the Arm
Make sure the set screws of the collar and clamp are facing the flat side of the axle.
The order from left to right in the image below is bushing, channel, spacer, collar, [space], arm, bushing,
bushing, channel. Align the large arm gear with the small gear on the chassis.
87: Completed Step 2 of Adding the Arm Motor Gears
A detail of the axel is shown on the next page.
Note that the
majority of the
robot is hidden to
make the picture
clearer.](https://image.slidesharecdn.com/pushbot-build-guide-170705193132/75/FTC-PushBot-Build-Guide-152-2048.jpg)
![FIRST®
Tech Challenge PushBot Build Guide | 153
Gracious Professionalism®
- “Doing your best work while treating others with respect and kindess - It’s what makes FIRST, first.”
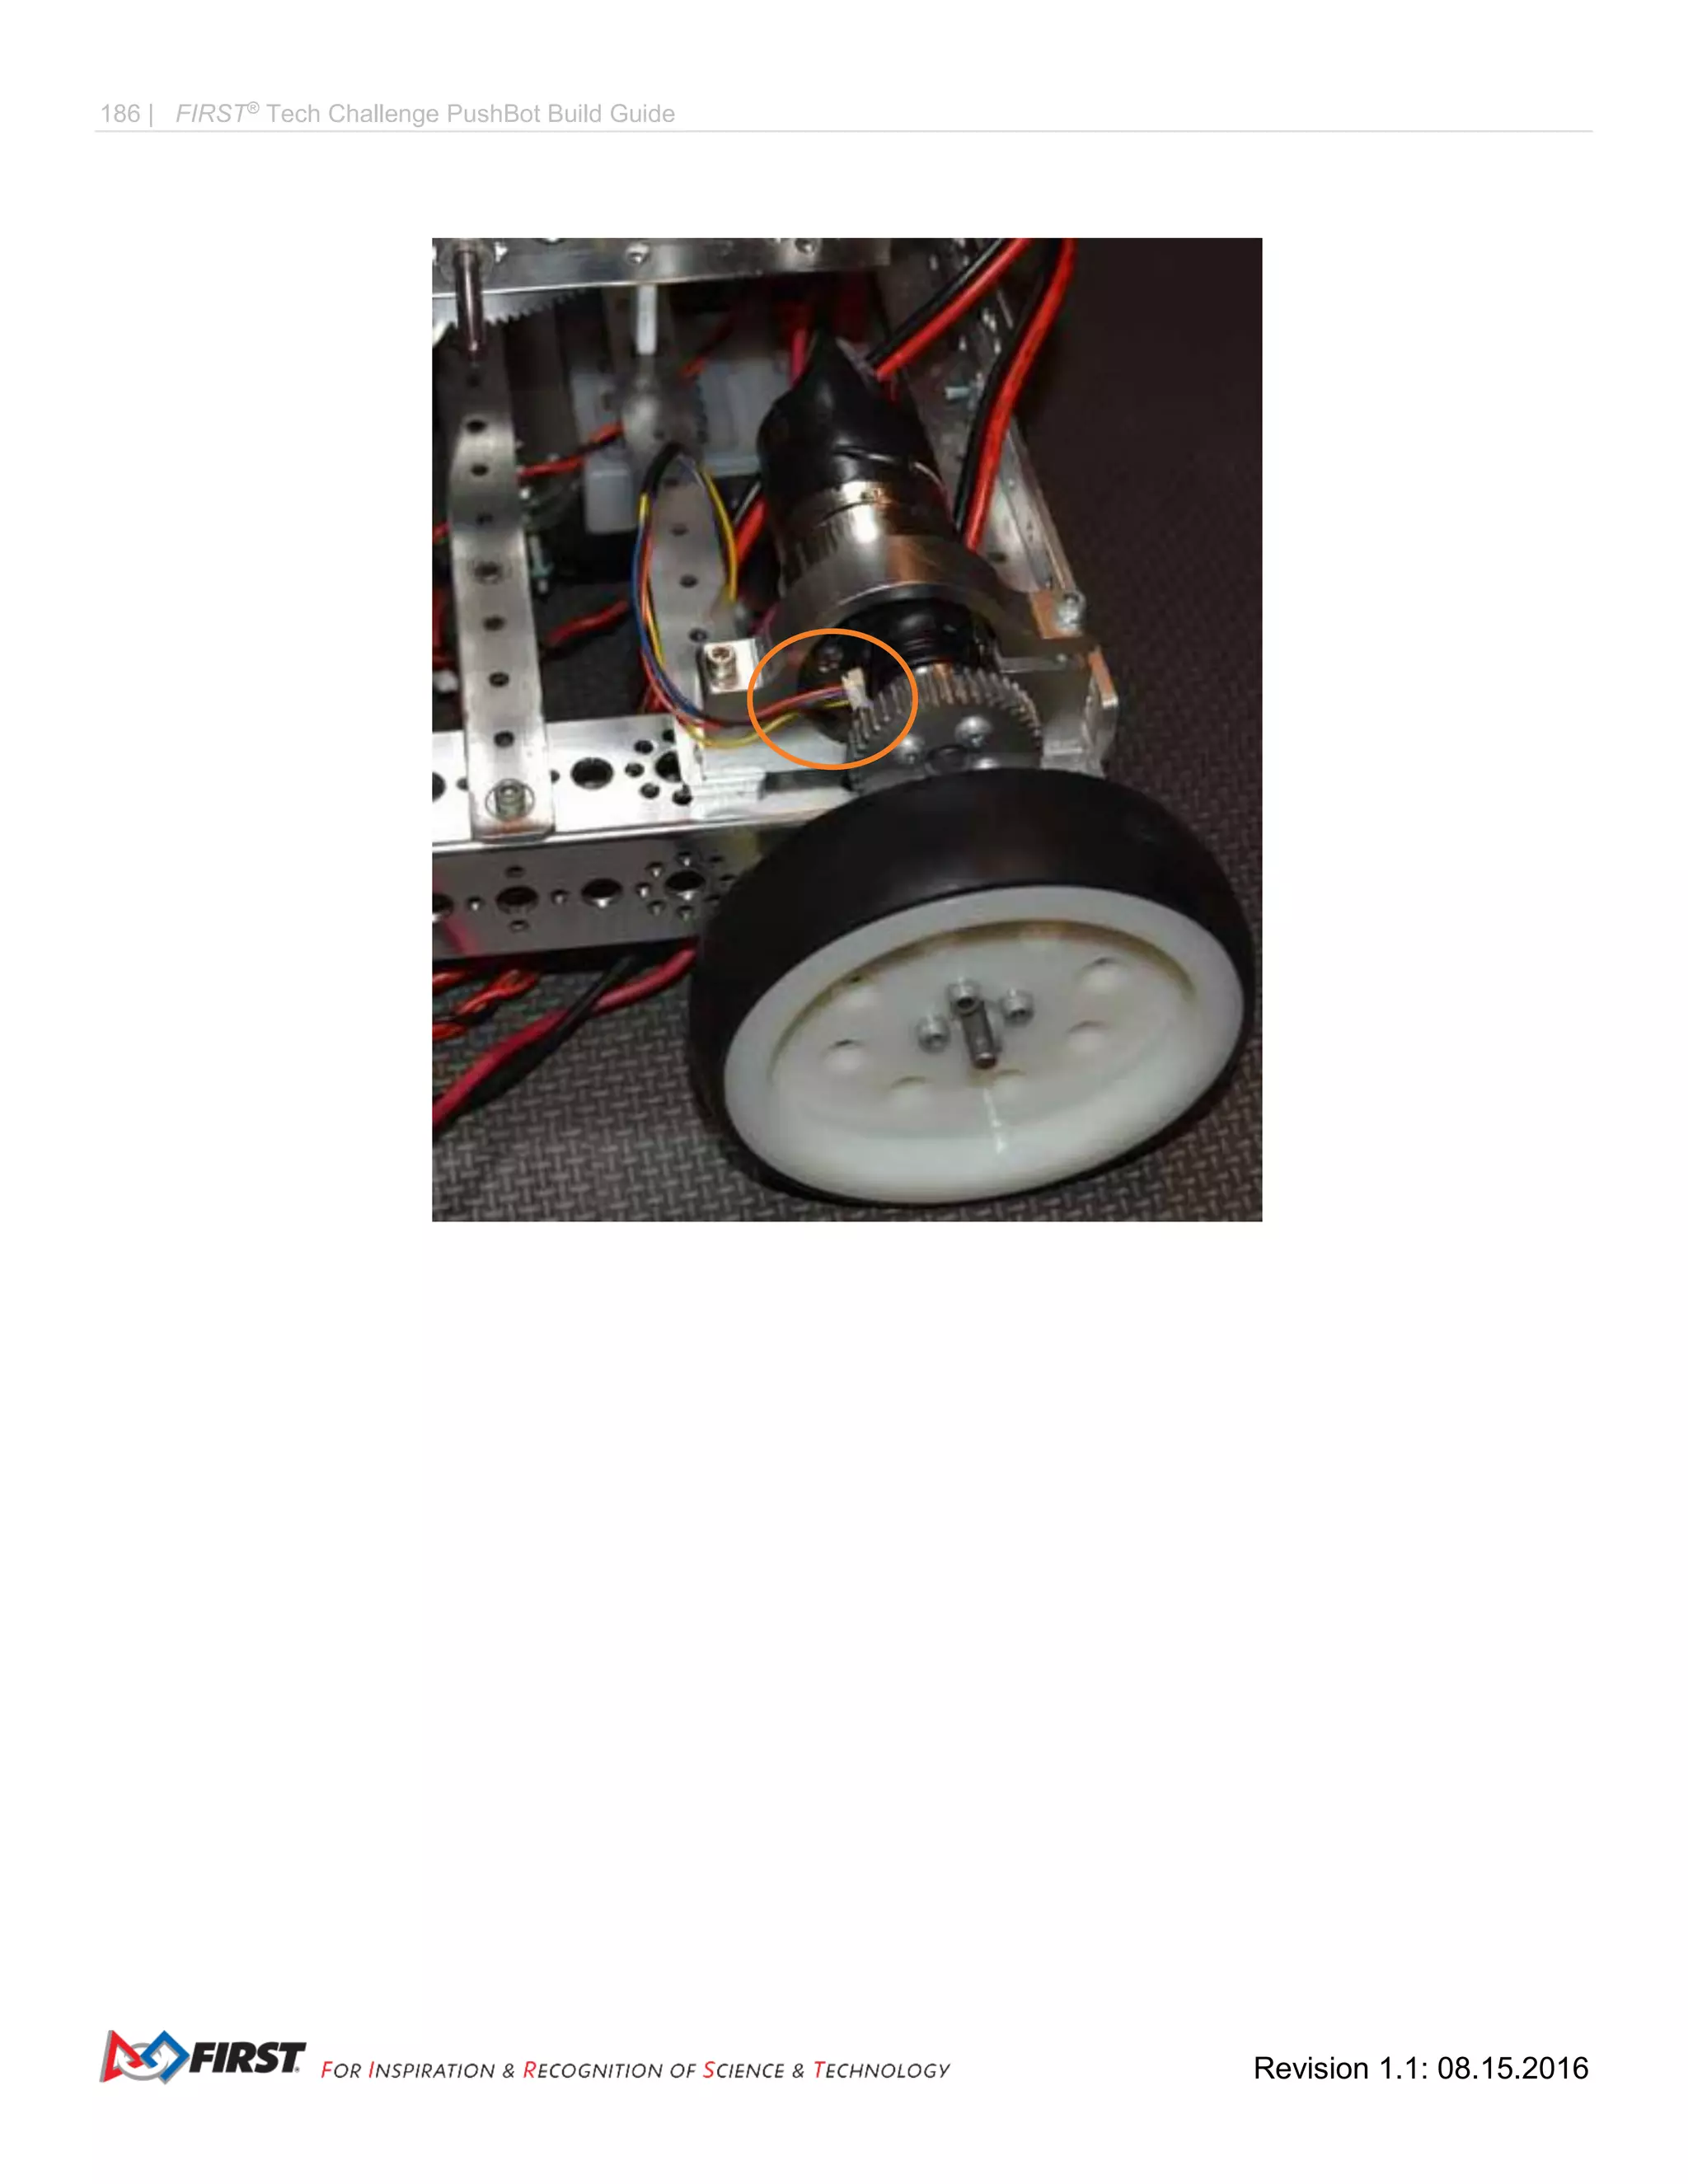
88: Completed Step 2 of Adding the Arm Motor Gears detail view
This detail of the completed step (shown on the previous page) shows the order.
The order from left to right is bushing, channel, spacer, collar, [space], arm, bushing, bushing, channel.](https://image.slidesharecdn.com/pushbot-build-guide-170705193132/75/FTC-PushBot-Build-Guide-153-2048.jpg)


![PPT On IOT BasedAutomatic Bumper [Autosaved].pptx](https://cdn.slidesharecdn.com/ss_thumbnails/pptoniotbasedautomaticbumperautosaved-240315163352-7fb59c2d-thumbnail.jpg?width=640&height=640&fit=bounds)