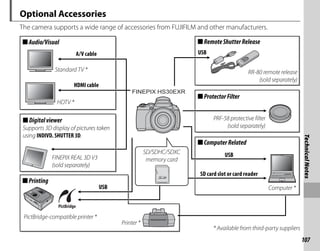
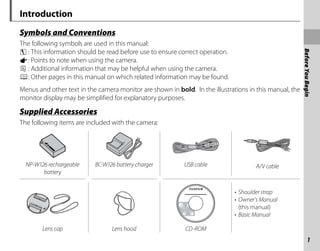
This document is the owner's manual for the Fujifilm FinePix HS30EXR digital camera. It contains safety warnings and instructions that must be read before using the camera. The manual provides information about camera features and how to use them, including basic photography, playback, movies, menus and troubleshooting.

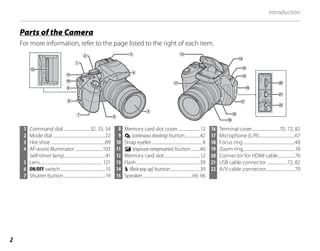

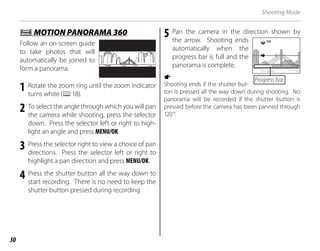

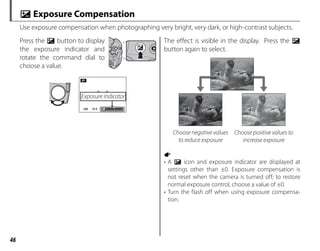


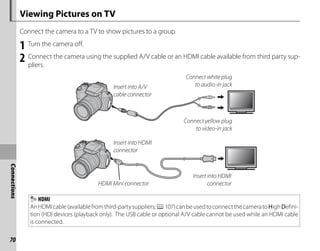
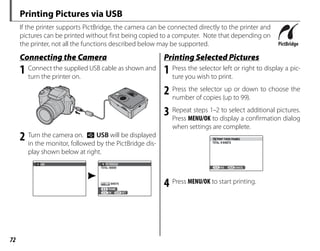
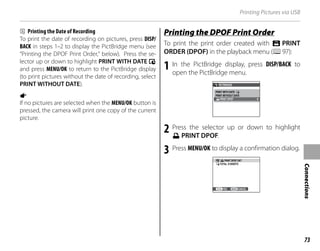
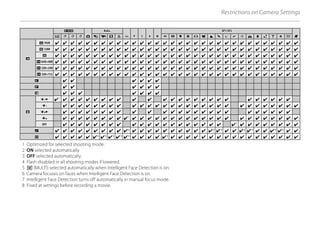
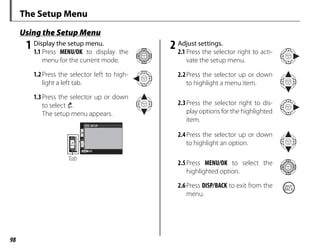
![84
Menus
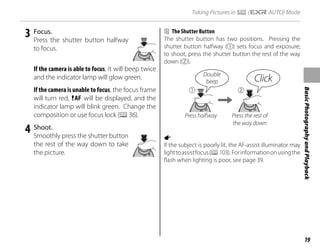
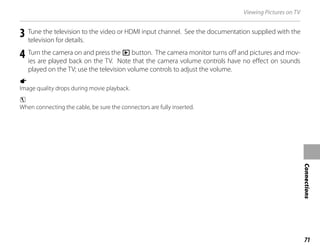
Using the Menus: Shooting Mode
Use the shooting menus to adjust shooting set-
tings. The options available vary with the shoot-
ing mode selected.
Using the Shooting Menu
Using the Shooting Menu
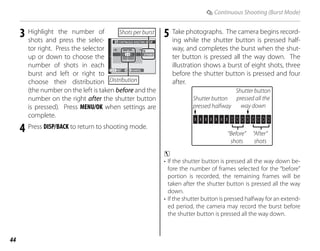
1 Press MENU/OK to display the shoot-
ing menu.
2 Press the selector up or down to
highlight the desired menu item.
3 Press the selector right to display op-
tions for the highlighted item.
4 Press the selector up or down to
highlight the desired option.
5 Press MENU/OK to select the high-
lighted option.
6 Press DISP/BACK to exit from the
menu.
Shooting Menu Options
Shooting Menu Options
Default values are shown in square brackets [ ].
A
A E
E MODE [
MODE [R
R]
]
Choose an option for E mode (P23).
A
A Adv.
Adv. MODE [
MODE [i
i]
]
Choose an advanced shooting mode (P24).
A
A SCENE POSITION
SCENE POSITION [
[SP1:
SP1:L
L] [
] [SP2:
SP2:M
M]
]
Choose a scene for SP1/SP2 mode (P28).
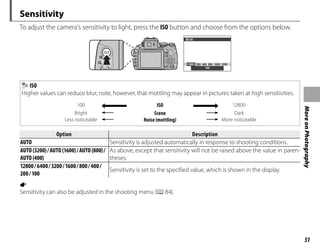
N
N ISO [AUTO (800)]
ISO [AUTO (800)]
Control the camera’s sensitivity to light (P51).](https://image.slidesharecdn.com/finepixhs30exrmanual01-211006181703/85/Finepix-hs30exr-manual_01-98-320.jpg)
![85
Menus
Using the Menus: Shooting Mode
O
O IMAGE SIZE [
IMAGE SIZE [O
O 4:3
4:3]
]
Choose the image size and
aspect ratio at which pictures
are recorded. Large pictures
can be printed at large sizes with no drop in qual-
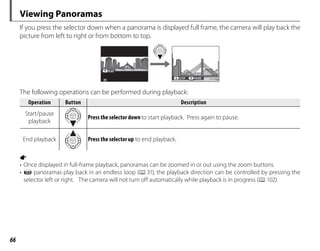
ity, while small pictures require less memory, al-
lowing more pictures to be recorded.
Size Versus Aspect Ratio
Size
Size
Option
Option Prints at sizes up to
Prints at sizes up to
O 34×25cm (13.5×10 in.)
P 24×18 cm (9.5×7 in.)
Q 17×13 cm (7 × 5 in.)
Aspect ratio
Aspect ratio
4:3: Pictures have
the same propor-
tions as the cam-
era display.
4
3
3:2: Pictures have
the same propor-
tions as a frame of
35 mm film.
3
2
16:9: Suited for
display on High
Definition (HD) de-
vices.
16
9
T
T IMAGE QUALITY [FINE]
IMAGE QUALITY [FINE]
Choose how much image files are compressed.
Option
Option Description
Description
FINE
FINE
Low compression. Select for higher image
quality.
NORMAL
NORMAL
High compression. Select this option to
store more pictures.
Aspect ratio
O 4:3
Size](https://image.slidesharecdn.com/finepixhs30exrmanual01-211006181703/85/Finepix-hs30exr-manual_01-99-320.jpg)
![86
Using the Menus: Shooting Mode
U
U DYNAMIC RANGE [AUTO]
DYNAMIC RANGE [AUTO]
Control contrast. Higher values are recommend-
ed for scenes that include both sunlight and deep
shade or for increased contrast with such subjects
as sunlight on water, brightly-lit autumn leaves,
portraits taken against a blue sky, and white ob-
jects or people wearing white; note, however, that
mottling may appear in pictures taken at higher
values. If AUTO is selected, the camera will auto-
matically select values between 100% and 400%
in response to shooting conditions.
Option
Option Description
Description
AUTO
AUTO
A
A 100%
100% Increase contrast when shooting
indoors or under overcast skies.
Reduce loss of detail in highlights
and shadows when photograph-
ing high-contrast scenes.
B
B 200%
200%
C
C 400%
400%
D
D 800%
800%
M
M 1600%
1600%
a
M 1600% and D 800% are available only when
D-RANGE PRIORITY is selected in E mode.
P
P FILM SIMULATION [
FILM SIMULATION [c
c]
]
Simulate the effects of different types of film, in-
cluding sepia and black-and-white.
Option
Option Description
Description
c
c PROVIA/
PROVIA/
STANDARD
STANDARD
Standard color reproduction. Suited to a
wide range of subjects, from portraits to
landscapes.
d
d Velvia/
Velvia/
VIVID
VIVID
A high-contrast palette of saturated col-
ors, suited to nature photographs.
e
e ASTIA/
ASTIA/
SOFT
SOFT
A soft-toned palette of less saturated col-
ors.
b
b B&W
B&W Take pictures in black and white.
f
f SEPIA
SEPIA Take pictures in sepia.](https://image.slidesharecdn.com/finepixhs30exrmanual01-211006181703/85/Finepix-hs30exr-manual_01-100-320.jpg)
![87
Menus
Using the Menus: Shooting Mode
d
d WB SHIFT
WB SHIFT
White balance can be fine-tuned. Adjust the se-
lected color axis (R–Cy=Red-Cyan or B-Ye=Blue–
Yellow) by +3 to –3 in increments of one.
f
f COLOR [MID]
COLOR [MID]
Adjust color density (HIGH/MID/LOW).
e
e TONE [STD]
TONE [STD]
Adjust contrast (HARD/STD/SOFT).
q
q SHARPNESS [STD]
SHARPNESS [STD]
Choose whether to sharpen or soften outlines
(HARD/STD/SOFT).
h
h NOISE REDUCTION [STD]
NOISE REDUCTION [STD]
Choose the amount of noise reduction (HIGH/
STD/LOW).
y
y INTELLIGENT SHARPNESS [OFF]
INTELLIGENT SHARPNESS [OFF]
Select ON to process photos digitally for sharp,
super high-resolution results.
a
• The time needed to record images increases.
• The effects are not visible in the display during shoot-
ing.
• Intelligent sharpness may turn off automatically in
some modes.
• This option has no effect on photos taken in continu-
ous mode.
R
R INTELLIGENT DIGITAL ZOOM [OFF]
INTELLIGENT DIGITAL ZOOM [OFF]
Intelligent digital zoom can be used to magnify
the image by 1.4× or 2× while processing it for
sharp, high-resolution results.
a
• Intelligent digital zoom may end when another mode
is selected.
• Intelligent digital zoom may sometimes produce low-
er quality images than optical zoom.
• The time needed to record images increases.
• The effects are not visible in the display during shoot-
ing.
• Intelligent digital zoom is not available in continuous
mode or during movie recording.](https://image.slidesharecdn.com/finepixhs30exrmanual01-211006181703/85/Finepix-hs30exr-manual_01-101-320.jpg)
![88
Using the Menus: Shooting Mode
Z
Z ADVANCED ANTI BLUR [ON]
ADVANCED ANTI BLUR [ON]
Select ON to enable advanced anti blur in R
mode (P24).
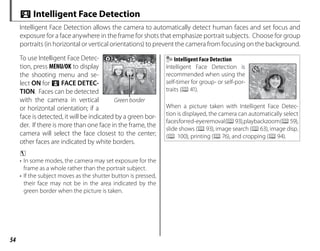
b
b FACE DETECTION
FACE DETECTION
Choose whether the camera automatically de-
tects and sets focus and exposure for human por-
trait subjects (P54).
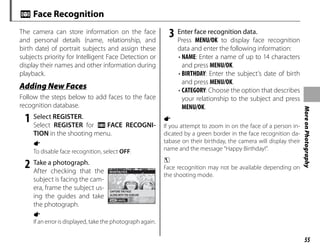
n
n FACE RECOGNITION
FACE RECOGNITION
Add portrait subjects to the face recognition da-
tabase. These subjects will be given priority dur-
ing Intelligent Face Detection, and their names
and other information can be viewed during
playback (P55).
W
W MOVIE MODE [
MOVIE MODE [i
i]
]
Choose a frame size for movies (P68).
a
a STILL SHOOTING IN MOVIE
STILL SHOOTING IN MOVIE
[MOVIE PRIORITY]
[MOVIE PRIORITY]
Choose how the camera records photographs
taken during movie recording (P68).
Option
Option Description
Description
MOVIE
MOVIE
PRIORITY
PRIORITY
The camera takes a photograph without
interrupting movie recording. Image size
is determined by the option selected for
W MOVIE MODE.
STILL
STILL
IMAGE
IMAGE
PRIORITY
PRIORITY
The camera interrupts filming to take the
photograph and resumes filming automati-
cally when recording is complete. Image
size is determined by the option selected
for O IMAGE SIZE, but note that the pho-
tograph will be recorded at size P if O is
selected.](https://image.slidesharecdn.com/finepixhs30exrmanual01-211006181703/85/Finepix-hs30exr-manual_01-102-320.jpg)
![89
Menus
Using the Menus: Shooting Mode
J
J AE BKT EV STEPS [±
AE BKT EV STEPS [±1
/3]
]
Choose the size of the exposure bracketing incre-
ment used when O (AE bracketing) is selected in
continuous shooting mode (P 45).
Choose from increments of ±1
/3 EV, ±2/3 EV, and
±1EV (note that the camera may not be able to
use the selected bracketing increment if the
amount of over- or under- exposure exceeds the
limits of the exposure metering system).
I
I FLASH [±0]
FLASH [±0]
Adjust flash brightness. Choose from values be-
tween +2/3 EV and –2/3 EV. The default setting is ±0.
Note that the desired results may not be achieved
depending on shooting conditions and the dis-
tance to the subject.
g
g EXTERNAL FLASH [OFF]
EXTERNAL FLASH [OFF]
Choose ON when using an optional flash unit (ex-
cept Fujifilm products) mounted on the camera
hot shoe.
c
• The flash may not fully light the subject at speeds
faster than 1
/1000 s.
• Use auto or custom white balance (P52).
• If the built-in flash is raised when ON is selected for
g EXTERNAL FLASH, the built-in flash will fire once
to provide a signal for the optional flash unit to fire.
• External flash units can be used in P, S, A, M or O
(S and T only) modes.
• Fujifilm external flash units do not require this setting.
a
• The camera can be used with flash units that provide
aperture adjustment, external metering, and sensitiv-
ity control. Some flash units that are designed spe-
cifically for other cameras can not be used.
• For information on Fujifilm external flash units, see
Accessories from FUJIFILM (P108).](https://image.slidesharecdn.com/finepixhs30exrmanual01-211006181703/85/Finepix-hs30exr-manual_01-103-320.jpg)
![90
Using the Menus: Shooting Mode
K
K CUSTOM SET
CUSTOM SET
Save settings for P, S, A, M and all O modes
except R (P35).
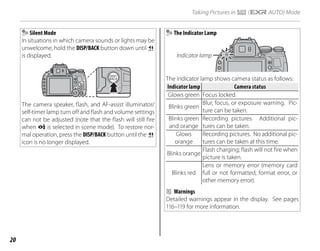
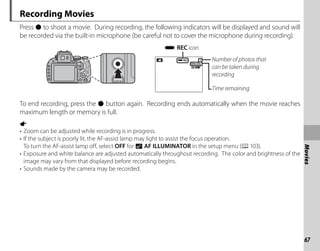
2
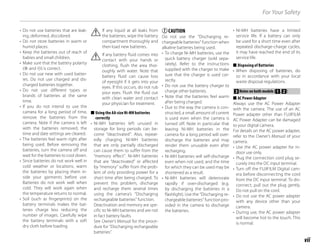
2 ELECTRONIC LEVEL [OFF]
ELECTRONIC LEVEL [OFF]
This option is useful to correct
for camera tilt. When ON is
selected, 2 lines are displayed
across the screen as shown. If
the lines stay perfectly over-
lapped, the camera is leveled.](https://image.slidesharecdn.com/finepixhs30exrmanual01-211006181703/85/Finepix-hs30exr-manual_01-104-320.jpg)

![93
Menus
Using the Menus: Playback Mode
I
I SLIDE SHOW [MULTIPLE]
SLIDE SHOW [MULTIPLE]
View pictures in an automated slide show. Choose
the type of show and press MENU/OK to start.
Press DISP/BACK at any time during the show to
view on-screen help. The show can be ended at
any time by pressing MENU/OK.
Option
Option Description
Description
NORMAL
NORMAL Press selector left or right to go back or
skip ahead one frame. Select FADE-IN
for fade transitions between frames.
FADE-IN
FADE-IN
NORMAL
NORMAL g
g As above, except that camera automati-
cally zooms in on faces selected with In-
telligent Face detection.
FADE-IN
FADE-IN g
g
MULTIPLE
MULTIPLE Display several pictures at once.
a
The camera will not turn off automatically while a slide
show is in progress.
B
B RED EYE REMOVAL
RED EYE REMOVAL
If the current picture is marked with a g icon to
indicate that it was taken with Intelligent Face De-
tection, this option can be used to remove red-
eye. The camera will analyze the image; if red-eye
is detected, the image will be processed to create
a copy with reduced red-eye.
1 Display the desired picture.
2 Select B RED EYE REMOVAL in the playback
menu.
3 Press MENU/OK.
a
• Red-eye may not be removed if the camera is unable
to detect a face or the face is in profile. Results may
differ depending on the scene. Red-eye can not be
removed from pictures that have already been pro-
cessed using red-eye removal or pictures created
with other devices.
• The amount of time needed to process the image
varies with the number of faces detected.
• Copies created with B RED EYE REMOVAL are indi-
cated by a e icon during playback.](https://image.slidesharecdn.com/finepixhs30exrmanual01-211006181703/85/Finepix-hs30exr-manual_01-107-320.jpg)
![97
Menus
Using the Menus: Playback Mode
n
n ERASE FACE RECOG.
ERASE FACE RECOG.
Remove face recognition links from the current
image. When this option is selected, the camera
will zoom in on an area in the current picture that
it has matched with a face in the face recognition
database. If the match is not correct, press MENU/
OK to remove the link to the face recognition da-
tabase.
a
Face recognition links can not be removed from copies
with a size of a or smaller.
K
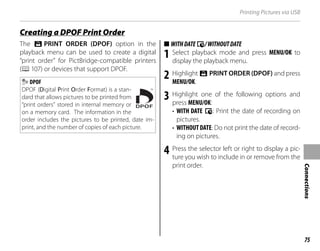
K PRINT ORDER (DPOF)
PRINT ORDER (DPOF)
Select pictures for printing on DPOF- and Pict-
Bridge-compatible devices (P73).
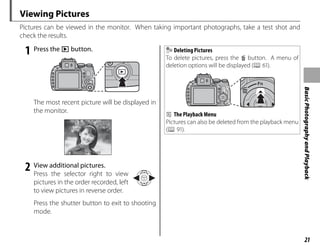
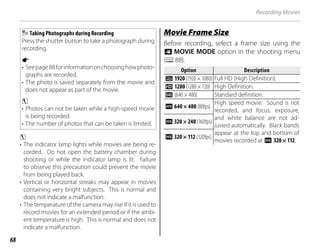
J
J DISP. ASPECT [4:3]
DISP. ASPECT [4:3]
Choose how High Definition (HD) devices display
pictures with an aspect ratio of 4 : 3 (this option is
available only when an HDMI cable is connected).
Select 16:9 to display the image so that it fills the
screen with its top and bottom cropped out, 4:3
to display the entire image with black bands at
either side.
16:9
16:9 4:3
4:3
a
Photographs with an aspect ratio of 16 : 9 are displayed
full screen, those with an aspect ratio of 3:2 in a black
frame.](https://image.slidesharecdn.com/finepixhs30exrmanual01-211006181703/85/Finepix-hs30exr-manual_01-111-320.jpg)
![99
Menus
The Setup Menu
Default values are shown in square brackets [ ].
F
F DATE/TIME
DATE/TIME
Set the camera clock (P16).
N
N TIME DIFFERENCE [
TIME DIFFERENCE [h
h]
]
Switch the camera clock instantly from your
home time zone to the local time at your desti-
nation when traveling. To specify the difference
between local time and your home time zone:
1 Highlight g LOCAL and press the selector
right.
2 Use the selector to choose the time difference
between local time and your home time zone.
3 Press MENU/OK.
To switch between local time and your home
time zone, highlight g LOCAL or h HOME and
press MENU/OK.
Option
Option Description
Description
h
h HOME
HOME
Switch to the time currently selected
for F DATE/TIME (see above).
g
g LOCAL
LOCAL
Switch to local time. If this option is
selected, g and the time and date
will be displayed in yellow for three
seconds each time the camera is
turned on.
L
L a
Choose a language.
o
o SILENT MODE [OFF]
SILENT MODE [OFF]
Select ON to disable the speaker, flash, and AF-
assist illuminator in situations in which camera
sounds or lights may be unwelcome (note that
the flash will still fire in C mode).
Setup Menu Options
Setup Menu Options](https://image.slidesharecdn.com/finepixhs30exrmanual01-211006181703/85/Finepix-hs30exr-manual_01-113-320.jpg)
![100
The Setup Menu
R
R RESET
RESET
Reset all settings except F DATE/TIME, N TIME
DIFFERENCE, O BACKGROUND COLOR, and
Q VIDEO SYSTEM to default values.
1 Highlight R RESET and press the selector
right to display a confirmation dialog.
2 Highlight OK and press MENU/OK.
K
K FORMAT
FORMAT
If a memory card is inserted in the camera, this
option will format the memory card. If no memo-
ry card is inserted, this option will format internal
memory.
c
• All data—including protected pictures—will be de-
leted from the memory card or internal memory. Be
sure important files have been copied to a computer
or other storage device.
• Do not open the battery-chamber cover during for-
matting.
A
A IMAGE DISP. [1.5 SEC]
IMAGE DISP. [1.5 SEC]
Choose how long pictures are displayed in the
LCD monitor after shooting.
Option
Option Description
Description
3 SEC
3 SEC Pictures are displayed for three sec-
onds (3 SEC) or 1.5 seconds (1.5 SEC).
Colors may differ slightly from those
in the final image.
1.5 SEC
1.5 SEC
ZOOM
ZOOM
(CONTINUOUS)
(CONTINUOUS)
Pictures are displayed until the MENU/
OK button is pressed.
OFF
OFF
Pictures are not displayed after
shooting.](https://image.slidesharecdn.com/finepixhs30exrmanual01-211006181703/85/Finepix-hs30exr-manual_01-114-320.jpg)
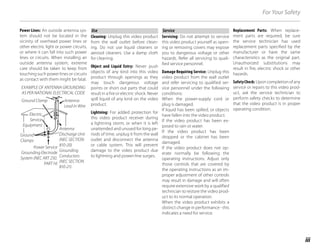
![101
Menus
The Setup Menu
B
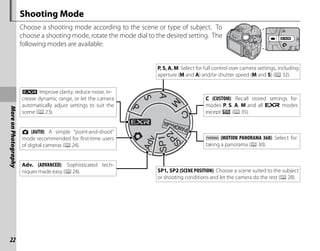
B FRAME NO. [CONT.]
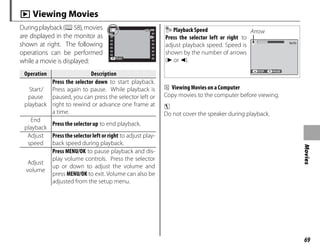
FRAME NO. [CONT.]
Newpicturesarestoredinim-
age files named using a four-
digit file number assigned
by adding one to the last file
number used. The file num-
ber is displayed during play-
back as shown at right. B FRAME NO. controls
whether file numbering is reset to 0001 when a
new memory card is inserted or the current mem-
ory card or internal memory is formatted.
Option
Option Description
Description
CONTINUOUS
CONTINUOUS
Numbering continues from the last
file number used or the first avail-
able file number, whichever is higher.
Choose this option to reduce the
number of pictures with duplicate
file names.
RENEW
RENEW
Numbering is reset to 0001 after for-
matting or when a new memory card
is inserted.
a
• If the frame number reaches 999-9999, the shutter
release will be disabled (P118).
• Selecting R RESET (P100) sets B FRAME NO. to
CONTINUOUS but does not reset the file number.
• Frame numbers for pictures taken with other cam-
eras may differ.
G
G OPERATION VOL. [
OPERATION VOL. [c
c]
]
Adjust the volume of the sounds produced when
camera controls are operated. Choose e OFF
(mute) to disable control sounds.
H
H SHUTTER VOLUME [
SHUTTER VOLUME [c
c]
]
Adjust the volume of the sounds produced when
the shutter is released. Choose e OFF (mute) to
disable the shutter sound.
e
e SHUTTER SOUND [
SHUTTER SOUND [i
i]
]
Choose the sound made by the shutter.
100-0001
100-0001
Frame number
File
number
Directory
number](https://image.slidesharecdn.com/finepixhs30exrmanual01-211006181703/85/Finepix-hs30exr-manual_01-115-320.jpg)
![102
The Setup Menu
I
I PLAYBACK VOLUME [7]
PLAYBACK VOLUME [7]
Adjust the volume for movie and voice memo
playback.
J
J LCD BRIGHTNESS [0]
LCD BRIGHTNESS [0]
Control the brightness of the display.
T
T MONITOR SUNLIGHT MODE [OFF]
MONITOR SUNLIGHT MODE [OFF]
Select ON to make the display in the monitor eas-
ier to read in bright light.
E
E EVF/LCD MODE [30fps]
EVF/LCD MODE [30fps]
Choose 30 fps to increase battery life, 50 fps for
improved display quality.
M
M AUTO POWER OFF [2 MIN]
AUTO POWER OFF [2 MIN]
Choose the length of time before the camera
turns off automatically when no operations are
performed. Shorter times increase battery life; if
OFF is selected, the camera must be turned off
manually. Note that in some situations the cam-
era turns off automatically even when OFF is se-
lected.
1
1 QUICK START MODE [OFF]
QUICK START MODE [OFF]
Allow the camera to restart in a fast manner after
turned off (ON/OFF).
c
This option will increase drain on the battery. Quick
start mode is cancelled automatically if no operations
are performed for about 20 minutes.
F
F Fn BUTTON
Fn BUTTON [
[R
R]
]
Choose the role played by the Fn button (P53).](https://image.slidesharecdn.com/finepixhs30exrmanual01-211006181703/85/Finepix-hs30exr-manual_01-116-320.jpg)
![103
Menus
The Setup Menu
L
L DUAL IS MODE [
DUAL IS MODE [L
L]
]
Choose from the following image stabilization
options:
Option
Option Description
Description
L
CONTINUOUS +
MOTION
Image stabilization on. If + MOTION
is selected, the camera will adjust
shutter speed to reduce motion blur
when a moving objects are detected.
l CONTINUOUS
M SHOOTING
+ MOTION
As above, except that image stabili-
zation is performed only when the
shutter button is pressed halfway or
the shutter is released.
m
SHOOTING ONLY
OFF
Image stabilization off. Choose this
option when using a tripod.
c
+ MOTION has no effect when sensitivity is set to a
fixed value, and may also be unavailable at some other
combinations of settings. The effect may vary with
lighting conditions and the speed at which the object
is moving.
B
B RED EYE REMOVAL [ON]
RED EYE REMOVAL [ON]
Choose ON to remove red-eye effects caused by
the flash when shooting with Intelligent Face De-
tection.
a
• Red-eye reduction is performed only when a face is
detected.
• Red-eye removal is not available with RAW images.
C
C AF ILLUMINATOR [ON]
AF ILLUMINATOR [ON]
If ON is selected, the AF-assist illuminator will light
to assist autofocus.
c
• The camera may be unable to focus using the AF-as-
sist illuminator in some cases. If the camera is unable
to focus in macro mode, try increasing the distance to
the subject.
• Avoid shining the AF-assist illuminator directly into
your subject’s eyes.](https://image.slidesharecdn.com/finepixhs30exrmanual01-211006181703/85/Finepix-hs30exr-manual_01-117-320.jpg)
![104
The Setup Menu
k
k AE/AF-LOCK MODE [P]
AE/AF-LOCK MODE [P]
If AE&AF ON WHEN PRESSING is selected, ex-
posure and/or focus will lock while the AE/AF LOCK
button is pressed. If AE&AF ON/OFF SWITCH is
selected, exposure and/or focus will lock while the
AE/AF LOCK button is pressed and remain locked
until the button is pressed again (P37).
v
v AE/AF-LOCK BUTTON [AE-L]
AE/AF-LOCK BUTTON [AE-L]
Choose whether the AE/AF LOCK button locks only
exposure, only focus, or both exposure and focus
(AE-L/AF-L/AE+AF).
j
j RAW [OFF]
RAW [OFF]
Choose RAW+JPEG or RAW to record RAW
pictures (note that because RAW data are not
processed on the camera, RAW pictures must
be copied to a computer for processing). If
RAW+JPEG is selected, JPEG copies will also be
recorded. Choose OFF to record pictures in JPEG
format only.
1
To convert RAW files for display on a computer, use the
supplied RAW File Converter software.
3
Crop, resize, and red-eye removal options are not avail-
able with RAW images during playback. The maximum
zoom available when viewing RAW images is 3.2×.](https://image.slidesharecdn.com/finepixhs30exrmanual01-211006181703/85/Finepix-hs30exr-manual_01-118-320.jpg)
![105
Menus
The Setup Menu
j
j FOCUS CHECK [ON]
FOCUS CHECK [ON]
If ON is selected, the image will be magnified in
the display to assist focus when the focus ring is
rotatedinmanualfocusmode(P 48). Thecamera
must be in manual focus mode.
t
t SAVE ORG IMAGE [OFF]
SAVE ORG IMAGE [OFF]
Choose ON to save unprocessed copies of seam-
less z panoramas or pictures taken using
B RED EYE REMOVAL, j PRO LOW-LIGHT
MODE, or i PRO FOCUS MODE.
m
m AUTOROTATE PB [ON]
AUTOROTATE PB [ON]
Choose ON to automatically rotate “tall” (portrait-
orientation) pictures during playback.
O
O BACKGROUND COLOR
BACKGROUND COLOR
Choose a color scheme.
c
c GUIDANCE DISPLAY [ON]
GUIDANCE DISPLAY [ON]
Choose whether to display tool tips.](https://image.slidesharecdn.com/finepixhs30exrmanual01-211006181703/85/Finepix-hs30exr-manual_01-119-320.jpg)
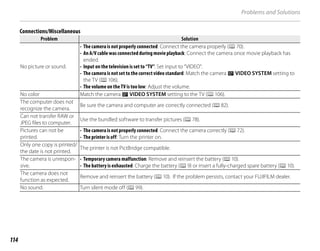
![106
The Setup Menu
Q
Q VIDEO SYSTEM
VIDEO SYSTEM
Choose a video mode for connection to a TV.
Option
Option Description
Description
NTSC
NTSC
Select this mode for connection to
video devices in North America, the
Caribbean, parts of Latin America,
and some East Asian countries.
PAL
PAL
Select this mode for connection to
video devices in the United Kingdom
and much of Europe, Australia, New
Zealand, and parts of Asia and Africa.
S
S CUSTOM RESET
CUSTOM RESET
Reset all settings for mode C. A confirmation
dialog will be displayed, press the selector up or
down to highlight OK and press MENU/OK.
U
U DATE STAMP [OFF]
DATE STAMP [OFF]
Stamp the time and/or date of recording on pho-
tographs as they are taken.
Option
Option Description
Description
R
R+
+S
S
Stamp new photographs with the
date and time of recording.
R
R
Stamp new photographs with the
date of recording.
OFF
OFF
Do not stamp the time and date on
new photographs.
c
• Time and date stamps can not be deleted. Turn
U DATE STAMP off to prevent time and date
stamps appearing on new photographs.
• If the camera clock is not set, you will be prompted to
set the clock to the current date and time (P16).
• We recommend that you turn the DPOF “print date”
option off when printing images with a time and date
stamp (P75).
• Time and date stamps do not appear on movies, pan-
oramas, or 3D photos.](https://image.slidesharecdn.com/finepixhs30exrmanual01-211006181703/85/Finepix-hs30exr-manual_01-120-320.jpg)