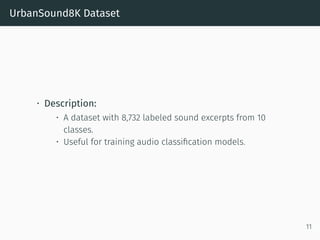
The document outlines the process of creating a custom audio dataset using PyTorch and Torchaudio, with the UrbanSound8K dataset as a practical example. It covers library imports, dataset class creation, audio transformations, and the extraction of mel spectrograms for audio classification tasks. The key takeaways emphasize the importance of audio processing techniques in machine learning applications.
![Creating a Custom Audio Dataset with PyTorch
Extracting Mel Spectrograms with Pytorch and
Torchaudio: UrbanSound8K Dataset
[By KAHSAY]
August 22, 2024
1](https://image.slidesharecdn.com/05extractingmelspectrogramswithpytorchandtorchaudio-241202073651-1b9ef6a5/85/Extracting-Mel-Spectrograms-with-Pytorch_and_Torchaudio-pdf-1-320.jpg)
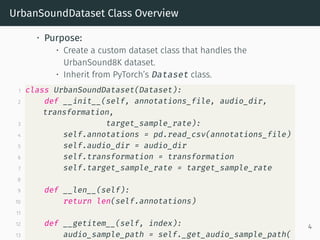
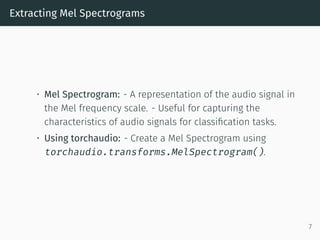
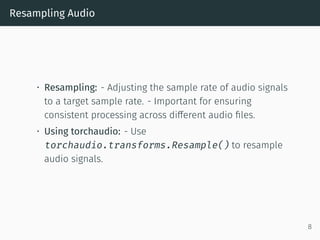
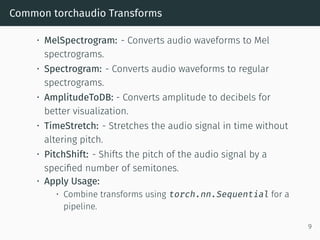
![Methods
• _resample_if_necessary():
• Resamples the audio signal to the target sample rate.
• _mix_down_if_necessary():
• Mixes down stereo audio to mono if necessary.
1 def _resample_if_necessary(self, signal, sr):
2 if sr != self.target_sample_rate:
3 resampler = torchaudio.transforms.Resample(
sr, self.target_sample_rate)
4 signal = resampler(signal)
5 return signal
6
7 def _mix_down_if_necessary(self, signal):
8 if signal.shape[0] > 1:
9 signal = torch.mean(signal, dim=0, keepdim=
True)
10 return signal
5](https://image.slidesharecdn.com/05extractingmelspectrogramswithpytorchandtorchaudio-241202073651-1b9ef6a5/85/Extracting-Mel-Spectrograms-with-Pytorch_and_Torchaudio-pdf-5-320.jpg)


![[DSC Europe 25] Josip Saban - Career building for data professionals.pptx](https://cdn.slidesharecdn.com/ss_thumbnails/zroflcttkm1vmli0txea-josip-saban-career-building-for-data-professionals-260123083019-587cdb8c-thumbnail.jpg?width=640&height=640&fit=bounds)


