Download to read offline


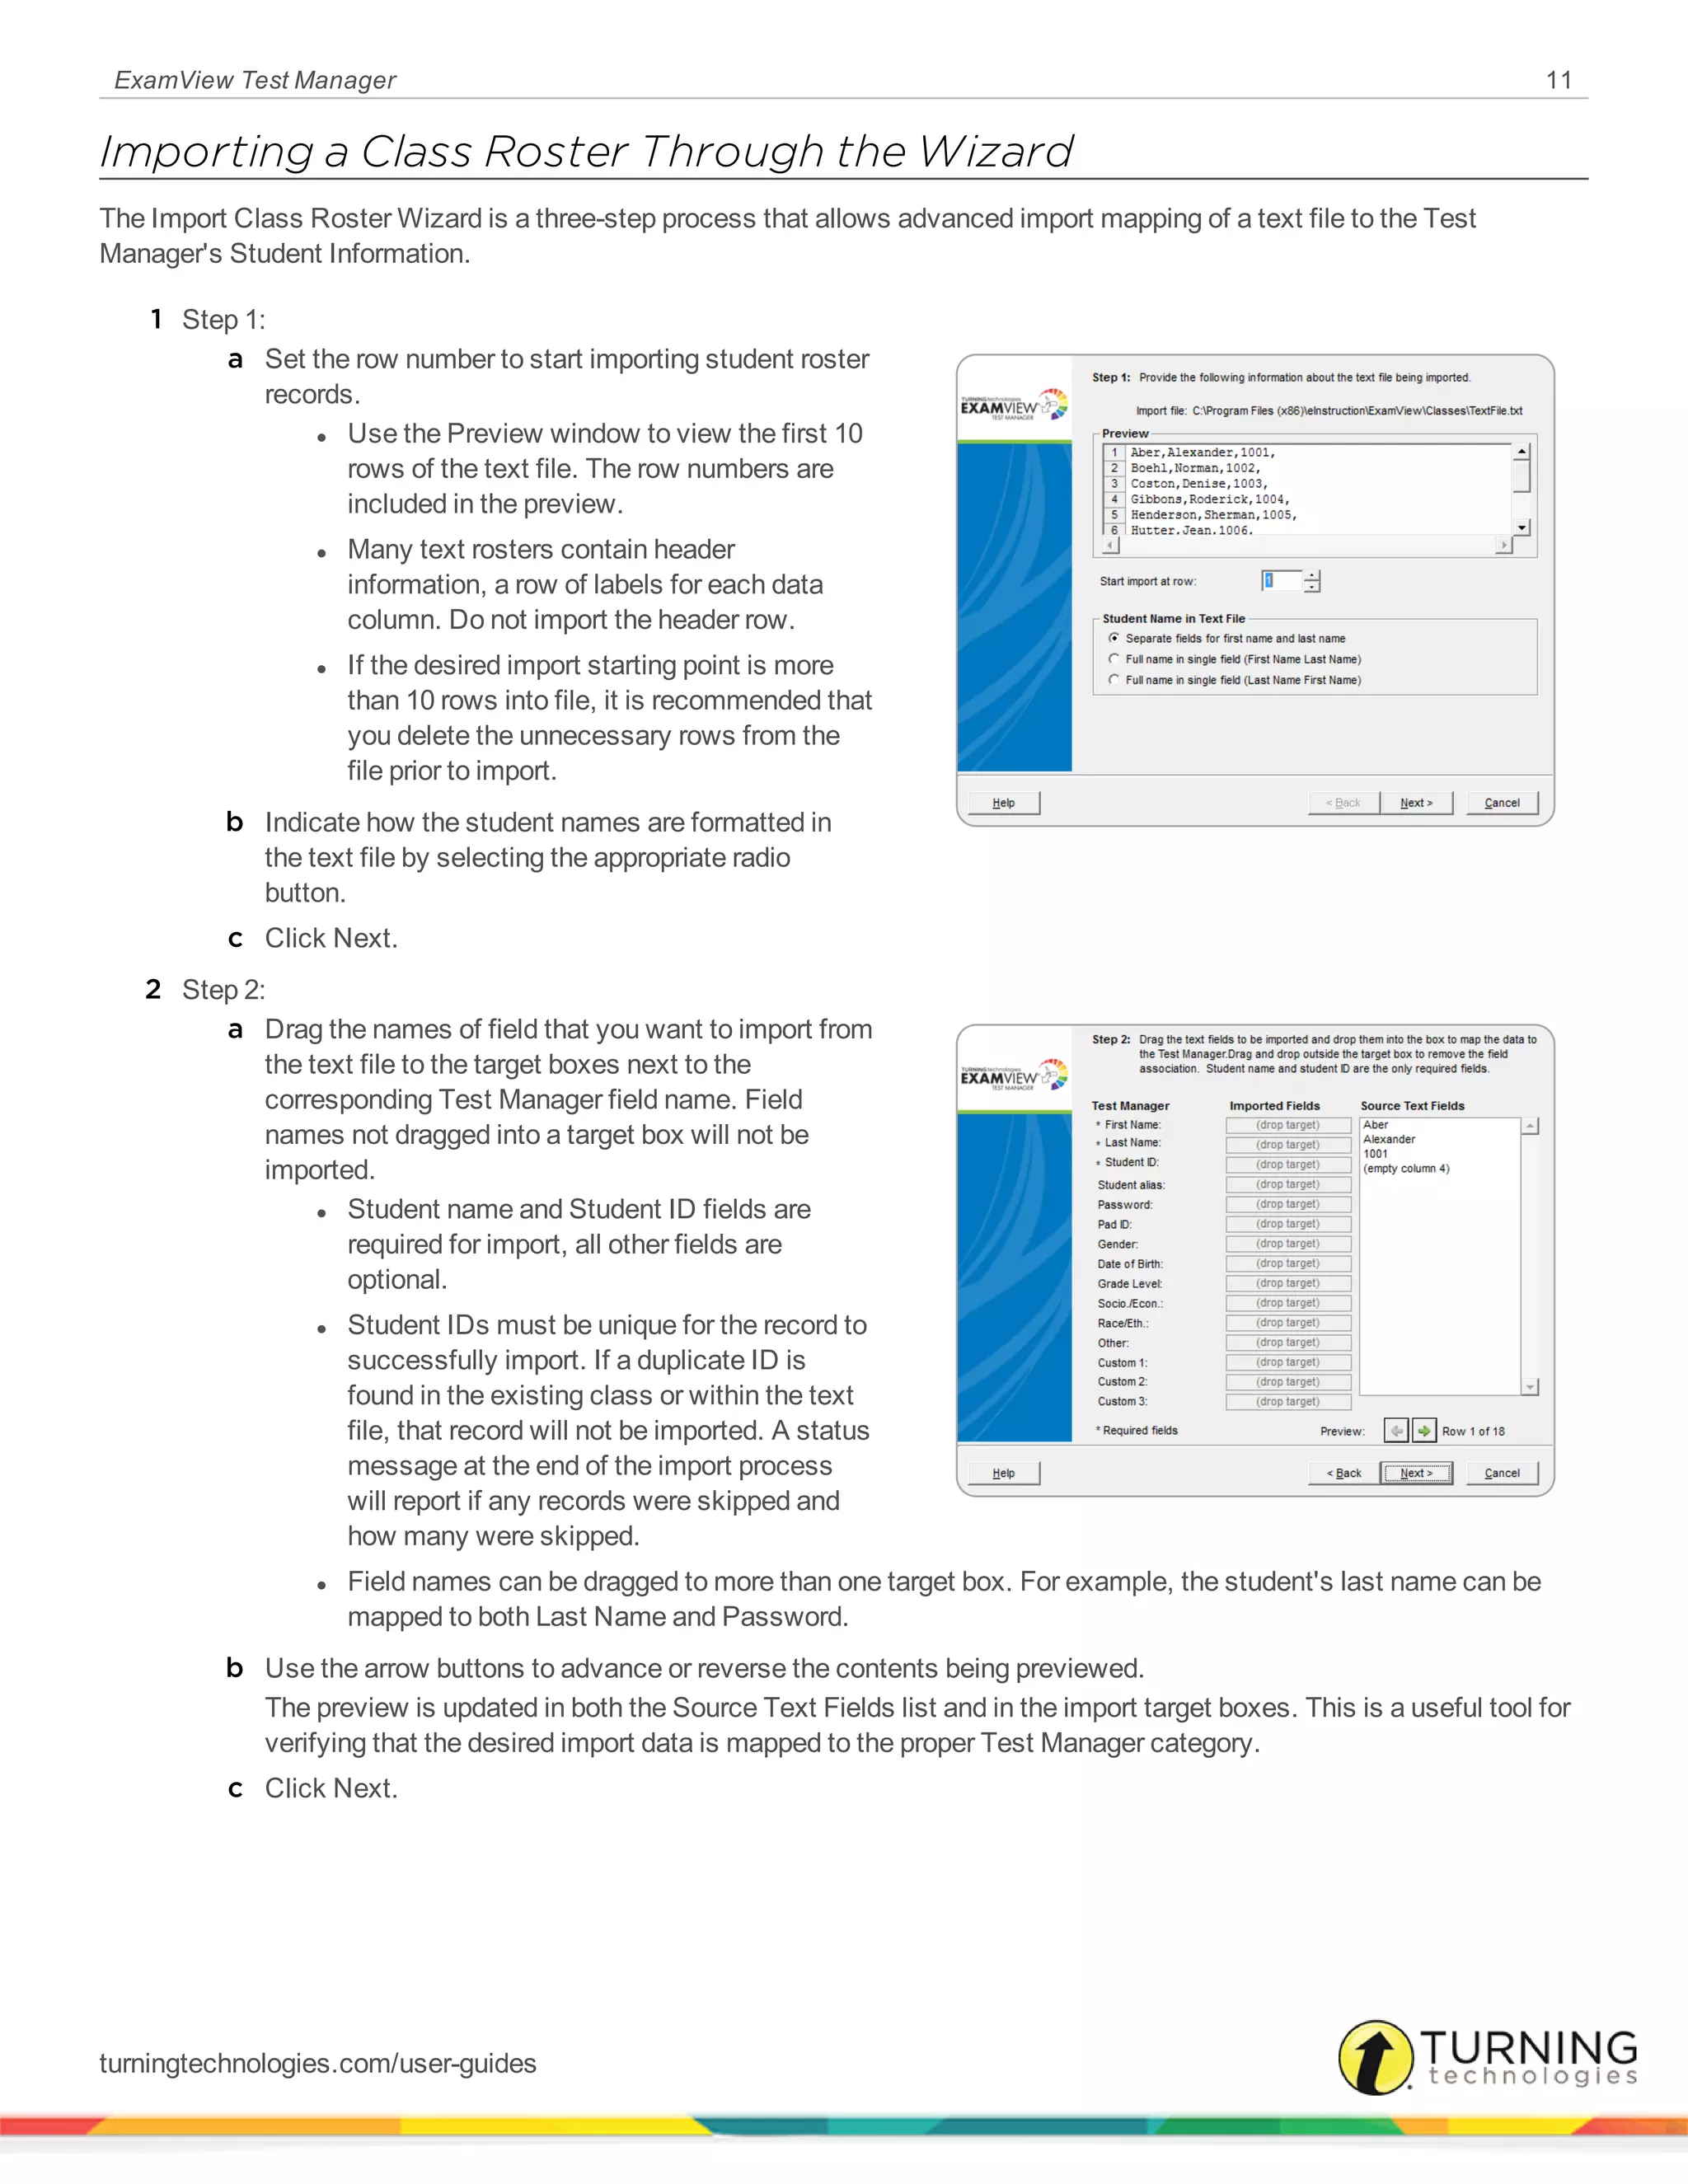
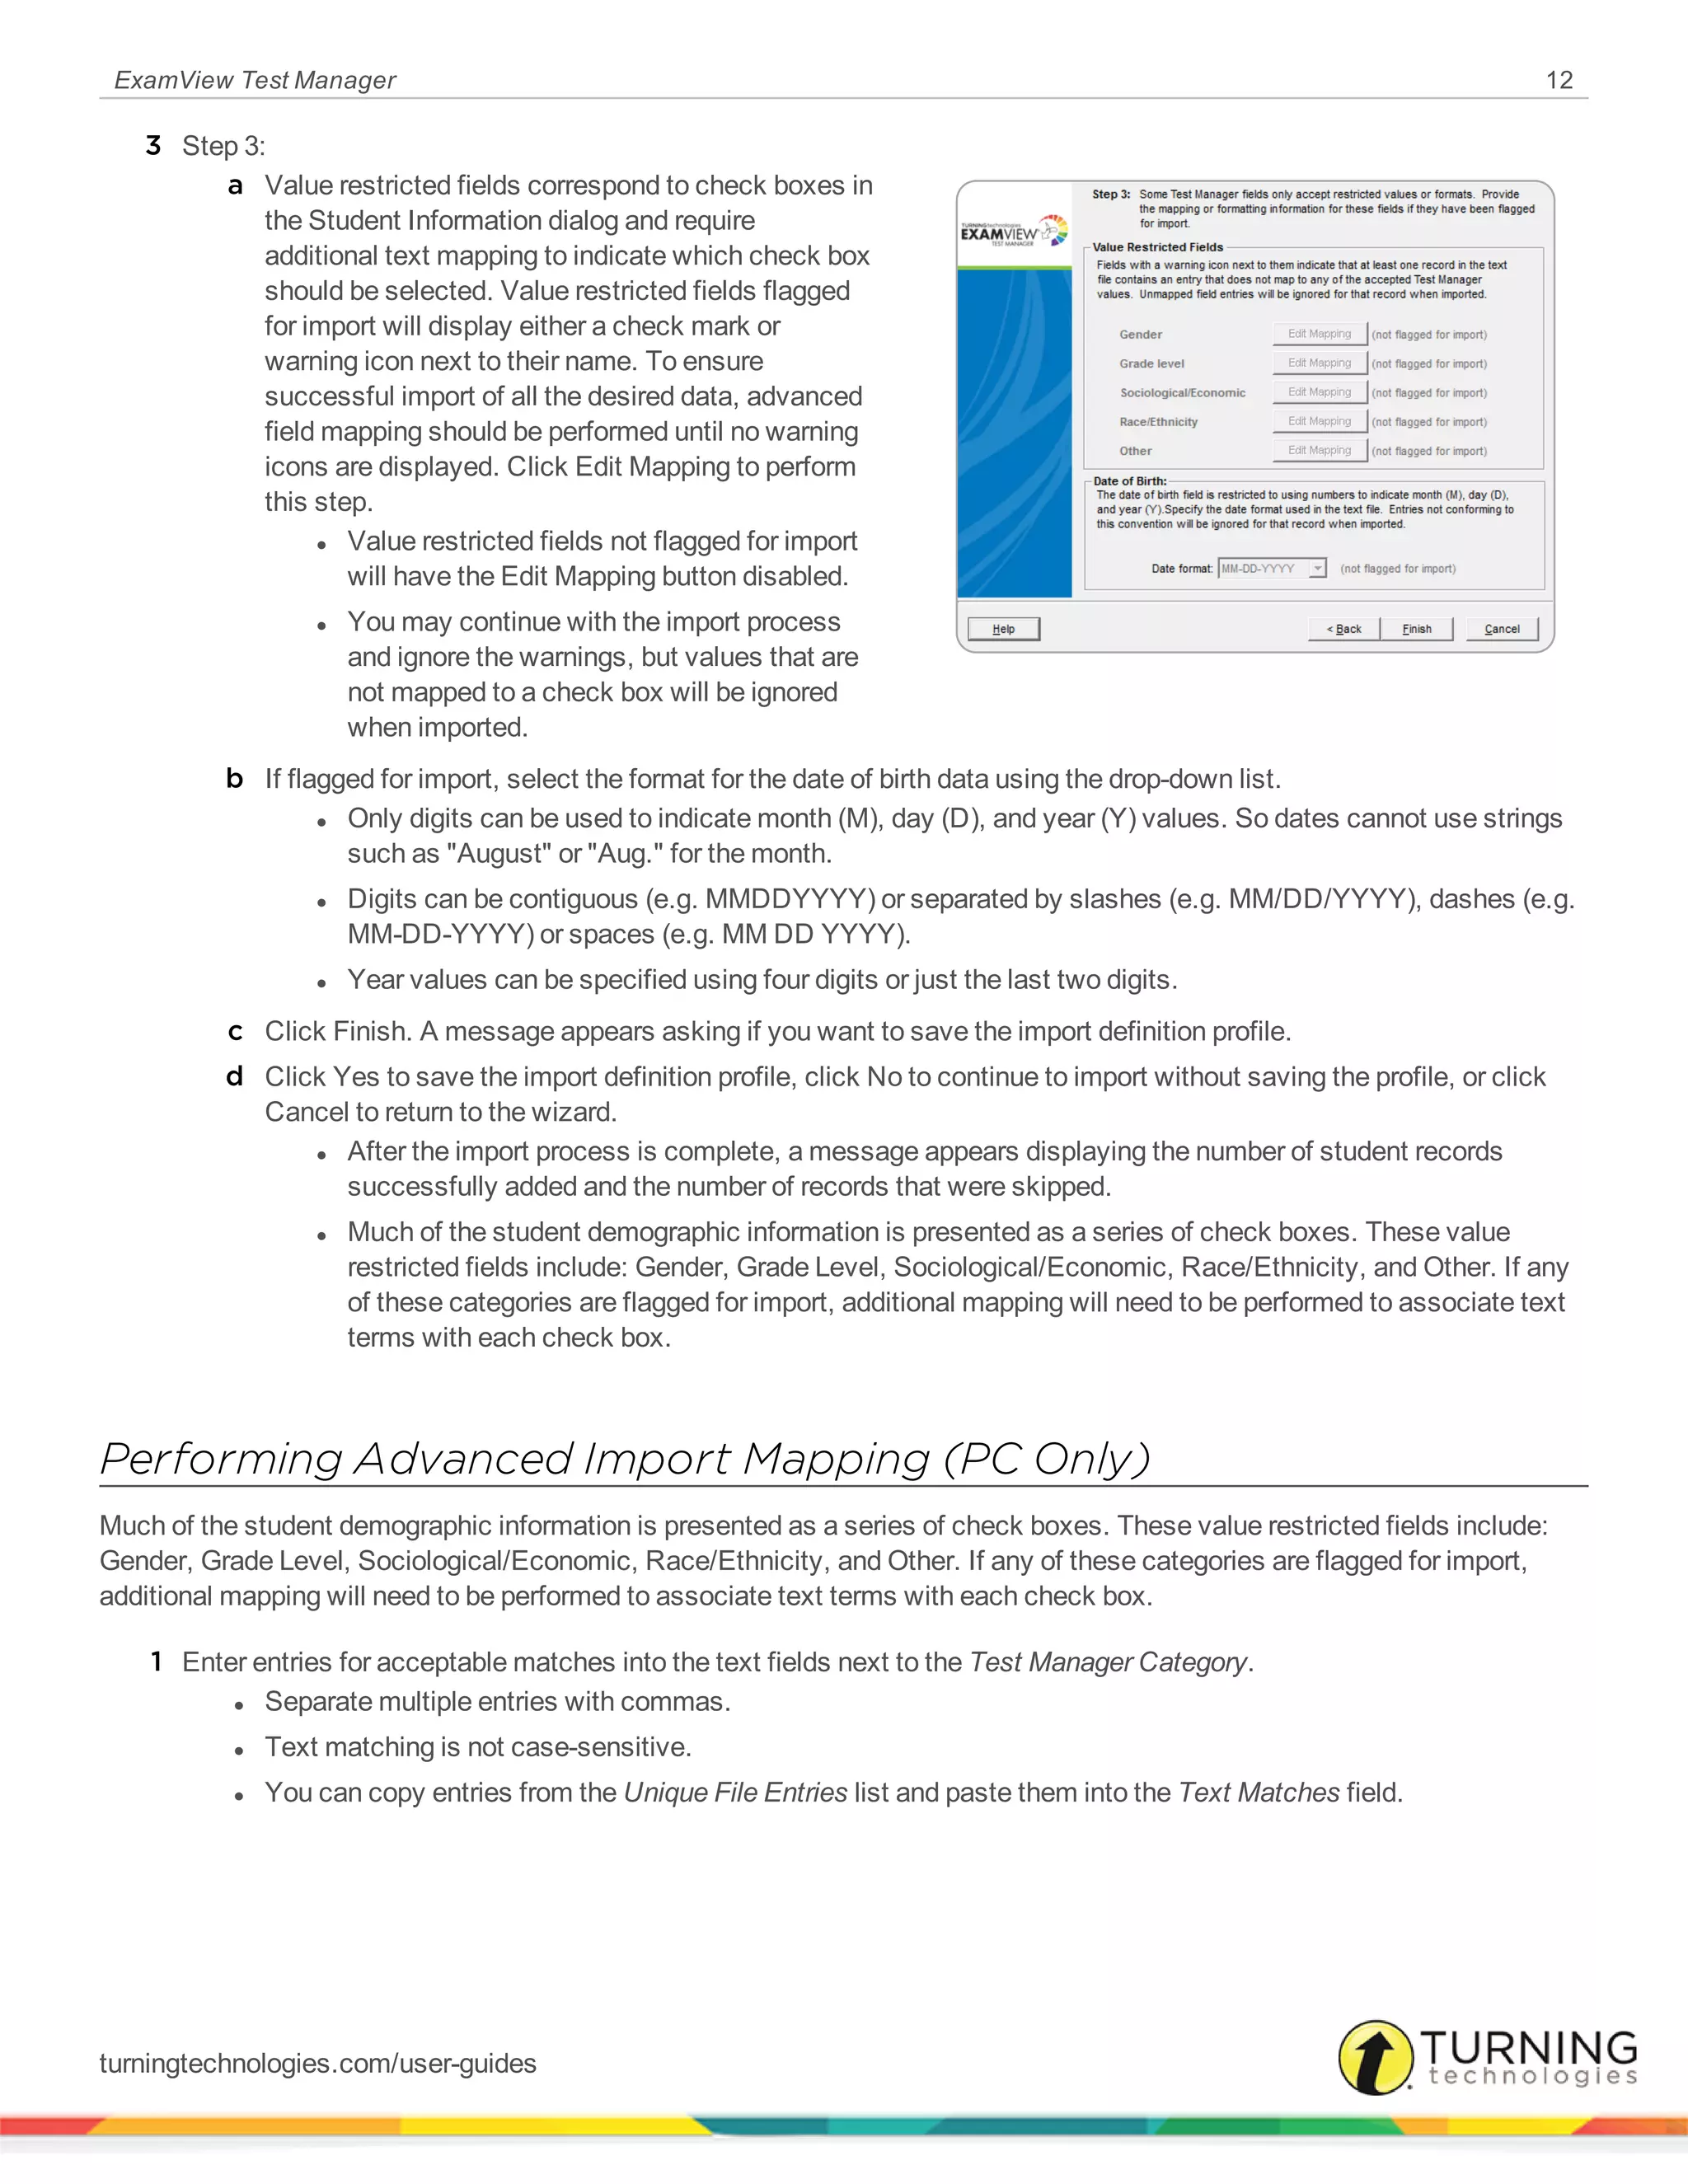
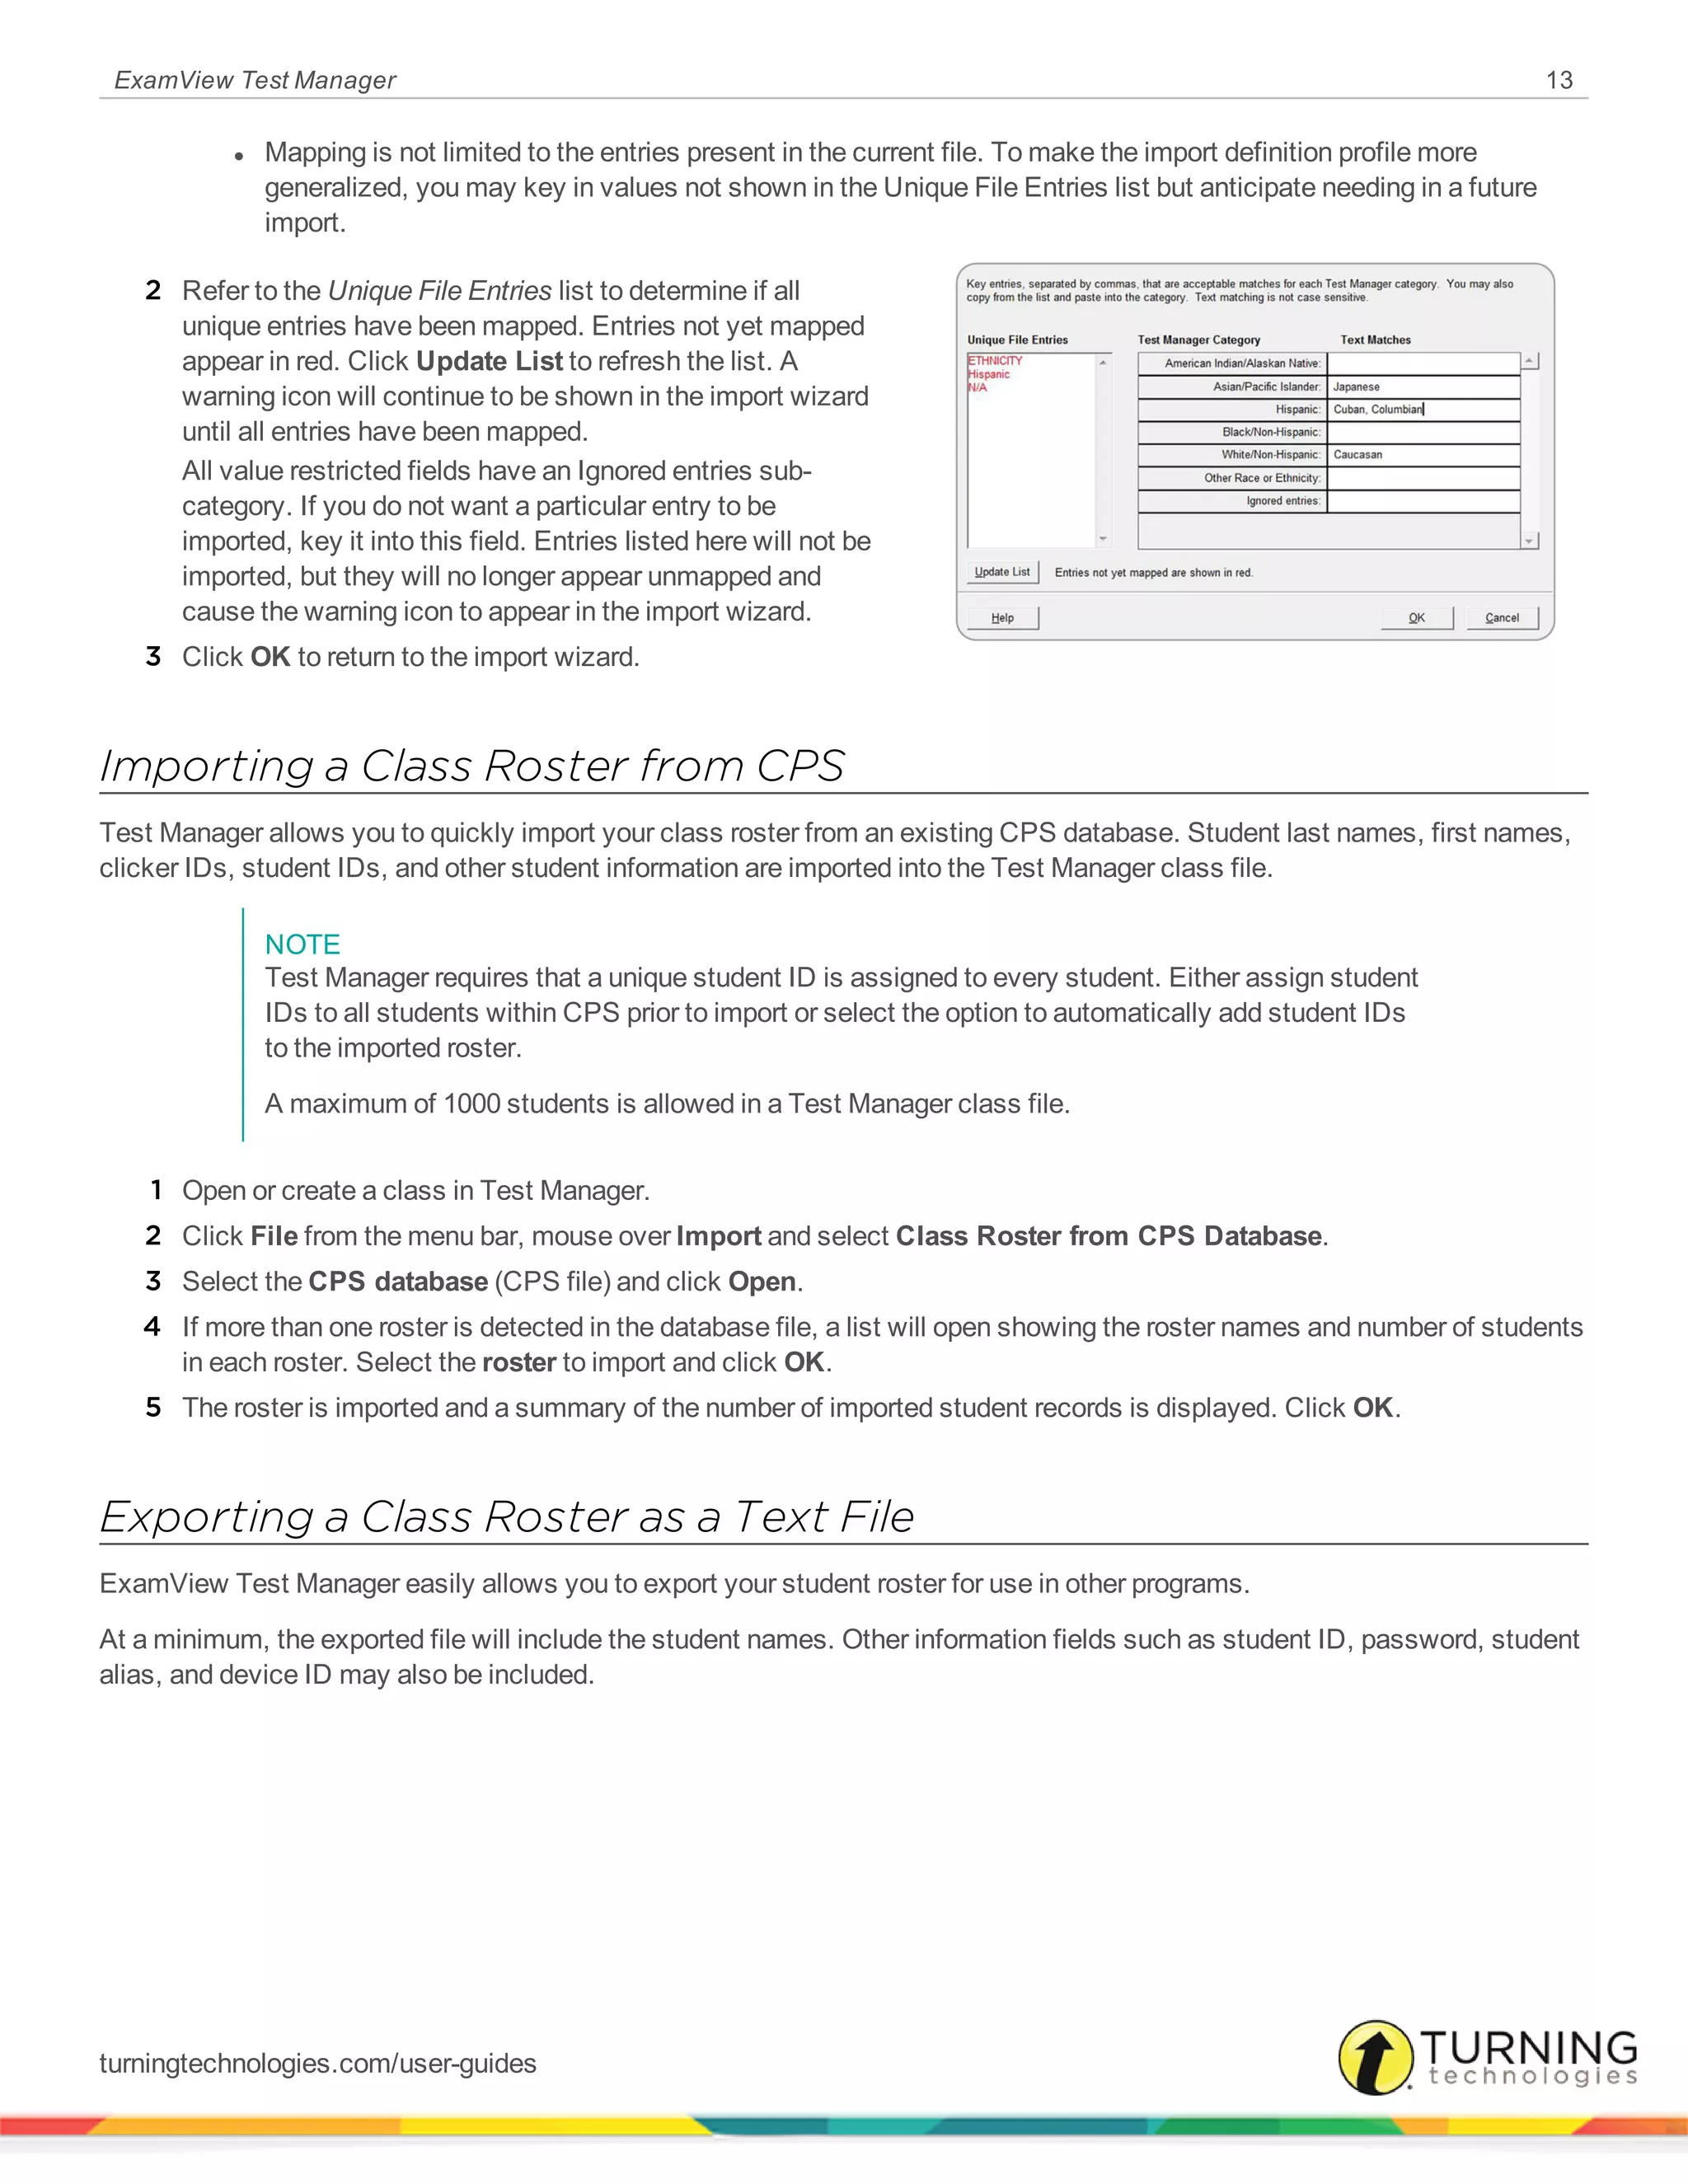
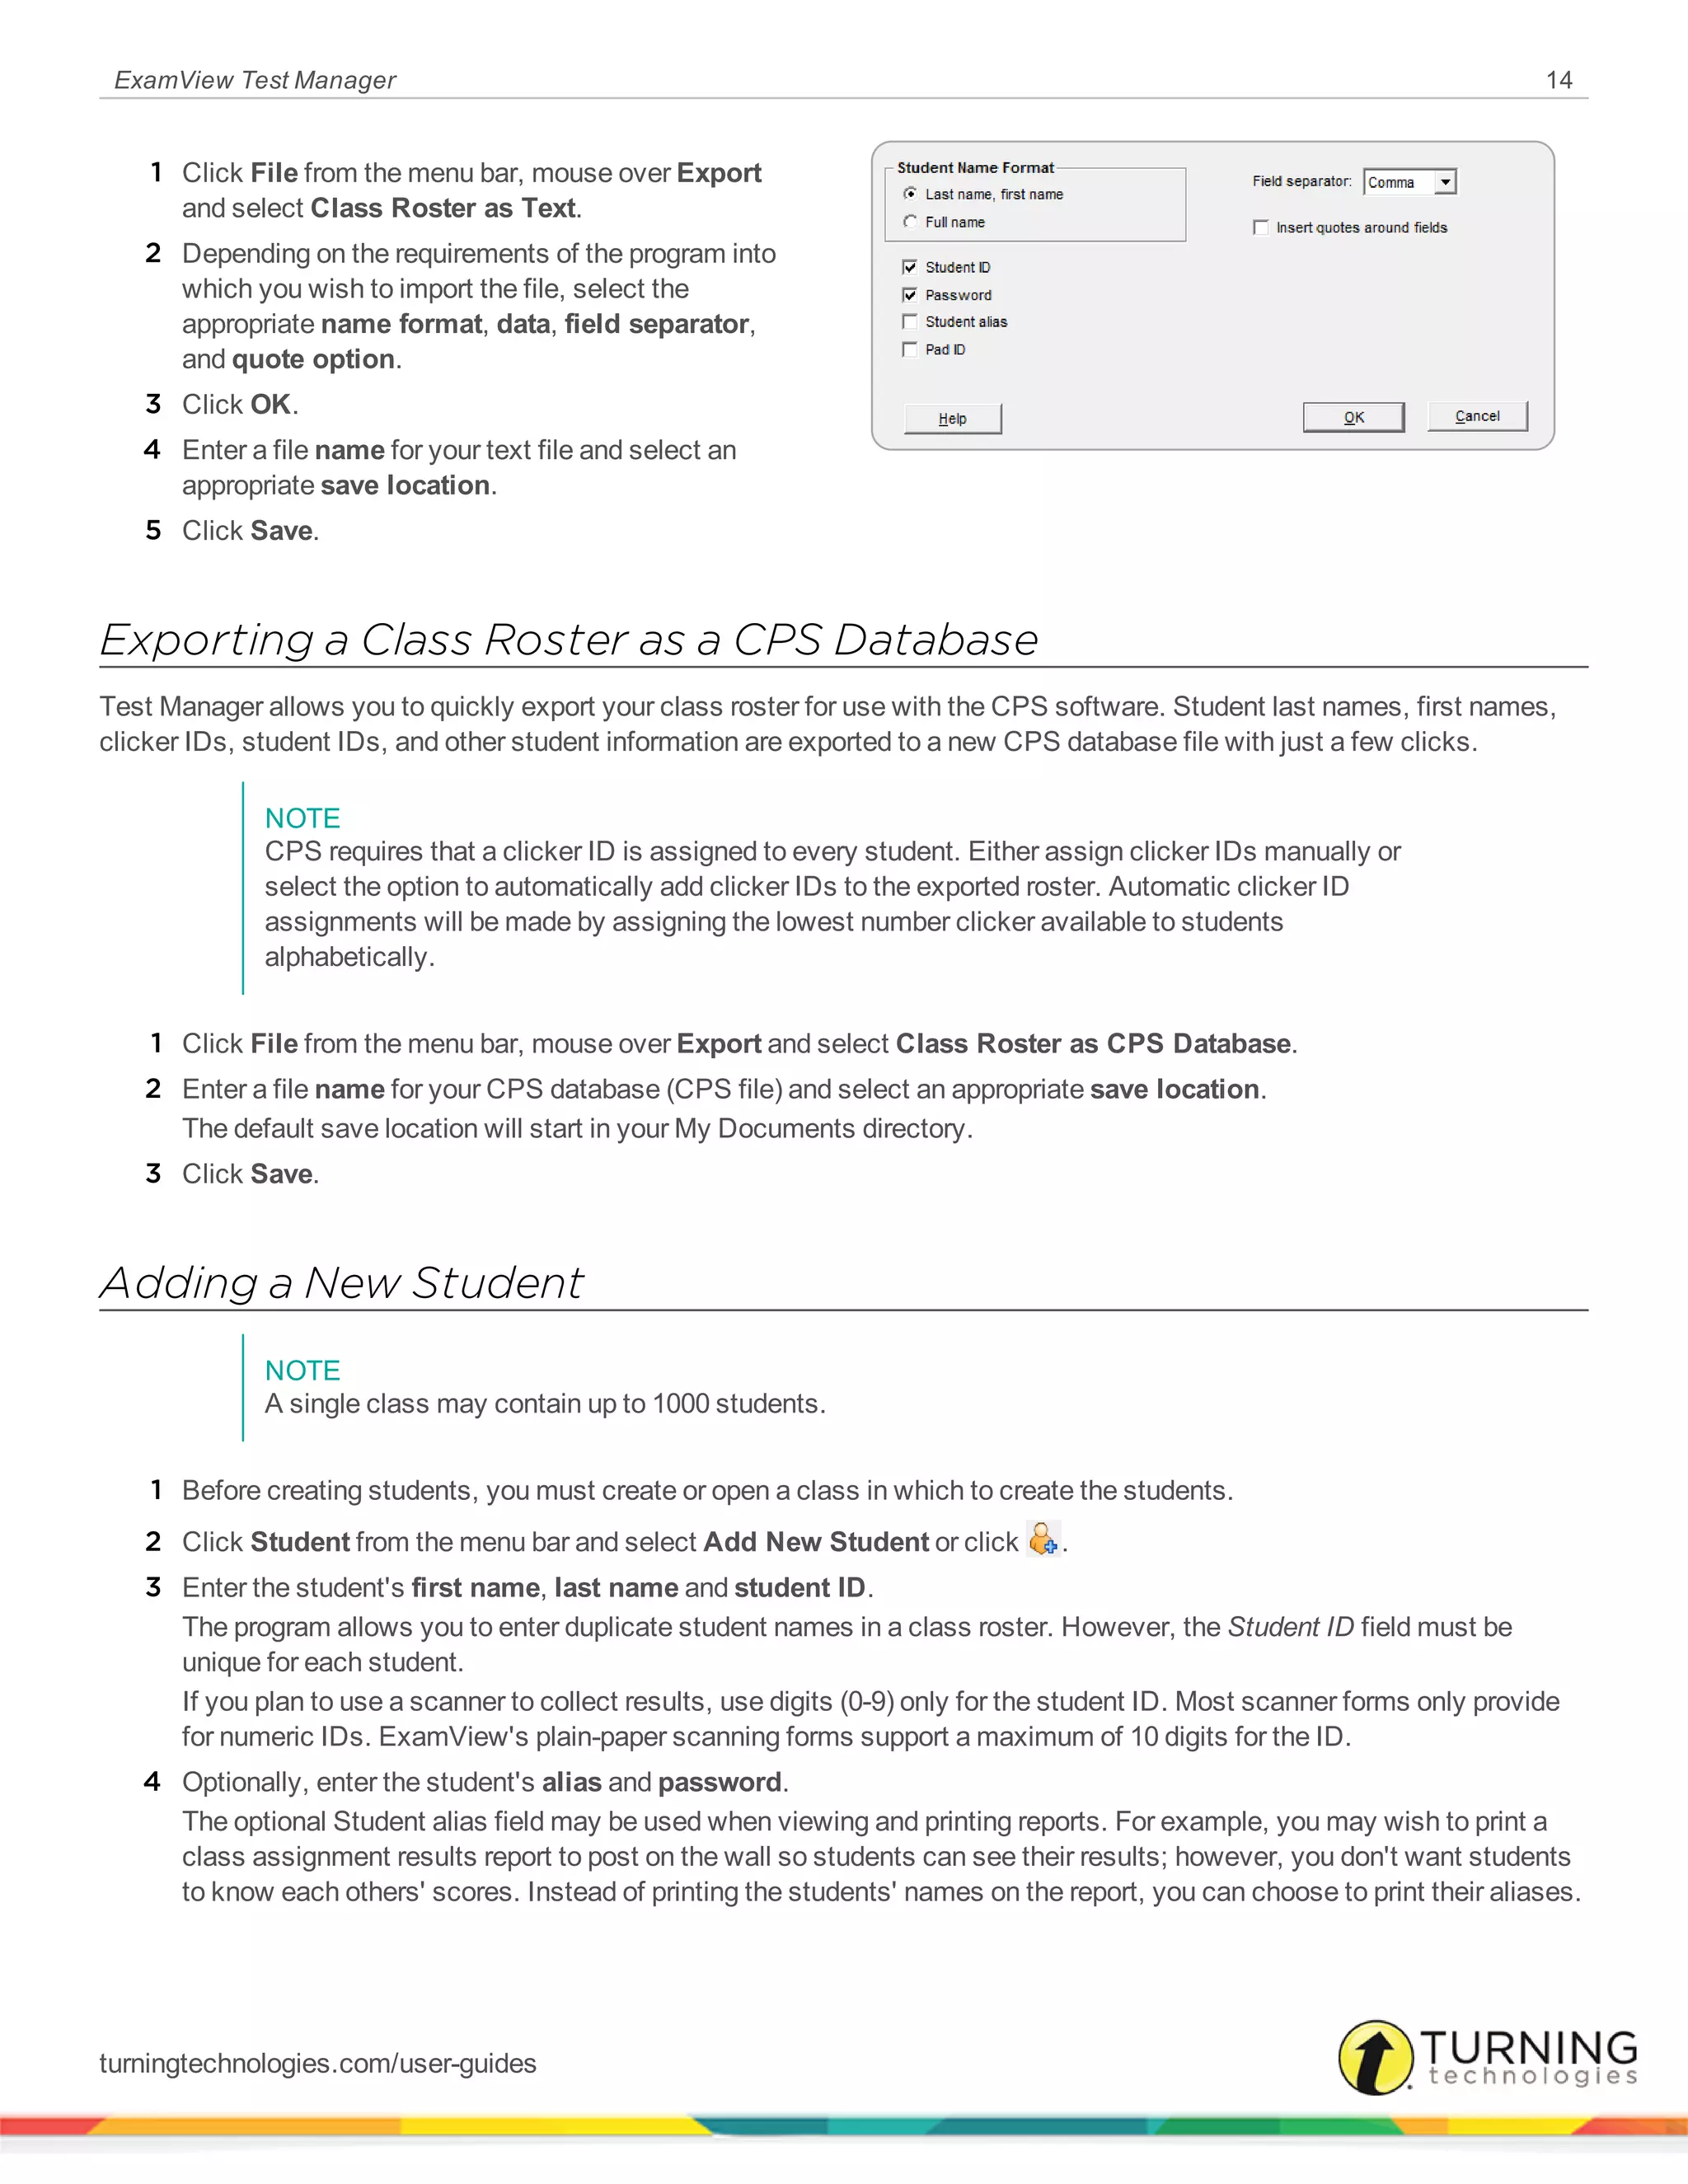


This document provides instructions for importing student roster data from a text file into the ExamView Test Manager software. It describes a three-step wizard process for mapping data fields from the text file to the corresponding fields in Test Manager, including options for formatting names, selecting the starting row for import, and mapping value-restricted fields. Preview windows allow verifying the correct mapping of source data to target fields before import. The process also supports saving the import mappings as profiles for reuse on future imports.


