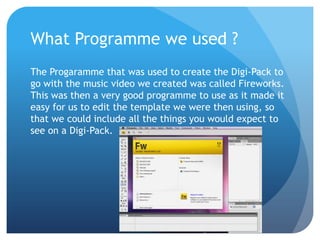
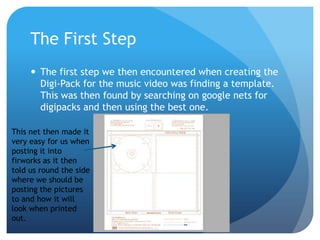
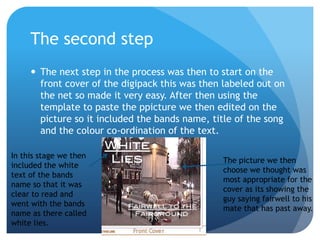
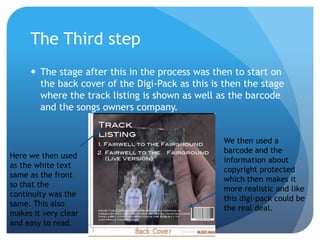
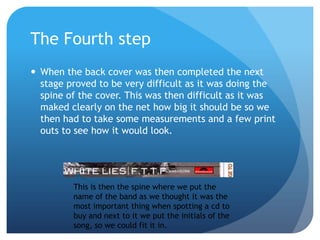
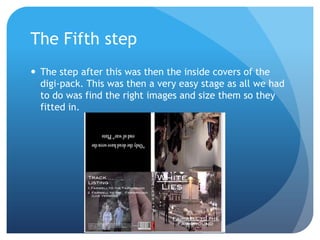
How the Digi-Pack was
              Created
What Programme we used ?
The Progaramme that was used to create the Digi-Pack to
go with the music video we created was called Fireworks.
This was then a very good programme to use as it made it
easy for us to edit the template we were then using, so
that we could include all the things you would expect to
see on a Digi-Pack.
The First Step
      The first step we then encountered when creating the
       Digi-Pack for the music video was finding a template.
       This was then found by searching on google nets for
       digipacks and then using the best one.

This net then made it
very easy for us when
posting it into
firworks as it then
told us round the side
where we should be
posting the pictures
to and how it will
look when printed
out.
The second step
      The next step in the process was then to start on the
       front cover of the digipack this was then labeled out on
       the net so made it very easy. After then using the
       template to paste the ppicture we then edited on the
       picture so it included the bands name, title of the song
       and the colour co-ordination of the text.

In this stage we then
                                                The picture we then
included the white
                                                choose we thought was
text of the bands
                                                most appropriate for the
name so that it was
                                                cover as its showing the
clear to read and
                                                guy saying fairwell to his
went with the bands
                                                mate that has past away.
name as there called
white lies.
The Third step
      The stage after this in the process was then to start on
       the back cover of the Digi-Pack as this is then the stage
       where the track listing is shown as well as the barcode
       and the songs owners company.


                                                 We then used a
                                                 barcode and the
Here we then used
                                                 information about
as the white text
                                                 copyright protected
same as the front
                                                 which then makes it
so that the
                                                 more realistic and like
continuity was the
                                                 this digi-pack could be
same. This also
                                                 the real deal.
makes it very clear
and easy to read.
The Fourth step
 When the back cover was then completed the next
  stage proved to be very difficult as it was doing the
  spine of the cover. This was then difficult as it was
  maked clearly on the net how big it should be so we
  then had to take some measurements and a few print
  outs to see how it would look.


         This is then the spine where we put the
         name of the band as we thought it was the
         most important thing when spotting a cd to
         buy and next to it we put the initials of the
         song, so we could fit it in.
The Fifth step
 The step after this was then the inside covers of the
  digi-pack. This was then a very easy stage as all we had
  to do was find the right images and size them so they
  fitted in.

Digipack pp

  • 1.
    How the Digi-Packwas Created
  • 2.
    What Programme weused ? The Progaramme that was used to create the Digi-Pack to go with the music video we created was called Fireworks. This was then a very good programme to use as it made it easy for us to edit the template we were then using, so that we could include all the things you would expect to see on a Digi-Pack.
  • 3.
    The First Step  The first step we then encountered when creating the Digi-Pack for the music video was finding a template. This was then found by searching on google nets for digipacks and then using the best one. This net then made it very easy for us when posting it into firworks as it then told us round the side where we should be posting the pictures to and how it will look when printed out.
  • 4.
    The second step  The next step in the process was then to start on the front cover of the digipack this was then labeled out on the net so made it very easy. After then using the template to paste the ppicture we then edited on the picture so it included the bands name, title of the song and the colour co-ordination of the text. In this stage we then The picture we then included the white choose we thought was text of the bands most appropriate for the name so that it was cover as its showing the clear to read and guy saying fairwell to his went with the bands mate that has past away. name as there called white lies.
  • 5.
    The Third step  The stage after this in the process was then to start on the back cover of the Digi-Pack as this is then the stage where the track listing is shown as well as the barcode and the songs owners company. We then used a barcode and the Here we then used information about as the white text copyright protected same as the front which then makes it so that the more realistic and like continuity was the this digi-pack could be same. This also the real deal. makes it very clear and easy to read.
  • 6.
    The Fourth step When the back cover was then completed the next stage proved to be very difficult as it was doing the spine of the cover. This was then difficult as it was maked clearly on the net how big it should be so we then had to take some measurements and a few print outs to see how it would look. This is then the spine where we put the name of the band as we thought it was the most important thing when spotting a cd to buy and next to it we put the initials of the song, so we could fit it in.
  • 7.
    The Fifth step The step after this was then the inside covers of the digi-pack. This was then a very easy stage as all we had to do was find the right images and size them so they fitted in.