SlideShare a Scribd company logo
Deck Structural Design


                                OVERVIEW


Introduction

Now that you have the conceptual design for your deck, and you plan on doing this on your own, it is time to
develop the structural elements and material specifications. No matter if you complete the project yourself or
hire a contractor, this exercise will help you to get an understanding of the details of your deck. These
specifications will be a part of the Construction Document you will either take to the building department for a
permit, use to get bids on the project or use to build the deck yourself.


You might have already begun thinking about the construction details and possibly have a pretty good idea of
the components that make up a deck or have some good questions. And, unless you have special conditions, we
will answer most of those questions here. Special conditions include steep slopes, unstable soil and specific
building codes. If you are unsure where your project fits, check with a contractor or the building department.


After you complete this tutorial, you will have a better idea whether to do-it-yourself or hire a contractor. So,
grab your sketches and here we go.


   • Beginner - 3 to 4 hours
   • Intermediate - 2 to 3 hours
   • Advanced - 1 to 2 hours

                       Saving money by scrimping on materials or crowding the design tables will come back
   on you when the deck begins to age. Pay more now to save in the future.


                   If you put this project out to bid, the estimates will be more "apples-for-apples" if the
   contractors have a detailed plan to bid from. The Construction Document you are creating here will help
   make this possible.


                   Determine the direction the deck boards will run, this will influence the layout of the joists
   and girders. Most deck boards run parallel with the long dimension of the deck.


                    Print out the Deck Spec and Materials list, which you can fill out in the following steps.
STEPS
1. Create a list: Fill in the blanks on the Deck Specs form. This information
   will give you the basis for completing the materials list. You should get the
   measurements from the conceptual plan created in the previous tutorial.
   The following steps will help you fill in the quantities for each item. When
   this list is complete, you will be able to set a budget for your deck project by
   getting an estimate from the lumberyard or putting the project out to bid.
   Make your own copy of this list and let's begin.


2. Estimate the ledger: Measure from your plans how many feet of wall will
   support the deck and add 10% for waste. Note: Always add a "waste
   factor," use 10% as a minimum.


3. Estimate concrete: This project calls for concrete pads measuring 18
   inches by 18 inches by 12 inches deep. That equals 2.25 cubic feet per pad,
   times the number of pads to figure the total cubic feet. Verify the standard
   in your area, as many areas, especially in colder climates, require deeper
   pads. The goal is to have concrete pads that extend below the frost line,
   which could be as deep as 42". For each set of stairs add 2 cubic feet to
   support the bottom of the stairs. Don't forget to add the 10% to the total
   for waste; and, there are 27 cubic feet in a cubic yard.


   Our 30 foot by 20 foot deck will have three rows of concrete pads with five
   pads in each row--15 concrete pads times 2.25 cubic feet (c.f.) equals 33.75
   c.f. plus 2 c.f. for a total of 35.75 c.f. Don't forget the 10% waste factor. For
   this deck we will order 37.125 c.f. Be sure to round up to the nearest
   available quantity.
4. Estimate concrete piers: Simply count the number of concrete pads; you
   will need a concrete pier for each pad. It is not necessary to include a waste
   factor for piers.
5. Estimate posts: You will need posts if your deck is over 18 inches above
   the ground. Count the number of concrete pads and multiply that number
   by the average height of the deck above the ground. Take care that the
   individual post heights fall evenly into a common 4x4 lengths; 4x4's come in
   two foot increments starting at 8 feet--8'-10'-12' and so on.


6. Estimate girders: The girders are 4x6's on this deck and will "run" the
   same direction as the deck boards. This plan calls for girders spaced 6 feet 8
   inches apart and supported by piers every 6 feet (check applicable joist
   span tables). Girders should be supported on three piers where possible--
   this will make the minimum desirable length 12 feet, remember the piers
   are 6 feet apart. Therefore the best girder lengths are multiples of six, and
   the longest manageable length will be 18 feet. Also, the girders must be
   supported at the ends on piers.


   For our deck there will be three "rows" of girders, each 30 feet long, for a
   total of 90 linear feet of 4x6. For this estimate add 10 % for waste, be sure
   to check for availability of the required lengths.

7. Estimate joists: The joists are spaced 16 inch on center and will run
   perpendicular to the girders and deck boards. To figure the number of
   joists, convert the length of the deck to inches (a 30 foot deck is 30 x 12 =
   360 inches) and divide that by the 16-inch spacing (360 / 16 = 22.5) and
   round up (22.5 becomes 23.) Add 1 to that to figure the total number of
   joists. This deck will require 24 joists spaced at 16 inches on center. Multiply
   this number by the deck width (20 feet) to estimate the total linear feet of
   2x6 joists, 460 linear feet plus 10% (46) equals 510 (round up.)


8. Estimate deck boards: This deck will have 2 x 6 decking, a 2 x 6 is usually
   5 ½ inches instead of 6 as the name implies. So a standard 2 x 6 one foot
   long (a linear foot of 2x6) will cover .46 square feet.


   Our deck is 600 square feet (20 x 30) so there will be 600 / .46 = 1,304
   linear feet of deck boards.Be sure to include a 10% waste factor (134 feet)
   and the total is 1434 linear feet of 2 x 6.


9. Estimate stairs: This deck is 30 inches above the ground and has one set
   of stairs 36 inches wide. To figure the actual number of steps, divide 30
   inches by 6 inches--5 steps, the last one being the deck itself. Height of
   deck above ground divided by 6 equal the number of steps.


   To figure stringer length, multiply the number of steps by 16 inches for each
   stringer. Our deck has five steps times 16 inches--80 inches-6 feet 8 inches.
   Stairs up to 36 inches wide have two stringers, and stairs over 36 inches
   have three stringers up to 6 feet for the stringers. The steps (the steps are
   2x6 the same as the deck) have two 2x6's, times the width of the stairs. In
   this case, each step will have two 2x6's by 36 inches. Five steps will require
   10 x 36 inch 2x6's or 30 lineal feet of material. Add this to the deck material
   order.
10 Estimate railings: This deck has guard railings on two sides and hand
. railings on the stairs. Measure the open sides of the deck and add the stair
   rail. Get the stair rail length from the stair stringer length in step nine.


    Calculate one 8-foot 4x4 (post) for each 6 feet of rail, 2 feet of 2x4 (top and
    bottom rail) for each 1 foot of rail and 2.2 1x2 (baluster) for each foot of
    rail.


    There are three parts of the railing, the posts, the top and bottom rail and
    the balusters.


11 Hardware and fasteners: You will need galvanized nails, metal connectors
. and bolts to connect your deck parts. Figure one pound of 16d galvanized
   nails for each 10 square feet of deck, use the double hot dipped galvanized
   kind.


    Each joist will require two joist hangars. Each post should have a post cap
    to connect it to the girder it supports. Figure one pound of galvanized nails
    for each 10 metal connectors. The manufacturer will specify the size of nail
    for their product. Allow one bolt per foot of ledger, be sure to measure the
    length necessary to "run" the bolt through the wall framing and install a nut
    and washer on the other side.


Materials Needed
•   Your design from previous tutorial

•   Blank paper for lists


Tools Needed
•   Calculator

•   Span tables

•   Material selection information

More Related Content

Similar to Deck structural design

Installing deck stairs
Installing deck stairsInstalling deck stairs
Installing deck stairsZulaiha Amaria
 
Roof framing
Roof framingRoof framing
Roof framing
Slawek Dobrowolski
 
Woodworking: The Essentila "all Purpose" workbench
Woodworking: The Essentila "all Purpose" workbenchWoodworking: The Essentila "all Purpose" workbench
Woodworking: The Essentila "all Purpose" workbench
YadeaHerman
 
Installing the deck railing
Installing the deck railingInstalling the deck railing
Installing the deck railingZulaiha Amaria
 
9. How to install asphalt roofing on a shed
9. How to install asphalt roofing on a shed9. How to install asphalt roofing on a shed
9. How to install asphalt roofing on a shed
icreatablesseo
 
2. How to build a shed floor?
2. How to build a shed floor?2. How to build a shed floor?
2. How to build a shed floor?
icreatablesseo
 
4 classic roubo-style-workbench
4 classic roubo-style-workbench4 classic roubo-style-workbench
4 classic roubo-style-workbench
YadeaHerman
 
Estimating Systems for Homes1
Estimating Systems for Homes1Estimating Systems for Homes1
Estimating Systems for Homes1Keith Daggett
 
Easy small wood projects
Easy small wood projectsEasy small wood projects
Easy small wood projects
heatherbarnard5
 
How to build your dream 12x8 shed
 How to build your dream 12x8 shed  How to build your dream 12x8 shed
How to build your dream 12x8 shed
NADIA نادية
 
I Year Diploma Presentation by Neha assudani B.Sc. Interior Design student
I Year Diploma Presentation by Neha assudani B.Sc. Interior Design studentI Year Diploma Presentation by Neha assudani B.Sc. Interior Design student
I Year Diploma Presentation by Neha assudani B.Sc. Interior Design studentdezyneecole
 
Coffee table @1
Coffee table @1Coffee table @1
Coffee table @1
WonderfullDaily
 
Maths A - Chapter 8
Maths A - Chapter 8Maths A - Chapter 8
Maths A - Chapter 8westy67968
 
Pvc and coroplast_class
Pvc and coroplast_classPvc and coroplast_class
Pvc and coroplast_classkjones9999
 
Lec 9 center line method
Lec 9 center line methodLec 9 center line method
Lec 9 center line method
malang1214
 
Rachel Hughes Portfolio
Rachel Hughes PortfolioRachel Hughes Portfolio
Rachel Hughes PortfolioRachel Hughes
 
4. How to build shed roof rafters
4. How to build shed roof rafters4. How to build shed roof rafters
4. How to build shed roof rafters
icreatablesseo
 

Similar to Deck structural design (20)

Installing deck stairs
Installing deck stairsInstalling deck stairs
Installing deck stairs
 
Roof framing
Roof framingRoof framing
Roof framing
 
Woodworking: The Essentila "all Purpose" workbench
Woodworking: The Essentila "all Purpose" workbenchWoodworking: The Essentila "all Purpose" workbench
Woodworking: The Essentila "all Purpose" workbench
 
Installing the deck railing
Installing the deck railingInstalling the deck railing
Installing the deck railing
 
9. How to install asphalt roofing on a shed
9. How to install asphalt roofing on a shed9. How to install asphalt roofing on a shed
9. How to install asphalt roofing on a shed
 
2. How to build a shed floor?
2. How to build a shed floor?2. How to build a shed floor?
2. How to build a shed floor?
 
4 classic roubo-style-workbench
4 classic roubo-style-workbench4 classic roubo-style-workbench
4 classic roubo-style-workbench
 
Estimating Systems for Homes1
Estimating Systems for Homes1Estimating Systems for Homes1
Estimating Systems for Homes1
 
Easy small wood projects
Easy small wood projectsEasy small wood projects
Easy small wood projects
 
How to build your dream 12x8 shed
 How to build your dream 12x8 shed  How to build your dream 12x8 shed
How to build your dream 12x8 shed
 
I Year Diploma Presentation by Neha assudani B.Sc. Interior Design student
I Year Diploma Presentation by Neha assudani B.Sc. Interior Design studentI Year Diploma Presentation by Neha assudani B.Sc. Interior Design student
I Year Diploma Presentation by Neha assudani B.Sc. Interior Design student
 
Coffee table @1
Coffee table @1Coffee table @1
Coffee table @1
 
Maths A - Chapter 8
Maths A - Chapter 8Maths A - Chapter 8
Maths A - Chapter 8
 
Pvc and coroplast_class
Pvc and coroplast_classPvc and coroplast_class
Pvc and coroplast_class
 
Timber decking
Timber deckingTimber decking
Timber decking
 
Lec 9 center line method
Lec 9 center line methodLec 9 center line method
Lec 9 center line method
 
Planning a deck
Planning a deckPlanning a deck
Planning a deck
 
Installing deck posts
Installing deck postsInstalling deck posts
Installing deck posts
 
Rachel Hughes Portfolio
Rachel Hughes PortfolioRachel Hughes Portfolio
Rachel Hughes Portfolio
 
4. How to build shed roof rafters
4. How to build shed roof rafters4. How to build shed roof rafters
4. How to build shed roof rafters
 

More from Praveen Sudarsan

How to install pvc downpipes
How to install pvc downpipesHow to install pvc downpipes
How to install pvc downpipesPraveen Sudarsan
 
How to construct a suimple garden pond
How to construct a suimple garden pondHow to construct a suimple garden pond
How to construct a suimple garden pondPraveen Sudarsan
 
How to build a retaining wall
How to build a retaining wallHow to build a retaining wall
How to build a retaining wallPraveen Sudarsan
 
How to build a raised formal pool
How to build a raised formal poolHow to build a raised formal pool
How to build a raised formal poolPraveen Sudarsan
 
How a lighting circuit works
How a lighting circuit worksHow a lighting circuit works
How a lighting circuit worksPraveen Sudarsan
 
How to avoid the cowboy builder
How to avoid the cowboy builderHow to avoid the cowboy builder
How to avoid the cowboy builderPraveen Sudarsan
 
General do it yourself safety comments
General do it yourself safety commentsGeneral do it yourself safety comments
General do it yourself safety commentsPraveen Sudarsan
 
Foundations for light garden walls
Foundations for light garden wallsFoundations for light garden walls
Foundations for light garden wallsPraveen Sudarsan
 
Fixing to plasterboard and plasterboard fixings
Fixing to plasterboard and plasterboard fixingsFixing to plasterboard and plasterboard fixings
Fixing to plasterboard and plasterboard fixingsPraveen Sudarsan
 

More from Praveen Sudarsan (20)

How to install pvc downpipes
How to install pvc downpipesHow to install pvc downpipes
How to install pvc downpipes
 
How to hang wallpaper
How to hang wallpaperHow to hang wallpaper
How to hang wallpaper
 
How to construct a suimple garden pond
How to construct a suimple garden pondHow to construct a suimple garden pond
How to construct a suimple garden pond
 
How to build a retaining wall
How to build a retaining wallHow to build a retaining wall
How to build a retaining wall
 
How to build a raised formal pool
How to build a raised formal poolHow to build a raised formal pool
How to build a raised formal pool
 
How to build a deck
How to build a deckHow to build a deck
How to build a deck
 
How a lighting circuit works
How a lighting circuit worksHow a lighting circuit works
How a lighting circuit works
 
Home security
Home securityHome security
Home security
 
Heat guns
Heat gunsHeat guns
Heat guns
 
Hanging wallpaper
Hanging wallpaperHanging wallpaper
Hanging wallpaper
 
Hanging a door
Hanging a doorHanging a door
Hanging a door
 
Handrail anatomy
Handrail anatomyHandrail anatomy
Handrail anatomy
 
Upvc fascia
Upvc fasciaUpvc fascia
Upvc fascia
 
Timber care
Timber careTimber care
Timber care
 
How to avoid the cowboy builder
How to avoid the cowboy builderHow to avoid the cowboy builder
How to avoid the cowboy builder
 
General do it yourself safety comments
General do it yourself safety commentsGeneral do it yourself safety comments
General do it yourself safety comments
 
Garage floor insulation
Garage floor insulationGarage floor insulation
Garage floor insulation
 
Foundations for light garden walls
Foundations for light garden wallsFoundations for light garden walls
Foundations for light garden walls
 
Fixing to plasterboard and plasterboard fixings
Fixing to plasterboard and plasterboard fixingsFixing to plasterboard and plasterboard fixings
Fixing to plasterboard and plasterboard fixings
 
Fixing to lathe & plaster
Fixing to lathe & plasterFixing to lathe & plaster
Fixing to lathe & plaster
 

Recently uploaded

Enchancing adoption of Open Source Libraries. A case study on Albumentations.AI
Enchancing adoption of Open Source Libraries. A case study on Albumentations.AIEnchancing adoption of Open Source Libraries. A case study on Albumentations.AI
Enchancing adoption of Open Source Libraries. A case study on Albumentations.AI
Vladimir Iglovikov, Ph.D.
 
Pushing the limits of ePRTC: 100ns holdover for 100 days
Pushing the limits of ePRTC: 100ns holdover for 100 daysPushing the limits of ePRTC: 100ns holdover for 100 days
Pushing the limits of ePRTC: 100ns holdover for 100 days
Adtran
 
Encryption in Microsoft 365 - ExpertsLive Netherlands 2024
Encryption in Microsoft 365 - ExpertsLive Netherlands 2024Encryption in Microsoft 365 - ExpertsLive Netherlands 2024
Encryption in Microsoft 365 - ExpertsLive Netherlands 2024
Albert Hoitingh
 
GDG Cloud Southlake #33: Boule & Rebala: Effective AppSec in SDLC using Deplo...
GDG Cloud Southlake #33: Boule & Rebala: Effective AppSec in SDLC using Deplo...GDG Cloud Southlake #33: Boule & Rebala: Effective AppSec in SDLC using Deplo...
GDG Cloud Southlake #33: Boule & Rebala: Effective AppSec in SDLC using Deplo...
James Anderson
 
GraphSummit Singapore | The Art of the Possible with Graph - Q2 2024
GraphSummit Singapore | The Art of the  Possible with Graph - Q2 2024GraphSummit Singapore | The Art of the  Possible with Graph - Q2 2024
GraphSummit Singapore | The Art of the Possible with Graph - Q2 2024
Neo4j
 
Uni Systems Copilot event_05062024_C.Vlachos.pdf
Uni Systems Copilot event_05062024_C.Vlachos.pdfUni Systems Copilot event_05062024_C.Vlachos.pdf
Uni Systems Copilot event_05062024_C.Vlachos.pdf
Uni Systems S.M.S.A.
 
Microsoft - Power Platform_G.Aspiotis.pdf
Microsoft - Power Platform_G.Aspiotis.pdfMicrosoft - Power Platform_G.Aspiotis.pdf
Microsoft - Power Platform_G.Aspiotis.pdf
Uni Systems S.M.S.A.
 
Video Streaming: Then, Now, and in the Future
Video Streaming: Then, Now, and in the FutureVideo Streaming: Then, Now, and in the Future
Video Streaming: Then, Now, and in the Future
Alpen-Adria-Universität
 
Observability Concepts EVERY Developer Should Know -- DeveloperWeek Europe.pdf
Observability Concepts EVERY Developer Should Know -- DeveloperWeek Europe.pdfObservability Concepts EVERY Developer Should Know -- DeveloperWeek Europe.pdf
Observability Concepts EVERY Developer Should Know -- DeveloperWeek Europe.pdf
Paige Cruz
 
Why You Should Replace Windows 11 with Nitrux Linux 3.5.0 for enhanced perfor...
Why You Should Replace Windows 11 with Nitrux Linux 3.5.0 for enhanced perfor...Why You Should Replace Windows 11 with Nitrux Linux 3.5.0 for enhanced perfor...
Why You Should Replace Windows 11 with Nitrux Linux 3.5.0 for enhanced perfor...
SOFTTECHHUB
 
Large Language Model (LLM) and it’s Geospatial Applications
Large Language Model (LLM) and it’s Geospatial ApplicationsLarge Language Model (LLM) and it’s Geospatial Applications
Large Language Model (LLM) and it’s Geospatial Applications
Rohit Gautam
 
Alt. GDG Cloud Southlake #33: Boule & Rebala: Effective AppSec in SDLC using ...
Alt. GDG Cloud Southlake #33: Boule & Rebala: Effective AppSec in SDLC using ...Alt. GDG Cloud Southlake #33: Boule & Rebala: Effective AppSec in SDLC using ...
Alt. GDG Cloud Southlake #33: Boule & Rebala: Effective AppSec in SDLC using ...
James Anderson
 
GraphSummit Singapore | Enhancing Changi Airport Group's Passenger Experience...
GraphSummit Singapore | Enhancing Changi Airport Group's Passenger Experience...GraphSummit Singapore | Enhancing Changi Airport Group's Passenger Experience...
GraphSummit Singapore | Enhancing Changi Airport Group's Passenger Experience...
Neo4j
 
A tale of scale & speed: How the US Navy is enabling software delivery from l...
A tale of scale & speed: How the US Navy is enabling software delivery from l...A tale of scale & speed: How the US Navy is enabling software delivery from l...
A tale of scale & speed: How the US Navy is enabling software delivery from l...
sonjaschweigert1
 
How to Get CNIC Information System with Paksim Ga.pptx
How to Get CNIC Information System with Paksim Ga.pptxHow to Get CNIC Information System with Paksim Ga.pptx
How to Get CNIC Information System with Paksim Ga.pptx
danishmna97
 
Elizabeth Buie - Older adults: Are we really designing for our future selves?
Elizabeth Buie - Older adults: Are we really designing for our future selves?Elizabeth Buie - Older adults: Are we really designing for our future selves?
Elizabeth Buie - Older adults: Are we really designing for our future selves?
Nexer Digital
 
Removing Uninteresting Bytes in Software Fuzzing
Removing Uninteresting Bytes in Software FuzzingRemoving Uninteresting Bytes in Software Fuzzing
Removing Uninteresting Bytes in Software Fuzzing
Aftab Hussain
 
Free Complete Python - A step towards Data Science
Free Complete Python - A step towards Data ScienceFree Complete Python - A step towards Data Science
Free Complete Python - A step towards Data Science
RinaMondal9
 
Communications Mining Series - Zero to Hero - Session 1
Communications Mining Series - Zero to Hero - Session 1Communications Mining Series - Zero to Hero - Session 1
Communications Mining Series - Zero to Hero - Session 1
DianaGray10
 
Mind map of terminologies used in context of Generative AI
Mind map of terminologies used in context of Generative AIMind map of terminologies used in context of Generative AI
Mind map of terminologies used in context of Generative AI
Kumud Singh
 

Recently uploaded (20)

Enchancing adoption of Open Source Libraries. A case study on Albumentations.AI
Enchancing adoption of Open Source Libraries. A case study on Albumentations.AIEnchancing adoption of Open Source Libraries. A case study on Albumentations.AI
Enchancing adoption of Open Source Libraries. A case study on Albumentations.AI
 
Pushing the limits of ePRTC: 100ns holdover for 100 days
Pushing the limits of ePRTC: 100ns holdover for 100 daysPushing the limits of ePRTC: 100ns holdover for 100 days
Pushing the limits of ePRTC: 100ns holdover for 100 days
 
Encryption in Microsoft 365 - ExpertsLive Netherlands 2024
Encryption in Microsoft 365 - ExpertsLive Netherlands 2024Encryption in Microsoft 365 - ExpertsLive Netherlands 2024
Encryption in Microsoft 365 - ExpertsLive Netherlands 2024
 
GDG Cloud Southlake #33: Boule & Rebala: Effective AppSec in SDLC using Deplo...
GDG Cloud Southlake #33: Boule & Rebala: Effective AppSec in SDLC using Deplo...GDG Cloud Southlake #33: Boule & Rebala: Effective AppSec in SDLC using Deplo...
GDG Cloud Southlake #33: Boule & Rebala: Effective AppSec in SDLC using Deplo...
 
GraphSummit Singapore | The Art of the Possible with Graph - Q2 2024
GraphSummit Singapore | The Art of the  Possible with Graph - Q2 2024GraphSummit Singapore | The Art of the  Possible with Graph - Q2 2024
GraphSummit Singapore | The Art of the Possible with Graph - Q2 2024
 
Uni Systems Copilot event_05062024_C.Vlachos.pdf
Uni Systems Copilot event_05062024_C.Vlachos.pdfUni Systems Copilot event_05062024_C.Vlachos.pdf
Uni Systems Copilot event_05062024_C.Vlachos.pdf
 
Microsoft - Power Platform_G.Aspiotis.pdf
Microsoft - Power Platform_G.Aspiotis.pdfMicrosoft - Power Platform_G.Aspiotis.pdf
Microsoft - Power Platform_G.Aspiotis.pdf
 
Video Streaming: Then, Now, and in the Future
Video Streaming: Then, Now, and in the FutureVideo Streaming: Then, Now, and in the Future
Video Streaming: Then, Now, and in the Future
 
Observability Concepts EVERY Developer Should Know -- DeveloperWeek Europe.pdf
Observability Concepts EVERY Developer Should Know -- DeveloperWeek Europe.pdfObservability Concepts EVERY Developer Should Know -- DeveloperWeek Europe.pdf
Observability Concepts EVERY Developer Should Know -- DeveloperWeek Europe.pdf
 
Why You Should Replace Windows 11 with Nitrux Linux 3.5.0 for enhanced perfor...
Why You Should Replace Windows 11 with Nitrux Linux 3.5.0 for enhanced perfor...Why You Should Replace Windows 11 with Nitrux Linux 3.5.0 for enhanced perfor...
Why You Should Replace Windows 11 with Nitrux Linux 3.5.0 for enhanced perfor...
 
Large Language Model (LLM) and it’s Geospatial Applications
Large Language Model (LLM) and it’s Geospatial ApplicationsLarge Language Model (LLM) and it’s Geospatial Applications
Large Language Model (LLM) and it’s Geospatial Applications
 
Alt. GDG Cloud Southlake #33: Boule & Rebala: Effective AppSec in SDLC using ...
Alt. GDG Cloud Southlake #33: Boule & Rebala: Effective AppSec in SDLC using ...Alt. GDG Cloud Southlake #33: Boule & Rebala: Effective AppSec in SDLC using ...
Alt. GDG Cloud Southlake #33: Boule & Rebala: Effective AppSec in SDLC using ...
 
GraphSummit Singapore | Enhancing Changi Airport Group's Passenger Experience...
GraphSummit Singapore | Enhancing Changi Airport Group's Passenger Experience...GraphSummit Singapore | Enhancing Changi Airport Group's Passenger Experience...
GraphSummit Singapore | Enhancing Changi Airport Group's Passenger Experience...
 
A tale of scale & speed: How the US Navy is enabling software delivery from l...
A tale of scale & speed: How the US Navy is enabling software delivery from l...A tale of scale & speed: How the US Navy is enabling software delivery from l...
A tale of scale & speed: How the US Navy is enabling software delivery from l...
 
How to Get CNIC Information System with Paksim Ga.pptx
How to Get CNIC Information System with Paksim Ga.pptxHow to Get CNIC Information System with Paksim Ga.pptx
How to Get CNIC Information System with Paksim Ga.pptx
 
Elizabeth Buie - Older adults: Are we really designing for our future selves?
Elizabeth Buie - Older adults: Are we really designing for our future selves?Elizabeth Buie - Older adults: Are we really designing for our future selves?
Elizabeth Buie - Older adults: Are we really designing for our future selves?
 
Removing Uninteresting Bytes in Software Fuzzing
Removing Uninteresting Bytes in Software FuzzingRemoving Uninteresting Bytes in Software Fuzzing
Removing Uninteresting Bytes in Software Fuzzing
 
Free Complete Python - A step towards Data Science
Free Complete Python - A step towards Data ScienceFree Complete Python - A step towards Data Science
Free Complete Python - A step towards Data Science
 
Communications Mining Series - Zero to Hero - Session 1
Communications Mining Series - Zero to Hero - Session 1Communications Mining Series - Zero to Hero - Session 1
Communications Mining Series - Zero to Hero - Session 1
 
Mind map of terminologies used in context of Generative AI
Mind map of terminologies used in context of Generative AIMind map of terminologies used in context of Generative AI
Mind map of terminologies used in context of Generative AI
 

Deck structural design

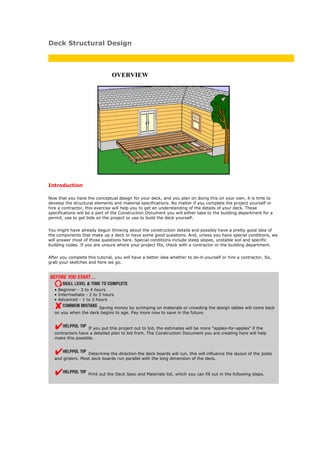
  • 1. Deck Structural Design OVERVIEW Introduction Now that you have the conceptual design for your deck, and you plan on doing this on your own, it is time to develop the structural elements and material specifications. No matter if you complete the project yourself or hire a contractor, this exercise will help you to get an understanding of the details of your deck. These specifications will be a part of the Construction Document you will either take to the building department for a permit, use to get bids on the project or use to build the deck yourself. You might have already begun thinking about the construction details and possibly have a pretty good idea of the components that make up a deck or have some good questions. And, unless you have special conditions, we will answer most of those questions here. Special conditions include steep slopes, unstable soil and specific building codes. If you are unsure where your project fits, check with a contractor or the building department. After you complete this tutorial, you will have a better idea whether to do-it-yourself or hire a contractor. So, grab your sketches and here we go. • Beginner - 3 to 4 hours • Intermediate - 2 to 3 hours • Advanced - 1 to 2 hours Saving money by scrimping on materials or crowding the design tables will come back on you when the deck begins to age. Pay more now to save in the future. If you put this project out to bid, the estimates will be more "apples-for-apples" if the contractors have a detailed plan to bid from. The Construction Document you are creating here will help make this possible. Determine the direction the deck boards will run, this will influence the layout of the joists and girders. Most deck boards run parallel with the long dimension of the deck. Print out the Deck Spec and Materials list, which you can fill out in the following steps.
  • 2. STEPS 1. Create a list: Fill in the blanks on the Deck Specs form. This information will give you the basis for completing the materials list. You should get the measurements from the conceptual plan created in the previous tutorial. The following steps will help you fill in the quantities for each item. When this list is complete, you will be able to set a budget for your deck project by getting an estimate from the lumberyard or putting the project out to bid. Make your own copy of this list and let's begin. 2. Estimate the ledger: Measure from your plans how many feet of wall will support the deck and add 10% for waste. Note: Always add a "waste factor," use 10% as a minimum. 3. Estimate concrete: This project calls for concrete pads measuring 18 inches by 18 inches by 12 inches deep. That equals 2.25 cubic feet per pad, times the number of pads to figure the total cubic feet. Verify the standard in your area, as many areas, especially in colder climates, require deeper pads. The goal is to have concrete pads that extend below the frost line, which could be as deep as 42". For each set of stairs add 2 cubic feet to support the bottom of the stairs. Don't forget to add the 10% to the total for waste; and, there are 27 cubic feet in a cubic yard. Our 30 foot by 20 foot deck will have three rows of concrete pads with five pads in each row--15 concrete pads times 2.25 cubic feet (c.f.) equals 33.75 c.f. plus 2 c.f. for a total of 35.75 c.f. Don't forget the 10% waste factor. For this deck we will order 37.125 c.f. Be sure to round up to the nearest available quantity. 4. Estimate concrete piers: Simply count the number of concrete pads; you will need a concrete pier for each pad. It is not necessary to include a waste factor for piers.
  • 3. 5. Estimate posts: You will need posts if your deck is over 18 inches above the ground. Count the number of concrete pads and multiply that number by the average height of the deck above the ground. Take care that the individual post heights fall evenly into a common 4x4 lengths; 4x4's come in two foot increments starting at 8 feet--8'-10'-12' and so on. 6. Estimate girders: The girders are 4x6's on this deck and will "run" the same direction as the deck boards. This plan calls for girders spaced 6 feet 8 inches apart and supported by piers every 6 feet (check applicable joist span tables). Girders should be supported on three piers where possible-- this will make the minimum desirable length 12 feet, remember the piers are 6 feet apart. Therefore the best girder lengths are multiples of six, and the longest manageable length will be 18 feet. Also, the girders must be supported at the ends on piers. For our deck there will be three "rows" of girders, each 30 feet long, for a total of 90 linear feet of 4x6. For this estimate add 10 % for waste, be sure to check for availability of the required lengths. 7. Estimate joists: The joists are spaced 16 inch on center and will run perpendicular to the girders and deck boards. To figure the number of joists, convert the length of the deck to inches (a 30 foot deck is 30 x 12 = 360 inches) and divide that by the 16-inch spacing (360 / 16 = 22.5) and round up (22.5 becomes 23.) Add 1 to that to figure the total number of joists. This deck will require 24 joists spaced at 16 inches on center. Multiply this number by the deck width (20 feet) to estimate the total linear feet of 2x6 joists, 460 linear feet plus 10% (46) equals 510 (round up.) 8. Estimate deck boards: This deck will have 2 x 6 decking, a 2 x 6 is usually 5 ½ inches instead of 6 as the name implies. So a standard 2 x 6 one foot long (a linear foot of 2x6) will cover .46 square feet. Our deck is 600 square feet (20 x 30) so there will be 600 / .46 = 1,304 linear feet of deck boards.Be sure to include a 10% waste factor (134 feet) and the total is 1434 linear feet of 2 x 6. 9. Estimate stairs: This deck is 30 inches above the ground and has one set of stairs 36 inches wide. To figure the actual number of steps, divide 30 inches by 6 inches--5 steps, the last one being the deck itself. Height of deck above ground divided by 6 equal the number of steps. To figure stringer length, multiply the number of steps by 16 inches for each stringer. Our deck has five steps times 16 inches--80 inches-6 feet 8 inches. Stairs up to 36 inches wide have two stringers, and stairs over 36 inches have three stringers up to 6 feet for the stringers. The steps (the steps are 2x6 the same as the deck) have two 2x6's, times the width of the stairs. In this case, each step will have two 2x6's by 36 inches. Five steps will require 10 x 36 inch 2x6's or 30 lineal feet of material. Add this to the deck material order.
  • 4. 10 Estimate railings: This deck has guard railings on two sides and hand . railings on the stairs. Measure the open sides of the deck and add the stair rail. Get the stair rail length from the stair stringer length in step nine. Calculate one 8-foot 4x4 (post) for each 6 feet of rail, 2 feet of 2x4 (top and bottom rail) for each 1 foot of rail and 2.2 1x2 (baluster) for each foot of rail. There are three parts of the railing, the posts, the top and bottom rail and the balusters. 11 Hardware and fasteners: You will need galvanized nails, metal connectors . and bolts to connect your deck parts. Figure one pound of 16d galvanized nails for each 10 square feet of deck, use the double hot dipped galvanized kind. Each joist will require two joist hangars. Each post should have a post cap to connect it to the girder it supports. Figure one pound of galvanized nails for each 10 metal connectors. The manufacturer will specify the size of nail for their product. Allow one bolt per foot of ledger, be sure to measure the length necessary to "run" the bolt through the wall framing and install a nut and washer on the other side. Materials Needed • Your design from previous tutorial • Blank paper for lists Tools Needed • Calculator • Span tables • Material selection information