CALL ON ➥8923113531 🔝Call Girls Aminabad Lucknow best Night Fun service
DaphileInstallation.pdf
1. hifi
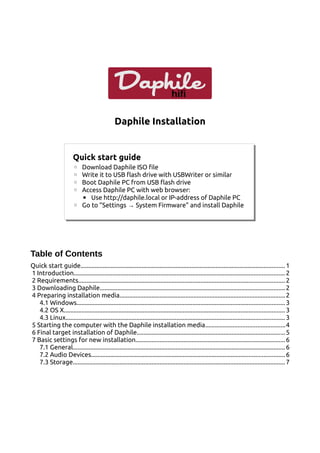
Daphile
Daphile Installation
Table of Contents
Quick start guide...............................................................................................................................1
1 Introduction...................................................................................................................................2
2 Requirements................................................................................................................................2
3 Downloading Daphile...................................................................................................................2
4 Preparing installation media.......................................................................................................2
4.1 Windows.................................................................................................................................3
4.2 OS X......................................................................................................................................... 3
4.3 Linux........................................................................................................................................ 3
5 Starting the computer with the Daphile installation media.................................................4
6 Final target installation of Daphile............................................................................................5
7 Basic settings for new installation.............................................................................................6
7.1 General....................................................................................................................................6
7.2 Audio Devices........................................................................................................................6
7.3 Storage....................................................................................................................................7
Quick start guide
◦ Download Daphile ISO file
◦ Write it to USB flash drive with USBWriter or similar
◦ Boot Daphile PC from USB flash drive
◦ Access Daphile PC with web browser:
▪ Use http://daphile.local or IP-address of Daphile PC
◦ Go to ”Settings System Firmware” and install Daphile
→
2. 7.3.1 Network drives..............................................................................................................8
8 Manual drive partitioning............................................................................................................9
9 Multiboot configuration..............................................................................................................9
9.1 BIOS boot loaders.................................................................................................................9
9.2 UEFI....................................................................................................................................... 10
10 Troubleshooting.......................................................................................................................10
1 Introduction
This document describes the Daphile installation and some basic system settings
that might be required to make the system usable for music listening. The default
installation method assumes the installation target drive will be used completely
for Daphile and all existing data will be deleted from it. This method does not
support automatic configuration for multiple operating system boot (multiboot).
If user wants to use custom drive partitioning and/or configure multiboot, the
chapters 8 and 9 should be read first.
2 Requirements
◦ Computer to run Daphile:
▪ Processor: x86 architecture based, minimum i486
▪ RAM: 512MB
▪ Network adapter: Ethernet and/or wireless
▪ Bootable storage device: 2GB (SATA, IDE or USB)
▪ Audio device: internal (PCI), USB or FireWire
◦ Another web browser equipped device to access Daphile
3 Downloading Daphile
Download Daphile ISO file from http://www.daphile.com/.
x86_64 version is the recommended version.
4 Preparing installation media
USB flash drive is the recommended installation media type as long as the
computer is able start the operating system from it. The following sections will
describe how the USB flash installation media is prepared using different operating
systems: Windows, OS X and Linux. The result of this phase is only the Daphile
installation media, not a final Daphile installation. Daphile installation media is only
meant to be used to make the final target installation.
There are many tools (e.g. unetbootin, Rufus, Universal USB Installer, etc...) that are
able to prepare a bootable USB drive from an ISO-file. You can create a “Daphile
Live USB” by using them. However this method is not recommended and should
only be used if the recommended method is not applicable. The “Daphile Live USB”
3. has limited functionality and most importantly lacks the capability for Daphile
version update.
All described methods below will delete any existing data from the device. You
must be extra careful to use right target device otherwise you could
experience serious data loss.
4. 4.1 Windows
Use USBWriter (https://sourceforge.net/projects/usbwriter/).
4.2 OS X
The easiest way to create a bootable USB media is to use Balena Etcher. You can
download the application from: https://www.balena.io/etcher/
After installing the application you just need to locate the Daphile image and select
the destination media. This is a guided three step process as shown here.
4.3 Linux
Run the following command, replacing /dev/sdx with your drive.
sudo dd if=/path/to/daphile.iso of=/dev/sdx bs=1M && sync
Find out the name of your drive with lsblk. Make sure that it is not mounted.
5. 5 Starting the computer with the Daphile installation media
You must first make sure that your computer will start the operating system from
the newly created installation media. In most of the cases you need to modify the
computer BIOS settings, search for boot options and boot drive priority.
With Apple Mac you must press the option key (“ ”) when Mac is powered on to
⌥
get boot drive options. Daphile installation media should appear as as EFI boot
drive.
• The first thing you will see after successful Daphile start is the following screen:
You should select to perform the initial settings by pressing F1 if you want to:
◦ configure wireless network,
◦ configure static IP address and/or
◦ wipe/prepare another storage device as a Daphile installation target.
Once the Daphile start has completed successfully you should get the following
message on screen.
6. 6 Final target installation of Daphile
The final target installation is made using the web interface of Daphile once the
computer is started using the Daphile installation media. You must use another
web browser enabled device to access Daphile web interface and complete the
installation there.
The easiest way to access the web interface is to use the IP-address from your
Daphile boot screen as the address for web browser, e.g. http://10.0.2.15. If the
operating system supports mDNS (iOS, OS X, most Linux distros and Windows 10
but not Android or older Windows versions), then you should be able to use also
http://daphile.local address. And when the router supports local DNS, you could try
either http://daphile or http://daphile. (the latter has a dot at the end).
On the Daphile web interface you should go to Settings tab, open the System
Firmware section and select the installation target drive for the new installation.
If your installation target drive is disabled on the selection list, you must either
wipe it empty (see chapter 4 how to perform it with Daphile installation media) or
create the required partitions manually (see chapter 8). If your Daphile PC has
enough RAM (512MB) and system image was loaded completely into RAM during
the boot, you could make the final target installation on the same drive that you
used as the installation media.
MSDOS partition table is the preferred one (better compatibility with PC BIOS) but
for larger than 2TB drives and for Mac computers you should select the GUID
partition table (GPT).
The boot loader selection depends on your PC. In most of the cases you could
select both and actually that would be also the best way to secure future
compatibility if you later decide to upgrade the PC. For Mac computers it's
recommended to select only UEFI boot loader.
The boot loader and partition table type options are not available when the
installation is done on drive that already contains DaphileBoot and DaphileData
partitions. In this case Daphile installs GRUB boot loader and EFI loader
(Daphile.efi) only to the DaphileBoot partition. User must manually finalize the
7. system boot loader configuration (see chapter 9).
You can configure the settings for the installation target system by selecting the
option for that. Otherwise the system will use the default values and you need to
configure everything from scratch after the Daphile start with new installation
target drive. See chapter 7 for instructions on some basic settings.
The installation can also be made on drive that already has an existing installation
of Daphile (DaphileBoot and DaphileData partitions exist), e.g. if you want to
upgrade Daphile using another USB drive. All user files and settings are retained. If
the “Configure system settings” option is selected, the new settings will replace
the old ones but still the user files and media server setup are retained.
7 Basic settings for new installation
7.1 General
The “System name” setting must be unique within the network where Daphile will
be connected to. Especially if your are planning to install multiple Daphile PCs in
the same network, you should rename already the first one as something else than
“daphile”.
The “Media server” is set to “Internal” by default. If you have another external
server, you need to configure the address of that server. If the external media
server is non-Daphile version and using non-default HTTP-port (default is 9000),
then you should also specify the non-default port number, e.g.
You will get either green Squeezebox icon or Daphile icon into the external media
server address field when the address is correct and media server is recognized to
be compatible.
7.2 Audio Devices
If you are using an audio device that is connected to speakers without an external
amplifier you must turn on the “Settings Audio Devices [audio device]
→ → →
Volume control” setting. With default value “Off – Bitperfect playback” you might
even destroy your speakers if there isn't any volume control.
8. Another important thing to check in the audio settings is the “Mixer controls”-list (if
existing). This is very audio device dependent list and it's quite possible that your
audio device is muted with the default settings. Check the list carefully and enable
the controls that are required to get the desired audio output working.
For example in the above list you might have to enable “Speaker”. However in some
cases you might want to disable it if it enables e.g. the laptop internal speaker and
you want to take audio out from line level connector.
7.3 Storage
Purpose of the Storage configuration is to included external music sources to
Daphile's music library. By default Daphile uses the DaphileData partition as the
music storage. The USB drives are automatically (also as hotplugged) taken into use
as music storages but only in the read-only mode. Otherwise user needs to
configure the settings of the storage drives according to her/his own needs.
The above example configures the directory “Users/Kimmo/Music” (directory must
exist) from “sdb1” partition to be used as a music storage. The “RW” option enables
Daphile user to also store and delete files there. This storage is named in Daphile as
“MyMusic” (use unique names). With “Share” option it will be also available as a
network attached storage (NAS) to other devices in the network using “MyMusic”
also as the share name.
Removable drives may be safely removed after pressing the Eject button.
9. 7.3.1 Network drives
All network drive types use the same basic format for the “Remote target” field:
"username@host:port/path". It consists four elements but some of them are
optional (depending on the network drive type). If the optional field is not used
then the associated delimiter may be left out also, e.g. "host/path" is valid if there
is no need to specify username and port.
"host" may be specified with the server name or IP address
The right-most checkbox besides the each drive configuration is used to select the
drive for the configuration removal
After the settings have been saved and the system has restarted there should be an
indicator icon for each network drive whether it has been taken into use
successfully. Note that the network drive should be available when the Daphile is
started.
Common Internet File System (cifs)
Common Internet File System (cifs) is probably the most common type of the
network attached storages (NAS). This type is also compatible with Server Message
Block (SMB) protocol. The drive mapping notation that Daphile uses differs from
the one used in Windows OS (hostpath vs. host/path; note the use of slash
instead of backslash).
• "path" must always contain at least the share name but it may be extended
with certain directory path also, eg. host/share/dir1/dir2
• "username" is optional if the service is accessible to guest users
• "port" must be specified only if the server does not use either of the
standard ports 139 or 445.
• The workgroup may be specified by including it at the end of the "username"
with "/"-delimiter, eg. "username/workgroup@host/path"
• "Password" field may be left empty if server does not require authentication
10. 8 Manual drive partitioning
In case you don't want to use the whole storage drive for Daphile as the automatic
installation does by default, you have to create the required partitions manually by
using other third party partitioning tool (e.g. GParted Live USB). Another possibility
is that you reduce the size of DaphileData partition after the installation and then
create additional partitions. This method requires also care and expertise along
with some third party tool.
Daphile requires two specific partitions for itself on the same drive. It's strongly
recommended that those partitions are formatted using the “EXT4” Linux file
system and they must be labeled as “DaphileBoot” and “DaphileData”.
DaphileBoot partition should be size of 1GB. Minimum size for DaphileData is also
1GB but it's recommended to use more space for it even if the music files will
stored somewhere else. For example the media server plugins, databases, caches,
etc... are stored on DaphileData partition.
Please note that when Daphile is installed on manually partitioned drive, Daphile
installs GRUB boot loader and EFI loader (Daphile.efi) only to the DaphileBoot
partition and user must manually finalize the system boot loader configuration (see
chapter 9).
9 Multiboot configuration
Daphile installation tool does not support multiboot configurations. However with
a little expertize and manual work it's possible to install and configure also Daphile
to work on multiple operating system setup.
9.1 BIOS boot loaders
The GRUB installation to the Master Boot Record (MBR) of the drive is done only
when Daphile installation uses automatic partitioning and user has selected the
BIOS boot loader option. However Daphile installs always the GRUB boot loader
into the DaphileBoot partition and you can manually configure your main boot
loader to chain load the GRUB from DaphileBoot partition. For example if your
main boot loader is also GRUB, then the menu entry to start Daphile from
DaphileBoot partition would be something like this:
menuentry "Daphile" {
insmod chain
insmod ext2
set root=(hd1,3) # 2nd HDD, 3rd partition
chainloader +1
}
It's not recommended to configure external boot loader by directly using the
11. Daphile kernel and initramfs. Daphile version upgrade updates only its own boot
loader configuration in DaphileBoot partition and you would have to update the
external boot loader configuration manually on every update if you are not using
the “chainloader” configuration.
9.2 UEFI
Daphile specific GRUB EFI loader (Daphile.efi) is created to DaphileBoot partition
during the installation process. In order to use it for UEFI multiboot you must
manually copy and possibly rename it into EFI system partition.
10 Troubleshooting
See the frequently asked questions list (FAQ) available on Daphile web site: http://
www.daphile.com/download/FAQ.txt