1. How to Install ArchLinux on a
USB Flashdrive in 2012 –
For Newbies Only!
By: Chukwuma I. Onyeije, M.D.
(linuxonyeije at onyeije dot net)
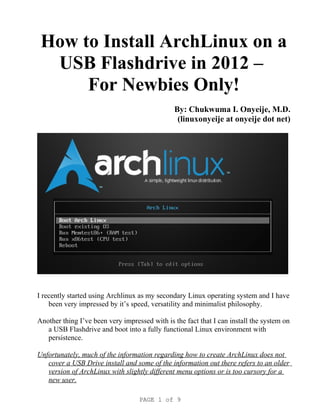
I recently started using Archlinux as my secondary Linux operating system and I have
been very impressed by it’s speed, versatility and minimalist philosophy.
Another thing I’ve been very impressed with is the fact that I can install the system on
a USB Flashdrive and boot into a fully functional Linux environment with
persistence.
Unfortunately, much of the information regarding how to create ArchLinux does not
cover a USB Drive install and some of the information out there refers to an older
version of ArchLinux with slightly different menu options or is too cursory for a
new user.
PAGE 1 of 9
2. Therefore; I am making available a tutorial based on my personal method for creating
an ArchLinux installation on a USB Flashdrive 2012.
WARNING: This tutorial is a bare bones description of the process to create an
ArchLinux installation for USB. Although suitable for Newbies (like myself)
the person doing this should have a fair amount of familiarity with Linux, the
command line and the Archlinux installation process.
ACKNOWLEDGEMENTS:
In order to create this tutorial I have borrowed heavily from the following
sources (and without whom I would have NEVER been able to do this):
Build a Killer Customized Arch Linux Installation (and Learn All About Linux in the
Process by Whitson Gordon:
http://lifehacker.com/5680453/build-a-killer-customized-arch-linux-installation-and-
learn-all-about-linux-in-the-process
How-To Install Archlinux on a USB Stick and boot from it! By PlatinumMonkey
over at USA Linux Users Group.
http://usalug.com/phpBB3//viewtopic.php?t=12377
Installing Arch Linux on a USB key over at the ArchLinux Wiki:
https://wiki.archlinux.org/index.php/Installing_Arch_Linux_on_a_USB_key
1. Obtain a cheap USB key with enough space. I was able to purchase an 8 GB USB
drive made by Patriot Memory for $5.95 at a local electronics store
2. Obtain the Arch Linux CD and burn the iso unto DVD. On my Ubuntu machine
I use Brasero. http://www.youtube.com/watch?v=KKdIco-3nvo
3. If you are using a Windows PC I would recommend Infracorder...
http://infrarecorder.org/
4. When I first created an ArchLinux USB drive I deleted all partitions on the USB
drive with Gparted and created a single primary partition using FAT32 format.
5. Alternatively, you can delete any existing parition(s) and create a new Primary
partition using the Linux type (83) within cfdisk. Please Note: One of the times
PAGE 2 of 9
3. I tried this it failed miserably. I recommend starting with a clean USB that has
been repartitioned with Gparted.
6. Boot the ArchLinux CD and launch AIF with (you will be instructed to do this on
the opening screen of the ArchLinux CD)
/arch/setup
7. Follow the steps for a normal Archlinux CD setup.
PARTITION THE USB DRIVE WITH cfdisk:
• In the main menu select Prepare Hard Drive and select your USB
• Please note that the USB flashdrive will likely be given a name like
/dev/sdb and your hard drive on your computer will likely be /dev/sda.
8. When given the option of how to prepare your drive, choose "Parition Hard
Drive" which will run cfdisk on the device your flashdrive
9. Make the partition bootable.
10. Make the FS Type Linux. (**** If cfdisk defaults to Linux type 82... Change it
to Linux type 83)
11. Leave space for a logical partition on the USB. I used about 512 MB.
12. I partitioned this extra space logical partition as W95 FAT32
13. Write these changes to the USB and exit.
14. Select “Manually Configure block devices, filesystems and mountpoints”
15. Select the UUID option
16. Select /dev/sdb1
17. Select YES when asked to Recreate file system
18. Select Ext4 for /dev/sdb1
19. Select / (root) as the mount point
20. Give the newly created mount point a label. I chose “arch”
21. Select the other partition on /dev/sdb (this will be something like /dev/sdb2 or
/dev/sdb5 or similar…)
22. Select YES when asked to recreate it’s file system
23. Select Ext2 for /dev/sdb5
24. Select custom mountpoint
PAGE 3 of 9
4. 25. When asked: “Enter custom mountpoint for /dev/sdb5 – insert a short label.
26. Allow the default option for all other questions
27. Ignore the warning that says No separate /boot filesystem and no swap partition
defined.
28. Select Packages
29. Select GRUB
30. Select “Configure system” from the Main Menu.
SELECT CONFIGURE SYSTEM FROM THE MAIN MENU:
31. Select: /etc/rc.conf:
• Scroll down to the NETWORKING section set your HOSTNAME to whatever
you want,
• Add eth0 to your so the line would read INTERFACES=eth0
32. Select: /etc/hosts: Make sure your computer's hostname matches the one you
picked in /etc/rc.conf (which it should have done automatically)
33. Select: /etc/fstab:
• Make sure fstab contains the /dev/sdb of the partitions from your USB
drive.
34. Select: /etc/mkinitcpio.conf:
• At the bottom of this file add “ide usb” after base and before udev.
35. Select /etc/pacman.conf:
• By default you are given three repositories: [core], [extra], and
[community].
• If you're on a 64-bit system, you should edit /etc/pacman.conf and
uncomment the [multilib] line and the line below it, near the bottom of the
file. This will add the [multilib] repository to your setup, which contains
32-bit applications for those situations in which you need them.
36. Select /etc/pacman.d/mirrorlist:
PAGE 4 of 9
5. • Uncomment mirrors that are near you.
37. Select: "Root-Password" to set the password for the root account, then scroll
down to "Done" and press Enter.
38. It will run through a few processes to configure your system and return you to the
main menu.
Select INSTALL BOOTLOADER:
• THIS IS IMPORTANT:
• You will be prompted to edit the menu.lst config file.
• Edit root to be set as “hd0,0”
39. Install the bootloader to the MBR for your USB drive (ie, /dev/sdb)
40. Exit Install.
41. Type “reboot “ at the command prompt.
42. If everything went well you should be greeted by a login prompt.
43. Update system with pacman:
pacman –Syu
44. If necessary, edit your mirrorlist with nano /etc/pacman.d/mirrorlist
45. ADD YOURSELF AS A USER:
• To do so, just run the following command:
useradd -m -g users -G
audio,lp,optical,storage,video,wheel,games,power -s
/bin/bash YOURNAMEHERE
46. Replace YOURNAMEHERE with your desired username. The long string of
comma-separated terms contains the groups to which your user belongs.
47. Next, add a password for your new user by running:
PAGE 5 of 9
6. passwd YOURNAMEHERE
and typing in your desired password when prompted.
48. QUICK (BUT DIRTY) ALTERNATIVE:Use the command adduser to add a user
and a password.
49. Install sudo with:
pacman -S sudo
50. Once you've installed Sudo, you'll want to add your user as a valid sudoer. You'll
need to use the special command visudo to do this, which uses the editor vi to
edit /etc/sudoers. Unfortunately, vi is not very friendly if you don't know how to
use it, so for now we'll change visudo's default editor to our friend nano by
running it with the EDITOR variable, like this:
EDITOR=nano visudo
51. You can use many strategies to add your user as a sudoer, but we're going to just
tell Arch to let all users in the group "wheel" use sudo. So, uncomment this line
in/etc/sudoers:
%wheel ALL=(ALL) ALL
52. When you're done, you can move on to configuring video and sound.
INSTALL ALSA
53. Before installing ALSA, you'll want to edit your /etc/modprobe.d/modprobe.conf file by
typing
nano /etc/modprobe.d/modprobe.conf
at the command prompt. Add the following line to the file:
options snd-pcsp index=2
PAGE 6 of 9
7. 54. This will make sure the snd-pcsp module load last, ensuring that your sound will
work correctly.
55. Then, install alsa-utils with Pacman. You should know how to do this by now, but
for good measure, the command is pacman -S alsa-utils. However, you'll also
probably want alsa-oss. You can actually install them both in one fell swoop with:
pacman -S alsa-utils alsa-oss
56. Next, you'll want to start up alsamixer as a normal user (not as root). To do so,
type su - yourusername and then enter:
alsamixer
57. Make sure the correct channels are unmuted (usually Master and PCM, though
you may need to turn up others like Front Speaker or Headphone). Usually, you'll
want to raise their volume all the way up, but make sure under "Item" at the top
there is not a positive number next to "dB gain". If there is, turn the channel down
until "dB gain" is zero.
58. Exit alsamixer with Esc and check if your sound is working correctly by typing in
the following command:
aplay /usr/share/sounds/alsa/Front_Center.wav
59. If you hear a woman's voice, your sound works correctly. If not, go back and
make sure the right channels are unmuted.
60. Switch back to the root user by running su and type in:
alsactl store
to store these values.
61. To make your computer call on these settings at boot, edit /etc/rc.conf in nano
and add alsa to the DAEMONS section:
PAGE 7 of 9
8. DAEMONS=(syslog-ng network netfs crond alsa)
INSTALL X
62. Install Xorg with the following command:
pacman -S xorg-server xorg-xinit xorg-utils xorg-
server-utils xorg-twm xorg-xclock xterm
63. You can also include the package mesa if you foresee yourself using 3D graphics.
INSTALL VIDEO DRIVERS:
64. You will need knowledge of which video chipset your machine has. If you do not know, use
the /usr/sbin/lspci program:
$ lspci | grep VGA
65. For a complete list of all open-source video drivers, search the package database:
$ pacman -Ss xf86-video | less
66. Use pacman to install the appropriate video driver for your video card/onboard video. Example for the
Vesa driver
# pacman -S xf86-video-vesa
67. Before testing X, you'll also want to fetch xf86-input-keyboard and xf86-input-mouse with
Pacman
pacman -S xf86-input-keyboard xf86-input-mouse
68. If you're on a laptop, you'll want xf86-input-synaptics as well.
69. Try starting X with:
startx
PAGE 8 of 9
9. 70. If it works, you should be able to interact with a very basic windowed
environment and run commands in xterm.
71. Exit by typing exit into xterm and hitting Enter
PAGE 9 of 9