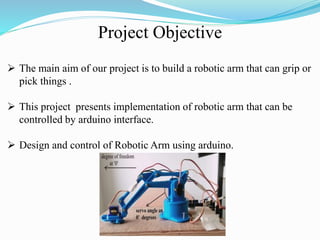
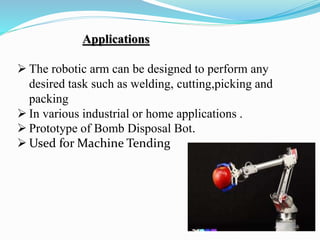
3D PRINTED ROBO ARM CONTROL USING ARDUINO
Presented by :
19C31A0260-Dharavath Shashi Kumar
19C31A0238-Maduri Tharun
19C31A0202-Anugoju Omkar
19C31A0205-Bachu Ramya
19C31A0215-Chaganti Varun
Under the guidance of:
Dr.S.Mallikarjun Reddy
DEPARTMENT OF ELECTRICAL & ELECTRONICS ENGINEERING
CONTENTS
 Abstract
 Aim of the project
 Types of robotic arm
 Block diagram
 What is Arduino?
 Hardware Connections With Arduino
 Application
ABSTRACT
 In the present days, number of situations exist where it is
not possible for a human operator to do an activity on
his/her own, due to a level of danger or difficulty involved.
 Employing robotic systems for performing difficult tasks,
rather than compromising on human lives.
 Here we propose to build a robotic arm controlled by
arduino uno.
 The development of this arm is based on Arduino platform
 A servo motor is a combination of DC motor, position
control system, gears.
Project Objective
 The main aim of our project is to build a robotic arm that can grip or
pick things .
 This project presents implementation of robotic arm that can be
controlled by arduino interface.
 Design and control of Robotic Arm using arduino.
TYPES OF ROBOTIC ARM’S :
 There are various ways in which a robotic arm may be
controlled.
 Typically, the following types of robotic arms are defined :
 Cartesian/Gantry Robot
 Cylindrical Robot
 Spherical/Polar Robot
 SCARA Robot
 Articulate Robot
 Parallel Robot
BLOCK DIAGRAM :
Arduino
IDE
 What is ARDUINO ?
 The Arduino Uno is a microcontroller
board based on the ATmega328(datasheet).
 It has 14 digital input/output pins of which
6 can be used as PWM outputs.
 6 analog inputs, a 16 MHz crystal
oscillator, a USB connection, a power jack
and a reset button
ARDUINO BOARD
What makes a servo ?
Servo motors are constructed out of basic DC motors, by adding:
 some gear reduction
 a position sensor for the motor shaft
 an electronic circuit that controls the motor's operation
HARDWARE CONNECTIONS WITH
ARDUINO
The best thing about a servo motor is that it can be connected
directly to an Arduino.
 Connect the motor
to the Arduino
 Arduino with Simulink
program
 Arduino And Servo
Motors
How servo motor work’s:
• The third pin accept the control signal which is a pulse-width modulation
(PWM) signal.
• It can be easily produced by all micro- controllers and Arduino board.
• The control signal is fairly simple compared to that of a stepper motor.
• The pulse width sent to servo ranges as follows:
Minimum: 1 millisecond ---> Corresponds to 0 rotation angle.
Maximum: 2 millisecond ---> Corresponds to 180 rotation
angle.
Applications
 The robotic arm can be designed to perform any
desired task such as welding, cutting,picking and
packing
 In various industrial or home applications .
 Prototype of Bomb Disposal Bot.
 Used for Machine Tending
Cylindrical robo arm

Cylindrical robo arm

  • 1.
    3D PRINTED ROBOARM CONTROL USING ARDUINO Presented by : 19C31A0260-Dharavath Shashi Kumar 19C31A0238-Maduri Tharun 19C31A0202-Anugoju Omkar 19C31A0205-Bachu Ramya 19C31A0215-Chaganti Varun Under the guidance of: Dr.S.Mallikarjun Reddy DEPARTMENT OF ELECTRICAL & ELECTRONICS ENGINEERING
  • 2.
    CONTENTS  Abstract  Aimof the project  Types of robotic arm  Block diagram  What is Arduino?  Hardware Connections With Arduino  Application
  • 3.
    ABSTRACT  In thepresent days, number of situations exist where it is not possible for a human operator to do an activity on his/her own, due to a level of danger or difficulty involved.  Employing robotic systems for performing difficult tasks, rather than compromising on human lives.  Here we propose to build a robotic arm controlled by arduino uno.  The development of this arm is based on Arduino platform  A servo motor is a combination of DC motor, position control system, gears.
  • 4.
    Project Objective  Themain aim of our project is to build a robotic arm that can grip or pick things .  This project presents implementation of robotic arm that can be controlled by arduino interface.  Design and control of Robotic Arm using arduino.
  • 5.
    TYPES OF ROBOTICARM’S :  There are various ways in which a robotic arm may be controlled.  Typically, the following types of robotic arms are defined :  Cartesian/Gantry Robot  Cylindrical Robot  Spherical/Polar Robot  SCARA Robot  Articulate Robot  Parallel Robot
  • 6.
  • 7.
     What isARDUINO ?  The Arduino Uno is a microcontroller board based on the ATmega328(datasheet).  It has 14 digital input/output pins of which 6 can be used as PWM outputs.  6 analog inputs, a 16 MHz crystal oscillator, a USB connection, a power jack and a reset button
  • 8.
  • 9.
    What makes aservo ? Servo motors are constructed out of basic DC motors, by adding:  some gear reduction  a position sensor for the motor shaft  an electronic circuit that controls the motor's operation
  • 10.
    HARDWARE CONNECTIONS WITH ARDUINO Thebest thing about a servo motor is that it can be connected directly to an Arduino.  Connect the motor to the Arduino  Arduino with Simulink program  Arduino And Servo Motors
  • 11.
    How servo motorwork’s: • The third pin accept the control signal which is a pulse-width modulation (PWM) signal. • It can be easily produced by all micro- controllers and Arduino board. • The control signal is fairly simple compared to that of a stepper motor. • The pulse width sent to servo ranges as follows: Minimum: 1 millisecond ---> Corresponds to 0 rotation angle. Maximum: 2 millisecond ---> Corresponds to 180 rotation angle.
  • 12.
    Applications  The roboticarm can be designed to perform any desired task such as welding, cutting,picking and packing  In various industrial or home applications .  Prototype of Bomb Disposal Bot.  Used for Machine Tending