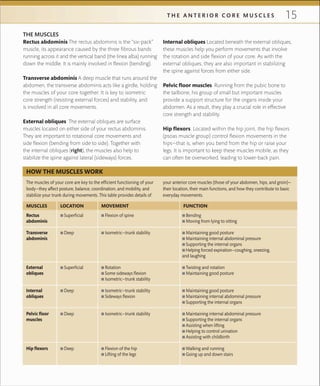
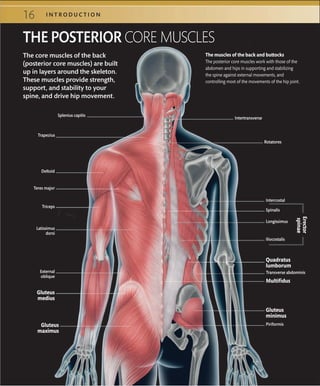
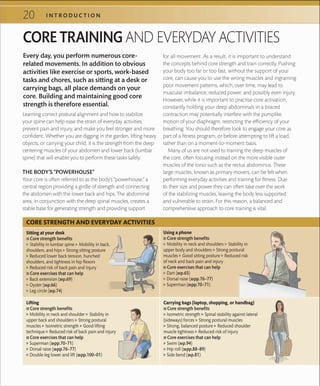
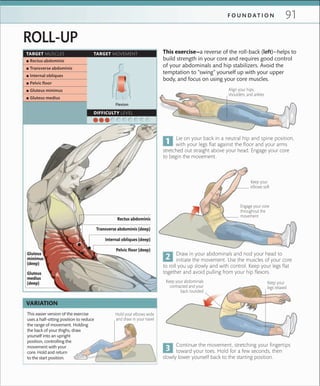
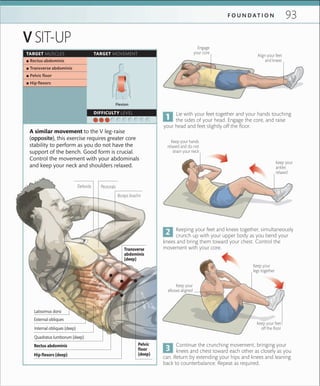
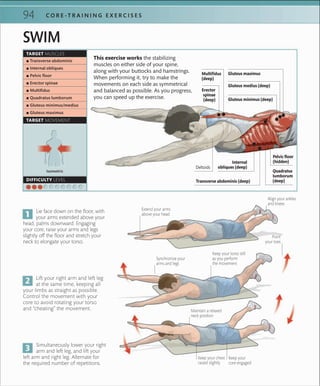
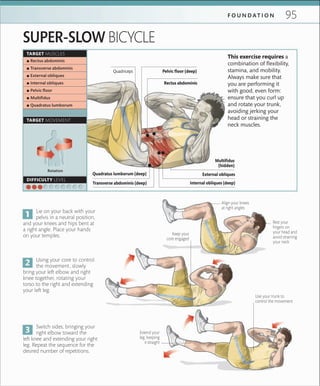
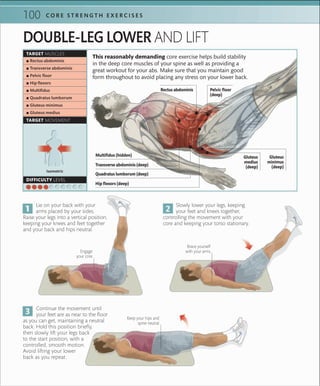
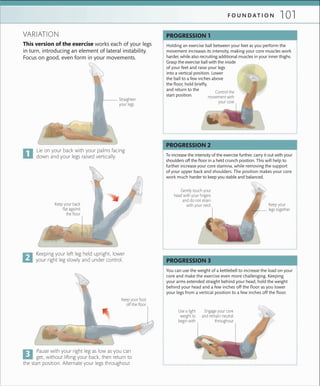
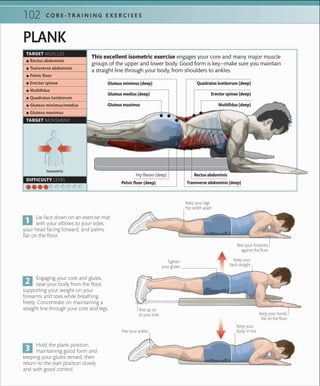
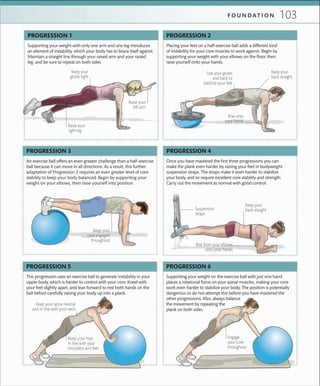
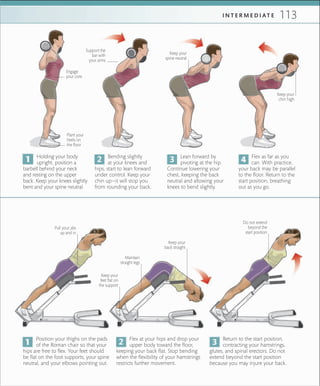
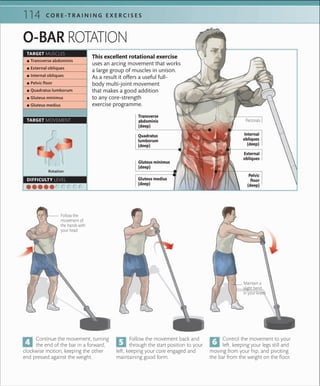
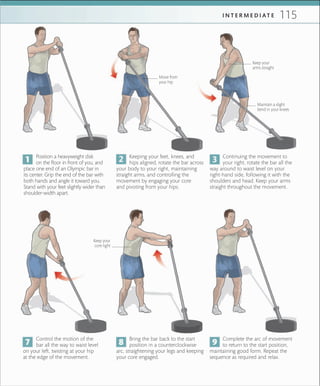
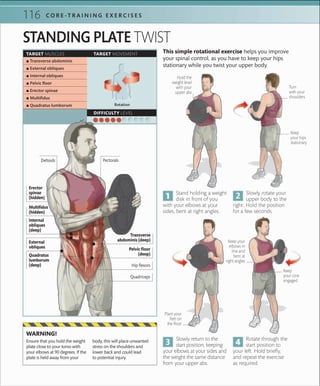
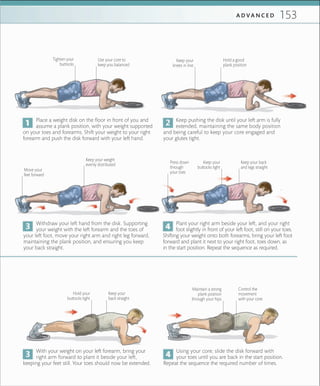
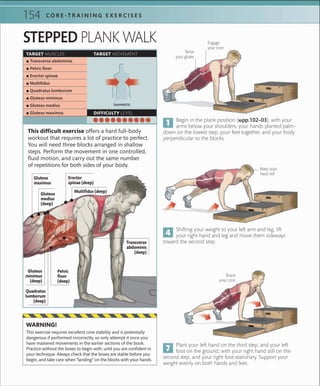
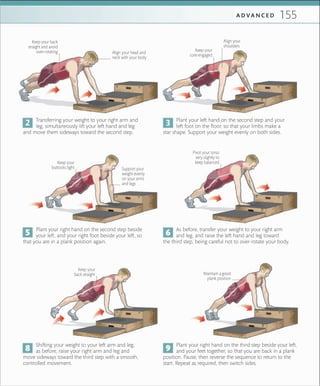
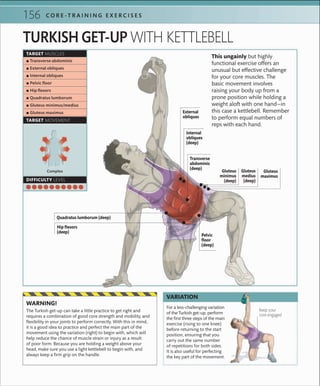
Download to read offline

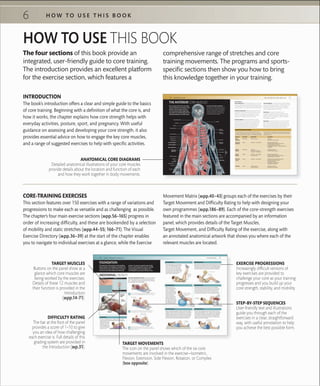


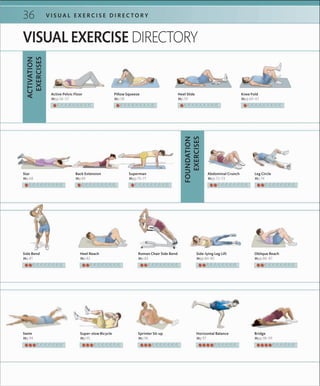
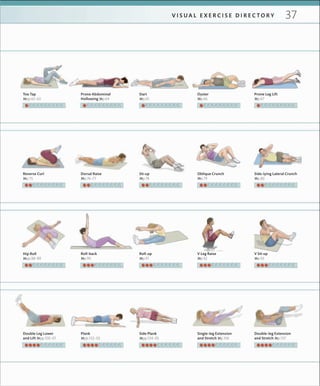

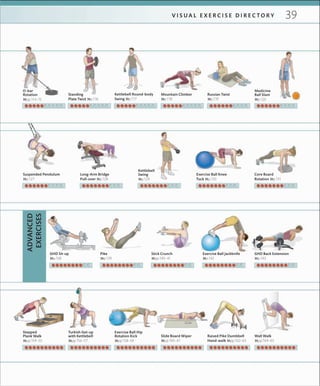
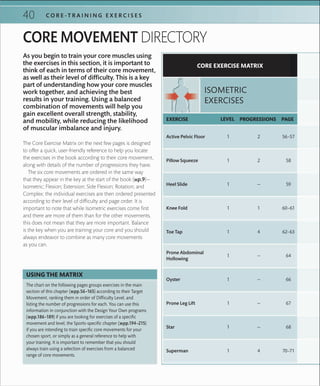
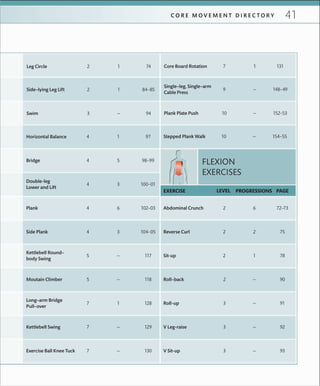


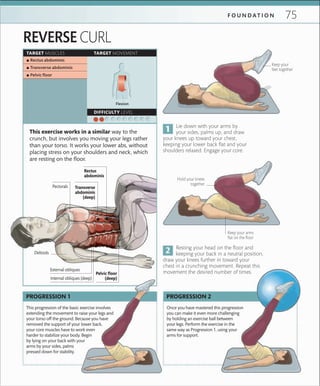
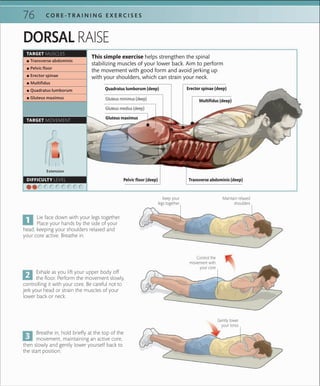
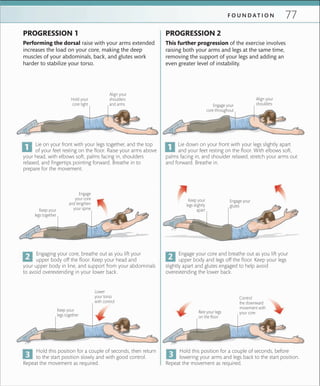
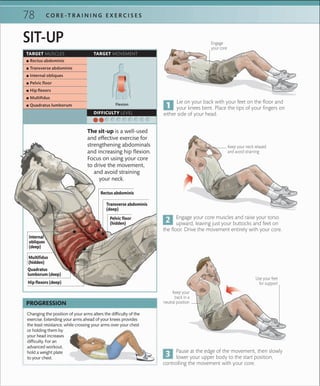


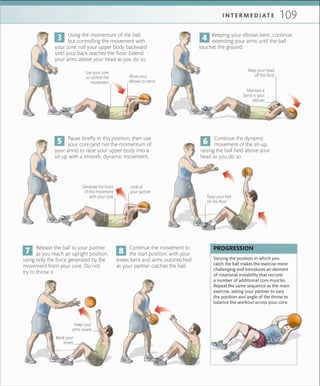


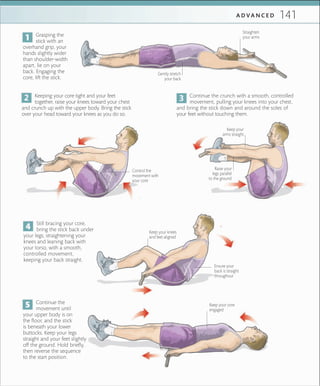
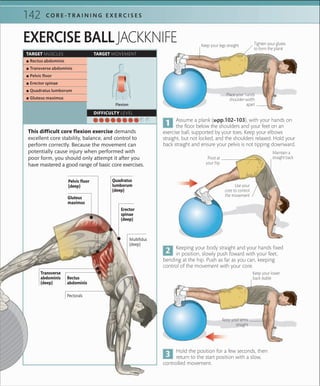
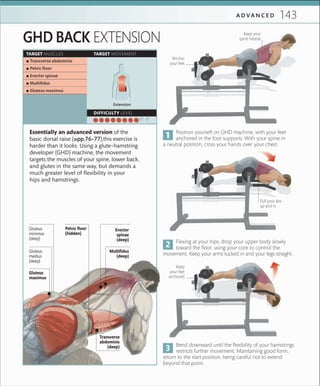
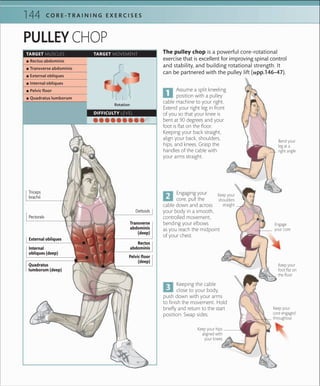


The document provides a step-by-step guide to stronger core muscles and better posture. It includes over 150 body-sculpting core exercises that target the core, strength, and posture for both men and women. The exercises are organized from foundational to advanced levels and cover mobilization, activation, and dynamic movements using bodyweight, equipment, and varying levels of difficulty.


