Colored pencil techniques for drawing a flower
•Download as PPTX, PDF•
4 likes•1,075 views


Recommended
More Related Content
Viewers also liked
Viewers also liked (20)
Similar to Colored pencil techniques for drawing a flower
Similar to Colored pencil techniques for drawing a flower (20)
More from Bob Ransley
More from Bob Ransley (13)
Recently uploaded
Recently uploaded (20)
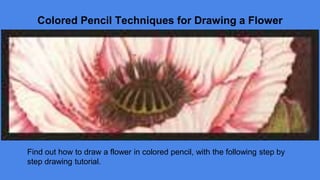
Colored pencil techniques for drawing a flower
- 1. Colored Pencil Techniques for Drawing a Flower Find out how to draw a flower in colored pencil, with the following step by step drawing tutorial.
- 2. Step One: With a color photocopy of a reference photo, I rearranged and cropped elements of the poppy composition. Using an HB pencil and light pressure, I drew my composition onto four-ply, 100% cotton museum board (frequently found among framing supplies.)
- 3. Step Two: Using very light pressure, I started applying the first colored pencil layer, adding more emphasis where the values will be deeper. Note that the pencil application still appears granular and that the texture of the museum board is still visible.
- 4. Step Three: To create the veins in the leaves and the fuzzy texture of the pod and stem, as well as the individual strands of stamens, I put down a sheet of translucent drafting paper.
- 5. Step Four: To intensify the colors and to make them appear less granular, I began blending with a clear, alcohol-based blending marker. The solvent within dissolved the binder (which may be wax or vegetable oil) in the colored pencil layer, releasing the pigment in a fluid manner.
- 6. Step Five: I continued intensifying the color, using a non-pigmented blending pencil over a previous layer; then I repeated a layer or two of color, much like a "color sandwich".