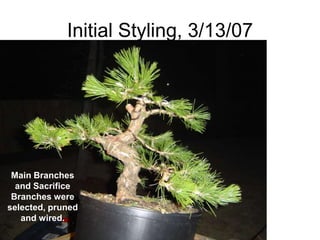
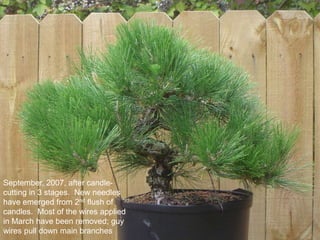
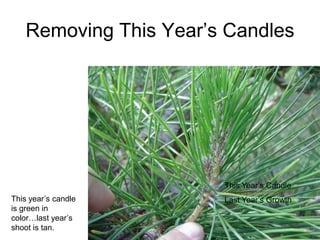
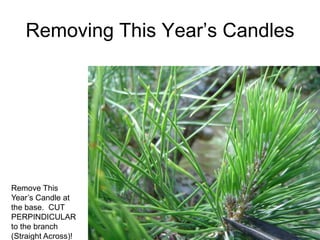
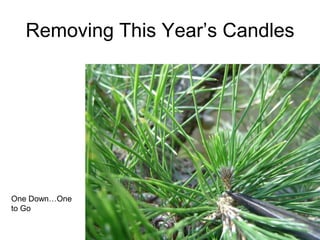
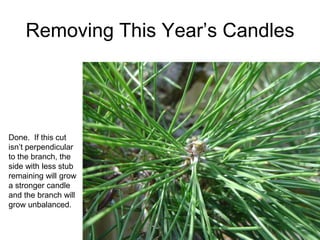
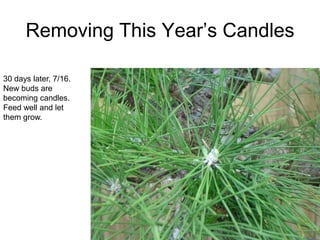
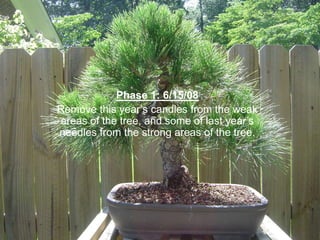
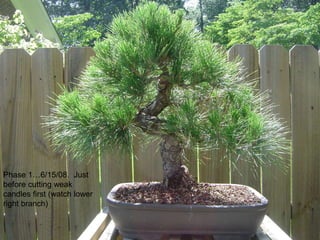
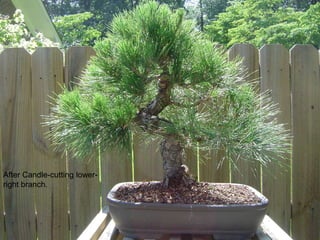
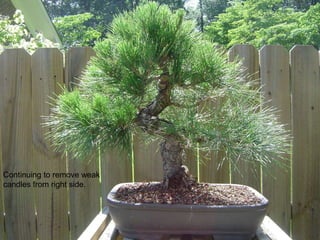
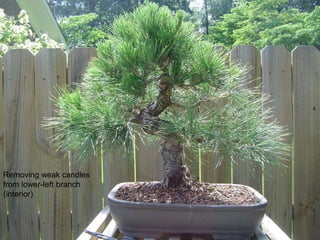
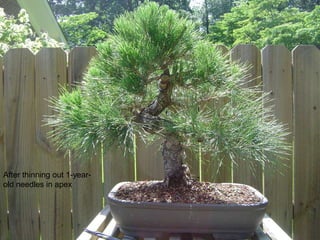
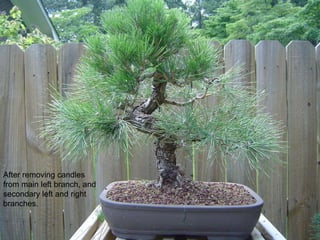
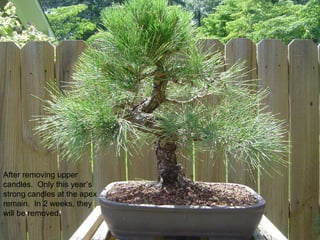
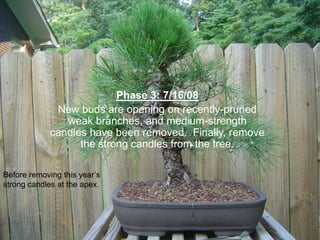
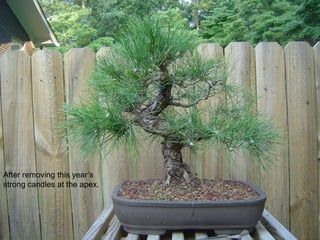
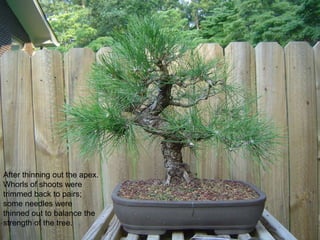
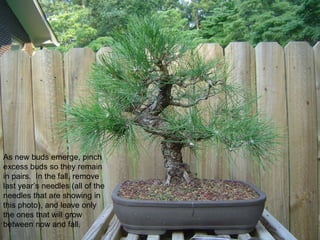
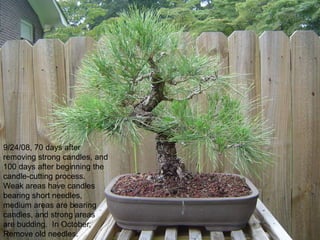
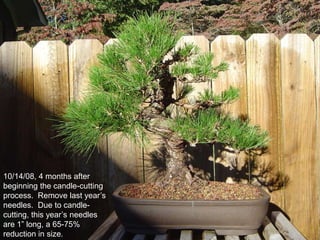
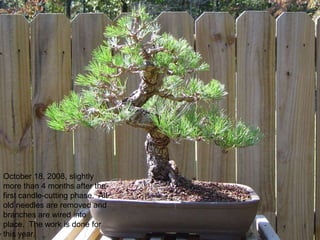
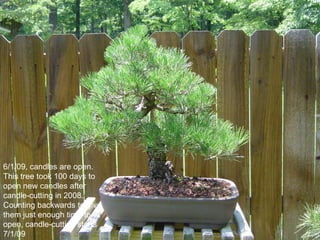
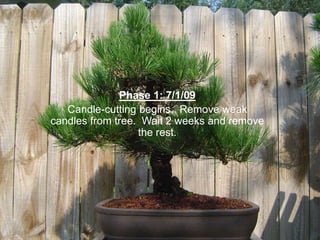
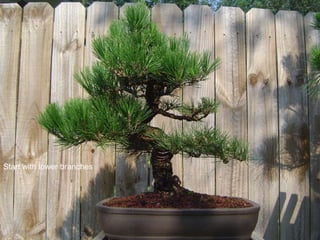
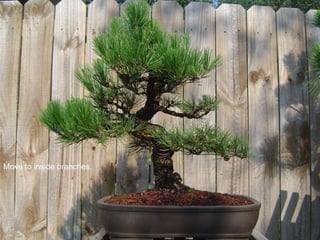
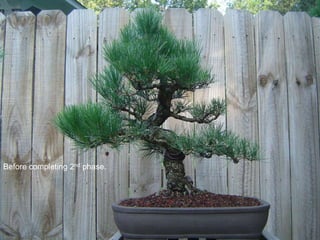
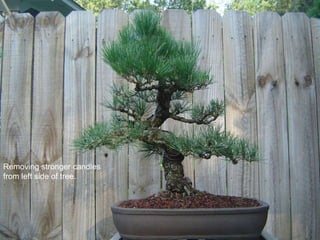
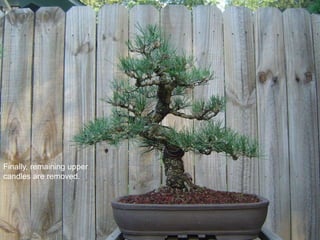
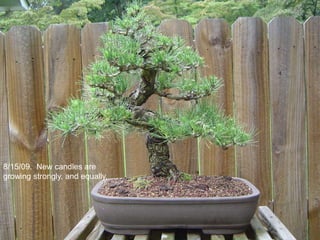
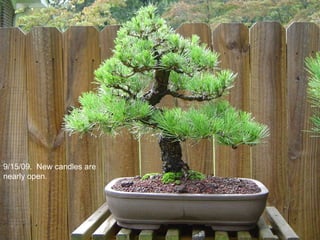
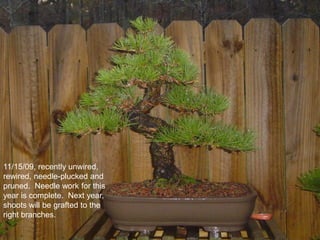
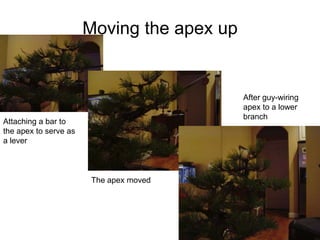
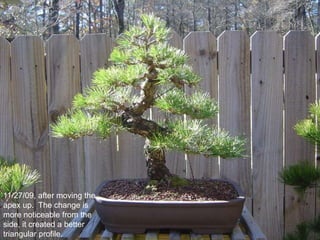
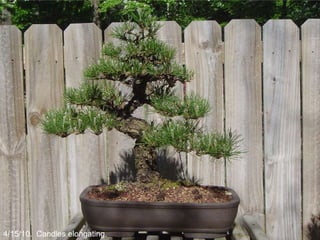
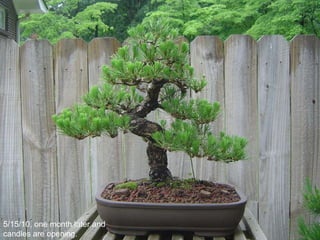
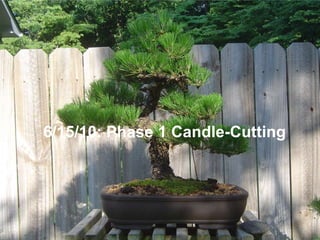
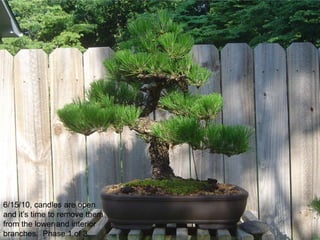
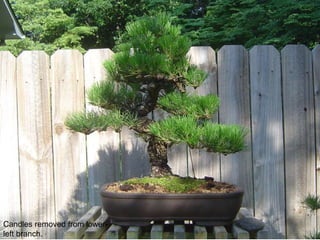
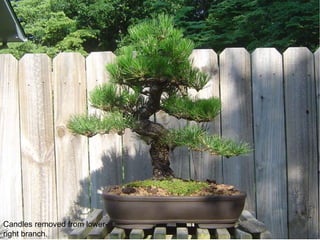
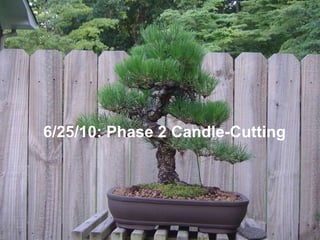
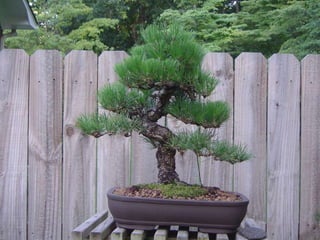
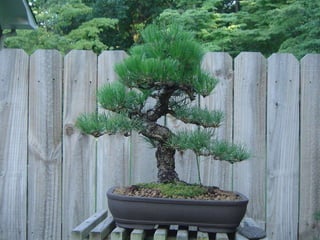
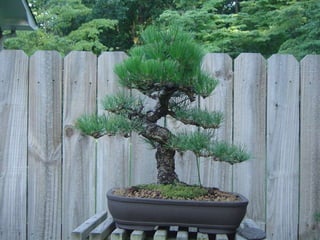
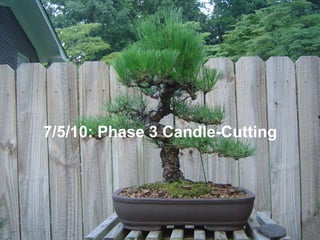
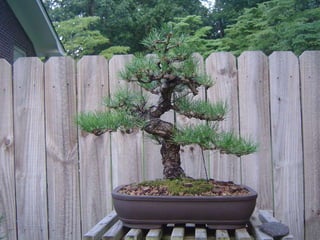
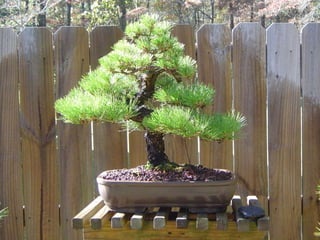
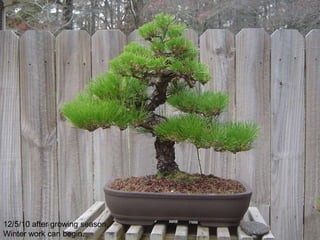
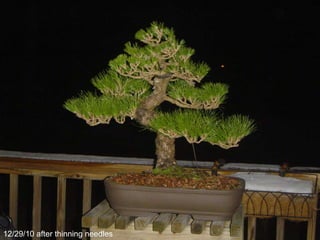
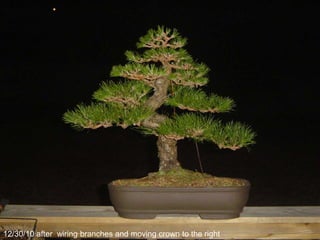
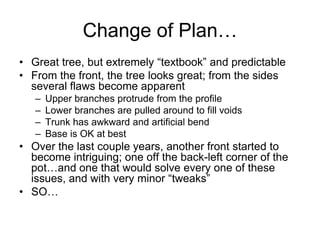
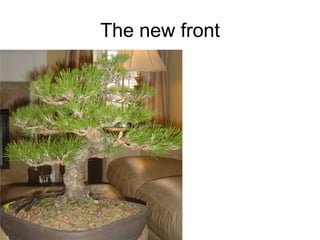
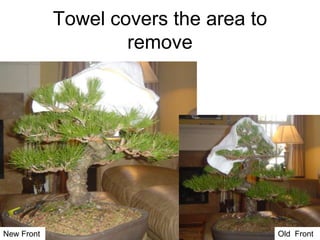
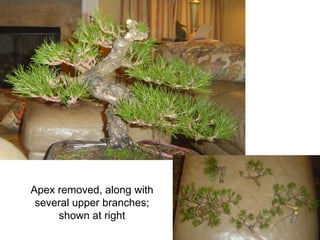
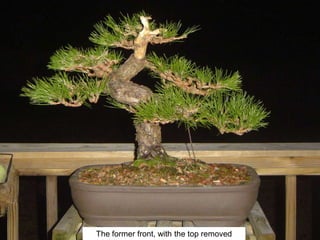
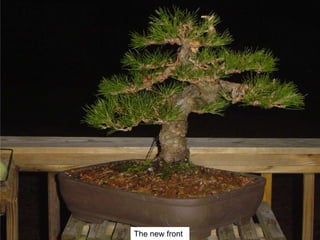
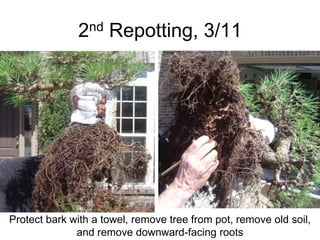
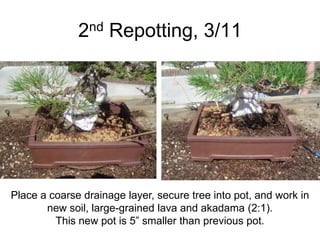
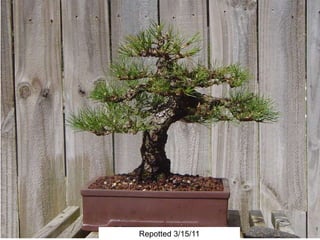
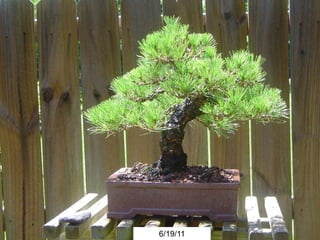
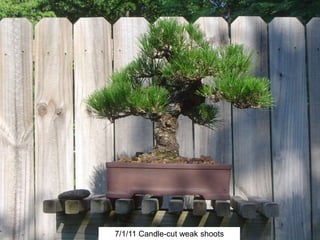
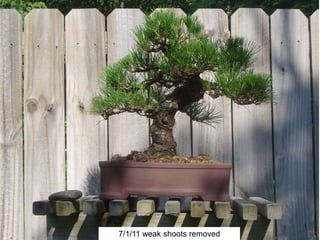
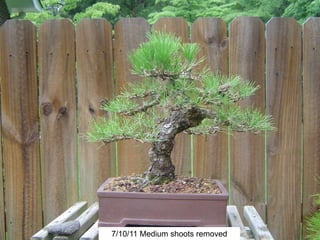
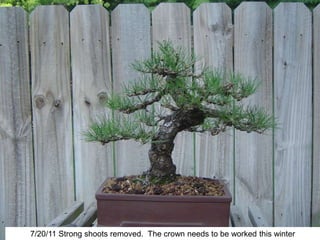
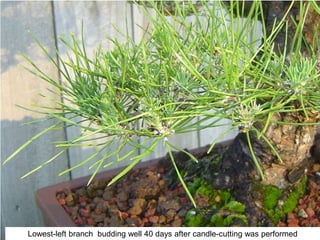
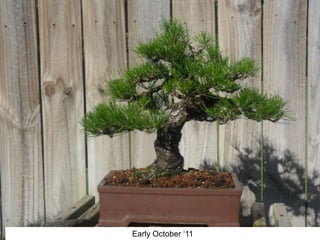
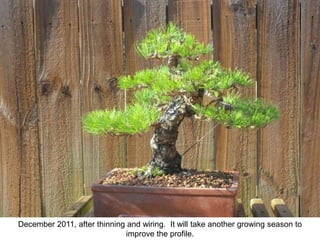
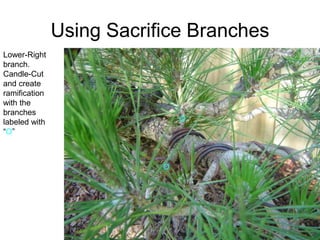
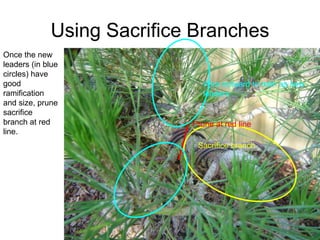
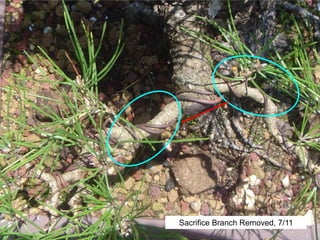
Japanese
Black Pine
Candle-Cutting
Brian Van Fleet
2007-2011
The Tree as purchased… 3/13/07
Japanese Black Pine,
Height 30”
Initial Styling, 3/13/07
Main Branches
and Sacrifice
Branches were
selected, pruned
and wired.
September, 2007, after candle-
cutting in 3 stages. New needles
have emerged from 2nd flush of
candles. Most of the wires applied
in March have been removed; guy
wires pull down main branches
Calendar of Work on a Pine
• Spring:
– When candles elongate, break off part of the
strong candles so all candles appear the
same length.
– Reduce the number of candles on each
branch tip so they emerge in pairs.
Candles elongating after
first transplanting into a
bonsai pot.
April 2008
After pinching candles so
they are the same length.
• Summer:
– When candles are open, remove them
completely. Do this in 3 phases at 2-week
intervals. Remove weak candles first,
medium candles second, strong candles last.
– Remove some of last year‟s needles from
strong areas to allow sunlight to penetrate to
the interior of the tree
Calendar of Work on a Pine
Removing This Year‟s Candles
This Year‟s Candle
Last Year‟s GrowthThis year‟s candle
is green in
color…last year‟s
shoot is tan.
Removing This Year‟s Candles
Remove This
Year‟s Candle at
the base. CUT
PERPINDICULAR
to the branch
(Straight Across)!
Removing This Year‟s Candles
One Down…One
to Go
Removing This Year‟s Candles
Done. If this cut
isn‟t perpendicular
to the branch, the
side with less stub
remaining will grow
a stronger candle
and the branch will
grow unbalanced.
Removing This Year‟s Candles
15 days later, 7/1.
New buds are
appearing from the
pruned branches.
Reduce to 2
opposed buds of
equal size
(creating forked
ramification)
Now that the weak
branches have a
head start on
forming new
buds…Time to
prune Medium-
strength areas.
Removing This Year‟s Candles
30 days later, 7/16.
New buds are
becoming candles.
Feed well and let
them grow.
Phase 1: 6/15/08
Remove this year‟s candles from the weak
areas of the tree, and some of last year‟s
needles from the strong areas of the tree.
Phase 1…6/15/08. Just
before cutting weak
candles first (watch lower
right branch)
After Candle-cutting lower-
right branch.
Continuing to remove weak
candles from right side.
Removing weak candles
from lower-left branch
(interior)
After thinning out 1-year-
old needles in apex
Phase 2: 7/1/08
New buds have formed on recently-pruned
weak branches. Now, remove this year‟s
candles from medium-strength areas of tree.
After removing candles
from main left branch, and
secondary left and right
branches.
After removing upper
candles. Only this year‟s
strong candles at the apex
remain. In 2 weeks, they
will be removed.
Phase 3: 7/16/08
New buds are opening on recently-pruned
weak branches, and medium-strength
candles have been removed. Finally, remove
the strong candles from the tree.
Before removing this year‟s
strong candles at the apex.
After removing this year‟s
strong candles at the apex.
After thinning out the apex.
Whorls of shoots were
trimmed back to pairs;
some needles were
thinned out to balance the
strength of the tree.
As new buds emerge, pinch
excess buds so they remain
in pairs. In the fall, remove
last year‟s needles (all of the
needles that are showing in
this photo), and leave only
the ones that will grow
between now and fall.
9/24/08, 70 days after
removing strong candles, and
100 days after beginning the
candle-cutting process.
Weak areas have candles
bearing short needles,
medium areas are bearing
candles, and strong areas
are budding. In October,
Remove old needles.
10/14/08, 4 months after
beginning the candle-cutting
process. Remove last year‟s
needles. Due to candle-
cutting, this year‟s needles
are 1” long, a 65-75%
reduction in size.
October 18, 2008, slightly
more than 4 months after the
first candle-cutting phase. All
old needles are removed and
branches are wired into
place. The work is done for
this year.
3/1/09…March, in like a
LION!
3/28/09, before equalizing the
length of emerging candles.
5/13/09, as candles are
opening. Note relatively
equal size throughout the
tree
6/1/09, candles are open.
This tree took 100 days to
open new candles after
candle-cutting in 2008.
Counting backwards to give
them just enough time to
open, candle-cutting starts
7/1/09
Phase 1: 7/1/09
Candle-cutting begins. Remove weak
candles from tree. Wait 2 weeks and remove
the rest.
7/1/09. Candles are open,
and it is time to begin candle-
cutting. It is important not to
do it too early in the summer.
Begin the process so that the
tree has just enough time to
grow new candles, but not
long needles.
Start with lower branches
Move to inside branches.
Finally, move to interior,
upper branches. This year,
candle cutting will be done in
two phases. In two weeks,
the rest of the candles will be
removed.
Phase 2: 7/15/09
Candle-cutting resumes. Remove remaining
stronger candles from tree.
Before completing 2nd phase.
Removing stronger candles
from left side of tree.
Finally, remaining upper
candles are removed.
8/15/09. New candles are
growing strongly, and equally.
9/15/09. New candles are
nearly open.
11/15/09, recently unwired,
rewired, needle-plucked and
pruned. Needle work for this
year is complete. Next year,
shoots will be grafted to the
right branches.
Moving the apex up
Attaching a bar to
the apex to serve as
a lever
The apex moved
After guy-wiring
apex to a lower
branch
11/27/09, after moving the
apex up. The change is
more noticeable from the
side, it created a better
triangular profile.
4/15/10. Candles elongating.
5/15/10, one month later and
candles are opening.
6/15/10: Phase 1 Candle-Cutting
6/15/10, candles are open
and it‟s time to remove them
from the lower and interior
branches. Phase 1 of 3.
Candles removed from lower-
left branch.
Candles removed from lower-
right branch.
6/25/10: Phase 2 Candle-Cutting
7/5/10: Phase 3 Candle-Cutting
12/5/10 after growing season.
Winter work can begin.
12/29/10 after thinning needles
12/30/10 after wiring branches and moving crown to the right
Change of Plan…
• Great tree, but extremely “textbook” and predictable
• From the front, the tree looks great; from the sides
several flaws become apparent
– Upper branches protrude from the profile
– Lower branches are pulled around to fill voids
– Trunk has awkward and artificial bend
– Base is OK at best
• Over the last couple years, another front started to
become intriguing; one off the back-left corner of the
pot…and one that would solve every one of these
issues, and with very minor “tweaks”
• SO…
The new front
Towel covers the area to
remove
New Front Old Front
Apex removed, along with
several upper branches;
shown at right
The former front, with the top removed
The new front
2nd Repotting, 3/11
Protect bark with a towel, remove tree from pot, remove old soil,
and remove downward-facing roots
2nd Repotting, 3/11
Place a coarse drainage layer, secure tree into pot, and work in
new soil, large-grained lava and akadama (2:1).
This new pot is 5” smaller than previous pot.
Repotted 3/15/11
6/19/11
7/1/11 Candle-cut weak shoots
7/1/11 weak shoots removed
7/10/11 Medium shoots removed
7/20/11 Strong shoots removed. The crown needs to be worked this winter
Lowest-left branch budding well 40 days after candle-cutting was performed
Early October „11
December 2011, after thinning and wiring. It will take another growing season to
improve the profile.
Using Sacrifice Branches
Lower-Right
branch.
Candle-Cut
and create
ramification
with the
branches
labeled with
“O”
O
O
Sacrifice branch
Prune at red line
Wire outward to train as new
leaders
Using Sacrifice Branches
Once the new
leaders (in blue
circles) have
good
ramification
and size, prune
sacrifice
branch at red
line.
Sacrifice Branch Removed, 7/11

Candle cutting by Nebari Bonsai