
Recommended
More Related Content
Similar to Bricks moulding Unit-3 (Bricks).pptx Unit-3 (Bricks).pptx
Similar to Bricks moulding Unit-3 (Bricks).pptx Unit-3 (Bricks).pptx (20)
Recently uploaded
Recently uploaded (20)
Bricks moulding Unit-3 (Bricks).pptx Unit-3 (Bricks).pptx
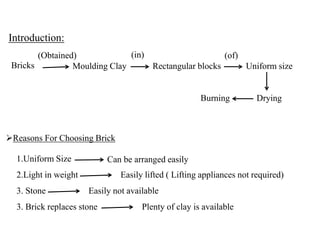
- 1. Introduction: Bricks Moulding Clay Rectangular blocks (Obtained) (in) Reasons For Choosing Brick 1.Uniform Size 2.Light in weight 3. Stone Can be arranged easily Easily lifted ( Lifting appliances not required) Easily not available (of) Uniform size Drying Burning 3. Brick replaces stone Plenty of clay is available
- 2. Comparison Of Brick work And Stone Work 1.Stone Not easily available Brick work Cheaper (becomes) Clay is available in plenty (provided) 2.Cost of construction (is) Less (in) Brick work Skilled workmanship is not required (because) 3 Lifting appliances (not required) Bricks (can be) Easily moved (with) Manual labor 4 Bricks (resist) Fire (do not) Disintegrate 5 Openings and connections (can be) Easily constructed Brick work (in)
- 3. Classification Of Bricks Based on field practice a) 1st Class bricks b) 2nd Class bricks c) 3rd Class bricks d) 4th Class bricks 1st Class bricks 1. These are table moulded 2. Surfaces and edges are sharp, square , smooth and straight 3. Well burnt and have uniform structure , metallic ringing sound when struck against each other 4. Used for superior work
- 4. 2nd Class bricks 1. These are ground moulded bricks 2. These surfaces are rough 3. The quality of these bricks are inferior 3rd Class bricks 1. The surface and edges are rough 2. Does not create any metallic sound 3. Used for temporary and unimportant structures 4th Class bricks 1. These bricks are over burnt 2. Irregular shape and dark color 3. Used as aggregate for concrete in foundations , floors , roads etc
- 5. Classification Of Bricks Based on uses a) Common bricks b) Engineering bricks c) Facing bricks Common bricks 1. Low quality bricks 2. Low compressive strength 3. Used for internal walls ( which is not seen) 4. No uniform color, texture or appearance
- 6. Engineering bricks 1. High in compressive strength 2. Low water absorption 3. Particularly used for below ground level construction 4. Used in areas of exposure of water Facing bricks 1. High quality 2. Uniform appearance 3. Used extremely in areas of “Seen brick work”
- 7. Properties Of Bricks Bricks should be table moulded Well burnt in the kilns Color – copper color Sharp and square edges Free from cracks Uniform in shape and size Should be of standard size Clear ringing sound 1st class bricks – should not absorb more than 20% of water by weight ( when soaked in cold water for 24 hours) 2nd class bricks – should not absorb more than 22% of water by weight ( when soaked in cold water for 24 hours) Bricks should be sufficiently hard Bricks should not break into pieces when dropped on a flat hard ground from a height of 1m
- 8. Properties Of Bricks Bricks should have low thermal conductivity They should be sound proof When soaked in water for 24 hours bricks should not show the deposits of white salts when dried in shade
- 9. Defects in Bricks 1. Name of the defect: Over burning of bricks Purpose of the defect: Due to burning of bricks more than desired temperature Result: Hard and loose their shape (not used for construction) 2. Name of the defect: Under burning of bricks Purpose of the defect: Due to not burning of bricks at desired temperature Result: More absorption of water and less compressive strength (not used for construction) When brick-clay contains bituminous matter or carbon and they are not completely removed by oxidation 3. Name of the defect: Black core Purpose of the defect: Result: The brick results in black core mainly because of improper burning (Not used in construction)
- 10. Defects in Bricks Check & cracks 4. Name of the defect: Purpose of the defect: Due to lumps of lime and excess of water Result: Shrinkage and cracks occur Spots 5. Name of the defect: Purpose of the defect: Due to the presence of iron sulphate in brick earth Result: Dark surfaces are formed on bricks which makes it not suitable for exposed brick work 6. Name of the defect: Purpose of the defect: Sulphates react with alumina content of cement and with hydraulic lime in the lime mortar Result: Increase in the volume of mortar Results in chipping and spalling of bricks Formation of cracks in the joints Most attacked elements: Exposed boundary walls, parapet walls, retaining walls(which mostly come in contact with moisture) Sulphate attack
- 11. Defects in Bricks 7. Name of the defect: Purpose of the defect: Due to corrosion of embedded iron or steel Iron and steel embedded in the brickwork gets corroded in the presence of dampness Result: Metal expands in volume and tends to crack the brick work Remedy: This defect can be prevented by covering the reinforcement or iron in dense cement mortar and providing a cover of 15mm to 25mm around the embedded member Prevention of above defects in the bricks Prevention: By providing water proof coping By providing water repellent materials in mortar By providing damp proof course
- 12. Defects in Bricks 9. Name of the defect: Purpose of the defect: Due to shrinkage on drying Brick work normally swells with the absorption of water and subsequently shrinks when the water evaporates Result: In the process of shrinkage it develops cracks in the masonry joints If the mortar used in the masonry is lean, the cracks are distributed over larger number of joints In case of rich mortar the cracks are few but wider Remedy: This defect can be prevented by using good quality bricks and by protecting masonry from moisture penetration
- 13. How to repair cracks in brick masonry Step- 1: An over view Repairing eroding and cracked mortar joints is called pointing, repointing or tuckpointing Identifying the cracks like it is vertical or horizontal cracks Picture- 1
- 14. Cut grooves 3/4 to 1 in. deep in cracked or deteriorating mortar using a 4-1/2 in. angle grinder fitted with a diamond blade. Push the blade into the joint until the grinder head contacts the brick, and make a single pass along the center of the joints How to repair cracks in brick masonry Step- 2: Tools and materials Angle grinder Picture- 2
- 15. Cleaning out old mortar joints requires basic tools: hammer, flat utility chisel (Photo 2), safety glasses, dust mask and whisk broom How to repair cracks in brick masonry Filling the cleaned-out joints requires masonry tools: brick trowel (Photo 5), 3/8-in. pointing trowel (Photo 5), a special tool for contouring the joints (Photo 7) and waterproof gloves
- 16. How to repair cracks in brick masonry Step- 3: Break out the old mortar Picture- 3 Break out old mortar using a hammer and cold chisel or a flat utility chisel that's narrow enough to fit into the joints (Photo 3) Wear safety glasses and a dust mask and remove 3/4 to 1 in. of old mortar (more if needed) until you reach a solid base for bonding the new mortar If the mortar is so soft that the bricks are loosening up, you'll have to remove and properly reset them To avoid nicking the bricks, cut the vertical joints before cutting the horizontal joints
- 17. How to repair cracks in brick masonry Step- 4: Clean the joints Once the old mortar is removed, dust out the joints (Photo 4). Prepare the joints to receive new mortar by misting them lightly with a garden hose sprayer Picture- 4 Clean out all the loose dust from the brick cavity using a whisk broom
- 18. How to repair cracks in brick masonry Step- 5: Mix the mortar just right Picture- 5 Dump mortar mix into a cement “boat” and gradually add the specified amount of water while mixing with a brick trowel. Allow the mortar to “rest” for 10 minutes, then remix it before using. The mix is right when it sticks to an overturned trowel
- 19. How to repair cracks in brick masonry Step- 6: Fill the joints with mortar Picture- 6 Load mortar onto an overturned brick trowel, hold the trowel under the horizontal joint— tight to the brick—and sweep 1/4-in. slivers of mortar into the cavity using a 3/8-in. wide pointing trowel. Fill the horizontal joints first. Avoid getting mortar on the brick face
- 20. How to repair cracks in brick masonry Step- 7: Match the new joints with the old Picture- 7 Drive a 6d box nail into a short 1x2 board so that it matches the depth of the existing joints. To “rake” joints, hold the board perpendicular to the bricks and move it back and forth, first along the vertical joints and then the horizontal joints. Other joint profiles require other shaping tools
- 21. How to repair cracks in brick masonry Step- 8: Match the new joints with the old Picture- 8 Sweep the loose mortar from the finished joints and brick faces using a soft- bristle brush. Mist the new mortar twice a day for two days using a hand pump sprayer or a light mist from a garden hose to help it harden
- 22. Common mortar joint profile Raked Joint http://www.familyhandyman.com/masonry /how-to-repair-mortar-joints/view-all V-Joint Concave Joint Flush Joint Bibliography
- 23. Name of the defect: Purpose of the defect: Result: Efflorescence on outer wall surfaces This defect is caused because of alkalies present in bricks When bricks come in contact with moisture, water is absorbed and the alkalis crystallize On drying grey or white powder patches appear on the brick surface Remedy for efflorescence: By brushing and washing the effected area repeatedly How to repair efflorescence defect in brick masonry To remove alkali efflorescence, use a weak solution of muriatic acid and water Use a nylon bristled brush to scrub very gently to minimize splashing
- 24. If you're going to deal with efflorescence on an interior surfaces where you don't want to use a dangerous acid, try using a strong vinegar solution in place of the muriatic acid. Boil a cup of vinegar down to a half cup. This will double the normal acid in the vinegar which may be effective on some efflorescence problems Name of the defect: Purpose of the defect: Result: Efflorescence on interior walls surfaces This defect is caused because of alkalies present in bricks When bricks come in contact with moisture, water is absorbed and the alkalis crystallize On drying grey or white powder patches appear on the brick surface Remedy for efflorescence: How to repair efflorescence defect in brick masonry
- 25. How to repair Pealing plaster on brick masonry Step – 1: Remove any flaked or peeling paint from the masonry If the wall has already been painted, you need to remove any old paint that is loose, peeling, or flaking away On an exterior wall, this is most efficiently done with a sandblaster loose paint can be removed with a stiff wire brush and a paint scraper Sand Blaster
- 26. How to repair Pealing plaster on brick masonry Step – 2: Clean the brick wall Like other surfaces, masonry should be cleaned before painting The best product for cleaning brick is trisodium phosphate (TSP) This compound can be purchased in powder form at hardware stores, or a cleaning product that contains TSP can be used, such as Spic and Span Mix the TSP with water in a bucket according to the manufacturer's directions. Apply the resulting mixture to the brick with a scrub brush, allowing it to thoroughly dry before proceeding with the painting process
- 27. How to repair Pealing plaster on brick masonry Step – 3: Apply a masonry sealer to the wall Because most masonry is more porous and more highly textured than materials such as drywall or wood, the extra step of applying a sealer is necessary before priming and painting Step – 4: Apply primer to the masonry wall Both oil-based and latex-based primers will work well on masonry Step – 5: Paint the brick wall Like priming, painting masonry can be accomplished with ordinary latex or oil paints, although masonry paints are available that increase the wall's ability to repel moisture http://www.wikihow.com/Paint-Masonry-Walls Bibliography
- 28. Brick damage or Brick Spalling is typically caused by excessive moisture or water infiltration of the interior brick courses of your Masonry walls Brick Masonry is designed to get wet and shed water when it rains, but when water is allowed to infiltrate the walls through faulty mortar joints or damaged roof copings, the walls do not dry-out sufficiently When your Brick Masonry is continually wet, the brick begins to decay, and Brick Replacement becomes necessary, this can involve just a few Brick, or hundreds. These areas are the most vulnerable for this kind of brick damage, particularly on many of the older or historic homes How to repair spalling in brick masonry Brick replacement involves carefully cutting out and actually replacing deteriorated bricks with full size matching or very closely-matching bricks