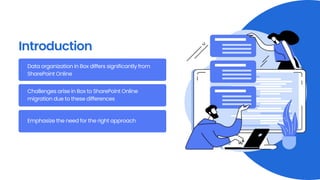
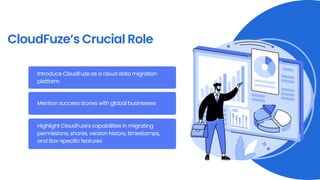
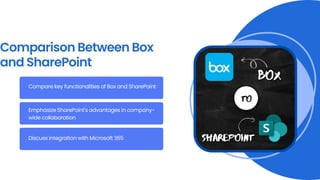
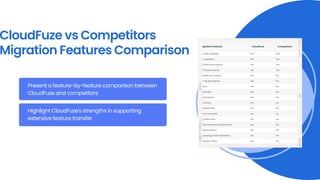
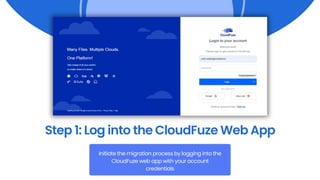
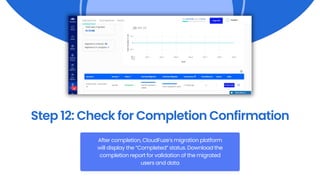
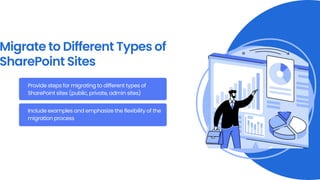
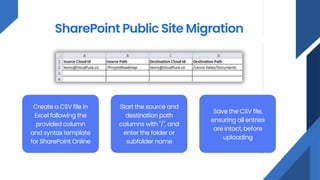
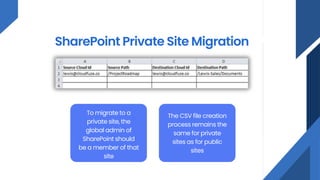
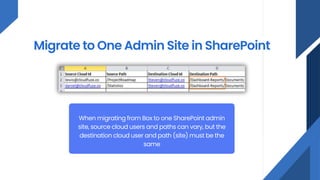
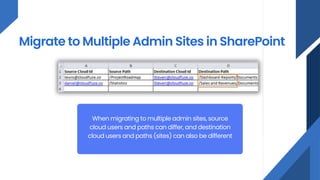
Box to
SharePoint
Migration Guide
for IT Admins
Introduction
Data organization in Box differs significantly from
SharePoint Online
Challenges arise in Box to SharePoint Online
migration due to these differences
Emphasize the need for the right approach
Box to OneDrive Migration
Challenges
Manual migration limitations, excluding sharing
permissions, TBs/PBs of data, timestamps, and Box-
specific features
Outline specific challenges like transferring large
data, migrating permissions, handling Box-specific
features, and tracking migration progress
CloudFuze’s Crucial Role
Introduce CloudFuze as a cloud data migration
platform
Mention success stories with global businesses
Highlight CloudFuze's capabilities in migrating
permissions, shares, version history, timestamps,
and Box-specific features
Comparison Between Box
and SharePoint
Compare key functionalities of Box and SharePoint
Emphasize SharePoint's advantages in company-
wide collaboration
Discuss integration with Microsoft 365
CloudFuze vs Competitors
Migration Features Comparison
Present a feature-by-feature comparison between
CloudFuze and competitors
Highlight CloudFuze's strengths in supporting
extensive feature transfer
Steps for Box to
SharePoint
Online
Migration
Step 1: Log into the CloudFuze Web App
Initiate the migration process by logging into the
CloudFuze web app with your account
credentials
Step 2: Add the Source Cloud, Box
Navigate to the Business Clouds section,
select Box, and authorize it by logging in
with admin credentials
Step 3: Add the Destination Cloud, SharePoint
Online
Under Business Clouds, choose SharePoint Online, and authorize it
by signing into Microsoft 365 with the Global Admin account
Step 4: Ensure Both Clouds Are Added
Properly
Visit the Manage Clouds section to confirm correct addition of
Box and SharePoint Online. Re-add and authorize if necessary
Step 5: Configure Source and Destination Clouds
Click on Team Migration, choose Box as the source,
SharePoint as the destination, and proceed by
clicking the Next button
Step 6: Map Source and Destination Users
Enter the Content Mapping page by clicking Next.
Map source (Box) users to destination (SharePoint)
users using a CSV file
Mapping users in a CSV file
Create an Excel
sheet with specified
column layout
Include correct
folder names in the
source and
destination paths
Save the Excel sheet
in CSV format
Uploading CSV file
In Content Mapping,
click the CSV icon
with an up arrow
Browse and select
the CSV file for
upload
CSV File Validation
The validation
process starts after
the upload
Duration depends
on the number of
mappings
After validation,
download the report
Step 7: Customize Permissions Mapping if
Needed
Modify permissions mapping during the Permissions
Mapping stage if required
Step 8: Choose the Required Migration
Features
In the Options stage, select the features for
migration
Step 9: Preview the Final Options
Review final configurations to ensure accuracy
before proceeding
Step 10: Start the Migration
Click the Start Migration button when ready to
initiate the migration process
Step 11: Monitor the Migration Progress
Check the progress in CloudFuze’s migration
platform, indicated as “In-Progress” in the Reports
dashboard
Step 12: Check for Completion Confirmation
After completion, CloudFuze’s migration platform
will display the “Completed” status. Download the
completion report for validation of the migrated
users and data
Migrate to Different Types of
SharePoint Sites
Provide steps for migrating to different types of
SharePoint sites (public, private, admin sites)
Include examples and emphasize the flexibility of the
migration process
SharePoint Public Site Migration
Create a CSV file in
Excel following the
provided column
and syntax template
for SharePoint Online
Start the source and
destination path
columns with "/", and
enter the folder or
subfolder name
Save the CSV file,
ensuring all entries
are intact, before
uploading
SharePoint Private Site Migration
To migrate to a
private site, the
global admin of
SharePoint should
be a member of that
site
The CSV file creation
process remains the
same for private
sites as for public
sites
Migrate to One Admin Site in SharePoint
When migrating from Box to one SharePoint admin
site, source cloud users and paths can vary, but the
destination cloud user and path (site) must be the
same
Migrate to Multiple Admin Sites in SharePoint
When migrating to multiple admin sites, source
cloud users and paths can differ, and destination
cloud users and paths (sites) can also be different
VISIT OUR
WEBSITE!
support@cloudfuze.com
www.cloudfuze.com

Box to SharePoint Migration

  • 1.
  • 2.
    Introduction Data organization inBox differs significantly from SharePoint Online Challenges arise in Box to SharePoint Online migration due to these differences Emphasize the need for the right approach
  • 3.
    Box to OneDriveMigration Challenges Manual migration limitations, excluding sharing permissions, TBs/PBs of data, timestamps, and Box- specific features Outline specific challenges like transferring large data, migrating permissions, handling Box-specific features, and tracking migration progress
  • 4.
    CloudFuze’s Crucial Role IntroduceCloudFuze as a cloud data migration platform Mention success stories with global businesses Highlight CloudFuze's capabilities in migrating permissions, shares, version history, timestamps, and Box-specific features
  • 5.
    Comparison Between Box andSharePoint Compare key functionalities of Box and SharePoint Emphasize SharePoint's advantages in company- wide collaboration Discuss integration with Microsoft 365
  • 6.
    CloudFuze vs Competitors MigrationFeatures Comparison Present a feature-by-feature comparison between CloudFuze and competitors Highlight CloudFuze's strengths in supporting extensive feature transfer
  • 7.
    Steps for Boxto SharePoint Online Migration
  • 8.
    Step 1: Loginto the CloudFuze Web App Initiate the migration process by logging into the CloudFuze web app with your account credentials
  • 9.
    Step 2: Addthe Source Cloud, Box Navigate to the Business Clouds section, select Box, and authorize it by logging in with admin credentials
  • 10.
    Step 3: Addthe Destination Cloud, SharePoint Online Under Business Clouds, choose SharePoint Online, and authorize it by signing into Microsoft 365 with the Global Admin account
  • 11.
    Step 4: EnsureBoth Clouds Are Added Properly Visit the Manage Clouds section to confirm correct addition of Box and SharePoint Online. Re-add and authorize if necessary
  • 12.
    Step 5: ConfigureSource and Destination Clouds Click on Team Migration, choose Box as the source, SharePoint as the destination, and proceed by clicking the Next button
  • 13.
    Step 6: MapSource and Destination Users Enter the Content Mapping page by clicking Next. Map source (Box) users to destination (SharePoint) users using a CSV file
  • 14.
    Mapping users ina CSV file Create an Excel sheet with specified column layout Include correct folder names in the source and destination paths Save the Excel sheet in CSV format
  • 15.
    Uploading CSV file InContent Mapping, click the CSV icon with an up arrow Browse and select the CSV file for upload
  • 16.
    CSV File Validation Thevalidation process starts after the upload Duration depends on the number of mappings After validation, download the report
  • 17.
    Step 7: CustomizePermissions Mapping if Needed Modify permissions mapping during the Permissions Mapping stage if required
  • 18.
    Step 8: Choosethe Required Migration Features In the Options stage, select the features for migration
  • 19.
    Step 9: Previewthe Final Options Review final configurations to ensure accuracy before proceeding
  • 20.
    Step 10: Startthe Migration Click the Start Migration button when ready to initiate the migration process
  • 21.
    Step 11: Monitorthe Migration Progress Check the progress in CloudFuze’s migration platform, indicated as “In-Progress” in the Reports dashboard
  • 22.
    Step 12: Checkfor Completion Confirmation After completion, CloudFuze’s migration platform will display the “Completed” status. Download the completion report for validation of the migrated users and data
  • 23.
    Migrate to DifferentTypes of SharePoint Sites Provide steps for migrating to different types of SharePoint sites (public, private, admin sites) Include examples and emphasize the flexibility of the migration process
  • 24.
    SharePoint Public SiteMigration Create a CSV file in Excel following the provided column and syntax template for SharePoint Online Start the source and destination path columns with "/", and enter the folder or subfolder name Save the CSV file, ensuring all entries are intact, before uploading
  • 25.
    SharePoint Private SiteMigration To migrate to a private site, the global admin of SharePoint should be a member of that site The CSV file creation process remains the same for private sites as for public sites
  • 26.
    Migrate to OneAdmin Site in SharePoint When migrating from Box to one SharePoint admin site, source cloud users and paths can vary, but the destination cloud user and path (site) must be the same
  • 27.
    Migrate to MultipleAdmin Sites in SharePoint When migrating to multiple admin sites, source cloud users and paths can differ, and destination cloud users and paths (sites) can also be different
  • 28.