Download to read offline


![Setting Up a Virtual Machine Host 21
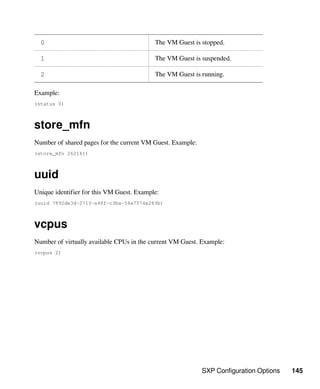
# echo -n $PCI_DOMAIN_BUS_SLOT_FUNC >
/sys/bus/pci/drivers/pciback/new_slot
5 Bind the PCI device to pciback.
# echo -n $PCI_DOMAIN_BUS_SLOT_FUNC >
/sys/bus/pci/drivers/pciback/bind
The device is now ready to be used in VM Guest by specifying
'pci=[$PCI_DOMAIN_BUS_SLOT_FUNC]' in the guest config file.
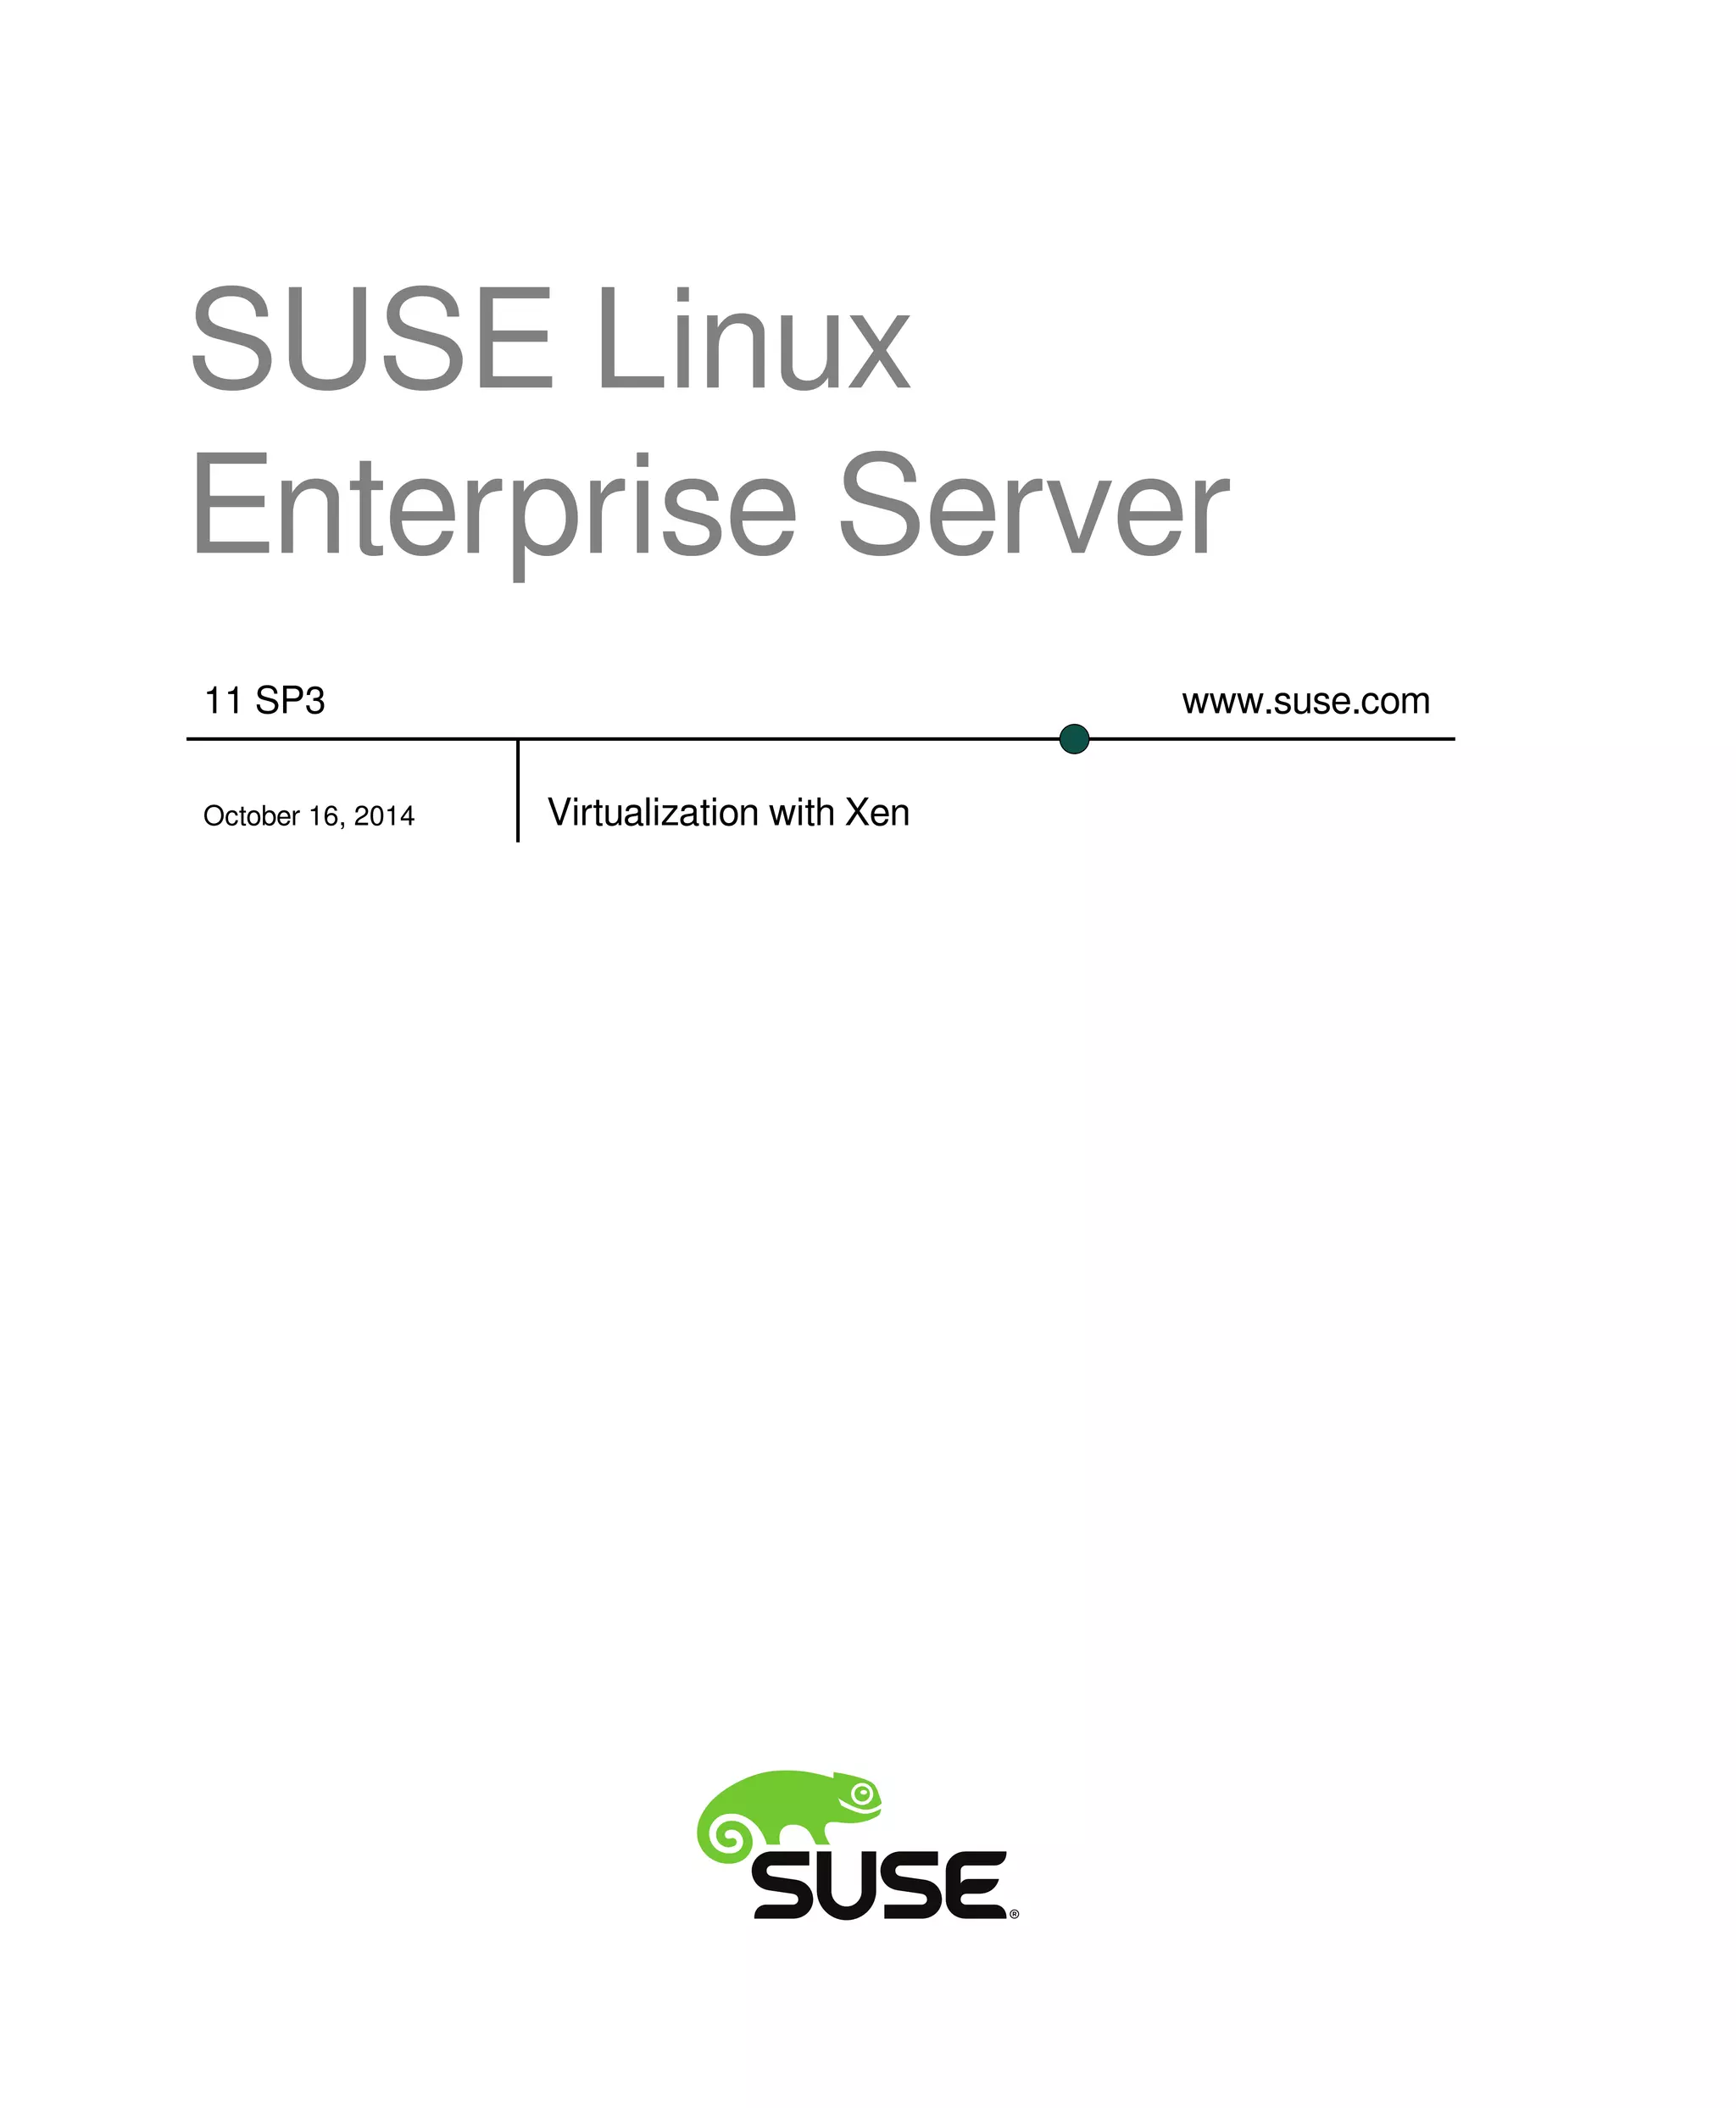
2.5.2 Assigning PCI Devices to VM Guest
Systems
There are several possibilities to dedicate a PCI device to a VM Guest:
Adding the device while installing:
During installation, add the pci line to the configuration file:
pci=['06:01.0']
TIP
If you want the Xen tools to manage preparing and assigning a PCI de-
vice to a VM Guest when it is activated, add managed=1 to the PCI set-
ting in the guest configuration file, denoting that it is a 'managed' PCI de-
vice:
pci=['06:01.0,managed=1']
When the VM Guest is activated, the Xen tools will unbind the PCI de-
vice from its existing driver, bind it to pciback, and attach the device to
the VM. When the VM is shut down, the tools will rebind the device to its
original driver. When using the managed mode, there is no need to con-
figure the hypervisor for PCI Pass-Through as described in Section 2.5.1,
“Configuring the Hypervisor for PCI Pass-Through” (page 20).
Hot adding PCI devices to VM Guest systems
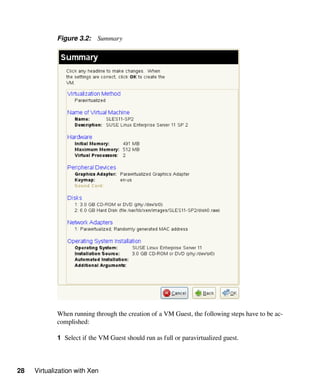
The command xm may be used to add or remove PCI devices on the fly. To Add
the device with number 06:01.0 to a guest with name sles11 use:
xm pci-attach sles11 06:01.0](https://image.slidesharecdn.com/book-150408235509-conversion-gate01/85/Book-31-320.jpg)
![Setting Up a Virtual Machine Host 23
To enable VGA Pass-Through, add the following settings to your fully virtualized
guest configuration file
gfx_passthru=1
pci=['yy:zz.n']
where yy:zz.n is the PCI controller ID of the VGA graphics adapter as found with
lspci -v on Domain0.
2.5.4 For More Information
There are several resources that provide interesting information about PCI Pass-
Through in the net:
• http://wiki.xensource.com/xenwiki/VTdHowTo
• http://software.intel.com/en-us/articles/intel-virtual
ization-technology-for-directed-io-vt-d-enhancing-in
tel-platforms-for-efficient-virtualization-of-io-de
vices/
• http://www.amd.com/us-en/assets/content_type/
white_papers_and_tech_docs/34434.pdf](https://image.slidesharecdn.com/book-150408235509-conversion-gate01/85/Book-33-320.jpg)


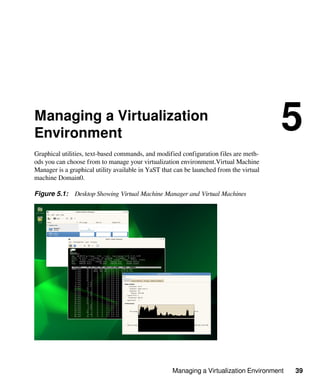
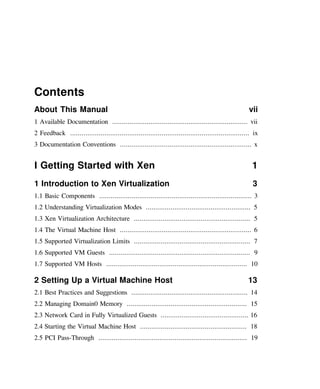
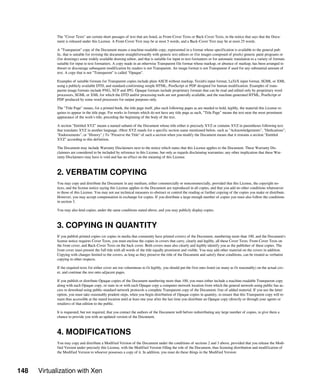
![Managing a Virtualization Environment 45
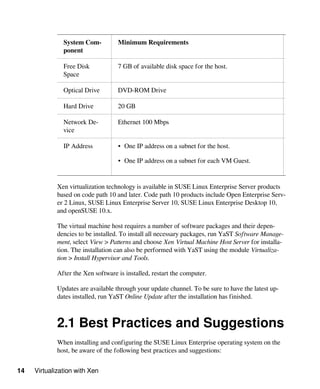
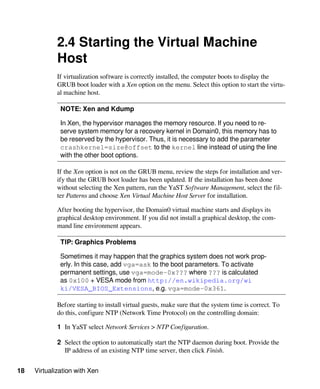
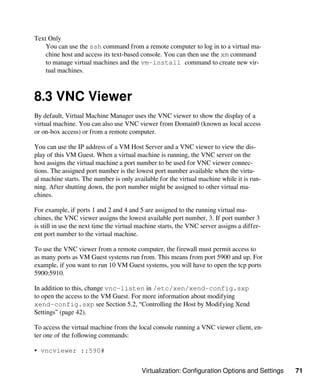
For example, the xm list --help displays all options that are available to the list
command. As an example, the xm list command displays the status of all virtual
machines.
# xm list
Name ID Mem VCPUs State Time(s)
Domain-0 0 457 2 r----- 2712.9
OES 7 512 1 -b---- 16.3
SLES10 512 1 12.9
The State information tells if a machine is running, and in which state it is. The most
common flags are r (running) and b (blocked) where blocked means it is either wait-
ing for IO, or just sleeping because there is nothing to do. For more details about the
state flags, see man 1 xm. The syntax of the xm command usually follows the for-
mat:
xm <subcommand> [domain-id] [OPTIONS]
where subcommand is the xm command to run, domain-id is the ID number as-
signed to a domain or the name of the virtual machine, and OPTIONS indicates sub-
command-specific options.
Other useful xm commands include:
• xm start starts a virtual machine
• xm reboot reboots a virtual machine
• xm destroy immediately terminates a virtual machine
• xm block-list displays all virtual block devices attached to a virtual machine
• All xm operations require that the Xen control daemon, Xend, be running. For this
reason, you should make sure Xend starts whenever the host boots.
• Most xm commands require root privileges to allow interaction with the Xen hyper-
visor. Entering the xm command when you are not logged in as root returns an er-
ror.
• Some xm commands return no textual information even though the action is com-
pleted. In some instances, for example, when shutting down a virtual machine, the
action can take several seconds to complete. To verify that the action has complet-
ed, you might need to view its status another way, such as, using the xm list
command.](https://image.slidesharecdn.com/book-150408235509-conversion-gate01/85/Book-55-320.jpg)


![Virtualization: Configuration Options and Settings 73
er. VNC viewer is faster for viewing desktops over a network, but SDL is faster for
viewing desktops from the same computer.
To set the default to use SDL instead of VNC, change the virtual machine's configu-
ration information to the following. For instructions, see Section 5.3, “Configuring a
Virtual Machine by Modifying its Xend Settings” (page 43).
• If it is a fully virtual machine, use vnc=0 and sdl=1.
• If it is a paravirtual virtual machine, use vfb=["type=sdl"].
Remember that, unlike a VNC viewer window, closing an SDL window terminates the
virtual machine.
8.4 Virtual Keyboards
When a virtual machine is started, the host creates a virtual keyboard that matches
the keymap entry according to the virtual machine's settings. If there is no keymap
entry in the virtual machine's settings, the host uses the keymap entry specified in
host's Xend file ( xend-config.sxp). If there is no keymap entry in either the
host's Xend file or the virtual machine's settings, the virtual machine's keyboard de-
faults to English (US).
Unless you manually specify it, a keymap entry is not specified in the host's Xend
file or for any virtual machine. Therefore, by default, all virtual machine settings use
the English (US) virtual keyboard. It is recommended that you specify a keymap set-
ting for Xend and for each virtual machine, especially, if you want to migrate virtual
machines to different hosts
To view a virtual machine's current keymap entry, enter the following command on
the Domain0:
xm list -l vm_name | grep keymap
You can specify a keymap entry to be used for all virtual machines and keymap en-
tries for specific machines.
• To specify a global keymap entry for virtual machines on the host, edit the host's
xend-config.sxp file.](https://image.slidesharecdn.com/book-150408235509-conversion-gate01/85/Book-83-320.jpg)

![Virtualization: Configuration Options and Settings 79
8 The device that should be assigned to alice has the number 4-2. To assign this de-
vice to the first virtual host controller with number 0 on its port 1, run the com-
mand:
xm usb-attach alice 0 1 4-2
After completing this procedure, you may use the keyboard, for example, to type in-
side a VNC window.
To detach the USB device, you need to know the number of the virtual host controller
and the port number of the assigned device inside the VM Guest. The port numbers
of the host controllers start with the 0, and the port numbers with 1. List currently as-
signed devices with the command xm usb-list alice. The result should look
similar to the following:
# xm usb-list alice
Idx BE state usb-ver BE-path
0 0 4 USB2.0 /local/domain/0/backend/vusb/2/0
port 1: 4-2 [ID 047b:0002 SILITEK USB Keyboard and Mouse]
port 2:
port 3:
port 4:
port 5:
port 6:
port 7:
port 8:
Remove this device with the command:
xm usb-detach alice 0 1
TIP: Assigning the Whole Controller
You can also use PCI pass-through to pass through the whole USB controller
PCI device, with all USB devices connected to it. For more information see
Section 2.5, “PCI Pass-Through” (page 19).
8.5.2.1 PVUSB Options in VM Guest's
Configuration File
While xm usb-attach is a “hot-plugging” way of connecting a USB device to a
VM Guest and the related device assignment will be forgotten after the guest system
is switched off, you can add corresponding configuration options to the VM Guest's
configuration file make the assignment permanent.](https://image.slidesharecdn.com/book-150408235509-conversion-gate01/85/Book-89-320.jpg)
![80 Virtualization with Xen
The same effect that can be reached with
xm usb-hc-create alice 2 4 && xm usb-attach alice 0 1 1-8
can be accomplished by adding the following line
vusb=['usbver=2, numports=4, port_1=1-8']
to the VM Guest's configuration file in the /etc/xen/vm directory and restarting
it. usbver= specifies the USB version, numports= specifies the number of ports
of the virtual controller, and port_1= specifies which physical USB device will be
assigned to port 1 of the controller (can be up to port_16=).
8.6 Dedicating CPU Resources
In Xen it is possible to specify how many and which CPU cores the Domain0 or VM
Guest should use to retain its performance. The performance of Domain0 is impor-
tant for the overall system as the disk and network drivers are running on it. Also I/O
intensive guests' workloads may consume lots of Domain0′s CPU cycles. On the oth-
er hand, the performance of VM Guests is also important to be able to accomplish the
task they were set up for.
8.6.1 Domain0
Dedicating CPU resources to Domain0 results in a better overall performance of the
virtualized environment because Domain0 has free CPU time to process I/O requests
from VM Guests. Failing to dedicate exclusive CPU resources to Domain0 usually re-
sults in a poor performance and can cause the VM Guests to function incorrectly.
Dedicating CPU resources involves three basic steps: modifying Xen boot line, bind-
ing Domain0's VCPUs to a physical processor, and configuring CPU related options
on VM Guests:
First you need to append the dom0_max_vcpus=X to the Xen boot line in /boot/
grub/menu.lst, where X is the number of VCPUs dedicated to Domain0. An ex-
ample Kernel boot entry follows:
title Xen -- SUSE Linux Enterprise Server 11 SP2 - 3.0.4-0.11
root (hd0,1)
kernel /boot/xen.gz dom0_max_vcpus=2
module /boot/vmlinuz-3.0.4-0.11-xen](https://image.slidesharecdn.com/book-150408235509-conversion-gate01/85/Book-90-320.jpg)

![XenStore: Configuration Database Shared between Domains 91
dmargs
Shows arguments passed to the QEMU process. If you look at the QEMU
process with ps, you should see the same arguments as in /vm/<uuid>/im
age/dmargs.
9.2.3 /local/domain/<domid>
This path is indexed by the running domain (VM Guest) ID, and contains informa-
tion about the running VM Guest. Remember that the domain ID changes during VM
Guest migration. The following entries are available:
vm
The path of the /vm directory for this VM Guest.
on_reboot, on_poweroff, on_crash, name
See identical options in Section 9.2.2, “/vm” (page 89)
domid
Domain identifier for the VM Guest.
cpu
The current CPU to which the VM Guest is pinned.
cpu_weight
The weight assigned to the VM Guest for scheduling purposes. Higher weights
use the physical CPUs more often.
Apart from the individual entries described above, there are also several subdirec-
tories under /local/domain/<domid>, containing specific entries. To see all
entries available, refer to XenStore Reference [http://wiki.xen.org/wi
ki/XenStore_Reference].
/local/domain/<domid>/memory
Contains memory information. /local/domain/<domid>/memory/tar-
get contains target memory size for the VM Guest (in kilobytes).
/local/domain/<domid>/console
Contains information about a console used by the VM Guest.
/local/domain/<domid>/backend
Contains information all back-end devices used by the VM Guest. The path has
subdirectories of its own.](https://image.slidesharecdn.com/book-150408235509-conversion-gate01/85/Book-101-320.jpg)


![126 Virtualization with Xen
Table A.1: Initial start-Up File Entries and Descriptions
Entry Description
disk = Virtual disks for the virtual machine.
For example:
disk = [ 'file:/var/lib/xen/images/VM1_SLES10/
hda,xvda,w' ]
This entry specifies a virtual disk based on a file ( file:)
named hda and located at /var/lib/xen/im-
ages/VM1_SLES10/. It presents itself as the first drive
(xvda) and has read/write access (w).
Disks can also be based on a block device.
memory = Virtual memory in Mb.
vcpus = Number of virtual CPUs.
builder = Specifies paravirtual mode (Linux) or full virtualization
mode (hvm).
name = Name of the virtual machine.
vif = Randomly-assigned MAC addresses and bridges assigned to
use the virtual machine’s network addresses.
localtime = Specifies a localtime (0) or UTC (1) time setting.
on_poweroff
=
Specifies the action that the virtual machine performs when
the operating system is powered off.
on_reboot = Specifies the action that the virtual machine performs when
the operating system reboots.
on_crash = Specifies the action that the virtual machine performs when
the operating system crashes.](https://image.slidesharecdn.com/book-150408235509-conversion-gate01/85/Book-136-320.jpg)

![132 Virtualization with Xen
2 pci
(pci { dev | uuid })
Defines the device of a PCI device that is dedicated to the given VM Guest. The PCI
device number is organized as [[[[domain]:]bus]:][slot][.[func]].
2.1 dev
(dev { bus | domain | func | slot | uuid | vslt })
Defines the path to the PCI device that is dedicated to the given VM Guest.
bus
A PCI device with device number 03:02.1 has the bus number 0x03
(bus 0x03)
domain
Most computers have only one PCI domain. This is then 0x0. To check the do-
main numbers of the PCI devices, use lspci -D.
(domain 0x0)
func
A PCI device with device number 03:02.1 has the function number
(func 0x1)
slot
A PCI device with device number 03:02.1 has the function number
(slot 0x02)
uuid
Unique identifier for this device. Example:
(uuid d33733fe-e36f-fa42-75d0-fe8c8bc3b4b7)
vslt
Defines the virtual slot for the PCI device in the VM Guest system.
(vslt 0x0)
2.2 uuid
Unique identifier for this device. Example:](https://image.slidesharecdn.com/book-150408235509-conversion-gate01/85/Book-142-320.jpg)


The Xen hypervisor allows multiple virtual machines to run simultaneously on a single physical machine. The Domain0 acts as the virtual machine host and controls the other virtual machines (VM Guests). Virtual machines can run in either paravirtual or full virtualization mode, with paravirtualized guests generally having better performance. The hypervisor, Domain0, VM Guests, and management tools together form the virtualization environment.


