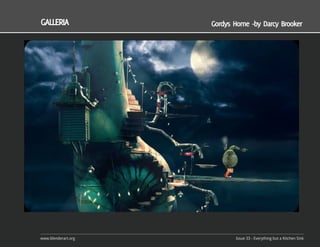
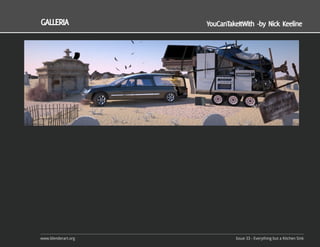
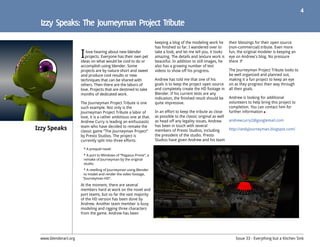
The article discusses two ambitious 3D modeling projects: 1) The Journeyman Project Tribute, which aims to remake the classic game The Journeyman Project using Blender. It will include a prequel novel, a Windows port of an earlier remake, and remaking the game's video footage in high definition with Blender. 2) Creating a 3D model of a convertible version of a Citroën C5 car based on blueprints and reference photos to showcase modeling techniques for vehicles in Blender. Both projects involve dedicated long-term work to create detailed 3D recreations of existing intellectual properties.


![33
film is made of mistakes over story, technical deficiencies are less
mistakes. My only aim with this advice important.
is to help you save time by avoiding
some of those mistakes. During a long project, something
terrible is likely to happen to you. At
some point, you will get bored of it. To
1. Write a good solid story maintain your own focus during a
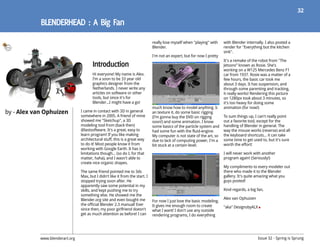
I recently finished my first long The first step is to have something to long time, it’s important for you to
project. It’s a short film called tell. When I started thinking of making believe in your own project. So take
21:00 [1-3] made with Blender this movie, my first approach was to some time to write a good script.
2.48. When I started working on make it with a real camera and real
it two years ago, I used PovRay actors. But some scenes were too
for all my digital works. I knew 2. Sketch a Storyboard
dangerous to be made with real
that this project was going to be too people so I decided to make it Creating a storyboard is something
complex to be made with PovRay so I digitally. I changed the technique, but everybody suggests and no one does
by - Enrique Sahagun started looking for an open source the story survived that change. but this is particularly important for
Maya-like suite. Then I found Blender digital films. Sketching the movie with
and it was like an epiphany. What I mean is that the key point of simple drawings is essential to
making a movie is to have a story to develop the visual appearance of your
As you can imagine, the last two years tell. It’s easy to find videos from digital film. Even if you know exactly how the
have been a long learning experience. artists that are technically jaw story is going to develop, it’s
On the one hand I discovered the dropping. Many short movies are just important to understand that there
huge technical power of Blender. On incredible visual exercises. That’s OK are still thousands of ways to transmit
the other hand I had to learn how to and sends a great message that this it through a film. The duration of the
make a movie and take the story I had shots, the position and motion of the
in my mind and get it into frames. camera relative to the action, the
After these two years I haven’t learned lighting and the use of flashbacks can
enough about Blender to make a good all dramatically change the perception
technical tutorial. What I can do of the story. A storyboard is essential
instead is give you some advice on to state the final visual aspect of your
how to face the problem of making a movie. Plus it also helps to keep
movie. things tidy (see point 5).
Of course, I will talk about my own But in a digital film there is an even
experience which is that of a single can be done and I’m good enough to more important reason to make a
guy making a nine minute short film, do it. But a car transforming into a storyboard. If you know where the
from the script to the final sound edit. robot or a house burning is not a camera points in every scene and how
I’m not a film director and my short story. Besides, if you have a good wide the shot is, you’ll know from the
www.blenderart.org Issue 32 - Spring is Sprung](https://image.slidesharecdn.com/blenderartmag-33eng-120301230618-phpapp02/85/Blenderart-mag-33-eng-33-320.jpg)
![34
very beginning which and how many elements the position and motion of the camera. You between them [9].
will need to be modeled. And believe me, this will learn a lot of useful tricks just by studying
will save a lot of time. For example, when I a single movie.
5. Keep things tidy.
started working on my film my instinct told
me to fill the 3D space with lots of detailed Think of this. You want to make a 4 minute
4. Don’t respect the general lighting. short film. That’s six thousand frames (at
objects as if it was a real space. However
many of these objects did not appear in the Don’t be afraid to change the lights for a single 25fps) and about 20 to 40 different shots. My
final film. If you first think where the camera shot. In a shot, lights can be divided into two approach is to create a blend file for each
is going to point and what the frame contains, groups: general lights and correction lights. shot (previously defined in the storyboard).
you’ll be able to make a precise list of the The first group are those defined by the This allows me to keep things tidy. If you save
models you’ll need. physics of the scene (the sun, a lamp, the each shot in a different blend file, you can
radiosity, etc). The second group are those correct them (if needed) by changing a small
that belong to a particular shot and they are number of keyframes. On the other hand, if
3. Learn how to move the Camera used to correct the lighting of the first group you create a very long sequence, with camera
One thing I learned making this movie was when needed. If your shot is not properly changes in a single file, a simple modification
how important the camera was. It may seem illuminated, don’t change the configuration of in the middle of the action can be painstaking.
that knowing the story you want to tell and its the general lights; use the correction lights.
evolution in time is enough to make a movie. Actually, this is the technique used in real Another interesting technique is to create a
You could place the camera or move it with no movies. master blend file with all the pieces of your
rule but to capture the action, and your film animation as they are rendered in the video
would be OK. But this is completely wrong. sequence editor (VSE) to have a global idea on
The first thing you notice when you make your how things are going.
first digital shots is that they don’t look like
those you see in real movies. 6. Previews, previews and more previews!
It is important to understand that the camera Make as many previews of your shots as you
critically affects the way a story is told. Where can. Not only for single shots but for whole
the camera points, its position and its motion, sequences. Prepare several shots, “make a
all add a new layer of perception to your camera view render” and put them together
story. This perception has been defined along with the VSE. This will give you a perfect idea
one hundred years of movie making. That’s of the quality of your shots and will allow you
why it is important to learn the basics of But be careful. You can change the light, but at to make corrections on the camera motion or
camera framing and the meaning of shots. the same time it is important to respect the on the duration of the shots before you tackle
There are lots of articles on the Internet on shadowing of the general lighting and the the final high quality render.
the subject [4-7] and also comments on the general colour palette of the movie. If you
technique of particular directors [8]. But I make strong changes in the lighting between 7. Take advantage of post-production
recommend a simple exercise. Take a film you two shots, you can break the connection
like and watch it carefully paying attention to When I started working on 21:00 I didn’t pay
www.blenderart.org Issue 33 - Everything but a Kitchen Sink](https://image.slidesharecdn.com/blenderartmag-33eng-120301230618-phpapp02/85/Blenderart-mag-33-eng-34-320.jpg)