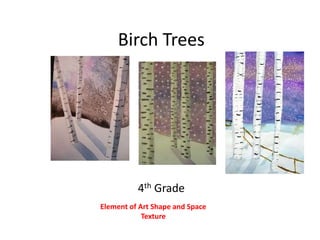
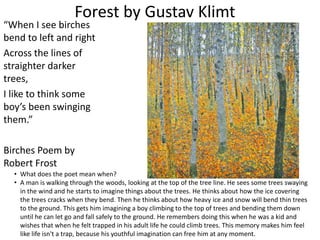
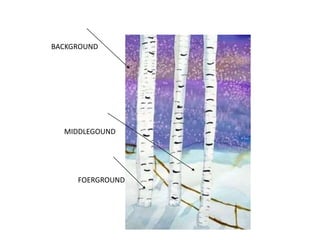
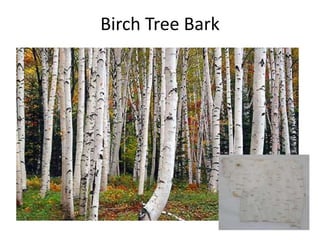
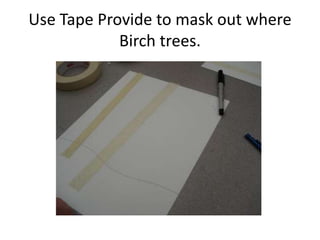
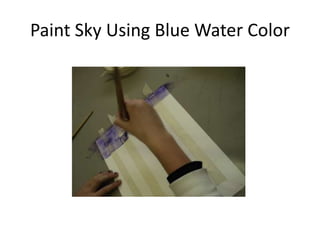
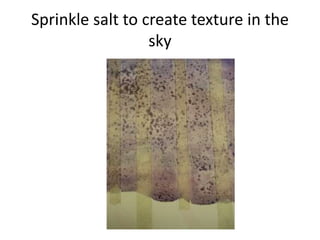
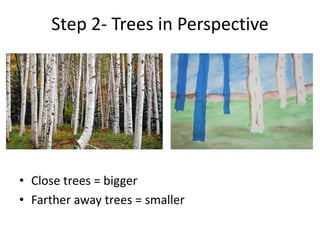
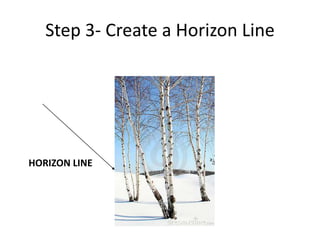
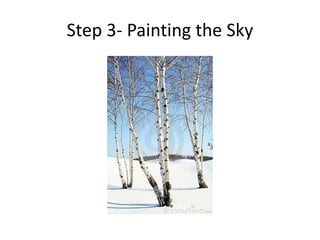
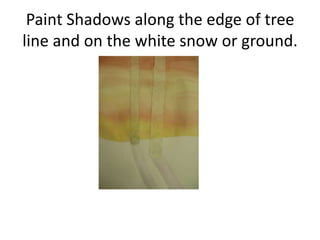
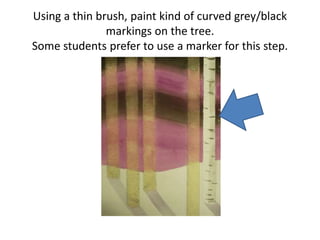
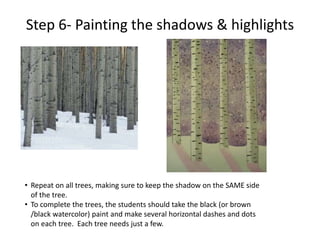
Birch Trees
4th Grade
Element of Art Shape and Space
Texture
Element of Art Shape and Space
Texture
Forest by Gustav Klimt
“When I see birches
bend to left and right
Across the lines of
straighter darker
trees,
I like to think some
boy’s been swinging
them.”
Birches Poem by
Robert Frost
• What does the poet mean when?
• A man is walking through the woods, looking at the top of the tree line. He sees some trees swaying
in the wind and he starts to imagine things about the trees. He thinks about how the ice covering
the trees cracks when they bend. Then he thinks about how heavy ice and snow will bend thin trees
to the ground. This gets him imagining a boy climbing to the top of trees and bending them down
until he can let go and fall safely to the ground. He remembers doing this when he was a kid and
wishes that when he felt trapped in his adult life he could climb trees. This memory makes him feel
like life isn't a trap, because his youthful imagination can free him at any moment.
BACKGROUND
FOERGROUND
MIDDLEGOUND
Today’s Project
• Birch tree bark
• Masking
• Watercolor background
• Salt texture
Birch Tree Bark
Use Tape Provide to mask out where
Birch trees.
Paint Sky Using Blue Water Color
Sprinkle salt to create texture in the
sky
Step 2- Trees in Perspective
• Close trees = bigger
• Farther away trees = smaller
Step 3- Create a Horizon Line
HORIZON LINE
Step 3- Painting the Sky
Paint Shadows along the edge of tree
line and on the white snow or ground.
Using a thin brush, paint kind of curved grey/black
markings on the tree.
Some students prefer to use a marker for this step.
Step 6- Painting the shadows & highlights
• Repeat on all trees, making sure to keep the shadow on the SAME side
of the tree.
• To complete the trees, the students should take the black (or brown
/black watercolor) paint and make several horizontal dashes and dots
on each tree. Each tree needs just a few.

Birtch trees pp

  • 1.
    Birch Trees 4th Grade Elementof Art Shape and Space Texture
  • 2.
    Element of ArtShape and Space Texture
  • 3.
    Forest by GustavKlimt “When I see birches bend to left and right Across the lines of straighter darker trees, I like to think some boy’s been swinging them.” Birches Poem by Robert Frost • What does the poet mean when? • A man is walking through the woods, looking at the top of the tree line. He sees some trees swaying in the wind and he starts to imagine things about the trees. He thinks about how the ice covering the trees cracks when they bend. Then he thinks about how heavy ice and snow will bend thin trees to the ground. This gets him imagining a boy climbing to the top of trees and bending them down until he can let go and fall safely to the ground. He remembers doing this when he was a kid and wishes that when he felt trapped in his adult life he could climb trees. This memory makes him feel like life isn't a trap, because his youthful imagination can free him at any moment.
  • 4.
  • 5.
    Today’s Project • Birchtree bark • Masking • Watercolor background • Salt texture
  • 6.
  • 7.
    Use Tape Provideto mask out where Birch trees.
  • 8.
    Paint Sky UsingBlue Water Color
  • 9.
    Sprinkle salt tocreate texture in the sky
  • 10.
    Step 2- Treesin Perspective • Close trees = bigger • Farther away trees = smaller
  • 11.
    Step 3- Createa Horizon Line HORIZON LINE
  • 12.
  • 13.
    Paint Shadows alongthe edge of tree line and on the white snow or ground.
  • 14.
    Using a thinbrush, paint kind of curved grey/black markings on the tree. Some students prefer to use a marker for this step.
  • 15.
    Step 6- Paintingthe shadows & highlights • Repeat on all trees, making sure to keep the shadow on the SAME side of the tree. • To complete the trees, the students should take the black (or brown /black watercolor) paint and make several horizontal dashes and dots on each tree. Each tree needs just a few.

Editor's Notes

  • #2 Presentation modified by Cecilia Isenberg 2016
  • #6 What does the poet mean when? A man is walking through the woods, looking at the top of the tree line. He sees some trees swaying in the wind and he starts to imagine things about the trees. He thinks about how the ice covering the trees cracks when they bend. Then he thinks about how heavy ice and snow will bend thin trees to the ground. This gets him imagining a boy climbing to the top of trees and bending them down until he can let go and fall safely to the ground. He remembers doing this when he was a kid and wishes that when he felt trapped in his adult life he could climb trees. This memory makes him feel like life isn't a trap, because his youthful imagination can free him at any moment.
  • #8 This project works best if you explain and do the steps in stages (don’t try to explain the entire project and then have them do it all at once).
  • #9 Begin by discussing birch trees and their appearance: show pictures (samples w/ lesson) and Klimt print. Also, if weather and teacher permit, take them for a walking tour outside: there is a stand of birch trees at Homestead Field (very close to the bathrooms, just south of the tennis courts). Note how the trees are bumpy, knobby, uneven, leaning (encourage them to help describe the trees). Can also contrast the shape with Douglas Fir, which are very different—they tend to be very straight and even. Three points: 1) white trunks; 2) brown bark showing through the white (where the white bark peels off); and 3) not perfectly straight (leaning, crooked, etc.).
  • #13 Give each student a 9x12 sheet of watercolor paper. Students can tear their own strips of painter’s tape, but it saves time and frustration if the parent volunteers have some tape pre-torn for them. Tape can be distributed a few pieces at a time so that they don’t get stuck together The uneven edges are then combined on the paper to make the trunks- uneven edges on the outside If the tape tears unevenly, it’s okay! That’s what makes the trees look realistic. For the first row of trees, all of the pieces of tape should hang over the bottom of the paper. Next, explain distance and perspective—how objects appear smaller the farther away they are, while things that are big will appear closer. On this project, the longer pieces of tape will look closer while the shorter pieces will appear farther away. To get this effect, have the students end the bottom pieces at varying heights (and they can tear off the bottom to get this effect, if necessary). Varying the height of the trunks will give the picture the illusion of depth. Press all the “trees” down firmly. Check that both sides of the tape are torn as that is what makes the irregular shape.
  • #14 When the students have applied the tape pieces correctly, it’s time to paint. First remind them not to use too much water or the tape will be hard to remove. Use the larger of the 2 paintbrushes for the land and sky Have the students think about a time of day for their picture: dawn, twilight, sunset, sunrise, daytime, night etc. Students should paint the bottom half of the picture first, making sure to cover all the bottoms of the trees so none of the tree trunks appears to be “floating.” Color choice is up to them: some might like greens (they can mix different greens, if desired); others might use yellows or browns.
  • #15 After the bottom half is painted, they should move to the top half and paint colors depending upon the time of day they have selected (oranges and reds for sunset, for example).