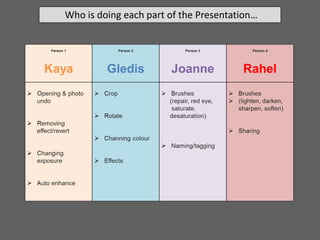
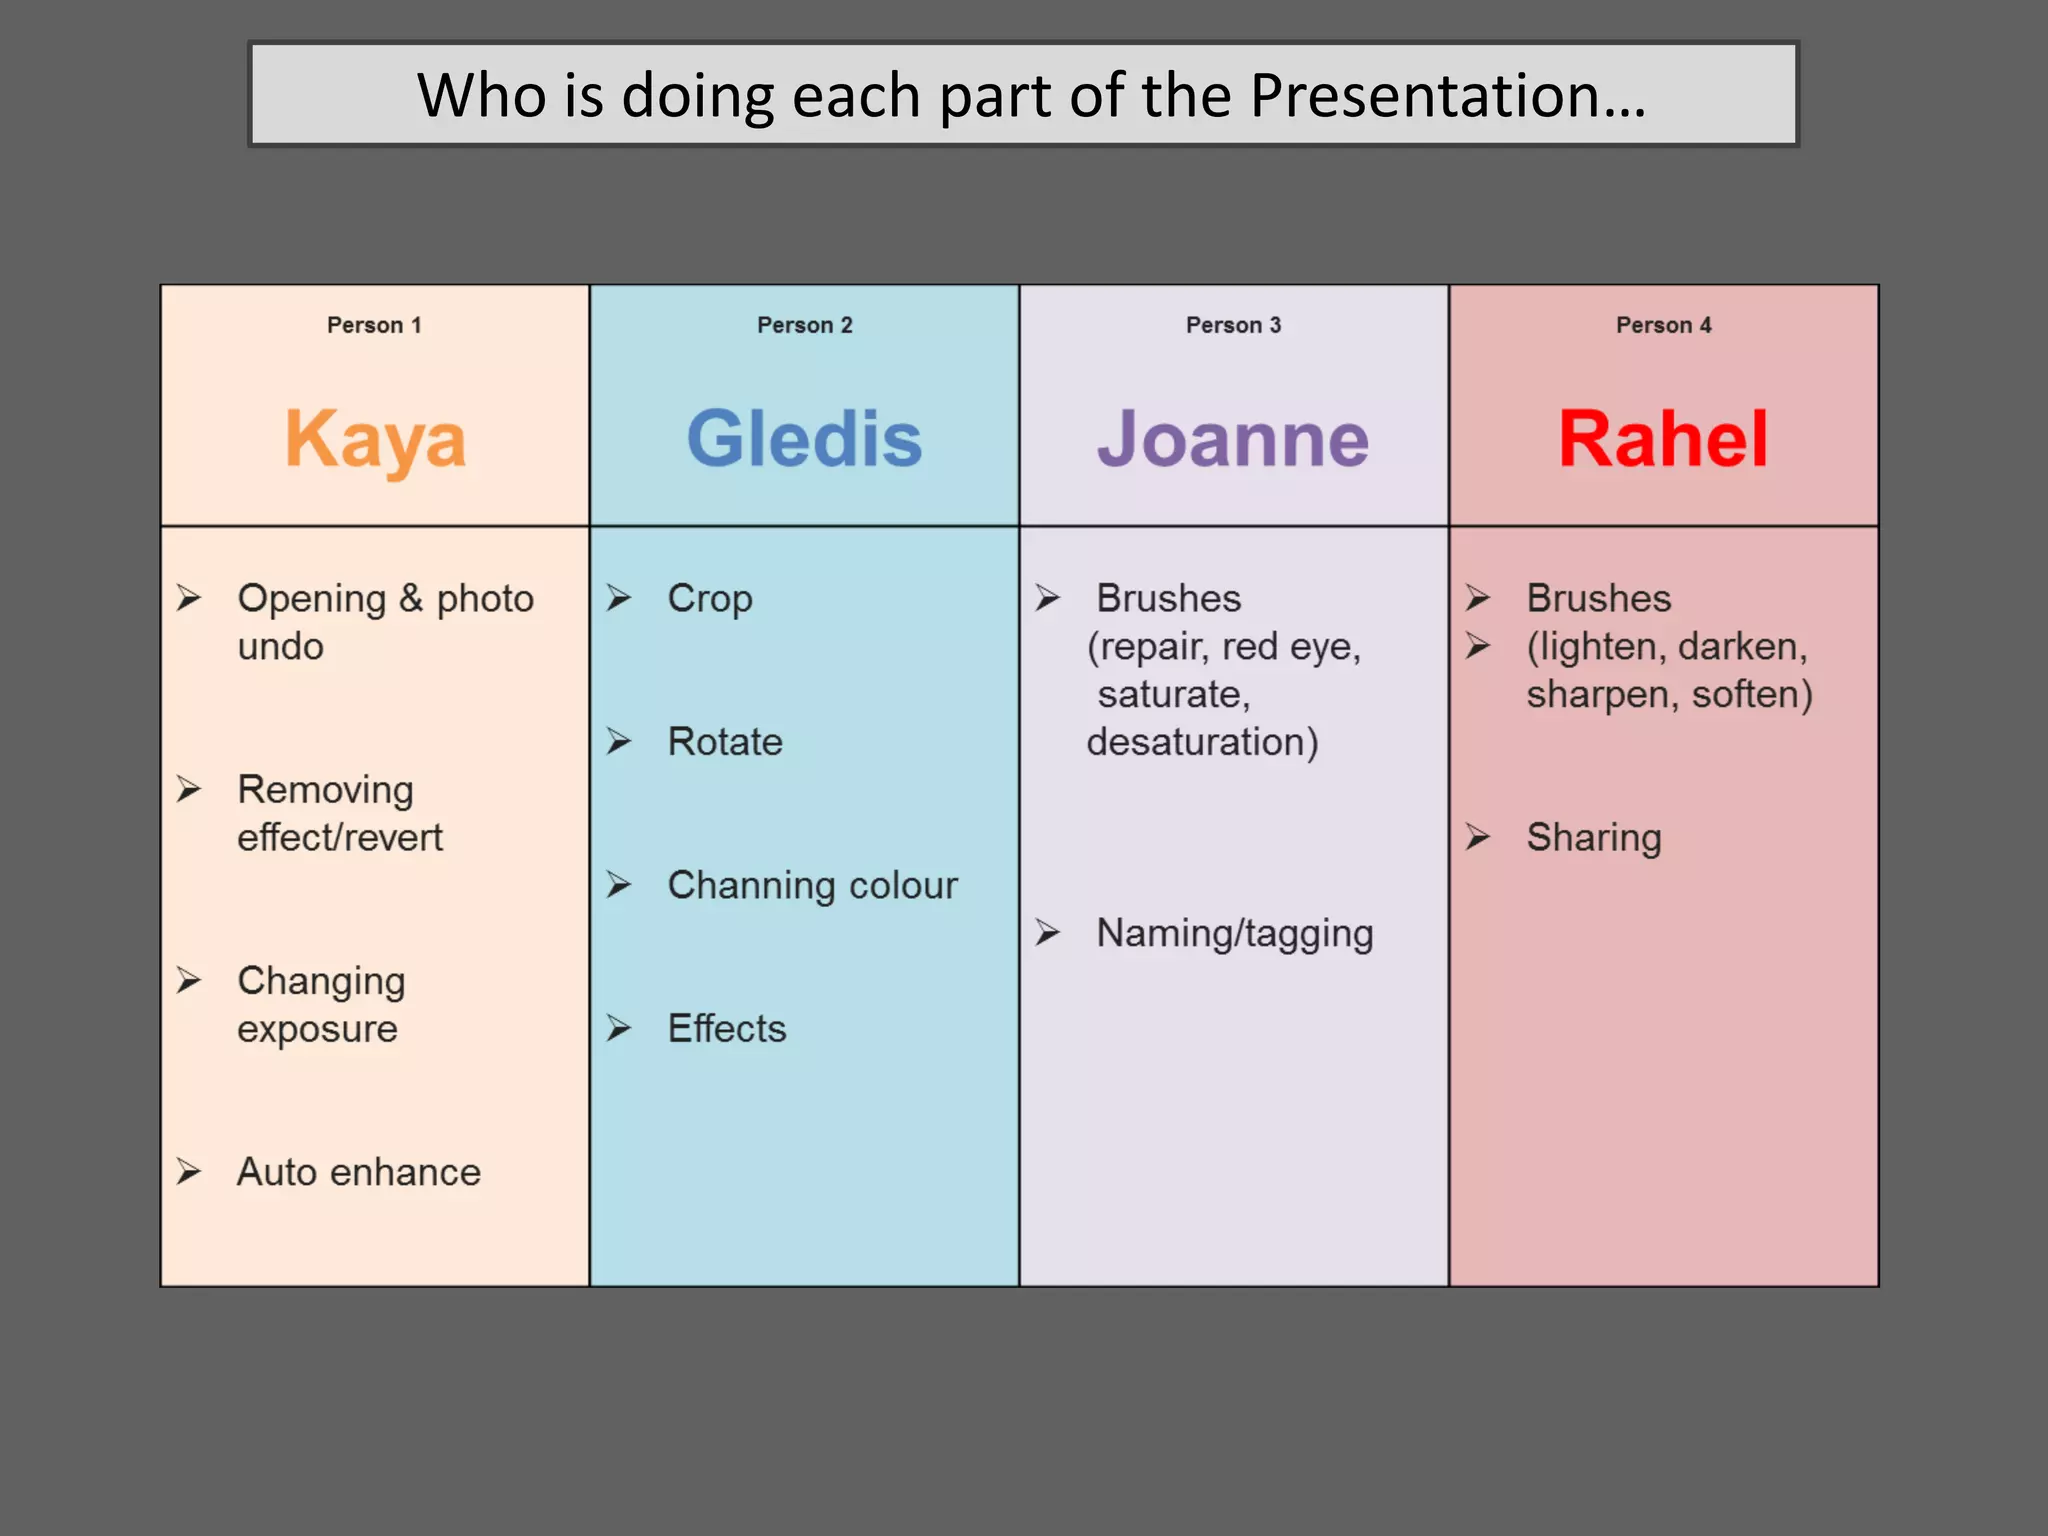
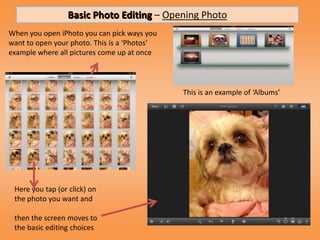
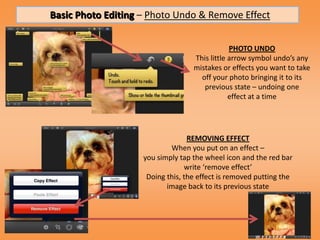
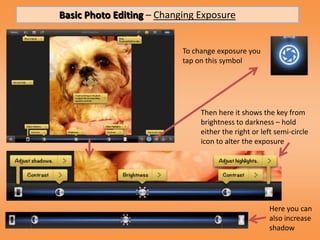
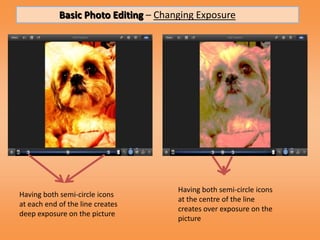
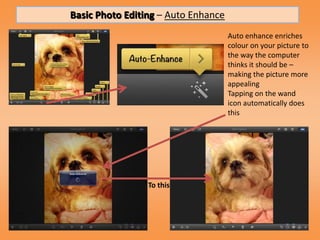
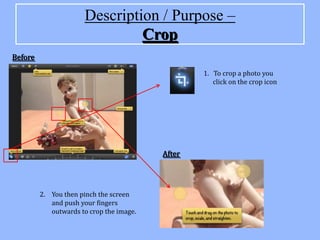
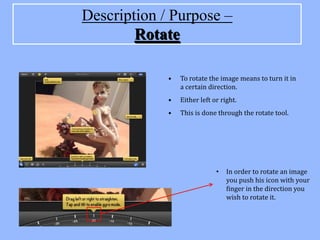
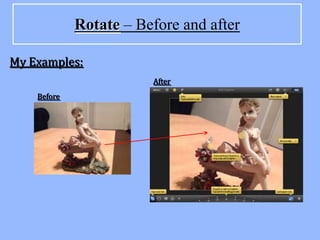
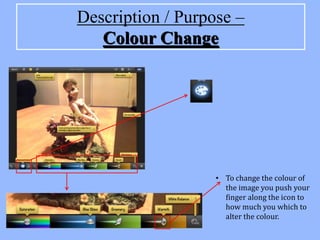
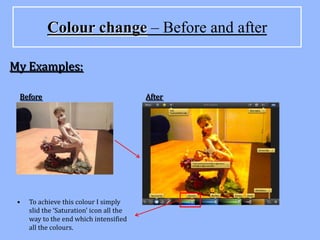
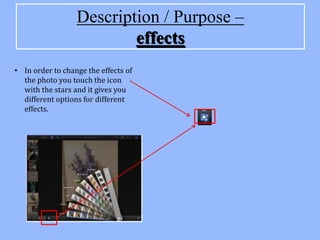
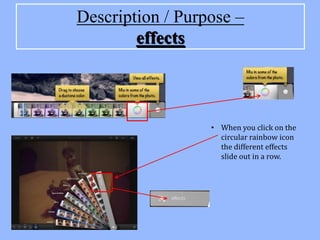
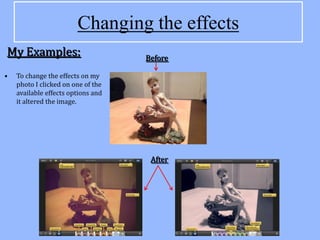
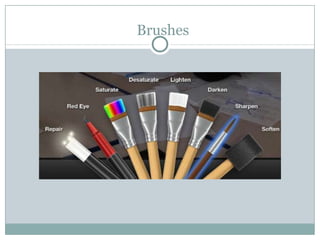
Who is doing each part of the Presentation…
Basic Photo Editing – Opening Photo
When you open iPhoto you can pick ways you
want to open your photo. This is a ‘Photos’
example where all pictures come up at once


                                              This is an example of ‘Albums’


 Here you tap (or click) on
 the photo you want and

 then the screen moves to
 the basic editing choices
Basic Photo Editing – Photo Undo & Remove Effect


                                               PHOTO UNDO
                                   This little arrow symbol undo’s any
                                   mistakes or effects you want to take
                                     off your photo bringing it to its
                                      previous state – undoing one
                                               effect at a time


                                  REMOVING EFFECT
                            When you put on an effect –
                    you simply tap the wheel icon and the red bar
                                 write ‘remove effect’
                     Doing this, the effect is removed putting the
                           image back to its previous state
Basic Photo Editing – Changing Exposure


                           To change exposure you
                           tap on this symbol


                                Then here it shows the key from
                                brightness to darkness – hold
                                either the right or left semi-circle
                                icon to alter the exposure


                                                      Here you can
                                                      also increase
                                                      shadow
Basic Photo Editing – Changing Exposure


                                      Having both semi-circle icons
Having both semi-circle icons
                                      at the centre of the line
at each end of the line creates
                                      creates over exposure on the
deep exposure on the picture
                                      picture
Basic Photo Editing – Auto Enhance
                                     Auto enhance enriches
                                     colour on your picture to
                                     the way the computer
                                     thinks it should be –
                                     making the picture more
                                     appealing
                                     Tapping on the wand
                                     icon automatically does
                                     this


                 To this
Description / Purpose –
                                Crop
Before

                                                  1. To crop a photo you
                                                     click on the crop icon


                                          After


         2. You then pinch the screen
            and push your fingers
            outwards to crop the image.
Description / Purpose –
        Rotate

             •   To rotate the image means to turn it in
                 a certain direction.
             •   Either left or right.
             •   This is done through the rotate tool.


                              •   In order to rotate an image
                                  you push his icon with your
                                  finger in the direction you
                                  wish to rotate it.
Rotate – Before and after

My Examples:
                        After
    Before
Description / Purpose –
   Colour Change


                   • To change the colour of
                     the image you push your
                     finger along the icon to
                     how much you which to
                     alter the colour.
Colour change – Before and after

My Examples:

 Before                                   After


 •   To achieve this colour I simply
     slid the ‘Saturation’ icon all the
     way to the end which intensified
     all the colours.
Description / Purpose –
                          effects
• In order to change the effects of
  the photo you touch the icon
  with the stars and it gives you
  different options for different
  effects.
Description / Purpose –
        effects


                  • When you click on the
                    circular rainbow icon
                    the different effects
                    slide out in a row.
Changing the effects
My Examples:                        Before

•   To change the effects on my
    photo I clicked on one of the
    available effects options and
    it altered the image.


                                     After
Changing the effects
My Examples:                        Before

•   To change the effects on my
    photo I clicked on one of the
    available effects options and
    it altered the image.


                                     After
Brushes

Assignment #14 (p3): Photography Research And Prectice

  • 1.
    Who is doingeach part of the Presentation…
  • 2.
    Basic Photo Editing– Opening Photo When you open iPhoto you can pick ways you want to open your photo. This is a ‘Photos’ example where all pictures come up at once This is an example of ‘Albums’ Here you tap (or click) on the photo you want and then the screen moves to the basic editing choices
  • 3.
    Basic Photo Editing– Photo Undo & Remove Effect PHOTO UNDO This little arrow symbol undo’s any mistakes or effects you want to take off your photo bringing it to its previous state – undoing one effect at a time REMOVING EFFECT When you put on an effect – you simply tap the wheel icon and the red bar write ‘remove effect’ Doing this, the effect is removed putting the image back to its previous state
  • 4.
    Basic Photo Editing– Changing Exposure To change exposure you tap on this symbol Then here it shows the key from brightness to darkness – hold either the right or left semi-circle icon to alter the exposure Here you can also increase shadow
  • 5.
    Basic Photo Editing– Changing Exposure Having both semi-circle icons Having both semi-circle icons at the centre of the line at each end of the line creates creates over exposure on the deep exposure on the picture picture
  • 6.
    Basic Photo Editing– Auto Enhance Auto enhance enriches colour on your picture to the way the computer thinks it should be – making the picture more appealing Tapping on the wand icon automatically does this To this
  • 7.
    Description / Purpose– Crop Before 1. To crop a photo you click on the crop icon After 2. You then pinch the screen and push your fingers outwards to crop the image.
  • 8.
    Description / Purpose– Rotate • To rotate the image means to turn it in a certain direction. • Either left or right. • This is done through the rotate tool. • In order to rotate an image you push his icon with your finger in the direction you wish to rotate it.
  • 9.
    Rotate – Beforeand after My Examples: After Before
  • 10.
    Description / Purpose– Colour Change • To change the colour of the image you push your finger along the icon to how much you which to alter the colour.
  • 11.
    Colour change –Before and after My Examples: Before After • To achieve this colour I simply slid the ‘Saturation’ icon all the way to the end which intensified all the colours.
  • 12.
    Description / Purpose– effects • In order to change the effects of the photo you touch the icon with the stars and it gives you different options for different effects.
  • 13.
    Description / Purpose– effects • When you click on the circular rainbow icon the different effects slide out in a row.
  • 14.
    Changing the effects MyExamples: Before • To change the effects on my photo I clicked on one of the available effects options and it altered the image. After
  • 15.
    Changing the effects MyExamples: Before • To change the effects on my photo I clicked on one of the available effects options and it altered the image. After
  • 16.