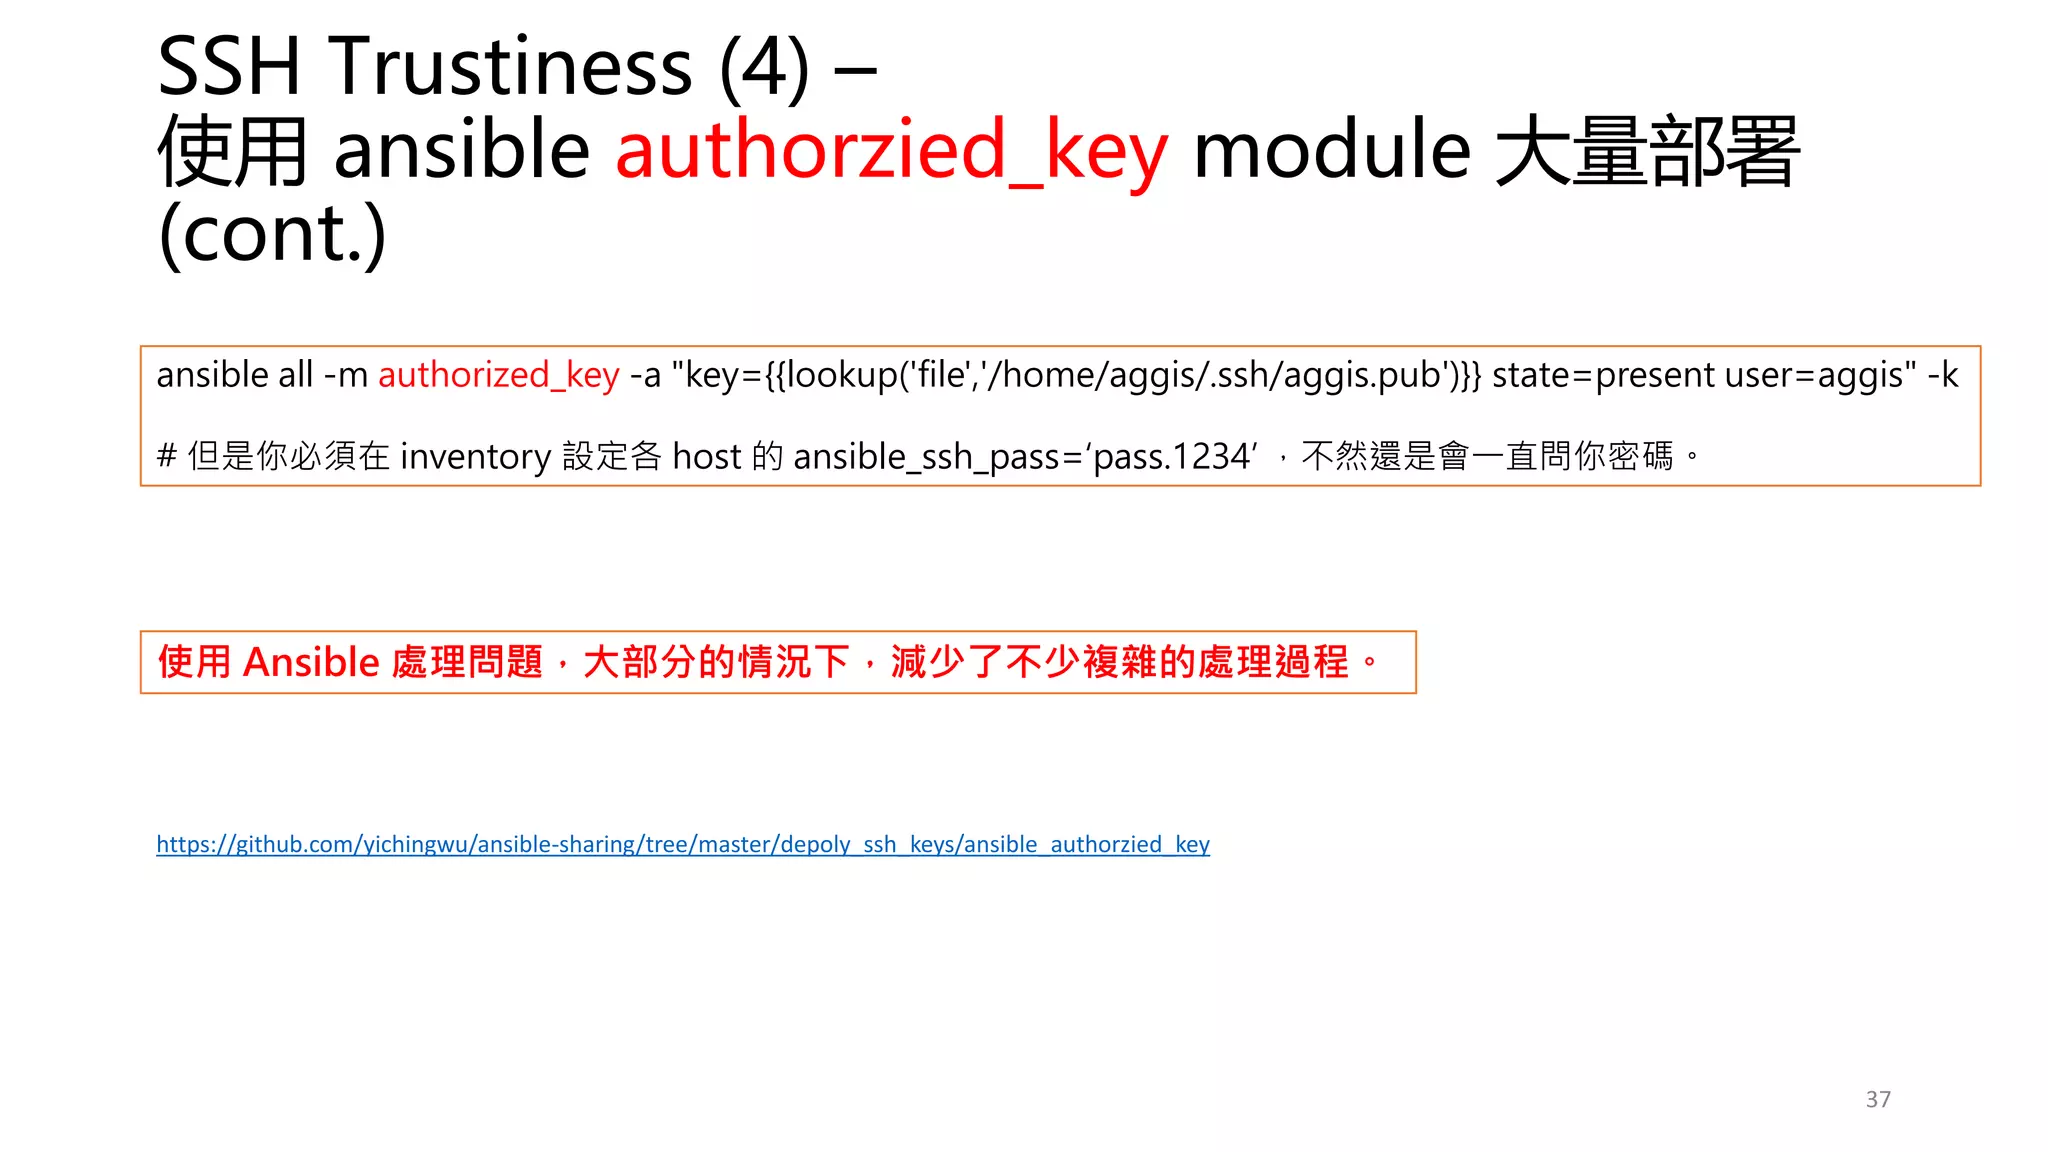
Loop 在 playbook的寫法 – with_nest
62
for item[0] in loop_test:
for item[1] in loop_nest:
print(item[0], item[1])
Python 語法
https://github.com/yichingwu/ansible-sharing/blob/master/playbook/loop/with_nest.yml
63.
Loop 在 playbook的寫法 – 取得特定的 key 值
63
vars 是 list, 而 list 的每個 item 是 dictionary
https://github.com/yichingwu/ansible-sharing/blob/master/playbook/loop/specific_item.yml


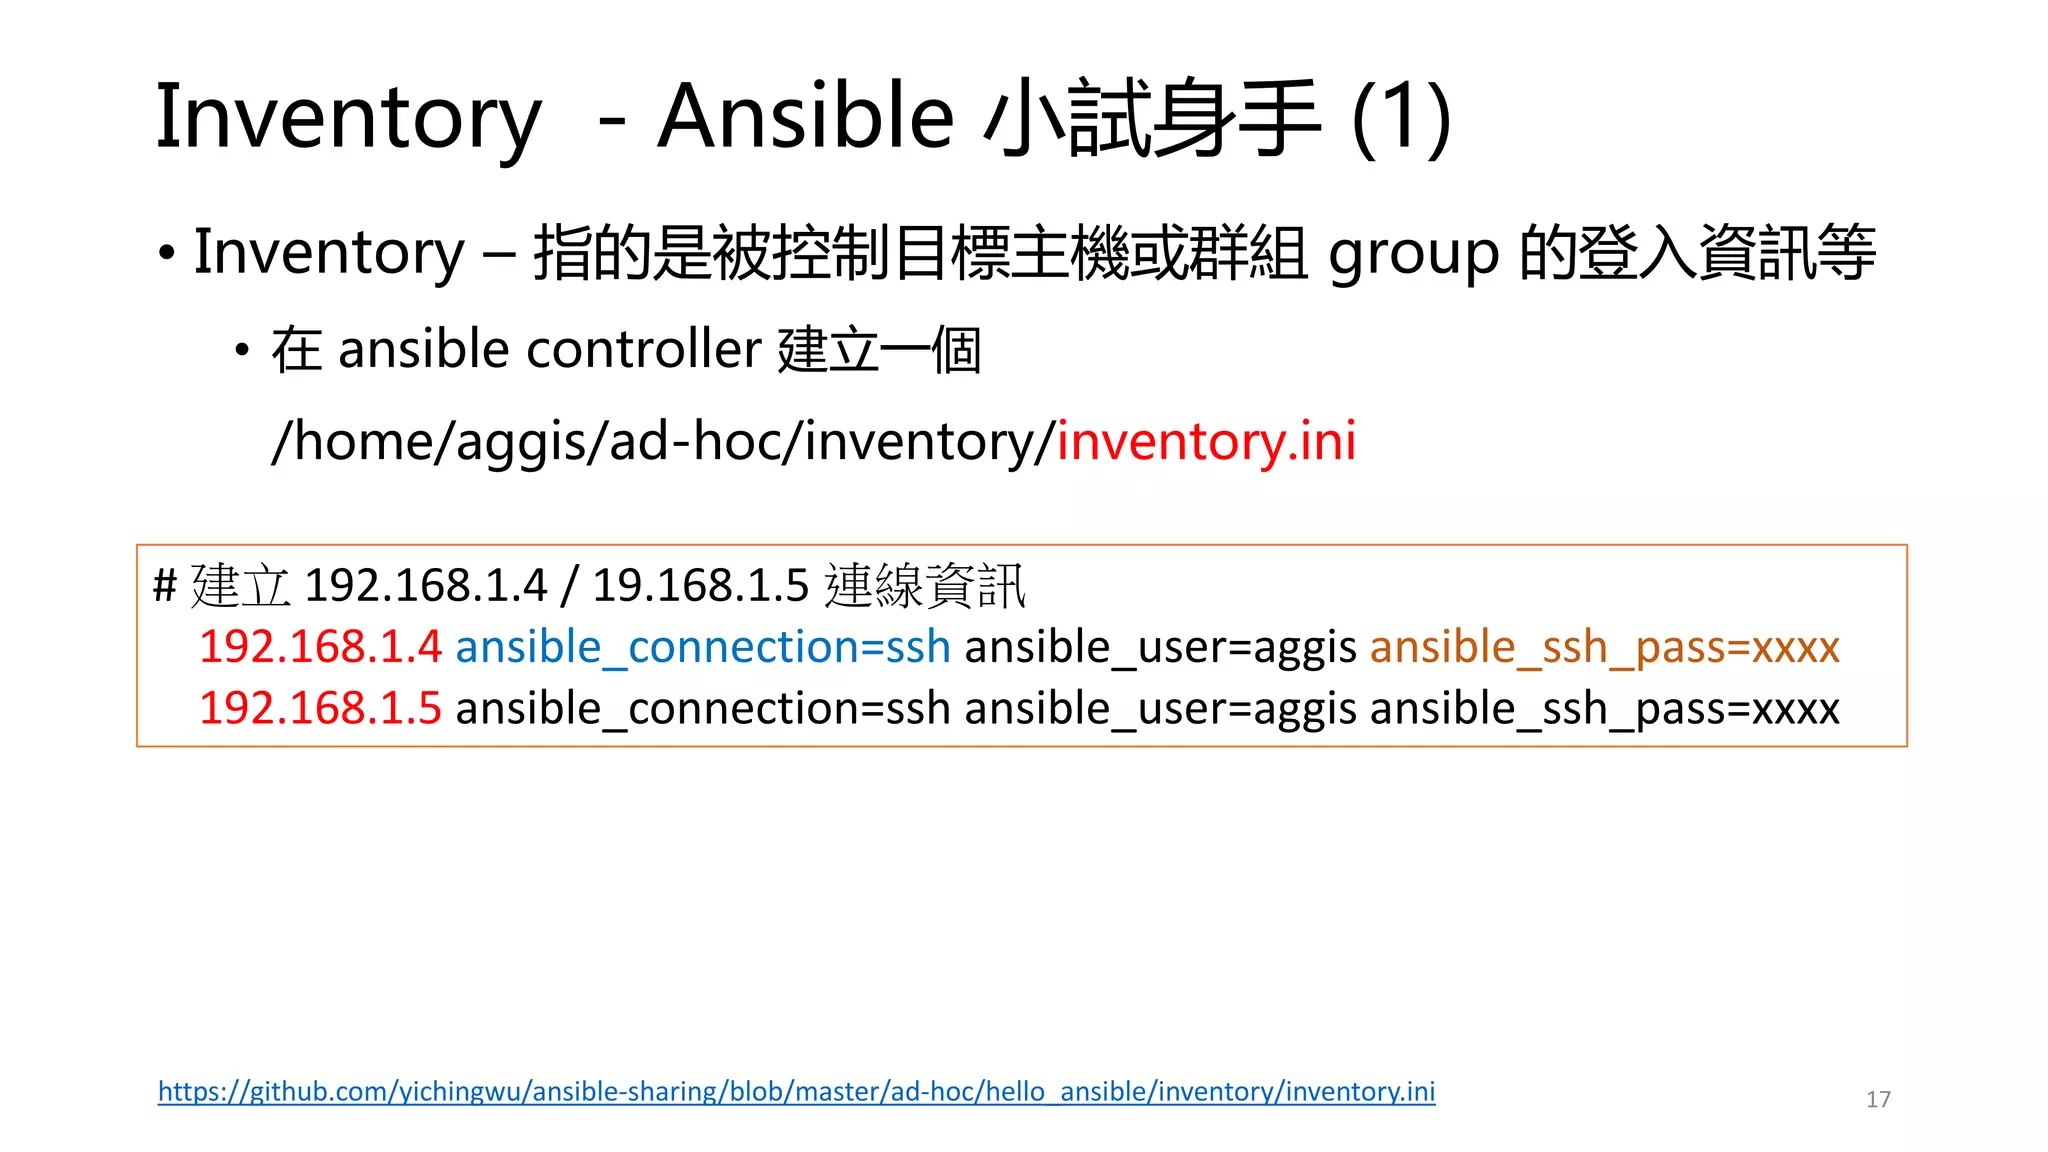
![Inventory - Ansible 小試身手 (3)
19
# 可以使用 regular express
192.168.1.[4:6] ansible_connection=ssh ansible_user=aggis ansible_ssh_pass=xxxx
nginx[4:6]p ansible_host=192.168.1[4:6] ?? 回家作業
# 如果不想每次都要輸入 inventory.ini 路徑,可設定 ansible.cfg
vim ansible.cfg
inventory = inventory/inventory.ini](https://image.slidesharecdn.com/ansible101-210630124739/75/Ansible-101-19-2048.jpg)


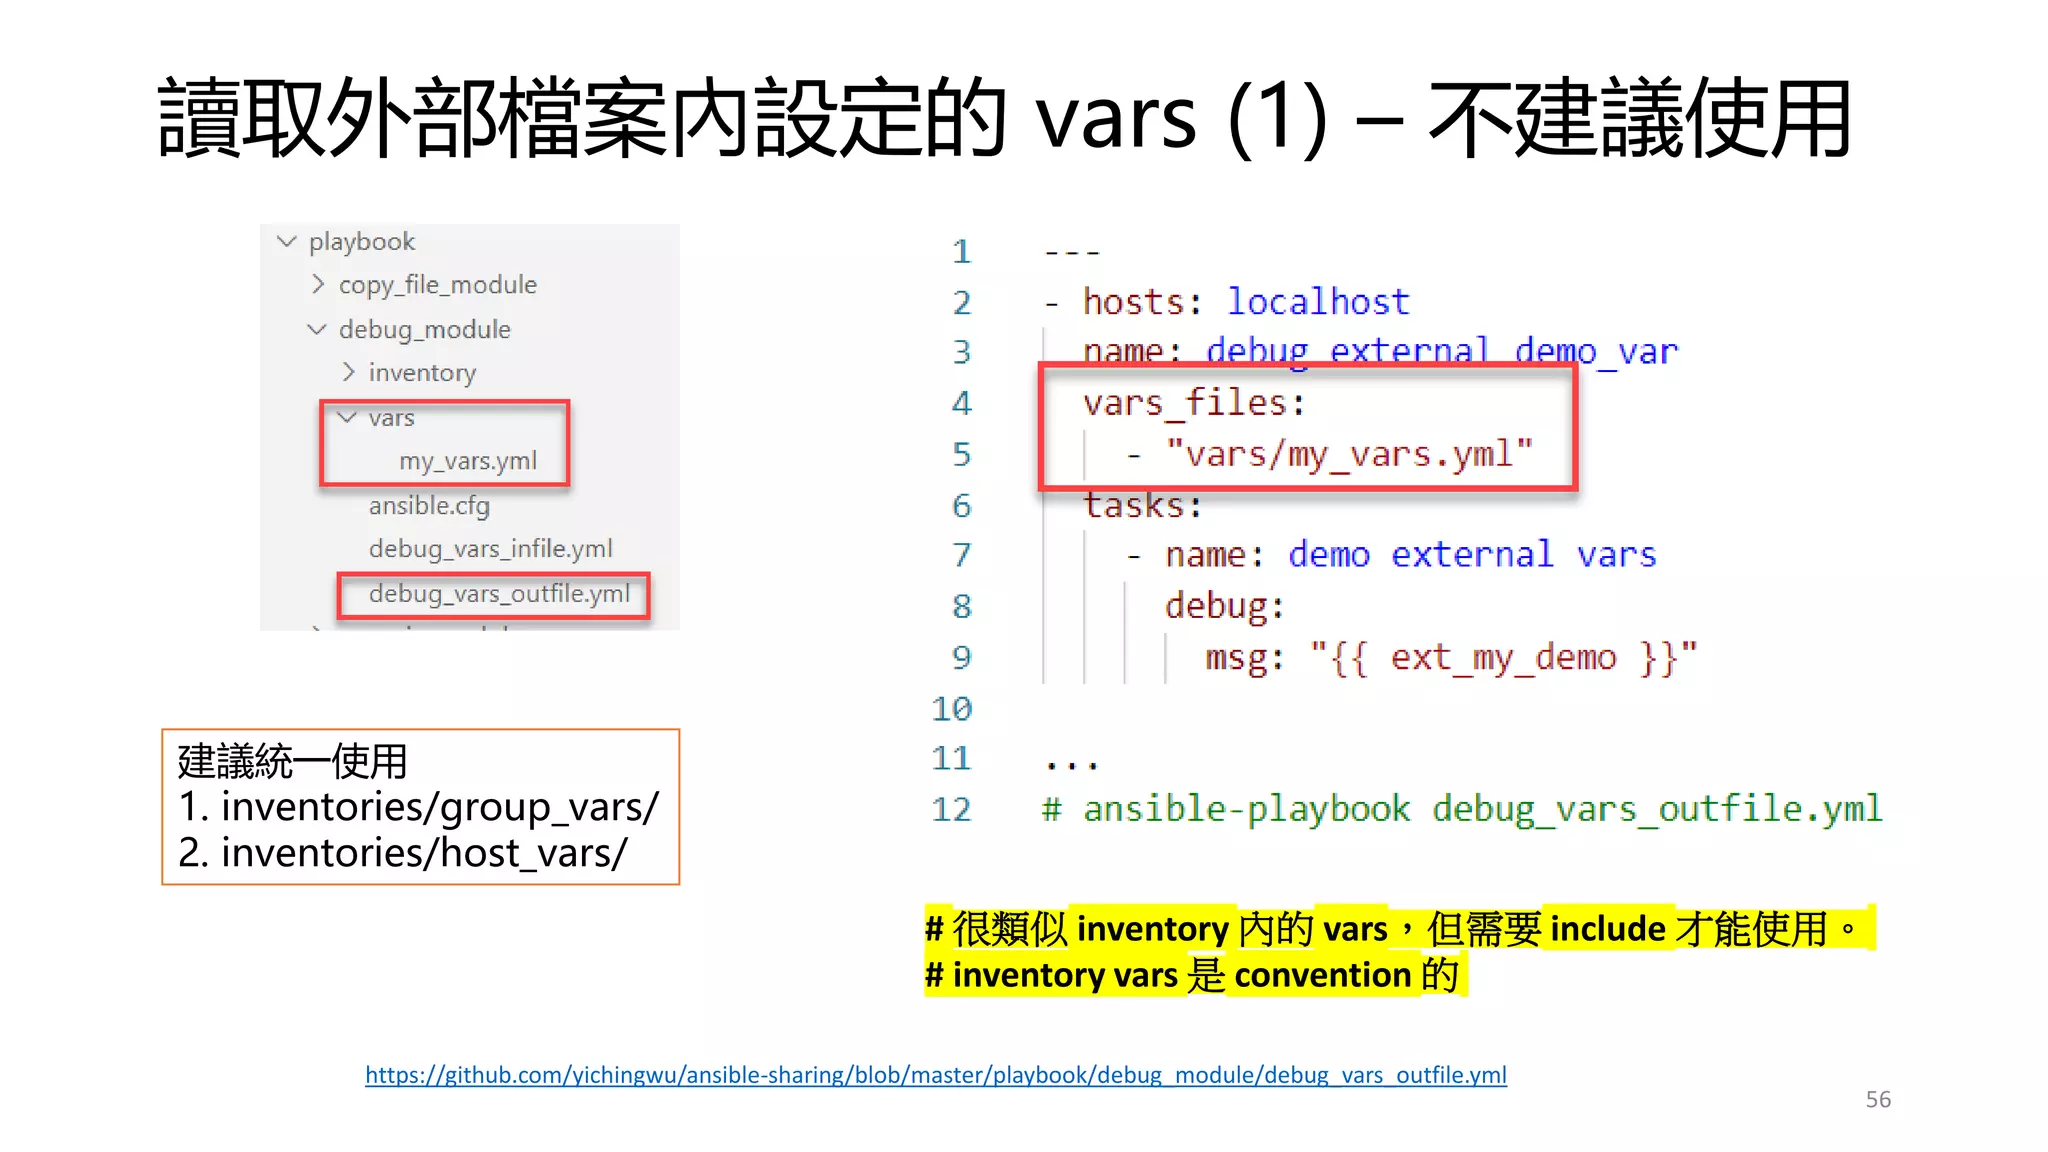
![如何取得某個 host 的所有 vars 變數? (1)
• 當 ansible vars 設定變複雜時,你很難一次看出某個 host 所有的 vars。
• 使用 debug module 印出 hostvars 即可
• ansible all -m debug -a "var=hostvars['ansible-node2']" -i inventory/best/inventory.ini
27
https://github.com/yichingwu/ansible-sharing/blob/master/ad-hoc/inventory_group_vars/ad-doc_retrieve_vars.sh](https://image.slidesharecdn.com/ansible101-210630124739/75/Ansible-101-27-2048.jpg)


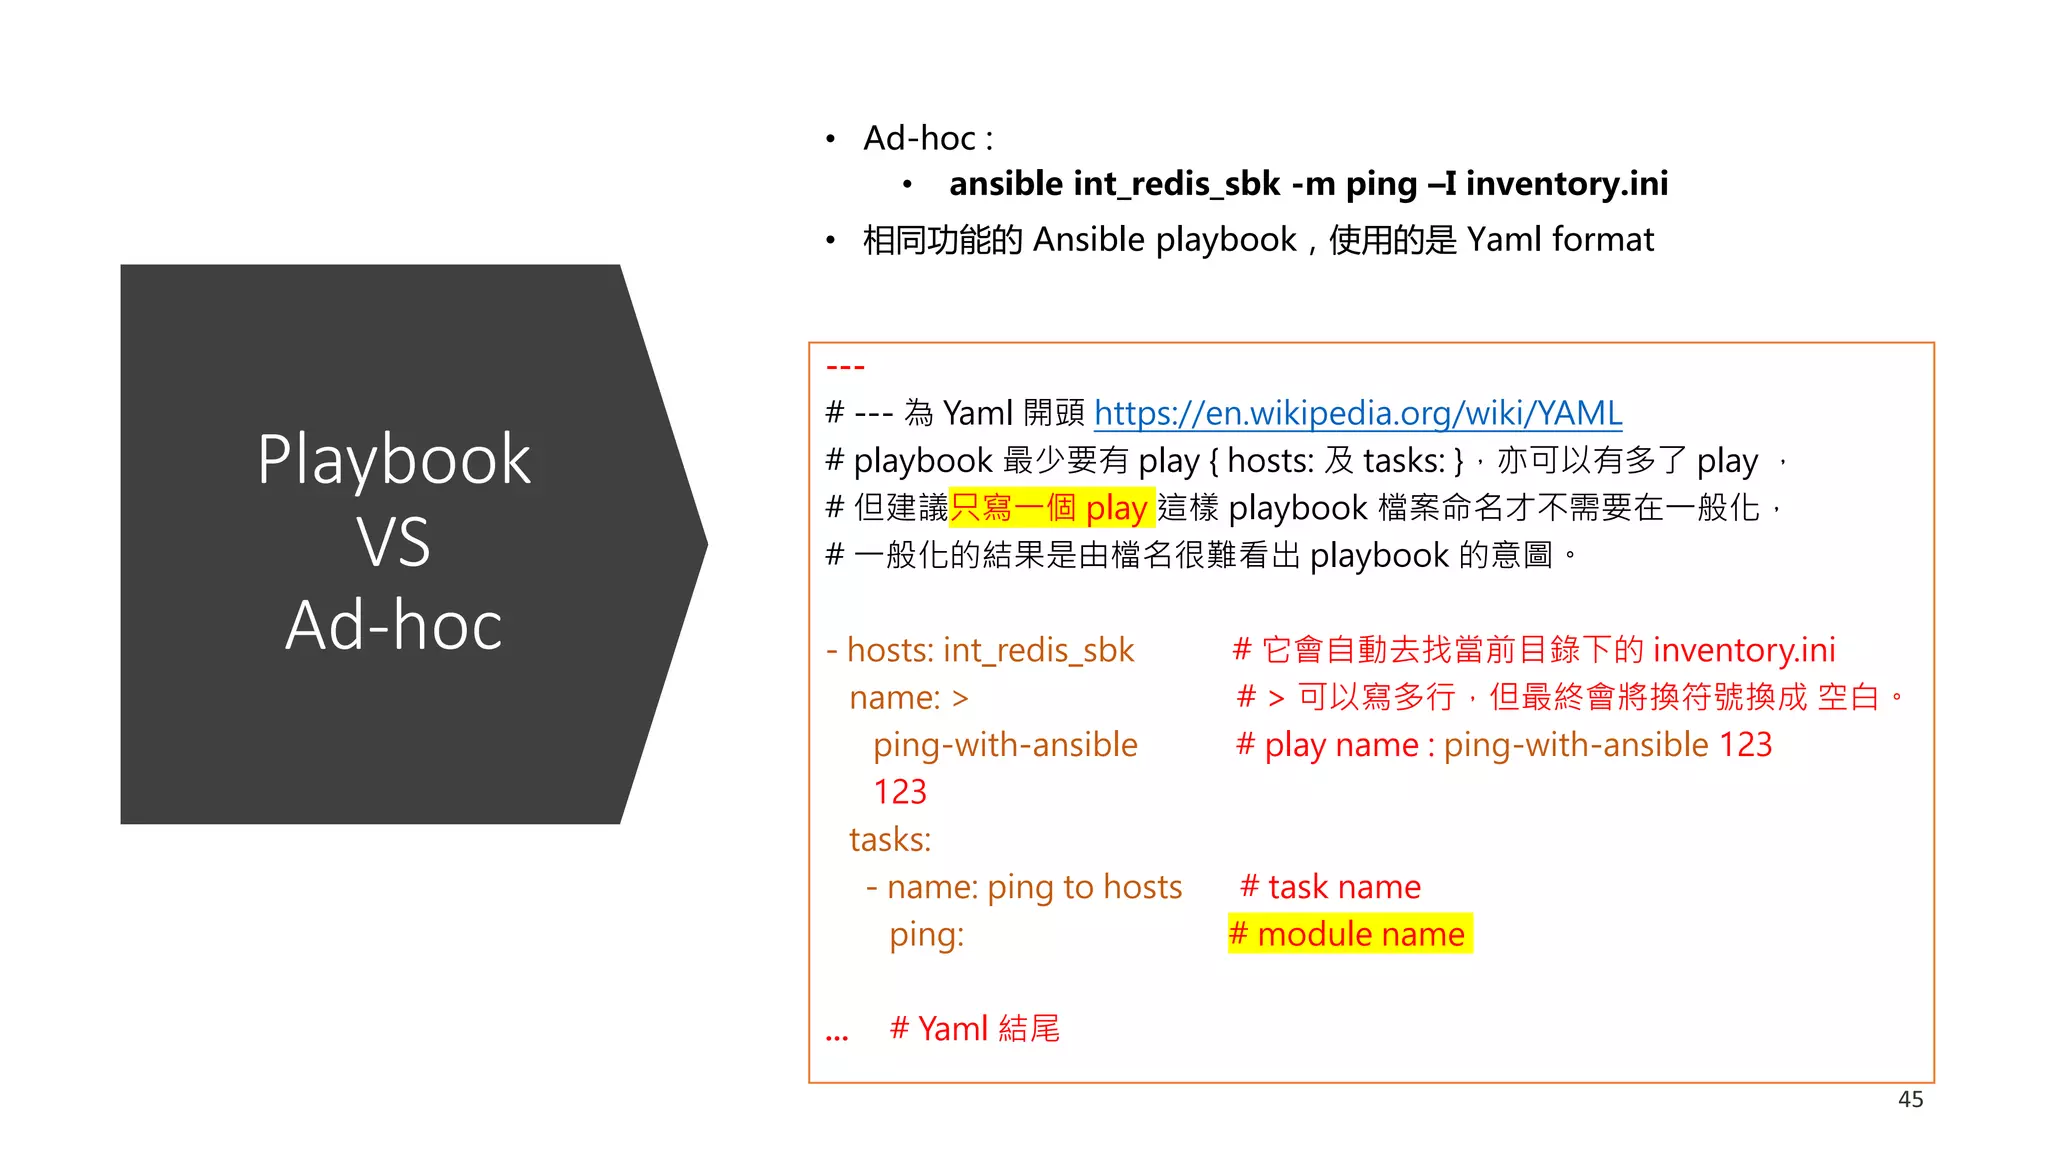
![SSH Trustiness
(4) – 使用
Expect 大量
部署 (cont.)
• vi /home/aggis/auto_sshcopyid.exp
#!/usr/bin/expect
set timeout 15
set user_hostname [lindex $argv 0]
set password [lindex $argv 1]
spawn ssh-copy-id $user_hostname
expect {
"(yes/no)?"
{
send "yesn"
expect "*password: " { send "$passwordn" }
}
"*password: " { send "$passwordn" }
}
expect eof](https://image.slidesharecdn.com/ansible101-210630124739/75/Ansible-101-35-2048.jpg)


![Ansible.cfg 介紹(3)
42
# Json file basis cache
gathering = smart
fact_caching = jsonfile
fact_caching_connection = /tmp/facts
# hardtimeout
fact_caching_timeout = 600
## Redis basis cache
# gathering = smart
# fact_caching_timeout = 86400
# fact_caching = redis
# fact_caching_connection = 192.168.1.3:6379
## 若 redis 需要設定密碼
# fact_caching_connection = 192.168.1.3:6379:0:admin
[ssh_connection]
ssh_args = -o ControlMaster=auto -o ControlPersist=300s
control_path = %(directory)s/%%h-%%r
pipelining = True](https://image.slidesharecdn.com/ansible101-210630124739/75/Ansible-101-42-2048.jpg)

![Playbook
主要結構
44
Task: [module1, module2, module3]
Play: [task1, task2, task3]
Playbook: [play1, play2, play3]](https://image.slidesharecdn.com/ansible101-210630124739/75/Ansible-101-44-2048.jpg)


![Ansible playbook 內 play 的 hosts 語法
1. all 或 * -> 取 inventory 所有的主機
2. : -> 聯集 host1:host2:group1,不重複的主機。
3. :& -> 交集 group1:&group2 ,同時出現在兩個 group 的主機。
4. :! -> exclusive group1:!host1 排除 host1
5. wildcard -> ab*.qq.com
6. integer range -> ab[0-10].qq.com
7. alpha range -> ab[a-z].qq.com
8. regular expression -> ~abd.qq.com
48](https://image.slidesharecdn.com/ansible101-210630124739/75/Ansible-101-48-2048.jpg)


![Loop 在 playbook 的寫法 – with_nest
62
for item[0] in loop_test:
for item[1] in loop_nest:
print(item[0], item[1])
Python 語法
https://github.com/yichingwu/ansible-sharing/blob/master/playbook/loop/with_nest.yml](https://image.slidesharecdn.com/ansible101-210630124739/75/Ansible-101-62-2048.jpg)