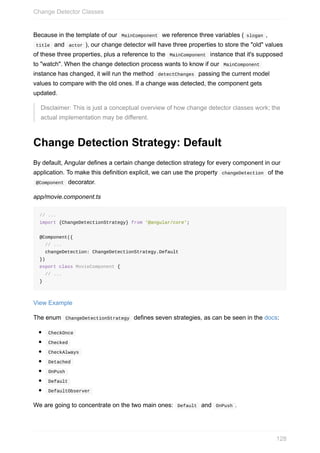
The document discusses why developers may choose Angular 2 over other front-end frameworks or Angular 1.x. Angular 2 improves on Angular 1.x by making the framework easier to learn and use, faster and more scalable through its modernized codebase written in TypeScript. Key advantages include Angular 2 simplifying concepts like components replacing controllers/directives, tighter integration with TypeScript for type safety and ES6/ES7 features, and addressing flaws revealed over five years of Angular 1.x usage.


![class Toppings {
constructor(toppings) {
this.toppings = Array.isArray(toppings) ? toppings : [];
}
outputList() {
this.toppings.forEach(function(topping, i) {
console.log(topping, i + '/' + this.toppings.length); // no this
})
}
}
var ctrl = new Toppings(['cheese', 'lettuce']);
ctrl.outputList();
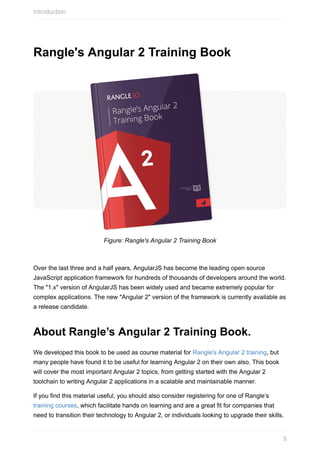
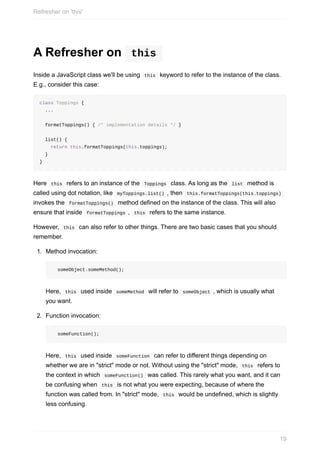
Let's try this code on ES6 Fiddle (http://www.es6fiddle.net/). As we see, this gives us an
error, since this is undefined inside the anonymous function.
Now, let's change the method to use the arrow function:
class Toppings {
constructor(toppings) {
this.toppings = Array.isArray(toppings) ? toppings : [];
}
outputList() {
this.toppings
.forEach((topping, i) => console
.log(topping, i + '/' + this.toppings.length); // `this` works!
)
}
}
var ctrl = new Toppings(['cheese', 'lettuce']);
Here this inside the arrow function refers to the instance variable.
Warning arrow functions do not have their own arguments variable, which can be confusing
to veteran JavaScript programmers. super , and new.target are also scoped from the
outer enclosure.
Arrow Functions
22](https://image.slidesharecdn.com/ngcourse2-160923035221/85/Angular-2-22-320.jpg)

![for(var x=0; x<5; x++) {
setTimeout(()=>console.log(x), 0)
}
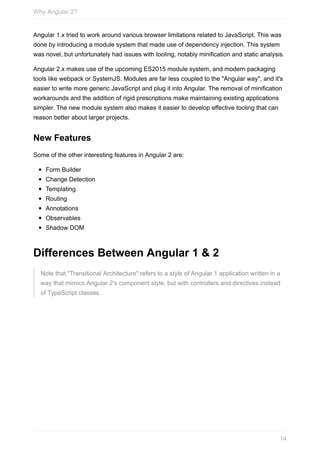
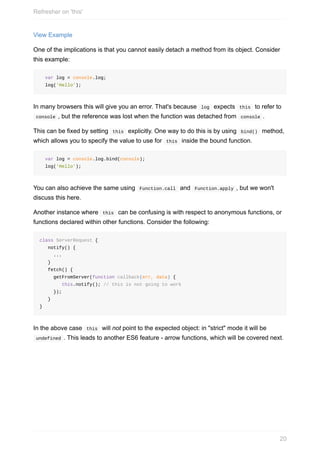
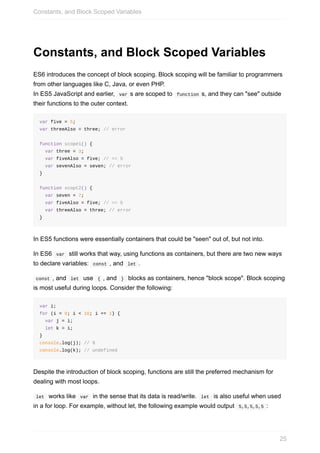
However, when using let instead of var , the value would be scoped in a way that people
would expect.
for(let x=0; x<5; x++) {
setTimeout(()=>console.log(x), 0)
}
Alternatively, const is read-only. Once const has been assigned, the identifier cannot be
reassigned; however the value itself is still mutable. For example:
const myName = 'pat';
let yourName = 'jo';
yourName = 'sam'; // assigns
myName = 'jan'; // error
The read-only nature can be demonstrated with any object:
const literal = {};
literal.attribute = 'test'; // fine
literal = []; // error;
Constants, and Block Scoped Variables
26](https://image.slidesharecdn.com/ngcourse2-160923035221/85/Angular-2-26-320.jpg)
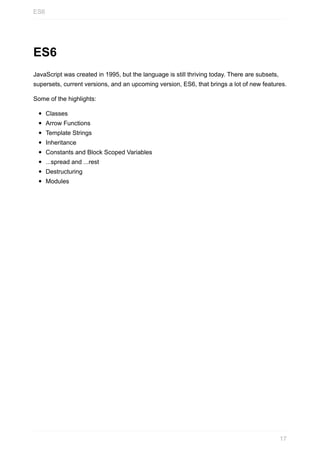
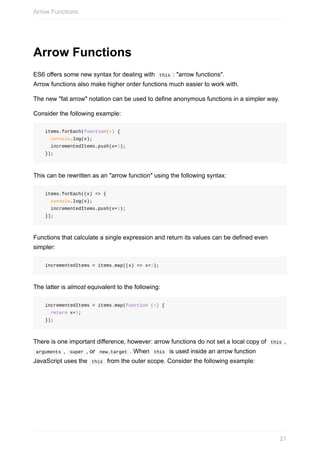
![...spread, and ...rest
Spread takes a collection of something, like [] s or {} s, and applies them to something
else that accepts , separated arguments, like function s, [] s, and {} s.
For example:
const add = (a, b) => a + b;
let args = [3, 5];
add(...args); // same as `add(args[0], args[1])`, or `add.apply(null, args)`
Functions aren't the only place in JavaScript that makes use of comma separated lists -
[] s can now be concatenated with ease:
let cde = ['c', 'd', 'e'];
let scale = ['a', 'b', ...cde, 'f', 'g']; // ['a', 'b', 'c', 'd', 'e', 'f', 'g']
Similarly, object literals can do the same thing:
let mapABC = { a: 5, b: 6, c: 3};
let mapABCD = { ...mapABC, d: 7}; // { a: 5, b: 6, c: 3, d: 7 }
...rest arguments share the ellipsis like syntax of rest operators but are used for a different
purpose. ...rest arguments are used to access a variable number of arguments passed to a
function. For example:
function addSimple(a, b) {
return a + b;
}
function add(...numbers) {
return numbers[0] + numbers[1];
}
addSimple(3, 2); // 5
add(3, 2); // 5
// or in es6 style:
const addEs6 = (...numbers) => numbers.reduce((p, c) => p + c, 0);
addEs6(1, 2, 3); // 6
...spread, and ...rest
27](https://image.slidesharecdn.com/ngcourse2-160923035221/85/Angular-2-27-320.jpg)
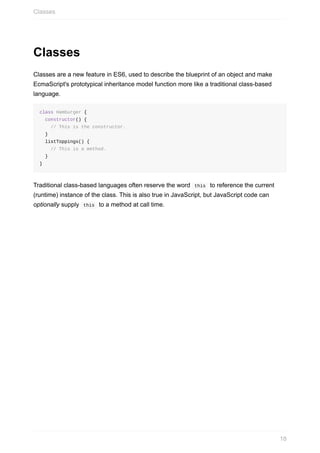
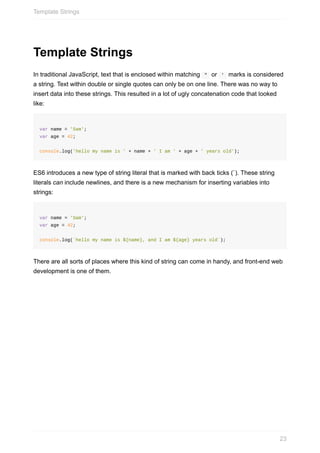
![Technically JavaScript already had an arguments variable set on each function (except for
arrow functions), however arguments has a lot of issues, one of which is the fact that it is
not technically an array.
...rest arguments are in fact arrays. The other important difference is that rest arguments
only include arguments not specifically named in a function like so:
function print(a, b, c, ...more) {
console.log(more[0]);
console.log(arguments[0]);
}
print(1, 2, 3, 4, 5);
// 4
// 1
...spread, and ...rest
28](https://image.slidesharecdn.com/ngcourse2-160923035221/85/Angular-2-28-320.jpg)
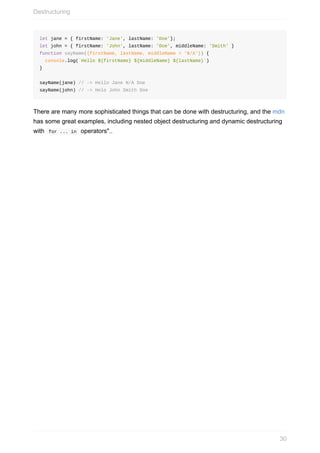
![Destructuring
Destructuring is a way to quickly extract data out of an {} or [] without having to write
much code.
To borrow from the MDN, destructuring can be used to turn the following:
let foo = ['one', 'two', 'three'];
let one = foo[0];
let two = foo[1];
let three = foo[2];
into
let foo = ['one', 'two', 'three'];
let [one, two, three] = foo;
console.log(one); // 'one'
This is pretty interesting, but at first it might be hard to see the use case. ES6 also supports
object destructuring, which might make uses more obvious:
let myModule = {
drawSquare: function drawSquare(length) { /* implementation */ },
drawCircle: function drawCircle(radius) { /* implementation */ },
drawText: function drawText(text) { /* implementation */ },
};
let {drawSquare, drawText} = myModule;
drawSquare(5);
drawText('hello');
Destructuring can also be used for passing objects into a function, allowing you to pull
specific properties out of an object in a concise manner. It is also possible to assign default
values to destructured arguments, which can be a useful pattern if passing in a configuration
object.
Destructuring
29](https://image.slidesharecdn.com/ngcourse2-160923035221/85/Angular-2-29-320.jpg)
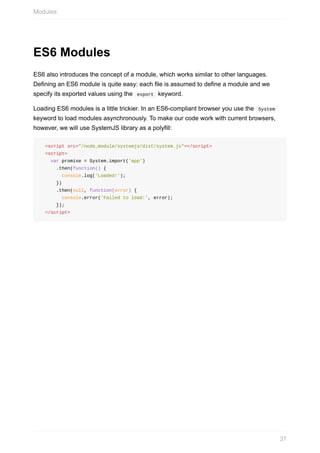
![Getting Started With TypeScript
Install the TypeScript transpiler using npm:
$ npm install -g typescript
Then use tsc to manually compile a TypeScript source file into ES5:
$ tsc test.ts
$ node test.js
Note About ES6 Examples
Our earlier ES6 class won't compile now. TypeScript is more demanding than ES6 and it
expects instance properties to be declared:
class Pizza {
toppings: string[];
constructor(toppings: string[]) {
this.toppings = toppings;
}
}
Note that now that we've declared toppings to be an array of strings, TypeScript will
enforce this. If we try to assign a number to it, we will get an error at compilation time.
If you want to have a property that can be set to a value of any type, however, you can still
do this: just declare its type to be "any":
class Pizza {
toppings: any;
//...
}
Getting Started With TypeScript
33](https://image.slidesharecdn.com/ngcourse2-160923035221/85/Angular-2-33-320.jpg)
![$ ls
a.js a.ts b.js b.ts
Excellent - there are now two JavaScript modules ready for consumption.
Telling the tsc command what to compile becomes tedious, and labour intensive even on
small projects. Fortunately TypeScript has a means of simplifying this. tsconfig.json files
let programmers write down all the compiler settings they want. When tsc is run, it looks
for tsconfig.json files, and uses their rules to compile JavaScript.
For Angular 2 projects there are a number of specific settings that need to be configured in a
project's tsconfig.json
{
"compilerOptions": {
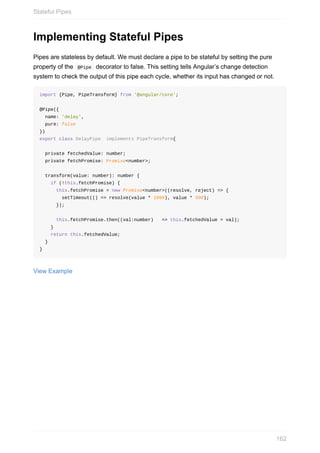
"module": "commonjs",
"target": "es5",
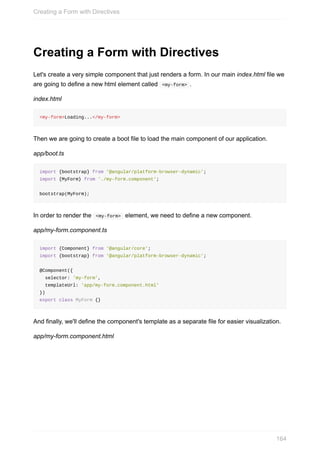
"emitDecoratorMetadata": true,
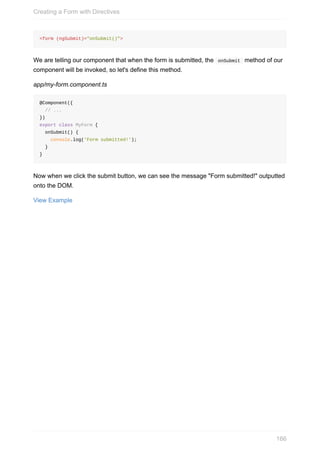
"experimentalDecorators": true,
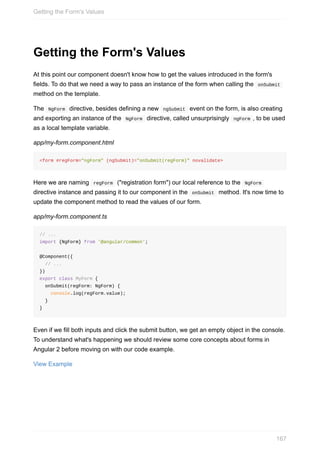
"noImplicitAny": false,
"removeComments": false,
"sourceMap": true
},
"exclude": [
"node_modules",
"dist/"
]
}
Target
The compilation target. Typescript supports targeting different platforms depending on your
needs. In our case, we're targeting modern browsers which support ES5.
Module
The target module resolution interface. We're integrating TypeScript through webpack which
supports different interfaces. We've decided to use node's module resolution interface,
commonjs .
Decorators
Working With tsc
35](https://image.slidesharecdn.com/ngcourse2-160923035221/85/Angular-2-35-320.jpg)
![Decorator support in TypeScript hasn't been finalized yet but since Angular 2 uses
decorators extensively, these need to be set to true. Decorators have not been introduced
yet, and will be covered later in this section.
TypeScript with Webpack
We won't be running tsc manually, however. Instead, webpack's ts-loader will do the
transpilation during the build:
// webpack.config.js
//...
loaders: [
{ test: /.ts$/, loader: 'ts', exclude: /node_modules/ },
//...
]
This loader calls tsc for us, and it will use our tsconfig.json .
Working With tsc
36](https://image.slidesharecdn.com/ngcourse2-160923035221/85/Angular-2-36-320.jpg)

![Linting
Many editors support the concept of "linting" - a grammar check for computer programs.
Linting can be done in a programmer's editor and/or through automation.
For TypeScript there is a package called tslint , ( npm install --save-dev tslint ) which
can be plugged into many editors. tslint can also be configured with a tslint.json file.
Webpack can run tslint before it attempts to run tsc . This is done by installing tslint-
loader ( npm install --save-dev tslint-loader ) which plugs into webpack like so:
// ...
module: {
preLoaders: [
{ test: /.ts$/, loader: 'tslint' }
],
loaders: [
{ test: /.ts$/, loader: 'ts', exclude: /node_modules/ },
// ...
]
// ...
}
Linting
38](https://image.slidesharecdn.com/ngcourse2-160923035221/85/Angular-2-38-320.jpg)
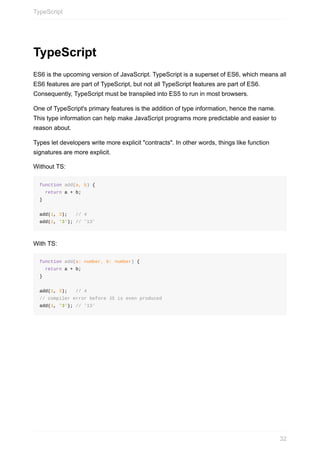
![TypeScript Features
Now that producing JavaScript from TypeScript code has been de-mystified, some of its
features can be described and experimented with.
Types
Interfaces
Shapes
Decorators
Types
Many people do not realize it, but JavaScript does in fact have types, they're just "duck
typed", which roughly means that the programmer does not have to think about them.
JavaScript's types also exist in TypeScript:
boolean (true/false)
number integers, floats, Infinity , and NaN
string characters, and strings of characters
[] Arrays of other types, like number[] or boolean[]
{} Object literal
undefined not set
TypeScript also adds
enum enumerations like { Red, Blue, Green }
any use any type
void nothing
Primitive type example:
TypeScript Features
39](https://image.slidesharecdn.com/ngcourse2-160923035221/85/Angular-2-39-320.jpg)
![let isDone: boolean = false;
let height: number = 6;
let name: string = "bob";
let list: number[] = [1, 2, 3];
let list: Array<number> = [1, 2, 3];
enum Color {Red, Green, Blue};
let c: Color = Color.Green;
let notSure: any = 4;
notSure = "maybe a string instead";
notSure = false; // okay, definitely a boolean
function showMessage(data: string): void {
alert(data);
}
showMessage('hello');
This illustrates the primitive types in TypeScript, and ends by illustrating a showMessage
function. In this function the parameters have specific types that are checked when tsc is
run.
In many JavaScript functions it's quite common for functions to take optional parameters.
TypeScript provides support for this, like so:
function logMessage(message: string, isDebug?: boolean) {
if (isDebug) {
console.log('Debug: ' + message);
} else {
console.log(message);
}
}
logMessage('hi'); // 'hi'
logMessage('test', true); // 'Debug: test'
Using a ? lets tsc know that isDebug is an optional parameter. tsc will not complain if
isDebug is omitted.
TypeScript Features
40](https://image.slidesharecdn.com/ngcourse2-160923035221/85/Angular-2-40-320.jpg)

![Interfaces
Sometimes classes are "more" than a programmer wants. Classes end up creating code, in
the form of transpiled ES6 classes or transpiled ES5 constructor functions.
Also, JavaScript is a subset of TypeScript, and in JavaScript functions are "first class" (they
can be assigned to variables and passed around), so how can functions be described in
TypeScript?
TypeScript's interfaces solve both of these problems. Interfaces are abstract descriptions of
things, and can be used to represent any non-primitive JavaScript object. They produce no
code (ES6 or ES5), and exist only to describe types to tsc .
Here is an example of an interface describing a function:
interface Callback {
(error: Error, data: any): void;
}
function callServer(callback: Callback) {
callback(null, 'hi');
}
callServer((error, data) => console.log(data)); // 'hi'
callServer('hi'); // tsc error
Sometimes JavaScript functions are "overloaded" - that is, they can have different call
signatures. Interfaces can be used to specify this. (Methods in classes can also be
overloaded):
interface PrintOutput {
(message: string): void; // common case
(message: string[]): void; // less common case
}
let printOut: PrintOutput = (message) => {
if (Array.isArray(message)) {
console.log(message.join(', '));
} else {
console.log(message);
}
}
printOut('hello'); // 'hello'
printOut(['hi', 'bye']); // 'hi, bye'
Interfaces
42](https://image.slidesharecdn.com/ngcourse2-160923035221/85/Angular-2-42-320.jpg)

![Type Inference
One common misconception about TypeScript's types are that code needs to explicitly
describe types at every possible opportunity. Fortunately this is not the case. TypeScript has
a rich type inference system that will "fill in the blanks" for the programmer. Consider the
following:
type-inference-finds-error.ts
let numbers = [2, 3, 5, 7, 11];
numbers = ['this will fail compilation']
tsc ./type-inference-finds-error.ts
type-inference-finds-error.ts(2,1): error TS2322: Type 'string[]' is not assignable to
type 'number[]'.
Type 'string' is not assignable to type 'number'.
The code contains no extra type information. In fact, it's valid ES6.
If var had been used, it would be valid ES5. Yet TypeScript is still able to determine type
information.
Type inference can also work through context, which is handy with callbacks. Consider the
following:
type-inference-finds-error-2.ts
interface FakeEvent {
type: string;
}
interface FakeEventHandler {
(e: FakeEvent):void;
}
class FakeWindow {
onMouseDown: FakeEventHandler
}
const fakeWindow = new FakeWindow();
fakeWindow.onMouseDown = (a: number) => {
// this will fail
};
Type Inference
45](https://image.slidesharecdn.com/ngcourse2-160923035221/85/Angular-2-45-320.jpg)


![Bootstrapping Providers
Calling bootstrap also starts the dependency injection system in Angular 2. We won't go
over Angular 2's dependency injection system here - that is covered later. Instead let's take
a look at an example of how to bootstrap your application with application-wide providers.
import {bootstrap} from '@angular/platform-browser-dynamic'
import {MyProvider} from './myprovider'
import {App} from './app.component'
bootstrap(MyApp, [MyProvider]);
View Example
We import our root Component, App , bootstrap , and a custom provider, MyProvider .
When we bootstrap our root component we can pass in application-wide providers that will
be injected to any component that wants to use them.
Bootstrapping Providers
63](https://image.slidesharecdn.com/ngcourse2-160923035221/85/Angular-2-63-320.jpg)
![Using Router Providers
In order to set up Angular 2's routing service, we must inject certain routing providers.
Routing is a large topic that needs its own section, but let's take a look at a simple example
of how to get started with Angular 2's routes using bootstrap .
import {bootstrap} from '@angular/platform-browser-dynamic'
import {ROUTER_PROVIDERS} from '@angular/router-deprecated'
import {LocationStrategy, HashLocationStrategy} from '@angular/common'
import {provide} from '@angular/core'
import {App} from './app.component'
bootstrap(App, [ROUTER_PROVIDERS, provide(LocationStrategy, {useClass: HashLocationStr
ategy})]);
View Example
Here we have imported ROUTER_PROVIDERS as an application-wide provider that can be
configured in our root component. Since we have injected ROUTER_PROVIDERS as an
application-wide provider, we can also employ useful router directives in any component we
want, thus allowing us to interact with the router at any point in our application.
Using Router Providers
64](https://image.slidesharecdn.com/ngcourse2-160923035221/85/Angular-2-64-320.jpg)

![Passing Data into a Component
The inputs attribute defines a set of parameters that can be passed down from the
component's parent. For example, we can modify the Hello component so that name can
be configured by the parent.
import {Component} from '@angular/core';
@Component({
selector: 'hello',
inputs: ['name'],
template: '<p>Hello, {{name}}</p>'
})
export class Hello {
name: string;
}
The point of making components is not only encapsulation, but also reusability. Inputs allow
us to configure a particular instance of a component.
We can now use our component like so:
<!-- To bind to a raw string -->
<hello name="World"></hello>
<!-- To bind to a variable in the parent scope -->
<hello [name]="name"></hello>
View Example
Unlike Angular 1.x, this is one-way binding.
Passing Data into a Component
69](https://image.slidesharecdn.com/ngcourse2-160923035221/85/Angular-2-69-320.jpg)
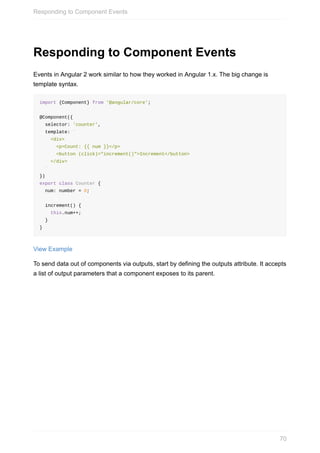
![import {Component, EventEmitter} from '@angular/core';
@Component({
selector: 'counter',
inputs: ['count'],
outputs: ['result'],
template: `
<div>
<p>Count: {{ count }}</p>
<button (click)="increment()">Increment</button>
</div>
`
})
export default class Counter {
count: number = 0;
result: EventEmitter<number> = new EventEmitter<number>();
increment() {
this.count++;
this.result.emit(this.count);
}
}
View Example
Together a set of input + output bindings define the public API of your component. In our
templates we use the [squareBrackets] to pass inputs and the (parenthesis) handle outputs.
Responding to Component Events
71](https://image.slidesharecdn.com/ngcourse2-160923035221/85/Angular-2-71-320.jpg)
![Two-Way Data Binding
Two-way data binding combines the input and output binding into a single notation using the
ngModel directive.
<input [(ngModel)]="name" >
What this is doing behind the scenes is equivalent to:
<input [ngModel]="name" (ngModelChange)="name=$event">
To create your own component that supports two-way binding, you must define an @Output
property to match an @Input , but suffix it with the Change , for example:
@Component({/*....*/})
export default class Counter {
@Input() count: number = 0;
@Output() countChange: EventEmitter<number> = new EventEmitter<number>();
increment() {
this.count++;
this.countChange.emit(this.count);
}
}
@Component({
template:'<counter [(count)]="myNumber"></counter>'
directives:[Counter]
})
class SomeComponent {
// ...
}
View Example
Two-Way Data Binding
72](https://image.slidesharecdn.com/ngcourse2-160923035221/85/Angular-2-72-320.jpg)
![Structural Directives
Angular's structural directives change the DOM layout by adding and removing DOM
elements. For example:
<div *ngIf="hero">{{ hero }}</div>
<div *ngFor="let hero of heroes">{{ hero }}</div>
<div [ngSwitch]="status">
<template [ngSwitchWhen]="'in-mission'">In Mission</template>
<template [ngSwitchWhen]="'ready'">Ready</template>
<template ngSwitchDefault>Unknown</template>
</div>
Structural Directives
73](https://image.slidesharecdn.com/ngcourse2-160923035221/85/Angular-2-73-320.jpg)
![The Asterisk (*) Syntax
The asterisk is syntactic sugar to make writing templates easier. Here is an example that
uses the verbose <template> syntax:
<template [ngIf]="condition">
<div>{{ hero }}</div>
</template>
Which can be simplified using the * syntax:
<div *ngIf="hero">{{ hero }}</div>
For more information see: angular.io/guide/template-syntax/star-template
The Asterisk (*) Syntax
74](https://image.slidesharecdn.com/ngcourse2-160923035221/85/Angular-2-74-320.jpg)
![Iteration with ngFor
When we have a list of items, we can use the ngFor directive within our component's
template to create identical DOM elements for each item. It can be used several ways, such
as:
<li *ngFor="let item of items; let i = index">...</li>
<li template="ngFor let item of items; let i = index">...</li>
<template ngFor let-item [ngForOf]="items" let-i="index"><li>...</li></template>
View Example
Iteration with ngFor
75](https://image.slidesharecdn.com/ngcourse2-160923035221/85/Angular-2-75-320.jpg)


![Accessing Other Components
Components depend on other components. For example, TodoList relies on TodoItem . To
let a component know about the dependent components we use the directive attribute.
import {Component} from '@angular/core';
import {TodoInput} from './components/todo-input';
import {TodoList} from './components/todo-list';
@Component({
selector: 'todo-app',
directives: [TodoInput, TodoList],
template: `...`
})
export class TodoApp {}
The same idea applies to pipes .
Accessing Other Components
81](https://image.slidesharecdn.com/ngcourse2-160923035221/85/Angular-2-81-320.jpg)
![View Encapsulation
View encapsulation defines whether the template and styles defined within the component
can affect the whole application or vice versa. Angular provides three encapsulation
strategies:
Emulated (default) - styles from main HTML propagate to the component. Styles
defined in this component's @Component decorator are scoped to this component only.
Native - styles from main HTML do not propagate to the child. Styles defined in this
component's @Component decorator are scoped to this component only.
None - styles from the component propagate back to the main HTML and therefore are
visible to all components on the page.
@Component({
...
encapsulation: ViewEncapsulation.None,
styles: [ ... ]
})
export class Hello { ... }
View Example
View Encapsulation
82](https://image.slidesharecdn.com/ngcourse2-160923035221/85/Angular-2-82-320.jpg)

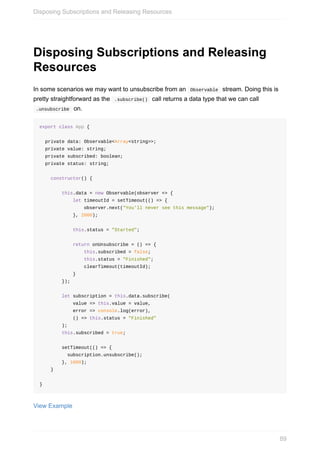
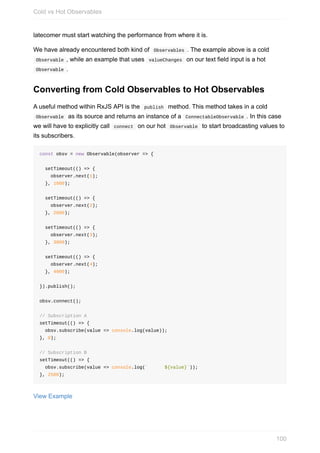
![Using Observables
Let's take a look at a basic example of how to create and use an Observable in an Angular
2 component:
import {Component} from '@angular/core';
import {Observable} from 'rxjs/Observable';
@Component({
selector: 'app',
template: `
<b>Angular 2 Component Using Observables!</b>
<div>Values: {{values.toString()}}</div>
<div>Errors? {{anyErrors}}</div>
<div>Finished? {{finished}}</div>
`
})
export class App {
private data: Observable<Array<number>>;
private values: Array<number> = [];
private anyErrors: boolean;
private finished: boolean;
constructor() {
this.data = new Observable(observer => {
setTimeout(() => {
observer.next(42);
}, 1000);
setTimeout(() => {
observer.next(43);
}, 2000);
setTimeout(() => {
observer.complete();
}, 3000);
});
let subscription = this.data.subscribe(
value => this.values.push(value),
error => this.anyErrors = true,
() => this.finished = true
);
}
}
Using Observables
85](https://image.slidesharecdn.com/ngcourse2-160923035221/85/Angular-2-85-320.jpg)
![export class App {
private data: Observable<Array<number>>;
private values: Array<number> = [];
private anyErrors: boolean;
private finished: boolean;
constructor() {
this.data = new Observable(observer => {
setTimeout(() => {
observer.next(42);
}, 1000);
setTimeout(() => {
observer.next(43);
}, 2000);
setTimeout(() => {
observer.complete();
}, 3000);
this.status = "Started";
});
let subscription = this.data.forEach(v => this.values.push(v))
.then(() => this.status = "Ended");
}
}
View Example
Using Observables
87](https://image.slidesharecdn.com/ngcourse2-160923035221/85/Angular-2-87-320.jpg)
![Error Handling
If something unexpected arises we can raise an error on the Observable stream and use
the function reserved for handling errors in our subscribe routine to see what happened.
export class App {
private data: Observable<Array<number>>;
private values: Array<number> = [];
private anyErrors: error;
constructor() {
this.data = new Observable(observer => {
setTimeout(() => {
observer.next(10);
}, 1500);
setTimeout(() => {
observer.error(new Error('Something bad happened!'));
}, 2000);
setTimeout(() => {
observer.next(50);
}, 2500);
});
let subscription = this.data.subscribe(
value => this.values.push(value),
error => this.anyErrors = error
);
}
}
View Example
Here an error is raised and caught. One thing to note is that if we included a .complete()
after we raised the error, this event will not actually fire. Therefore you should remember to
include some call in your error handler that will turn off any visual loading states in your
application.
Error Handling
88](https://image.slidesharecdn.com/ngcourse2-160923035221/85/Angular-2-88-320.jpg)


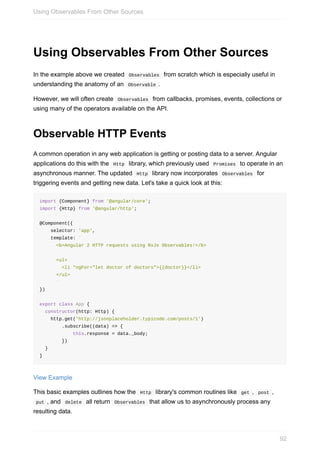
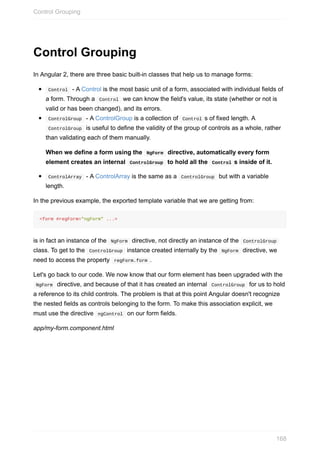
![Observable Form Events
Let's take a look at how Observables are used in Angular 2 forms. Each field in a form is
treated as an Observable that we can subscribe to and listen for any changes made to the
value of the input field.
import {Component} from '@angular/core';
import {Control, ControlGroup, FormBuilder} from '@angular/common';
@Component({
selector: 'app',
template: `
<form [ngFormModel]="coolForm"><input ngControl="email"></form>
<div><b>You Typed:</b> {{data}}</div>
`
})
export class App {
email: Control;
coolForm: ControlGroup;
data: string;
constructor(private fb: FormBuilder) {
this.email = new Control();
this.coolForm = fb.group({
email: this.email
});
this.email.valueChanges
.subscribe(value => this.data = value);
}
}
View Example
Here we have created a new form by initializing a new Control field and grouped it into a
ControlGroup tied to the coolForm HTML form. The Control field has a property
.valueChanges that returns an Observable that we can subscribe to. Now whenever a user
types something into the field we'll get it immediately.
Using Observables From Other Sources
93](https://image.slidesharecdn.com/ngcourse2-160923035221/85/Angular-2-93-320.jpg)
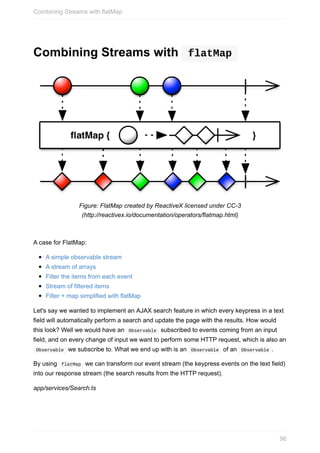
![Observables Array Operations
In addition to simply iterating over an asynchronous collection, we can perform other
operations such as filter or map and many more as defined in the RxJS API. This is what
bridges an Observable with the iterable pattern, and lets us conceptualize them as
collections.
Let's expand our example and do something a little more with our stream:
export class App {
private doctors = [];
constructor(http: Http) {
http.get('http://jsonplaceholder.typicode.com/users/')
.flatMap((data) => data.json())
.filter((person) => person.id > 5)
.map((person) => "Dr. " + person.name)
.subscribe((data) => {
this.doctors.push(data);
});
}
}
View Example
Here are two really useful array operations - map and filter . What exactly do these do?
map will create a new array with the results of calling a provided function on every
element in this array. In this example we used it to create a new result set by iterating
through each item and appending the "Dr." abbreviation in front of every user's name.
Now every object in our array has "Dr." prepended to the value of its name property.
filter will create a new array with all elements that pass the test implemented by a
provided function. Here we have used it to create a new result set by excluding any user
whose id property is less than 6.
Now when our subscribe callback gets invoked, the data it receives will be a list of JSON
objects whose id properties are greater than or equal to 5 and whose name properties
have been prepended with Dr. .
Note the chaining function style, and the optional static typing that comes with TypeScript,
that we used in this example. Most importantly functions like filter return an Observable ,
as in Observables beget other Observables , similarly to promises. In order to use map and
filter in a chaining sequence we have flattened the results of our Observable using
Observables Array Operations
94](https://image.slidesharecdn.com/ngcourse2-160923035221/85/Angular-2-94-320.jpg)


![import {Component} from '@angular/core';
import {Control, ControlGroup, FormBuilder} from '@angular/common';
import {SearchService} from './services/Search';
import 'rxjs/Rx';
@Component({
selector: 'app',
template: `
<form [ngFormModel]="coolForm"><input ngControl="search" placeholder="Search S
potify artist"></form>
<div *ngFor="let artist of result">
{{artist.name}}
</div>
`
})
export class App {
searchField: Control;
coolForm: ControlGroup;
constructor(private searchService: SearchService, private fb: FormBuilder) {
this.searchField = new Control();
this.coolForm = fb.group({search: this.searchField});
this.searchField.valueChanges
.debounceTime(400)
.flatMap(term => this.searchService.search(term))
.subscribe((result) => {
this.result = result.artists.items
});
}
}
View Example
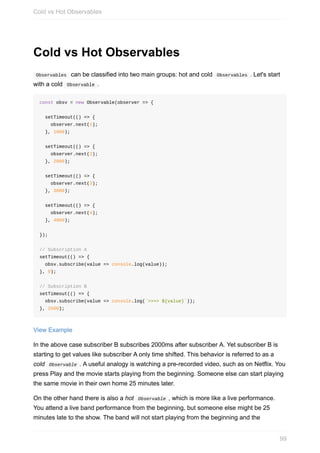
Here we have set up a basic form with a single field, searchField , which we subscribe to for
event changes. We've also set up a simple binding for any results coming from the
SearchService. The real magic here is flatMap which allows us to flatten our two separate
subscribed Observables into a single cohesive stream we can use to control events coming
from user input and from server responses.
Note that flatMap flattens a stream of Observables (i.e Observable of Observables ) to a
stream of emitted values (a simple Observable ), by emitting on the "trunk" stream
everything that will be emitted on "branch" streams.
Combining Streams with flatMap
98](https://image.slidesharecdn.com/ngcourse2-160923035221/85/Angular-2-98-320.jpg)

![Summary
Observables offer a flexible set of APIs for composing and transforming asynchronous
streams. They provide a multitude of functions to create stream from many other types, and
to manipulate and transform them. We've taken a look at how Angular 2 uses Observables
to create stream[s] from many other types to read user input, perform asynchronous data
fetches, and set up custom emit/subscribe routines.
rxjs 4 to 5 migration
rxjs Observable API
Which operator do I use?
rxmarbles
RxJS Operators by Example
Summary
102](https://image.slidesharecdn.com/ngcourse2-160923035221/85/Angular-2-102-320.jpg)

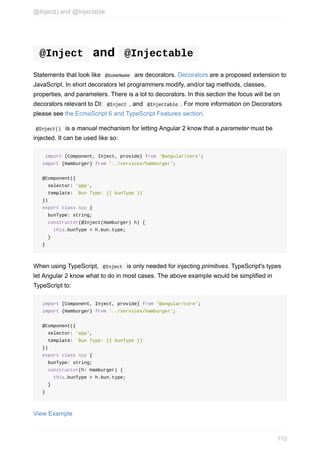
![What is DI?
So dependency injection makes programmers' lives easier, but what does it really do?
Consider the following code:
class Hamburger {
private bun: Bun;
private patty: Patty;
private toppings: Toppings;
constructor() {
this.bun = new Bun('withSesameSeeds');
this.patty = new Patty('beef');
this.toppings = new Toppings(['lettuce', 'pickle', 'tomato']);
}
}
The above code is a contrived class that represents a hamburger. The class assumes a
Hamburger consists of a Bun , Patty , and Toppings . The class is also responsible for
making the Bun , Patty , and Toppings . This is a bad thing. What if a vegetarian burger
were needed? One naive approach might be:
class VeggieHamburger {
private bun: Bun;
private patty: Patty;
private toppings: Toppings;
constructor() {
this.bun = new Bun('withSesameSeeds');
this.patty = new Patty('tofu');
this.toppings = new Toppings(['lettuce', 'pickle', 'tomato']);
}
}
There, problem solved right? But what if we need a gluten free hamburger? What if we want
different toppings... maybe something more generic like:
What is DI?
104](https://image.slidesharecdn.com/ngcourse2-160923035221/85/Angular-2-104-320.jpg)
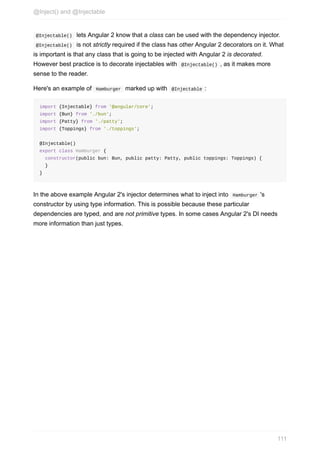
![class Hamburger {
private bun: Bun;
private patty: Patty;
private toppings: Toppings;
constructor(bunType: string, pattyType: string, toppings: string[]) {
this.bun = new Bun(bunType);
this.patty = new Patty(pattyType);
this.toppings = new Toppings(toppings);
}
}
Okay this is a little different, and it's more flexible in some ways, but it is still quite brittle.
What would happen if the Patty constructor changed to allow for new features? The whole
Hamburger class would have to be updated. In fact, any time any of these constructors used
in Hamburger 's constructor are changed, Hamburger would also have to be changed.
Also, what happens during testing? How can Bun , Patty , and Toppings be effectively
mocked?
Taking those concerns into consideration, the class could be rewritten as:
class Hamburger {
private bun: Bun;
private patty: Patty;
private toppings: Toppings;
constructor(bun: Bun, patty: Patty, toppings: Toppings) {
this.bun = bun;
this.patty = patty;
this.toppings = toppings;
}
}
Now when Hamburger is instantiated it does not need to know anything about its Bun ,
Patty , or Toppings . The construction of these elements has been moved out of the class.
This pattern is so common that TypeScript allows it to be written in shorthand like so:
class Hamburger {
constructor(private bun: Bun, private patty: Patty,
private toppings: Toppings) {}
}
The Hamburger class is now simpler, and easier to test. This model of having the
dependencies provided to Hamburger is basic dependency injection.
However there is still a problem. How can the instantiation of Bun , Patty , and Toppings
best be managed?
What is DI?
105](https://image.slidesharecdn.com/ngcourse2-160923035221/85/Angular-2-105-320.jpg)

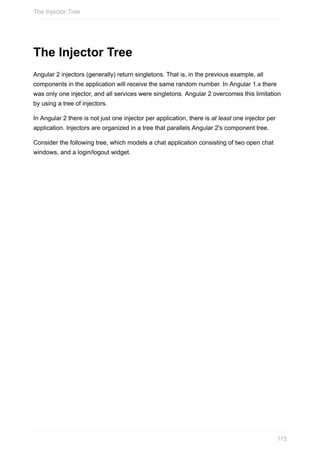
![DI Framework
So there's a fancy new Hamburger class that is easy to test, but it's currently awkward to
work with. Instantiating a Hamburger requires:
const hamburger = new Hamburger(new Bun(), new Patty('beef'), new Toppings([]));
That's a lot of work to create a Hamburger , and now all the different pieces of code that
make Hamburger s have to understand how Bun , Patty , and Toppings get instantiated.
One approach to dealing with this new problem might be to make a factory function like so:
function makeHamburger() {
const bun = new Bun();
const patty = new Patty('beef');
const toppings = new Toppings(['lettuce', 'tomato', 'pickles']);
return new Hamburger(bun, patty, toppings);
}
This is an improvement, but when more complex Hamburger s need to be created this factory
will become confusing. The factory is also responsible for knowing how to create four
different components. This is a lot for one function.
This is where a dependency injection framework can help. DI Frameworks have the concept
of an Injector object. An Injector is a lot like the factory function above, but more general,
and powerful. Instead of one giant factory function, an Injector has a factory, or recipe (pun
intended) for a collection of objects. With an Injector , creating a Hamburger could be as
easy as:
const injector = new Injector([Hamburger, Bun, Patty, Toppings]);
const burger = injector.get(Hamburger);
DI Framework
107](https://image.slidesharecdn.com/ngcourse2-160923035221/85/Angular-2-107-320.jpg)
![Angular 2's DI
The last example introduced a hypothetical Injector object. Angular 2 simplifies DI even
further. With Angular 2, programmers almost never have to get bogged down with injection
details.
Angular 2's DI system is very subtle. It's not obvious, but calling Angular 2's bootstrap
function initializes Angular 2's injection framework.
For example:
import {bootstrap} from '@angular/platform-browser-dynamic';
import {App} from './path/to/your/root/component';
bootstrap(App)
Believe it or not, the above example creates the root injector. This example is too primitive
though; the injector is not told about anything.
import {bootstrap} from '@angular/platform-browser-dynamic';
import {Injectable} from '@angular/core';
import {App} from './path/to/your/root/component';
@Injectable()
class Hamburger {
constructor(private bun: Bun, private patty: Patty,
private toppings: Toppings) {}
}
bootstrap(App, [Hamburger]);
In the above example the root injector is initialized, and told about the Hamburger class.
Another way of saying this is that Angular 2 has been provided a Hamburger .
That seems pretty straightforward, but astute readers will be wondering how Angular 2
knows how to build Hamburger . What if Hamburger was a string, or a plain function?
Angular 2 assumes that it's being given a class.
What about Bun , Patty , and Toppings ? How is Hamburger getting those?
It's not, at least not yet. Angular 2 does not know about them yet. That can be changed
easily enough:
Angular 2's DI
108](https://image.slidesharecdn.com/ngcourse2-160923035221/85/Angular-2-108-320.jpg)
![import {bootstrap} from '@angular/platform-browser-dynamic';
import {Injectable} from '@angular/core';
import {App} from './path/to/your/root/component';
@Injectable()
class Hamburger {
constructor(private bun: Bun, private patty: Patty,
private toppings: Toppings) {}
}
@Injectable()
class Patty {}
@Injectable()
class Bun {}
@Injectable()
class Toppings {}
// provide injectables to Angular 2
bootstrap(App, [Hamburger, Patty, Bun, Toppings]);
Okay, this is starting to look a little bit more complete. The key takeaway here is
bootstrap(App, [Hamburger, Patty, Bun, Toppings]) . The second parameter is an array of
providers .
Although it's still unclear how Hamburger is being told about its dependencies. Perhaps that
is related to those odd @Injectable statements.
Angular 2's DI
109](https://image.slidesharecdn.com/ngcourse2-160923035221/85/Angular-2-109-320.jpg)
![Injection Beyond Classes
So far the only types that injection has been used for have been classes, but
Angular 2 is not limited to injecting classes. The concept of providers was also briefly
touched upon.
So far providers have been passed to Angular 2's bootstrap function in an array.
providers have also all been class identifiers. Angular 2 lets programmers specify
providers with a more verbose "recipe". This is done with Angular 2's provide function, like
so:
import {App} from './containers/app'; // hypothetical app component
import {Hamburger} from './services/hamburger';
import {bootstrap} from '@angular/platform-browser-dynamic';
import {provide} from '@angular/core';
bootstrap(App, [provide(Hamburger, { useClass: Hamburger })]);
This example is yet another example that provide s a class, but it does so with Angular 2's
longer format. The second parameter to the provide function lets programmers "use"
things other than classes for dependency injection.
This long format is really handy. If the programmer wanted to switch out Hamburger
implementations, for example to allow for a DoubleHamburger , they could do this easily:
import {App} from './containers/app'; // hypothetical app component
import {Hamburger} from './services/hamburger';
import {DoubleHamburger} from './services/double-hamburger';
import {bootstrap} from '@angular/platform-browser-dynamic';
import {provide} from '@angular/core';
bootstrap(App, [provide(Hamburger, { useClass: DoubleHamburger })]);
The best part of this implementation swap is that the injection system knows how to build
DoubleHamburgers , and will sort all of that out.
The injector can use more than classes though. useValue , and useFactory are two other
examples of provider "recipes" that Angular 2 can use. For example:
Injection Beyond Classes
112](https://image.slidesharecdn.com/ngcourse2-160923035221/85/Angular-2-112-320.jpg)
![import {App} from './containers/app'; // hypothetical app component
import {bootstrap} from '@angular/platform-browser-dynamic';
import {provide} from '@angular/core';
const randomFactory = () => { return Math.random(); };
const randomDefinition = { useFactory: randomFactory };
bootstrap(App, [provide('Random', randomDefinition)]);
In the hypothetical app component, 'Random' could be injected like:
import {Component, Inject, provide} from '@angular/core';
import {Hamburger} from '../services/hamburger';
@Component({
selector: 'app',
template: `Random: {{ value }}`
})
export class App {
value: number;
constructor(@Inject('Random') r) {
this.value = r;
}
}
View Example
One important note is that 'Random' is in quotes, both in the provide function, and in the
consumer. This is because as a factory we have no Random identifier anywhere to access.
The above example uses Angular 2's useFactory recipe. When Angular 2 is told to
provide things using useFactory , Angular 2 expects the provided value to be a function.
Sometimes functions and classes are even more than what's needed. Angular 2 has a
"recipe" called useValue for these cases that works almost exactly the same:
import {bootstrap} from '@angular/platform-browser-dynamic';
import {provide} from '@angular/core';
import {App} from './containers/app';
const randomDefinition = { useValue: Math.random() };
bootstrap(App, [provide('Random', randomDefinition)]);
View Example
In this case, the product of Math.random is assigned to the useValue property passed to the
provider .
Injection Beyond Classes
113](https://image.slidesharecdn.com/ngcourse2-160923035221/85/Angular-2-113-320.jpg)

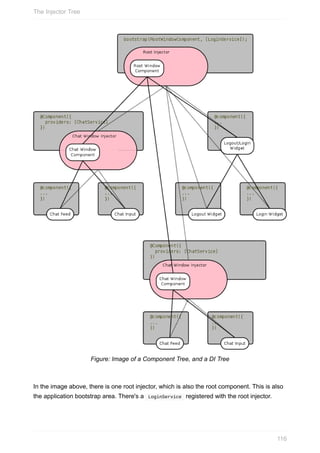
![There are also two child injectors, one for each ChatWindow component. Each of these
components has their own instantiation of a ChatService .
There is a third child component, Logout/Login , but it has no injector.
There are several grandchild components that have no injectors. There are ChatFeed and
ChatInput components for each ChatWindow . There are also LoginWidget and
LogoutWidget components with Logout/Login as their parent.
The injector tree does not make a new injector for every component, but does make a new
injector for every component with a providers array in its decorator.
Components that have no providers array look to their parent component for an injector. If
the parent does not have an injector, it looks up until it reaches the root injector.
Warning: Be careful with provider arrays. If a child component is decorated with a
providers array that contains dependencies that were also requested in the parent
component(s), the dependencies the child receives will shadow the parent dependencies.
This can have all sorts of unintended consequences.
Consider the following example:
app/boot.ts
import {bootstrap} from '@angular/platform-browser-dynamic';
import {provide} from '@angular/core';
import {App} from './containers/app';
import {Unique} from './services/unique';
bootstrap(App, [Unique]);
In the example above, Unique is bootstrapped into the root injector.
app/services/unique.ts
import {Injectable} from '@angular/core';
@Injectable()
export class Unique {
value: string;
constructor() {
this.value = (+Date.now()).toString(16) + '.' +
Math.floor(Math.random() * 500);
}
}
The Unique service generates a value unique to its instance upon instantiation.
The Injector Tree
117](https://image.slidesharecdn.com/ngcourse2-160923035221/85/Angular-2-117-320.jpg)
![app/components/child-inheritor.component.ts
import {Component, Inject} from '@angular/core';
import {Unique} from '../services/unique';
@Component({
selector: 'child-inheritor',
template: `<span>{{ value }}</span>`
})
export class ChildInheritor {
value: number;
constructor(u: Unique) {
this.value = u.value;
}
}
The child inheritor has no injector. It will traverse the component tree upwards looking for an
injector.
app/components/child-own-injector.component.ts
import {Component, Inject} from '@angular/core';
import {Unique} from '../services/unique';
@Component({
selector: 'child-own-injector',
template: `<span>{{ value }}</span>`,
providers: [Unique]
})
export class ChildOwnInjector {
value: number;
constructor(u: Unique) {
this.value = u.value;
}
}
The child own injector component has an injector that is populated with its own instance of
Unique . This component will not share the same value as the root injector's Unique
instance.
app/containers/app.ts
The Injector Tree
118](https://image.slidesharecdn.com/ngcourse2-160923035221/85/Angular-2-118-320.jpg)
![import {Component, Inject, provide} from '@angular/core';
import {Hamburger} from '../services/hamburger';
import {ChildInheritor} from '../components/child-inheritor';
import {ChildOwnInjector} from '../components/child-own-injector';
import {Unique} from '../services/unique';
@Component({
selector: 'app',
template: `
<p>
App's Unique dependency has a value of {{ value }}
</p>
<p>
which should match
</p>
<p>
ChildInheritor's value: <child-inheritor></child-inheritor>
</p>
<p>
However,
</p>
<p>
ChildOwnInjector should have its own value: <child-own-injector></child-own-injec
tor>
<p>
ChildOwnInjector's other instance should also have its own value <child-own-injec
tor></child-own-injector>
</p>
`,
directives: [ChildInheritor, ChildOwnInjector]
})
export class App {
value: number;
constructor(u: Unique) {
this.value = u.value;
}
}
View Example
The Injector Tree
119](https://image.slidesharecdn.com/ngcourse2-160923035221/85/Angular-2-119-320.jpg)


![import {Component} from '@angular/core';
import {MovieComponent} from './movie.component';
import {Actor} from './actor.model';
@Component({
selector: 'main',
directives: [MovieComponent],
template: `
<h1>MovieApp</h1>
<p>{{ slogan }}</p>
<button type="button" (click)="changeActorProperties()">Change Actor Properties</b
utton>
<button type="button" (click)="changeActorObject()">Change Actor Object</button>
<movie [title]="title" [actor]="actor"></movie>`
})
export class MainComponent {
slogan: string = 'Just movie information';
title: string = 'Terminator 1';
actor: Actor = new Actor('Arnold', 'Schwarzenegger');
changeActorProperties() {
this.actor.firstName = 'Nicholas';
this.actor.lastName = 'Cage';
}
changeActorObject() {
this.actor = new Actor('Bruce', 'Willis');
}
}
In the above code snippet, we can see that our component defines two buttons that trigger
different methods. The changeActorProperties will update the lead actor of the movie by
directly changing the properties of the actor object. In contrast, the method
changeActorObject will change the information of the actor by creating a completely new
instance of the Actor class.
The Actor model is pretty straightforward, it is just a class that defines the firstName and
the lastName of an actor.
app/actor.model.ts
export class Actor {
constructor(
public firstName: string,
public lastName: string) {}
}
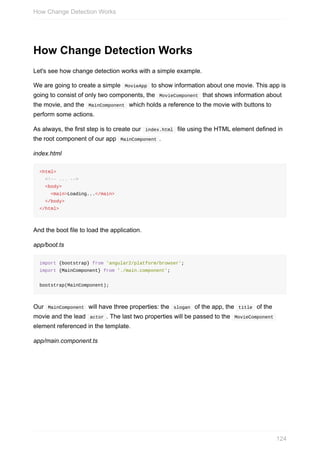
How Change Detection Works
125](https://image.slidesharecdn.com/ngcourse2-160923035221/85/Angular-2-125-320.jpg)
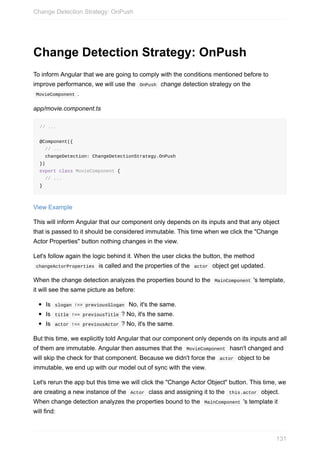
![Finally, the MovieComponent shows the information provided by the MainComponent in its
template.
app/movie.component.ts
import {Component, Input} from '@angular/core';
import {Actor} from './actor.model';
@Component({
selector: 'movie',
styles: ['div {border: 1px solid black}'],
template: `
<div>
<h3>{{ title }}</h3>
<p>
<label>Actor:</label>
<span>{{actor.firstName}} {{actor.lastName}}</span>
</p>
</div>`
})
export class MovieComponent {
@Input() title: string;
@Input() actor: Actor;
}
The final result of the app is shown in the screenshot below:
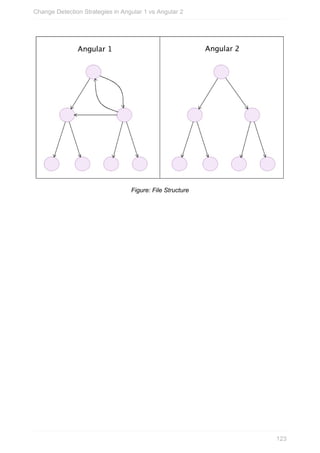
Figure: File Structure
How Change Detection Works
126](https://image.slidesharecdn.com/ngcourse2-160923035221/85/Angular-2-126-320.jpg)

![Performance Impact
Traversing all the tree components to check for changes could be costly. Imagine that
instead of just having one reference to <movie> inside our MainComponent 's template, we
have multiple references?
<movie *ngFor="let movie of movies" [title]="movie.title" [actor]="movie.actor"></movie
>`
If our movie list grows too big, the performance of our system will start degrading. We can
narrow the problem to one particular comparison:
Is actor !== previousActor ?
As we have learned, this result is not very useful because we could have changed the
properties of the object without changing the instance, and the result of the comparison will
always be false . Because of this, change detection is going to have to check every child
component to see if any of the properties of that object ( firstName or lastName ) have
changed.
What if we can find a way to indicate to the change detection that our MovieComponent
depends only on its inputs and that these inputs are immutable? In short, we are trying to
guarantee that when we change any of the properties of the actor object, we end up with a
different Actor instance so the comparison actor !== previousActor will always return
true . On the other hand, if we did not change any property, we are not going to create a
new instance, so the same comparison is going to return false .
If the above condition can be guaranteed (create a new object every time any of its
properties changes, otherwise we keep the same object), then when checking the inputs of
the MovieComponent has this result:
Is title !== previousTitle ? No, it's the same.
Is actor !== previousActor ? No, it's the same.
then we can skip the internal check of the component's template because we are now
certain that nothing has changed internally and there's no need to update the DOM. This will
improve the performance of the change detection system because fewer comparisons have
to be made to propagate changes through the app.
Change Detector Classes
130](https://image.slidesharecdn.com/ngcourse2-160923035221/85/Angular-2-130-320.jpg)

![Enforcing Immutability
We cheated a little in the previous example. We told Angular that all of our inputs, including
the actor object, were immutable objects, but we went ahead and updated its properties,
violating the immutability principle. As a result we ended with a sync problem between our
models and our views. One way to enforce immutability is using the library Immutable.js.
Because in JavaScript primitive types like string and number are immutable by definition,
we should only take care of the objects we are using. In this case, the actor object.
Here's an example comparing a mutable type like an array to an immutable type like a
string :
var b = ['C', 'a', 'r'];
b[0] = 'B';
console.log(b) // ['B', 'a', 'r'] => The first letter changed, arrays are mutable
var a = 'Car';
a[0] = 'B';
console.log(a); // 'Car' => The first letter didn't change, strings are immutable
First we need to install the immutable.js library using the command:
npm install --save immutable
Then in our MainComponent we import the library and use it to create an actor object as an
immutable.
app/main.component.ts
Enforcing Immutability
133](https://image.slidesharecdn.com/ngcourse2-160923035221/85/Angular-2-133-320.jpg)
![import {Component} from '@angular/core';
import {MovieComponent} from './movie.component';
import {Immutable} from 'immutable';
@Component({
selector: 'main',
directives: [MovieComponent],
template: `
<h1>MovieApp</h1>
<p>{{ slogan }}</p>
<button type="button" (click)="changeActor()">Change Actor</button>
<movie [title]="title" [actor]="actor"></movie>`
})
export class MainComponent {
slogan: string = 'Just movie information';
title: string = 'Terminator 1';
actor: Immutable.Map<string, string> = Immutable.Map({firstName: 'Arnold', lastName:
'Schwarzenegger'});
changeActor() {
this.actor = this.actor.merge({firstName: 'Nicholas', lastName: 'Cage'});
}
}
Now, instead of creating an instance of an Actor class, we are defining an immutable
object using Immutable.Map . Because this.actor is now an immutable object, we cannot
change its internal properties ( firstName and lastName ) directly. What we can do however
is create another object based on actor that has different values for both fields - that is
exactly what the merge method does.
Because we are always getting a new object when we try to change the actor , there's no
point in having two different methods in our component. We removed the methods
changeActorProperties and changeActorObject and created a new one called changeActor .
Additional changes have to be made to the MovieComponent as well. First we need to
declare the actor object as an immutable, and in the template, instead of trying to access
the object properties directly using a syntax like actor.firstName , we need to resort on the
get method of the immutable.
app/movie.component.ts
Enforcing Immutability
134](https://image.slidesharecdn.com/ngcourse2-160923035221/85/Angular-2-134-320.jpg)
![import {Component, Input} from '@angular/core';
import {ChangeDetectionStrategy} from '@angular/core';
import * as Immutable from 'immutable';
@Component({
selector: 'movie',
styles: ['div {border: 1px solid black}'],
template: `
<div>
<h3>{{ title }}</h3>
<p>
<label>Actor:</label>
<span>{{actor.get('firstName')}} {{actor.get('lastName')}}</span>
</p>
</div>`,
changeDetection: ChangeDetectionStrategy.OnPush
})
export class MovieComponent {
@Input() title: string;
@Input() actor: Immutable.Map<string, string>;
}
View Example
Using this pattern we are taking full advantage of the "OnPush" change detection strategy
and thus reducing the amount of work done by Angular to propagate changes and to get
models and views in sync. This improves the performance of the application.
Enforcing Immutability
135](https://image.slidesharecdn.com/ngcourse2-160923035221/85/Angular-2-135-320.jpg)


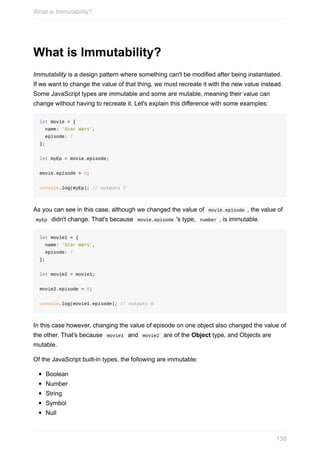
![Undefined
And the following are mutable:
Object
Array
Function
String's an unusual case, since it can be iterated over using for...of and provides numeric
indexers just like an array, but doing something like:
let message = 'Hello world';
message[5] = '-';
console.log(message); // writes Hello world
This will throw an error in strict mode and fail silently in non-strict mode.
What is Immutability?
139](https://image.slidesharecdn.com/ngcourse2-160923035221/85/Angular-2-139-320.jpg)
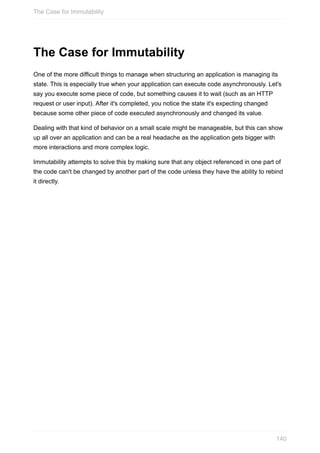


![Nested Objects
Immutable.Map wraps objects shallowly, meaning if you have an object with properties
bound to mutable types then those properties can be mutated.
let movie = Immutable.Map({
name: 'Star Wars',
episode: 7,
actors: [
{ name: 'Daisy Ridley', character: 'Rey'},
{ name: 'Harrison Ford', character: 'Han Solo' }
],
mpaa: {
rating: 'PG-13',
reason: 'sci-fi action violence'
}
});
movie.get('actors').pop();
movie.get('mpaa').rating = 'PG';
console.log(movie.toObject());
/* writes
{ name: 'Star Wars',
episode: 7,
actors: [ { name: 'Daisy Ridley', character: 'Rey' } ],
mpaa: { rating: 'PG', reason: 'sci-fi action violence' } }
*/
To avoid this issue, use Immutable.fromJS instead.
Nested Objects
147](https://image.slidesharecdn.com/ngcourse2-160923035221/85/Angular-2-147-320.jpg)
![let movie = Immutable.fromJS({
name: 'Star Wars',
episode: 7,
actors: [
{ name: 'Daisy Ridley', character: 'Rey'},
{ name: 'Harrison Ford', character: 'Han Solo' }
],
mpaa: {
rating: 'PG-13',
reason: 'sci-fi action violence'
}
});
movie.get('actors').pop();
movie.get('mpaa').rating = 'PG';
console.log(movie.toObject());
/* writes
{ name: 'Star Wars',
episode: 7,
actors: List [ Map { "name": "Daisy Ridley", "character": "Rey" }, Map { "name": "Ha
rrison Ford", "character": "Han Solo" } ],
mpaa: Map { "rating": "PG-13", "reason": "sci-fi action violence" } }
*/
So let's say you want to modify movie.mpaa.rating . You might think of doing something like
this: movie = movie.get('mpaa').set('rating', 'PG') . However, set will always return the
calling Map instance, which in this case returns the Map bound to the mpaa key rather than
the movie you wanted. We must use the setIn method to update nested properties.
Nested Objects
148](https://image.slidesharecdn.com/ngcourse2-160923035221/85/Angular-2-148-320.jpg)
![let movie = Immutable.fromJS({
name: 'Star Wars',
episode: 7,
actors: [
{ name: 'Daisy Ridley', character: 'Rey'},
{ name: 'Harrison Ford', character: 'Han Solo' }
],
mpaa: {
rating: 'PG-13',
reason: 'sci-fi action violence'
}
});
movie = movie
.update('actors', actors => actors.pop())
.setIn(['mpaa', 'rating'], 'PG');
console.log(movie.toObject());
/* writes
{ name: 'Star Wars',
episode: 7,
actors: List [ Map { "name": "Daisy Ridley", "character": "Rey" } ],
mpaa: Map { "rating": "PG", "reason": "sci-fi action violence" } }
*/
We also added a call to Map.update which, unlike set , accepts a function as the second
argument instead of a value. This function accepts the existing value at that key and must
return the new value of that key.
Nested Objects
149](https://image.slidesharecdn.com/ngcourse2-160923035221/85/Angular-2-149-320.jpg)
![Deleting Keys
Keys can be deleted from maps using the Map.delete and Map.deleteIn methods.
let movie = Immutable.fromJS({
name: 'Star Wars',
episode: 7,
actors: [
{ name: 'Daisy Ridley', character: 'Rey'},
{ name: 'Harrison Ford', character: 'Han Solo' }
],
mpaa: {
rating: 'PG-13',
reason: 'sci-fi action violence'
}
});
movie = movie.delete('mpaa');
console.log(movie.toObject());
/* writes
{ name: 'Star Wars',
episode: 7,
actors: List [ Map { "name": "Daisy Ridley", "character": "Rey" }, Map { "name": "Ha
rrison Ford", "character": "Han Solo" } ] }
*/
Nested Objects
150](https://image.slidesharecdn.com/ngcourse2-160923035221/85/Angular-2-150-320.jpg)
![Maps are Iterable
Maps in Immutable.js are iterable, meaning that you can map , filter , reduce , etc. each
key-value pair in the map.
let features = Immutable.Map<string, boolean>({
'send-links': true,
'send-files': true,
'local-storage': true,
'mirror-notifications': false,
'api-access': false
});
let myFeatures = features.reduce((providedFeatures, provided, feature) => {
if(provided)
providedFeatures.push(feature);
return providedFeatures;
}, []);
console.log(myFeatures); // [ 'send-links', 'send-files', 'local-storage' ]
const mapMap = Immutable.Map({ a: 0, b: 1, c: 2 });
mapMap.map(i => i * 30);
const mapFilter = Immutable.Map({ a: 0, b: 1, c: 2 });
mapFilter.filter(i => i % 2);
const mapReduce = Immutable.Map({ a: 10, b: 20, c: 30 });
mapReduce.reduce((acc, i) => acc + i, 0);
Nested Objects
151](https://image.slidesharecdn.com/ngcourse2-160923035221/85/Angular-2-151-320.jpg)
![Immutable.List
List is the immutable version of JavaScript's array structure.
let movies = Immutable.fromJS([ // again use fromJS for deep immutability
{
name: 'The Fellowship of the Ring',
released: 2001,
rating: 8.8
},
{
name: 'The Two Towers',
released: 2002,
rating: 8.7
}
]);
movies = movies.push(Immutable.Map({
name: 'The Return of the King',
released: 2003
}));
movies = movies.update(2, movie => movie.set('rating', 8.9)); // 0 based
movies = movies.zipWith(
(movie, seriesNumber) => movie.set('episode', seriesNumber),
Immutable.Range(1, movies.size + 1) // size property instead of length
);
console.log(movies);
/* writes
List [
Map { "name": "The Fellowship of the Ring", "released": 2001, "rating": 8.8, "episod
e": 1 },
Map { "name": "The Two Towers", "released": 2002, "rating": 8.7, "episode": 2 },
Map { "name": "The Return of the King", "released": 2003, "rating": 8.9, "episode":
3 } ]
*/
Here we use the Immutable.fromJS call again since we have objects stored in the array. We
call push to add items to the list, just like we would call it on an array. But since we're
creating a new copy, we must rebind the variable. We have the same set and update
calls when we want to update items at specific indexes. We also have access to array
functions like map , reduce with support for extras like the one we're using here, zipWith .
Immutable.List
152](https://image.slidesharecdn.com/ngcourse2-160923035221/85/Angular-2-152-320.jpg)


![Custom Pipes
Angular 2 allows you to create your own custom pipes:
import {Pipe, PipeTransform} from '@angular/core';
@Pipe({name: 'length'})
export class LengthPipe implements PipeTransform {
transform(value:string, displayMessage: boolean): string {
return displayMessage ? `${value} ${value.length}` : `${value.length}`
}
}
View Example
Each custom pipe implementation must:
have the @Pipe decorator with pipe metadata that has a name property. This value will
be used to call this pipe in template expressions. It must be a valid JavaScript identifier.
implement the PipeTransform interface's transform method. This method takes the
value being piped and a variable number of arguments of any type and return a
transformed ("piped") value.
Each colon-delimited parameter in the template maps to one method argument in the same
order.
import {Component} from '@angular/core';
import {LengthPipe} from './length.pipe';
@Component({
selector: 'Hello',
template: '<div><p>{{ message | length:true }}</p><p>{{ message | length:false }}<
/p></div>',
pipes: [LengthPipe]
})
export class Hello {
message: string = 'Hello There';
}
View Example
Custom Pipes
160](https://image.slidesharecdn.com/ngcourse2-160923035221/85/Angular-2-160-320.jpg)

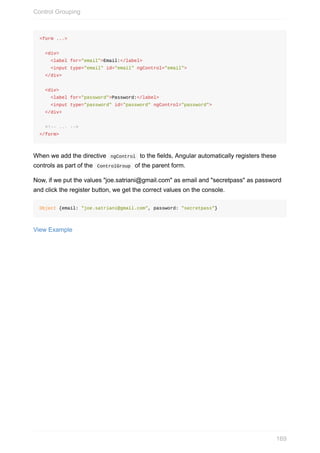
![<form novalidate>
<div>
<label for="email">Email:</label>
<input type="email" id="email">
</div>
<div>
<label for="password">Password:</label>
<input type="password" id="password">
</div>
<button type="submit">Register</button>
</form>
We are using the attribute novalidate in our form to prevent the browser from
performing its built-in validation for the email field. We are going to create our own
validation using Angular in a following section.
View Example
At this point, if we click the submit button nothing happens because we defined a standard
HTML form, not an Angular 2 form. To fix that, we need to tell our component to upgrade our
form using the NgForm directive which will give us access to new properties and event
bindings on our form to interact with it.
app/my-form.component.ts
// ...
import {FORM_DIRECTIVES} from '@angular/common';
@Component({
// ...
directives: [FORM_DIRECTIVES]
})
export class MyForm {}
Notice that we didn't include the NgForm directly, instead we included FORM_DIRECTIVES
which is an array of all the directives used in forms, including NgForm . To see all the
directives included in this array, check the source code.
Because we now have an Angular 2 form, we can listen to the ngSubmit event which is
triggered whenever the form is submitted.
app/my-form.component.html
Creating a Form with Directives
165](https://image.slidesharecdn.com/ngcourse2-160923035221/85/Angular-2-165-320.jpg)
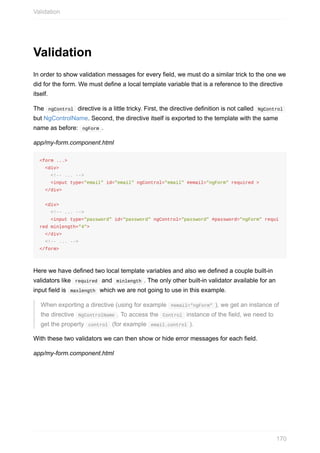
![<form ...>
<div>
<!-- ... -->
<ul *ngIf="email.dirty && !email.valid">
<li *ngIf="email.errors.required">An email is required</li>
</ul>
</div>
<div>
<!-- ... -->
<ul *ngIf="password.dirty && !password.valid">
<li *ngIf="password.errors.required">A password is required</li>
<li *ngIf="password.errors.minlength">A password needs to have at least 4 charac
ters</li>
</ul>
</div>
<button type="submit">Register</button>
</form>
We have access to the validity of each field using the property valid ; the state with dirty ,
touched and pristine ; and particular errors based on the validators applied inside the
object errors . The description of the different states for a particular field are described in
the table below:
State Meaning
pristine The field has just been rendered and hasn't been modified
dirty The field has been modified
touched The field has been modified and has lost focus
valid The field is passing all the validators
It's worth noting that Control , ControlGroup and ControlArray all inherit from
AbstractControl and because of this they share the same API to get values, errors and
check the internal state (valid, dirty). For that reason, we can also check the validity of the
form as a whole to disabled or enabled with the submit button.
app/my-form.component.html
<form ...>
<!-- ... -->
<button type="submit" [disabled]="!regForm.valid">Register</button>
</form>
View Example
Validation
171](https://image.slidesharecdn.com/ngcourse2-160923035221/85/Angular-2-171-320.jpg)

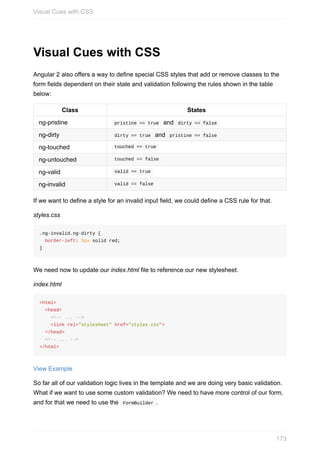

![Now we need to go back to our form template to change a few things. We are going to
remove the validation temporarily because we have not defined the validators yet using this
new approach.
app/my-form.component.html
<form [ngFormModel]="group" (ngSubmit)="onSubmit()" novalidate>
<div>
<label for="email">Email:</label>
<input type="email" id="email" [ngFormControl]="email">
</div>
<div>
<label for="password">Password:</label>
<input type="password" id="password" [ngFormControl]="password">
<div>
<button type="submit">Register</button>
</form>
View Example
There are five things to notice here:
We changed the name we use to refer to our form from regForm to group because
regForm used to be an instance of the ngForm directive while group is an instance of
ControlGroup .
We are binding our ControlGroup instance group created by the FormBuilder to the
actual HTML form using the special property [ngFormModel] .
We are binding our Control instances using the property [ngFormControl] to each of
the form fields. We are using the [ngFormControl] property instead of the ngControl
directive because the latter will try to create a new Control and not use the ones we
have already created in our component.
We don't need to export the form or the controls using the syntax #group="ngForm" or
#email="ngForm" because we have already created those variables in our component
and thus they are available in the template.
We don't need to pass the form object to the onSubmit method because we have
access to it inside our component in the variable this.group .
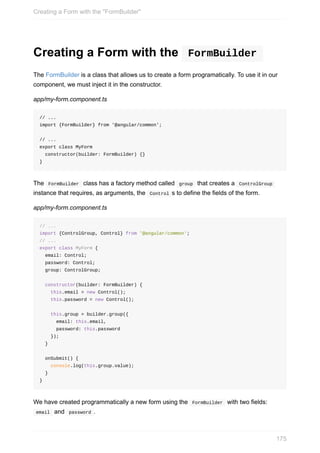
Creating a Form with the "FormBuilder"
176](https://image.slidesharecdn.com/ngcourse2-160923035221/85/Angular-2-176-320.jpg)
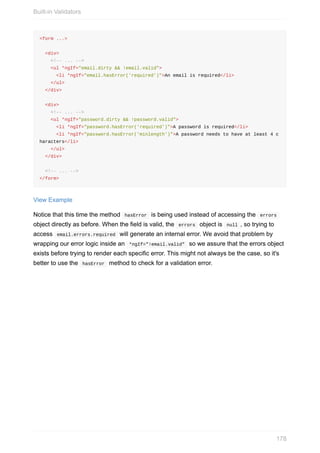
![Built-in Validators
In contrast with our first approach, we are not going to use the HTML properties required
and minlength . Instead we will pass these validators to the Control constructor of both
fields.
app/my-form.component.ts
// ...
import {Validators} from '@angular/common';
// ...
export class MyForm {
// ...
constructor(builder: FormBuilder) {
this.email = new Control('', Validators.required);
this.password = new Control('',
Validators.compose([Validators.required, Validators.minLength(4)])
);
// ...
}
// ...
}
The first (optional) value of the Control constructor is the default value for the field - we are
leaving it empty. The second argument is the validators that should apply to the field.
The Validator class gives us access to the three built-in validators, require , minLength
and maxLength . If more than one validator is needed for a field, we must combine them
using the compose method as shown in the previous example.
Now that our validators are in place, we can again add the template to show the error
messages.
app/my-form.component.html
Built-in Validators
177](https://image.slidesharecdn.com/ngcourse2-160923035221/85/Angular-2-177-320.jpg)
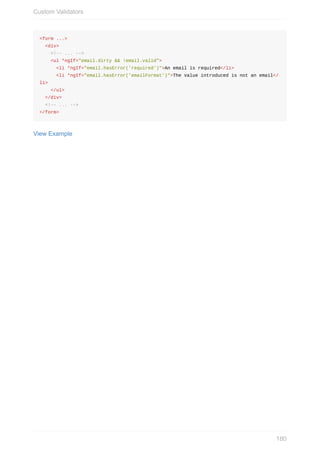
![Custom Validators
Having three validators is just not enough - let's create a custom validator to check that our
email field has the proper format.
app/custom-validators.ts
import {Control} from '@angular/common';
export class CustomValidators {
static emailFormat(control: Control): [[key: string]: boolean] {
let pattern:RegExp = /S+@S+.S+/;
return pattern.test(control.value) ? null : {"emailFormat": true};
}
}
A validator is just a class with a number of static methods. Each method receives a Control
instance and returns an object in case the validation fails or null in case the validation
passes.
We can now add the validator in our component logic and add a new item in our HTML to
show this error.
app/validators.ts
// ...
import {CustomValidators} from './custom-validators';
// ...
export class MyForm {
// ...
constructor(builder: FormBuilder) {
// ...
this.email = new Control('',
Validators.compose([Validators.required, CustomValidators.emailFormat])
);
// ...
}
// ...
}
In the template, we need to look for the same key that is returned by the validator in case of
an error - in this case, the key emailFormat .
app/my-form.component.html
Custom Validators
179](https://image.slidesharecdn.com/ngcourse2-160923035221/85/Angular-2-179-320.jpg)
![Async Validators
Up to this point, our validation logic is living in the front-end, but what happens if we want to
check for some logic that only exists in the server? For example, let's say we want to
prevent two users trying to register using the same email. To do that, we must verify that the
email entered does not exist in our database and we want to alert the user as he/she types.
This is where the async validator comes in handy.
Our new async validator is going to live inside the CustomValidators class and the return
value of the static method is going to be exactly the same as the method emailFormat , so
before writing our new validation rule let's do a simple refactoring to clean the code a bit.
app/validators.ts
// ...
interface IValidation {
[key: string]: boolean;
}
export class CustomValidators {
static emailFormat(control: Control): IValidation {
let pattern:RegExp = /S+@S+.S+/;
return pattern.test(control.value) ? null : {"emailFormat": true};
}
}
We have created an interface to define the return value of our methods so we can use the
same interface with our new validator.
An async validator must return a promise that should resolve to an object with the error
when our server responds with a failed validation, or should resolve to null when the
server responds with a successful validation.
app/validators.ts
Async Validators
181](https://image.slidesharecdn.com/ngcourse2-160923035221/85/Angular-2-181-320.jpg)
![// ...
export class CustomValidators {
// ...
static duplicated(control: Control) {
const q = new Promise<IValidation>((resolve, reject) => {
setTimeout(() => {
if(control.value === 'john.doe@gmail.com') {
resolve({'duplicated': true});
} else {
resolve(null);
}
}, 1000);
});
return q;
}
}
We named our new validator duplicated and we used the setTimeout function to mock a
call to the server that could take one second to complete.
The next step is to add the new validation method as the third argument of the Control
constructor.
app/my-form.component.ts
// ...
export class MyForm {
// ...
constructor(builder: FormBuilder) {
this.email = new Control('',
Validators.compose([Validators.required, CustomValidators.emailFormat]), CustomV
alidators.duplicated
);
// ...
}
// ...
}
We can modify our template again to accommodate the new error message.
app/my-form.component.html
Async Validators
182](https://image.slidesharecdn.com/ngcourse2-160923035221/85/Angular-2-182-320.jpg)
![<form ...>
<div>
<label for="email">Email:</label>
<input type="text" id="email" [ngFormControl]="email">
<span *ngIf="email.pending">Checking duplication...</span>
<ul ...>
<!-- ... -->
<li *ngIf="email.hasError('duplicated')">This email has been registered already</
li>
</ul>
</div>
<!-- ... -->
</form>
View Example
Notice that not only do we have a new error key but our field has a new state called
pending that is true when Angular waits for the promise to be resolved and false
otherwise. This way we can give feedback to the user that some validation is being
performed in the background that could take a while to finish.
Async Validators
183](https://image.slidesharecdn.com/ngcourse2-160923035221/85/Angular-2-183-320.jpg)
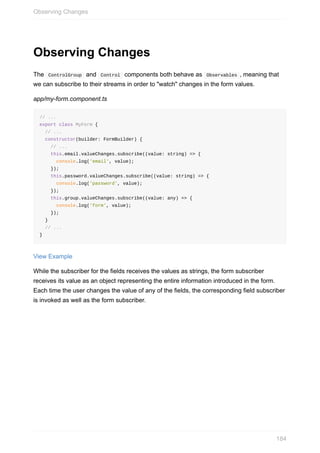
![Models
So far the form only gets information from the user. What if there's a need to edit an existing
model? The property [ngModel] exists just for that.
First, define a model as a new class.
app/user.model.ts
export class User {
constructor(
public email: string,
public password: string) {}
}
In order to use it in the MyForm component, define an instance of the User class.
app/my-form.component.ts
// ...
import {User} from './user.model';
// ...
export class MyForm {
user: User;
// ...
constructor() {
this.user = new User('joe.satriani@gmail.com', 'secretpass');
// ...
}
// ...
}
With this instance, the property [ngModel] can be used in the template to bind the value of
the field to the model.
app/my-form.component.html
Models
185](https://image.slidesharecdn.com/ngcourse2-160923035221/85/Angular-2-185-320.jpg)
![<form ...>
<div>
<!-- ... -->
<input type="email" id="email" [ngFormControl]="email" [ngModel]="user.email">
<!-- ... -->
</div>
<div>
<!-- ... -->
<input type="password" id="password" [ngFormControl]="password" [ngModel]="user.
password">
<!-- ... -->
</div>
<p>{{ user | json }}</p>
<!-- ... -->
</form>
Notice that when changing the values of the forms, the debug information shown at the
bottom of the form is not being updated accordingly. That's because the property binding
[ngModel] implements one-way data binding. To close the circle, the component can be
modified to update the model on submit.
app/my-form.component.ts
// ...
export class MyForm {
// ...
onSubmit() {
this.user.email = this.group.value.email;
this.user.password = this.group.value.password;
console.log('data sent to server', this.user);
}
}
View Example
Using this approach we avoid Angular 1's two-way data binding approach. If we still need
two-way data binding, we can combine the property syntax with the event syntax.
app/my-form.component.html
Models
186](https://image.slidesharecdn.com/ngcourse2-160923035221/85/Angular-2-186-320.jpg)
![<form ...>
<div>
<!-- ... -->
<input type="email" id="email" [ngFormControl]="email" [(ngModel)]="user.email">
<!-- ... -->
</div>
<div>
<!-- ... -->
<input type="password" id="password" [ngFormControl]="password" [(ngModel)]="user.
password">
<!-- ... -->
</div>
<!-- ... -->
</form>
View Example
Now the model is updated any time the form is changed.
Alternative Syntax
When dealing with a very long form, creating a variable for every field in the form can be
tedious. Angular 2 provides an alternative syntax to creating a form using the FormBuilder .
app/my-form.component.ts
Models
187](https://image.slidesharecdn.com/ngcourse2-160923035221/85/Angular-2-187-320.jpg)
![// ...
export class MyForm {
group: ControlGroup;
user: User
constructor(builder: FormBuilder) {
this.user = new User('joe.satriani@gmail.com', 'secretpass');
this.group = builder.group({
email: ['',
Validators.compose([Validators.required, CustomValidators.emailFormat]),
CustomValidators.duplicated
],
password: ['',
Validators.compose([Validators.required, Validators.minLength(4)])
]
});
this.group.find('email').valueChanges.subscribe((value: string) => {
console.log('email', value);
});
this.group.find('password').valueChanges.subscribe((value: string) => {
console.log('password', value);
});
this.group.valueChanges.subscribe((value: any) => {
console.log('form', value);
});
}
//...
}
Instead of assigning our controls to each key in the group method, we now pass an array
where every element is a map of the arguments present in the Control constructor.
Because we no longer have access to every control in our template, we must resort to do
the validation for each field in the form itself.
app/my-form.component.html
Models
188](https://image.slidesharecdn.com/ngcourse2-160923035221/85/Angular-2-188-320.jpg)
![<form ...>
<div>
<!-- ... -->
<input type="email" id="email" [ngFormControl]="group.find('email')" [(ngModel)]="
user.email">
<span *ngIf="group.find('email').pending">Checking duplication...</span>
<ul *ngIf="group.find('email').dirty && !group.find('email').valid">
<li *ngIf="group.hasError('required', 'email')">This field is required</li>
<li *ngIf="group.hasError('emailFormat', 'email')">This field needs to have at l
east 3 characters</li>
<li *ngIf="group.hasError('duplicated', 'email')">This value cannot be used</li>
</ul>
</div>
<div>
<!-- ... -->
<input type="password" id="password" [ngFormControl]="group.find('password')" [(ng
Model)]="user.password">
<ul *ngIf="group.find('password').dirty && !group.find('password').valid">
<li *ngIf="group.hasError('required', 'password')">This field is required</li>
<li *ngIf="group.hasError('minlength', 'password')">This field doesn't allow num
bers</li>
</ul>
</div>
<!-- ... -->
</form>
View Example
We are using two methods of our form component: find and hasError .
Let's get the instance of the Control we are using from the form and in this way we can do
the same validations of state and errors as before.
In some docs you may find a control object used instead of the method find , like
this: group.controls['firstName'] . We are avoiding this approach because it will only
work when dealing with a ControlGroup where every control is stored in an object. If
we were working with a ControlArray , this approach would not work because there's
not a key to refer to each control. The method find is an abstraction that will take care
of both situations and will get us the proper control back.
Models
189](https://image.slidesharecdn.com/ngcourse2-160923035221/85/Angular-2-189-320.jpg)


![RouteConfig
The @RouteConfig decorator is used to define the routing for the component. This is where
we can set up the expected paths, the components we want to use, and what we want our
application to understand them as. To use @RouteConfig , you decorate a class with it, and
provide an array containing a Route Definition Object.
Below is the sample RouteConfig defined in the main application component:
@RouteConfig([
{ path: "/", redirectTo: "/ComponentOne" },
{ path: "/component-one", as: "ComponentOne", component: ComponentOne },
{ path: "/component-two", as: "ComponentOne", component: ComponentTwo }
])
export default class Main {
}
Route Definition Object
RouteConfig is a decorator defined in Angular 2 which takes the array of RouteDefinition to
define routes within the application. Each RouteDefinition could have different attributes;
some of the common attributes are:
path - URL to be shown in the browser when application is on the specific route
component - Component to be rendered when the application is on the specific route
redirectTo - Redirect route if needed; each route can have either component or redirect
attribute defined in the route
name or as - Unique identifier for the route to be used within the application, must be
CamelCase
useAsDefault - Boolean variable which, if set to true, forces the corresponding child
route to navigate to it by default
data - Optional property of any type representing arbitrary route metadata for the given
route
loader - Function that returns a promise that resolves to a component.
RouteConfig
193](https://image.slidesharecdn.com/ngcourse2-160923035221/85/Angular-2-193-320.jpg)
![RouterOutlet
A RouterOutlet is a placeholder that Angular dynamically fills based on the application's
route. In order to make use of the RouterOutlet we must give component access to the
router components by passing ROUTER_DIRECTIVES in the component directives array.
A component can only have one unnamed router-outlet per template. If you need to use
multiple router-outlets , they must be provided a name, which will be covered in the Using
Auxiliary Routes section.
Below is the example of how we use the RouterOutlet in Angular 2:
// ...
@Component({
selector: 'simple-routing',
directives: [ROUTER_DIRECTIVES]
template: `<div>
Basic Routing
<ul>
<li><a [routerLink]="['/ComponentOne']">Component One</a></li>
<li><a [routerLink]="['/ComponentTwo']">Component Two</a></li>
</ul>
<div style="border: 1px solid black">
<router-outlet></router-outlet>
</div>
`
})
@RouteConfig([
{path: '/componentOne', as: 'ComponentOne', useAsDefault: true, component: Component
One},
{path: '/componentTwo', as: 'ComponentTwo', useAsDefault: false, component: Componen
tTwo}
])
export class SimpleRouting {
}
// ...
View Example
RouterOutlet
194](https://image.slidesharecdn.com/ngcourse2-160923035221/85/Angular-2-194-320.jpg)
![RouterLink
After declaring routes and adding the outlet, we must tell Angular how to navigate between
the routes. There are two ways to do this. One way is to use href links in the templates as
shown below.
<nav>
<a href="/componentOne">Component One</a>
<a href="/componentTwo">Component Two</a>
</nav>
While this does work, it is not always recommended, because if you change your
@RouteConfig definition you will have to manually update all of your templates to reflect the
new URL. There is also an issue where this can result in a full-page reload, which is usually
something we do not want in our single page applications.
The preferred way is to define them using the RouterLink. The RouterLink directive lets you
link to specific parts of your app. The values in the array will map to the name or as that
was given to the component in the @RouteConfig . The following example shows how to
define routes using RouterLink:
<ul>
<li><a [routerLink]="['/ComponentOne']">Component One</a></li>
<li><a [routerLink]="['/ComponentTwo']">Component Two</a></li>
</ul>
If we want to define routes with parameters, we must pass the specific parameter value after
each route in the routerLink array as shown below:
<ul>
<li><a [routerLink]="['/ComponentOne']">Component One</a></li>
<li><a [routerLink]="['/ComponentTwo']">Component Two</a></li>
<li><a [routerLink]="['/ComponentThree',{message: 'Hello World'}]">Component Thr
ee with Param</a></li>
</ul>
View Example
We will cover accessing the RouteParams in your component later in the RouteParams
section.
RouterLink
195](https://image.slidesharecdn.com/ngcourse2-160923035221/85/Angular-2-195-320.jpg)

![Using the Router Programmatically
In addition to being able to use the routerLink directive to control the navigation of your
application, you can also access the router from your components using the Router
service. To do this you must inject the router into your component as shown:
// ...
@Component({
selector: 'component-one',
template: `Component One<br/>
<button (click)="onClick()">Click Me</button>
`
})
export default class ComponentOne {
constructor(private _router:Router) {
}
onClick () {
this._router.navigate(['/ComponentThree',{message: 'Called from _router.Navigate'}
]);
}
}
View Example
Using the Router Programmatically
197](https://image.slidesharecdn.com/ngcourse2-160923035221/85/Angular-2-197-320.jpg)
![Creating Child Routes
To declare the child routes in the application, we declare the main route in the main app and
then define specific child routes in the main child component.
@RouteConfig([
.....
{ path: '/componentOne/...', component: ComponentOneContainer, as: 'ComponentOneCont
ainer'},
.....
])
In the above example we define the main /componentOne route which maps to the
ComponentOneContainer . The ... dots at the end of the route tell Angular that it has
associated child routes. Next in the child ComponentOneContainer we must do two things:
Define the RouterOutlet view where child routes get rendered
Set up the child routes using another @RouteConfig decorator on the child component.
Here's an example:
Creating Child Routes
198](https://image.slidesharecdn.com/ngcourse2-160923035221/85/Angular-2-198-320.jpg)
![@Component({
directives: [ROUTER_DIRECTIVES]
selector: 'component-one-container',
template: `Component One Container
<br/>
<div style="border: 1px solid red">
<router-outlet></router-outlet>
</div>
`
})
@RouteConfig([{
path: '/',
component: ComponentOne,
as: 'ComponentOne',
useAsDefault: true
}, {
path: '/component-three-nested/:message',
component: ComponentThree,
as: 'ComponentThree'
}
, {
path: '/component-one-child-one',
component: ComponentOneChildOne,
as 'ComponentOneChildOne'
}, {
path: '/component-one-child-two',
component: ComponentOneChildTwo,
as 'ComponentOneChildTwo'
}, {
path: '/component-one-child-three/:message',
component: ComponentThree,
as 'ComponentThree'
}])
export default class ComponentOneContainer {
}
View Example
Creating Child Routes
199](https://image.slidesharecdn.com/ngcourse2-160923035221/85/Angular-2-199-320.jpg)
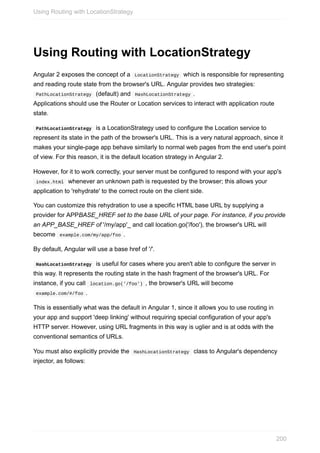
![import {RouterApp} from './router-app/router-app';
import {ROUTER_PROVIDERS} from '@angular/router-deprecated';
import {LocationStrategy, Location, HashLocationStrategy } from '@angular/common';
export function main() {
return bootstrap(RouterApp, [
ROUTER_PROVIDERS,
provide(LocationStrategy, { useClass: HashLocationStrategy })
])
}
Using Routing with LocationStrategy
201](https://image.slidesharecdn.com/ngcourse2-160923035221/85/Angular-2-201-320.jpg)

![@Component({
selector: 'simple-routing',
directives: [ROUTER_DIRECTIVES]
template: `<div>
<!-- ... -->
<div style="border: 1px solid red;">
<h3>Default Route Outlet</h3>
<router-outlet></router-outlet>
</div>
<div style="border: 1px solid blue;">
<h3>Test Aux 1</h3>
<router-outlet name="testAux1"></router-outlet>
</div>
<!-- ... -->
`
})
@RouteConfig([
{
path: '/',
component: ComponentOne,
as: 'ComponentOne',
useAsDefault: true
},
{
aux: 'testAux1',
component: ComponentOne,
name: 'TestAux1',
path: '/aux1'
},
{
aux: 'testAux2',
component: ComponentTwo,
name: 'TestAux2',
path: '/aux2'
}
])
export class SimpleRouting {
}
Next we must define the link to the auxiliary route for the application to navigate and render
the contents.
<a [routerLink]="['./ComponentOne',['TestAux1']]">Test Aux</a>
View Example
Each auxiliary route is an independent route which can have:
Using Auxiliary Routes
203](https://image.slidesharecdn.com/ngcourse2-160923035221/85/Angular-2-203-320.jpg)

![Lazy Loading of Components
Angular 2's router also allows us to defer navigation until some loading code is executed.
We can do this by configuring an AsyncRoute as shown below:
import {RouteConfig, AsyncRoute} from '@angular/router-deprecated';
@RouteConfig([
new AsyncRoute({
path: '/lazy',
loader: () => ComponentHelper.LoadComponentAsync('LazyLoaded','./components/lazy
-loaded/lazy-loaded'),
name: 'Lazy'
})
])
@Component({ /* ... */ })
class App { /* ... */}
In this case, loader can be set to a function that returns a promise that resolves to a
component.
This feature is analogous to Angular 1's resolve feature. However we recommend against
using it for similar reasons: delaying navigation is bad user experience because the UI
provides no feedback. It's usually better to navigate to the component immediately, and build
some kind of progress UI into the component itself so the user knows that the app is OK and
isn't hanging due to a bug.
Lazy Loading of Components
205](https://image.slidesharecdn.com/ngcourse2-160923035221/85/Angular-2-205-320.jpg)
![RouteParams
RouteParams is an immutable map of parameters for the given route based on the URL
matcher and optional parameters for that route.
You can inject RouteParams into the constructor of a component to use it:
app/app.component.ts
// ....
@Component({
selector: 'simple-routing',
directives: [ROUTER_DIRECTIVES]
template: `<div>
Basic Routing
<ul>
<li><a [routerLink]="['/ComponentOne']">Component One</a></li>
<li><a [routerLink]="['/ComponentTwo',{message:'Route Params In Message'}]">Comp
onent Two</a></li>
</ul>
<div style="border: 1px solid black">
<router-outlet></router-outlet>
</div>
`
})
@RouteConfig([
{path: '/componentOne', as: 'ComponentOne', useAsDefault: true, component: Component
One},
{path: '/componentTwo/:message', as: 'ComponentTwo', useAsDefault: false, component:
ComponentTwo}
])
export class SimpleRouting {
}
And to access the RouteParams in ComponentTwo :
app/component-two.ts
RouteParams
206](https://image.slidesharecdn.com/ngcourse2-160923035221/85/Angular-2-206-320.jpg)
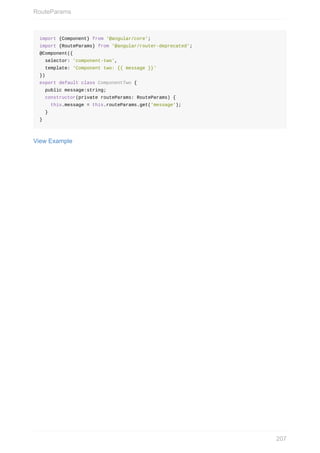
![RouteData
While usually parent components pass data to their children, Angular also offers a
mechanism to pass additional data to components at the time of the route configuration. For
example, besides the data that a component needs for implementing application logic, we
may need to pass a flag indicating if the application runs in production environment or not.
This can be done by using the data property of the @RouteConfig decorator. For example,
let's modify the routing for the previous example to add data to ComponentTwo :
app/component-two.ts
@RouteConfig([
{ path: '/componentOne',
as: 'ComponentOne',
useAsDefault: true,
component: ComponentOne},
{ path: '/componentTwo/:message',
as: 'ComponentTwo',
component: ComponentTwo,
data: { passedData: 'Passed in via Data'}}
])
export class SimpleRouting {
}
Accordingly, the constructor of the ComponentTwo will need an extra argument of type
RouteData:
RouteData
208](https://image.slidesharecdn.com/ngcourse2-160923035221/85/Angular-2-208-320.jpg)
![Route Lifecycle Hooks
Angular 2 routing supports two lifecycle hooks: the @CanActivate decorator and the
CanDeactivate interface.
These are places where you can perform logic to see if the user is able to navigate to or
away from the component.
For example you might use @CanActivate to do a permissions check. You might use
routerCanDeactivate to confirm if a user wants to leave a form where there is unsaved data.
Both of these hooks will receive the next and previous componentInstruction , which
represent the route you are navigating from and to respectively.
Example componentInstruction
{
"urlPath": "componentTwo/Route Params In Message",
"urlParams": [],
"terminal": true,
"specificity": 10099,
"params": {
"message": "Route Params In Message"
},
"reuse": false,
"routeData": {
"data": {
"passedData": "Passed in via Data"
}
}
}
@CanActivate
Angular 2 uses @CanActivate as a decorator, because it is called before an instance if the
class is actually created.
If the function returns a true value or a promise that resolves, it will allow the component to
activate. If a false value or a promise that gets rejected is returned, the component will not
activate.
Route Lifecycle Hooks
210](https://image.slidesharecdn.com/ngcourse2-160923035221/85/Angular-2-210-320.jpg)
![Review of Reducers and Pure Functions
One of the core concepts of Redux is the reducer. A reducer is simply a function that iterates
over a collection of values, and returns a new single value at the end of it.
A simple example of a reducer is a sum function:
let x = [1,2,3].reduce((value,state)=>value+state,0)
// x == 6
Review of Reducers and Pure Functions
213](https://image.slidesharecdn.com/ngcourse2-160923035221/85/Angular-2-213-320.jpg)
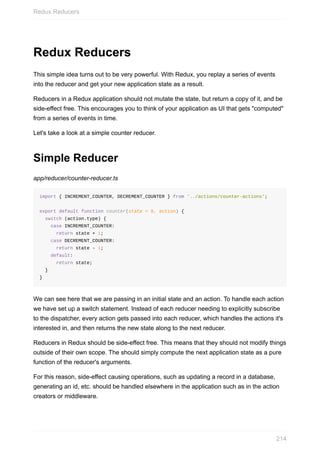
![Another consideration when creating your reducers is to ensure that they are immutable and
not modifying the state of your application. If you mutate your application state, it can cause
unexpected behavior. There are a few ways to help maintain immutability in your reducers.
One way is by using new ES6 features such as Object.assign or the spread operator for
arrays.
function immutableObjectReducer(state = { someValue: 'value'} , action) {
switch(action.payload) {
case SOME_ACTION:
return Object.assign({}, state, { someValue: action.payload.value });
default:
return state;
}
}
function immutableArrayReducer(state = [1,2,3], action) {
switch(action.payload) {
case ADD_ITEM:
return [...state,action.payload.value]
default:
return state;
}
}
However, when dealing with complex or deeply nested objects, it can be difficult to maintain
immutability in your application using this syntax. This is where a library like ImmutableJS
can help.
Redux Reducers
215](https://image.slidesharecdn.com/ngcourse2-160923035221/85/Angular-2-215-320.jpg)
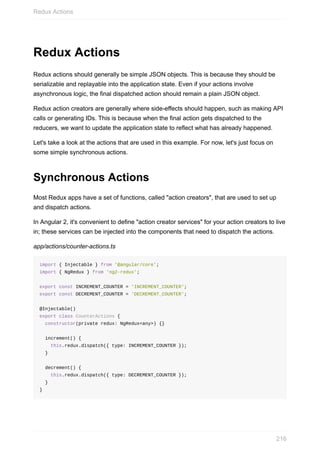
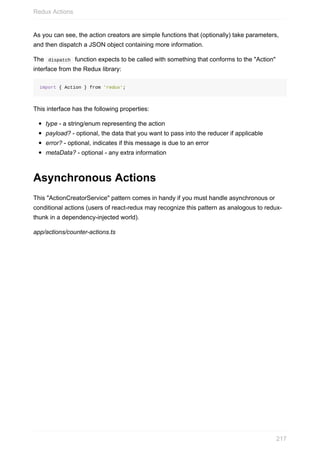
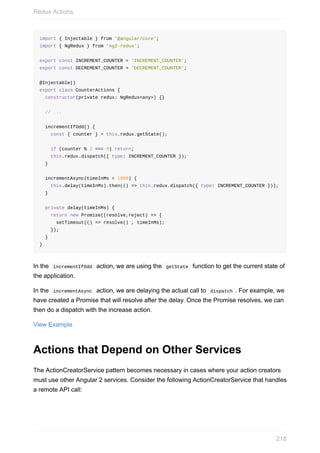
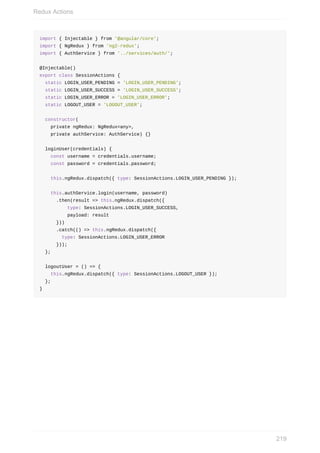
![Configuring your Application to use Redux
Once you have the reducers and actions created, it is time to configure your Angular 2
application to make use of Ng2-Redux. For this, we will need to:
Register Ng2-Redux with Angular 2
Create our application reducer
Create and configure a store
Registering Ng2-Redux with Angular 2
app/boot.ts
import { bootstrap } from '@angular/platform-browser-dynmic'
import { SimpleRedux } from './containers/app-container'
import { NgRedux } from 'ng2-redux'
bootstrap(
SimpleRedux,
[ NgRedux, /* ... */ ]);
Here, we're simply adding the NgRedux class as a provider in our bootstrap file.
Create our Application Reducer
app/reducers/index.ts
import { combineReducers } from 'redux';
import counter from './counter-reducer';
export default combineReducers({
counter
});
combineReducers allows us to break out our application into smaller reducers with a single
area of concern. Each reducer that you pass into it will control a property on the state. So
when we are subscribing to our state changes with Ng2-Redux's @select decorator, we are
able to select a counter property counter, or any other reducers you have provided.
Configuring your Application to use Redux
220](https://image.slidesharecdn.com/ngcourse2-160923035221/85/Angular-2-220-320.jpg)
![Create and Configure a Store
Next we want Ng2-Redux to configure our store based on settings we provide. This should
be done once, in the top-level component of your application.
app/containers/SimpleRedux.ts
import { Component } from '@angular/core';
import { NgRedux } from 'ng2-redux';
import logger from '../store/configure-logger';
import reducer from '../reducers/index';
@Component({
// ...
})
class SimpleRedux {
constructor(ngRedux: NgRedux) {
const initialState = {};
const middleware = [ logger ];
ngRedux.configureStore(reducer, initialState, middleware);
}
}
In this example we are creating a store that uses the redux-logger middleware, which will
add some logging functionality to the application.
Configuring your Application to use Redux
221](https://image.slidesharecdn.com/ngcourse2-160923035221/85/Angular-2-221-320.jpg)
![Using Redux with Components
We will use the select pattern from Ng2-Redux to bind our components to the store. To
demonstrate how this works, let's take a look at a small example with a counter component.
Counter Example
Let's start by building out a counter component. The component will be responsible for
keeping track of how many times it was clicked, and displaying that amount.
app/components/counter-component.ts
import { Component } from '@angular/core';
import { select } from 'ng2-redux';
import { CounterActions } from '../actions/counter-actions';
@Component({
selector: 'counter',
providers: [ CounterActions ],
template: `
<p>
Clicked: {{ counter$ | async }} times
<button (click)="actions.increment()">+</button>
<button (click)="actions.decrement()">-</button>
<button (click)="actions.incrementIfOdd()">Increment if odd</button>
<button (click)="actions.incrementAsync()">Increment async</button>
</p>
`
})
export class Counter {
@select() counter$: Observable<number>;
constructor(private actions: CounterActions) {}
}
View Example
The template syntax should be familiar by now, displaying a Observable counter with the
async pipe, and handling some click events.
In this case, the click events are bound to expressions that call our action creators from the
CounterActions ActionCreatorService.
Let's take a look at the use of @select .
Using Redux with Components
222](https://image.slidesharecdn.com/ngcourse2-160923035221/85/Angular-2-222-320.jpg)
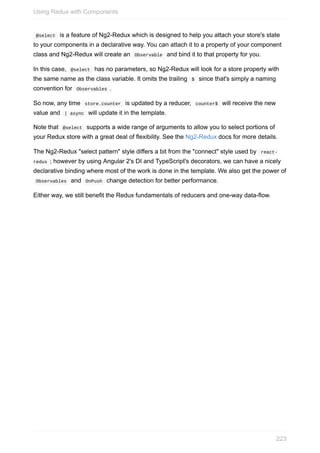
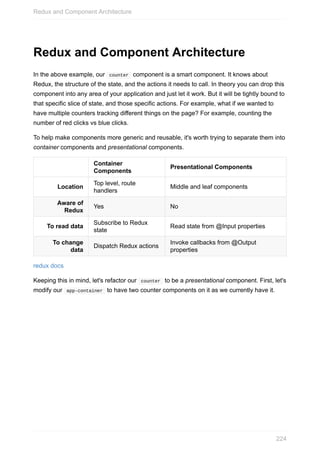
![import { Component } from '@angular/core';
import { Counter } from '../components/counter-component';
@Component({
selector: 'simple-redux',
directives: [ Counter ]
template: `
<div>
<h1>Redux: Two components, one state.</h1>
<div style="float: left; border: 1px solid red;">
<h2>Click Counter</h2>
<counter>
</counter>
</div>
<div style="float: left; border: 1px solid blue;">
<h2>Curse Counter</h2>
<counter>
</counter>
</div>
</div>
`
})
export class SimpleRedux {}
View Example
As you can see in the example, when clicking on the buttons the numbers in both
components will update in sync. This is because the counter component is coupled to a
specific piece of state and action.
Looking at the example, you can see that there is already an app/reducers/curse-reducer.ts,
and app/actions-curse-actions.ts. They are pretty much the same as the counter actions and
counter reducer, we just wanted to create a new reducer to hold the state of it.
To turn the counter component from a smart component into a dumb component, we need to
change it to have data and callbacks passed down into it. For this, we will pass the data into
the component using @Input properties, and the action callbacks as @Output properties.
We now have a nicely-reusable presentational component with no knowledge of Redux or
our application state.
app/components/counter-component.ts
Redux and Component Architecture
225](https://image.slidesharecdn.com/ngcourse2-160923035221/85/Angular-2-225-320.jpg)
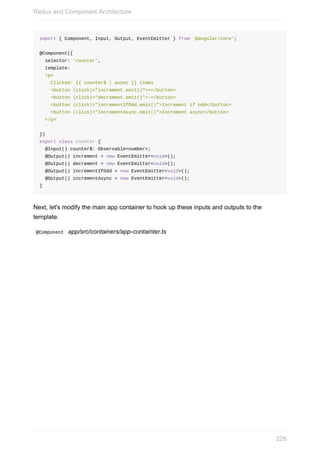
![@Component({
selector: 'simple-redux',
providers: [ CounterActions, CurseActions ],
directives: [ Counter ],
template: `
<div>
<h1>Redux: Presentational Counters</h1>
<div style="float: left; border: 1px solid red;">
<h2>Click Counter</h2>
<counter [counter$]="counter$"
(increment)="counterActions.increment()"
(decrement)="counterActions.decrement()"
(incrementIfOdd)="counterActions.incrementIfOdd()"
(incrementAsync)="counterActions.incrementAsync()">
</counter>
</div>
<div style="float: left; border: 1px solid blue;">
<h2>Curse Counter</h2>
<counter [counter]="curse$"
(increment)="curseActions.castCurse()"
(decrement)="curseActions.removeCurse()"
(incrementIfOdd)="curseActions.castIfOdd()"
(incrementAsync)="curseActions.castAsync()">
</counter>
</div>
</div>
`
})
At this point, the template is attempting to call actions on our two ActionCreatorServices,
CounterActions and CurseActions ; we just need to hook those up using Dependency
Injection:
app/src/containers/app-container.ts
Redux and Component Architecture
227](https://image.slidesharecdn.com/ngcourse2-160923035221/85/Angular-2-227-320.jpg)
![import { Component, View, Inject, OnDestroy, OnInit } from '@angular/core';
import { select } from 'ng2-redux';
import { Counter } from '../components/counter-component';
import { CounterActions } from '../actions/counter-actions';
import { CurseActions } from '../actions/curse-actions';
@Component({ /* see above .... */})
export class SimpleRedux {
@select() counter$: Observable<number>;
@select() curse$: Observable<number>;
constructor(
private counterActions: CounterActions,
private curseActions: CurseActions,
redux: NgRedux) {
const initialState = {};
const middleware = [ logger ];
redux.configureStore(reducer, initialState, middleware);
}
}
View Example
Our two Observable s, counter$ and curse$ will now get updated with a new value every
time the relevant store properties are updated by the rest of the system.
Redux and Component Architecture
228](https://image.slidesharecdn.com/ngcourse2-160923035221/85/Angular-2-228-320.jpg)

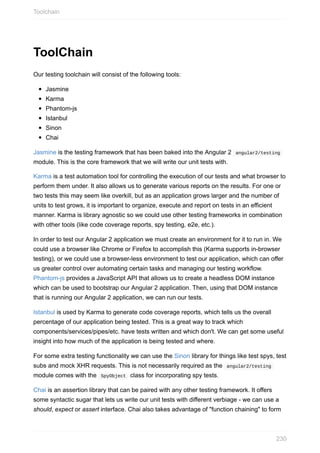


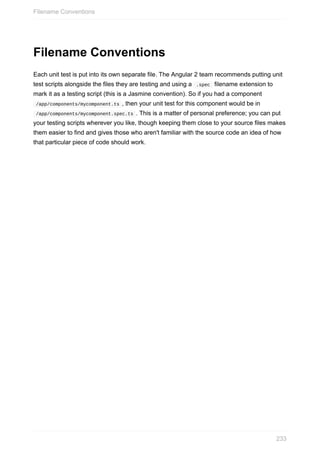

![module.exports = (config) => {
config.set({
frameworks: [
'jasmine',
'source-map-support',
],
files: ['./src/tests.entry.ts'],
preprocessors: {
'./src/**/*.ts': [
'webpack',
'sourcemap',
],
'./src/**/!(*.test|tests.*).ts': [
'coverage',
],
},
webpack: {...},
webpackServer: {
noInfo: true, // prevent console spamming when running in Karma!
},
reporters: [
'spec',
'coverage',
],
coverageReporter: {
reporters: [
{ type: 'json' },
{ type: 'html' },
],
dir: './coverage/',
subdir: (browser) => {
return browser.toLowerCase().split(/[ /-]/)[0]; // returns 'chrome'
},
},
port: 9999,
browsers: ['Chrome'], // Alternatively: 'PhantomJS'
singleRun: true,
colors: true,
logLevel: config.LOG_INFO,
autoWatch: true,
captureTimeout: 6000,
});
};
Karma Configuration
235](https://image.slidesharecdn.com/ngcourse2-160923035221/85/Angular-2-235-320.jpg)
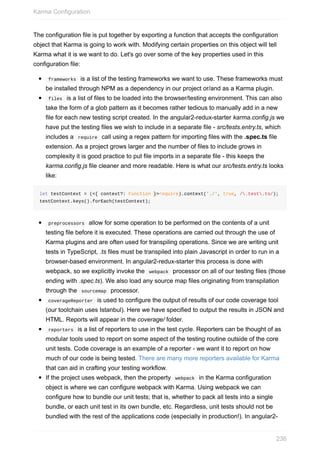
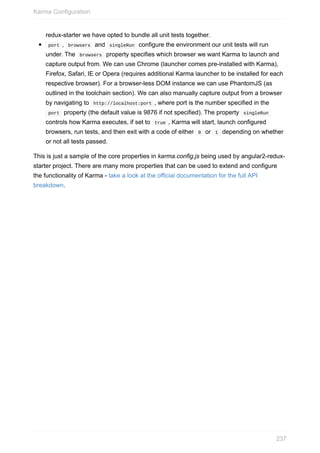

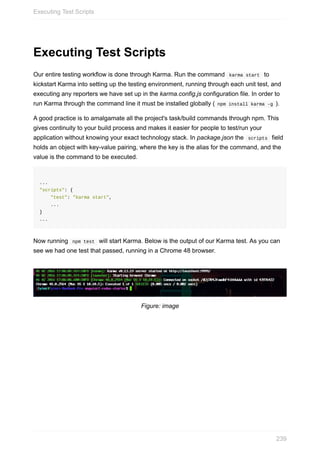
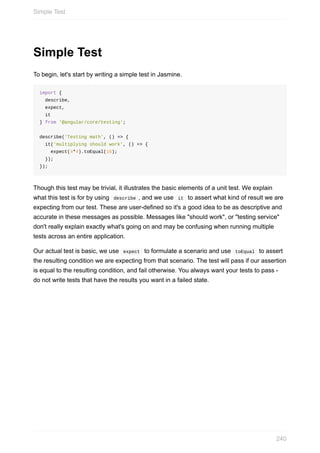


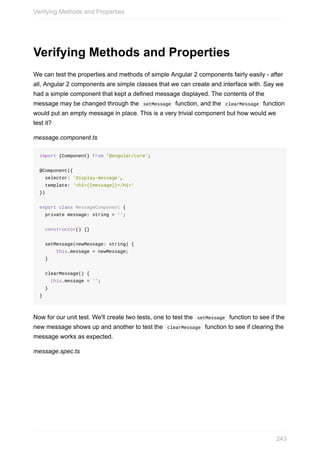
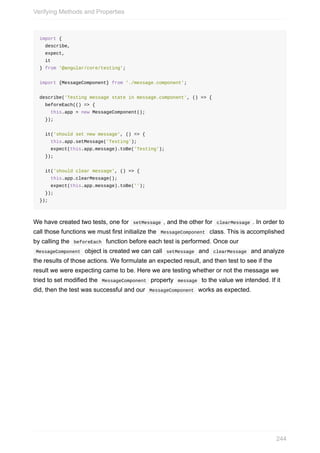

![class MockQuoteService {
public quote: 'Test quote';
getQuote() {
return new Promise((resolve, reject) => {
resolve(this.quote);
});
}
}
import {QuoteService} from 'quote.service.ts';
import {QuoteComponent} from 'quote.component.ts';
import {provide} from '@angular/core';
import {
async,
expect,
it,
describe,
inject,
beforeEach,
beforeEachProvider,
} from '@angular/core/testing';
import {
TestComponentBuilder,
ComponentFixture,
}
from '@angular/compiler/testing';
describe('Testing Quote Component', () => {
beforeEachProviders(() => [
provide(QuoteService, { useClass: MockQuoteService })
]);
it('Should get quote',
async(inject([TestComponentBuilder], (tcb: TestComponentBuilder) => {
tcb.createAsync(QuoteComponent).then(fixture => {
fixture.componentInstance.getQuote();
fixture.whenStable().then(() => {
fixture.detectChanges();
let compiled = fixture.debugElement.nativeElement;
expect(compiled.querySelector('div')).toHaveText('Test quote');
});
});
}))
);
});
Injecting Dependencies and DOM Changes
246](https://image.slidesharecdn.com/ngcourse2-160923035221/85/Angular-2-246-320.jpg)

![Overriding Components for Testing
In some components, providers are not directly injected through the constructor but instead
defined through a decorator. Consider the following component:
@Component({
selector: 'example',
template: '<div>Simple example</div>',
providers: [ExampleService]
});
class SimpleComponent() {}
This won't work when using beforeEachProvider . Instead we can use the
TestComponentBuilder to explicitly inject the ExampleService provider through
overrideProviders . As we did before, you should create a mocked version of the
ExampleService to feed in data you expect.
it('Should work', async(inject(
[TestComponentBuilder], (tcb: TestComponentBuilder) => {
tcb.overrideProviders(SimpleComponent, [
provide(ExampleService, {useClass: MockExampleService})
]).createAsync(SimpleComponent).then(fixture => {
// test your fixture here
});
}))
);
TestComponentBuilder also lets you override a component's template. This is useful for
testing a small part of a large component, as you can ignore the output from the rest of the
DOM and only focus on the part you are interested in testing. Calling overrideTemplate will
set the component's template to whatever you pass in.
Injecting Dependencies and DOM Changes
248](https://image.slidesharecdn.com/ngcourse2-160923035221/85/Angular-2-248-320.jpg)
![it('Should work', async(inject(
[TestComponentBuilder], (tcb: TestComponentBuider) => {
tcb.overrideTemplate(SimpleComponent, '<span>{{message}}</span>')
.createAsync(SimpleComponent).then(fixture => {
// test all things relating to the message property here
// test all things relating to the message property here
});
}))
);
Injecting Dependencies and DOM Changes
249](https://image.slidesharecdn.com/ngcourse2-160923035221/85/Angular-2-249-320.jpg)
![Testing Asynchronous Actions
Sometimes we need to test components that rely on asynchronous actions that happen at
specific times. Angular provides a function called fakeAsync which wraps our tests in a
zone and gives us access to the tick function, which will allow us to simulate the passage
of time precisely.
Suppose we had a component with a button that will trigger an action within a setTimeout of
two seconds. Here's what our component and unit test might look like:
@Component({
selector: 'example',
template: `
<span>{{message}}</span>
<button (click)="performAction()">Click me</button>
`})
class SampleComponent {
constructor() {}
performAction () {
setTimeout(() => {
this.message = 'My expected data';
}, 2000);
}
}
it('Should work',
fakeAsync(inject([TestComponentBuilder], (tcb: TestComponentBuilder) => {
tcb.createAsync(SampleComponent).then(fixture => {
fixture.debugElement.nativeElement.querySelector('button')
.click();
tick(2000);
fixture.detectChanges();
expect(fixture.debugElement.nativeElement.querySelector('span'))
.toHaveText('My expected data');
});
}));
);
Testing Asynchronous Actions
250](https://image.slidesharecdn.com/ngcourse2-160923035221/85/Angular-2-250-320.jpg)


![wikisearch.spec.ts
import {
BaseRequestOptions,
Response,
ResponseOptions,
ConnectionBackend,
Http
} from '@angular/http';
import {
it,
expect,
describe,
beforeEachProviders,
inject
} from '@angular/core/testing';
import {MockBackend} from '@angular/http/testing';
import {provide} from '@angular/core';
import {SearchWiki} from './wikisearch';
describe('Testing the wikipedia search service', () => {
beforeEachProviders(() => {
return [
MockBackend,
BaseRequestOptions,
SearchWiki,
provide(
Http, {
useFactory: (
mockbackend: ConnectionBackend,
defaultOptions: BaseRequestOptions
) => {
return new Http(mockbackend, defaultOptions);
},
deps: [MockBackend, BaseRequestOptions]
}
)
];
});
});
As you can see, we have quite a few imports here to set up our mocked HTTP module. We
use beforeEachProviders to include MockBackend to create our mocked HTTP module. In
order to properly set up our mocked module we also include BaseRequestOptions and
ConnectionBackend . We create an instance of Http that our service will get by using a
factory.
Injecting Dependencies
257](https://image.slidesharecdn.com/ngcourse2-160923035221/85/Angular-2-257-320.jpg)


![describe('verify search', () => {
it('searches for the correct term',
fakeAsync(inject([SearchWiki, MockBackend], (searchWiki, mockBackend) => {
const expectedUrl = 'https://en.wikipedia.org/w/api.php?' +
'action=query&list=search&srsearch=Angular';
mockBackend.connections.subscribe((conn) => {
expect(conn.request.url).toBe(expectedUrl);
let response = new ResponseOptions({
body: {
query: {
searchInfo: { totalhits: 1 }
},
search: [
{
ns: 0,
title: 'Angular',
size: 840,
wordcount: 115
}
]
}
});
conn.mockRespond(new Response(response));
});
let result;
searchWiki.search('Angular').subscribe((res) => {
result = res;
});
tick();
expect(result.query.searchInfo.totalhits).toBe(1);
})));
});
Our testing strategy is fairly straightforward - we check to see that our service has requested
the right URL, and once we've responded with mock data we want to verify that our service
returns that same data.
We use inject to inject the SearchWiki service and the MockBackend into our test. We
then wrap our entire test with a call to fakeAsync , which will be used to control the
asynchronous behavior of the SearchWiki service for testing.
Testing HTTP Requests
261](https://image.slidesharecdn.com/ngcourse2-160923035221/85/Angular-2-261-320.jpg)
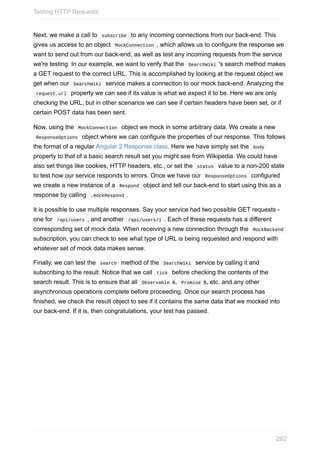

![Executing Tests Asynchronously
Since services operate in an asynchronous manner it may be useful to execute a service's
entire unit test asynchronously. This can speed up the overall time it takes to complete a full
testing cycle since a particular long unit test will not block other unit tests from executing. We
can set up our unit test to return a promise, which will resolve as either a success or failure
depending on the activity of the test.
describe('verify search', () => {
it('searches for the correct term',
fakeAsync(injectAsync([SearchWiki, MockBackend], (searchWiki, mockBackend) => {
return new Promise((pass, fail) => {
...
});
})));
});
Instead of using inject , we use injectAsync to fulfill dependencies and execute the test
in an asynchronous process. Using injectAsync requires us to return a Promise, which we
use to resolve the competition of our test by calling pass , or fail , depending on the
results of our test.
Executing Tests Asynchronously
264](https://image.slidesharecdn.com/ngcourse2-160923035221/85/Angular-2-264-320.jpg)


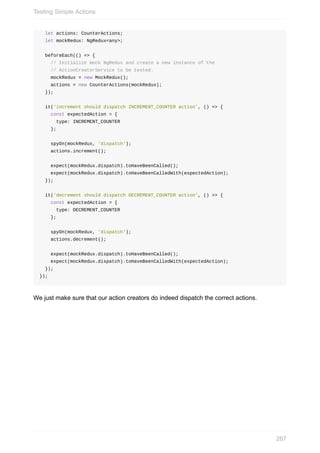
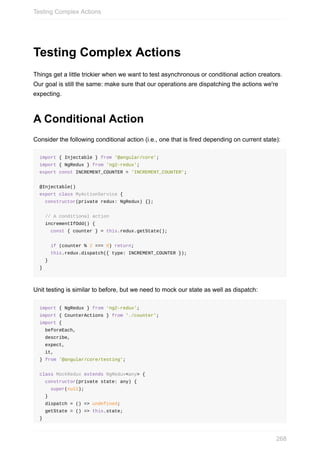
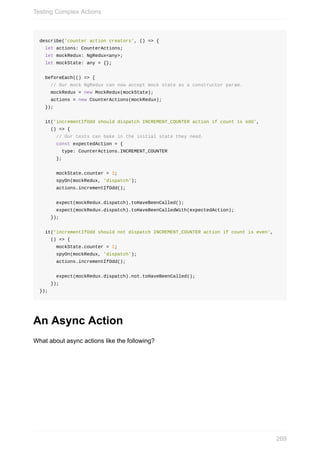
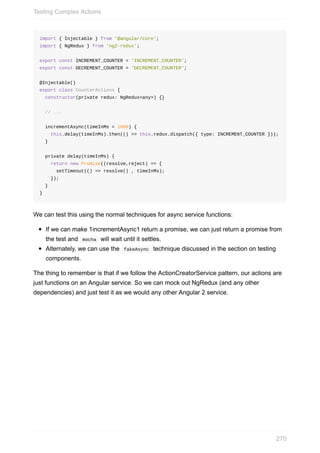

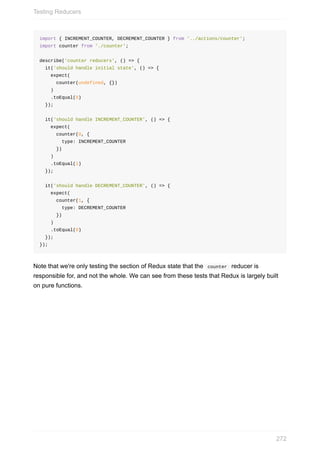


![Bootstrapping ng-upgrade
Use manual Angular 1.x bootstrapping, and remove ng-app / ng-strict-di references
if they exist
Add Angular 2 dependencies
Add the upgrade adapter import {UpgradeAdapter} from 'angular2/upgrade'
Call the upgrade adapter's bootstrap
Once this is working the foundation is set for transitioning from Angular 1.x to Angular 2. It is
important to note that the upgrade adapter's bootstrap mechanism is asynchronous.
Additionally it's important to treat the upgrade adapter as a singleton.
The following file creates an instance of UpgradeAdapter and exports it.
// Angular 2 Vendor Import
import {UpgradeAdapter} from '@angular/upgrade';
// Instantiate an adapter
export const upgradeAdapter = new UpgradeAdapter();
The following file bootstraps an Angular 1/2 hybrid application:
// Angular 1 Vendor Import
import * as angular from 'angular';
// Import the upgradeAdapter singleton
import {upgradeAdapter} from './upgrade-adapter';
// Name the application
const APPNAME = 'angular-upgrade-example';
// Register classic Angular 1 modules
angular
.module(APPNAME, []);
// Bootstrap Angular 1 manually
angular.bootstrap(document.body, [APPNAME]);
// Bootstrap Angular 2 - *note* this is asynchronous
upgradeAdapter.bootstrap(document.documentElement, [APPNAME], {strictDi: true});
The above example does not actually do anything other than bootstrap an empty application.
Bootstrapping ng-upgrade
283](https://image.slidesharecdn.com/ngcourse2-160923035221/85/Angular-2-283-320.jpg)

![Upgrading Components
The only Angular 1.x components that can be upgraded and used in Angular 2 code are
those that strictly follow the component pattern outlined at the top of this document.
Wherever possible use Angular 1.5+'s .component .
Here is an Angular 1.x directive that conforms to ng-upgrade's "component directive"
specification:
export function a1UpgradableDirective() {
return {
restrict: 'E',
scope: {},
bindToController: {},
controller: Upgradable,
controllerAs: 'a1Upgradable',
template: `<span>{{ a1Upgradable.message }}</span>`
};
}
class Upgradable {
message = 'I am an Angular 1 Directive';
}
Here is an Angular 2 component that will use the upgraded Angular 1.x directive:
import {Component} from '@angular/core';
import {upgradeAdapter} from '../upgrade-adapter';
@Component({
selector: 'a2-using-a1',
directives: [upgradeAdapter.upgradeNg1Component('a1Upgradable')],
template: `<p>{{ message }}<a1-upgradable></a1-upgradable></p>`
})
export class A2UsingA1Component {
message = 'Angular 2 Using Angular 1: ';
}
Finally, let Angular 1.x know about the directive:
Upgrading Components
286](https://image.slidesharecdn.com/ngcourse2-160923035221/85/Angular-2-286-320.jpg)


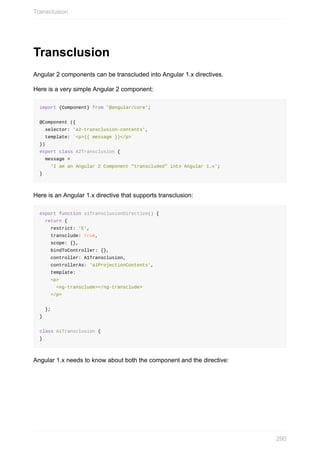

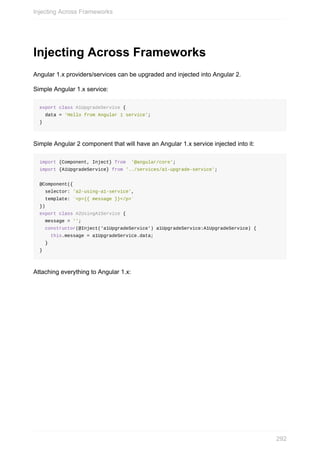

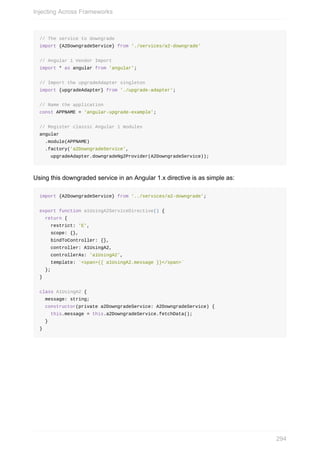


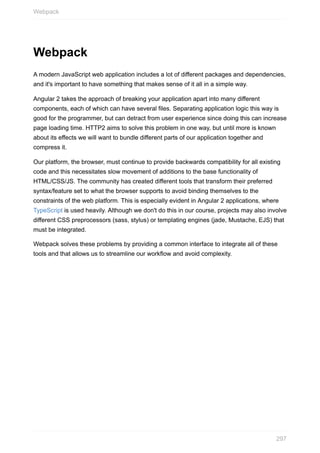
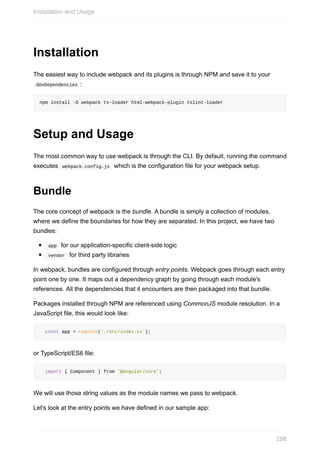
![{
...
entry: {
app: './src/index.ts',
vendor: [
'es6-shim',
'angular2/bundles/angular2-polyfills',
'angular2/bootstrap',
'angular2/platform/browser',
'angular2/platform/common_dom',
'@angular/core',
'angular2/router',
'angular2/http',
'redux',
'redux-thunk',
'ng2-redux',
'redux-logger'
]
}
...
}
The entry point for app , ./src/index.ts , is the base file of our Angular 2 application. If
we've defined the dependencies of each module correctly, those references should connect
all the parts of our application from here. The entry point for vendor is a list of modules that
we need for our application code to work correctly. Even if these files are referenced by
some module in our app bundle, we want to separate these resources in a bundle just for
third party code.
Output Configuration
In most cases we don't just want to configure how webpack generates bundles - we also
want to configure how those bundles are output.
Often, we will want to re-route where files are saved. For example into a bin or dist
folder. This is because we want to optimize our builds for production.
Webpack transforms the code when bundling our modules and outputting them. We
want to have a way of connecting the code that's been generated by webpack and the
code that we've written.
Server routes can be configured in many different ways. We probably want some way of
configuring webpack to take our server routing setup into consideration.
All of these configuration options are handled by the config's output property. Let's look at
how we've set up our config to address these issues:
Installation and Usage
299](https://image.slidesharecdn.com/ngcourse2-160923035221/85/Angular-2-299-320.jpg)
![{
...
output: {
path: path.resolve(__dirname, 'dist'),
filename: '[name].[hash].js',
publicPath: "/",
sourceMapFilename: '[name].[hash].js.map'
}
...
}
Some options have words wrapped in square brackets. Webpack has the ability to
parse parameters for these properties, with each property having a different set of
parameters available for substitution. Here, we're using name (the name of the bundle)
and hash (a hash value of the bundle's content).
To save bundled files in a different folder, we use the path property. Here, path tells
webpack that all of the output files must be saved to path.resolve(__dirname, 'dist') . In
our case, we save each bundle into a separate file. The name of this file is specified by the
filename property.
Linking these bundled files and the files we've actually coded is done using what's known as
source maps. There are different ways to configure source maps. What we want is to save
these source maps in a separate file specified by the sourceMapFilename property. The way
the server accesses the files might not directly follow the filesystem tree. For us, we want to
use the files saved under dist as the root folder for our server. To let webpack know this,
we've set the publicPath property to / .
Installation and Usage
300](https://image.slidesharecdn.com/ngcourse2-160923035221/85/Angular-2-300-320.jpg)
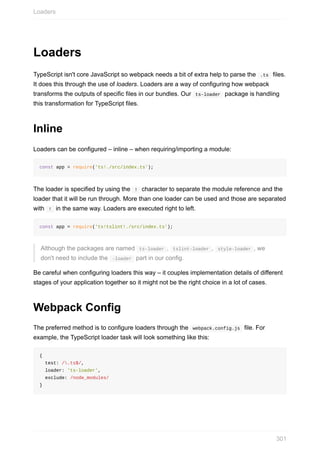
![This runs the typescript compiler which respects our configuration settings as specified
above. We want to be able to handle other files and not just TypeScript files, so we need to
specify a list of loaders. This is done by creating an array of tasks.
Tasks specified in this array are chained. If a file matches multiple conditions, it will be
processed using each task in order.
{
...
module: {
preLoaders: [{
test: /.ts$/,
loader: 'tslint'
}],
loaders: [
{ test: /.ts$/, loader: 'ts', exclude: /node_modules/ },
{ test: /.html$/, loader: 'raw' },
{ test: /.css$/, loader: 'style!css?sourceMap' },
{ test: /.svg/, loader: 'url' },
{ test: /.eot/, loader: 'url' },
{ test: /.woff/, loader: 'url' },
{ test: /.woff2/, loader: 'url' },
{ test: /.ttf/, loader: 'url' },
],
noParse: [ /zone.js/dist/.+/, /angular2/bundles/.+/ ]
}
...
}
Each task has a few configuration options:
test - The file path must match this condition to be handled. This is commonly used to
test file extensions eg. /.ts$/ .
loader - The loaders that will be used to transform the input. This follows the syntax
specified above.
exclude - The file path must not match this condition to be handled. This is commonly
used to exclude file folders, e.g. /node_modules/ .
include - The file path must match this condition to be handled. This is commonly used
to include file folders. eg. path.resolve(__dirname, 'app/src') .
Pre-Loaders
The preLoaders array works just like the loaders array only it is a separate task chain that is
executed before the loaders task chain.
Loaders
302](https://image.slidesharecdn.com/ngcourse2-160923035221/85/Angular-2-302-320.jpg)

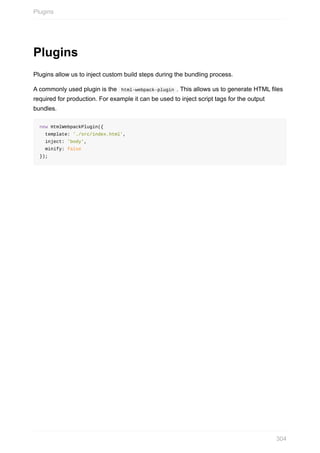
![Summary
When we put everything together, our complete webpack.config.js file looks something like
this:
'use strict';
const path = require("path");
const webpack = require('webpack');
const HtmlWebpackPlugin = require('html-webpack-plugin');
const basePlugins = [
new webpack.optimize.CommonsChunkPlugin('vendor', '[name].[hash].bundle.js'),
new HtmlWebpackPlugin({
template: './src/index.html',
inject: 'body',
minify: false
})
];
const envPlugins = {
production: [
new webpack.optimize.UglifyJsPlugin({
compress: {
warnings: false
}
})
],
development: []
};
const plugins = basePlugins.concat(envPlugins[process.env.NODE_ENV] || []);
module.exports = {
entry: {
app: './src/index.ts',
vendor: [
'es6-shim',
'angular2/bundles/angular2-polyfills',
'angular2/bootstrap',
'angular2/platform/browser',
'angular2/platform/common_dom',
'@angular/core',
'angular2/router',
'angular2/http',
'redux',
'redux-thunk',
'ng2-redux',
Summary
305](https://image.slidesharecdn.com/ngcourse2-160923035221/85/Angular-2-305-320.jpg)
!['redux-logger'
]
},
output: {
path: path.resolve(__dirname, 'dist'),
filename: '[name].[hash].js',
publicPath: "/",
sourceMapFilename: '[name].[hash].js.map'
},
devtool: 'source-map',
resolve: {
extensions: ['', '.webpack.js', '.web.js', '.ts', '.js']
},
plugins: plugins,
module: {
preLoaders: [{
test: /.ts$/,
loader: 'tslint'
}],
loaders: [
{ test: /.ts$/, loader: 'ts', exclude: /node_modules/ },
{ test: /.html$/, loader: 'raw' },
{ test: /.css$/, loader: 'style!css?sourceMap' },
{ test: /.svg/, loader: 'url' },
{ test: /.eot/, loader: 'url' },
{ test: /.woff/, loader: 'url' },
{ test: /.woff2/, loader: 'url' },
{ test: /.ttf/, loader: 'url' },
],
noParse: [ /zone.js/dist/.+/, /angular2/bundles/.+/ ]
}
}
Going further
Webpack also does things like hot code reloading and code optimization which we haven't
covered. For more information you can check out the official documentation. The source is
also available on Github.
Summary
306](https://image.slidesharecdn.com/ngcourse2-160923035221/85/Angular-2-306-320.jpg)
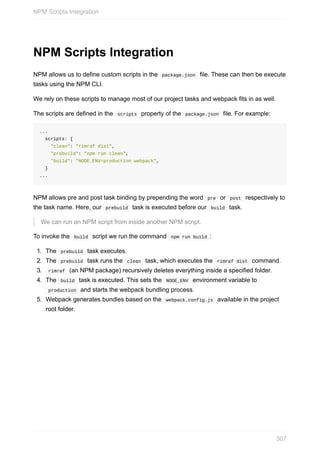


![Creating a New App
Use the ng new [app-name] command to create a new app. This will generate a basic app in
the folder of the app name provided. The app has all of the features available to work with
the CLI commands. Creating an app may take a few minutes to complete since npm will
need to install all of the dependencies. The directory is automatically set up as a new git
repository as well. If git is not your version control of choice, simply remove the .git folder
and .gitignore file.
File and Folder Setup
The generated app folder will look like this:
Creating a New App
310](https://image.slidesharecdn.com/ngcourse2-160923035221/85/Angular-2-310-320.jpg)


![Creating Components
The CLI can scaffold Angular 2 components through the generate command. To create a
new component run:
ng generate component [component-name]
Executing the command creates a folder, [component-name], in the project's src/app path or
the current path the command is executed in if it's a child folder of the project. The folder has
the following:
[component-name].component.ts the component class file
[component-name].component.css for styling the component
[component-name].component.html component html
[component-name].component.spec.ts tests for the component
index.ts which exports the component
Creating Components
314](https://image.slidesharecdn.com/ngcourse2-160923035221/85/Angular-2-314-320.jpg)
![Creating Routes
The ng g route [route-name] command will spin up a new folder and route files for you. It
will also insert the route into the parent component's @Routes decorator. For example, ng g
route myRoute adds a route to the main component and creates the following files:
+my-route/
shared/
index.ts
my-route.component.css
my-route.component.html
my-route.component.ts
my-route.component.spec.ts
It also adds the path to the root component's @Route decorator:
@Routes([
{path: '/my-route', component: MyRouteComponent}
])
By default, routes are created as lazy routes (and indicated with a + in the folder name),
meaning they will only be loaded into the browser when needed. You can turned this off
using the flag --lazy false .
Creating Routes
315](https://image.slidesharecdn.com/ngcourse2-160923035221/85/Angular-2-315-320.jpg)
![Creating Other Things
The CLI can scaffold other Angular 2 entities such as services, pipes and directives using
the generate command.
ng generate [entity] [entity-name]
This creates the entity at src/app/[entity-name].[entity].ts along with a spec file, or at the
current path if the command is executed in a child folder of the project. The CLI provides
blueprints for the following entities out of the box:
Item Command Files generated
Component:
ng g component
[name] component, HTML, CSS, test spec files
Directive:
ng g directive
[name] component, test spec files
Pipe: ng g pipe [name] component, test spec files
Service:
ng g service
[name] component, test spec files
Class: ng g class [name] component, test spec files
Route: ng g route [name]
component, HTML, CSS, test spec files (in new
folder)
Creating Other Things
316](https://image.slidesharecdn.com/ngcourse2-160923035221/85/Angular-2-316-320.jpg)


![CLI Command Overview
One of the advantages of using the Angular CLI is that it automatically configures a number
of useful tools that you can use right away. To get more details on the options for each task,
use ng --help .
Linting
ng lint lints the code in your project using tslint. You can customize the rules for your
project by editing tslint.json .
You can switch some of these to use your preferred tool by editing the scripts in
package.json .
Testing
ng test triggers a build and then runs the unit tests set up for your app using Karma. Use
the --watch option to rebuild and retest the app automatically whenever source files
change.
Build
ng build will build your app (and minify your code) and place it into the default output path,
dist/ .
Serve
ng-serve builds and serves your app on a local server and will automatically rebuild on file
changes. By default, your app will be served on http://localhost:4200/.
Include --port [number] to serve your app on a different HTTP port.
E2E
Once your app is served, you can run end-to-end tests using ng e2e . The CLI uses
Protractor for these tests.
CLI Command Overview
319](https://image.slidesharecdn.com/ngcourse2-160923035221/85/Angular-2-319-320.jpg)


![[Newie Induction] Personal Effectiveness](https://cdn.slidesharecdn.com/ss_thumbnails/personaleffectivenessgst-140210025126-phpapp02-thumbnail.jpg?width=640&height=640&fit=bounds)