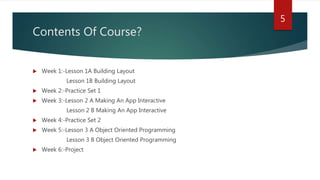
Android Development
For
Beginners
BY:-DAKSH SEMWAL
CS-A 4 SEM. |ROLL NO-38(1011419)
1
Website:-https://www.udacity.com
Instructors:-Katherine Kuan | Kunal Chawla | Lyla Fujiwara
Duration:- 6 Weeks
2
What is Android ?
 Android is a mobile operating system developed by Google
 Based on the Linux kernel and designed primarily for touchscreen mobile devices
such as smartphones and tablets.
 Android's user interface is mainly based on direct manipulation, using touch
gestures that loosely correspond to real-world actions,
 Such as swiping, tapping and pinching, to manipulate on-screen objects, along
with a virtual keyboard for text input.
3
Why This Course ?
 While Android has evolved over the years, iOS has as well, even adopting plenty of
early Android features that once made this the easy operating system of choice
for many of us.
 Is it about control, still? Is it the “openness” to everything (like apps talking to each
other and a file manager)? Is it about choice?
 Is it because you just flat out love HTC or Samsung or Motorola or LG?
 Is it because you need the best Google app experiences (sans Hangouts of
course)?
 Or maybe, you really just do despise all that is Apple?
4
Contents Of Course?
 Week 1:-Lesson 1A Building Layout
Lesson 1B Building Layout
 Week 2:-Practice Set 1
 Week 3:-Lesson 2 A Making An App Interactive
Lesson 2 B Making An App Interactive
 Week 4:-Practice Set 2
 Week 5:-Lesson 3 A Object Oriented Programming
Lesson 3 B Object Oriented Programming
 Week 6:-Project
5
Week 1 BUILDING LAYOUT
6
VIEWS
 Text View
 Image View
 List View
7
Text View Syntax
8
<TextView
android:layout_width="wrap_content"
android:layout_height="wrap_content"
android:textAppearance="?android:attr/textAppearanceLarge"
android:text="First Name"
android:id="@+id/textView"
android:layout_alignTop="@+id/editText_name"
android:layout_alignParentLeft="true"
android:layout_alignParentStart="true" />
Image View Syntax
9
<ImageView
android:layout_width="wrap_content"
android:layout_height="wrap_content"
android:id="@+id/imageView"
android:layout_alignParentBottom="true"
android:layout_toRightOf="@+id/textView_id"
android:layout_toEndOf="@+id/textView_id" />
Week 3 MAKING AN APP INTERACTIVE
10
LAYOUT
 Linear Layout
 Relative Layout
 Table Layout
 Absolute Layout
 Frame Layout
11
Relative Layout
12
<RelativeLayout xmlns:android="http://schemas.android.com/apk/res/android"
xmlns:tools="http://schemas.android.com/tools"
android:layout_width="match_parent"
android:layout_height="match_parent"
android:paddingBottom="@dimen/activity_vertical_margin"
android:paddingLeft="@dimen/activity_horizontal_margin"
android:paddingRight="@dimen/activity_horizontal_margin"
android:paddingTop="@dimen/activity_vertical_margin"
tools:context="in.blogspot.programmingssolution007.www.sqliteapp.MainActivity"></RelativeLayout>
Linear Layout
 <LinearLayout xmlns:android="http://schemas.android.com/apk/res/android"
xmlns:tools="http://schemas.android.com/tools"
android:layout_width=“fill_parent"
android:layout_height=“fill_parent"
android:paddingBottom="@dimen/activity_vertical_margin"
android:paddingLeft="@dimen/activity_horizontal_margin"
android:paddingRight="@dimen/activity_horizontal_margin"
android:paddingTop="@dimen/activity_vertical_margin"
tools:context="in.blogspot.programmingssolution007.www.sqliteapp.MainActivity"></LinearLay
out>
13
Table Layout
14
<TableLayout xmlns:android="http://schemas.android.com/apk/res/android"
android:layout_width="fill_parent" android:layout_height="fill_parent">
<TableRow>
<TextView android:text="First Name" android:layout_width="wrap_content"
android:layout_height="wrap_content" android:layout_column="1" />
<EditText android:width="200px" android:layout_width="wrap_content"
android:layout_height="wrap_content" />
</TableRow>
</TableLayout>
Absolute Layout
15
<AbsoluteLayout xmlns:android="http://schemas.android.com/apk/res/android"
android:layout_width="fill_parent"
android:layout_height="fill_parent">
<Button android:layout_width="100dp“
android:layout_height="wrap_content"
android:text="OK" android:layout_x="50px“
android:layout_y="361px" />
<Button android:layout_width="100dp"
android:layout_height="wrap_content"
android:text="Cancel" android:layout_x="225px“
android:layout_y="361px" />
</AbsoluteLayout>
Frame Layout
16
<FrameLayout xmlns:android="http://schemas.android.com/apk/res/android"
android:layout_width="fill_parent“
android:layout_height="fill_parent">
<ImageView android:src="@drawable/ic_launcher“
android:scaleType="fitCenter" android:layout_height="250px"
android:layout_width="250px"/>
<TextView android:text="Frame Demo" android:textSize="30px"
android:textStyle="bold" android:layout_height="fill_parent“
android:layout_width="fill_parent" android:gravity="center"/>
</FrameLayout>
Button
17
• This class is used to make a normal button with text
• <Button
android:layout_width="wrap_content"
android:layout_height="wrap_content"
android:text="@string/button_text"
... />
Image Button
 This class is used to create a button with image icon
 <ImageButton
android:layout_width="wrap_content"
android:layout_height="wrap_content"
android:src="@drawable/button_icon"
... />
18
Button With Drawable Attribute
 This Class is used to create a button with text and icon
 <Button
android:layout_width="wrap_content"
android:layout_height="wrap_content"
android:text="@string/button_text"
android:drawableLeft="@drawable/button_icon"
... />
19
Key Learnings
 Understanding of basic layouts of Android.
 Understanding of buttons used in Android.
 Understanding of different views in Android.
 Better understanding of java embedding in Android.
 Understanding of How XML works.
 How to make simple calculator app.
20
21
22

Android Development