SOIL
is at thecenter of all
healthy organic agriculture
production. It is the mixture
of organic matter, minerals,
liquids, gases ang organism
that serve as a medium for
plant life.
COLOR
•Indication of variousprocesses going
on in the soil.
RED- it is the abundance of iron oxide
under oxidized conditions in the soil.
DARK BROWN- accumulation of
decaying organic matter.
YELLOW- hydrated iron oxides and
hydroxide.
9.
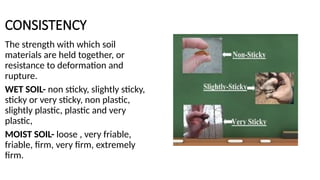
CONSISTENCY
The strength withwhich soil
materials are held together, or
resistance to deformation and
rupture.
WET SOIL- non sticky, slightly sticky,
sticky or very sticky, non plastic,
slightly plastic, plastic and very
plastic,
MOIST SOIL- loose , very friable,
friable, firm, very firm, extremely
firm.
•Soil organisms breakdown
organic matter and while
doing so make nutrients
available for uptake by plants.
13.
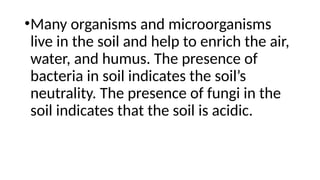
•Many organisms andmicroorganisms
live in the soil and help to enrich the air,
water, and humus. The presence of
bacteria in soil indicates the soil’s
neutrality. The presence of fungi in the
soil indicates that the soil is acidic.
14.
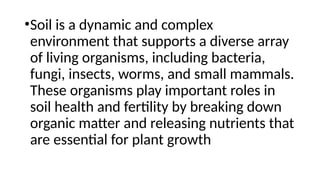
•Soil is adynamic and complex
environment that supports a diverse array
of living organisms, including bacteria,
fungi, insects, worms, and small mammals.
These organisms play important roles in
soil health and fertility by breaking down
organic matter and releasing nutrients that
are essential for plant growth
15.
SOIL MICROBIOTA
Refers tothe
ecological
“communities” of
microorganisms in
the soil that are
responsible for
nutrient cycle and
protect infection and
disease.
16.
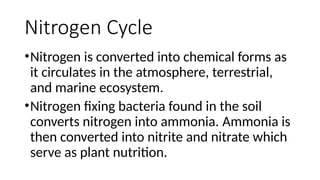
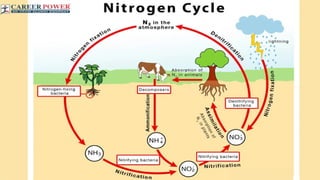
Nitrogen Cycle
•Nitrogen isconverted into chemical forms as
it circulates in the atmosphere, terrestrial,
and marine ecosystem.
•Nitrogen fixing bacteria found in the soil
converts nitrogen into ammonia. Ammonia is
then converted into nitrite and nitrate which
serve as plant nutrition.
19.
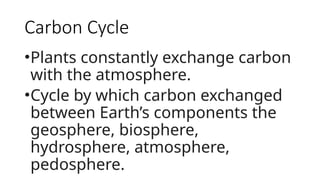
Carbon Cycle
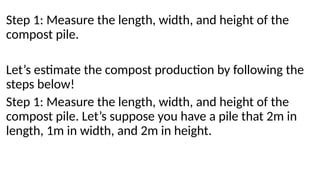
•Plants constantlyexchange carbon
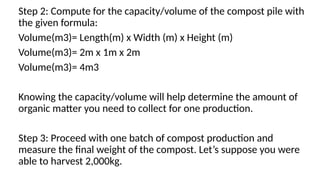
with the atmosphere.
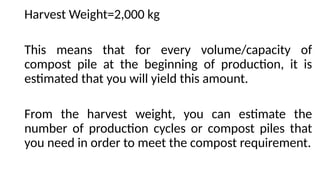
•Cycle by which carbon exchanged
between Earth’s components the
geosphere, biosphere,
hydrosphere, atmosphere,
pedosphere.
20.
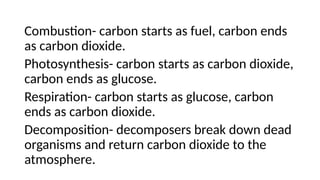
Combustion- carbon startsas fuel, carbon ends
as carbon dioxide.
Photosynthesis- carbon starts as carbon dioxide,
carbon ends as glucose.
Respiration- carbon starts as glucose, carbon
ends as carbon dioxide.
Decomposition- decomposers break down dead
organisms and return carbon dioxide to the
atmosphere.
22.
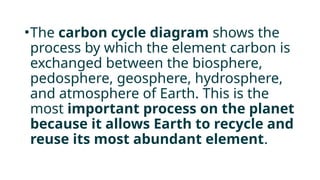
•The carbon cyclediagram shows the
process by which the element carbon is
exchanged between the biosphere,
pedosphere, geosphere, hydrosphere,
and atmosphere of Earth. This is the
most important process on the planet
because it allows Earth to recycle and
reuse its most abundant element.
Chemical properties reflectthe
influence between soil solution (soil
water and nutrients) and exchange
sites (clay particles, organic matter);
plant health; the nutritional
requirements of plant; and levels of
soil contaminants and their
availability for uptake by plants.
27.
SALINITY
The amount ofdissolved salt in the water.
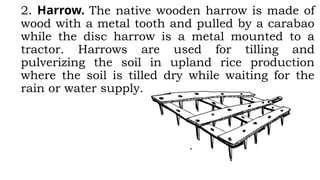
High concentration of salt in the soil
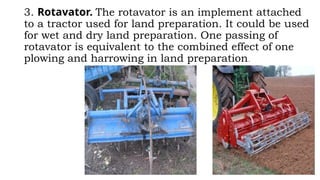
reduces water available to plants, causing
them to wilt. Some salts are also toxic to
plants in high concentration.
28.
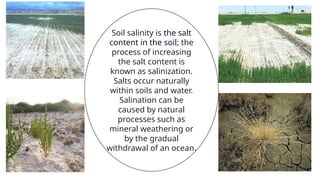
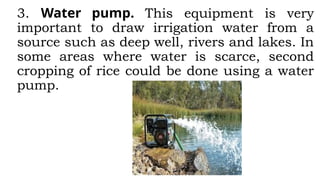
Soil salinity isthe salt
content in the soil; the
process of increasing
the salt content is
known as salinization.
Salts occur naturally
within soils and water.
Salination can be
caused by natural
processes such as
mineral weathering or
by the gradual
withdrawal of an ocean.
31.
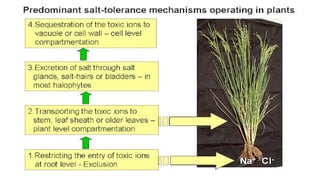
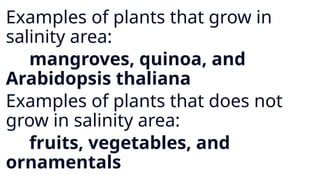
Examples of plantsthat grow in
salinity area:
mangroves, quinoa, and
Arabidopsis thaliana
Examples of plants that does not
grow in salinity area:
fruits, vegetables, and
ornamentals
32.
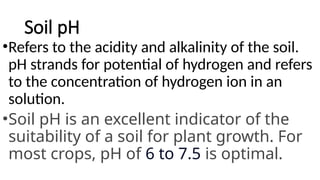
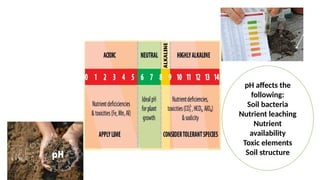
Soil pH
•Refers tothe acidity and alkalinity of the soil.
pH strands for potential of hydrogen and refers
to the concentration of hydrogen ion in an
solution.
•Soil pH is an excellent indicator of the
suitability of a soil for plant growth. For
most crops, pH of 6 to 7.5 is optimal.
33.
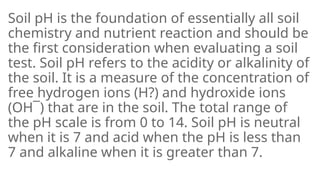
Soil pH isthe foundation of essentially all soil
chemistry and nutrient reaction and should be
the first consideration when evaluating a soil
test. Soil pH refers to the acidity or alkalinity of
the soil. It is a measure of the concentration of
free hydrogen ions (H?) and hydroxide ions
(OH¯) that are in the soil. The total range of
the pH scale is from 0 to 14. Soil pH is neutral
when it is 7 and acid when the pH is less than
7 and alkaline when it is greater than 7.
34.
A neutral pHoccurs where the
hydrogen (H?) and hydroxide
(OH¯) concentrations are equal
(H?= OH¯). Soil pH is directly
related to base saturation; as
base saturation increases, so
dose pH.
APPLICATION:
Chemical properties canbe used for building chemical
classifications. They can also be useful to identify an
unknown substance or to separate or purify it from other
substance.
Chemical properties of the soil are important to soil fertility,
plant growth and reproduction. That is why it is important
to understand how chemical properties of the soil interact
to affect the soil's capacity to store and release nutrients,
and how soil chemistry can affect soil structure.
39.
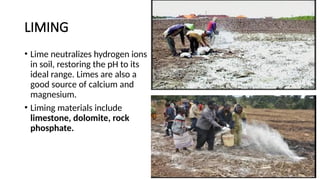
LIMING
• Lime neutralizeshydrogen ions
in soil, restoring the pH to its
ideal range. Limes are also a
good source of calcium and
magnesium.
• Liming materials include
limestone, dolomite, rock
phosphate.
41.
WAYS TO RESTORESOIL FERTILITY
Good quality soil is the bedrock of
a healthy and lush green earth,
and if your lawn looks dry and
unappealing with yellow-brown
patches, chances are that you need
to find out how to restore soil
42.
1. Add OrganicCompost
Compost is a mixture of
decomposed leaves, dried plants,
and vegetable waste that can be
used as a fertilizer to improve the
health of lawn soil. It helps the soil
retain moisture and protect grass
and plants from pests and diseases.
Using organic compost as a
fertilizer is a great way to recycle
biodegradable waste.
43.
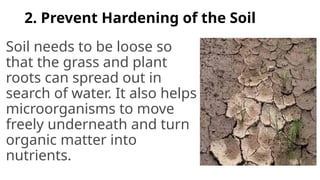
2. Prevent Hardeningof the Soil
Soil needs to be loose so
that the grass and plant
roots can spread out in
search of water. It also helps
microorganisms to move
freely underneath and turn
organic matter into
nutrients.
44.
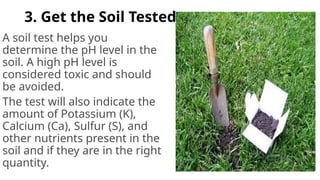
3. Get theSoil Tested
A soil test helps you
determine the pH level in the
soil. A high pH level is
considered toxic and should
be avoided.
The test will also indicate the
amount of Potassium (K),
Calcium (Ca), Sulfur (S), and
other nutrients present in the
soil and if they are in the right
quantity.
45.
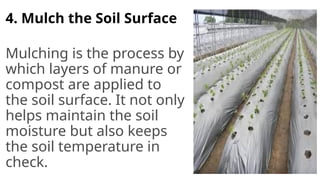
4. Mulch theSoil Surface
Mulching is the process by
which layers of manure or
compost are applied to
the soil surface. It not only
helps maintain the soil
moisture but also keeps
the soil temperature in
check.
46.
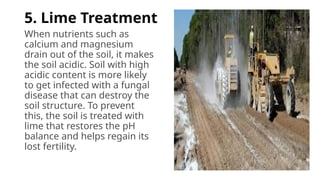
5. Lime Treatment
Whennutrients such as
calcium and magnesium
drain out of the soil, it makes
the soil acidic. Soil with high
acidic content is more likely
to get infected with a fungal
disease that can destroy the
soil structure. To prevent
this, the soil is treated with
lime that restores the pH
balance and helps regain its
lost fertility.
47.
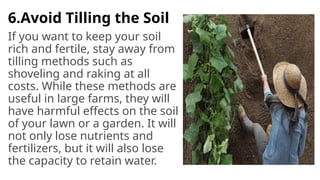
6.Avoid Tilling theSoil
If you want to keep your soil
rich and fertile, stay away from
tilling methods such as
shoveling and raking at all
costs. While these methods are
useful in large farms, they will
have harmful effects on the soil
of your lawn or a garden. It will
not only lose nutrients and
fertilizers, but it will also lose
the capacity to retain water.
48.
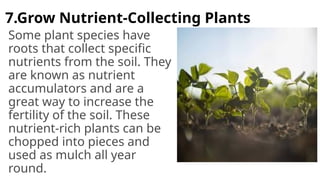
7.Grow Nutrient-Collecting Plants
Someplant species have
roots that collect specific
nutrients from the soil. They
are known as nutrient
accumulators and are a
great way to increase the
fertility of the soil. These
nutrient-rich plants can be
chopped into pieces and
used as mulch all year
round.
49.
Always keep inmind that
soil restoration is an
ongoing process that
takes time, patience, and
the right expertise.
PREPARING FOR ORGANICFERTILIZER
PRODUCTION
The most widely used organic fertilizer
is compost. It is made from organic
materials that have undergone
complete decomposition; it contains
essential plant nutrients and humus.
52.
Reasons for theWide use of Compost
•Availability of raw materials
•Minimal technology required for production
•Utilizes farm wastes that would, otherwise,
contribute to pollution
•Preparation does not require technological
equipment
•Does not occupy a huge portion of farm space
53.
Choosing the Sitefor Composting
Begins with the selection and preparation of
the site for the compost heap/pit. In doing so,
consider the design principles for the site
selection as well as the factors that affect the
rate of composting.
54.
GOOD DRAINAGE
- willprevent compost leachate from polluting groundwater.
Choose flat areas with sandy, silty, or loamy soils.
WEATHER CONDITION
- the site must be protect from harsh weather conditions.
Windy areas can dry out and decrease the compost pile’s
temperature. Choose an area with minimal exposure to sunlight
to prevent compost from drying and microorganisms from dying.
SIZE
the size of the area depends on the volume of production. It
should be big enough for you to carry out tasks such as
shredding, and turning the pile.
55.
CONVENIENCE/EASE OF ACCESS
-the site must be close to the source of waste to minimize
labor. It should be far from areas where food is being handled.
It must be near a water source.
STRUCTURE
-identify the structures that must be built based on preferred
method of composting:
• pit
•Enclosure
•Concreate floor
•Shed, etc.
56.
AERATION
- aerobic micro-organismsneed oxygen in the air to
decompose organic materials. Provide aeration by adding air
vents or by turning the pile regularly. This will also release
excess heat, water vapor, and trapped gases from the pile.
MOISTURE
-supports the growth of microorganisms that convert
materials into compost. Maintain moisture content (MC) at
45-60%. Beyond the ideal range for MC, decomposition will
slow down. If MC drops below 40, microorganisms begin to
die. If MC goes higher than 60, aeration is hampered.
57.
TEMPERATURE
- two typesof bacteria are involved in different phases
of composting- mesophilic and thermophilic bacteria.
Mesophilic bacteria thrive at 20-40 degree Celsius and
higher.
CARBON-NITROGEN RATIO
-Micro- organisms need carbon for growth and energy,
and nitrogen for protein synthesis. The ideal carbon-to-
nitrogen (C:N) ratio is 30:1. If C:N ratio increases to 40:1,
composting will take longer. If C:N goes below 20:1, you
will lose nitrogen through ammonia volatilization.
58.
pH
-maintain pH levelat 5.0-8.0. at higher pH levels,
nitrogen is converted to ammonia and is lost to the
atmosphere through volatilization. Add nitrogen sources
if pH level drops below 4.0. Add carbon sources if it goes
above 8.0.
PARTICLE SIZE
- the bigger the particle the longer it takes to
decompose. Shred your materials before adding them to
your compost. Do not overdo shredding as this will
decrease porosity and aeration.
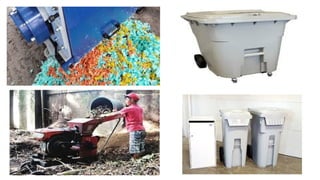
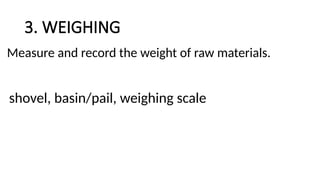
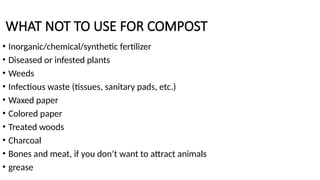
1. COLLECTION
Collect rawmaterials and segregate plant
material from animal material.
rake, shovel, sickle, container/waste bag, wheelbarrow.
62.
2. SHREDDING
Reduce thesize of the materials by using a shredder or
by manual chopping.
Shredder or knife, container
64.
3. WEIGHING
Measure andrecord the weight of raw materials.
shovel, basin/pail, weighing scale
66.
4. Adjusting Carbon-NitrogenRatio
Adjust the combination of organic materials to
get an estimated C:N ratio of 30:1.
Shovel, basin/pail, weighing scale, calculator
(optional).
67.
WHAT NOT TOUSE FOR COMPOST
• Inorganic/chemical/synthetic fertilizer
• Diseased or infested plants
• Weeds
• Infectious waste (tissues, sanitary pads, etc.)
• Waxed paper
• Colored paper
• Treated woods
• Charcoal
• Bones and meat, if you don’t want to attract animals
• grease
68.
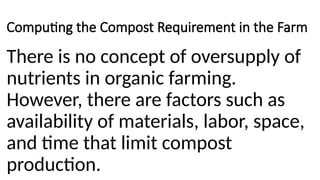
Computing the CompostRequirement in the Farm
There is no concept of oversupply of
nutrients in organic farming.
However, there are factors such as
availability of materials, labor, space,
and time that limit compost
production.
69.
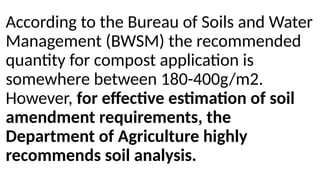
According to theBureau of Soils and Water
Management (BWSM) the recommended
quantity for compost application is
somewhere between 180-400g/m2.
However, for effective estimation of soil
amendment requirements, the
Department of Agriculture highly
recommends soil analysis.
70.
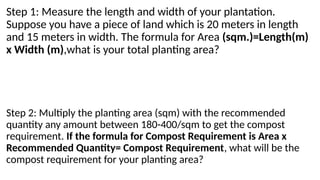
Step 1: Measurethe length and width of your plantation.
Suppose you have a piece of land which is 20 meters in length
and 15 meters in width. The formula for Area (sqm.)=Length(m)
x Width (m),what is your total planting area?
Step 2: Multiply the planting area (sqm) with the recommended
quantity any amount between 180-400/sqm to get the compost
requirement. If the formula for Compost Requirement is Area x
Recommended Quantity= Compost Requirement, what will be the
compost requirement for your planting area?
71.
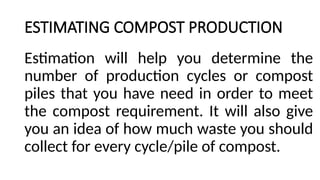
ESTIMATING COMPOST PRODUCTION
Estimationwill help you determine the
number of production cycles or compost
piles that you have need in order to meet
the compost requirement. It will also give
you an idea of how much waste you should
collect for every cycle/pile of compost.
72.
Step 1: Measurethe length, width, and height of the
compost pile.
Let’s estimate the compost production by following the
steps below!
Step 1: Measure the length, width, and height of the
compost pile. Let’s suppose you have a pile that 2m in
length, 1m in width, and 2m in height.
73.
Step 2: Computefor the capacity/volume of the compost pile with
the given formula:
Volume(m3)= Length(m) x Width (m) x Height (m)
Volume(m3)= 2m x 1m x 2m
Volume(m3)= 4m3
Knowing the capacity/volume will help determine the amount of
organic matter you need to collect for one production.
Step 3: Proceed with one batch of compost production and
measure the final weight of the compost. Let’s suppose you were
able to harvest 2,000kg.
74.
Harvest Weight=2,000 kg
Thismeans that for every volume/capacity of
compost pile at the beginning of production, it is
estimated that you will yield this amount.
From the harvest weight, you can estimate the
number of production cycles or compost piles that
you need in order to meet the compost requirement.
Entrepreneurs are peoplewith skills and capabilities to build,
organize and evaluate business opportunities. They are
individuals who can strategically identify products or services
needed by the community and deliver these at the
right time and the right place.
Entrepreneurs are agents of economic change; they organize,
manage
and assume risks of a business. Some of the good qualities of
an entrepreneur
are opportunity seeker, risk taker, goal setter, excellent
planner, confident
problem solver, hardworking, persistent and committed worker.
77.
The entrepreneurial competenciesrefer to
the important characteristics that should be
possessed by an individual in order to
perform entrepreneurial functions effectively.
In this module, you will learn some of the
most important
characteristics, attributes, lifestyle, skills,
and traits of a successful entrepreneur
in order to be successful in a chosen career.
78.
Few important characteristics/traits/attributesof a good
entrepreneur:
• Hardworking: One of the important characteristics of a good
entrepreneur is being a hard worker. This means habitually working
diligently for hours. Hardworking people keep on improving their
performance to produce good products and/or provide good services.
• Self-confident: Entrepreneurs have confidence in their own ability and
judgment. They exhibit self-confidence which enables them to cope with
all the risks in operating their own business.
• Discipline: Successful entrepreneurs always stick to the plan and fight
the temptation to do what is unimportant.
• Committed: A good entrepreneur accepts full responsibility in all
aspects of his/her business. He/she gives full commitment and solid
dedication to make the business succeed
79.
• Ability toaccept change: Nothing is permanent but change.
Change occurs frequently. When one owns a business, he/she
should cope with and thrive on changes. He capitalizes on positive
changes to make his business grow.
Creative: An entrepreneur should be creative and innovative to
stay
in business and in order to have an edge over other competitors.
• Has the Initiative: An entrepreneur takes the initiative. He
assumes
responsibility in the failure or success of his business.
Profit-Oriented: A person enters the world of business to generate
profit or additional income. Therefore, he must see to it that the
business would prosper.
80.
• Listed beloware the important skills of a successful
entrepreneur.
Planner: Planning is a strategic thinking and setting of goals to
achieve objectives and carefully maximizing all the available
resources. A good entrepreneur develops and applies step-by-step
plans to realize goals. He knows that planning is effective only when
combined with diligent action.
People Skills: are skills which are very important in order to be
successful in any kind of business. People skills refer to an effective
and efficient communication and relationship with people working in
and out of the business. In day-to-day business transactions, one
needs to deal with people. Well- developed people skills can spell out
the difference between success and failure of the business.
81.
•Decision Making: Successfulentrepreneurs
have the ability to think quickly and make a
wise decision towards the pre-determined set
of objectives. No one can deny that the ability
to make decision is an important skill that an
entrepreneur should possess. Sound decision
should spring out from given facts/information
and should be directed towards the pre-
determined objectives.
One of thebest ways to evaluate the opportunities
and constraints is to conduct SWOT (Strengths,
Weaknesses, Opportunities and Threats)
Analysis. SWOT analysis is a managerial tool to
assess the environment. It gathers important
information, which in turn is used in crafting a
strategic plan. Strengths and weaknesses are
internal in an organization. Basically they relate to
resources owned by the organization, things that
one has control over, as- well
as the extent of its marketing capability.
84.
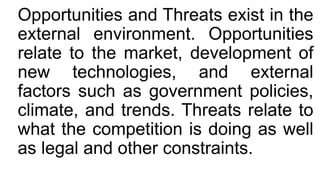
Opportunities and Threatsexist in the
external environment. Opportunities
relate to the market, development of
new technologies, and external
factors such as government policies,
climate, and trends. Threats relate to
what the competition is doing as well
as legal and other constraints.
85.
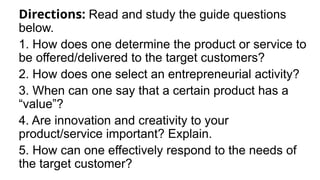
Directions: Read andstudy the guide questions
below.
1. How does one determine the product or service to
be offered/delivered to the target customers?
2. How does one select an entrepreneurial activity?
3. When can one say that a certain product has a
“value”?
4. Are innovation and creativity to your
product/service important? Explain.
5. How can one effectively respond to the needs of
the target customer?
86.
LEARNING GOALS ANDTARGET
Goals and Target
Learning Activities
Ultimate Goal
These goals would motivate you to learn
more about Environment and Market.
87.
Product Development
When wetalk of product development, we are
referring to a process of making a new product
to be sold by a business or enterprise to its
customers. Product development may involve
modification of an existing product or its
presentation, or formulation of an entirely new
product that satisfies a newly defined customer’s
needs and/or want and/or a market place.
88.
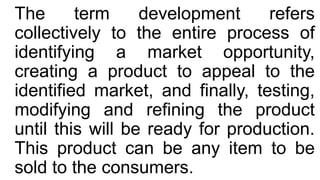
The term developmentrefers
collectively to the entire process of
identifying a market opportunity,
creating a product to appeal to the
identified market, and finally, testing,
modifying and refining the product
until this will be ready for production.
This product can be any item to be
sold to the consumers.
89.
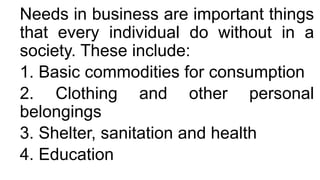
Needs in businessare important things
that every individual do without in a
society. These include:
1. Basic commodities for consumption
2. Clothing and other personal
belongings
3. Shelter, sanitation and health
4. Education
90.
Needs and wantsof people are the basic
indicators of the kind of business that you may
engage into because they can serve as the
measure of your success. Some other good points
that you might consider in business
undertakings are the people, their needs, wants,
lifestyle, culture, and tradition,
and social orientation. Product development
entirely depends on the needs and wants of the
customers. Another important issue to deal with
are the key concept of developing a product.
91.
Concepts of Developinga Product
Concept development is a very critical phase in
developing of a product. From this stage, the
needs of the target market are identified and
competitive products are reviewed before the
product specifications are defined. The product
concept is selected along with an economic
analysis to come up with an outline of how a
product is being developed.
Concept and Development
Theprocess of product development follows these steps:
• A. Identify Customer Needs- This stage is very important because this
would determine the product to be produced or provided.
• B. Establish Target Specifications - Based on customers' needs and
reviews of competitive products, you may now establish target
specifications of the prospective new product and/or service. Target
specifications are essentially a wish-list.
• C. Analyze Competitive Products - It is imperative to analyze existing
competitive products to provide important information on establishing
product/service specifications.
• D. Generate Product Concepts - After having gone through with the
previous processes, you may now develop a number of product concepts
to illustrate what types of product/service are both technically feasible and
would best meet the requirements of the target consumers/market.
94.
E. Select aProduct Concept - Through the process of evaluation between
attributes, a final concept is selected. After the final selection, additional market
research can be applied to obtain feedbacks from certain key
customers.
F. Refine Product Specifications - In this stage, product/service specifications
are refined on the basis of input from the foregoing activities. Final specifications
are the results of extensive study. Expected service life and
projected selling price are being considered in this stage.
G. Perform Economic Analysis - Throughout the process of product
development, it is very important to always review and estimate the economic
implications regarding development expenses, manufacturing
costs, and selling price of the product/service to be offered/provided.
H. Plan the Remaining Development Project - In this final stage of concept
development, you may prepare a detailed development plan which includes a list
of activities, the necessary resources and expenses, and a development
schedule with milestones for tracking progress.
95.
Finding Value
The valuethat you incorporate to your product is called
value proposition.
Value proposition is “a believable collection of the most
persuasive reasons people should notice you and take
the action you are asking for.” Value is created by
fulfilling deep desires and solving deep problems. This
is what gets the people moving, and keep them
spending for your product/service.
96.
Innovation
Innovation is theintroduction of something new in
your product/service. This may be a new idea, a
new method or a device. If you want to increase
your sales and profit you must innovate. Some of
the possible innovations in your products are
change in packaging, improved taste, color, size,
shape, and perhaps price. Some of the possible
innovations in providing services are application of
new improved methods, additional feature of
product/ services, and possibly, freebies.
97.
• Unique SellingProposition (USP)
Unique Selling Proposition is the factor or consideration presented by a
seller as the reason that the product or service being offered is different
from and better than that of other key players or competitors. USP would
require careful analysis of other businesses' ads and marketing messages.
Here's how to discover your USP and use it to increase your sales
and profit:
Use empathy: Put yourself in the shoes of your customers. Always
focus on the needs of the target customers and forget falling in love with
your own product or service. Always remember, you are making this
product or providing for the target customers to eventually increase sales
and earn high profit.
• Identify what motivates your customers. It is very important for you to
understand and find out what drives and motivates your customers to buy
your product/service.
98.
• Discover theactual and genuine reasons why customers buy your product
instead of that of your competitor's. Information is very important in decision
making.
Generating Ideas for Business
The process of developing/generating business idea is not a simple process. Some
people come up with a bunch of business ideas, while some are without ideas. There
are two problems that arise; first is the excessive generation of ideas that makes one
remain in the dreaming stage, and second, when one fails to generate.
Here are some basic yet very important considerations that you may use to generate
possible ideas for business:
1. Examine the existing goods and services.
You can also improve the materials used in crafting the product. In addition, you introduce new ways of
using the product, making it more useful and adaptable to the customers’ many needs. When you are
improving the product or enhancing it, you are doing an innovation.
99.
2. Examine thepresent and future needs. Look and listen
to what the customers, institution, and communities are
missing in terms of goods and services.
3. Examine how the needs are being satisfied. Needs for
the products and services are referred to as market demand.
To satisfy these needs is to supply the products and services
that meet the demands of the market.
4. Examine the available resources around you. Observe
what materials or skills are available in abundance in your
area.
5. Read magazines, news articles, and other
publications on new products and techniques or
advances in technology.
100.
Branding
Branding is amarketing practice of creating name, symbol or design
that identifies and differentiates product/service from that of the
competitors. It is also a promise to your customers. Branding is one
of the most important aspects of any business. An effective brand
strategy gives you a major edge in increasingly competitive markets.
• The features of a good product brand are as follows:
• - delivers the message clearly
• - confirms your credibility
• - connects your target prospects emotionally
• - motivates the buyer
• - concretizes user loyalty
101.
Here are somesimple tips to publicize your brand.
·Develop a tagline. Write a meaningful, unforgettable,
and easy-to remember statement that captures the
essence of your brand.
Design a great logo. Create a logo suitable to your
business and consistent with your tagline and advertise it.
Write down your brand messaging. Select key
messages you want to communicate about your brand.
·Be true to your brand. Deliver your brand promise.
Be consistent. Be reliable and consistent every time.
102.
Farm Tools andEquipment
HAND TOOLS
Hand tools are usually light and
are used without the help of
animals or machines. They are
being used in performing farm
activities which involve small
yet important jobs to be done.
103.
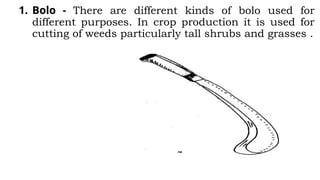
1. Bolo -There are different kinds of bolo used for
different purposes. In crop production it is used for
cutting of weeds particularly tall shrubs and grasses .
104.
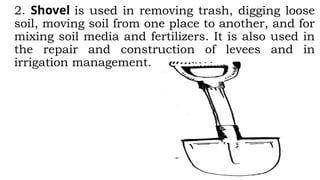
2. Shovel isused in removing trash, digging loose
soil, moving soil from one place to another, and for
mixing soil media and fertilizers. It is also used in
the repair and construction of levees and in
irrigation management.
105.
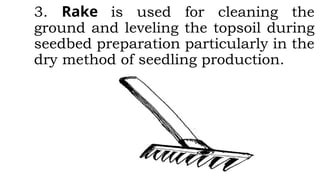
3. Rake isused for cleaning the
ground and leveling the topsoil during
seedbed preparation particularly in the
dry method of seedling production.
106.
FARM IMPLEMENTS
These areaccessories which are
being pulled by working animals
or mounted to machineries (hand
tractor, tractor) which are usually
used in the preparation of large
tract of land. These are usually
made of a special kind of metal.
107.
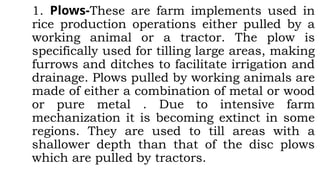
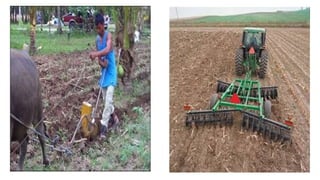
1. Plows-These arefarm implements used in
rice production operations either pulled by a
working animal or a tractor. The plow is
specifically used for tilling large areas, making
furrows and ditches to facilitate irrigation and
drainage. Plows pulled by working animals are
made of either a combination of metal or wood
or pure metal . Due to intensive farm
mechanization it is becoming extinct in some
regions. They are used to till areas with a
shallower depth than that of the disc plows
which are pulled by tractors.
109.
2. Harrow. Thenative wooden harrow is made of
wood with a metal tooth and pulled by a carabao
while the disc harrow is a metal mounted to a
tractor. Harrows are used for tilling and
pulverizing the soil in upland rice production
where the soil is tilled dry while waiting for the
rain or water supply.
110.
3. Rotavator. Therotavator is an implement attached
to a tractor used for land preparation. It could be used
for wet and dry land preparation. One passing of
rotavator is equivalent to the combined effect of one
plowing and harrowing in land preparation.
111.
EQUIPMENT
These are machineriesused in farm
operations especially in rice
production. They are used in land
preparation and in transporting farm
inputs and produce. Using these
equipment requires a highly skilled
operator .
112.
1. Hand tractor.It is the most useful and convenient
equipment of the farmers. It is used to pull a plow and
harrow in preparing a wide area of land. It is also used to
transport other materials from the house to the farm and
a very important equipment in the mobility of most
farmers.
113.
2. Four wheeltractor. It is used to pull disc plow disc
harrow and rotavator in preparing much wider area of
land. It is also used to draw a trailer to transport bulk of
materials, equipment, farm inputs, and harvest. It is
very useful during harvest and other post harvest
activities.
114.
3. Water pump.This equipment is very
important to draw irrigation water from a
source such as deep well, rivers and lakes. In
some areas where water is scarce, second
cropping of rice could be done using a water
pump.
115.
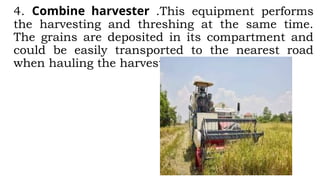
4. Combine harvester.This equipment performs
the harvesting and threshing at the same time.
The grains are deposited in its compartment and
could be easily transported to the nearest road
when hauling the harvests.
117.
Remember:
Smooth operations ofall
machines are ensured if
periodic maintenance is
done. These can affect
performance and your
118.
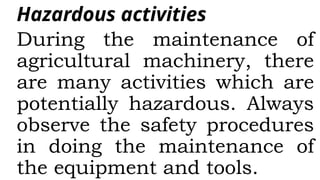
Hazardous activities
During themaintenance of
agricultural machinery, there
are many activities which are
potentially hazardous. Always
observe the safety procedures
in doing the maintenance of
the equipment and tools.
119.
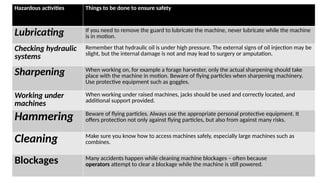
Hazardous activities Thingsto be done to ensure safety
Lubricating If you need to remove the guard to lubricate the machine, never lubricate while the machine
is in motion.
Checking hydraulic
systems
Remember that hydraulic oil is under high pressure. The external signs of oil injection may be
slight, but the internal damage is not and may lead to surgery or amputation.
Sharpening When working on, for example a forage harvester, only the actual sharpening should take
place with the machine in motion. Beware of flying particles when sharpening machinery.
Use protective equipment such as goggles.
Working under
machines
When working under raised machines, jacks should be used and correctly located, and
additional support provided.
Hammering Beware of flying particles. Always use the appropriate personal protective equipment. It
offers protection not only against flying particles, but also from against many risks.
Cleaning Make sure you know how to access machines safely, especially large machines such as
combines.
Blockages Many accidents happen while cleaning machine blockages – often because
operators attempt to clear a blockage while the machine is still powered.
120.
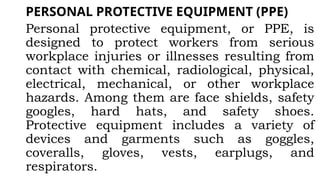
PERSONAL PROTECTIVE EQUIPMENT(PPE)
Personal protective equipment, or PPE, is
designed to protect workers from serious
workplace injuries or illnesses resulting from
contact with chemical, radiological, physical,
electrical, mechanical, or other workplace
hazards. Among them are face shields, safety
googles, hard hats, and safety shoes.
Protective equipment includes a variety of
devices and garments such as goggles,
coveralls, gloves, vests, earplugs, and
respirators.
121.
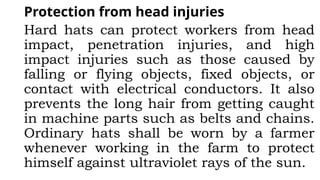
Protection from headinjuries
Hard hats can protect workers from head
impact, penetration injuries, and high
impact injuries such as those caused by
falling or flying objects, fixed objects, or
contact with electrical conductors. It also
prevents the long hair from getting caught
in machine parts such as belts and chains.
Ordinary hats shall be worn by a farmer
whenever working in the farm to protect
himself against ultraviolet rays of the sun.
122.
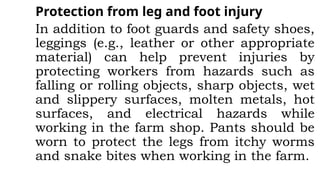
Protection from legand foot injury
In addition to foot guards and safety shoes,
leggings (e.g., leather or other appropriate
material) can help prevent injuries by
protecting workers from hazards such as
falling or rolling objects, sharp objects, wet
and slippery surfaces, molten metals, hot
surfaces, and electrical hazards while
working in the farm shop. Pants should be
worn to protect the legs from itchy worms
and snake bites when working in the farm.
123.
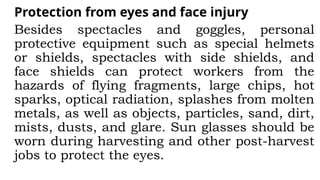
Protection from eyesand face injury
Besides spectacles and goggles, personal
protective equipment such as special helmets
or shields, spectacles with side shields, and
face shields can protect workers from the
hazards of flying fragments, large chips, hot
sparks, optical radiation, splashes from molten
metals, as well as objects, particles, sand, dirt,
mists, dusts, and glare. Sun glasses should be
worn during harvesting and other post-harvest
jobs to protect the eyes.
124.
Protection from hearinginjury
Wearing earplugs or earmuffs can help prevent
damage to hearing. Exposure to high noise
levels can cause irreversible hearing loss or
impairment as well as physical and
psychological stress. Earplugs made from foam,
waxed cotton, or fiberglass wool are self-forming
and usually fit well. A professional should fit
your workers individually for molded or
preformed earplugs. Clean earplugs regularly,
and replace those that are no longer functional.
125.
Protection from handinjury
Workers exposed to harmful substances
causing skin absorption, severe cuts or
lacerations, severe abrasions, chemical
burns, thermal burns, and harmful
extreme temperature will benefit from
hand protection. Wear leather globes
while operating some machines; but
when handling chemicals use rubber
gloves.
126.
Protection from bodyinjury
In some cases, workers must shield most
of their bodies against hazards in the
workplace, such as exposure to heat and
radiation, hot metals, scalding liquids,
body fluids, hazardous materials or waste,
and others. In addition to fire-retardant
wool and fire retardant cotton, materials
used in whole-body personal protective
equipment, include leather, synthetics,
rubber, and plastic.
127.
Respiratory Protection
Workers mustuse appropriate respirators
to protect against adverse health effects
caused by breathing air contaminated
with harmful dusts, fogs, fumes, mists,
gases, smokes, sprays, or vapors.
Respirators generally cover the nose and
mouth or the entire face or head and help
prevent illness and injury. A proper fit is
essential, for respirators to be effective.
Like any otherplant,
rice needs an
appropriate kind of soil
as well as good location
to attain the highest
possible yield.
130.
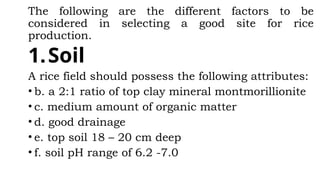
The following arethe different factors to be
considered in selecting a good site for rice
production.
1.Soil
A rice field should possess the following attributes:
• b. a 2:1 ratio of top clay mineral montmorillionite
• c. medium amount of organic matter
• d. good drainage
• e. top soil 18 – 20 cm deep
• f. soil pH range of 6.2 -7.0
131.
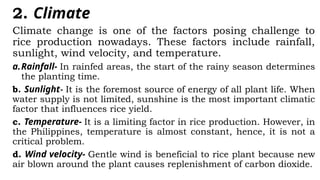
2. Climate
Climate changeis one of the factors posing challenge to
rice production nowadays. These factors include rainfall,
sunlight, wind velocity, and temperature.
a.Rainfall- In rainfed areas, the start of the rainy season determines
the planting time.
b. Sunlight- It is the foremost source of energy of all plant life. When
water supply is not limited, sunshine is the most important climatic
factor that influences rice yield.
c. Temperature- It is a limiting factor in rice production. However, in
the Philippines, temperature is almost constant, hence, it is not a
critical problem.
d. Wind velocity- Gentle wind is beneficial to rice plant because new
air blown around the plant causes replenishment of carbon dioxide.
132.
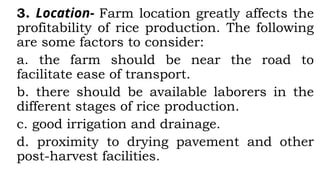
3. Location- Farmlocation greatly affects the
profitability of rice production. The following
are some factors to consider:
a. the farm should be near the road to
facilitate ease of transport.
b. there should be available laborers in the
different stages of rice production.
c. good irrigation and drainage.
d. proximity to drying pavement and other
post-harvest facilities.
134.
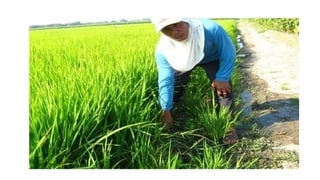
Soil Sampling andSoil Analysis
The success of rice production starts with
knowing the kind of soil where you are
going to plant. The rice plant is nutrient
sensitive; its ability to produce good
harvest depends on the nutrients present
in the soil. Soil sampling and analysis are
important to determine the pH level and
the nutrients present in the soil. The
result of the soil analysis will be the basis
of fertilizer application.
135.
Procedures to Followin Soil
Sampling
1.Make a sketch of the area showing
sampling areas (SA).Divide the
farm into sampling areas.
2. In each SA dig from 5 -10 pits
and collect samples corresponding
to the size of the sampling area.
136.
clear thesoil surface area
using a shovel or spade dig a pit to a depth of 20-30
centimeters
from one vertical side of the pit take a slice of soil 2-3
cm thick with a single downward thrust of the spade.
Using a knife or trowel trim the slice of soil on both
sides to a bar of 3-4 cm width.
place the thin bar of soil in a pail or any suitable
clean container.
if the subsoil sample is needed, take a bar of soil from
the succeeding 20 to 30 cm soil depth. The subsoil and
surface soil should be placed in separate containers.
137.
IMPORTANT THINGS TOREMEMBER
Selecting the appropriate site plays a vital role in the success of rice production.
Factors to consider in selecting the site
a. accessibility of the farm to the road
b. availability of good labor supply
c. good irrigation and drainage
d. proximity of threshing and drying pavement
Factors that affect growth and development of the crop
1. kinds of soil
2. climate
3. location
Soil pH for rice is from 6.2 to 7.0
Prepare the Landfor Planting
High yield in rice production could be traced back to land
preparation. Many problems in cultural management practices could
be prevented with well-puddled and well-leveled rice paddies. Aside
from making the soil soft for easy transplanting, a well leveled soil
prevents the emergence of early weeds. It also facilitates mixing of
organic matter such as rice straw, weeds and stubbles with the soil
which promotes decomposition. Proper soil preparation serves to
level the field for uniform distribution of irrigation water, fertilizers
and pesticides. It also aids in the efficient control of some pests like
the golden snail. During dry season planting, it also prevents or
minimizes water seepage from the field thereby resulting to efficient
water management. If land preparation is not uniform, growth of
plant is uneven causing variations of plant development and stage
maturity resulting in possible decrease in harvest. Land preparation
should be started at least four weeks before transplanting.
141.
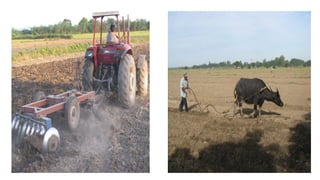
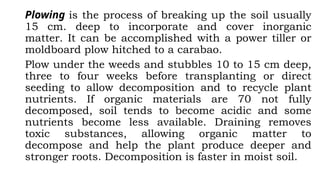
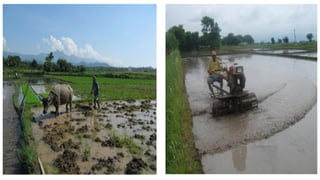
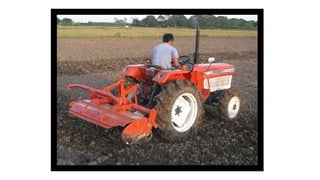
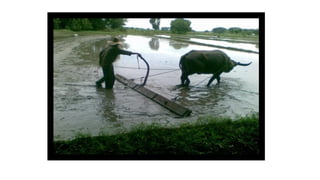
Plowing is theprocess of breaking up the soil usually
15 cm. deep to incorporate and cover inorganic
matter. It can be accomplished with a power tiller or
moldboard plow hitched to a carabao.
Plow under the weeds and stubbles 10 to 15 cm deep,
three to four weeks before transplanting or direct
seeding to allow decomposition and to recycle plant
nutrients. If organic materials are 70 not fully
decomposed, soil tends to become acidic and some
nutrients become less available. Draining removes
toxic substances, allowing organic matter to
decompose and help the plant produce deeper and
stronger roots. Decomposition is faster in moist soil.
143.
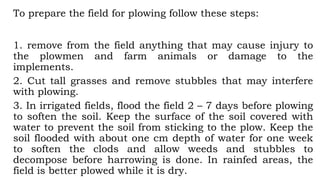
To prepare thefield for plowing follow these steps:
1. remove from the field anything that may cause injury to
the plowmen and farm animals or damage to the
implements.
2. Cut tall grasses and remove stubbles that may interfere
with plowing.
3. In irrigated fields, flood the field 2 – 7 days before plowing
to soften the soil. Keep the surface of the soil covered with
water to prevent the soil from sticking to the plow. Keep the
soil flooded with about one cm depth of water for one week
to soften the clods and allow weeds and stubbles to
decompose before harrowing is done. In rainfed areas, the
field is better plowed while it is dry.
144.
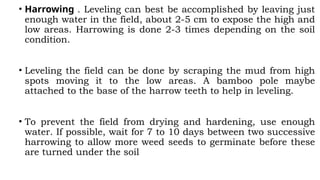
• Harrowing .Leveling can best be accomplished by leaving just
enough water in the field, about 2-5 cm to expose the high and
low areas. Harrowing is done 2-3 times depending on the soil
condition.
• Leveling the field can be done by scraping the mud from high
spots moving it to the low areas. A bamboo pole maybe
attached to the base of the harrow teeth to help in leveling.
• To prevent the field from drying and hardening, use enough
water. If possible, wait for 7 to 10 days between two successive
harrowing to allow more weed seeds to germinate before these
are turned under the soil
145.
Harrow the fieldat least twice with one week interval
for irrigated field and at least one day for rainfed field
due to limited supply of water. The first harrowing is
done a week after plowing to break the soil clods and
to incorporate the stubbles. This will allow dropped
rice seeds during the previous cropping and weed
seeds to germinate. The second harrowing which is
also the first levelling should be done across the
direction of the first harrowing. This further
incorporates the volunteer plants and allowing the
remaining dropped seeds and weed seeds to
germinate. These practices help reduce the initial pest
host population and maintain the hardpan which
minimizes water seepage.
147.
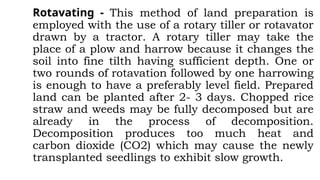
Rotavating - Thismethod of land preparation is
employed with the use of a rotary tiller or rotavator
drawn by a tractor. A rotary tiller may take the
place of a plow and harrow because it changes the
soil into fine tilth having sufficient depth. One or
two rounds of rotavation followed by one harrowing
is enough to have a preferably level field. Prepared
land can be planted after 2- 3 days. Chopped rice
straw and weeds may be fully decomposed but are
already in the process of decomposition.
Decomposition produces too much heat and
carbon dioxide (CO2) which may cause the newly
transplanted seedlings to exhibit slow growth.
149.
LET US REMEMBER
Afterthe last leveling
there should be no
higher or lower levels of
the rice paddies.
150.
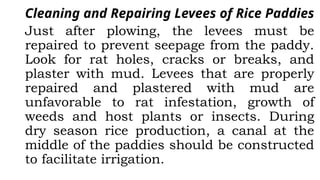
Cleaning and RepairingLevees of Rice Paddies
Just after plowing, the levees must be
repaired to prevent seepage from the paddy.
Look for rat holes, cracks or breaks, and
plaster with mud. Levees that are properly
repaired and plastered with mud are
unfavorable to rat infestation, growth of
weeds and host plants or insects. During
dry season rice production, a canal at the
middle of the paddies should be constructed
to facilitate irrigation.
152.
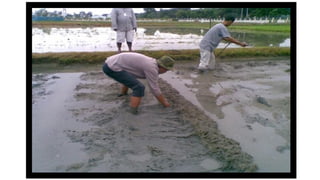
The best timeto fix the levee is after the first plowing because
the upturned soil near the levees can be used for plastering in
the work. The following are the steps in repairing levees.
1. Clean the levees. Trim the thick portions of both sides of
the levees using a bolo. Patch all rat holes, breaks, and soft
spots.
2. Repair the levees by using soil which has been broken up
during the first plowing for patching soft spots and cracks.
Break up and rebuild the portion of the levees containing rat
holes.
3. Patch-up/cover/fill the levee with mud making sure that
all cracks are sealed properly.
4. Dikes must be cleaned to remove pest, compact to prevent
seepage, and maintain at 15 cm high x 20 cm wide to prevent
rat burrowing. Ditches will ensure even water distribution
and drainage.
153.
IMPORTANT THINGS TOREMEMBER
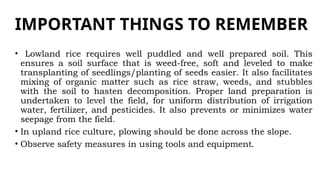
• Lowland rice requires well puddled and well prepared soil. This
ensures a soil surface that is weed-free, soft and leveled to make
transplanting of seedlings/planting of seeds easier. It also facilitates
mixing of organic matter such as rice straw, weeds, and stubbles
with the soil to hasten decomposition. Proper land preparation is
undertaken to level the field, for uniform distribution of irrigation
water, fertilizer, and pesticides. It also prevents or minimizes water
seepage from the field.
• In upland rice culture, plowing should be done across the slope.
• Observe safety measures in using tools and equipment.
154.
• Tools –simple devices used in the farm such as bolo,
digging bar, and shovel
• Equipment – machineries used in the farm such as
tractor
• Farm implements – devices such as plow and harrow
• Levee – dike or bund that surrounds a paddy
• PPE – Personal Protective Equipment
• Puddled soil – a soil surface which was plowed and
harrowed several times, leveled and ready for
planting.
• Seepage – sideward loss of water
155.
Activity#3
Pretend to bean outstanding farmer
who will demonstrate the proper way
of harrowing and leveling rice
paddies before planting using either
a carabao drawn harrow or hand
tractor. Explain why paddies should
be well-leveled.
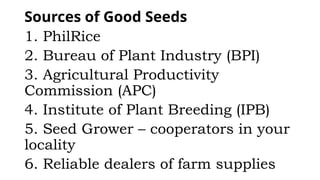
Sources of GoodSeeds
1. PhilRice
2. Bureau of Plant Industry (BPI)
3. Agricultural Productivity
Commission (APC)
4. Institute of Plant Breeding (IPB)
5. Seed Grower – cooperators in your
locality
6. Reliable dealers of farm supplies
159.
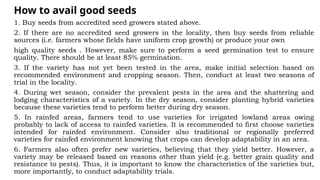
How to availgood seeds
1. Buy seeds from accredited seed growers stated above.
2. If there are no accredited seed growers in the locality, then buy seeds from reliable
sources (i.e. farmers whose fields have uniform crop growth) or produce your own
high quality seeds . However, make sure to perform a seed germination test to ensure
quality. There should be at least 85% germination.
3. If the variety has not yet been tested in the area, make initial selection based on
recommended environment and cropping season. Then, conduct at least two seasons of
trial in the locality.
4. During wet season, consider the prevalent pests in the area and the shattering and
lodging characteristics of a variety. In the dry season, consider planting hybrid varieties
because these varieties tend to perform better during dry season.
5. In rainfed areas, farmers tend to use varieties for irrigated lowland areas owing
probably to lack of access to rainfed varieties. It is recommended to first choose varieties
intended for rainfed environment. Consider also traditional or regionally preferred
varieties for rainfed environment knowing that crops can develop adaptability in an area.
6. Farmers also often prefer new varieties, believing that they yield better. However, a
variety may be released based on reasons other than yield (e.g. better grain quality and
resistance to pests). Thus, it is important to know the characteristics of the varieties but,
more importantly, to conduct adaptability trials.
160.
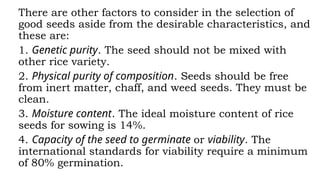
There are otherfactors to consider in the selection of
good seeds aside from the desirable characteristics, and
these are:
1. Genetic purity. The seed should not be mixed with
other rice variety.
2. Physical purity of composition. Seeds should be free
from inert matter, chaff, and weed seeds. They must be
clean.
3. Moisture content. The ideal moisture content of rice
seeds for sowing is 14%.
4. Capacity of the seed to germinate or viability. The
international standards for viability require a minimum
of 80% germination.
161.
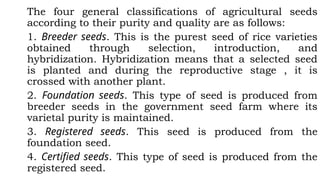
The four generalclassifications of agricultural seeds
according to their purity and quality are as follows:
1. Breeder seeds. This is the purest seed of rice varieties
obtained through selection, introduction, and
hybridization. Hybridization means that a selected seed
is planted and during the reproductive stage , it is
crossed with another plant.
2. Foundation seeds. This type of seed is produced from
breeder seeds in the government seed farm where its
varietal purity is maintained.
3. Registered seeds. This seed is produced from the
foundation seed.
4. Certified seeds. This type of seed is produced from the
registered seed.
162.
Testing the Viabilityof Seeds
Before sowing it is highly recommended that a test be
conducted to determine the viability of the seeds. Many
seeds fail to germinate because they have been kept too
long under bad conditions. That renders them too weak
when grown or too immature when harvested. Every
plant grower should determine the germinating power
of seeds by testing them to ensure high percentage of
germination, less expenses, time and effort.
Methods Of Seed Testing
There are two methods of testing the viability of seeds,
the rag doll and the seedbed. This should be done
before sowing in seedbed or before directly seeding in
paddy.
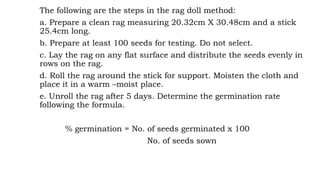
The following arethe steps in the rag doll method:
a. Prepare a clean rag measuring 20.32cm X 30.48cm and a stick
25.4cm long.
b. Prepare at least 100 seeds for testing. Do not select.
c. Lay the rag on any flat surface and distribute the seeds evenly in
rows on the rag.
d. Roll the rag around the stick for support. Moisten the cloth and
place it in a warm –moist place.
e. Unroll the rag after 5 days. Determine the germination rate
following the formula.
% germination = No. of seeds germinated x 100
No. of seeds sown
165.
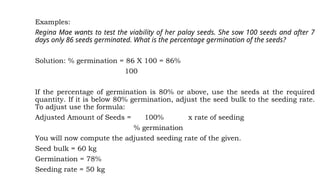
Examples:
Regina Mae wantsto test the viability of her palay seeds. She sow 100 seeds and after 7
days only 86 seeds germinated. What is the percentage germination of the seeds?
Solution: % germination = 86 X 100 = 86%
100
If the percentage of germination is 80% or above, use the seeds at the required
quantity. If it is below 80% germination, adjust the seed bulk to the seeding rate.
To adjust use the formula:
Adjusted Amount of Seeds = 100% x rate of seeding
% germination
You will now compute the adjusted seeding rate of the given.
Seed bulk = 60 kg
Germination = 78%
Seeding rate = 50 kg
166.
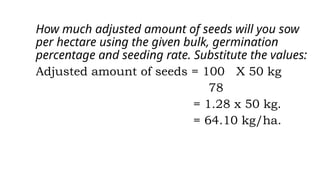
How much adjustedamount of seeds will you sow
per hectare using the given bulk, germination
percentage and seeding rate. Substitute the values:
Adjusted amount of seeds = 100 X 50 kg
78
= 1.28 x 50 kg.
= 64.10 kg/ha.
167.
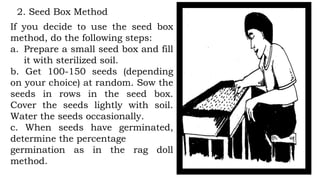
2. Seed BoxMethod
If you decide to use the seed box
method, do the following steps:
a. Prepare a small seed box and fill
it with sterilized soil.
b. Get 100-150 seeds (depending
on your choice) at random. Sow the
seeds in rows in the seed box.
Cover the seeds lightly with soil.
Water the seeds occasionally.
c. When seeds have germinated,
determine the percentage
germination as in the rag doll
method.
168.
IMPORTANT THINGS TOREMEMBER
To ensure high crop yield and good quality, viable seeds
should be selected. Desirable characteristics such as early
maturing, resistance to lodging and nitrogen responsiveness
are not the only factors to consider when buying rice seeds.
Other factors such as purity, physical composition, moisture
content, and capacity of the seed to germinate should be
included. Seed viability is a characteristic of rice essential to
profitable rice production because good quality seeds bring
about a maximum yield with minimum expenditure of time,
money and effort. Seed viability test should be done before
the seed is sown in seed beds or directly seeding in paddies
following the rag doll or seed box methods.
In rice farming,it is very important
to know the varieties your neighbor
will be planting, as well as their
expected date of sowing. This will
give you the best idea when to sow
your seeds to have almost a uniform
date of harvesting, and for a more
convenient transport of farm
equipment and harvest.
171.
Once you haveidentified the best variety of rice suited to the
climatic conditions of the locality which is high yielding and
with high quality of harvest, you must decide on the method
of raising seedlings you will use based on the availability of
water. The following points should be considered:
1. Select a site far from the residential area and away from
wandering chicken. If not, protect the area against stray
animals with a nylon net or chicken wire.
2. The site must have undergone soil analysis to be able to
correct soil deficiency and to ensure healthy seed growth. 3.
Make sure it is far from fields infected with tungro, grassy
stunt, and other diseases. It should not be lighted at night to
avoid attracting adult stem borers, brown plant hoppers,
and green leaf hoppers.
172.
4. Monitor fieldsnearby to detect
the presence of virus-infected
plants particularly from ratoon of
previous crop.
5. Protect against insect vectors. If
there is an abnormally high
incidence of virus infestation in
the area, look for better site.
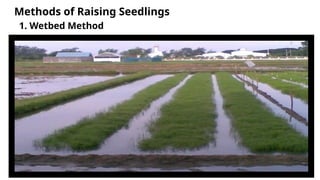
The wetbed methodis widely
used in areas where water
abounds, even in rainfed
areas and in the second/dry
cropping season. It is
usually done 25-30 days
before transplanting.
175.
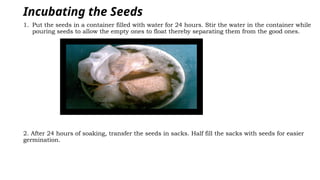
Incubating the Seeds
1.Put the seeds in a container filled with water for 24 hours. Stir the water in the container while
pouring seeds to allow the empty ones to float thereby separating them from the good ones.
2. After 24 hours of soaking, transfer the seeds in sacks. Half fill the sacks with seeds for easier
germination.
176.
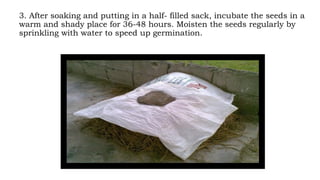
3. After soakingand putting in a half- filled sack, incubate the seeds in a
warm and shady place for 36-48 hours. Moisten the seeds regularly by
sprinkling with water to speed up germination.
177.
Sowing the pre-germinatedseeds
After the seeds have germinated, they are broadcasted uniformly on the
surface of the seedbed. Avoid sowing too thickly to ensure healthy seedling
growth. Too dense sowing will result in thin and weak stems.
178.
Care and maintenanceof the Seedlings
After sowing, the pre-germinated seeds should be submerged in
water overnight. Drain them the following day to ensure uniform
germination.
Start shallow irrigation 2-3 cm depth within 3-5 days after
sowing. Then apply nitrogen fertilizer at the rate of 5 kgs per 40-
50 sq m seedbed. Continue irrigation, by gradually increasing
the water depth to 5 cm. As a rule of thumb, you have to visit
your seedbed always to detect occurrence of insect pests and
diseases. Upon detection, immediately spray with appropriate
insecticide or fungicide, following the rate recommended by the
manufacturer. Transplant the seedlings using the following
guide: 16 - 18 days old for the early maturing varieties
harvestable after 116 days, and 20 - 25 days old for varieties
that are harvestable after 126 days or more.