SlideShare a Scribd company logo
Owners Manual


                                     (CMK-175)

                  Cart-Away Concrete Systems, Inc.
                 1405 NE Alpha Dr. McMinnville, OR. 97128
                      503-434-4444 fax: 503-434-5888


                                                           Call a Cart-Away Expert.
All drawings and statements in this document are
proprietary information, title to which is held by Cart-    1-800-909-9809
Away Concrete Systems, Inc.
Use of these materials contrary to the best interest of
Cart-Away Concrete System, Inc. is prohibited. Any
reproduction or distribution of this material included
herein is expressly limited to the purpose for which
they where originally provided.
CMK Mixing Trailer
                   Material Loading Instructions

The ideal loading system for a MixKing/CMK moves the dry aggregates
and powdered cement into the mouth of the mixing drum. These dry
materials mix with the water in the drum to produce concrete.
Optional loading can be accomplished using an auger that would
charge the drum with pre-mixed concrete. In both cases the instructions
for preparing the trailer for loading and towing will be the same.


 1. It is critical that the trailer is safely connected to the towing vehicle and that the
    vehicle meets company hook-up policies. (See Hints for Hook-up in this
    manual)
 2. Direct the towing vehicle to back the rear of the trailer into position in front of
    the loading belt or auger.
 3. Use the vari-height adjustment screw on the trailer tongue to position the
    height of the drum opening in relation to the discharge height of the loading
    belt or auger.
 4. Check and fill the gas tank on the Honda engine.
 5. Check and fill the water tank when available.
 6. Turn the GearSaver knob until the valve “clicks” into the center position.
 7. Start the Honda engine and set it at full throttle.
 8. Turn the GearSaver knob clockwise into the MIX direction until the drum is
    spinning at full speed.
 9. Load some water prior to introducing dry materials. (this procedure will vary
    with the material loader that you are using. Please refer to the owner’s manual
    for your CLS or your CBL loader for pre-loading water into the mix).
 10. Begin loading the trailer with the dry materials.
 11. After the material loader has completed loading the materials into the drum,
    slow the drum rotation approximately 50% using the GearSaver knob in the
    counter-clockwise direction. This is the suggested “traveling speed” as the
    trailer is pulled to the jobsite.
 12. Use the tongue adjustment screw on the trailer to level the trailer for safe
    towing.
 13. Recheck the hook-up to the towing vehicle prior to send the load with the
    customer.


                                Call a Cart-Away Expert.
                                 1-800-909-9809
CMK Mixing Trailer
                       Operating Instructions
                      to Unload the Concrete.
The advantage of using the mixing trailer is that water can be added at
the jobsite to “freshen” the mix. When adding water to mixing trailer
that is full of concrete, raise the mouth of the drum up to it’s highest
position in order to blend the water into the mixture.

1. After arriving at the jobsite, check the mix and add water as needed but
   remember that excess water will weaken concrete.
2. Carefully back the trailer to a convenient spot to begin unloading the concrete.
3. Place a wheelbarrow behind the mixing trailer if necessary for moving the
   concrete to the form.
4. Turn the GearSaver knob counter-clockwise to the center position (it will
   click into neutral) to stop the drum from turning.
5. Slowly tilt the drum down using the “Raise/Lower” lever on the trailer controls
   until the wet concrete begins to flow out of the drum. WARNING: By tilting
   the drum too quickly, you risk a weight shift in the drum that can cause
   the hydraulic systems to be overridden and dump all of the concrete
   onto the ground.
6. After the wheelbarrow is full, raise the drum back to full height and turn the
   GearSaver knob clockwise to about 50%. This will allow the drum to mix the
   materials while you empty the wheelbarrow into the form.
7. Repeat steps 4 to 6 until the drum is nearly emptied.
8. Move the wheelbarrow under the mouth of the drum and tilt the drum all the
   way down.
9. Use GearSaver knob to reverse the drum rotation to full speed.
10. This will begin to screw the remaining concrete out of the drum.
11. Continue dumping the concrete into the wheelbarrow until it is full and then
   return the drum to the up position using the “Raise/Lower” lever.
12. Repeat steps 9 to 11 until all the concrete is removed from the drum.


                         Call a Cart-Away Expert.
                           1-800-909-9809
CMK Mixing Trailer
                     Drum Cleaning Procedures
It is not necessary to use a great deal of water to clean the mixing
drum. Note that any water used to clean the very back of the drum,
while the drum is in the “MIX” mode, will be pulled toward the opening
of the drum where it will also clean the mixing paddles.

1. Return the drum to the full-up position using the “Raise/Lower” handle.
2. Turn the GearSaver clockwise to full speed. This is the MIX direction.
3. Use a spray nozzle on a garden hose to wash down the spiral fins and the
   mixing paddles (the ones with the holes). Pay special attention to the concrete
   build-up to the back side of the spiral fins near the mouth of the drum.
4. After the debris is removed from the fins and paddles, turn the GearSaver
   knob to neutral.
5. Move the wheelbarrow under the mouth of the drum so as to catch clean-up
   water.
6. Use the “Raise/Lower” handle to lower the drum for dumping.
7. Turn the GearSaver knob counter-clockwise to DUMP.
8. The wash water and debris will empty into the wheelbarrow.
9. When the drum is in the fully down position, use the spray nozzle to
   concentrate the water pressure on the front of the drum to let the water wash
   over the paddles and fins as it moves toward the wheelbarrow.
10. When the drum is clean, empty the wheel barrow, return the drum to the full
   up position and return the trailer. IT IS VERY IMPORTANT THAT YOU
   LEAVE THE DRUM SPINNING DURING THE TRAVELS TO AND FROM
   THE MATERIAL LOADING LOCATION.
11. Optional water systems will require the re-storage and securing of the water
   hose before traveling on the road.


                        Call a Cart-Away Expert.
                          1-800-909-9809
CMK Mixing Trailer
                  Maintenance And Precautions
Following a few simple precautions and a planned maintenance
schedule will greatly extend the life of your equipment. Pay attention to
and monitor regularly all of the safety devises on your trailer.

1. Lubricate the GearSaver parts with a lubricant regularly.
2. Always train your customers to keep the drum turning and in the full-up
   position during transit to and from their jobsite. Failure to do this may result in
   early wear or damage to your casters and drum.
3. Check the engine oil level every day prior to starting the engine.
4. Follow the maintenance and service intervals of the Honda owners manual.
5. Check the level of hydraulic fluid every day and keep it topped off.
6. Check the fluid level in the gearbox every month.
7. Grease the caster bearings every month or as needed.
8. Grease the tongue adjustment screw assembly every month or as needed.
9. Grease the bearing buddies every quarter or as needed.

                        CUSTOMER SUPPORT
Cart-Away Concrete Systems, Inc. is committed to building quality equipment and
supporting your ready-mix business. We want you to know that we are here to
help you and your service staff.
  Your satisfaction and positive “word of mouth” concerning our products
   and our company is our highest priority, so contact us with any issues.
     On Weekdays from 6AM to 5PM (PST) 800-909-9809 503-434-4444
             Fax: 503-434-5888 email: info@cart-away.com
                       Cell: 503-437-4141 Service Manager


Our service department is available to come to your location if and when you
need extra technical support (call for a complete pricing package).
.


                             Call a Cart-Away Expert.
                                  1-800-909-9809
Hints for Hook-Up
Safely hooking the trailer to your customer’s tow vehicle is very important both to
them and your employees. Take a moment to read these tips and train your
employees to only hook a trailer safely.

•   Teach your employees to be consistent. Always use the same hand signals to
    guide your customer as they back towards the trailer. As the employees
    become accustomed to this, so will your repeat customers and it will limit the
    confusion for everyone.
•   Use hand signals that can be clearly seen by the customer from the rear view
    mirrors or over their shoulder. Use only one hand to make signals because
    two-handed signals can be confusing.
•   Simple hand signals are the most easily understood, and taught. But it is
    important that the signal has a definite meaning. Moving your fingers is not a
    definite signal and may be difficult to see by your customer. We recommend
    using the forearm and hand together. For instance, to move your customer
    toward you: move you arm from the elbow, with your open palm facing you.
    Bring the palm of your hand towards you to indicate for the customer to come
    that way. Keep in mind that the speed that you move your arm will indicate to
    the customer how fast you want them to go. As they get closer to where you
    want them to be, slow your arm movements. Don’t move your arm less, just
    move it slower. To move the customer to the left or right, us the index finger
    or thumb of the signaling hand while keeping the signal definite.
•   DO NOT place one hand on the hitch while signaling with the other hand.
    DO NOT straddle the hitch between tow vehicle and trailer. These can result
    in personal injury at the pinch points between vehicle ball and trailer hitch.
•   Stop your customer about 2-3” from the hitch using a fingers extended palm
    forward motion or a closed fist facing forward. Once they have completely
    stopped and have placed the vehicle in park or have set the brake, inspect
    their hitch for the correct rating of hitch and towing vehicle.

    If any of the above are not correct, do not hook the trailer to the customer’s
    vehicle. Sell or rent the customer the proper ball or hitch.
•   Once satisfied with the condition and capabilities of the towing vehicle, use
    the tongue adjustment screw handle to align the hitch with the pintle hook and
    pull the trailer forward the remaining short distance to seat the hitch on the
    pintle hook. You may chose to back the customer up that distance, but it is
not recommended as a full size vehicle is difficult to move safely and slowly
    for only a matter of inches.
•   Close the jaws of the pintle hitch over the hook, making sure that any locking
    mechanism is in it’s proper position to lock the pintle hook down and keep it
    from coming off while towing the trailer.
•   Secure the safety chains to the towing vehicle in a crossing pattern under the
    trailer tongue. Always connect safety chains as close to the center of the
    vehicle as possible. Unless you have no other option, never hook safety
    chains to the far left and/or right of the towing vehicle.
•   Attach the emergency break-away cable to the towing vehicle at a point that
    is as close to center of the vehicle as possible. Never connect the cable to a
    safety chain.
•   Level the trailers wheels to the ground using the tongue adjustment screw
    handle.
•   Inform your customer to drive safely, follow all traffic laws, and of any policies
    of your own.
If you have any questions, please contact our Service Department between 6
a.m. and 5 p.m. at 800-909-9809 Monday through Friday. On weekends, or after
hours, call 503-437-4141


                            Call a Cart-Away Expert.
                              1-800-909-9809

More Related Content

What's hot

What's hot (7)

Toyota 50-4FDK160 Forklift Service Repair Manual
Toyota 50-4FDK160 Forklift Service Repair ManualToyota 50-4FDK160 Forklift Service Repair Manual
Toyota 50-4FDK160 Forklift Service Repair Manual
 
Indo farm presentation 2014
Indo farm presentation 2014Indo farm presentation 2014
Indo farm presentation 2014
 
Fieldking farm Implements, Rotavator, Power Harrow, Cultivator, Laser Levelle...
Fieldking farm Implements, Rotavator, Power Harrow, Cultivator, Laser Levelle...Fieldking farm Implements, Rotavator, Power Harrow, Cultivator, Laser Levelle...
Fieldking farm Implements, Rotavator, Power Harrow, Cultivator, Laser Levelle...
 
Bulls
BullsBulls
Bulls
 
XUV orientation
XUV orientationXUV orientation
XUV orientation
 
Storage project - Grain handling equipment upgrades at Strawson’s Farms
Storage project - Grain handling equipment upgrades at Strawson’s FarmsStorage project - Grain handling equipment upgrades at Strawson’s Farms
Storage project - Grain handling equipment upgrades at Strawson’s Farms
 
Wellhead control-pl-web
Wellhead control-pl-webWellhead control-pl-web
Wellhead control-pl-web
 

Similar to 1.75 yard MixKing Concrete Mixer

Caterpillar cat gc35 k forklift lift trucks service repair manual snat87a 202...
Caterpillar cat gc35 k forklift lift trucks service repair manual snat87a 202...Caterpillar cat gc35 k forklift lift trucks service repair manual snat87a 202...
Caterpillar cat gc35 k forklift lift trucks service repair manual snat87a 202...
jknsmmem
 
Caterpillar Cat GC55K Forklift Lift Trucks Service Repair Manual SN:AT88A-202...
Caterpillar Cat GC55K Forklift Lift Trucks Service Repair Manual SN:AT88A-202...Caterpillar Cat GC55K Forklift Lift Trucks Service Repair Manual SN:AT88A-202...
Caterpillar Cat GC55K Forklift Lift Trucks Service Repair Manual SN:AT88A-202...
jkemmd eudkmd
 
Caterpillar cat 906 h compact wheel loader (prefix sdh) service repair manual...
Caterpillar cat 906 h compact wheel loader (prefix sdh) service repair manual...Caterpillar cat 906 h compact wheel loader (prefix sdh) service repair manual...
Caterpillar cat 906 h compact wheel loader (prefix sdh) service repair manual...
fjjskkdmnsme
 
Caterpillar cat 906 h compact wheel loader (prefix sdh) service repair manual...
Caterpillar cat 906 h compact wheel loader (prefix sdh) service repair manual...Caterpillar cat 906 h compact wheel loader (prefix sdh) service repair manual...
Caterpillar cat 906 h compact wheel loader (prefix sdh) service repair manual...
fujseskemmesd
 

Similar to 1.75 yard MixKing Concrete Mixer (20)

Agricultural Mechanization.ppt
Agricultural Mechanization.pptAgricultural Mechanization.ppt
Agricultural Mechanization.ppt
 
Manual de despiece de una grua pluma
Manual de despiece de una grua plumaManual de despiece de una grua pluma
Manual de despiece de una grua pluma
 
Motorized Tongue Jack Owners Manual
Motorized Tongue Jack  Owners ManualMotorized Tongue Jack  Owners Manual
Motorized Tongue Jack Owners Manual
 
wp2300 - Operator manual.pdf
wp2300 - Operator manual.pdfwp2300 - Operator manual.pdf
wp2300 - Operator manual.pdf
 
Royal Sovereign RSC6500H Heat Assist Wide Format Laminator 65” - Printfinish.com
Royal Sovereign RSC6500H Heat Assist Wide Format Laminator 65” - Printfinish.comRoyal Sovereign RSC6500H Heat Assist Wide Format Laminator 65” - Printfinish.com
Royal Sovereign RSC6500H Heat Assist Wide Format Laminator 65” - Printfinish.com
 
Royal Sovereign RSC-5500H Heat Assist Roll Laminator Machine - PrintFinish.com
Royal Sovereign RSC-5500H Heat Assist Roll Laminator Machine - PrintFinish.comRoyal Sovereign RSC-5500H Heat Assist Roll Laminator Machine - PrintFinish.com
Royal Sovereign RSC-5500H Heat Assist Roll Laminator Machine - PrintFinish.com
 
Safe use of hydra
Safe use of hydraSafe use of hydra
Safe use of hydra
 
Operating Instruction for THE ESF03 Piling Vibrator
Operating Instruction for THE ESF03 Piling VibratorOperating Instruction for THE ESF03 Piling Vibrator
Operating Instruction for THE ESF03 Piling Vibrator
 
ESF1 Piling Vibrator - Operating instructions
ESF1 Piling Vibrator - Operating instructionsESF1 Piling Vibrator - Operating instructions
ESF1 Piling Vibrator - Operating instructions
 
Caterpillar cat gc35 k forklift lift trucks service repair manual snat87a 202...
Caterpillar cat gc35 k forklift lift trucks service repair manual snat87a 202...Caterpillar cat gc35 k forklift lift trucks service repair manual snat87a 202...
Caterpillar cat gc35 k forklift lift trucks service repair manual snat87a 202...
 
Caterpillar Cat GC55K Forklift Lift Trucks Service Repair Manual SN:AT88A-202...
Caterpillar Cat GC55K Forklift Lift Trucks Service Repair Manual SN:AT88A-202...Caterpillar Cat GC55K Forklift Lift Trucks Service Repair Manual SN:AT88A-202...
Caterpillar Cat GC55K Forklift Lift Trucks Service Repair Manual SN:AT88A-202...
 
Case ih dx60 tractor service repair manual
Case ih dx60 tractor service repair manualCase ih dx60 tractor service repair manual
Case ih dx60 tractor service repair manual
 
Case ih dx55 tractor service repair manual
Case ih dx55 tractor service repair manualCase ih dx55 tractor service repair manual
Case ih dx55 tractor service repair manual
 
Unit 301 and 302 familarization ppt
Unit 301 and 302 familarization pptUnit 301 and 302 familarization ppt
Unit 301 and 302 familarization ppt
 
Unit 301 and 302 familarization ppt
Unit 301 and 302 familarization pptUnit 301 and 302 familarization ppt
Unit 301 and 302 familarization ppt
 
Wylie%20 familiarization%203630 3629[1]
Wylie%20 familiarization%203630 3629[1]Wylie%20 familiarization%203630 3629[1]
Wylie%20 familiarization%203630 3629[1]
 
Wylie%20 familiarization%203630 3629[1]
Wylie%20 familiarization%203630 3629[1]Wylie%20 familiarization%203630 3629[1]
Wylie%20 familiarization%203630 3629[1]
 
Vehicle maintenance
Vehicle maintenanceVehicle maintenance
Vehicle maintenance
 
Caterpillar cat 906 h compact wheel loader (prefix sdh) service repair manual...
Caterpillar cat 906 h compact wheel loader (prefix sdh) service repair manual...Caterpillar cat 906 h compact wheel loader (prefix sdh) service repair manual...
Caterpillar cat 906 h compact wheel loader (prefix sdh) service repair manual...
 
Caterpillar cat 906 h compact wheel loader (prefix sdh) service repair manual...
Caterpillar cat 906 h compact wheel loader (prefix sdh) service repair manual...Caterpillar cat 906 h compact wheel loader (prefix sdh) service repair manual...
Caterpillar cat 906 h compact wheel loader (prefix sdh) service repair manual...
 

More from Bruce A. Christensen

More from Bruce A. Christensen (10)

Killing themselves with shovels
Killing themselves with shovels Killing themselves with shovels
Killing themselves with shovels
 
Concrete MD - Parts Catalog
Concrete MD - Parts CatalogConcrete MD - Parts Catalog
Concrete MD - Parts Catalog
 
Concrete MD mixer - trough rubber replacement guide
Concrete MD mixer - trough rubber replacement guideConcrete MD mixer - trough rubber replacement guide
Concrete MD mixer - trough rubber replacement guide
 
Concrete solutions for global supply chains
Concrete solutions for global supply chainsConcrete solutions for global supply chains
Concrete solutions for global supply chains
 
Bases solides - Strong Foundations
Bases solides - Strong FoundationsBases solides - Strong Foundations
Bases solides - Strong Foundations
 
Bases solides
Bases solidesBases solides
Bases solides
 
Concrete mixing trailer locator
Concrete mixing trailer locatorConcrete mixing trailer locator
Concrete mixing trailer locator
 
Sme concrete enterprises
Sme concrete enterprisesSme concrete enterprises
Sme concrete enterprises
 
Sme concrete enterprises
Sme concrete enterprisesSme concrete enterprises
Sme concrete enterprises
 
The concrete MD
The concrete MDThe concrete MD
The concrete MD
 

Recently uploaded

一比一原版SDSU毕业证圣地亚哥州立大学毕业证成绩单如何办理
一比一原版SDSU毕业证圣地亚哥州立大学毕业证成绩单如何办理一比一原版SDSU毕业证圣地亚哥州立大学毕业证成绩单如何办理
一比一原版SDSU毕业证圣地亚哥州立大学毕业证成绩单如何办理
psavhef
 
The Future of Autonomous Vehicles | civilthings.com | Detailed information
The Future of Autonomous Vehicles | civilthings.com |  Detailed informationThe Future of Autonomous Vehicles | civilthings.com |  Detailed information
The Future of Autonomous Vehicles | civilthings.com | Detailed information
gettygaming1
 
一比一原版BC毕业证波士顿学院毕业证成绩单如何办理
一比一原版BC毕业证波士顿学院毕业证成绩单如何办理一比一原版BC毕业证波士顿学院毕业证成绩单如何办理
一比一原版BC毕业证波士顿学院毕业证成绩单如何办理
amvovau
 

Recently uploaded (10)

Tyre Industrymarket overview with examples of CEAT
Tyre Industrymarket overview with examples of CEATTyre Industrymarket overview with examples of CEAT
Tyre Industrymarket overview with examples of CEAT
 
一比一原版SDSU毕业证圣地亚哥州立大学毕业证成绩单如何办理
一比一原版SDSU毕业证圣地亚哥州立大学毕业证成绩单如何办理一比一原版SDSU毕业证圣地亚哥州立大学毕业证成绩单如何办理
一比一原版SDSU毕业证圣地亚哥州立大学毕业证成绩单如何办理
 
The Future of Autonomous Vehicles | civilthings.com | Detailed information
The Future of Autonomous Vehicles | civilthings.com |  Detailed informationThe Future of Autonomous Vehicles | civilthings.com |  Detailed information
The Future of Autonomous Vehicles | civilthings.com | Detailed information
 
Why Isn't Your BMW X5's Comfort Access Functioning Properly Find Out Here
Why Isn't Your BMW X5's Comfort Access Functioning Properly Find Out HereWhy Isn't Your BMW X5's Comfort Access Functioning Properly Find Out Here
Why Isn't Your BMW X5's Comfort Access Functioning Properly Find Out Here
 
gtyccccccccccccccccccccccccccccccccccccccccccccccccccccccc
gtycccccccccccccccccccccccccccccccccccccccccccccccccccccccgtyccccccccccccccccccccccccccccccccccccccccccccccccccccccc
gtyccccccccccccccccccccccccccccccccccccccccccccccccccccccc
 
Advanced Technology for Auto Part Industry Inventory Solutions
Advanced Technology for Auto Part Industry Inventory SolutionsAdvanced Technology for Auto Part Industry Inventory Solutions
Advanced Technology for Auto Part Industry Inventory Solutions
 
Essential Maintenance Tips For Commercial Vans.
Essential Maintenance Tips For Commercial Vans.Essential Maintenance Tips For Commercial Vans.
Essential Maintenance Tips For Commercial Vans.
 
Wondering if Your Mercedes EIS is at Fault Here’s How to Tell
Wondering if Your Mercedes EIS is at Fault Here’s How to TellWondering if Your Mercedes EIS is at Fault Here’s How to Tell
Wondering if Your Mercedes EIS is at Fault Here’s How to Tell
 
Core technology of Hyundai Motor Group's EV platform 'E-GMP'
Core technology of Hyundai Motor Group's EV platform 'E-GMP'Core technology of Hyundai Motor Group's EV platform 'E-GMP'
Core technology of Hyundai Motor Group's EV platform 'E-GMP'
 
一比一原版BC毕业证波士顿学院毕业证成绩单如何办理
一比一原版BC毕业证波士顿学院毕业证成绩单如何办理一比一原版BC毕业证波士顿学院毕业证成绩单如何办理
一比一原版BC毕业证波士顿学院毕业证成绩单如何办理
 

1.75 yard MixKing Concrete Mixer

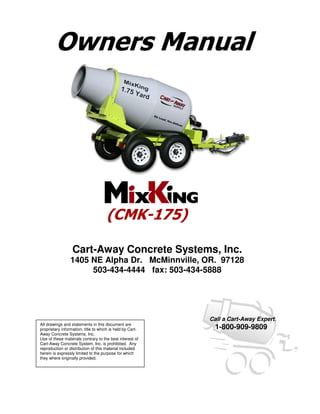
  • 1. Owners Manual (CMK-175) Cart-Away Concrete Systems, Inc. 1405 NE Alpha Dr. McMinnville, OR. 97128 503-434-4444 fax: 503-434-5888 Call a Cart-Away Expert. All drawings and statements in this document are proprietary information, title to which is held by Cart- 1-800-909-9809 Away Concrete Systems, Inc. Use of these materials contrary to the best interest of Cart-Away Concrete System, Inc. is prohibited. Any reproduction or distribution of this material included herein is expressly limited to the purpose for which they where originally provided.
  • 2. CMK Mixing Trailer Material Loading Instructions The ideal loading system for a MixKing/CMK moves the dry aggregates and powdered cement into the mouth of the mixing drum. These dry materials mix with the water in the drum to produce concrete. Optional loading can be accomplished using an auger that would charge the drum with pre-mixed concrete. In both cases the instructions for preparing the trailer for loading and towing will be the same. 1. It is critical that the trailer is safely connected to the towing vehicle and that the vehicle meets company hook-up policies. (See Hints for Hook-up in this manual) 2. Direct the towing vehicle to back the rear of the trailer into position in front of the loading belt or auger. 3. Use the vari-height adjustment screw on the trailer tongue to position the height of the drum opening in relation to the discharge height of the loading belt or auger. 4. Check and fill the gas tank on the Honda engine. 5. Check and fill the water tank when available. 6. Turn the GearSaver knob until the valve “clicks” into the center position. 7. Start the Honda engine and set it at full throttle. 8. Turn the GearSaver knob clockwise into the MIX direction until the drum is spinning at full speed. 9. Load some water prior to introducing dry materials. (this procedure will vary with the material loader that you are using. Please refer to the owner’s manual for your CLS or your CBL loader for pre-loading water into the mix). 10. Begin loading the trailer with the dry materials. 11. After the material loader has completed loading the materials into the drum, slow the drum rotation approximately 50% using the GearSaver knob in the counter-clockwise direction. This is the suggested “traveling speed” as the trailer is pulled to the jobsite. 12. Use the tongue adjustment screw on the trailer to level the trailer for safe towing. 13. Recheck the hook-up to the towing vehicle prior to send the load with the customer. Call a Cart-Away Expert. 1-800-909-9809
  • 3. CMK Mixing Trailer Operating Instructions to Unload the Concrete. The advantage of using the mixing trailer is that water can be added at the jobsite to “freshen” the mix. When adding water to mixing trailer that is full of concrete, raise the mouth of the drum up to it’s highest position in order to blend the water into the mixture. 1. After arriving at the jobsite, check the mix and add water as needed but remember that excess water will weaken concrete. 2. Carefully back the trailer to a convenient spot to begin unloading the concrete. 3. Place a wheelbarrow behind the mixing trailer if necessary for moving the concrete to the form. 4. Turn the GearSaver knob counter-clockwise to the center position (it will click into neutral) to stop the drum from turning. 5. Slowly tilt the drum down using the “Raise/Lower” lever on the trailer controls until the wet concrete begins to flow out of the drum. WARNING: By tilting the drum too quickly, you risk a weight shift in the drum that can cause the hydraulic systems to be overridden and dump all of the concrete onto the ground. 6. After the wheelbarrow is full, raise the drum back to full height and turn the GearSaver knob clockwise to about 50%. This will allow the drum to mix the materials while you empty the wheelbarrow into the form. 7. Repeat steps 4 to 6 until the drum is nearly emptied. 8. Move the wheelbarrow under the mouth of the drum and tilt the drum all the way down. 9. Use GearSaver knob to reverse the drum rotation to full speed. 10. This will begin to screw the remaining concrete out of the drum. 11. Continue dumping the concrete into the wheelbarrow until it is full and then return the drum to the up position using the “Raise/Lower” lever. 12. Repeat steps 9 to 11 until all the concrete is removed from the drum. Call a Cart-Away Expert. 1-800-909-9809
  • 4. CMK Mixing Trailer Drum Cleaning Procedures It is not necessary to use a great deal of water to clean the mixing drum. Note that any water used to clean the very back of the drum, while the drum is in the “MIX” mode, will be pulled toward the opening of the drum where it will also clean the mixing paddles. 1. Return the drum to the full-up position using the “Raise/Lower” handle. 2. Turn the GearSaver clockwise to full speed. This is the MIX direction. 3. Use a spray nozzle on a garden hose to wash down the spiral fins and the mixing paddles (the ones with the holes). Pay special attention to the concrete build-up to the back side of the spiral fins near the mouth of the drum. 4. After the debris is removed from the fins and paddles, turn the GearSaver knob to neutral. 5. Move the wheelbarrow under the mouth of the drum so as to catch clean-up water. 6. Use the “Raise/Lower” handle to lower the drum for dumping. 7. Turn the GearSaver knob counter-clockwise to DUMP. 8. The wash water and debris will empty into the wheelbarrow. 9. When the drum is in the fully down position, use the spray nozzle to concentrate the water pressure on the front of the drum to let the water wash over the paddles and fins as it moves toward the wheelbarrow. 10. When the drum is clean, empty the wheel barrow, return the drum to the full up position and return the trailer. IT IS VERY IMPORTANT THAT YOU LEAVE THE DRUM SPINNING DURING THE TRAVELS TO AND FROM THE MATERIAL LOADING LOCATION. 11. Optional water systems will require the re-storage and securing of the water hose before traveling on the road. Call a Cart-Away Expert. 1-800-909-9809
  • 5. CMK Mixing Trailer Maintenance And Precautions Following a few simple precautions and a planned maintenance schedule will greatly extend the life of your equipment. Pay attention to and monitor regularly all of the safety devises on your trailer. 1. Lubricate the GearSaver parts with a lubricant regularly. 2. Always train your customers to keep the drum turning and in the full-up position during transit to and from their jobsite. Failure to do this may result in early wear or damage to your casters and drum. 3. Check the engine oil level every day prior to starting the engine. 4. Follow the maintenance and service intervals of the Honda owners manual. 5. Check the level of hydraulic fluid every day and keep it topped off. 6. Check the fluid level in the gearbox every month. 7. Grease the caster bearings every month or as needed. 8. Grease the tongue adjustment screw assembly every month or as needed. 9. Grease the bearing buddies every quarter or as needed. CUSTOMER SUPPORT Cart-Away Concrete Systems, Inc. is committed to building quality equipment and supporting your ready-mix business. We want you to know that we are here to help you and your service staff. Your satisfaction and positive “word of mouth” concerning our products and our company is our highest priority, so contact us with any issues. On Weekdays from 6AM to 5PM (PST) 800-909-9809 503-434-4444 Fax: 503-434-5888 email: info@cart-away.com Cell: 503-437-4141 Service Manager Our service department is available to come to your location if and when you need extra technical support (call for a complete pricing package). . Call a Cart-Away Expert. 1-800-909-9809
  • 6. Hints for Hook-Up Safely hooking the trailer to your customer’s tow vehicle is very important both to them and your employees. Take a moment to read these tips and train your employees to only hook a trailer safely. • Teach your employees to be consistent. Always use the same hand signals to guide your customer as they back towards the trailer. As the employees become accustomed to this, so will your repeat customers and it will limit the confusion for everyone. • Use hand signals that can be clearly seen by the customer from the rear view mirrors or over their shoulder. Use only one hand to make signals because two-handed signals can be confusing. • Simple hand signals are the most easily understood, and taught. But it is important that the signal has a definite meaning. Moving your fingers is not a definite signal and may be difficult to see by your customer. We recommend using the forearm and hand together. For instance, to move your customer toward you: move you arm from the elbow, with your open palm facing you. Bring the palm of your hand towards you to indicate for the customer to come that way. Keep in mind that the speed that you move your arm will indicate to the customer how fast you want them to go. As they get closer to where you want them to be, slow your arm movements. Don’t move your arm less, just move it slower. To move the customer to the left or right, us the index finger or thumb of the signaling hand while keeping the signal definite. • DO NOT place one hand on the hitch while signaling with the other hand. DO NOT straddle the hitch between tow vehicle and trailer. These can result in personal injury at the pinch points between vehicle ball and trailer hitch. • Stop your customer about 2-3” from the hitch using a fingers extended palm forward motion or a closed fist facing forward. Once they have completely stopped and have placed the vehicle in park or have set the brake, inspect their hitch for the correct rating of hitch and towing vehicle. If any of the above are not correct, do not hook the trailer to the customer’s vehicle. Sell or rent the customer the proper ball or hitch. • Once satisfied with the condition and capabilities of the towing vehicle, use the tongue adjustment screw handle to align the hitch with the pintle hook and pull the trailer forward the remaining short distance to seat the hitch on the pintle hook. You may chose to back the customer up that distance, but it is
  • 7. not recommended as a full size vehicle is difficult to move safely and slowly for only a matter of inches. • Close the jaws of the pintle hitch over the hook, making sure that any locking mechanism is in it’s proper position to lock the pintle hook down and keep it from coming off while towing the trailer. • Secure the safety chains to the towing vehicle in a crossing pattern under the trailer tongue. Always connect safety chains as close to the center of the vehicle as possible. Unless you have no other option, never hook safety chains to the far left and/or right of the towing vehicle. • Attach the emergency break-away cable to the towing vehicle at a point that is as close to center of the vehicle as possible. Never connect the cable to a safety chain. • Level the trailers wheels to the ground using the tongue adjustment screw handle. • Inform your customer to drive safely, follow all traffic laws, and of any policies of your own. If you have any questions, please contact our Service Department between 6 a.m. and 5 p.m. at 800-909-9809 Monday through Friday. On weekends, or after hours, call 503-437-4141 Call a Cart-Away Expert. 1-800-909-9809