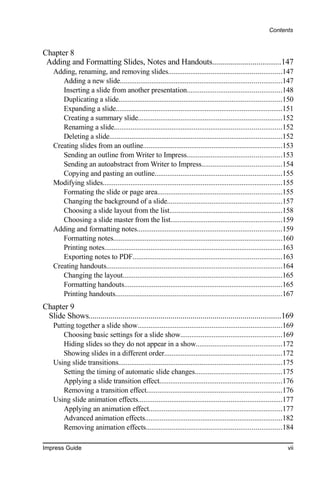
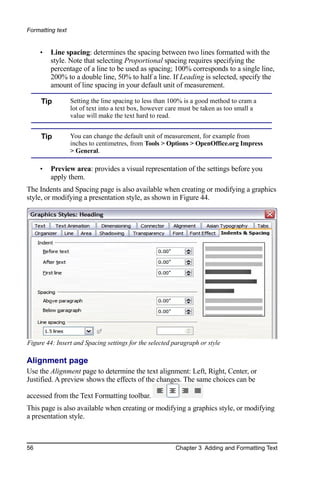
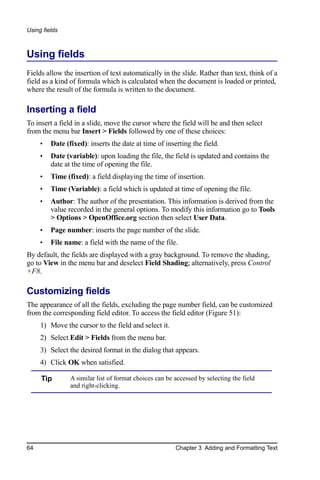
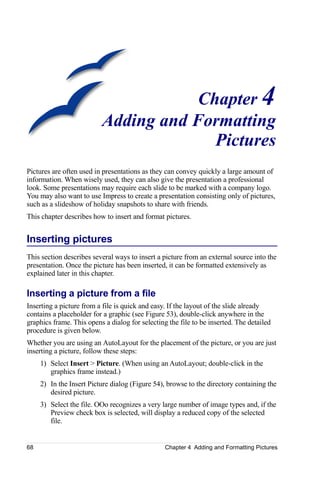
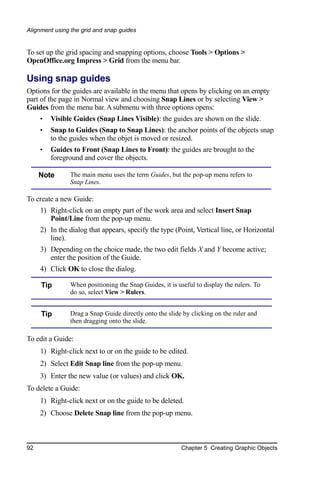
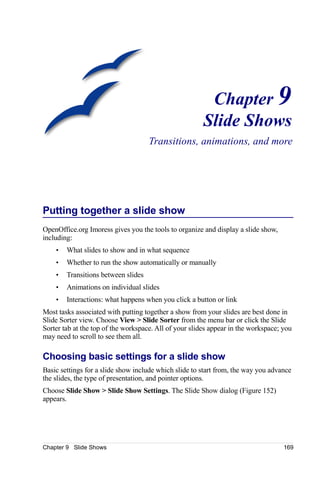
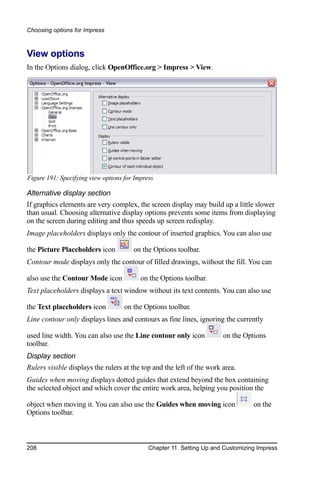
Normal view is for working on an individual slide. This is the default view
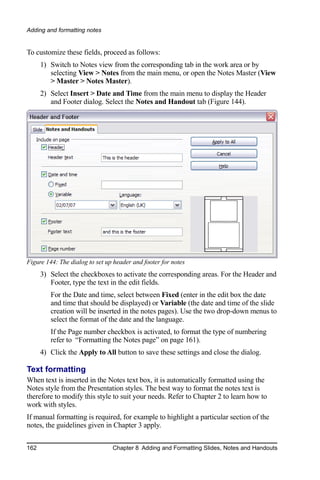
shown in Figure 1.
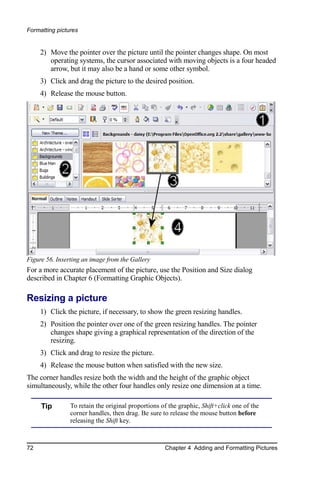
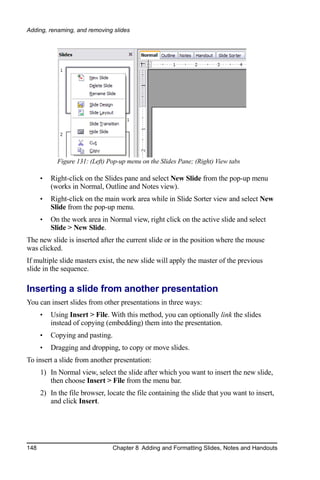
• Outline view shows a hierarchical list of all the slides in the presentation, with
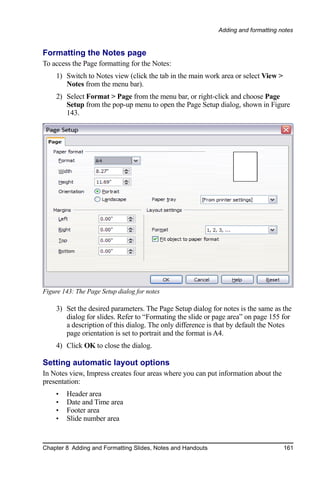
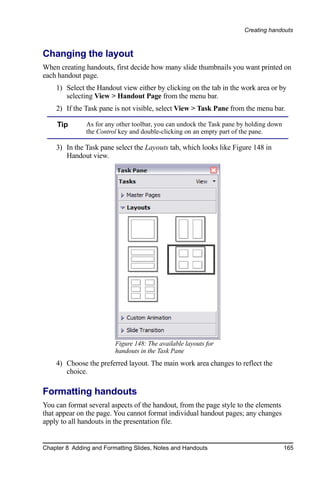
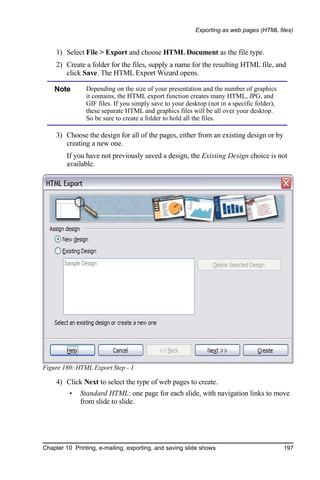
their titles. It is useful for creating or modifying the outline of the presentation.
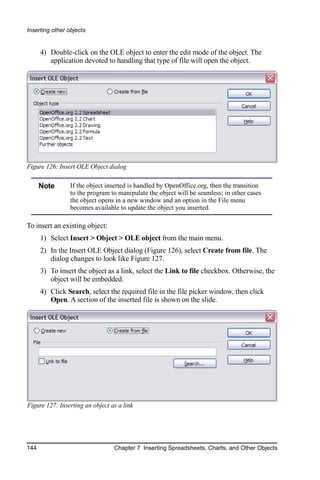
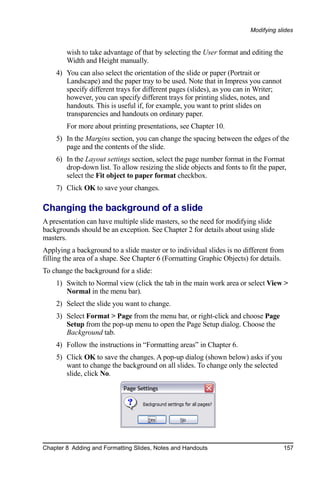
• Notes view allows you to add notes to each slide that will not be seen by the
audience during the slide show.
• Handout view is used to design the printed handouts for your audience.
• Slide Sorter view displays thumbnail images of all the slides in your
presentation and allows you to quickly rearrange their order.
Chapter 1 Introducing Impress 3
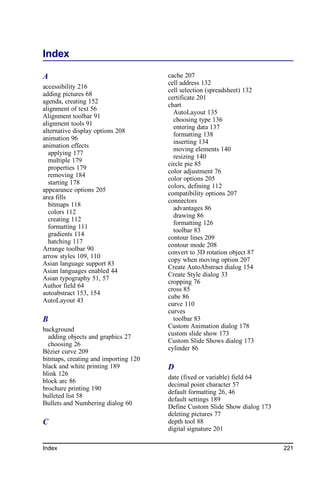
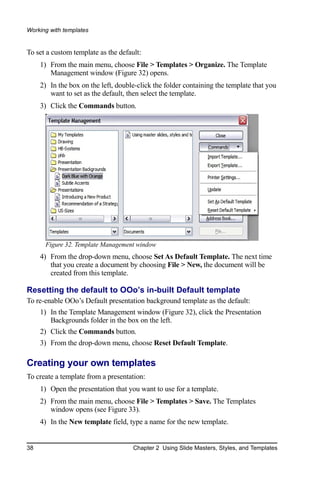
�Parts of the main Impress window
Normal


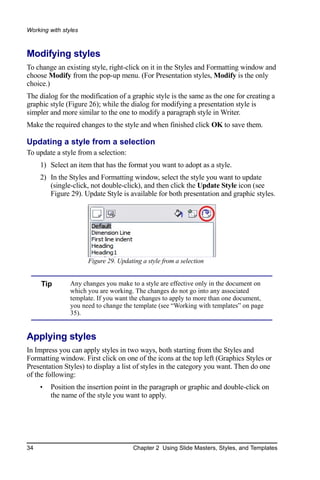


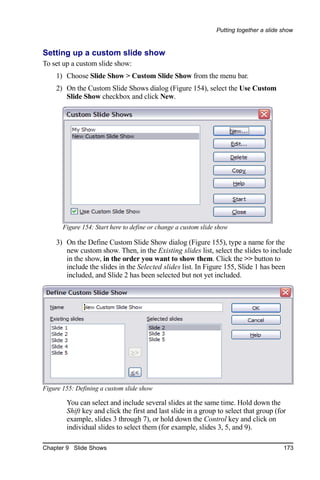
![Adding, renaming, and removing slides
Expanding a slide
Sometimes you will have a slide with too many subpoints to fit in the space available.
Instead of reducing the font size or using other methods to squeeze more text into the
space, it is usually better to subdivide the contents of the slide into two or more slides.
As mentioned in the Tip above, you can duplicate the slide and manually split the
points. Another way is to “expand” the contents of the slide. To do this:
1) [optional] Duplicate the slide (in case it is needed later).
2) Choose Insert > Expand Slide from the menu bar. Impress creates a new
slide for each highest level of the outline. The outline text becomes the title of
the new slide. Outline points below the top level on the original slide are
moved up one level on the new slide.
3) If required, repeat steps 2 and 3 on any slide where level 2 entries of the
outline exist, to expand those as well.
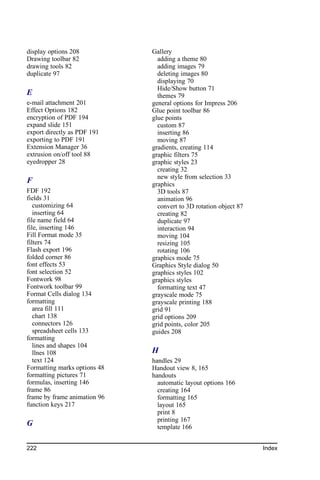
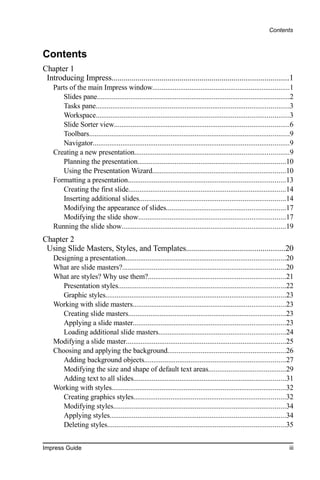
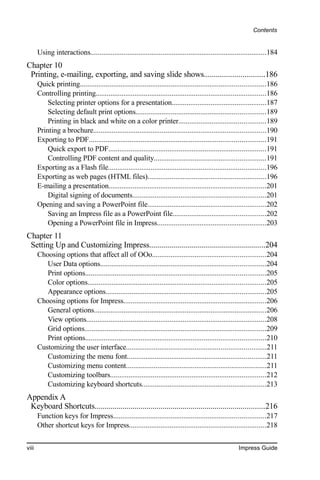
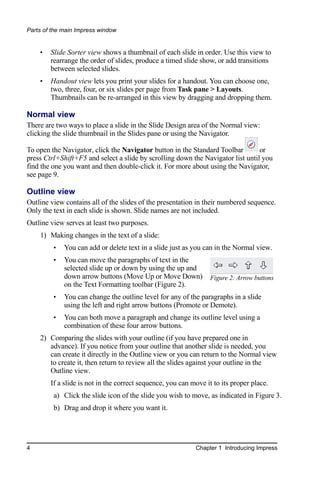
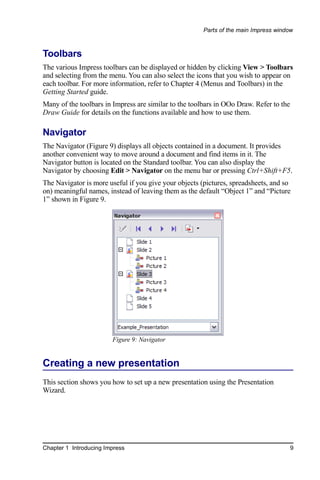
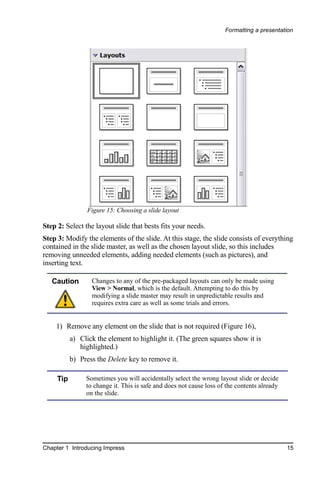
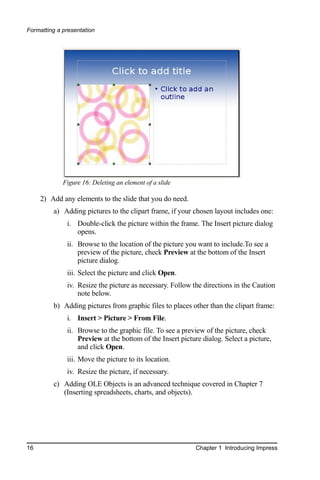
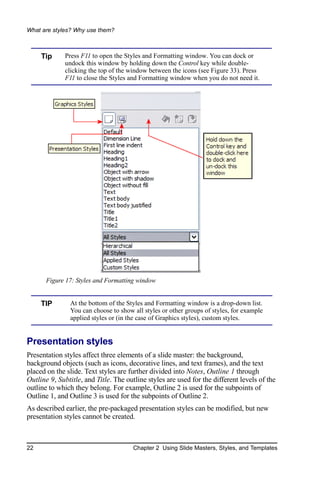
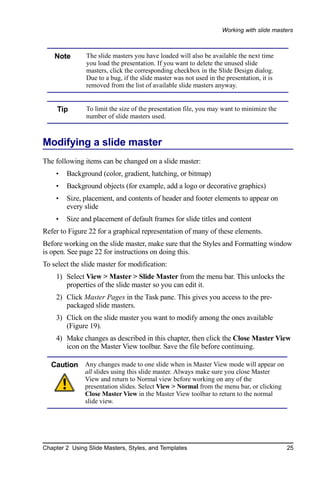
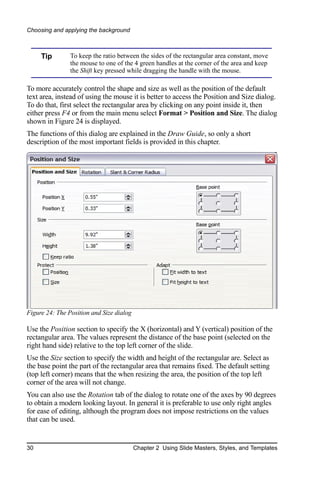
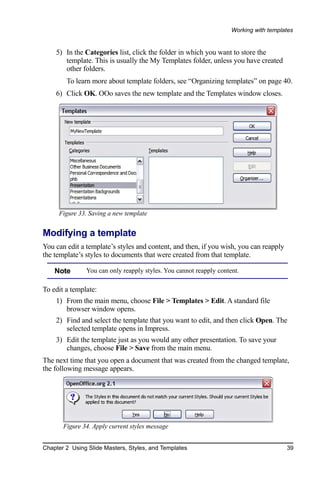
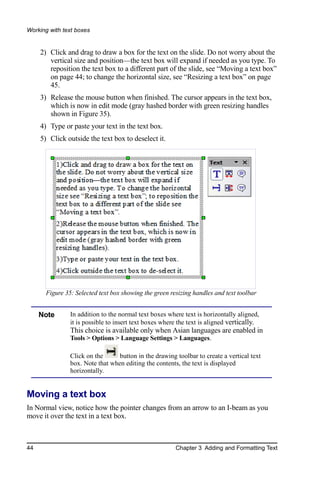
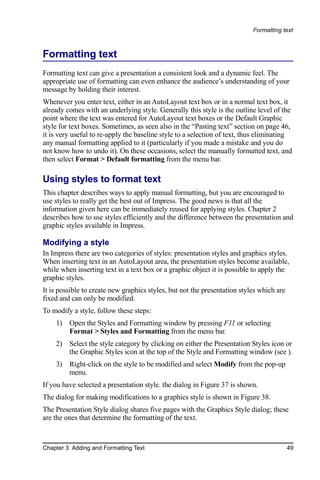
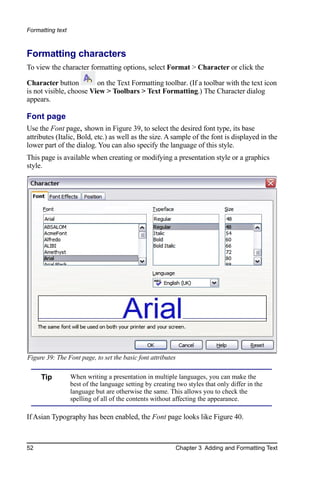
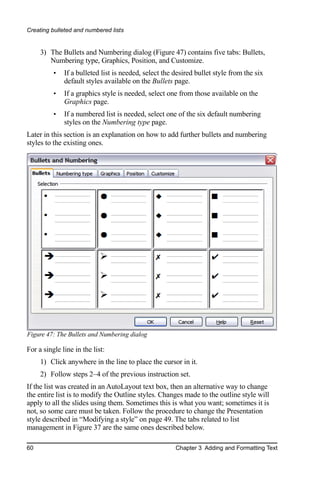
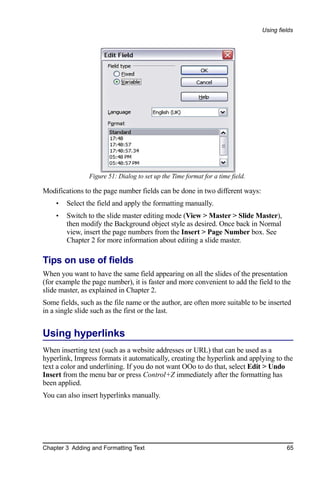
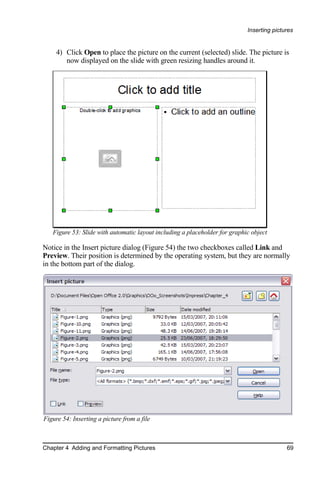
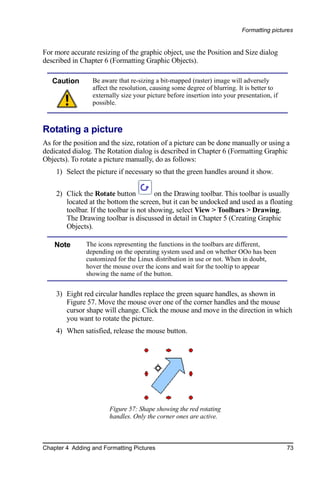
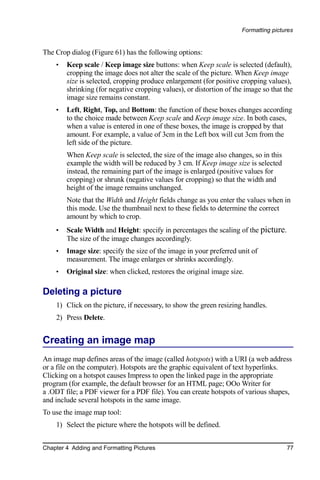
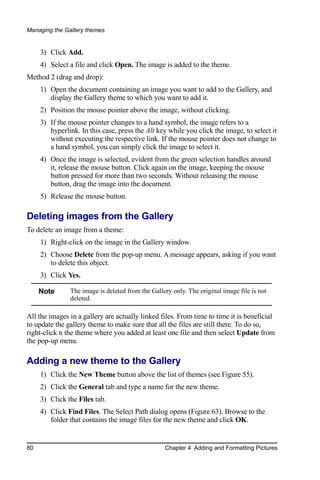
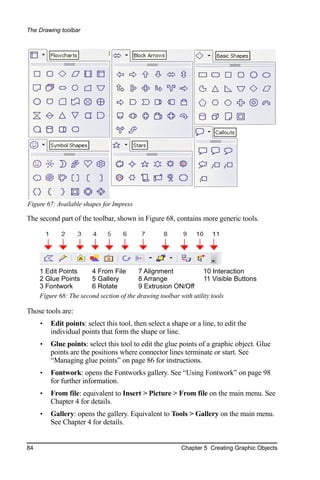
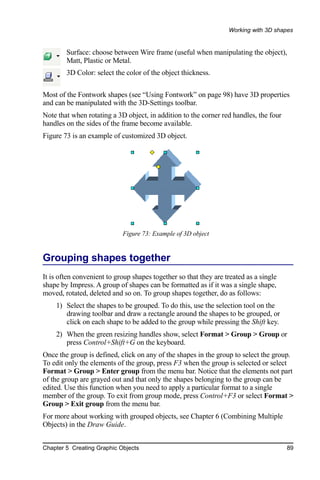
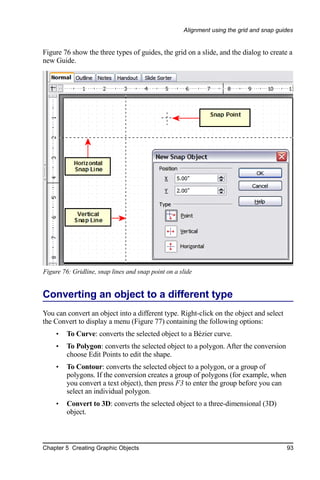
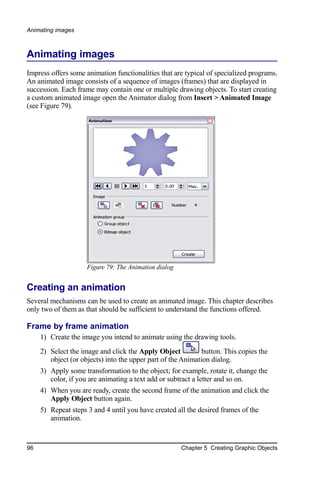
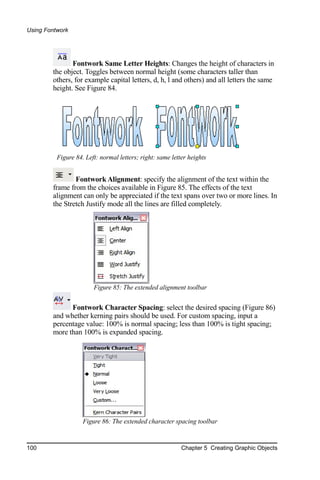
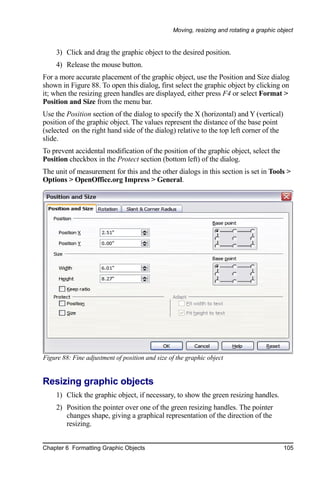
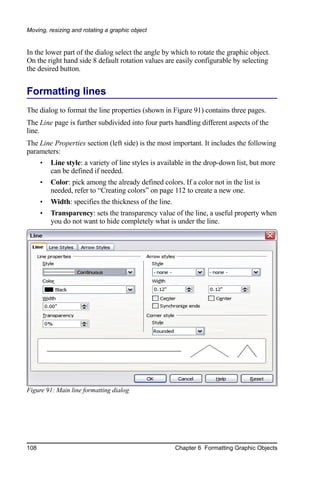
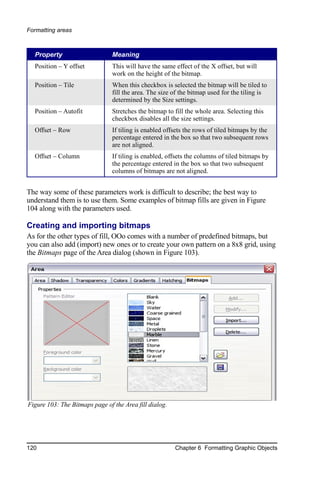
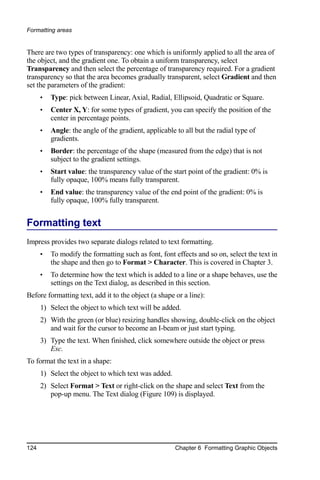
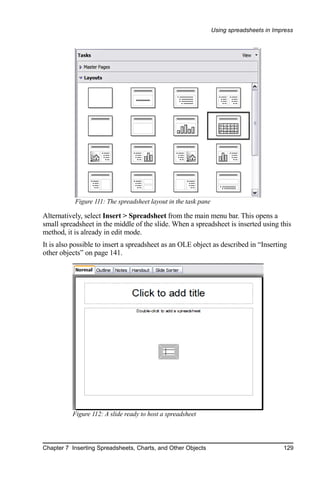
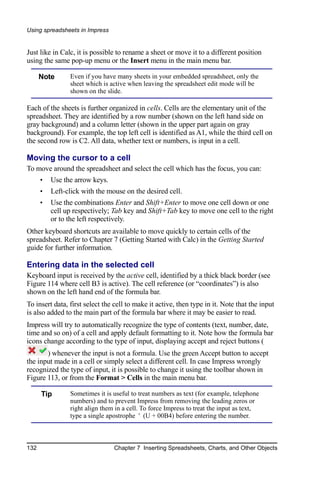
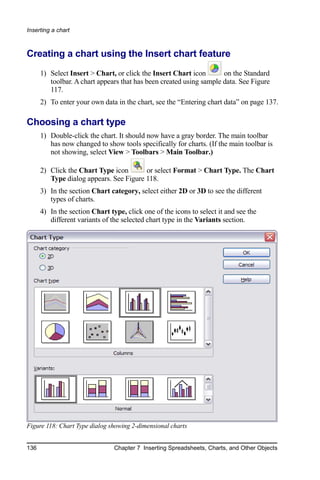
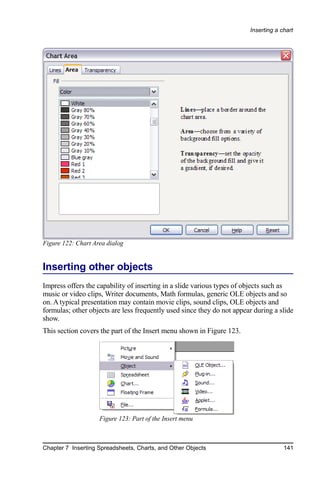
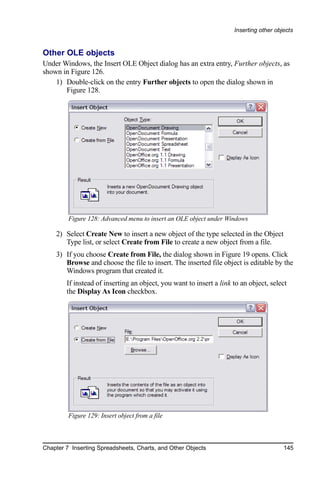
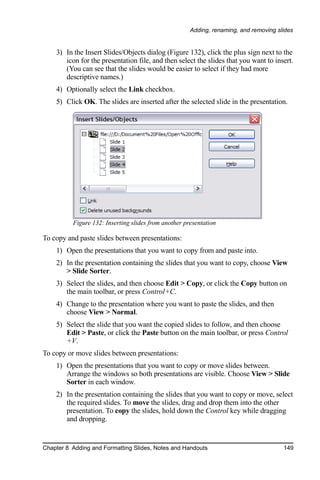
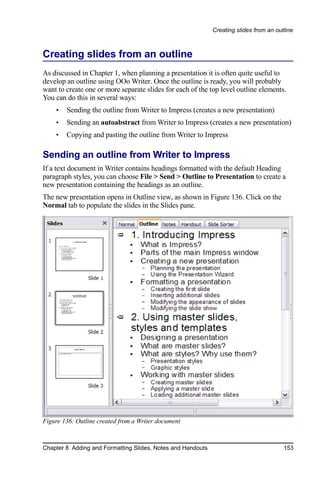
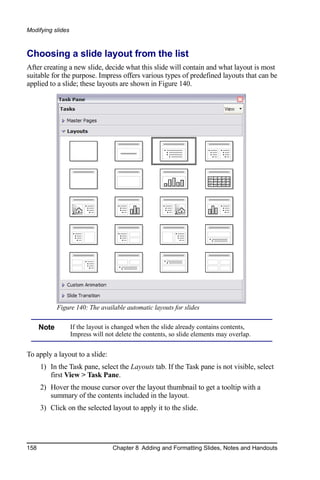
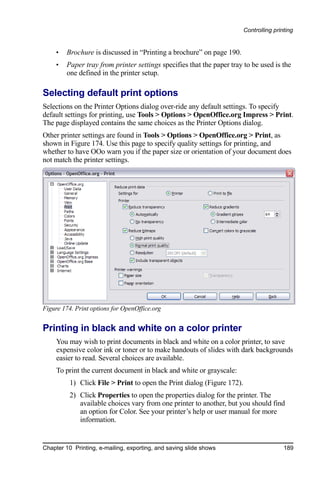
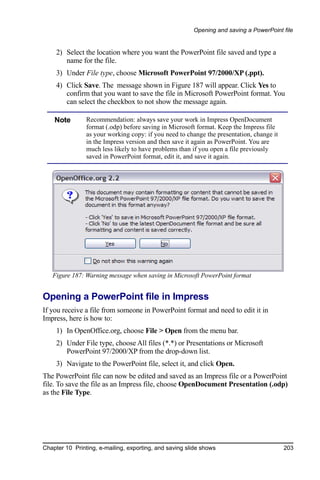
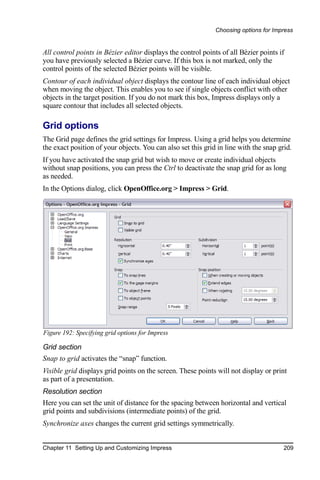
Figure 135 shows a slide with an outline consisting of three high level points and two
second-level points under bullet point 2. The Expand command has generated three
slides, each having as title the first level outline and (if present) the second level
points in the text area.
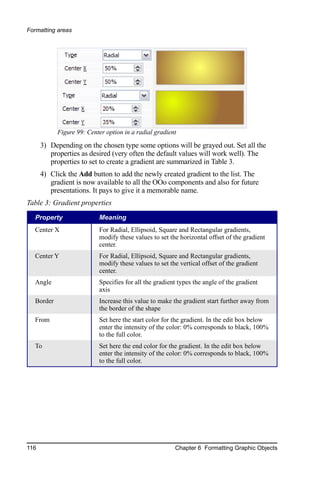
Figure 135: Slide 1 is expanded in slides 2, 3 and 4.
Chapter 8 Adding and Formatting Slides, Notes and Handouts 151](https://image.slidesharecdn.com/0500igimpressguide6x9a-090923185025-phpapp01/85/0500-I-G-Impress-Guide6x9a-161-320.jpg)
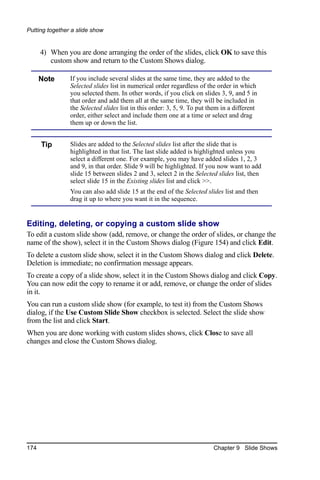

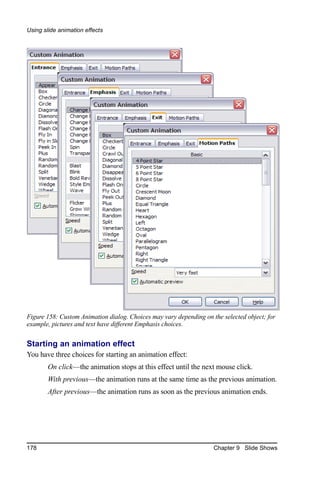

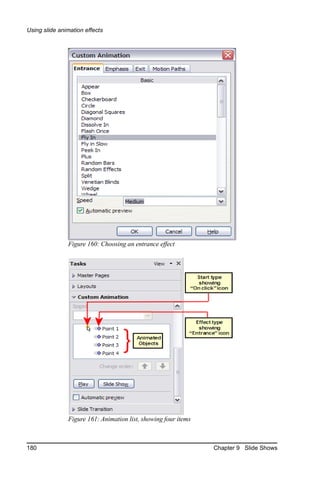

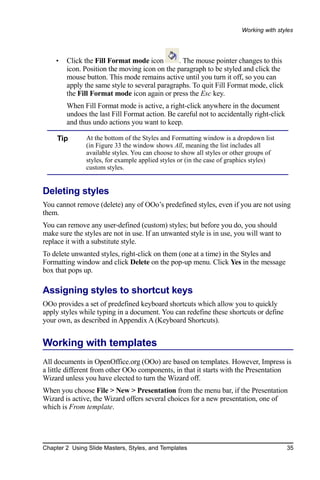
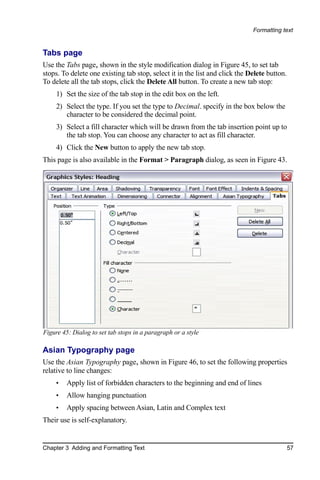
![Using slide animation effects
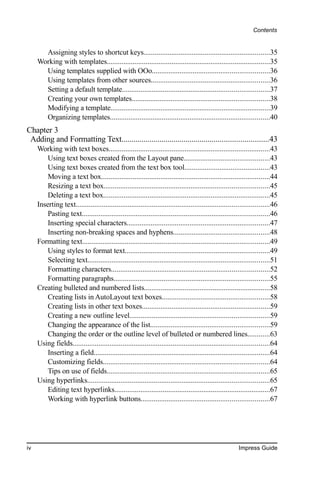
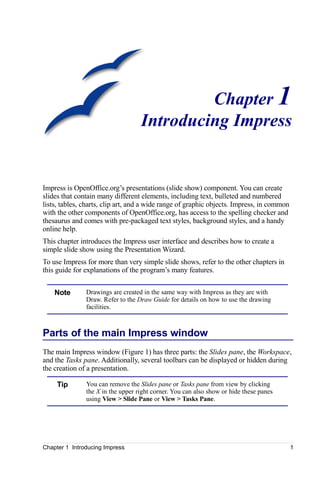
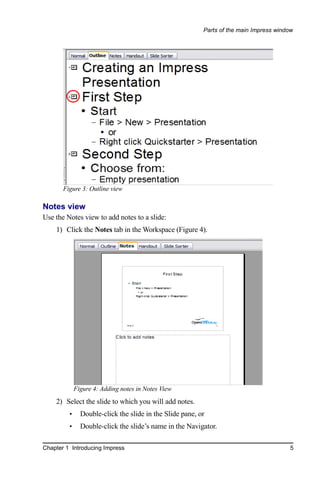
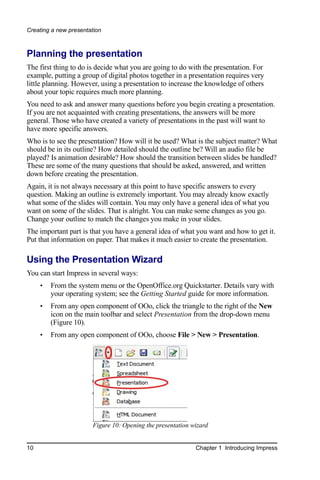
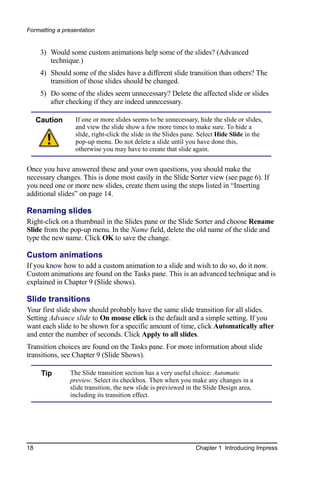
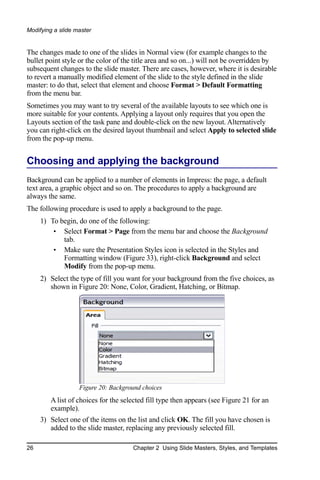
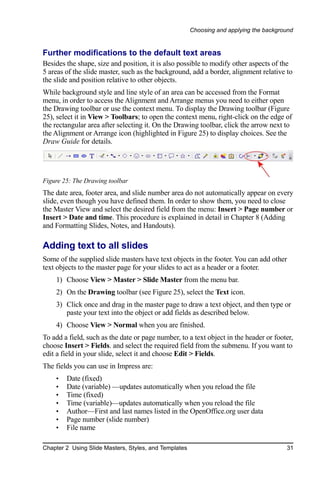
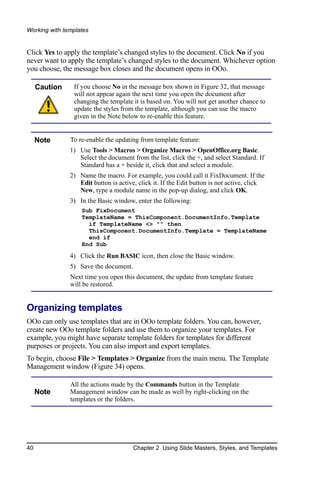
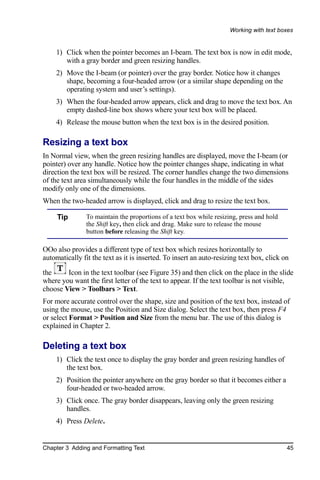
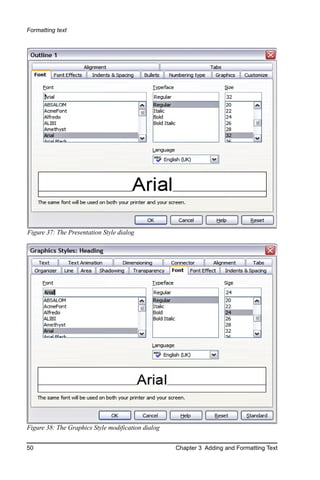
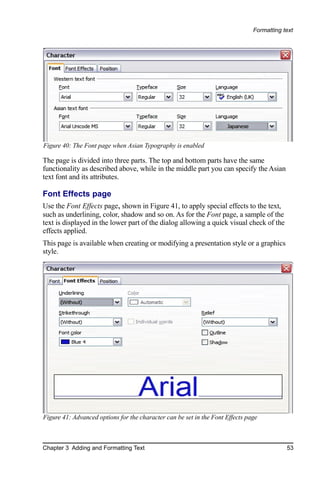
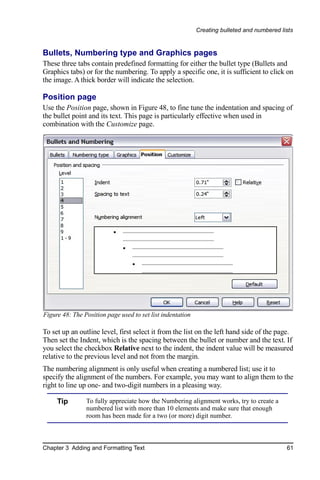
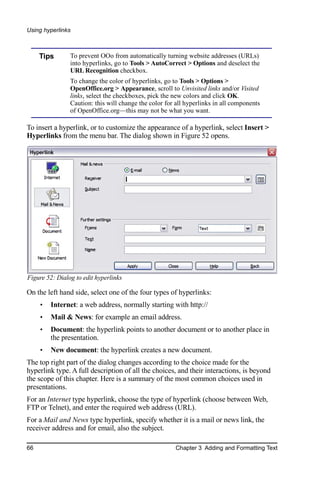
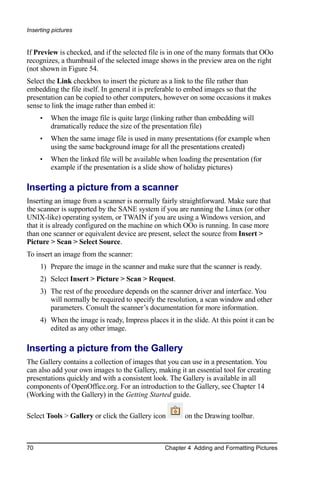
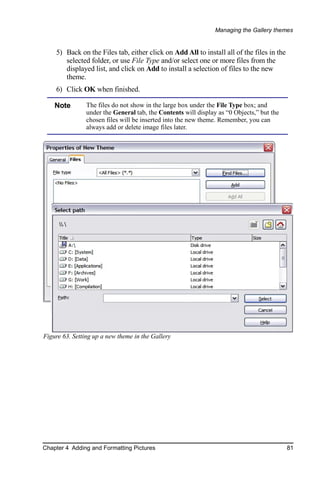
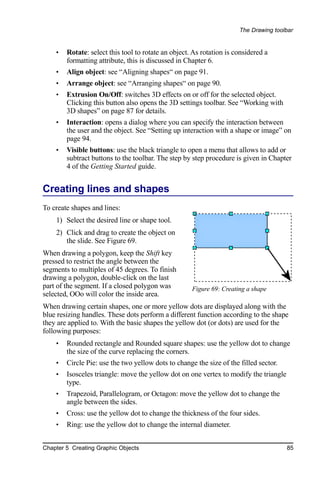
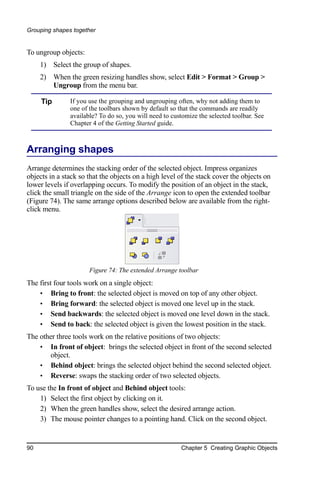
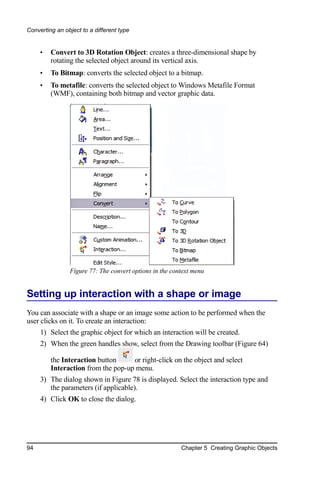
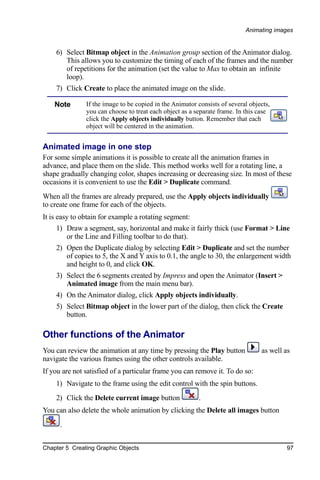
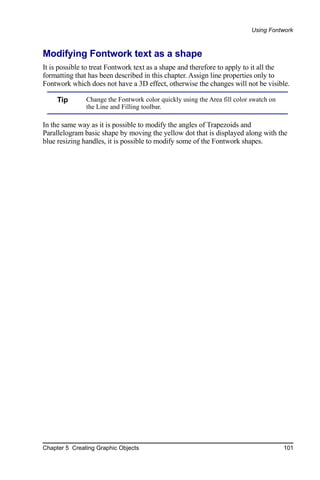
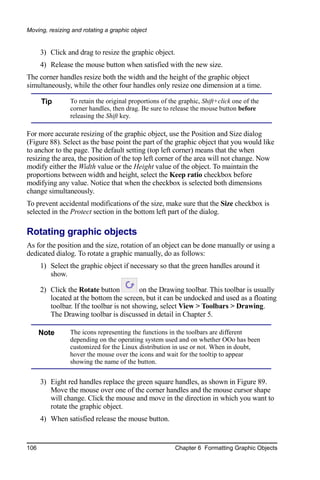
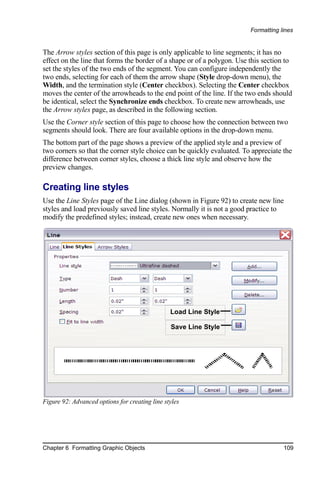
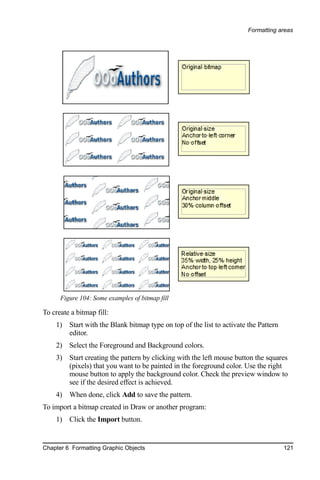
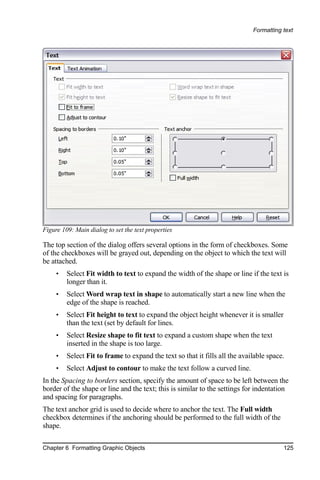
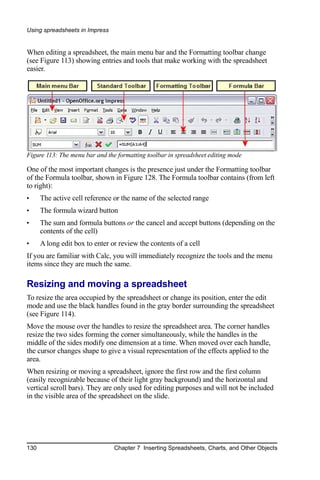
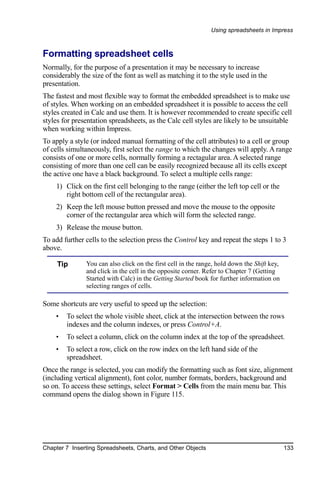
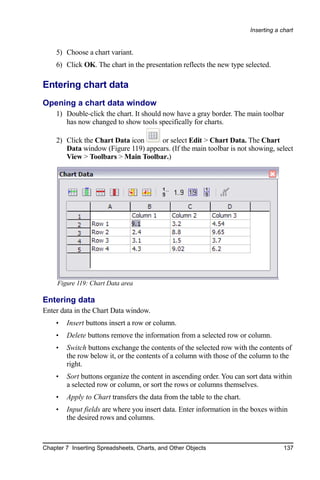
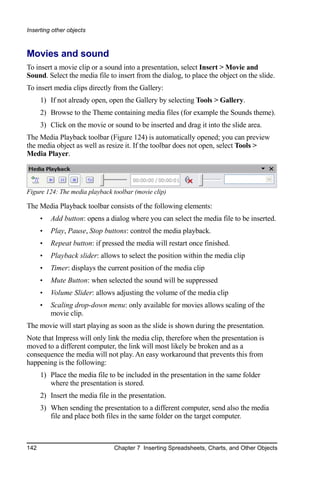
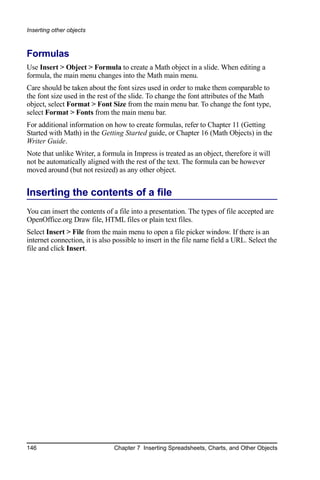
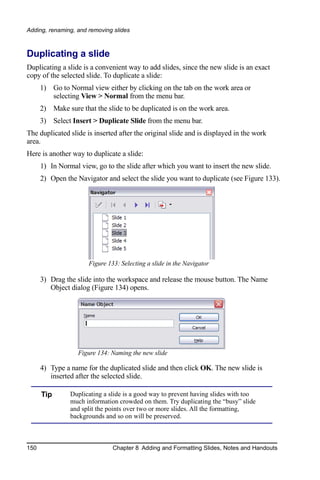
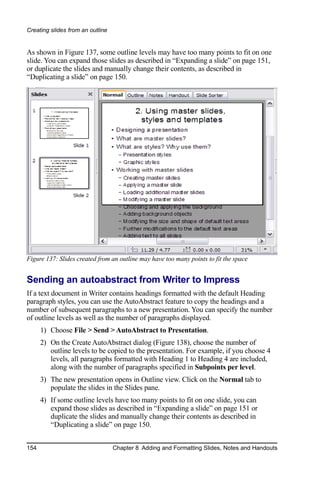
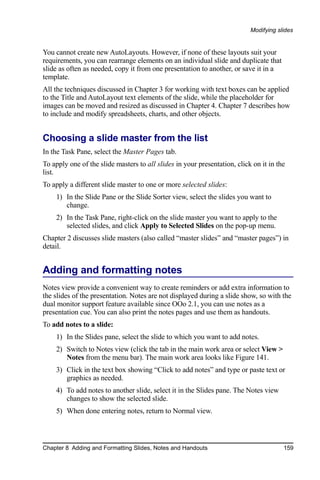
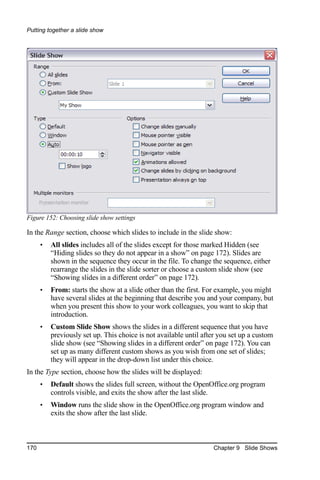
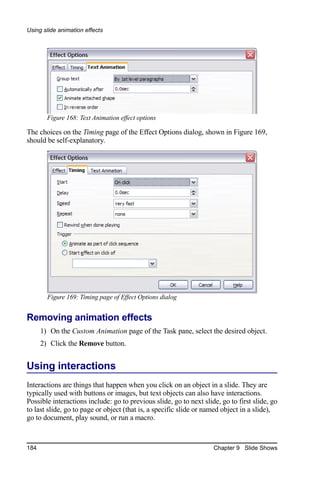
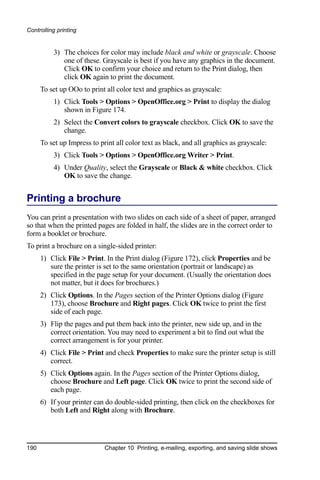
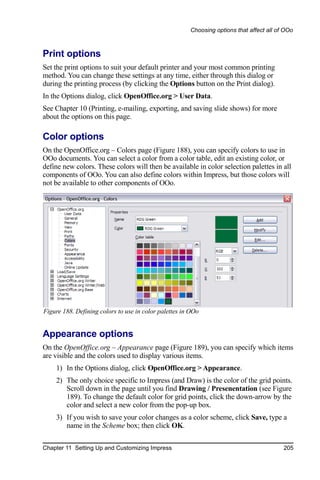
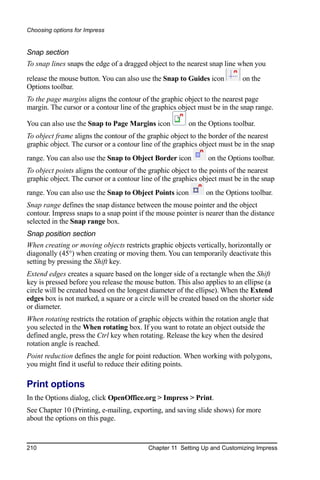
4) Use the Change order: up-arrow button to move each of the last three items
up the list to just under the other item with the same name. The animation list
will now look like Figure 164.
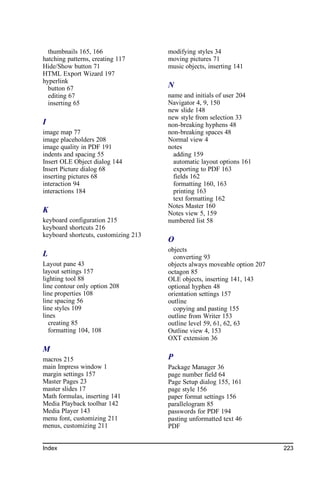
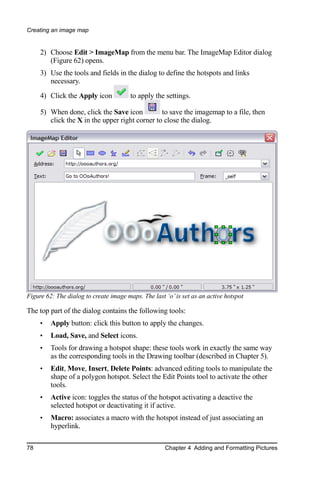
Figure 164: Animation list after moving
items into required sequence
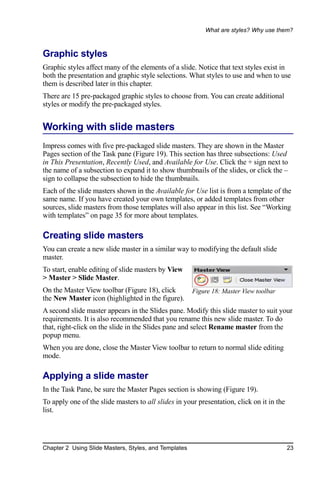
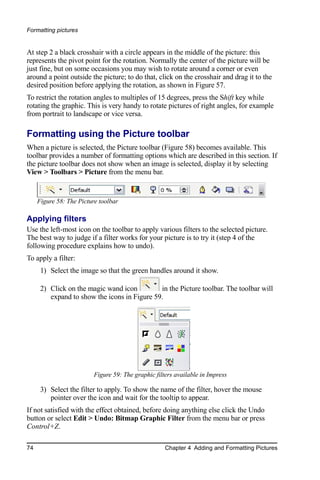
Step 3. Change the timing for some list items from With previous to On click
Notice that all of the items on the animations list (except for the two “Point one”
items) are set to start at the same time as the previous item. However, we want the
second “Point two” animation and the second “Point three” animation to also occur
On click.
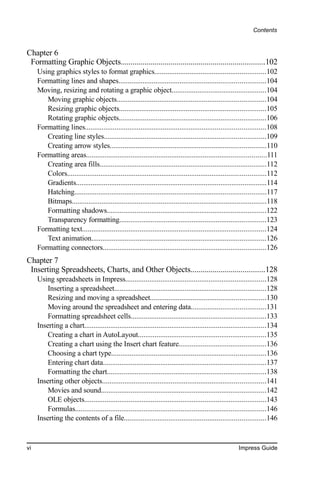
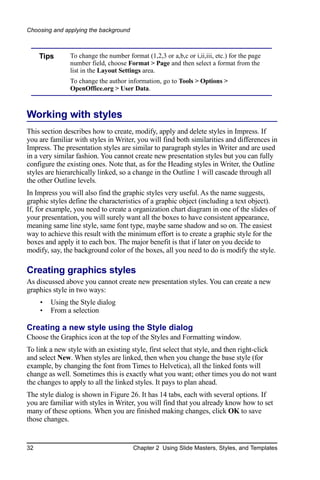
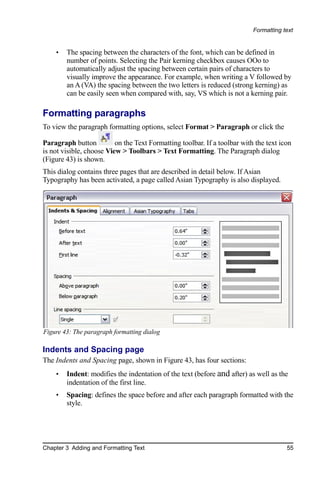
1) Select these items, and then choose On click from the Start list. The
animation list now looks like Figure 165.
2) Save the file.
3) Test this set of animations by clicking the Slide Show button.
Figure 165: Final list of animations
Advanced animation effects
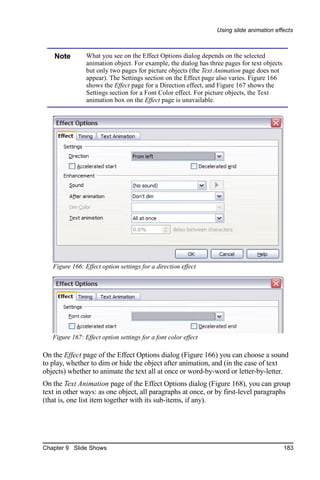
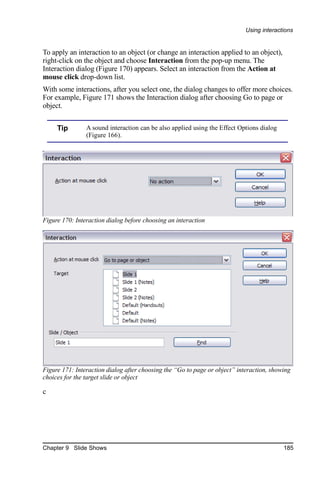
Click the Effect Options button [...] next to the properties drop-down list to display
the Effect Options dialog.
182 Chapter 9 Slide Shows](https://image.slidesharecdn.com/0500igimpressguide6x9a-090923185025-phpapp01/85/0500-I-G-Impress-Guide6x9a-192-320.jpg)
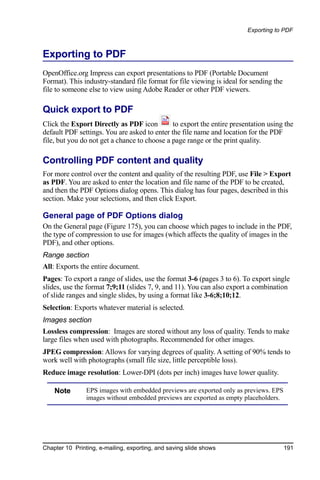


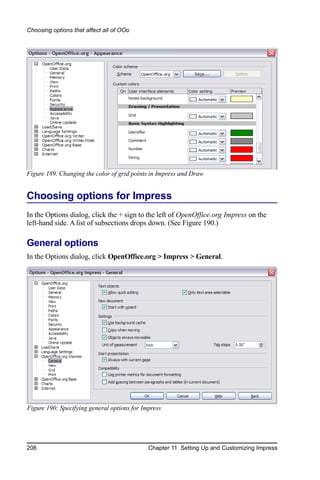

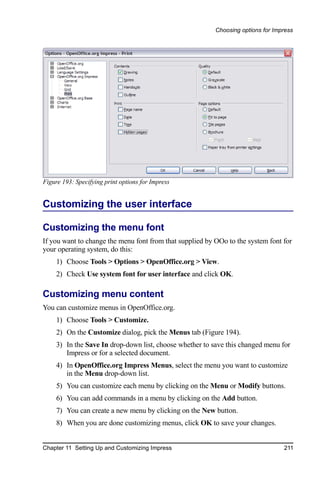


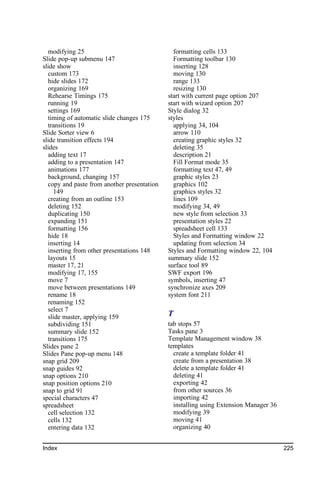
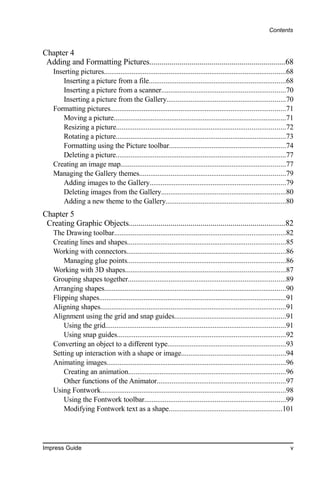
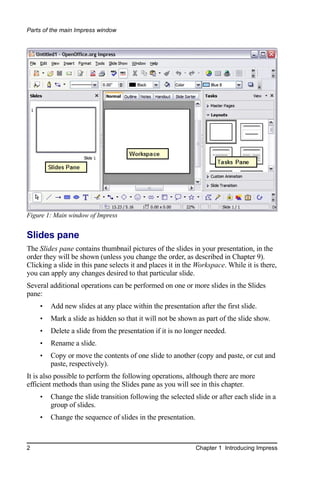
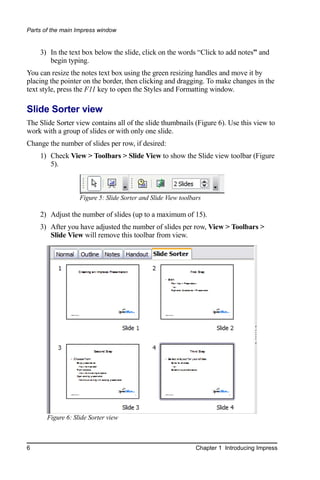
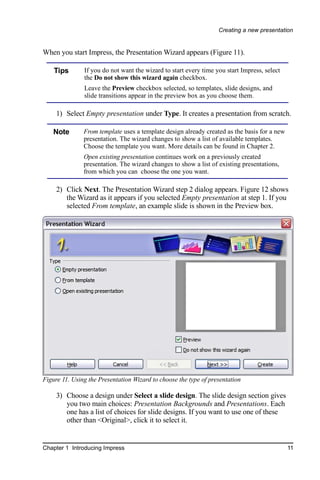
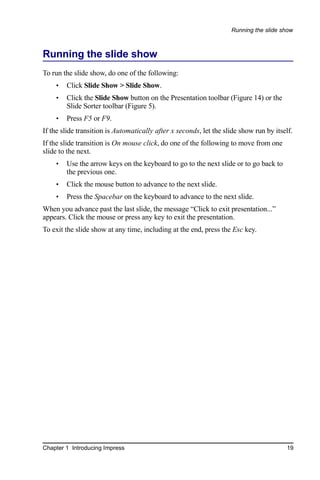
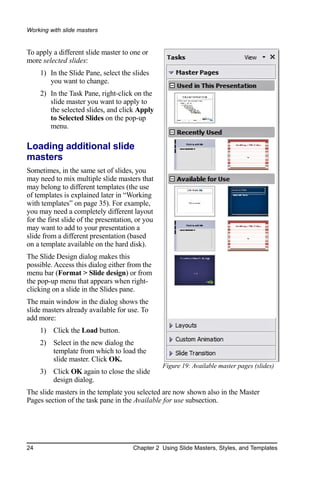
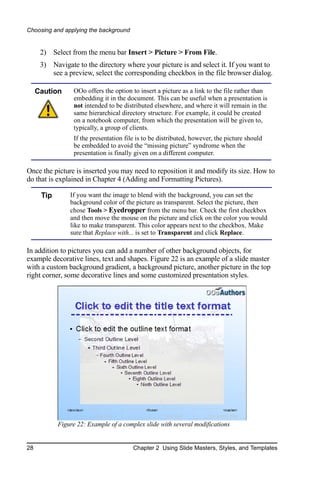
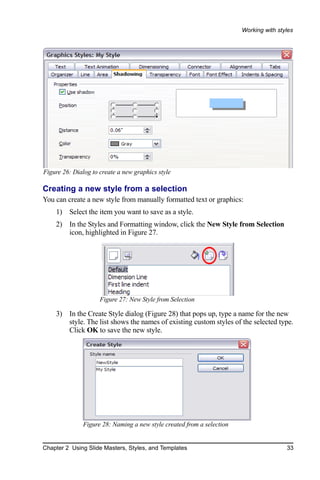
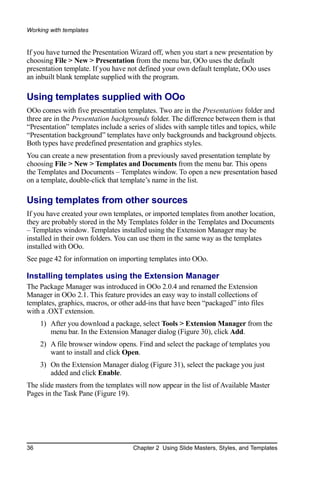
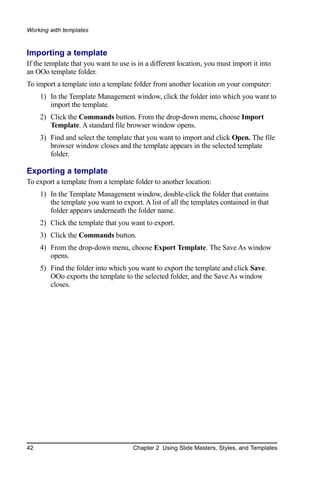
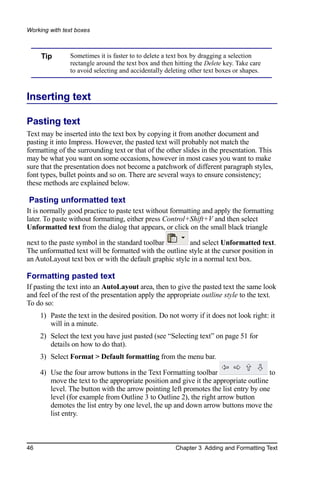
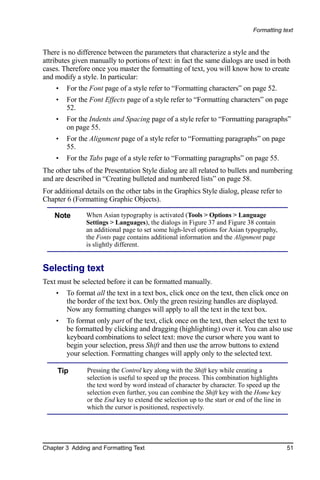
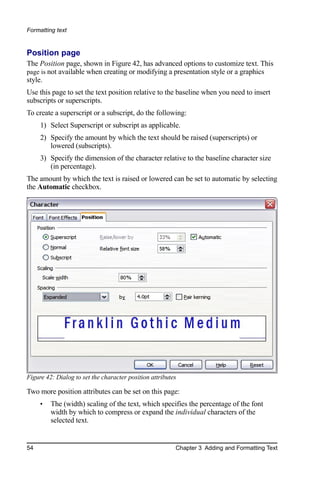
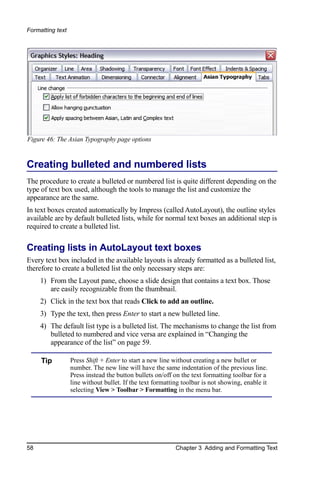
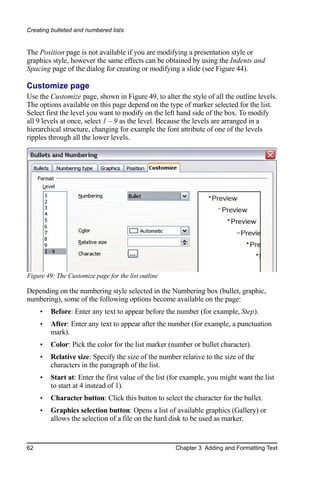
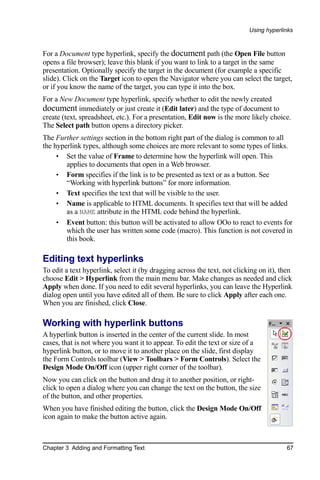
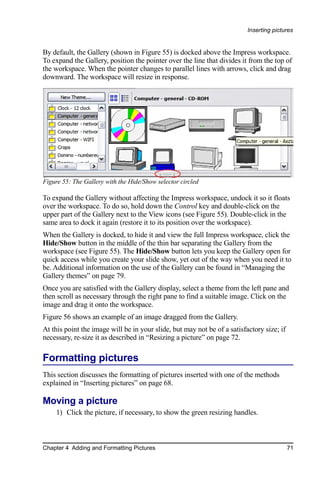
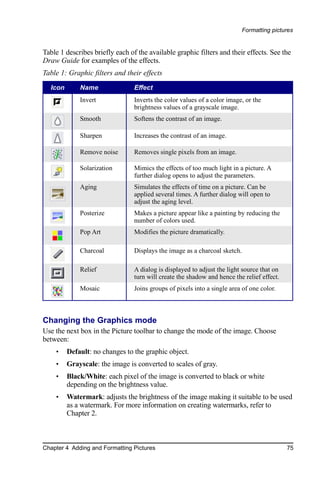
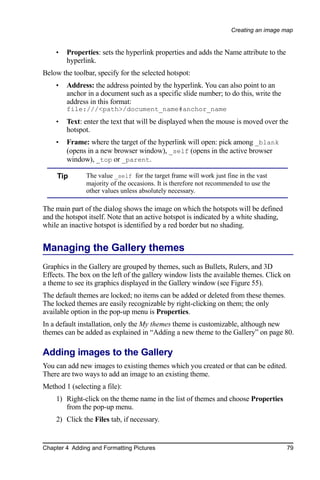
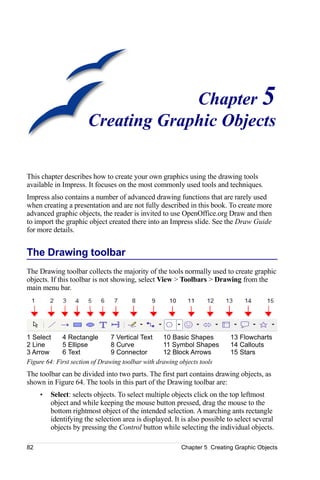
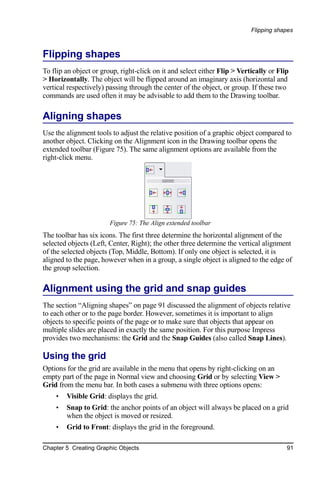
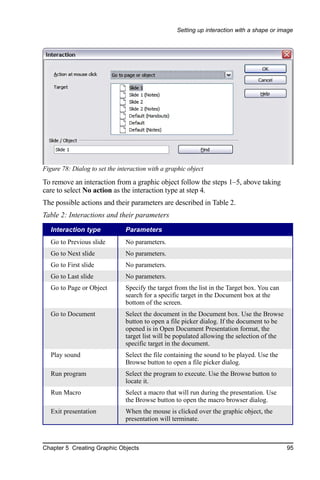
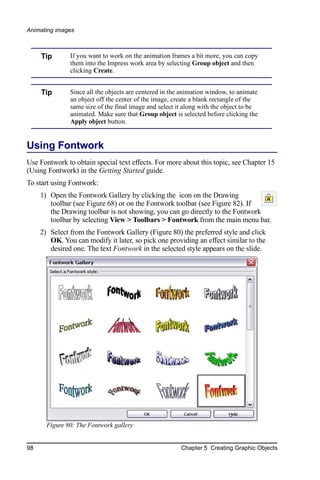
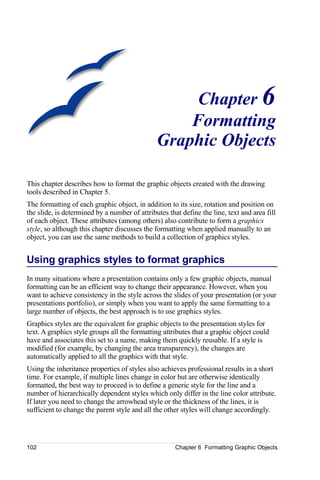
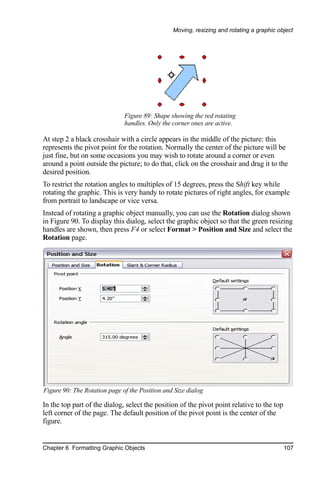
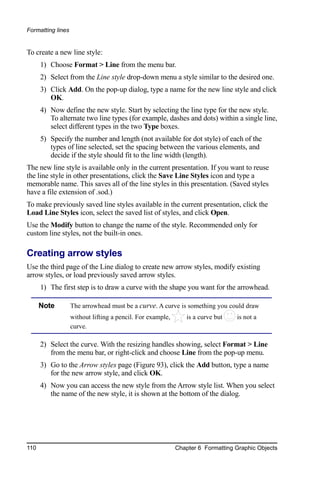
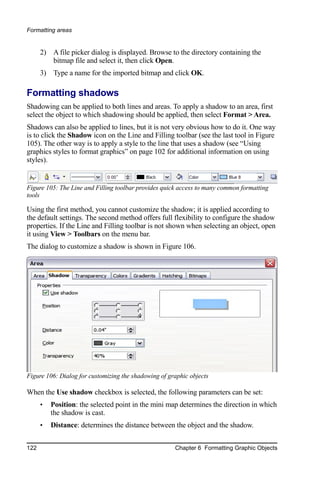
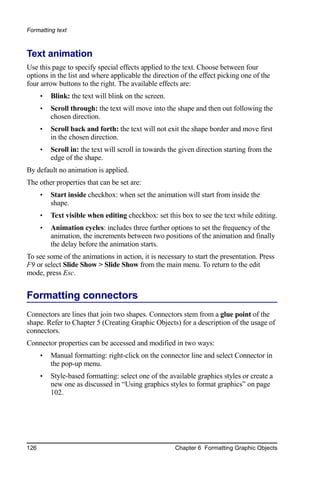
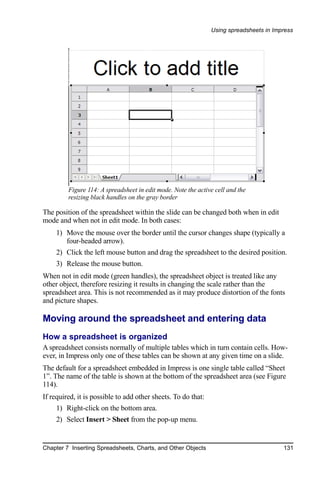
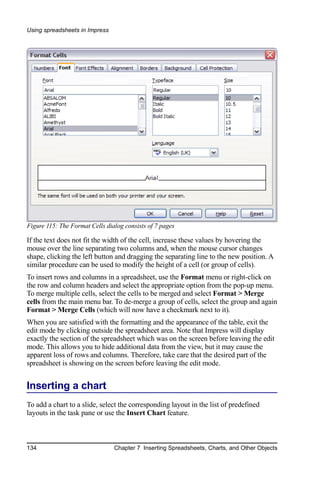
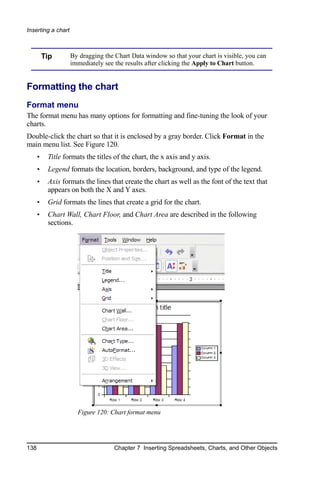
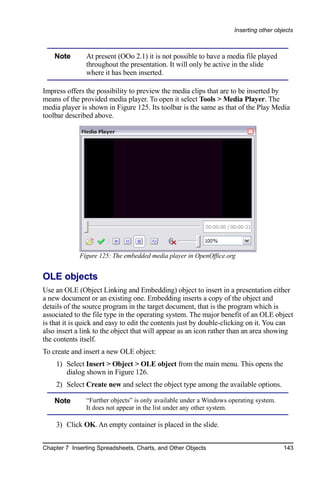
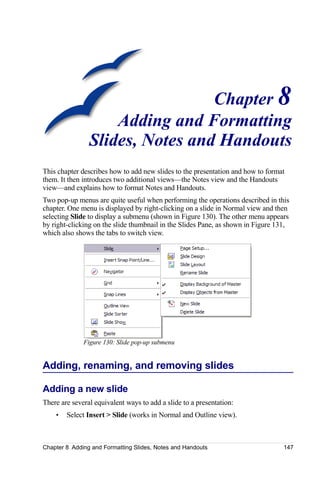
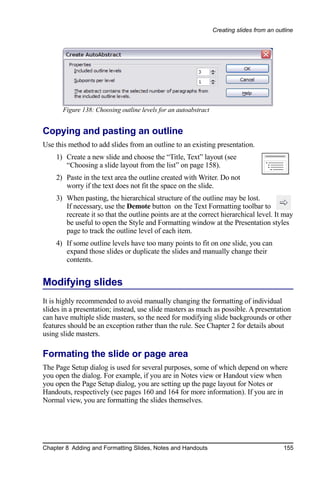
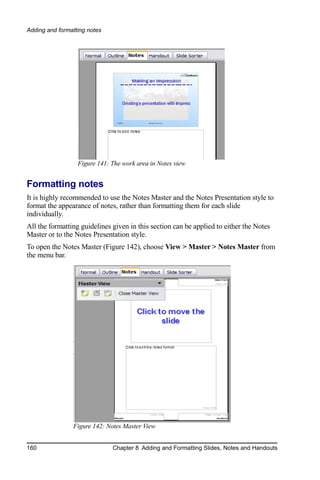
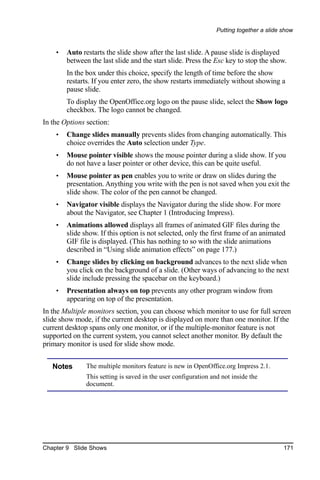
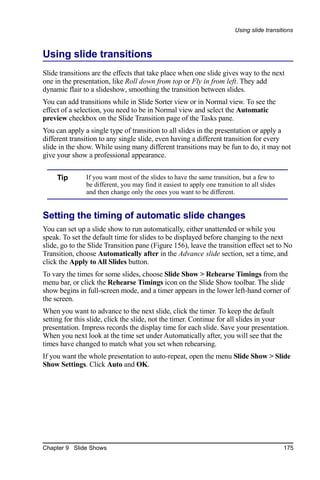
![Shortcut keys in slide shows
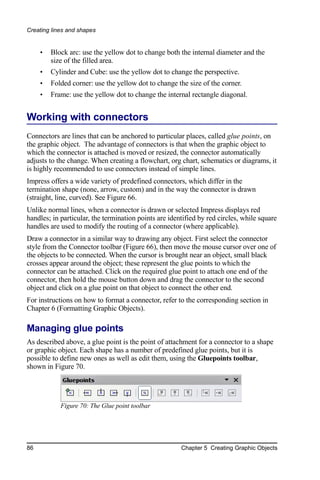
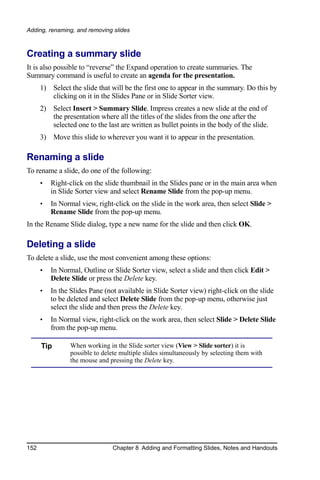
Shortcut keys in slide shows
Shortcut Keys Effect
Esc End presentation.
Spacebar or Right arrow or Play next effect (if any, else go to
Down arrow or Page Down or next slide).
Enter or Return or N
Alt+Page Down Go to next slide without playing
effects.
[number] + Enter Type a number of a slide and
press Enter to go to the slide.
Left arrow or Up arrow or Play previous effect again. If no
Page Up or Backspace or P previous effect exists on this
slide, show previous slide.
Alt+Page Up Go to the previous slide without
playing effects.
Home Jump to first slide in the slide
show.
End Jump to the last slide in the slide
show.
Ctrl+Page Up Go to the previous slide.
Ctrl+Page Down Go to the next slide.
B or . Show black screen until next key
or mouse wheel event.
W or , Show white screen until next key
or mouse wheel event.
Navigating with the keyboard in Slide Sorter
Shortcut Keys Effect
Escape Moves the focus to the first slide.
Arrow key Moves the focus to the next slide.
Spacebar Makes the slide with the focus the current slide.
220 Appendix A Keyboard Shortcuts](https://image.slidesharecdn.com/0500igimpressguide6x9a-090923185025-phpapp01/85/0500-I-G-Impress-Guide6x9a-230-320.jpg)