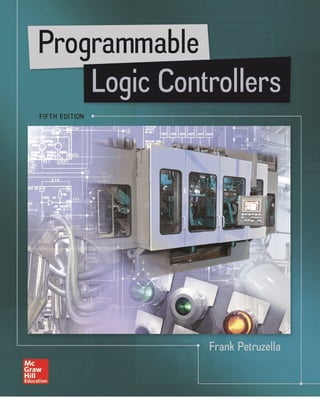
Controladores lógicos programables por Frank D. Petruzella.pdf
•
0 likes•1,749 views

PLC

Recommended
Recommended
More Related Content
What's hot
What's hot (20)
Similar to Controladores lógicos programables por Frank D. Petruzella.pdf
Similar to Controladores lógicos programables por Frank D. Petruzella.pdf (20)
More from SANTIAGO PABLO ALBERTO
More from SANTIAGO PABLO ALBERTO (20)
Recently uploaded
Recently uploaded (20)
Controladores lógicos programables por Frank D. Petruzella.pdf
- 1. plc4me.com
- 3. m This page intentionally left blank plc4me.com
- 4. m Programmable Logic Controllers Frank D. Petruzella Fifth Edition plc4me.com
- 5. m PROGRAMMABLE LOGIC CONTROLLERS, FIFTH EDITION Published by McGraw-Hill Education, 2 Penn Plaza, New York, NY 10121. Copyright © 2017 by McGraw-Hill Education. All rights reserved. Printed in the United States of America. Previous editions © 2011, 2005, 1998. No part of this publication may be reproduced or distributed in any form or by any means, or stored in a database or retrieval system, without the prior written consent of McGraw-Hill Education, including, but not limited to, in any network or other electronic storage or transmission, or broadcast for distance learning. Some ancillaries, including electronic and print components, may not be available to customers outside the United States. This book is printed on acid-free paper. 1 2 3 4 5 6 7 8 9 0 RMN/RMN 1 0 9 8 7 6 ISBN 978-0-07-337384-3 MHID 0-07-337384-2 Senior Vice President, Products & Markets: Kurt L. Strand Vice President, General Manager, Products & Markets: Marty Lange Vice President, Content Design & Delivery: Kimberly Meriwether David Managing Director: Thomas Timp Global Brand Manager: Raghu Srinivasan Director, Product Development: Rose Koos Product Developer: Vincent Bradshaw Marketing Manager: Nick McFadden Digital Product Developer: Amy Bumbaco, Ph.D. Director, Content Design & Delivery: Linda Avenarius Executive Program Manager: Faye M. Herrig Content Project Managers: Jessica Portz, Tammy Juran, Sandra Schnee Buyer: Laura M. Fuller Content Licensing Specialist: Lorraine Buczek Compositor: MPS Limited Printer: R. R. Donnelley All credits appearing on page or at the end of the book are considered to be an extension of the copyright page. Library of Congress Cataloging-in-Publication Data Petruzella, Frank D., author. Programmable logic controllers / Frank D. Petruzella.—Fifth edition. pages cm Includes index. ISBN 978-0-07-337384-3 (alk. paper)—ISBN 0-07-337384-2 (alk. paper) 1. Programmable controllers. I. Title. TJ223.P76P48 2017 629.8’95—dc23 2015035302 The Internet addresses listed in the text were accurate at the time of publication. The inclusion of a website does not indicate an endorsement by the authors or McGraw-Hill Education, and McGraw-Hill Education does not guarantee the accuracy of the information presented at these sites. mheducation.com/highered plc4me.com
- 6. m Contents 3.8 ASCII Code. . . . . . . . . . . . . . . . . . . . . . . . . . . 54 3.9 Parity Bit. . . . . . . . . . . . . . . . . . . . . . . . . . . . . 54 3.10 Binary Arithmetic . . . . . . . . . . . . . . . . . . . . . . 55 3.11 Floating Point Arithmetic . . . . . . . . . . . . . . . . 57 Review Questions. . . . . . . . . . . . . . . . . . . . . . . . . . . . . 59 Problems . . . . . . . . . . . . . . . . . . . . . . . . . . . . . . . . . . . 60 Chapter 4 Fundamentals of Logic 61 4.1 The Binary Concept . . . . . . . . . . . . . . . . . . . . 62 4.2 AND, OR, and NOT Functions. . . . . . . . . . . . 62 The AND Function . . . . . . . . . . . . . . . . . . . . . 62 The OR Function. . . . . . . . . . . . . . . . . . . . . . . 63 The NOT Function . . . . . . . . . . . . . . . . . . . . . 64 The Exclusive-OR (XOR) Function. . . . . . . . . 65 4.3 Boolean Algebra . . . . . . . . . . . . . . . . . . . . . . . 65 4.4 Developing Logic Gate Circuits from Boolean Expressions. . . . . . . . . . . . . . . . . . . . . . . . . . . 66 4.5 Producing the Boolean Equation for a Given Logic Gate Circuit . . . . . . . . . . . . . . . . . . . . . 66 4.6 Hardwired Logic versus Programmed Logic . 67 4.7 Programming Word Level Logic Instructions. 70 Review Questions. . . . . . . . . . . . . . . . . . . . . . . . . . . . . 72 Problems . . . . . . . . . . . . . . . . . . . . . . . . . . . . . . . . . . . 72 Chapter 5 Basics of PLC Programming 74 5.1 Processor Memory Organization . . . . . . . . . . 75 Program Files . . . . . . . . . . . . . . . . . . . . . . . . . 75 Data Files . . . . . . . . . . . . . . . . . . . . . . . . . . . . 75 5.2 Program Scan . . . . . . . . . . . . . . . . . . . . . . . . . 78 5.3 PLC Programming Languages . . . . . . . . . . . . 81 5.4 Bit-Level Logic Instructions. . . . . . . . . . . . . . 83 5.5 Instruction Addressing . . . . . . . . . . . . . . . . . . 86 5.6 Branch Instructions. . . . . . . . . . . . . . . . . . . . . 87 5.7 Internal Relay Instructions . . . . . . . . . . . . . . . 89 5.8 Programming Examine If Closed and Examine If Open Instructions . . . . . . . . . . . . . . . . . . . . 90 5.9 Entering the Ladder Diagram . . . . . . . . . . . . . 91 5.10 Modes of Operation . . . . . . . . . . . . . . . . . . . . 93 5.11 Connecting with Analog Devices . . . . . . . . . . 93 Review Questions. . . . . . . . . . . . . . . . . . . . . . . . . . . . . 95 Problems . . . . . . . . . . . . . . . . . . . . . . . . . . . . . . . . . . . 96 Preface . . . . . . . . . . . . . . . . . . . . . . . . . . . . . . . . . . . . .viii Acknowledgments . . . . . . . . . . . . . . . . . . . . . . . . . . . . .xi About the Author . . . . . . . . . . . . . . . . . . . . . . . . . . . . . xii Chapter 1 Programmable Logic Controllers (PLCs): An Overview 1 1.1 Programmable Logic Controllers . . . . . . . . . . . 2 1.2 Parts of a PLC. . . . . . . . . . . . . . . . . . . . . . . . . . 4 1.3 Principles of Operation. . . . . . . . . . . . . . . . . . . 8 1.4 Modifying the Operation . . . . . . . . . . . . . . . . 11 1.5 PLCs versus Computers . . . . . . . . . . . . . . . . . 11 1.6 PLC Size and Application. . . . . . . . . . . . . . . . 12 Review Questions. . . . . . . . . . . . . . . . . . . . . . . . . . . . . 15 Problems . . . . . . . . . . . . . . . . . . . . . . . . . . . . . . . . . . . 16 Chapter 2 PLC Hardware Components 17 2.1 The I/O Section. . . . . . . . . . . . . . . . . . . . . . . . 18 2.2 Discrete I/O Modules . . . . . . . . . . . . . . . . . . . 22 2.3 Analog I/O Modules . . . . . . . . . . . . . . . . . . . . 27 2.4 Special I/O Modules . . . . . . . . . . . . . . . . . . . . 31 2.5 I/O Specifications . . . . . . . . . . . . . . . . . . . . . . 33 Typical Discrete I/O Module Specifications . . 33 Typical Analog I/O Module Specifications . . . 34 2.6 The Central Processing Unit (CPU) . . . . . . . . . . . . . . . . . . . . . . . . . . . 35 2.7 Memory Design . . . . . . . . . . . . . . . . . . . . . . . 36 2.8 Memory Types . . . . . . . . . . . . . . . . . . . . . . . . 37 2.9 Programming Terminal Devices . . . . . . . . . . . 39 2.10 Recording and Retrieving Data. . . . . . . . . . . . 39 2.11 Human Machine Interfaces (HMIs) . . . . . . . . 39 Review Questions. . . . . . . . . . . . . . . . . . . . . . . . . . . . . 43 Problems . . . . . . . . . . . . . . . . . . . . . . . . . . . . . . . . . . . 45 Chapter 3 Number Systems and Codes 46 3.1 Decimal System . . . . . . . . . . . . . . . . . . . . . . . 47 3.2 Binary System. . . . . . . . . . . . . . . . . . . . . . . . . 47 3.3 Negative Numbers. . . . . . . . . . . . . . . . . . . . . . 49 3.4 Octal System. . . . . . . . . . . . . . . . . . . . . . . . . . 49 3.5 Hexadecimal System. . . . . . . . . . . . . . . . . . . . 50 3.6 Binary Coded Decimal (BCD) System. . . . . . 51 3.7 Gray Code. . . . . . . . . . . . . . . . . . . . . . . . . . . . 53 v plc4me.com
- 7. m vi Contents Chapter 6 Developing Fundamental PLC Wiring Diagrams and Ladder Logic Programs 98 6.1 Electromagnetic Control Relays. . . . . . . . . . . 99 6.2 Contactors. . . . . . . . . . . . . . . . . . . . . . . . . . . 100 6.3 Motor Starters . . . . . . . . . . . . . . . . . . . . . . . . 101 6.4 Manually Operated Switches . . . . . . . . . . . . 102 6.5 Mechanically Operated Switches . . . . . . . . . 103 6.6 Sensors . . . . . . . . . . . . . . . . . . . . . . . . . . . . . 104 Proximity Sensor. . . . . . . . . . . . . . . . . . . . . . 104 Magnetic Reed Switch. . . . . . . . . . . . . . . . . . 107 Light Sensors. . . . . . . . . . . . . . . . . . . . . . . . . 107 Ultrasonic Sensors . . . . . . . . . . . . . . . . . . . . 109 Strain/Weight Sensors . . . . . . . . . . . . . . . . . . 110 Temperature Sensors. . . . . . . . . . . . . . . . . . . 110 Flow Measurement . . . . . . . . . . . . . . . . . . . . 111 Velocity and Position Sensors . . . . . . . . . . . . 111 6.7 Output Control Devices . . . . . . . . . . . . . . . . 112 6.8 Seal-In Circuits . . . . . . . . . . . . . . . . . . . . . . . 114 6.9 Electrical Interlocking Circuits. . . . . . . . . . . 115 6.10 Latching Relays . . . . . . . . . . . . . . . . . . . . . . 116 6.11 Converting Relay Schematics into PLC Ladder Programs . . . . . . . . . . . . . . . . . 121 6.12 Writing a Ladder Logic Program Directly from a Narrative Description . . . . . . . . . . . . 124 6.13 Instrumentation. . . . . . . . . . . . . . . . . . . . . . . 127 Review Questions. . . . . . . . . . . . . . . . . . . . . . . . . . . . 128 Problems . . . . . . . . . . . . . . . . . . . . . . . . . . . . . . . . . . 129 Chapter 7 Programming Timers 131 7.1 Mechanical Timing Relays . . . . . . . . . . . . . . 132 7.2 Timer Instructions. . . . . . . . . . . . . . . . . . . . . 134 7.3 On-Delay Timer Instruction . . . . . . . . . . . . . 135 7.4 Off-Delay Timer Instruction . . . . . . . . . . . . . 140 7.5 Retentive Timer. . . . . . . . . . . . . . . . . . . . . . . 144 7.6 Cascading Timers . . . . . . . . . . . . . . . . . . . . . 147 Review Questions. . . . . . . . . . . . . . . . . . . . . . . . . . . . 151 Problems . . . . . . . . . . . . . . . . . . . . . . . . . . . . . . . . . . 151 Chapter 8 Programming Counters 156 8.1 Counter Instructions . . . . . . . . . . . . . . . . . . . 157 8.2 Up-Counter . . . . . . . . . . . . . . . . . . . . . . . . . . 159 One-Shot Instruction. . . . . . . . . . . . . . . . . . . 162 8.3 Down-Counter. . . . . . . . . . . . . . . . . . . . . . . . 166 8.4 Cascading Counters . . . . . . . . . . . . . . . . . . . 170 8.5 Incremental Encoder-Counter Applications . 173 8.6 Combining Counter and Timer Functions . . 174 8.7 High-Speed Counters . . . . . . . . . . . . . . . . . . 177 Review Questions. . . . . . . . . . . . . . . . . . . . . . . . . . . . 179 Problems . . . . . . . . . . . . . . . . . . . . . . . . . . . . . . . . . . 179 Chapter 9 Program Control Instructions 184 9.1 Program Control . . . . . . . . . . . . . . . . . . . . . . 185 9.2 Master Control Reset Instruction . . . . . . . . . 185 9.3 Jump Instruction . . . . . . . . . . . . . . . . . . . . . . 188 9.4 Subroutine Functions . . . . . . . . . . . . . . . . . . 190 9.5 Immediate Input and Immediate Output Instructions . . . . . . . . . . . . . . . . . . . . . . . . . . 193 9.6 Forcing External I/O Addresses . . . . . . . . . . 195 9.7 Safety Circuitry. . . . . . . . . . . . . . . . . . . . . . . 197 9.8 Selectable Timed Interrupt . . . . . . . . . . . . . . 200 9.9 Fault Routine. . . . . . . . . . . . . . . . . . . . . . . . . 201 9.10 Temporary End Instruction . . . . . . . . . . . . . . 201 9.11 Suspend Instruction. . . . . . . . . . . . . . . . . . . . 202 Review Questions. . . . . . . . . . . . . . . . . . . . . . . . . . . . 203 Problems . . . . . . . . . . . . . . . . . . . . . . . . . . . . . . . . . . 203 Chapter 10 Data Manipulation Instructions 207 10.1 Data Manipulation . . . . . . . . . . . . . . . . . . . . 208 10.2 Data Transfer Operations . . . . . . . . . . . . . . . 208 10.3 Data Compare Instructions . . . . . . . . . . . . . . 216 10.4 Data Manipulation Programs . . . . . . . . . . . . 221 10.5 Numerical Data I/O Interfaces . . . . . . . . . . . 224 10.6 Closed-Loop Control . . . . . . . . . . . . . . . . . . 226 Review Questions. . . . . . . . . . . . . . . . . . . . . . . . . . . . 230 Problems . . . . . . . . . . . . . . . . . . . . . . . . . . . . . . . . . . 231 Chapter 11 Math Instructions 234 11.1 Math Instructions . . . . . . . . . . . . . . . . . . . . . 235 11.2 Addition Instruction . . . . . . . . . . . . . . . . . . . 236 11.3 Subtraction Instruction . . . . . . . . . . . . . . . . . 238 11.4 Multiplication Instruction . . . . . . . . . . . . . . . 239 11.5 Division Instruction . . . . . . . . . . . . . . . . . . . 240 11.6 Other Word-Level Math Instructions . . . . . . 242 11.7 File Arithmetic Operations . . . . . . . . . . . . . . 245 Review Questions. . . . . . . . . . . . . . . . . . . . . . . . . . . . 247 Problems . . . . . . . . . . . . . . . . . . . . . . . . . . . . . . . . . . 248 Chapter 12 Sequencer and Shift Register Instructions 252 12.1 Mechanical Sequencers. . . . . . . . . . . . . . . . . 253 12.2 Sequencer Instructions . . . . . . . . . . . . . . . . . 255 12.3 Sequencer Programs . . . . . . . . . . . . . . . . . . . 259 12.4 Bit Shift Registers. . . . . . . . . . . . . . . . . . . . . 264 12.5 Word Shift Operations . . . . . . . . . . . . . . . . . 272 Review Questions. . . . . . . . . . . . . . . . . . . . . . . . . . . . 277 Problems . . . . . . . . . . . . . . . . . . . . . . . . . . . . . . . . . . 277 plc4me.com
- 8. m Chapter 13 PLC Installation Practices, Editing, and Troubleshooting 281 13.1 PLC Enclosures. . . . . . . . . . . . . . . . . . . . . . . 282 13.2 Electrical Noise. . . . . . . . . . . . . . . . . . . . . . . 284 13.3 Leaky Inputs and Outputs. . . . . . . . . . . . . . . 285 13.4 Grounding. . . . . . . . . . . . . . . . . . . . . . . . . . . 285 13.5 Voltage Variations and Surges. . . . . . . . . . . . 287 13.6 Program Editing and Commissioning. . . . . . 288 13.7 Programming and Monitoring . . . . . . . . . . . 289 13.8 Preventive Maintenance . . . . . . . . . . . . . . . . 291 13.9 Troubleshooting . . . . . . . . . . . . . . . . . . . . . . 292 Processor Module . . . . . . . . . . . . . . . . . . . . . 292 Input Malfunctions . . . . . . . . . . . . . . . . . . . . 292 Output Malfunctions . . . . . . . . . . . . . . . . . . . 294 Ladder Logic Program . . . . . . . . . . . . . . . . . 294 13.10 PLC Programming Software. . . . . . . . . . . . . 299 Review Questions. . . . . . . . . . . . . . . . . . . . . . . . . . . . 302 Problems . . . . . . . . . . . . . . . . . . . . . . . . . . . . . . . . . . 302 Chapter 14 Process Control, Network Systems, and SCADA 305 14.1 Types of Processes . . . . . . . . . . . . . . . . . . . . 306 14.2 Structure of Control Systems . . . . . . . . . . . . 308 14.3 On/Off Control . . . . . . . . . . . . . . . . . . . . . . . 310 14.4 PID Control. . . . . . . . . . . . . . . . . . . . . . . . . . 311 14.5 Motion Control . . . . . . . . . . . . . . . . . . . . . . . 315 14.6 Data Communications. . . . . . . . . . . . . . . . . . 316 Data Highway. . . . . . . . . . . . . . . . . . . . . . . . 322 Serial Communication . . . . . . . . . . . . . . . . . 322 DeviceNet . . . . . . . . . . . . . . . . . . . . . . . . . . . 322 ControlNet. . . . . . . . . . . . . . . . . . . . . . . . . . . 325 EtherNet/IP. . . . . . . . . . . . . . . . . . . . . . . . . . 325 Modbus . . . . . . . . . . . . . . . . . . . . . . . . . . . . . 326 Fieldbus. . . . . . . . . . . . . . . . . . . . . . . . . . . . . 326 PROFIBUS-DP. . . . . . . . . . . . . . . . . . . . . . . 326 14.7 Supervisory Control and Data Acquisition (SCADA) . . . . . . . . . . 328 Review Questions. . . . . . . . . . . . . . . . . . . . . . . . . . . . 331 Problems . . . . . . . . . . . . . . . . . . . . . . . . . . . . . . . . . . 332 Chapter 15 ControlLogix Controllers 333 Part 1 Memory and Project Organization . . . . . . 334 Memory Layout . . . . . . . . . . . . . . . . . . . . . . 334 Configuration . . . . . . . . . . . . . . . . . . . . . . . . 334 Project. . . . . . . . . . . . . . . . . . . . . . . . . . . . . . 335 Tasks . . . . . . . . . . . . . . . . . . . . . . . . . . . . . . . 336 Programs. . . . . . . . . . . . . . . . . . . . . . . . . . . . 336 Routines . . . . . . . . . . . . . . . . . . . . . . . . . . . . 337 Tags. . . . . . . . . . . . . . . . . . . . . . . . . . . . . . . . 337 Structures . . . . . . . . . . . . . . . . . . . . . . . . . . . 340 Creating Tags . . . . . . . . . . . . . . . . . . . . . . . . 341 Monitoring and Editing Tags . . . . . . . . . . . . 342 Array. . . . . . . . . . . . . . . . . . . . . . . . . . . . . . . 342 Review Questions . . . . . . . . . . . . . . . . . . . . . 344 Part 2 Bit-Level Programming . . . . . . . . . . . . . . . 345 Program Scan . . . . . . . . . . . . . . . . . . . . . . . . 345 Creating Ladder Logic . . . . . . . . . . . . . . . . . 346 Tag-Based Addressing . . . . . . . . . . . . . . . . . 347 Adding Ladder Logic to the Main Routine. . 348 Internal Relay Instructions . . . . . . . . . . . . . . 350 Latch and Unlatch Instructions. . . . . . . . . . . 352 One-Shot Instruction. . . . . . . . . . . . . . . . . . . 353 Review Questions . . . . . . . . . . . . . . . . . . . . . 356 Problems . . . . . . . . . . . . . . . . . . . . . . . . . . . . 356 Part 3 Programming Timers . . . . . . . . . . . . . . . . . 358 Timer Predefined Structure. . . . . . . . . . . . . . 358 On-Delay Timer (TON) . . . . . . . . . . . . . . . . 359 Off-Delay Timer (TOF) . . . . . . . . . . . . . . . . 362 Retentive Timer On (RTO) . . . . . . . . . . . . . . 364 Cascading of Timers . . . . . . . . . . . . . . . . . . . 365 Review Questions . . . . . . . . . . . . . . . . . . . . . 367 Problems . . . . . . . . . . . . . . . . . . . . . . . . . . . . 367 Part 4 Programming Counters . . . . . . . . . . . . . . . 368 Counters . . . . . . . . . . . . . . . . . . . . . . . . . . . . 368 Count-Up (CTU) Counter. . . . . . . . . . . . . . . 369 Count-Down (CTD) Counter . . . . . . . . . . . . 371 Combining Counter and Timer Functions . . 372 Review Questions . . . . . . . . . . . . . . . . . . . . . 373 Problems . . . . . . . . . . . . . . . . . . . . . . . . . . . . 373 Part 5 Math, Comparison, and Move Instructions . . . . . . . . . . . . . . . . 374 Math Instructions . . . . . . . . . . . . . . . . . . . . . 374 Comparison Instructions. . . . . . . . . . . . . . . . 376 Move Instructions . . . . . . . . . . . . . . . . . . . . . 379 Combining Math, Comparison, and Move Instructions. . . . . . . . . . . . . . . . . . 380 Review Questions . . . . . . . . . . . . . . . . . . . . . 383 Problems . . . . . . . . . . . . . . . . . . . . . . . . . . . . 383 Part 6 Function Block Programming . . . . . . . . . . 384 Function Block Diagram (FBD) . . . . . . . . . . 384 FBD Programming . . . . . . . . . . . . . . . . . . . . 388 Review Questions . . . . . . . . . . . . . . . . . . . . . 394 Problems . . . . . . . . . . . . . . . . . . . . . . . . . . . . 394 Glossary . . . . . . . . . . . . . . . . . . . . . . . . . . . . . . . . . . . 395 Index . . . . . . . . . . . . . . . . . . . . . . . . . . . . . . . . . . . . . 407 Contents vii plc4me.com
- 9. m viii Preface Programmable logic controllers (PLCs) continue to evolve as new technologies are added to their capabilities. As PLC technology has advanced, so have programming lan- guages and communications capabilities. Today’s PLCs offer faster scan times, space efficient high-density input/ output systems, and special interfaces to allow non- traditional devices to be attached directly to the PLC. Now in its Fifth Edition, changes made to the content of the text have been made solely based on reviews from current instructors and include: • material that should be added or deleted from chapters • topics requiring more in-depth coverage • increased integration of the ControlLogix platform of controllers • chapter modifications require to meet current cur- riculum needs The primary source of information for a particular PLC is always the accompanying user manuals provided by the manufacturer. This textbook is not intended to replace the vendor’s reference material, but rather to comple- ment, clarify, and expand on this information. The text covers the basics of programmable logic controllers in a manner that complements instruction with a SLC-500 or ControlLogix platform. The underlying PLC principles and concepts covered in the text are common to most manufacturers. They serve to maximize the knowledge gained through on-the-job training and programs offered by different vendors. The text is written in an easy-to-read style that is de- signed for students with no prior PLC experience. For example, when the operation of a program is called for, a bulleted list is used to summarize its execution. The bulled list replaces a lengthy paragraph and is especially helpful when covering the different steps related to the execution of a program. Each chapter begins with a brief introduction outlin- ing chapter coverage and learning objectives. When ap- plicable, the relay equivalent of the virtual programmed instruction is explained first, followed by the appropriate PLC instruction. Chapters conclude with a set of review questions and problems. The review questions are closely related to the chapter objectives and require students to recall and apply information covered in the chapter. The problems range from easy to difficult, thus challenging students at various levels of competence. Features new to the Fifth Edition include: • Key concepts and terms are highlighted in bold the first time they appear. • New/updated photos and line art for every chapter. • New topics for every chapter as requested by reviewers. • Addition review questions for new topics. • Updated instructor PowerPoint lessons. • More than 175 SLC-500 and ControlLogix program simulation videos tied directly to the programs studied in the text In addition, students who are using McGraw- Hill’s Connect can watch simulated, step-by-step execution of numerous ladder logic programming examples. They’re guided by an audio commen- tary that explains what to look for as the program is executed. The videos are part of the Student Resources section of Connect. plc4me.com
- 10. m Preface ix Chapter changes in this edition include: Chapter 1 • Testing of field devices. • Extended coverage of scan cycle sequence. • Additional test bank questions. • Program video simulations. • New and modified line diagrams and photos. Chapter 2 • ControlLogix Base and Alias addressing. • Extended coverage of DC module Sinking and Sourcing. • Analog module input sensor 2-, 3-, and 4-wire connections. • Scaling of PLC analog inputs and outputs. • Extended coverage of Human Machine Interfaces (HMIs) • Additional chapter review questions. • Additional test bank questions. • Program video simulations. • New and modified line diagrams and photos. Chapter 3 • 16 bit 2’s complement. • Floating point arithmetic. • Additional chapter problems. • Additional test bank questions. • Program video simulations. • New and modified line diagrams and photos. Chapter 4 • Modification to hardwired programming examples • Additional test bank questions. • Additional chapter review questions. • Program video simulations. • New and modified line diagrams and photos. Chapter 5 • Electrical versus logical continuity. • Evaluating XIO and XIC bit instructions. • Rack-based versus tag-based addressing. • Connecting with analog devices. • Additional test bank questions. • Additional chapter review questions. • Program video simulations. • New and modified line diagrams and photos. Chapter 6 • Magnetic reed float switch. • Resistance temperature detectors (RTDs). • Electrical interlocking circuits. • Process instrumentation. • Additional test bank questions. • Additional chapter review questions. • Program video simulations. • New and modified line diagrams and photos. Chapter 7 • Extended coverage of timer instructions. • ControlLogix timer instruction. • Reciprocating timers. • TON timer bit table. • TOF timer bit table. • Additional test bank questions. • Program video simulations. • New and modified line diagrams and photos. Chapter 8 • ControlLogix counter instruction. • Extended coverage of CTD instruction. • Additional information on incremental encoders. • New section on High-Speed Counter instruction. • Additional test bank questions. • Program video simulations. • New and modified line diagrams and photos. Chapter 9 • Extended coverage of MCR instruction. • Extended coverage of Jump instruction. • Extended coverage of Immediate Input and Output instructions. • ControlLogix Immediate Output instruction. • Additional test bank questions. • Program video simulations. • New and modified line diagrams and photos. plc4me.com
- 11. m x Preface Chapter 10 • Extended coverage of the Masked Move instruction. • New example of a copy instruction program. • New example of a data compare program. • ControlLogix Limit Comparison instruction and program. • Additional test bank questions. • Program video simulations. • New and modified line diagrams and photos. Chapter 11 • Extended coverage of basic math instruction. • New example of a compute instruction program. • New coverage Modulo (MOD) instruction. • New scale analog input using the SCP instruction. • New scale analog output using the SCP instruction. • Additional test bank questions. • Program video simulations. • New and modified line diagrams and photos. Chapter 12 • Extended coverage of Sequencer Output (SQO) instruction. • ControlLogix Sequencer Output (SQO) instruction and program. • ControlLogix shift registers instruction and program. • ControlLogix FIFO instruction and program. • Additional test bank questions. • Program video simulations. • New and modified line diagrams and photos. Chapter 13 • Extended coverage of communications using RSLinx and RSWho. • Additional test bank questions. • Program video simulations. • New and modified line diagrams and photos. Chapter 14 • SERCOS standard communication for motion control. • HART communication protocol. • SCADA alarm monitoring. • FactoryTalk services platform. • Additional test bank questions. • Program video simulations. • New and modified line diagrams and photos. Chapter 15 Part 1 • Extended coverage of tag types. • Program video simulations. • New and modified line diagrams and photos. Part 2 • Reversing conveyor motor program and operation. • Motor pilot light internal relay program and operation. • Latch/unlatch car wash program and operation. • One-shot program instructions used in conjunction with math operations. • Program video simulations. • New and modified line diagrams and photos. Part 3 • Cascading TON timers for timed event-driven rou- tines program and operation • Program video simulations. • New and modified line diagrams and photos. Part 4 • Combining Counter and Timer Functions program and operation. • Program video simulations. • New and modified line diagrams and photos. Part 5 • Monitoring the setting of a thumbwheel switch program and operation. • PLC program for three-speed control of a conveyor system program and operation. • Conveyor parts tracking program and operation. • Program video simulations. • New and modified line diagrams and photos. • Part 6 Function block parameters tab. • Program video simulations. • New and modified line diagrams and photos. plc4me.com
- 12. m xi I would like to thank the following reviewers for their comments and suggestions: Noureddine Bekhouche Jacksonville State University Mark Bohnet Northwest Iowa Community College Michael Buck Dakota County Technical College Wayne Buroker Waukesha County Technical College Jerry Clark Northwest Mississippi Community College Chris Haley North Georgia Technical College Garrett Hunter Western Illinois University Wael Ibrahim ECPI University Ahmed Kamal Tennessee Tech University Gholam H. Massiha University of Louisiana at Lafayette Randy Owens Henderson Community College James Schabowski Waukesha County Technical College Jenifer Shannon Penn State University, Berks Campus Accounties Lashan Smith Tri-County Technical College Kenneth E. Swayne Pellissippi State Community College John Veitch SUNY Adirondack William Walker Truckee Meadows Community College Robert Permenter Albany Technical College A special thanks to Don Pelster of Nashville State Community College, for his outstanding work on per- forming a technical edit of the text and providing us with detailed feedback, suggestions and recommendations. Frank D. Petruzella Acknowledgments plc4me.com
- 13. m xii Frank D. Petruzella has extensive practical experience in the electrical control field, as well as many years of experience teaching and author- ing textbooks. Before becoming a full time edu- cator, he was employed as an apprentice and electrician in areas of electrical installation and maintenance. He holds a Master of Science degree from Niagara University, a Bachelor of Science degree from the State University of New York College–Buffalo, as well as diplomas in Electrical Power and Electronics from the Erie County Technical Institute. About the Author plc4me.com
- 14. m xiii Here, drawings and photos of real-world input and output devices have been included P rogrammable Logic Controllers makes it easy to learn PLCs from the ground up! Up- to-the-minute revisions include all the new- est developments in programming, installing, and maintaining processes. Clearly developed chapters deliver the organizing objectives, explanatory con- tent with helpful diagrams and illustrations, and closing review problems that evaluate retention of the chapter objectives. CHAPTER OBJECTIVES overview the chapter, letting stu- dents and instructors focus on the main points to better grasp concepts and retain information. Ladder logic program B3:0/1 (Internal) B3:0/2 (Internal) LEQ LESS THAN OR EQUAL Source A Source B GEQ GREATER THAN OR EQUAL Source A Source B MOV MOVE Source Destination Low temp. B3:0/1 Heater Heater High temp. B3:0/2 L1 Inputs S1 S1 S1 Thermocouple Thermocouple Thermocouple Thermocouple LED Heater L2 Outputs LED Display LED 5 9 5 597 603 Chapter content includes rich illustrative detail and extensive visual aids, allowing students to grasp concepts more quickly and understand practical applications In Chapter 02, students not only read about but can also see how HMIs fit into an overall PLC system, giving them a practical introduction to the topics HMI Package I/O Server Graphic Screen Communication ports PLC Tag Database Start Stop Chapter Objectives After completing this chapter, you will be able to: • Describe the operation of pneumatic on-delay and off-delay timers • Describe PLC timer instruction and differentiate between a nonretentive and retentive timer • Convert fundamental timer relay schematic diagrams to PLC ladder logic programs • Analyze and interpret typical PLC timer ladder logic programs • Program the control of outputs using the timer instruction control bits Ima Th coi de in the oth ind plc4me.com
- 15. m xiv Conventional system I/O Module DeviceNet Scanner Module DeviceNet system 4-wire cable and connector Coverage of communications and control networks utilizes clear graphics to demonstrate how things work BULLETED LISTS break down processes to helpfully sum- marize execution of tasks • When the Motor_Stop button is opened the output of the BAND block turns false to de-energize the contactor coil and stop the motor. Figure 15-110 shows a comparison between ladder logic and the FBD equivalent for the 10 second TON (on- delay timer) and TONR (on-delay with reset). The opera- tion of the FBD can be summarized as follows: • When the Timer_Sw is closed, the TONR func- tion block timer turns true and starts accumulating time. • The accumulated time is monitored by the output reference tag named ACC. • The EN (enable bit) output changes to 1 to turn on the EN_PL. • The TT (timer timing bit) output changes to 1 to turn on the TT_PL. • The timer times out after 10 seconds to set the DN (done bit) to 1 and turn on the DN_PL and reset the TT bit to zero and turn off the TT_PL. • The EN bit and EN_PL remain on as long as the Timer_Sw stays toggled closed. • Opening the Timer_Sw resets all outputs as well as the accumulated value to zero. • The timer can also be reset by way of the Reset input. Figure 15-111 shows a comparison between ladder logic and the FBD equivalent for the Up/Down counter used to limit the number of parts stored in a buffer zone to 50. The operation of the FBD can be summarized as follows: • The CTUD up/down counter function block accu- mulated value is initially reset by momentary actua- tion of the Restart_Button. • The accumulated count is monitored by the output reference tag named ACC. • Each time a part enters the buffer zone, the Enter_ Limit_Sw is actuated and the CUEnable input turns true to increment the count by 1. • Each time a part exits the buffer zone, the Exit_ Limit_Sw is actuated and the CDEnable input turns true to decrement the count by 1. • Whenever the number of parts in the buffer zone reaches 50 the DN bit is set to 1 and the output of Figure 15-110 Comparison between ladder logic and the FBD equivalent for a 10 second TON and TONR timer. 10000 0 DN_PL 0 TT_PL 0 EN_PL Status_Timer.DN DN_PL <Local:2:O.Data.3> Status_Timer.TT Input L1 TT_PL <Local:2:O.Data.2> Status_Timer.EN EN Timer On Delay Timer Preset Accum Status_Timer 10000 0 EN_PL <Local:2:O.Data.1> DN Timer_Sw <Local:1:I.Data.6> TON Ladder logic FBD equivalent TONR_01 ... TONR Timer On Delay with Reset TimerEnable ACC PRE Reset EN TT DN Timer_Sw Outputs L2 TT_PL EN_PL 0 ACC_Value 0 10000 Timer_Sw DN_PL Diagrams, such as this one illustrating an overview of the func- tion block programming language, help students put the pieces together Operation of the program can be viewed in real time Wash_In_Use Wash_In_Use Wash_In_Use L U Motor_Stop <Local:1:I.Data.0> Motor_Start <Local:1:I.Data.1> Track_Motor <Local:2:O.Data.0> Discrete I/O Slot 1 00 01 02 03 00 01 02 03 Slot 2 Exit_LS <Local:1:I.Data.3> Enter_LS <Local:1:I.Data.2> Do_Not_Enter_Sign <Local:2:O.Data.1> Track_Motor <Local:2:O.Data.0> More than 175 SLC-500 and ControlLogix program simulation videos tied directly to the programs studied in the text • The processor ignores the actual state of input limit switch I:1/3. • Although limit switch I:1/3 is off (0 or false) the processor considers it as being in the on (1 or true) state. • The program scan records this, and the program is executed with this forced status. • In other words, the program is executed as if the limit switch were actually closed. L1 L2 Input Outputs Ladder logic program OFF I:1/3 I:1/3 O:2/5 O:2/6 O:2/5 Force> ON O:2/5 O:2/6 M ON ON plc4me.com
- 16. m xv END-OF-CHAPTER REVIEWS are structured to reinforce chapter objectives EXAMPLE PROBLEMS help bring home the applicability of chapter concepts 128 Chapter 6 Developing Fundamental PLC Wiring Diagrams and Ladder Logic Programs 1. Explain the basic operating principle of an electro- magnetic control relay. 2. What is the operating difference between a nor- mally open and a normally closed relay contact? 3. In what ways are control relay coils and contacts rated? 4. How do contactors differ from relays? 5. What is the main difference between a contactor and a magnetic motor starter? 6. a. Draw the schematic for an across-the-line AC magnetic motor starter. b. With reference to this schematic, explain the function of each of the following parts: i. Main contact M ii. Control contact M iii. Starter coil M iv. OL relay coils v. OL relay contact 7. The current requirement for the control circuit of a magnetic starter is normally much smaller than that required by the power circuit. Why? 8. Compare the method of operation of each of the following types of switches: a. Manually operated switch b. Mechanically operated switch c. Proximity switch 9. What do the abbreviations NO and NC represent when used to describe switch contacts? 10. Draw the electrical symbol used to represent each of the following switches: a. NO pushbutton switch b. NC pushbutton switch c. Break-make pushbutton switch d. Three-position selector switch e. NO limit switch f. NC temperature switch g. NO pressure switch h. NC level switch i. NO proximity switch 11. Outline the method used to actuate inductive and capacitive proximity sensors. 12. How are reed switch sensors actuated? 13. Compare the operation of a photovoltaic solar cell with that of a photoconductive cell. 14. What are the two basic components of a photoelec- tric sensor? 15. Compare the operation of the reflective-type and through-beam photoelectric sensors. 16. Give an explanation of how a scanner and a decoder act in conjunction with each other to read a bar code. 17. How does an ultrasonic sensor operate? 18. Explain the principle of operation of a strain gauge. 19. Explain the principle of operation of a thermocouple. 20. What is the most common approach taken with re- gard to the measurement of fluid flow? 21. Explain how a tachometer is used to measure rota- tional speed. 22. How does an optical encoder work? 23. Draw an electrical symbol used to represent each of the following PLC control devices: a. Pilot light b. Relay c. Motor starter coil d. OL relay contact e. Alarm f. Heater g. Solenoid h. Solenoid valve i. Motor j. Horn 24. Explain the function of each of the following actuators: a. Solenoid b. Solenoid valve c. Stepper motor 25. Compare the operation of open-loop and closed- loop control. 26. What is a seal-in circuit? 27. In what way is the construction and operation of an electromechanical latching relay different from a standard relay? 28. Give a short description of each of the following control processes: a. Sequential b. Combination c. Automatic 29. Compare the type of sensor signal obtained from a thermocouple with that from an RTD. 30. Explain how a magnetic reed float switch works. 31. What is the function of an electrical interlocking circuit? 32. What is the role of instrumentation in an industrial process? 33. You have been assigned the task of calibrating an instrument. How would you proceed? CHAPTER 6 REVIEW QUESTIONS CHAPTER 6 PROBLEMS will correctly execute the hardwired control circuit in Figure 6-78. Assume: Stop pushbutton used is an NO type. Run pushbutton used is an NO type. Jog pushbutton used has one set of NO contacts. OL contact is hardwired. 5. Design a PLC program and prepare a typical I/O connection diagram and ladder logic program that will correctly execute the hardwired control circuit in Figure 6-79. Assume: PB1 pushbutton used is an NO type. PB2 pushbutton used is an NC type. PS1 pressure switch used is an NO type. LS1 limit switch used has only one set of NC contacts. 1. Design and draw the schematic for a conventional hardwired relay circuit that will perform each of the following circuit functions when a normally closed pushbutton is pressed: • Switch a pilot light on • De-energize a solenoid • Start a motor running • Sound a horn 2. Design and draw the schematic for a conventional hardwired circuit that will perform the following circuit functions using two break-make pushbuttons: • Turn on light L1 when pushbutton PB1 is pressed. • Turn on light L2 when pushbutton PB2 is pressed. • Electrically interlock the pushbuttons so that L1 and L2 cannot both be turned on at the same time. 3. Study the ladder logic program in Figure 6-77, and answer the questions that follow: a. Under what condition will the latch rung 1 be true? b. Under what conditions will the unlatch rung 2 be true? c. Under what condition will rung 3 be true? d. When PL1 is on, the relay is in what state (latched or unlatched)? e. When PL2 is on, the relay is in what state (latched or unlatched)? f. If AC power is removed and then restored to the circuit, what pilot light will automatically come on when the power is restored? g. Assume the relay is in its latched state and all three inputs are false. What input change(s) must occur for the relay to switch into its unlatched state? h. If the examine if closed instructions at addresses I/1, I/2, and I/3 are all true, what state will the relay remain in (latched or unlatched)? 4. Design a PLC program and prepare a typical I/O connection diagram and ladder logic program that I/1 L1 Inputs Ladder logic program Outputs L2 I/2 I/1 I/2 O/9 L I/3 O/9 U Rung 1 Rung 2 PL2 PL1 O/10 O/9 Start CR1 SOL CR1-2 CR1-1 PS1 LS1 SS1 CR2-2 CR2-1 CR2 SOL SOL L L 1 2 3 2 1 2 1 Stop PB PB PL1 Figure 6-78 Hardwired control circuit for Problem 4. L L Stop Run OL Jog M 2 1 M plc4me.com
- 17. m xvi ANCILLARIES THAT WORK Expanded on and updated from the previous edition, this new edition includes an outstanding instructor support package: • ExamView and EZ Test question test banks for each chapter. • PowerPoint lessons with animations that help visualize the actual process. • Activity Manual contains true/false, completion, matching, and multiple-choice tests for every chapter in the text. So that stu- dents get a better understanding of programmable logic controllers, the manual also includes a wide range of programming assignments and additional practice exercises. • Answers to the questions and problems in the textbook, Activities Manual, and LogixPro Manual. Available on the Instructor Resources section of Connect. In addition, for students, this edition also has available: • LogixPro PLC Lab Manual for use with Programmable Logic Controllers Fifth Edition, with LogixPro PLC Simulator. This manual contains: • McGraw-Hill’s Connect and Smartbook. • LogixPro simulations with audio and video for those using Connect. • Over 250 LogixPro student lab exercises sequenced to support material covered in the text. plc4me.com
- 18. m Required=Results ® McGraw-Hill Connect® Learn Without Limits Connect is a teaching and learning platform that is proven to deliver better results for students and instructors. Connect empowers students by continually adapting to deliver precisely what they need, when they need it, and how they need it, so your class time is more engaging and effective. Mobile Connect Insight® Connect Insight is Connect’s new one-of-a-kind visual analytics dashboard—now available for both instructors and students—that provides at-a-glance information regarding student performance, which is immediately actionable. By presenting assignment, assessment, and topical performance results together with a time metric that is easily visible for aggregate or individual results, Connect Insight gives the user the ability to take a just-in-time approach to teaching and learning, which was never before available. Connect Insight presents data that empowers students and helps instructors improve class performance in a way that is efficient and effective. 88% of instructors who use Connect require it; instructor satisfaction increases by 38% when Connect is required. Students can view their results for any Connect course. Analytics Using Connect improves passing rates by 10.8% and retention by 16.4%. Connect’s new, intuitive mobile interface gives students and instructors flexible and convenient, anytime–anywhere access to all components of the Connect platform. plc4me.com
- 19. m SmartBook® Proven to help students improve grades and study more efficiently, SmartBook contains the same content within the print book, but actively tailors that content to the needs of the individual. SmartBook’s adaptive technology provides precise, personalized instruction on what the student should do next, guiding the student to master and remember key concepts, targeting gaps in knowledge and offering customized feedback, and driving the student toward comprehension and retention of the subject matter. Available on smartphones and tablets, SmartBook puts learning at the student’s fingertips—anywhere, anytime. Adaptive Over 4 billion questions have been answered, making McGraw-Hill Education products more intelligent, reliable, and precise. THE FIRST AND ONLY ADAPTIVE READING EXPERIENCE DESIGNED TO TRANSFORM THE WAY STUDENTS READ More students earn A’s and B’s when they use McGraw-Hill Education Adaptive products. plc4me.com
- 20. m 1 1 Programmable Logic Controllers (PLCs) An Overview Chapter Objectives After completing this chapter, you will be able to: • Define what a programmable logic controller (PLC) is and list its advantages over relay systems • Identify the main parts of a PLC and describe their functions • Outline the basic sequence of operation for a PLC • Identify the general classifications of PLCs This chapter gives a brief history of the evolution of the programmable logic controller, or PLC. The reasons for changing from relay control sys- tems to PLCs are discussed. You will learn the basic parts of a PLC, how a PLC is used to con- trol a process, and the different kinds of PLCs and their applications. The ladder logic language, which was developed to simplify the task of pro- gramming PLCs, is introduced. Image Courtesy of Rockwell Automation, Inc. plc4me.com
- 21. m 2 Chapter 1 Programmable Logic Controllers (PLCs) Programmable controllers offer several advantages over a conventional relay type of control. Relays have to be hardwired to perform a specific function. When the system requirements change, the relay wiring has to be changed or modified. In extreme cases, such as in the auto industry, complete control panels had to be replaced since it was not economically feasible to rewire the old panels with each model changeover. The programmable control- ler has eliminated much of the hardwiring associated with conventional relay control circuits (Figure 1-2). It is small and inexpensive compared to equivalent relay-based pro- cess control systems. Modern control systems still include relays, but these are rarely used for logic. PLCs provide many other benefits including: • Increased Reliability. Once a program has been written and tested, it can be easily downloaded to other PLCs. Since all the logic is contained in the PLC’s memory, there is no chance of making a logic wiring error (Figure 1-3). The program takes the place of much of the external wiring that would normally be required for control of a process. Hardwiring, though still required to connect field devices, is less intensive. PLCs also offer the reliability associated with solid-state components. • More Flexibility. It is easier to create and change a program in a PLC than to wire and rewire a circuit. With a PLC the relationships between the inputs and outputs are determined by the user program instead of the manner in which they are interconnected (Figure 1-4). Original equipment manufacturers can provide system updates by simply sending out a new program. End users can modify the program in the field, or if desired, security can be provided by hardware features such as key locks and by software passwords. • Lower Cost. PLCs were originally designed to re- place relay control logic, and the cost savings have been so significant that relay control is becoming 1. 1 Programmable Logic Controllers Programmable logic controllers (Figure 1-1) are now the most widely used industrial process control technology. A programmable logic controller (PLC) is an industrial grade computer that is capable of being programmed to perform control functions. The programmable controller has eliminated much of the hardwiring associated with conventional relay control circuits. Other benefits include fast response, easy programming and installation, high control speed, network compatibility, troubleshooting and testing convenience, and high reliability. The PLC is designed for multiple input and output arrangements, extended temperature ranges, immunity to electrical noise, and resistance to vibration and im- pact. Programs for the control and operation of manu- facturing process equipment and machinery are typically stored in battery-backed or nonvolatile memory. A PLC is an example of a real-time system since the output of the system controlled by the PLC depends on the input conditions. The PLC is, then, basically a digital computer designed for use in machine control. Unlike a personal computer, it has been designed to operate in the industrial environ- ment and is equipped with special input/output interfaces and a control programming language. The common ab- breviation used in industry for these devices, PC, can be confusing because it is also the abbreviation for “personal computer.” Therefore, most manufacturers refer to their programmable controller as a PLC, which stands for “programmable logic controller.” Initially the PLC was used to replace relay logic, but its ever-increasing range of functions means that it is found in many and more complex applications. Because the structure of a PLC is based on the same principles as those employed in computer architecture, it is capable not only of performing relay switching tasks but also of per- forming other applications such as timing, counting, cal- culating, comparing, and the processing of analog signals. Figure 1-1 Programmable logic controller. Source: (a–b) Courtesy GE Intelligent Platforms. (a) (b) plc4me.com
- 22. m Programmable Logic Controllers (PLCs) Chapter 1 3 • Faster Response Time. PLCs are designed for high- speed and real-time applications (Figure 1-6). The programmable controller operates in real time, which means that an event taking place in the field will result in the execution of an operation or output. Machines that process thousands of items per second and objects that spend only a fraction of a second in front of a sen- sor require the PLC’s quick-response capability. • Easier to Troubleshoot. PLCs have resident diag- nostics and override functions that allow users to easily trace and correct software and hardware obsolete except for power applications. Generally, if an application has more than about a half-dozen control relays, it will probably be less expensive to install a PLC. • Communications Capability. A PLC can communi- cate with other controllers or computer equipment to perform such functions as supervisory control, data gathering, monitoring devices and process parameters, and download and upload of programs (Figure 1-5). User program PLC Figure 1-3 All the logic is contained in the PLC’s memory. Figure 1-4 Relationships between the inputs and outputs are determined by the user program. Contactor Light Solenoid Outputs Inputs Pushbutton Limit switch Sensor (a) (b) Figure 1-2 Relay- and PLC-based control panels. (a) Relay- based control panel. (b) PLC-based control panel. Source: (a) Courtesy Mid-Illini Technical Group, Inc.; (b) Photo courtesy Ramco Electric, Ltd. plc4me.com
- 23. m 4 Chapter 1 Programmable Logic Controllers (PLCs) point. For example, a control system consisting of hundreds of input and output field devices may be contained within a very large manufacturing area. Thus, it would take a considerable amount of time to check each device at its location. By having each device wired back to a common point on a PLC module, each device could be checked for operation fairly quickly. 1.2 Parts of a PLC A typical PLC can be divided into parts, as illustrated in Figure 1-8. These are the central processing unit (CPU), the input/output (I/O) section, the power supply, and the programming device. The term architecture can refer to PLC hardware, to PLC software, or to a combination of both. An open architecture design allows the system to be connected easily to devices and programs made by other manufacturers. Open architectures use off-the- shelf components that conform to approved standards. A system with a closed architecture is one whose design is proprietary, making it more difficult to connect to other systems. Most PLC systems are in fact proprietary, so you must be sure that any generic hardware or software you may use is compatible with your particular PLC. Also, although the principal concepts are the same in all methods of programming, there might be slight differ- ences in addressing, memory allocation, retrieval, and data handling for different models. Consequently, PLC programs cannot be interchanged among different PLC manufacturers. There are two ways in which I/Os (Inputs/Outputs) are incorporated into the PLC: fixed and modular. Fixed I/O (Figure 1-9) is typical of small PLCs that come in one package with no separate, removable units. The processor and I/O are packaged together, and the I/O terminals will have a fixed number of connections built in for inputs and outputs. The main advantage of this type of packaging is lower cost. The number of available I/O points varies and usually can be expanded by buying additional units of fixed I/O. One disadvantage of fixed I/O is its lack of flex- ibility; you are limited in what you can get in the quanti- ties and types dictated by the packaging. Also, for some models, if any part in the unit fails, the whole unit has to be replaced. Modular I/O (Figure 1-10) is divided by compart- ments into which separate modules can be plugged. This feature greatly increases your options and the unit’s flex- ibility. You can choose from the modules available from the manufacturer and mix them any way you desire. The basic modular controller consists of a rack, power sup- ply, processor module (CPU), input/output (I/O mod- ules), and an operator interface for programming and Figure 1-7 Control program can be displayed on a monitor in real time. PLC Monitor Figure 1-5 PLC communication module. Source: Photo courtesy Automation Direct, www.automationdirect.com. Figure 1-6 High-speed counting. Source: Courtesy Banner Engineering Corp. problems. To find and fix problems, users can dis- play the control program on a monitor and watch it in real time as it executes (Figure 1-7)· • Easier to Test Field Devices. A PLC control panel has the ability to check field devices at a common plc4me.com
- 24. m Programmable Logic Controllers (PLCs) Chapter 1 5 monitoring. The modules plug into a rack. When a mod- ule is slid into the rack, it makes an electrical connection with a series of contacts called the backplane, located at the rear of the rack. The PLC processor is also connected to the backplane and can communicate with all the mod- ules in the rack. The power supply supplies DC power to other modules that plug into the rack (Figure 1-11). For large PLC sys- tems, this power supply does not normally supply power to the field devices. With larger systems, power to field devices is provided by external alternating current (AC) or direct current (DC) supplies. For some small micro PLC systems, the power supply may be used to power field devices. The processor (CPU) is the “brain” of the PLC. A typical processor (Figure 1-12) usually consists of a mi- croprocessor for implementing the logic and controlling the communications among the modules. The processor requires memory for storing user program instructions, numerical values, and I/O devices status. Figure 1-8 Typical parts of a programmable logic controller. Source: (a) Courtesy Mitsubishi Automation; (b) Images Courtesy of Rockwell Automation, Inc. Figure 1-9 Fixed I/O configuration. PL Input connections Common power bus L1 L2 Common return bus Output connections Processor PLC M (a) Modular type Central Processing Unit (CPU) Programming device Memory Input sensing devices Output load devices Program Data Optical isolation Input module Output module Processor Module Optical isolation Power supply module (b) Fixed type Power supply Communications Input section Output section Memory CPU plc4me.com
- 25. m 6 Chapter 1 Programmable Logic Controllers (PLCs) The CPU controls all PLC activity and is designed so that the user can enter the desired program in relay ladder logic. The PLC program is executed as part of a repetitive process referred to as a scan (Figure 1-13). A typical PLC scan starts with the CPU reading the sta- tus of inputs. Then, the application program is executed. Once the program execution is completed, the status of all outputs is updated. Next, the CPU performs inter- nal diagnostic and communication tasks. This process is repeated continuously as long as the PLC is in the run mode. The I/O system forms the interface by which field de- vices are connected to the controller (Figure 1-14). The purpose of this interface is to condition the various sig- nals received from or sent to external field devices. Input devices such as pushbuttons, limit switches, and sensors Figure 1-11 The power supply supplies DC power to other modules that plug into the rack. Source: Photo of PLC Modicon M340 © Schneider Electric, 2010. www.schneider-electric.com. Power supply Figure 1-12 Typical PLC processor modules. Source: Image Courtesy of Rockwell Automation, Inc. Execu t e p r o g r a m D i a g n o s t ics & c o m m u n i cation R e ad inputs Update ou t p u t s Figure 1-13 Typical PLC scan cycle. Output module Input module Processor module Power supply Combination I/O module Module slides into the rack Figure 1-10 Modular I/O configuration. plc4me.com
- 26. m Programmable Logic Controllers (PLCs) Chapter 1 7 modifying programs, and transferring programs to mul- tiple machines. A personal computer (PC) is the most commonly used programming device. Most brands of PLCs have soft- ware available so that a PC can be used as the program- ming device. This software allows users to create, edit, document, store, and troubleshoot ladder logic programs (Figure 1-15). The computer monitor is able to display more logic on the screen than can hand-held types, thus simplifying the interpretation of the program. The per- sonal computer communicates with the PLC processor via a serial or parallel data communications link, or Ethernet. If the programming unit is not in use, it may be unplugged and removed. Removing the programming unit will not affect the operation of the user program. A program is a user-developed series of instructions that directs the PLC to execute actions. A programming language provides rules for combining the instructions so that they produce the desired actions. Relay ladder logic (RLL) is the standard programming language used with PLCs. Its origin is based on electromechanical relay control. The relay ladder logic program graphically represents rungs of contacts, coils, and special instruc- tion blocks. RLL was originally designed for easy use and understanding for its users and has been modified to keep up with the increasing demands of industry’s control needs. are hardwired to the input terminals. Output devices such as small motors, motor starters, solenoid valves, and in- dicator lights are hardwired to the output terminals. To electrically isolate the internal components from the input and output terminals, PLCs commonly employ an optical isolator, which uses light to couple the circuits together. The external devices are also referred to as “field” or “real-world” inputs and outputs. The terms field or real world are used to distinguish actual external devices that exist and must be physically wired from the internal user program that duplicates the function of relays, timers, and counters. A programming device is used to enter the desired program into the memory of the processor. The program can be entered using relay ladder logic, which is one of the most popular programming languages. Instead of words, ladder logic programming language uses graphic symbols that show their intended outcome. A program in ladder logic is similar to a schematic for a relay control circuit. It is a special language written to make it easy for people familiar with relay logic control to program the PLC. Hand-held programming devices are sometimes used to program small PLCs because they are inexpen- sive and easy to use. Once plugged into the PLC, they can be used to enter and monitor programs. Both com- pact hand-held units and laptop computers are frequently used on the factory floor for troubleshooting equipment, Input module 0 1 2 3 4 5 6 7 8 9 10 11 12 13 14 15 IN 0 IN 2 IN 4 IN 6 IN 8 IN 10 IN 12 IN 14 DC COM IN 1 IN 3 IN 5 IN 7 IN 9 IN 11 IN 13 IN 15 DC COM Output module 0 1 2 3 4 5 6 7 8 9 10 11 12 13 14 15 VAC OUT 1 OUT 3 OUT 5 OUT 7 OUT 9 OUT 11 OUT 13 OUT 15 OUT 0 OUT 2 OUT 4 OUT 6 OUT 8 OUT 10 OUT 12 OUT 14 AC COM 24 VDC input module 240 VAC output module 24 VDC Field device power supply + – 240 VAC M Field device power supply L2 L1 R Y Figure 1-14 Typical PLC input/output (I/O) system connections. plc4me.com
- 27. m 8 Chapter 1 Programmable Logic Controllers (PLCs) operation of the motor is provided by means of a sepa- rate pushbutton station. The process is monitored with temperature and pressure sensor switches that close their respective contacts when conditions reach their preset values. This control problem can be solved using the relay method for motor control shown in the relay ladder diagram of Figure 1-17. The motor starter coil (M) is energized when both the pressure and temperature switches are closed or when the manual pushbutton is pressed. 1.3 Principles of Operation To get an idea of how a PLC operates, consider the sim- ple process control problem illustrated in Figure 1-16. Here a mixer motor is to be used to automatically stir the liquid in a vat when the temperature and pres- sure reach preset values. In addition, direct manual Figure 1-15 Typical PC software used to create a ladder logic program. Source: Image Courtesy of Rockwell Automation, Inc. Pressure sensor switch Motor Temperature sensor switch Manual pushbutton station Figure 1-16 Mixer process control problem. L1 L2 M OL Manual pushbutton 120 VAC Motor starter coil Temperature switch Pressure switch Figure 1-17 Process control relay ladder diagram. plc4me.com
- 28. m Programmable Logic Controllers (PLCs) Chapter 1 9 The same output field device (motor starter coil) would also be used. This device would be hardwired to an appro- priate output module according to the manufacturer’s ad- dressing location scheme. Typical wiring connections for a 120 VAC modular configured output module are shown in Figure 1-19. Next, the PLC ladder logic program would be con- structed and entered into the memory of the CPU. A typical ladder logic program for this process is shown in Figure 1-20. The format used is similar to the layout of Now let’s look at how a programmable logic controller might be used for this application. The same input field devices (pressure switch, temperature switch, and push- button) are used. These devices would be hardwired to an appropriate input module according to the manufac- turer’s addressing location scheme. Typical wiring con- nections for a 120 VAC modular configured input module are shown in Figure 1-18. Common 0 1 2 3 4 5 6 7 Input module L1 N 120 VAC Manual pushbutton Temperature Pressure Figure 1-18 Typical wiring connections for a 120 VAC modular configured input module. Source: Photo courtesy Automation Direct, www.automationdirect.com. Output module 120 VAC N L1 L1 0 1 2 3 4 5 6 7 Motor starter coil M OL Figure 1-19 Typical wiring connections for a 120 VAC modular configured output module. Source: Photo courtesy Automation Direct, www.automationdirect.com. O/1 Motor starter coil I/1 I/1 Pressure switch I/2 I/2 O/1 Temperature switch I/3 I/3 Manual pushbutton L2 L1 Inputs Output Program Monitor inputs Checks the inputs Execute program Change outputs ... Executes control program ... And updates the outputs ... M OL Figure 1-20 Process control PLC ladder logic program with typical addressing scheme. plc4me.com
- 29. m 10 Chapter 1 Programmable Logic Controllers (PLCs) for the process control scheme can be described by the following sequence of events: • First, the pressure switch, temperature switch, and pushbutton inputs are examined and their status is recorded in the controller’s memory. • A closed contact is recorded in memory as logic 1 and an open contact as logic 0. • Next the ladder diagram is evaluated, with each internal contact given an OPEN or CLOSED status according to its recorded 1 or 0 state. • When the states of the input contacts provide logic continuity from left to right across the rung, the output coil memory location is given a logic 1 value and the output module interface contacts will close. • When there is no logic continuity of the program rung, the output coil memory location is set to logic 0 and the output module interface contacts will be open. • The completion of one cycle of this sequence by the controller is called a scan. The scan time, the time required for one full cycle, provides a measure of the speed of response of the PLC. • Generally, the output memory location is updated dur- ing the scan but the actual output is not updated until the end of the program scan during the I/O scan. Figure 1-21 shows the typical wiring required to im- plement the process control scheme using a fixed PLC the hardwired relay ladder circuit. The individual symbols represent instructions, whereas the numbers represent the instruction location addresses. To program the controller, you enter these instructions one by one into the proces- sor memory from the programming device. Each input and output device is given an address, which lets the PLC know where it is physically connected. Note that the I/O address format will differ, depending on the PLC model and manufacturer. Instructions are stored in the user pro- gram portion of the processor memory. During the pro- gram scan the controller monitors the inputs, executes the control program, and changes the output accordingly. For the program to operate, the controller is placed in the RUN mode, or operating cycle. During the program scan, the controller monitors the inputs, executes the control pro- gram, and changes the output accordingly. Each symbol (looks like a normally open contact) is an instruction. The symbol is considered to represent a coil that, when energized, will energize the device that is wired to the re- spective output. In the ladder logic program of Figure 1-20, the coil O/1 is energized when contacts I/1 and I/2 are closed or when contact I/3 is closed. Either of these con- ditions provides a continuous logic path from left to right across the rung that includes the coil. A programmable logic controller operates in real time in that an event taking place in the field will result in an operation or output taking place. The RUN operation I1 I1 I2 I3 L1 L2 I2 Q1 I3 L1 L2 M Starter Inputs Pressure Temp PB Outputs Program Q1 Q2 Q3 Q4 Figure 1-21 Typical wiring required to implement the process control scheme using a fixed PLC controller. Source: Image Courtesy of Rockwell Automation, Inc. plc4me.com
- 30. m Programmable Logic Controllers (PLCs) Chapter 1 11 1.5 PLCs versus Computers The architecture of a PLC is basically the same as that of a personal computer. A personal computer (PC) can be made to operate as a programmable logic controller if you provide some way for the computer to receive informa- tion from devices such as pushbuttons or switches. You also need a program to process the inputs and some way to turn devices on and off. However, some important characteristics distinguish PLCs from personal computers. First, unlike PCs, the PLC is designed to operate in the industrial environ- ment with wide ranges of ambient temperature and humidity. A well-designed industrial PLC installa- tion, such as that shown in Figure 1-24, is not usually affected by the electrical noise inherent in most indus- trial locations. Unlike the personal computer, the PLC is programmed in relay ladder logic or other easily learned languages. The PLC comes with its program language built into its memory and has no permanently attached keyboard, CD drive, or monitor. Instead, PLCs come equipped with controller. In this example, the Allen-Bradley Pico con- troller equipped with 8 inputs and 4 outputs is used to control and monitor the process. Installation can be sum- marized as follows: • Fused power lines, of the specified voltage type and level, are connected to the controller’s L1 and L2 terminals. • The pressure switch, temperature switch, and push- button field input devices are hardwired between L1 and controller input terminals I1, I2, and I3, respectively. • The motor starter coil connects directly to L2 and in series with Q1 relay output contacts to L1. • The ladder logic program is entered using the front keypad and LCD display. • Pico programming software is also available that allows you to create as well as test your program using a personal computer. 1.4 Modifying the Operation One of the important features of a PLC is the ease with which the program can be changed. For example, assume that the original process control circuit for the mixing op- eration must be modified as shown in the relay ladder dia- gram of Figure 1-22. The change requires that the manual pushbutton control be permitted to operate at any pres- sure, but not unless the specified temperature setting has been reached. If a relay system were used, it would require some re- wiring of the circuit shown in Figure 1-22 to achieve the desired change. However, if a PLC system were used, no rewiring would be necessary. The inputs and outputs are still the same. All that is required is to change the PLC ladder logic program as shown in Figure 1-23. L1 L2 Manual pushbutton 120 VAC Motor starter coil Temperature switch Pressure switch M OL Figure 1-22 Relay ladder diagram for the modified process. O/1 Motor starter coil I/1 Pressure switch I/2 Temperature switch I/3 Manual pushbutton Figure 1-23 PLC ladder logic program for the modified process. Figure 1-24 PLC installed in an industrial environment. Source: Courtesy of Softac Systems, Ltd. plc4me.com
- 31. m 12 Chapter 1 Programmable Logic Controllers (PLCs) Most recently automation manufacturers have re- sponded to the increased requirements of industrial control systems by blending the advantages of PLC-style control with that of PC-based systems. Such a device has been termed a programmable automation controller, or PAC (Figure 1-26). Programmable automation controllers com- bine PLC ruggedness with PC functionality. Using PACs, you can build advanced systems incorporating software capabilities such as advanced control, communication, data logging, and signal processing with rugged hardware performing logic, motion, process control, and vision. 1.6 PLC Size and Application The criteria used in categorizing PLCs include function- ality, number of inputs and outputs, cost, and physical size (Figure 1-27). Of these, the I/O count is the most terminals for input and output field devices as well as communication ports. Computers are complex computing machines capable of executing several programs or tasks simultaneously and in any order. Most PLCs, on the other hand, execute a single program in an orderly and sequential fashion from first to last instruction. PLC control systems have been designed to be easily installed and maintained. Troubleshooting is simplified by the use of fault indicators and messaging displayed on the programmer screen. Input/output modules for connecting the field devices are easily connected and replaced. Software associated with a PLC but written and run on a personal computer falls into the following two broad categories: • PLC software that allows the user to program and document gives the user the tools to write a PLC program—using ladder logic or another programming language—and document or explain the program in as much detail as is necessary. • PLC software that allows the user to monitor and control the process is also called a human machine interface (HMI). It enables the user to view a process—or a graphical representation of a process—on a monitor, determine how the system is running, trend values, and receive alarm conditions (Figure 1-25). Many operator interfaces do not use PLC software. PLCs can be integrated with HMIs but the same software does not program both devices. Figure 1-25 Human Machine Interface (HMI) Source: Image Courtesy of Rockwell Automation, Inc. Figure 1-26 Programmable automation controller (PAC). Source: Photo courtesy Omron Industrial Automation, www.ia.omron.com. Figure 1-27 Typical range of sizes of programmable controllers. Source: Courtesy Siemens. plc4me.com
- 32. m Programmable Logic Controllers (PLCs) Chapter 1 13 the PLC would be a subsystem of a larger process and would have to communicate with a central PLC or com- puter, provisions for a data communications network are also required. A control management PLC application involves one PLC controlling several others (Figure 1-29). This kind of application requires a large PLC processor designed to communicate with other PLCs and possibly with a com- puter. The control management PLC supervises several PLCs by downloading programs that tell the other PLCs what has to be done. It must be capable of connection to all PLCs so that by proper addressing it can communicate with any one it wishes to. Memory is the part of a PLC that stores data, instruc- tions, and the control program. Memory size is usually expressed in K values: 1 K, 6 K, 12 K, and so on. The mea- surement kilo, abbreviated K, normally refers to 1000 units. When dealing with computer or PLC memory, however, 1 K means 1024, because this measurement is based on the binary number system (210 5 1024). Depending on memory type, 1 K can mean 1024 bits, 1024 bytes, or 1024 words. Although it is common for us to measure the memory capacity of PLCs in words, we need to know the num- ber of bits in each word before memory size can be accu- rately compared. Modern computers usually have a word size of 16, 32, or 64 bits. For example, a PLC that uses 8-bit words has 49,152 bits of storage with a 6 K word capacity (8 3 6 3 1024 5 49,152), whereas a PLC using 32-bit words has 196,608 bits of storage with the same 6 K memory (32 3 6 3 1024 5 196,608). The amount of memory required depends on the application. Factors affecting the memory size needed for a particular PLC installation include: • Number of I/O points used • Size of control program • Data-collecting requirements • Supervisory functions required • Future expansion important factor. In general, the nano is the smallest size with less than 15 I/O points. This is followed by micro types (15 to 128 I/O points), medium types (128 to 512 I/O points), and large types (over 512 I/O points). Matching the PLC with the application is a key factor in the selection process. In general it is not advisable to buy a PLC system that is larger than current needs dic- tate. However, future conditions should be anticipated to ensure that the system is the proper size to fill the current and possibly future requirements of an application. There are three major types of PLC application: single- ended,multitask,andcontrolmanagement.Asingle-ended or stand-alone PLC application involves one PLC con- trolling one process (Figure 1-28). This would be a stand- alone unit and would not be used for communicating with other computers or PLCs. The size and sophistication of the process being controlled are obvious factors in de- termining which PLC to select. The applications could dictate a large processor, but usually this category re- quires a small PLC. A multitask PLC application involves one PLC con- trolling several processes. Adequate I/O capacity is a sig- nificant factor in this type of installation. In addition, if Figure 1-28 Single-ended PLC application. Source: Courtesy Rogers Machinery Company, Inc. Figure 1-29 Control management PLC application. plc4me.com
- 33. m 14 Chapter 1 Programmable Logic Controllers (PLCs) The instruction set for a particular PLC lists the dif- ferent types of instructions supported. Typically, this Table 1-1 Typical PLC Instructions Instruction Operation XIC (Examine ON) . . . . . . . . . . . . Examine a bit for an ON condition XIO (Examine OFF) . . . . . . . . . . . Examine a bit for an OFF condition OTE (Output Energize) . . . . . . . . . Turn ON a bit (nonretentive) OTL (Output Latch) . . . . . . . . . . . Latch a bit (retentive) OTU (Output Unlatch) . . . . . . . . . Unlatch a bit (retentive) TOF (Timer Off-Delay) . . . . . . . . . Turn an output ON or OFF after its rung has been OFF for a preset time interval TON (Timer On-Delay) . . . . . . . . . Turn an output ON or OFF after its rung has been ON for a preset time interval CTD (Count Down) . . . . . . . . . . . Use a software counter to count down from a specified value CTU (Count Up) . . . . . . . . . . . . . . Use a software counter to count up to a specified value ranges from 15 instructions on smaller units up to 100 in- structions on larger, more powerful units (see Table 1-1). plc4me.com
- 34. m Programmable Logic Controllers (PLCs) Chapter 1 15 1. What is a programmable logic controller (PLC)? 2. Identify four tasks in addition to relay switching operations that PLCs are capable of performing. 3. List six distinct advantages that PLCs offer over conventional relay-based control systems. 4. Explain the differences between open and propri- etary PLC architecture. 5. State two ways in which I/O is incorporated into the PLC. 6. Describe how the I/O modules connect to the pro- cessor in a modular-type PLC configuration. 7. Explain the main function of each of the following major components of a PLC: a. Processor module (CPU) b. I/O modules c. Programming device d. Power supply module 8. What are the two most common types of PLC programming devices? 9. Explain the terms program and programming language as they apply to a PLC. 10. What is the standard programming language used with PLCs? 11. Answer the following with reference to the process control relay ladder diagram of Figure 1-17 of this chapter: a. When do the pressure switch contacts close? b. When do the temperature switch contacts close? c. How are the pressure and temperature switches connected with respect to each other? d. Describe the two conditions under which the motor starter coil will become energized. e. What is the approximate value of the voltage drop across each of the following when their contacts are open? (1) Pressure switch (2) Temperature switch (3) Manual pushbutton 12. The programmable controller operates in real time. What does this mean? 13. Answer the following with reference to the process control PLC ladder logic diagram of Figure 1-20 of this chapter: a. What do the individual symbols represent? b. What do the numbers represent? c. What field device is the number I/2 identified with? d. What field device is the number O/1 identified with? e. What two conditions will provide a continuous path from left to right across the rung? f. Describe the sequence of operation of the controller for one scan of the program. 14. Compare the method by which the process control operation is changed in a relay-based system to the method used for a PLC-based system. 15. Compare the PLC and PC with regard to: a. Physical hardware differences b. Operating environment c. Method of programming d. Execution of program 16. What two categories of software written and run on PCs are used in conjunction with PLCs? 17. What is a programmable automation controller (PAC)? 18. List four criteria by which PLCs are categorized. 19. Compare the single-ended, multitask, and control management types of PLC applications. 20. What is the memory capacity, expressed in bits, for a PLC that uses 16-bit words and has an 8 K word capacity? 21. List five factors affecting the memory size needed for a particular PLC installation. 22. What does the instruction set for a particular PLC refer to? CHAPTER 1 REVIEW QUESTIONS plc4me.com
- 35. m 16 Chapter 1 Programmable Logic Controllers (PLCs) CHAPTER 1 PROBLEMS 1. Given two single-pole switches, write a program that will turn on an output when both switch A and switch B are closed. 2. Given two single-pole switches, write a program that will turn on an output when either switch A or switch B is closed. 3. Given four NO (Normally Open) pushbuttons (A- B-C-D), write a program that will turn a lamp on if pushbuttons A and B or C and D are closed. 4. Write a program for the relay ladder diagram shown in Figure 1-30. 120 VAC S3 TS1 PB1 S2 S1 PS1 L1 Figure 1-31 Circuit for Problem 5. LS2 120 VAC S1 LS1 L1 Figure 1-30 Circuit for Problem 4. 5. Write a program for the relay ladder diagram shown in Figure 1-31. plc4me.com
- 36. m 17 2 PLC Hardware Components Chapter Objectives After completing this chapter, you will be able to: • List and describe the function of the hardware components used in PLC systems • Describe the basic circuitry and applications for discrete and analog I/O modules, and interpret typical I/O and CPU specifications • Explain I/O addressing • Describe the general classes and types of PLC memory devices • List and describe the different types of PLC peripheral support devices available Courtesy of Nercon This chapter exposes you to the details of PLC hardware and modules that make up a PLC con- trol system. The chapter’s illustrations show the various parts of a PLC as well as general connec- tion paths. In this chapter we discuss the CPU and memory hardware components, including the various types of memory that are available, and we describe the hardware of the input/out- put section, including the difference between the discrete and analog types of modules. plc4me.com
- 37. m 18 Chapter 2 PLC Hardware Components 2. 1 The I/O Section The input/output (I/O) section of a PLC is the section to which all field devices are connected and provides the in- terface between them and the CPU. Input/output arrange- ments are built into a fixed PLC while modular types use external I/O modules that plug into the PLC. Figure 2-1 illustrates a rack-based I/O section made up of individual I/O modules. Input interface modules accept signals from the machine or process devices and con- vert them into signals that can be used by the controller. Output interface modules convert controller signals into external signals used to control the machine or process. A typical PLC has room for several I/O modules, allowing it to be customized for a particular application by selecting the appropriate modules. Each slot in the rack is capable of accommodating any type of I/O module. The I/O system provides an interface between the hard- wired components in the field and the CPU. The input interface allows status information regarding processes to be communicated to the CPU, and thus allows the CPU to communicate operating signals through the output interface to the process devices under its control. One benefit of a PLC system is the ability to locate the I/O modules near the field devices, as illustrated in Figure 2-2, in order to minimize the amount of wiring required. The processor receives signals from the remote input modules and sends signals back to their output modules via the communication module. A rack is referred to as a remote rack when it is located away from the processor module. To communicate with the processor, the remote rack uses a special communica- tions network. Each remote rack requires a unique station number to distinguish one from another. The remote racks are linked to the local rack through a communications module. Cables connect the modules with each other. If fiber optic cable is used between the CPU and I/O rack, it is possible to operate I/O points from distances greater than 20 miles with no voltage drop. Coaxial cable will allow remote I/O to be installed at distances greater than two miles. Fiber optic cable will not pick up noise caused by adjacent high power lines or equipment normally found in an industrial environment. Coaxial cable is more susceptible to this type of noise. The PLC’s memory system stores information about the status of all the inputs and outputs. To keep track of all this information, it uses a system called addressing. An address is a label or number that indicates where a cer- tain piece of information is located in a PLC’s memory. Just as your home address tells where you live in your city, a device’s or a piece of data’s address tells where Figure 2-2 Remote I/O rack. Power Processor Input Output Local I/O Stop/Start Hopper Motor Power Input Output Remote I/O Communication Sensor On/Off control Figure 2-1 Rack-based I/O section. Power supply 0 1 2 3 4 5 6 Slot I/O modules Processor module plc4me.com
- 38. m PLC Hardware Components Chapter 2 19 information about it resides in the PLC’s memory. That way, if a PLC wants to find out information about a field device, it knows to look in its corresponding address location. Examples of addressing schemes include rack/ slot-based, versions of which are used in Allen-Bradley SLC 500 controllers, tag-based used in Allen-Bradley ControlLogix controllers, and PC-based control used in soft PLCs. In general, rack/slot-based addressing elements include: Type—The type determines if an input or output is being addressed. Slot—The slot number is the physical location of the I/O module. This may be a combination of the rack number and the slot number when using expansion racks. Word and Slot—The word and slot are used to iden- tify the actual terminal connection in a particular I/O module. A discrete module usually uses only one word, and each connection corresponds to a different bit that makes up the word. With a rack/slot address system the location of a module within a rack and the terminal number of a mod- ule to which an input or output device is connected will determine the device’s address. Figure 2-3 illustrates the Allen-Bradley SLC 500 con- troller rack/slot addressing format. The address is used by the processor to identify where the device is located to monitor or control it. In addition, there is some means of connecting field wiring on the I/O module housing. Con- necting the field wiring to the I/O housing allows easier disconnection and reconnection of the wiring to change modules. Lights are also added to each module to indicate the ON or OFF status of each I/O circuit. Most output modules also have blown fuse indicators. The following are typical examples of SLC 500 real-world general input and output addresses: EveryinputandoutputdeviceconnectedtoadiscreteI/O module is addressed to a specific bit in the PLC’s memory. A bit is a binary digit that can be either 1 or 0. Analog I/O modules use a word addressing format, which allows the entire words to be addressed. The bit part of the address is usually not used; however, bits of the digital representation of the analog value can be addressed by the programmer if necessary. Figure 2-4 illustrates bit level and word level addressing as it applies to an SLC 500 controller. Tag-based memory structures are the newest type of PLC memory addressing. Figure 2-5 illustrates the Allen-Brad- ley ControlLogix and CompactLogix tag-based addressing format. Memory locations are defined by using base and alias tags.A base tag defines a memory location where data are stored. An alias tag is used to create an alternate name (alias) for a tag. The alias tag is often used to create a tag name to represent a real world input or output. Figure 2-6 shows a comparison between rack/slot- based addressing and tag-based addressing. Input and output modules, when configured, automatically cre- ate their own tags like Local:1:I.Data.1. Tag names are descriptive to the data being stored in them. The alias tag lets you use names that are more meaningful for the application. In this example: • Pressure_switch is used instead of I:1/1 • Temperature_switch is used instead of I:1/2 • Manual_pushbutton is used instead of I:1/3 • Mixer_motor is used instead of O:2/1 Figure 2-3 Allen-Bradley SLC 500 rack/slot-based addressing format. Source: Image Courtesy of Rockwell Automation, Inc. Memory address Real-world address I 1 3 0 . / : File type File number Element number Slot number Module type Subelement number For terminals above #15 0 1 Bit number Terminal number O:4/15 Output module in slot 4, terminal 15 I:3/8 Input module in slot 3, terminal 8 O:6.0 Output module, slot 6 I:5.0 Input module, slot 5 plc4me.com
- 39. m 20 Chapter 2 PLC Hardware Components Figure 2-4 SLC 500 bit level and word level addressing. (a) Bit level addressing. (b) Word level addressing. 1 Inputs Data files Program files Output I:1/0 0 I:1/1 Processor memory Input addressing Output addressing I:1/1 I:1/1 I:1/0 O:3/0 O:3/0 I:1/0 0 0:3/0 (a) Processor O0:2.0 (address) Valve analog output Thermocouple analog input I:1:2:0 (address) 0 Analog module 1 2 I 2 0 Type Slot Address Word Bit Inputs O 2 0 Type Slot Address Word Bit 0 1 Outputs 0 1 Not used Not used IN 0 + – + – IN 0 OUT 0 OUT 0 Output Input Power Analog (b) Figure 2-5 Allen-Bradley ControlLogix tag-based addressing format. Source: Image Courtesy of Rockwell Automation, Inc. Start I_PBO <Local:6:1.Data.0> Input instruction Base address Alias tag pointing to base address Description assigned to alias tag plc4me.com
- 40. m PLC Hardware Components Chapter 2 21 PC-based control runs on personal or industrial hard- ened computers. Also known as soft PLCs, they simulate the functions of a PLC on a PC, allowing open architecture systems to replace proprietary PLCs. This implementa- tion uses an input/output card (Figure 2-7) in conjunction with the PC as an interface for the field devices. Combination I/O modules can have both input and output connections in the same physical module as illus- trated in Figure 2-8. A module is made up of a printed circuit board and a terminal assembly. The printed circuit board contains the electronic circuitry used to interface the circuit of the processor with that of the input or output device. Modules are designed to plug into a slot or con- nector in the I/O rack or directly into the processor. The terminal assembly, which is attached to the front edge of the printed circuit board, is used for making field-wiring connections. Modules contain terminals for each input and output connection, status lights for each of the inputs and outputs, and connections to the power supply used to Figure 2-7 Typical PC interface card. Source: Photo © Beckhoff Automation GmbH & Co. KG. Figure 2-8 Typical combination I/O module. Source: Image Courtesy of Rockwell Automation, Inc. 0 1 2 3 4 5 6 7 Status Inputs Status indicators Input Output Input connections Output connections 0 1 2 3 4 5 6 7 Outputs Power supply connections Power supply connections Figure 2-6 Rack/slot-based versus tag-based addressing. (b) Equivalent ControlLogix 5000 tag-base addressing (a) SLC 500 rack/slot-based addressing I:1 I:1 I:1 O:2 1 2 1 3 Pressure_switch <Local:1:I.Data.1> Temperature_switch <Local:1:I.Data.2> Manual_pushbutton <Local:1:I.Data.3> Mixer_motor <Local:2:0.Data.1> plc4me.com
- 41. m 22 Chapter 2 PLC Hardware Components power the inputs and outputs. Terminal and status light arrangements vary with different manufacturers. Most PLC modules have plug-in wiring terminal strips. The terminal block is plugged into the actual module as illustrated in Figure 2-9. If there is a problem with a mod- ule, the entire strip is removed, a new module is inserted, and the terminal strip is plugged into the new module. Unless otherwise specified, never install or remove I/O modules or terminal blocks while the PLC is powered. A module inserted into the wrong slot could be dam- aged by improper voltages connected through the wiring arm. Most faceplates and I/O modules are keyed to pre- vent putting the wrong faceplate on the wrong module. In other words, an output module cannot be placed in the slot where an input module was originally located. Input and output modules can be placed anywhere in a rack, but they are normally grouped together for ease of wiring. I/O modules can be 8, 16, 32, or 64 point cards (Figure 2-10). The number refers to the number of inputs or outputs available. The standard I/O module has eight inputs or outputs. A high-density module may have up to 64 inputs or outputs. The advantage with the high-density module is that it is possible to install up to 64 inputs or outputs in one slot for greater space savings. The only dis- advantage is that the high-density output modules cannot handle as much current per output. 2.2 Discrete I/O Modules The most common type of I/O interface module is the discrete type (Figure 2-11). This type of interface connects field input devices of the ON/OFF nature such as selec- tor switches, pushbuttons, and limit switches. Likewise, output control is limited to devices such as lights, relays, solenoids, and motor starters that require simple ON/OFF switching. The classification of discrete I/O covers bit- oriented inputs and outputs. In this type of input or output, each bit represents a complete information element in itself and provides the status of some external contact or advises of the presence or absence of power in a process circuit. Each discrete I/O module is powered by some field- supplied voltage source. Since these voltages can be of different magnitude or type, I/O modules are available at various AC and DC voltage ratings, as listed in Table 2-1. The modules themselves receive their voltage and cur- rent for proper operation from the backplane of the rack enclosure into which they are inserted, as illustrated in Figure 2-12. Backplane power is provided by the PLC module power supply and is used to power the electronics that reside on the I/O module circuit board. The relatively higher currents required by the loads of an output module are normally provided by user-supplied power. Module power supplies typically may be rated for 3A, 4A, 12A, or 16 A depending on the type and number of modules used. Figure 2-9 Plug-in terminal block. Terminal block Module Figure 2-10 16, 32, and 64 point I/O modules. Source: (all ) Photos courtesy Omron Industrial Automation, www.ia.omron.com. plc4me.com
- 42. m PLC Hardware Components Chapter 2 23 Figure 2-11 Discrete input and output devices. Indicator lights Signaling column Relays Motor starter Pushbuttons Selector switch Limit switch Discrete inputs Discrete outputs Proximity switches Figure 2-12 Modules receive their voltage and current from the backplane. Backplane power Power supply Figure 2-13 Discrete AC input module block diagram. L1 (120 VAC) Input signal L2 Logic circuits To processor (low VDC) Input status indicator Zener diode level detection Power Logic Opto-electrical isolation Bridge rectifier Figure 2-13 shows the block diagrams for one input of a typical alternating current (AC) discrete input module. The input circuit is composed of two basic sections: the power section and the logic section. An optical isolator is used to provide electrical isolation between the field wiring and the PLC backplane internal circuitry. The input LED turns on or off, indicating the status of the input device. Logic circuits process the digital signal to the processor. Internal PLC con- trol circuitry typically operates at 5 VDC or less volts. A simplified diagram for a single input of a discrete AC input module is shown in Figure 2-14. The operation of the circuit can be summarized as follows: • The input noise filter consisting of the capacitor and resistors R1 and R2 removes false signals that are due to contact bounce or electrical interference. • When the pushbutton is closed, 120 VAC is applied to the bridge rectifier input. • This results in a low-level DC output voltage that is applied across the LED of the optical isolator. Input Interfaces Output Interfaces 12 V AC/DC /24 V AC/DC 12–48 V AC 48 V AC/DC 120 V AC 120 V AC/DC 230 V AC 230 V AC/DC 120 V DC 5 V DC (TTL level) 230 V DC 5 V DC (TTL level) 24 V DC Table 2-1 Common Ratings for Discrete I/O Interface Modules plc4me.com
- 43. m 24 Chapter 2 PLC Hardware Components • The zener diode (ZD ) voltage rating sets the mini- mum threshold level of voltage that can be detected. • When light from the LED strikes the phototransistor, it switches into conduction and the status of the push- button is communicated in logic to the processor. • The optical isolator not only separates the higher AC input voltage from the logic circuits but also prevents damage to the processor due to line volt- age transients. In addition, this isolation also helps reduce the effects of electrical noise, common in the industrial environment, which can cause erratic operation of the processor. • For fault diagnosis, an input state LED indicator is on when the input pushbutton is closed. This indica- tor may be wired on either side of the optical isolator. • An AC/DC type of input module is used for both AC and DC inputs as the input polarity does not matter. • A PLC input module will have either all inputs isolated from each other with no common input connections or groups of inputs that share a common connection. Discrete input modules perform four tasks in the PLC control system. They: • Sense when a signal is received from a field device. • Convert the input signal to the correct voltage level for the particular PLC. • Isolate the PLC from fluctuations in the input signal’s voltage or current. • Send a signal to the processor indicating which sen- sor originated the signal. Figure 2-15 shows the block diagram for one output of a typical discrete output module. Like the input module, it is composed of two basic sections: the power section and the logic section, coupled by an isolation circuit. The output interface can be thought of as an electronic switch that turns the output load device on and off. Logic circuits determine the output status. An output LED indicates the status of the output signal. A simplified diagram for a single output of a discrete AC output module is shown in Figure 2-16. The operation of the circuits ....set can be summarized as follows: • As part of its normal operation, the digital logic circuits ....set of the processor sets the output status according to the program. Figure 2-14 Simplified diagram for a single input of a discrete AC input module. Bridge rectifier Input module terminal strip Filter Fuse Z Threshold detector Internal module circuit D Optical isolator LED input status indicator Digital logic circuit Common Field wiring L2 R3 L1 PB R2 R1 C Figure 2-15 Discrete AC output module block diagram. Digital signal from processor Output status indicator Logic circuits Electronic switch Load 120 VAC Logic Power L1 L2 Opto-electrical isolation plc4me.com