SlideShare a Scribd company logo
1 of 12
Download to read offline
instructables
Code a Traffic Light in Tinkercad Codeblocks & Circuits
by MrErdreich
While Tinkercad is well known for its 3D computer-aided-
design (CAD) and modeling capabilities, many users are
unaware of the powerful coding applications also built
within the Tinkercad platform. Through this Instructable,
I will showcase two of these applications using a block-
coding method inspired by Tinkercad's 2020 Block Code
Contest and many of the lessons I implement in my
middle school classroom.
Tinkercad Codeblocks -Codeblocks are a relatively
new feature at the time of writing this in late-2020.
Codeblocks allows users to learn how to apply computer
programming skills and methods in a unique way,
creating a 3D model. Like the 3D design features that
Tinkercad is well known for, Codeblocks allows users to
add and manipulate basic geometric shapes to make
just about anything imaginable. Unlike the typical CAD
platform however, users can only add, move, or
manipulate shapes by adding lines of code through a
block-programming method.
Tinkercad Circuits -What was once part of the legacy
123D application suite, Tinkercad Circuits allows for users
to create analog circuits in a simple-to-use simulation
program. By dragging and dropping components
connected by wires and breadboards, virtually any
circuit can be assembled and simulated. In addition to
basic analog circuit design, users can also drop in ATTiny,
Arduino, or Micro:Bit controllers to program circuits
using either block-based or script-based methods.
And because both of these applications are built into the
Tinkercad platform, they are completely free, user
friendly, and compatible on just about every device!
Through this Instructable, we will create a 3D model of a
tra c light using Codeblocks(Part 1 of the
Instructable) and then create a circuit with LEDs
programmed to function like a tra c light using Circuits
(Part 2 of this Instructable).
Code a Traffic Light in Tinkercad Codeblocks & Circuits: Page 1
Step 1: Part 1 Step 1 - How to Use Codeblocks
Step 2: Part 1 Step 2 - Starting Our Model
Part 1 of this Instructable is creating a 3D model of a tra c light using Tinkercad Codeblocks.
After signing into Tinkercad, click on Codeblocks in the left-side menu. Like the 3D modeling app, you will see any
existing Codeblock projects you've created or a blue button to create a new one. Once you click to make a new project,
you will be able to open a template based upon a previous project (if applicable), or tutorials designed by the Tinkercad
team.
If you've ever used Scratch or another block-based programming application, Codeblocks will look familiar to you. The
big di erence is that instead of seeing some type of animation preview window, we see a 3D work plane that we can
control with our code. There are six categories of codeblocks we can use to manipulate our shapes.
1. Shapes - This category of blocks allows us to create and add geometric shapes to our design
2. Modify - This category of blocks allows us to manipulate any shapes, or groups of shapes, we have in our
design
3. Control - This category of blocks allows us to loop or repeat tasks
4. Math - This category of blocks allows us create variables or manipulate numbers and quantities in our
design
5. Data - This category of blocks allows us work with any variables that are created using Math blocks
6. Mark Up - This category of blocks allows us to add comments or messages throughout our program
1. Code block categories
2. programming window
3. 3D model window
4. play button
1
2
3
4
Code a Traffic Light in Tinkercad Codeblocks & Circuits: Page 2
Step 3: Part 1 Step 3 - Adding Our Lights
You can create a shape by simplly dragging and
dropping a shape block into your programming window,
then press the play button in the top right corner to
preview your code. You must press the play button each
time you wish to see your code run.
We are going to create an Object before adding any
shapes. Objects allow us to manipulate or merge shapes
together and consolidate our codeblocks. Our rst
object will consist of the main housing and light bulbs of
our tra c lights. To start, grab a "Create New Object"
block from the Modify blocks category and drag it into
your programming window.
Next, we are going add a "Box" block from the Shapes
category and snap it in place under our new Object. You
can adjust the color and size of your box in the code
block. Set it to be yellow, 30 W, 100 L, and 20 H . We will
then rotate our box by adding a "Rotate" from the
Modify category. By Rotating around the X-axis 90
degrees, we will stand the yellow box up vertically.
Lastly, we are going to add a "Move" block from the
Modify category to life the box vertically so it is resting
on top of the work plane. Drop your move block in under
the rotate block and set Z to 50.
1. this will be our first object 1. change between solid fills, or a transparent hole
2. the 3D model window will update as you run your code
1. modify shapes using blocks
1
1 2
1
Code a Traffic Light in Tinkercad Codeblocks & Circuits: Page 3
Step 4: Part 1 Step 4 - Adding the Light Hoods
Now that we have our yellow box to act as the main part
of our tra c light housing, we will add cylinders to act as
our light bulbs.
Add a "Cylinder" from the Shapes category snapped to
our code from the previous step. Set this cylinder to be
red with a Radius of 10, 20 H, 20 Sides, 0 Edge, 1 Edge
Steps. We are then going to add a "Rotate" block and
rotate our red cylinder around the X-axis by 90 degrees.
Next, we are going to lift this cylinder using a "Move"
block by setting Z to 80. Lastly, we are going to extrude
the cylinder out of our box by setting Y to -2.
We should now have a red cylinder at the top of our
light! We can copy the Shape, Rotate, and Move blocks
from the red lgiht to create the yellow and green one
with greater ease. Right click the red cylinder block and
select duplicate. This will copy all three blocks we need,
then snap them in place under all other code.
For the yellow light, change the color parameter on the
cylinder block to be yellow, then set Z to be 50 in the
yellow light's move block. We will again duplicate the
three blocks of code from our red cylinder to make our
green one.
After duplicating for the green light, change the color
parameter on the cylinder block to be green, then set Z
to be 20 in the green light's move block. You should now
have all three lights!
1. not all of the parameters must be completed
2. -2 pulls the cylinder out so it extrudes from the yellow box
1. duplicate these three blocks for each following light cylinder
1
2
1
Code a Traffic Light in Tinkercad Codeblocks & Circuits: Page 4
The last part of our Tra c Light model are the hoods
that go above each light. We will be creating a new
Object from our main housing as we will need to group
shapes together and duplicate them to complete these
parts, but we don't want these modi cations to e ect
the shapes we already have (thus the need for a new
object). Start by grabbing the "Create New Object"
block from the Modifycategory and drag it in new space
in your programming window.
We are going to add a yellow"Round Roof" from the
Shapes category into our new object. We are then going
to move this round roof above the red light cylinder
using a "Move" block and by setting Z to be 90 and Y to
-10. Next, we are going to add another "Round Roof"
but set this second one to be transparent, or a hole,
rather than a ll color. Add another move block to lift
the roof hole by setting Z to 87 and Y to -10.
Lastly, we are going to add a "Group" block from the
Modify category to the bottom of our hood object code
blocks. This will group the yellow rounded roof to the
hole rounded roof just like the group function in the 3D
design portion of Tinkercad. We now should have our
rst light hood above the red light!
Next, we are going to create a new object so we can
easily duplicate our light hood object two more times.
Start by dragging another "Create New Object" block
from the Modify category in new space of your
programming window. Add a "Add Copy of Object"
block from the Modify category, then drag the variable
block for your rst light hood from the Data category
into the blank parameter of your modify block. This will
add a new light hood overtop of the existing one.
We now are going to add a "Move" block from the
Modify category and set Z to -30 to move the second
hood over the yellow light. To complete our model, we
are going to add another "Add Copy of Object"block
from the Modify category to create another copy of our
light hood. For this last hood, we are going to add a
"Move" block from the Modify category and set Z to -60
to move the last hood over the green light.
And that concludes Part 1, Coding a 3D model of a
Tra c Light using Tinkercad's Codeblocks!
1. this roof is set to fill solid yellow
2. this hood is set to be a hole to cut into the first roof
3. grouping the shapes together will cut one into the other
1. the first light hood added from our new object
1
2
3
1
Code a Traffic Light in Tinkercad Codeblocks & Circuits: Page 5
Step 5: Part 2 Step 1 - How to Use Circuits
1. a new object will allow us to manipulate new shapes separate from existing shapes 1. all three hoods have been added!
Part 2 of this Instructable is programming a
simulated circuit using an Arduino to function like a
tra c light in Tinkercad Circuits.
After signing into Tinkercad, click on Circuits in the left-
side menu. Like the 3D modeling app, you will see any
existing Circuits projects you've created and a blue
button to create a new one. Once you click to make a
new project, you will be brought to a blank document
where you can drag and drop in components, or starter
circuits made by the Tinkercad team.
Tools to rotate, navigate, undo, redo, delete, or annotate
are in the top left corner of the toolbar. To add code, you
can click the "Code" button in the top right corner of the
tool bar, though no code can be added until a
micro-controller component has been added rst. To see
your circuit in action, you need to press the "Start
Simulation" button. Without the simulation turned on,
no electricity is owing through your circuit, its in a
prototyping-mode. Once the simulator is started, you
should see your circuit function as if it is truly connected
using real components on your workbench in front of
you.
To get started, you can drag and drop components from
the component list out into your workspace. A simple
click of your mouse will allow you to draw wires from
component to component. Any options that are possible
will be visible in an object menu when a component is
selected (color, resistance, voltage, etc).
1
1
Code a Traffic Light in Tinkercad Codeblocks & Circuits: Page 6
Step 6: Part 2 Step 2 - Starting Our Circuit
1. Tools to rotate and manipulate shapes
2. components can be added from this menu
3. this is the workspace to assemble your circuits
4. click here to add or edit your code
5. start simulation connects your circuit to power
Before we dive into three LEDs (light emitting diodes), we are going to work our way in by adding a single light rst. Start
by dragging the following components out into your workspace:
1. Arduino Uno R3
2. Red LED
3. 1K Ohm Resistor
4. Breadboard Small
Next we need to connect your components together. Rotate the LED so it is facing right, then drop it into any two rows
on your breadboard. Connect the resistor from the cathode of the LED to the black negative channel of your
breadboard. This will provide a ground, or negative current, to your LED. LEDs can only handle so many amps (current
ow of electrons before failing). A resistor allows us to control the ow of current to ensure we provide the correct
amount of current our LEDs need. LEDs are also Polar, meaning they must be hooked up in a particular orientation for
current to pass through. Resistors are Non-Polar and can be connected in any direction.
Next, connect a red wire from your LEDs anode to Pin 13 on your Arduino by clicking on the anode, moving your mouse
(not click and dragging), and then clicking again on Pin 13. If you want to make bends in your wire, click your mouse as
you move it across your workspace. Bend positions can be manipulated after drawing a wire.
Lastly, connect a black wire from a GND Pin on the Arduino to a pin in the black negative channel of your breadboard
that the resistor is connected to. This will complete your starter circuit!
1
2
3
4 5
Code a Traffic Light in Tinkercad Codeblocks & Circuits: Page 7
Step 7: Part 2 Step 3 - Starting Our Code
1. connecting the black wire and the resistor into the same column
connects them together
2. placing the resistor and LED cathode in the same row connects them
together
3. connect the anode to Pin 13 of the arduino
Next, we are going to program our red LED to blink on an o as we begin to put our code together! Start by clicking on
the "Code" button to open your programming window. You are able to program your Arduino using both block-based
and script-based methods, but we'll be focusing on blocks in this Instructable.
Like Codeblocks or other block-based languages, there are categories we can choose our blocks from to assemble our
programs. Tinkercad Circuits has six categories:
1. Output - This category of blocks allows us to send power to components out through our pins
2. Input - This category of blocks allows us to read signals coming from components through our pins
3. Control - This category of blocks allows us to manipulate our programs with delays, loops, or logic
statements
4. Math - This category of blocks allows us to utilize operators to enhance our logic functions
5. Variables - This category of blocks allows us create variables as placeholders to increase complexity and
function in our programs
6. Notation - This category of blocks allows us to add comments or titles to our programs
To turn our LED on, we simply need to drag and drop a "Set Pin _ to HIGH"block from the Output category into our
programming window. HIGH sends a high signal, or 5 volts, through whatever pin is selected in the block. Select Pin 13
as that is the pin we have connected our red LED to and 5V would turn the LED on.
Press Start Simulation and your red LED should turn on!
To make our red LED turn on and o , we need to rst add a "Wait" block from the Control category and snap it in place
below our set to HIGH block. For now, the time delay isn't important, but the duration set in your wait block will be how
1
2
3
Code a Traffic Light in Tinkercad Codeblocks & Circuits: Page 8
Step 8: Part 2 Step 4 - Adding LEDs
long the LED stays on, then o , then on again for.
Lastly, drag and drop another "Set Pin _ to HIGH"block from the Output category into our program. Again, select Pin 13
for the red LED, but this time select LOW. Low sends a low signal or theoretically no volts to our LED which would turn it
o .
Press Start Simulation and your red LED should blink on and o repeatedly!
1. HIGH = on
2. LOW = off
3. 13 is the pin we connected our red LED to
Now that we've completed a proof of concept with one
LED, we can add our remaining two LEDs and complete
our circuit! Drag in two more LEDs, set one to be yellow
and one to be green. Match the order of a tra c light by
placing the yellow light below the red one, then the
green light at the bottom.
Like the red LED, we need to run part of our circuit
through a resistor to prevent our LED from failing under
too much current. You could add a resistor for each LED
by matching the wiring method we used with our red
LED in the second step. Alternatively, you could share
the red LEDs resistor by connecting each cathode
(ground) signal together. In a typical circuit, all
components share a common ground. As a result,
running ground through three resistors, one per LED, or
one resistor shared among them would have the same
e ect.
Next, we will connect the anode of the yellow LED to Pin
12 and the anode of the green LED to Pin 11. Like
before, the pin we choose is insigni cant for this
purpose, but I've chosen to use Pins 12 and 11 to keep
our circuit organized.
Next, we need to program our LEDs to turn on and o by
completing our code!
1
2
3
Code a Traffic Light in Tinkercad Codeblocks & Circuits: Page 9
Step 9: Part 2 Step 5 - Completing Our Code
1. connecting resistors to each LED works, but is not the most efficient way to
create your circuit
1. you can share one resistor across a common ground
To complete our tra c light circuit, we need to add code blocks that control our yellow and green LEDs like we have for
our red one. First, let's analyze the behavior of a tra c light.
1. Red light is on, Yellow and Green are o , typically for a longerduration
2. Green light is on, Yellow and Red are o , typically for a longerduration
3. Yellow light is on, Red and Green are o , typically for a shorterduration
In the real-world, longer durations typically span two to ve minutes while shorter durations last for ten to thirty
seconds. In our prototype, we will use 3 seconds for our longer duration and 1 second for our shorter duration.
First, let's add two "Set Pin _ to HIGH"block from the Output category below our 13 HIGH block. Set one for Pin 12
LOW to turn o the yellow light, and the other to be Pin 11 LOW to turn o the green light. Next, set the Wait block to
be 3 secondsto create a longer duration. This will have only our Red light on for a longer duration, as listed in step 1 of
our tra c light behavior.
Next, let's duplicate all four code blocks we currently have by right clicking on our rst block and selecting duplicate.
Drag these four new blocks in place under our wait block. For this section, Pin 13 = LOW, Pin 12 = LOW,and Pin 11 =
HIGH for 3 seconds. This will have only our Green light on for a longer duration, as listed in step 2 of our tra c light
behavior.
Lastly, let's duplicate the four code blocks again by right clicking on our rst block and selecting duplicate. Drag these
four new blocks in place under our wait block. For this section, Pin 13 = LOW, Pin 12 = HIGH, and Pin 11 = LOWfor 1
seconds. This will have only our Yellow light on for a shorter duration, as listed in step 3 of our tra c light behavior.
Press Start Simulation and your three LEDs should blink on and o like a real tra c light!
1
1
Code a Traffic Light in Tinkercad Codeblocks & Circuits: Page 10
Step 10: Code Files and Conclusion
And that concludes Part 2, Coding a Tra c Light inspired circuit using Tinkercad Circuits!
1. each LED needs its own block to set it to be HIGH or LOW
2. each stage is separated by a wait block
Tinkercad's Codeblocks and Circuit features are
incredibly powerful tools for anyone looking to develop
skills in computer science! With user friendly interfaces,
Codeblocks and Circuits makes learning how to create
programs simple and fun.
See the sample project from Part 1 - Modeling a Tra c
Light using Codeblocks here.
See the sample project from Part 2 - Creating a Tra c
Light circuit and program in Circuitshere.
And if you're curious as to how the Tra c Light circuit
would look like if you used a script-based language
instead of a block-based one, check out this project.
Moving into script-based programming languages are
made easy in Tinkercad Circuits as you can utilize both
simultaneously. For an added challenge, try to make
your tra c light into a smart circuit by adding sensors
that would detect a car to trigger when it should change
from red to green!
Tinkercad is a powerful tool in all aspects of my
classroom, whether it be for 3D modeling, circuit design,
fundamentals of programming, or advanced
programming. This tra c light project is one of my
personal favorites and I hope you enjoy it too!
Thanks for reading, happy making!
1
2
Code a Traffic Light in Tinkercad Codeblocks & Circuits: Page 11
Awesome!
Code a Traffic Light in Tinkercad Codeblocks & Circuits: Page 12

More Related Content

Similar to Arduino: Codifique un semáforo en el circuito de bloques de código de Tinkercad

Similar to Arduino: Codifique un semáforo en el circuito de bloques de código de Tinkercad (20)

978 1-58503-717-9-3
978 1-58503-717-9-3978 1-58503-717-9-3
978 1-58503-717-9-3
 
autocad demo.pptx
autocad demo.pptxautocad demo.pptx
autocad demo.pptx
 
TUTORIAL AUTO CAD 3D
TUTORIAL AUTO CAD 3DTUTORIAL AUTO CAD 3D
TUTORIAL AUTO CAD 3D
 
3 d autocad_2009
3 d autocad_20093 d autocad_2009
3 d autocad_2009
 
Experiment_1.pdf
Experiment_1.pdfExperiment_1.pdf
Experiment_1.pdf
 
AutoCad 1.pptx
AutoCad 1.pptxAutoCad 1.pptx
AutoCad 1.pptx
 
Ads
AdsAds
Ads
 
Utilizing Layers in AutoCAD Prototype Package
Utilizing Layers in AutoCAD Prototype PackageUtilizing Layers in AutoCAD Prototype Package
Utilizing Layers in AutoCAD Prototype Package
 
Practical work 4
Practical work 4Practical work 4
Practical work 4
 
presentationonautocad-150912110202-lva1-app6891 (1).pdf
presentationonautocad-150912110202-lva1-app6891 (1).pdfpresentationonautocad-150912110202-lva1-app6891 (1).pdf
presentationonautocad-150912110202-lva1-app6891 (1).pdf
 
Mentor manual
Mentor manualMentor manual
Mentor manual
 
Dtmf robot
Dtmf robotDtmf robot
Dtmf robot
 
3 d auto cad 2009
3 d auto cad 20093 d auto cad 2009
3 d auto cad 2009
 
3 d autocad_2009
3 d autocad_20093 d autocad_2009
3 d autocad_2009
 
3 d autocad_2009
3 d autocad_20093 d autocad_2009
3 d autocad_2009
 
VB.NET programming
VB.NET programmingVB.NET programming
VB.NET programming
 
auto cad ppt.pptx
auto cad ppt.pptxauto cad ppt.pptx
auto cad ppt.pptx
 
Auto cad
Auto cadAuto cad
Auto cad
 
Presentation On Auto Cad
Presentation On Auto CadPresentation On Auto Cad
Presentation On Auto Cad
 
AutoCAD Presentation 2021 (Internship Project)
AutoCAD Presentation 2021 (Internship Project)AutoCAD Presentation 2021 (Internship Project)
AutoCAD Presentation 2021 (Internship Project)
 

More from SANTIAGO PABLO ALBERTO

Manual de teoría y practica electroneumática avanzada
Manual de teoría y practica electroneumática avanzadaManual de teoría y practica electroneumática avanzada
Manual de teoría y practica electroneumática avanzadaSANTIAGO PABLO ALBERTO
 
Programacion de PLC basado en Rslogix 500 por Roni Domínguez
Programacion de PLC basado en Rslogix 500 por Roni Domínguez Programacion de PLC basado en Rslogix 500 por Roni Domínguez
Programacion de PLC basado en Rslogix 500 por Roni Domínguez SANTIAGO PABLO ALBERTO
 
Programación de microcontroladores PIC en C con Fabio Pereira
Programación de microcontroladores PIC en  C con Fabio PereiraProgramación de microcontroladores PIC en  C con Fabio Pereira
Programación de microcontroladores PIC en C con Fabio PereiraSANTIAGO PABLO ALBERTO
 
Análisis y Diseño de Sistemas de Control Digital por Ricardo Fernandez del Bu...
Análisis y Diseño de Sistemas de Control Digital por Ricardo Fernandez del Bu...Análisis y Diseño de Sistemas de Control Digital por Ricardo Fernandez del Bu...
Análisis y Diseño de Sistemas de Control Digital por Ricardo Fernandez del Bu...SANTIAGO PABLO ALBERTO
 
Programación de autómatas PLC OMRON CJ/CP1
Programación de  autómatas PLC OMRON CJ/CP1Programación de  autómatas PLC OMRON CJ/CP1
Programación de autómatas PLC OMRON CJ/CP1SANTIAGO PABLO ALBERTO
 
Manual del sistema del controlador programable S7-200 SMART
Manual del sistema del controlador programable S7-200 SMARTManual del sistema del controlador programable S7-200 SMART
Manual del sistema del controlador programable S7-200 SMARTSANTIAGO PABLO ALBERTO
 
PLC: Buses industriales y de campo practicas de laboratorio por Jose Miguel R...
PLC: Buses industriales y de campo practicas de laboratorio por Jose Miguel R...PLC: Buses industriales y de campo practicas de laboratorio por Jose Miguel R...
PLC: Buses industriales y de campo practicas de laboratorio por Jose Miguel R...SANTIAGO PABLO ALBERTO
 
PLC y Electroneumática: Electricidad y Automatismo eléctrico por Luis Miguel...
PLC y Electroneumática: Electricidad y Automatismo eléctrico por  Luis Miguel...PLC y Electroneumática: Electricidad y Automatismo eléctrico por  Luis Miguel...
PLC y Electroneumática: Electricidad y Automatismo eléctrico por Luis Miguel...SANTIAGO PABLO ALBERTO
 
Electrónica: Diseño y desarrollo de circuitos impresos con Kicad por Miguel P...
Electrónica: Diseño y desarrollo de circuitos impresos con Kicad por Miguel P...Electrónica: Diseño y desarrollo de circuitos impresos con Kicad por Miguel P...
Electrónica: Diseño y desarrollo de circuitos impresos con Kicad por Miguel P...SANTIAGO PABLO ALBERTO
 
PLC: Diseño, construcción y control de un motor doble Dahlander(cuatro veloci...
PLC: Diseño, construcción y control de un motor doble Dahlander(cuatro veloci...PLC: Diseño, construcción y control de un motor doble Dahlander(cuatro veloci...
PLC: Diseño, construcción y control de un motor doble Dahlander(cuatro veloci...SANTIAGO PABLO ALBERTO
 
Electrónica digital: Introducción a la Lógica Digital - Teoría, Problemas y ...
Electrónica digital:  Introducción a la Lógica Digital - Teoría, Problemas y ...Electrónica digital:  Introducción a la Lógica Digital - Teoría, Problemas y ...
Electrónica digital: Introducción a la Lógica Digital - Teoría, Problemas y ...SANTIAGO PABLO ALBERTO
 

More from SANTIAGO PABLO ALBERTO (20)

secuencia electroneumática parte 1
secuencia electroneumática parte 1secuencia electroneumática parte 1
secuencia electroneumática parte 1
 
secuencia electroneumática parte 2
secuencia electroneumática parte 2secuencia electroneumática parte 2
secuencia electroneumática parte 2
 
Manual de teoría y practica electroneumática avanzada
Manual de teoría y practica electroneumática avanzadaManual de teoría y practica electroneumática avanzada
Manual de teoría y practica electroneumática avanzada
 
Programacion de PLC basado en Rslogix 500 por Roni Domínguez
Programacion de PLC basado en Rslogix 500 por Roni Domínguez Programacion de PLC basado en Rslogix 500 por Roni Domínguez
Programacion de PLC basado en Rslogix 500 por Roni Domínguez
 
Programación de microcontroladores PIC en C con Fabio Pereira
Programación de microcontroladores PIC en  C con Fabio PereiraProgramación de microcontroladores PIC en  C con Fabio Pereira
Programación de microcontroladores PIC en C con Fabio Pereira
 
Análisis y Diseño de Sistemas de Control Digital por Ricardo Fernandez del Bu...
Análisis y Diseño de Sistemas de Control Digital por Ricardo Fernandez del Bu...Análisis y Diseño de Sistemas de Control Digital por Ricardo Fernandez del Bu...
Análisis y Diseño de Sistemas de Control Digital por Ricardo Fernandez del Bu...
 
Arduino: Arduino de cero a experto
Arduino: Arduino de cero a expertoArduino: Arduino de cero a experto
Arduino: Arduino de cero a experto
 
Fisica I
Fisica IFisica I
Fisica I
 
Quimica.pdf
Quimica.pdfQuimica.pdf
Quimica.pdf
 
Manual básico PLC OMRON
Manual básico PLC OMRON Manual básico PLC OMRON
Manual básico PLC OMRON
 
Programación de autómatas PLC OMRON CJ/CP1
Programación de  autómatas PLC OMRON CJ/CP1Programación de  autómatas PLC OMRON CJ/CP1
Programación de autómatas PLC OMRON CJ/CP1
 
Manual del sistema del controlador programable S7-200 SMART
Manual del sistema del controlador programable S7-200 SMARTManual del sistema del controlador programable S7-200 SMART
Manual del sistema del controlador programable S7-200 SMART
 
Catálogo de PLC S7-200 SMART
Catálogo de PLC S7-200 SMART Catálogo de PLC S7-200 SMART
Catálogo de PLC S7-200 SMART
 
PLC: Automatismos industriales
PLC: Automatismos industrialesPLC: Automatismos industriales
PLC: Automatismos industriales
 
PLC: Buses industriales y de campo practicas de laboratorio por Jose Miguel R...
PLC: Buses industriales y de campo practicas de laboratorio por Jose Miguel R...PLC: Buses industriales y de campo practicas de laboratorio por Jose Miguel R...
PLC: Buses industriales y de campo practicas de laboratorio por Jose Miguel R...
 
PLC y Electroneumática: Electricidad y Automatismo eléctrico por Luis Miguel...
PLC y Electroneumática: Electricidad y Automatismo eléctrico por  Luis Miguel...PLC y Electroneumática: Electricidad y Automatismo eléctrico por  Luis Miguel...
PLC y Electroneumática: Electricidad y Automatismo eléctrico por Luis Miguel...
 
Electrónica: Diseño y desarrollo de circuitos impresos con Kicad por Miguel P...
Electrónica: Diseño y desarrollo de circuitos impresos con Kicad por Miguel P...Electrónica: Diseño y desarrollo de circuitos impresos con Kicad por Miguel P...
Electrónica: Diseño y desarrollo de circuitos impresos con Kicad por Miguel P...
 
PLC: Diseño, construcción y control de un motor doble Dahlander(cuatro veloci...
PLC: Diseño, construcción y control de un motor doble Dahlander(cuatro veloci...PLC: Diseño, construcción y control de un motor doble Dahlander(cuatro veloci...
PLC: Diseño, construcción y control de un motor doble Dahlander(cuatro veloci...
 
PLC: Motor Dahlander
PLC: Motor DahlanderPLC: Motor Dahlander
PLC: Motor Dahlander
 
Electrónica digital: Introducción a la Lógica Digital - Teoría, Problemas y ...
Electrónica digital:  Introducción a la Lógica Digital - Teoría, Problemas y ...Electrónica digital:  Introducción a la Lógica Digital - Teoría, Problemas y ...
Electrónica digital: Introducción a la Lógica Digital - Teoría, Problemas y ...
 

Recently uploaded

Introduction to Microprocesso programming and interfacing.pptx
Introduction to Microprocesso programming and interfacing.pptxIntroduction to Microprocesso programming and interfacing.pptx
Introduction to Microprocesso programming and interfacing.pptxvipinkmenon1
 
OSVC_Meta-Data based Simulation Automation to overcome Verification Challenge...
OSVC_Meta-Data based Simulation Automation to overcome Verification Challenge...OSVC_Meta-Data based Simulation Automation to overcome Verification Challenge...
OSVC_Meta-Data based Simulation Automation to overcome Verification Challenge...Soham Mondal
 
main PPT.pptx of girls hostel security using rfid
main PPT.pptx of girls hostel security using rfidmain PPT.pptx of girls hostel security using rfid
main PPT.pptx of girls hostel security using rfidNikhilNagaraju
 
Call Girls Narol 7397865700 Independent Call Girls
Call Girls Narol 7397865700 Independent Call GirlsCall Girls Narol 7397865700 Independent Call Girls
Call Girls Narol 7397865700 Independent Call Girlsssuser7cb4ff
 
Current Transformer Drawing and GTP for MSETCL
Current Transformer Drawing and GTP for MSETCLCurrent Transformer Drawing and GTP for MSETCL
Current Transformer Drawing and GTP for MSETCLDeelipZope
 
HARMONY IN THE NATURE AND EXISTENCE - Unit-IV
HARMONY IN THE NATURE AND EXISTENCE - Unit-IVHARMONY IN THE NATURE AND EXISTENCE - Unit-IV
HARMONY IN THE NATURE AND EXISTENCE - Unit-IVRajaP95
 
GDSC ASEB Gen AI study jams presentation
GDSC ASEB Gen AI study jams presentationGDSC ASEB Gen AI study jams presentation
GDSC ASEB Gen AI study jams presentationGDSCAESB
 
Architect Hassan Khalil Portfolio for 2024
Architect Hassan Khalil Portfolio for 2024Architect Hassan Khalil Portfolio for 2024
Architect Hassan Khalil Portfolio for 2024hassan khalil
 
Sheet Pile Wall Design and Construction: A Practical Guide for Civil Engineer...
Sheet Pile Wall Design and Construction: A Practical Guide for Civil Engineer...Sheet Pile Wall Design and Construction: A Practical Guide for Civil Engineer...
Sheet Pile Wall Design and Construction: A Practical Guide for Civil Engineer...Dr.Costas Sachpazis
 
Study on Air-Water & Water-Water Heat Exchange in a Finned Tube Exchanger
Study on Air-Water & Water-Water Heat Exchange in a Finned Tube ExchangerStudy on Air-Water & Water-Water Heat Exchange in a Finned Tube Exchanger
Study on Air-Water & Water-Water Heat Exchange in a Finned Tube ExchangerAnamika Sarkar
 
What are the advantages and disadvantages of membrane structures.pptx
What are the advantages and disadvantages of membrane structures.pptxWhat are the advantages and disadvantages of membrane structures.pptx
What are the advantages and disadvantages of membrane structures.pptxwendy cai
 
Biology for Computer Engineers Course Handout.pptx
Biology for Computer Engineers Course Handout.pptxBiology for Computer Engineers Course Handout.pptx
Biology for Computer Engineers Course Handout.pptxDeepakSakkari2
 
Model Call Girl in Narela Delhi reach out to us at 🔝8264348440🔝
Model Call Girl in Narela Delhi reach out to us at 🔝8264348440🔝Model Call Girl in Narela Delhi reach out to us at 🔝8264348440🔝
Model Call Girl in Narela Delhi reach out to us at 🔝8264348440🔝soniya singh
 
CCS355 Neural Network & Deep Learning UNIT III notes and Question bank .pdf
CCS355 Neural Network & Deep Learning UNIT III notes and Question bank .pdfCCS355 Neural Network & Deep Learning UNIT III notes and Question bank .pdf
CCS355 Neural Network & Deep Learning UNIT III notes and Question bank .pdfAsst.prof M.Gokilavani
 
Oxy acetylene welding presentation note.
Oxy acetylene welding presentation note.Oxy acetylene welding presentation note.
Oxy acetylene welding presentation note.eptoze12
 
(ANVI) Koregaon Park Call Girls Just Call 7001035870 [ Cash on Delivery ] Pun...
(ANVI) Koregaon Park Call Girls Just Call 7001035870 [ Cash on Delivery ] Pun...(ANVI) Koregaon Park Call Girls Just Call 7001035870 [ Cash on Delivery ] Pun...
(ANVI) Koregaon Park Call Girls Just Call 7001035870 [ Cash on Delivery ] Pun...ranjana rawat
 
Artificial-Intelligence-in-Electronics (K).pptx
Artificial-Intelligence-in-Electronics (K).pptxArtificial-Intelligence-in-Electronics (K).pptx
Artificial-Intelligence-in-Electronics (K).pptxbritheesh05
 
College Call Girls Nashik Nehal 7001305949 Independent Escort Service Nashik
College Call Girls Nashik Nehal 7001305949 Independent Escort Service NashikCollege Call Girls Nashik Nehal 7001305949 Independent Escort Service Nashik
College Call Girls Nashik Nehal 7001305949 Independent Escort Service NashikCall Girls in Nagpur High Profile
 
Software and Systems Engineering Standards: Verification and Validation of Sy...
Software and Systems Engineering Standards: Verification and Validation of Sy...Software and Systems Engineering Standards: Verification and Validation of Sy...
Software and Systems Engineering Standards: Verification and Validation of Sy...VICTOR MAESTRE RAMIREZ
 

Recently uploaded (20)

Introduction to Microprocesso programming and interfacing.pptx
Introduction to Microprocesso programming and interfacing.pptxIntroduction to Microprocesso programming and interfacing.pptx
Introduction to Microprocesso programming and interfacing.pptx
 
OSVC_Meta-Data based Simulation Automation to overcome Verification Challenge...
OSVC_Meta-Data based Simulation Automation to overcome Verification Challenge...OSVC_Meta-Data based Simulation Automation to overcome Verification Challenge...
OSVC_Meta-Data based Simulation Automation to overcome Verification Challenge...
 
main PPT.pptx of girls hostel security using rfid
main PPT.pptx of girls hostel security using rfidmain PPT.pptx of girls hostel security using rfid
main PPT.pptx of girls hostel security using rfid
 
Call Girls Narol 7397865700 Independent Call Girls
Call Girls Narol 7397865700 Independent Call GirlsCall Girls Narol 7397865700 Independent Call Girls
Call Girls Narol 7397865700 Independent Call Girls
 
Current Transformer Drawing and GTP for MSETCL
Current Transformer Drawing and GTP for MSETCLCurrent Transformer Drawing and GTP for MSETCL
Current Transformer Drawing and GTP for MSETCL
 
HARMONY IN THE NATURE AND EXISTENCE - Unit-IV
HARMONY IN THE NATURE AND EXISTENCE - Unit-IVHARMONY IN THE NATURE AND EXISTENCE - Unit-IV
HARMONY IN THE NATURE AND EXISTENCE - Unit-IV
 
GDSC ASEB Gen AI study jams presentation
GDSC ASEB Gen AI study jams presentationGDSC ASEB Gen AI study jams presentation
GDSC ASEB Gen AI study jams presentation
 
Architect Hassan Khalil Portfolio for 2024
Architect Hassan Khalil Portfolio for 2024Architect Hassan Khalil Portfolio for 2024
Architect Hassan Khalil Portfolio for 2024
 
Sheet Pile Wall Design and Construction: A Practical Guide for Civil Engineer...
Sheet Pile Wall Design and Construction: A Practical Guide for Civil Engineer...Sheet Pile Wall Design and Construction: A Practical Guide for Civil Engineer...
Sheet Pile Wall Design and Construction: A Practical Guide for Civil Engineer...
 
Study on Air-Water & Water-Water Heat Exchange in a Finned Tube Exchanger
Study on Air-Water & Water-Water Heat Exchange in a Finned Tube ExchangerStudy on Air-Water & Water-Water Heat Exchange in a Finned Tube Exchanger
Study on Air-Water & Water-Water Heat Exchange in a Finned Tube Exchanger
 
What are the advantages and disadvantages of membrane structures.pptx
What are the advantages and disadvantages of membrane structures.pptxWhat are the advantages and disadvantages of membrane structures.pptx
What are the advantages and disadvantages of membrane structures.pptx
 
Exploring_Network_Security_with_JA3_by_Rakesh Seal.pptx
Exploring_Network_Security_with_JA3_by_Rakesh Seal.pptxExploring_Network_Security_with_JA3_by_Rakesh Seal.pptx
Exploring_Network_Security_with_JA3_by_Rakesh Seal.pptx
 
Biology for Computer Engineers Course Handout.pptx
Biology for Computer Engineers Course Handout.pptxBiology for Computer Engineers Course Handout.pptx
Biology for Computer Engineers Course Handout.pptx
 
Model Call Girl in Narela Delhi reach out to us at 🔝8264348440🔝
Model Call Girl in Narela Delhi reach out to us at 🔝8264348440🔝Model Call Girl in Narela Delhi reach out to us at 🔝8264348440🔝
Model Call Girl in Narela Delhi reach out to us at 🔝8264348440🔝
 
CCS355 Neural Network & Deep Learning UNIT III notes and Question bank .pdf
CCS355 Neural Network & Deep Learning UNIT III notes and Question bank .pdfCCS355 Neural Network & Deep Learning UNIT III notes and Question bank .pdf
CCS355 Neural Network & Deep Learning UNIT III notes and Question bank .pdf
 
Oxy acetylene welding presentation note.
Oxy acetylene welding presentation note.Oxy acetylene welding presentation note.
Oxy acetylene welding presentation note.
 
(ANVI) Koregaon Park Call Girls Just Call 7001035870 [ Cash on Delivery ] Pun...
(ANVI) Koregaon Park Call Girls Just Call 7001035870 [ Cash on Delivery ] Pun...(ANVI) Koregaon Park Call Girls Just Call 7001035870 [ Cash on Delivery ] Pun...
(ANVI) Koregaon Park Call Girls Just Call 7001035870 [ Cash on Delivery ] Pun...
 
Artificial-Intelligence-in-Electronics (K).pptx
Artificial-Intelligence-in-Electronics (K).pptxArtificial-Intelligence-in-Electronics (K).pptx
Artificial-Intelligence-in-Electronics (K).pptx
 
College Call Girls Nashik Nehal 7001305949 Independent Escort Service Nashik
College Call Girls Nashik Nehal 7001305949 Independent Escort Service NashikCollege Call Girls Nashik Nehal 7001305949 Independent Escort Service Nashik
College Call Girls Nashik Nehal 7001305949 Independent Escort Service Nashik
 
Software and Systems Engineering Standards: Verification and Validation of Sy...
Software and Systems Engineering Standards: Verification and Validation of Sy...Software and Systems Engineering Standards: Verification and Validation of Sy...
Software and Systems Engineering Standards: Verification and Validation of Sy...
 

Arduino: Codifique un semáforo en el circuito de bloques de código de Tinkercad

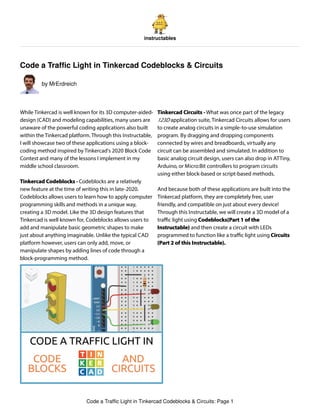
  • 1. instructables Code a Traffic Light in Tinkercad Codeblocks & Circuits by MrErdreich While Tinkercad is well known for its 3D computer-aided- design (CAD) and modeling capabilities, many users are unaware of the powerful coding applications also built within the Tinkercad platform. Through this Instructable, I will showcase two of these applications using a block- coding method inspired by Tinkercad's 2020 Block Code Contest and many of the lessons I implement in my middle school classroom. Tinkercad Codeblocks -Codeblocks are a relatively new feature at the time of writing this in late-2020. Codeblocks allows users to learn how to apply computer programming skills and methods in a unique way, creating a 3D model. Like the 3D design features that Tinkercad is well known for, Codeblocks allows users to add and manipulate basic geometric shapes to make just about anything imaginable. Unlike the typical CAD platform however, users can only add, move, or manipulate shapes by adding lines of code through a block-programming method. Tinkercad Circuits -What was once part of the legacy 123D application suite, Tinkercad Circuits allows for users to create analog circuits in a simple-to-use simulation program. By dragging and dropping components connected by wires and breadboards, virtually any circuit can be assembled and simulated. In addition to basic analog circuit design, users can also drop in ATTiny, Arduino, or Micro:Bit controllers to program circuits using either block-based or script-based methods. And because both of these applications are built into the Tinkercad platform, they are completely free, user friendly, and compatible on just about every device! Through this Instructable, we will create a 3D model of a tra c light using Codeblocks(Part 1 of the Instructable) and then create a circuit with LEDs programmed to function like a tra c light using Circuits (Part 2 of this Instructable). Code a Traffic Light in Tinkercad Codeblocks & Circuits: Page 1
  • 2. Step 1: Part 1 Step 1 - How to Use Codeblocks Step 2: Part 1 Step 2 - Starting Our Model Part 1 of this Instructable is creating a 3D model of a tra c light using Tinkercad Codeblocks. After signing into Tinkercad, click on Codeblocks in the left-side menu. Like the 3D modeling app, you will see any existing Codeblock projects you've created or a blue button to create a new one. Once you click to make a new project, you will be able to open a template based upon a previous project (if applicable), or tutorials designed by the Tinkercad team. If you've ever used Scratch or another block-based programming application, Codeblocks will look familiar to you. The big di erence is that instead of seeing some type of animation preview window, we see a 3D work plane that we can control with our code. There are six categories of codeblocks we can use to manipulate our shapes. 1. Shapes - This category of blocks allows us to create and add geometric shapes to our design 2. Modify - This category of blocks allows us to manipulate any shapes, or groups of shapes, we have in our design 3. Control - This category of blocks allows us to loop or repeat tasks 4. Math - This category of blocks allows us create variables or manipulate numbers and quantities in our design 5. Data - This category of blocks allows us work with any variables that are created using Math blocks 6. Mark Up - This category of blocks allows us to add comments or messages throughout our program 1. Code block categories 2. programming window 3. 3D model window 4. play button 1 2 3 4 Code a Traffic Light in Tinkercad Codeblocks & Circuits: Page 2
  • 3. Step 3: Part 1 Step 3 - Adding Our Lights You can create a shape by simplly dragging and dropping a shape block into your programming window, then press the play button in the top right corner to preview your code. You must press the play button each time you wish to see your code run. We are going to create an Object before adding any shapes. Objects allow us to manipulate or merge shapes together and consolidate our codeblocks. Our rst object will consist of the main housing and light bulbs of our tra c lights. To start, grab a "Create New Object" block from the Modify blocks category and drag it into your programming window. Next, we are going add a "Box" block from the Shapes category and snap it in place under our new Object. You can adjust the color and size of your box in the code block. Set it to be yellow, 30 W, 100 L, and 20 H . We will then rotate our box by adding a "Rotate" from the Modify category. By Rotating around the X-axis 90 degrees, we will stand the yellow box up vertically. Lastly, we are going to add a "Move" block from the Modify category to life the box vertically so it is resting on top of the work plane. Drop your move block in under the rotate block and set Z to 50. 1. this will be our first object 1. change between solid fills, or a transparent hole 2. the 3D model window will update as you run your code 1. modify shapes using blocks 1 1 2 1 Code a Traffic Light in Tinkercad Codeblocks & Circuits: Page 3
  • 4. Step 4: Part 1 Step 4 - Adding the Light Hoods Now that we have our yellow box to act as the main part of our tra c light housing, we will add cylinders to act as our light bulbs. Add a "Cylinder" from the Shapes category snapped to our code from the previous step. Set this cylinder to be red with a Radius of 10, 20 H, 20 Sides, 0 Edge, 1 Edge Steps. We are then going to add a "Rotate" block and rotate our red cylinder around the X-axis by 90 degrees. Next, we are going to lift this cylinder using a "Move" block by setting Z to 80. Lastly, we are going to extrude the cylinder out of our box by setting Y to -2. We should now have a red cylinder at the top of our light! We can copy the Shape, Rotate, and Move blocks from the red lgiht to create the yellow and green one with greater ease. Right click the red cylinder block and select duplicate. This will copy all three blocks we need, then snap them in place under all other code. For the yellow light, change the color parameter on the cylinder block to be yellow, then set Z to be 50 in the yellow light's move block. We will again duplicate the three blocks of code from our red cylinder to make our green one. After duplicating for the green light, change the color parameter on the cylinder block to be green, then set Z to be 20 in the green light's move block. You should now have all three lights! 1. not all of the parameters must be completed 2. -2 pulls the cylinder out so it extrudes from the yellow box 1. duplicate these three blocks for each following light cylinder 1 2 1 Code a Traffic Light in Tinkercad Codeblocks & Circuits: Page 4
  • 5. The last part of our Tra c Light model are the hoods that go above each light. We will be creating a new Object from our main housing as we will need to group shapes together and duplicate them to complete these parts, but we don't want these modi cations to e ect the shapes we already have (thus the need for a new object). Start by grabbing the "Create New Object" block from the Modifycategory and drag it in new space in your programming window. We are going to add a yellow"Round Roof" from the Shapes category into our new object. We are then going to move this round roof above the red light cylinder using a "Move" block and by setting Z to be 90 and Y to -10. Next, we are going to add another "Round Roof" but set this second one to be transparent, or a hole, rather than a ll color. Add another move block to lift the roof hole by setting Z to 87 and Y to -10. Lastly, we are going to add a "Group" block from the Modify category to the bottom of our hood object code blocks. This will group the yellow rounded roof to the hole rounded roof just like the group function in the 3D design portion of Tinkercad. We now should have our rst light hood above the red light! Next, we are going to create a new object so we can easily duplicate our light hood object two more times. Start by dragging another "Create New Object" block from the Modify category in new space of your programming window. Add a "Add Copy of Object" block from the Modify category, then drag the variable block for your rst light hood from the Data category into the blank parameter of your modify block. This will add a new light hood overtop of the existing one. We now are going to add a "Move" block from the Modify category and set Z to -30 to move the second hood over the yellow light. To complete our model, we are going to add another "Add Copy of Object"block from the Modify category to create another copy of our light hood. For this last hood, we are going to add a "Move" block from the Modify category and set Z to -60 to move the last hood over the green light. And that concludes Part 1, Coding a 3D model of a Tra c Light using Tinkercad's Codeblocks! 1. this roof is set to fill solid yellow 2. this hood is set to be a hole to cut into the first roof 3. grouping the shapes together will cut one into the other 1. the first light hood added from our new object 1 2 3 1 Code a Traffic Light in Tinkercad Codeblocks & Circuits: Page 5
  • 6. Step 5: Part 2 Step 1 - How to Use Circuits 1. a new object will allow us to manipulate new shapes separate from existing shapes 1. all three hoods have been added! Part 2 of this Instructable is programming a simulated circuit using an Arduino to function like a tra c light in Tinkercad Circuits. After signing into Tinkercad, click on Circuits in the left- side menu. Like the 3D modeling app, you will see any existing Circuits projects you've created and a blue button to create a new one. Once you click to make a new project, you will be brought to a blank document where you can drag and drop in components, or starter circuits made by the Tinkercad team. Tools to rotate, navigate, undo, redo, delete, or annotate are in the top left corner of the toolbar. To add code, you can click the "Code" button in the top right corner of the tool bar, though no code can be added until a micro-controller component has been added rst. To see your circuit in action, you need to press the "Start Simulation" button. Without the simulation turned on, no electricity is owing through your circuit, its in a prototyping-mode. Once the simulator is started, you should see your circuit function as if it is truly connected using real components on your workbench in front of you. To get started, you can drag and drop components from the component list out into your workspace. A simple click of your mouse will allow you to draw wires from component to component. Any options that are possible will be visible in an object menu when a component is selected (color, resistance, voltage, etc). 1 1 Code a Traffic Light in Tinkercad Codeblocks & Circuits: Page 6
  • 7. Step 6: Part 2 Step 2 - Starting Our Circuit 1. Tools to rotate and manipulate shapes 2. components can be added from this menu 3. this is the workspace to assemble your circuits 4. click here to add or edit your code 5. start simulation connects your circuit to power Before we dive into three LEDs (light emitting diodes), we are going to work our way in by adding a single light rst. Start by dragging the following components out into your workspace: 1. Arduino Uno R3 2. Red LED 3. 1K Ohm Resistor 4. Breadboard Small Next we need to connect your components together. Rotate the LED so it is facing right, then drop it into any two rows on your breadboard. Connect the resistor from the cathode of the LED to the black negative channel of your breadboard. This will provide a ground, or negative current, to your LED. LEDs can only handle so many amps (current ow of electrons before failing). A resistor allows us to control the ow of current to ensure we provide the correct amount of current our LEDs need. LEDs are also Polar, meaning they must be hooked up in a particular orientation for current to pass through. Resistors are Non-Polar and can be connected in any direction. Next, connect a red wire from your LEDs anode to Pin 13 on your Arduino by clicking on the anode, moving your mouse (not click and dragging), and then clicking again on Pin 13. If you want to make bends in your wire, click your mouse as you move it across your workspace. Bend positions can be manipulated after drawing a wire. Lastly, connect a black wire from a GND Pin on the Arduino to a pin in the black negative channel of your breadboard that the resistor is connected to. This will complete your starter circuit! 1 2 3 4 5 Code a Traffic Light in Tinkercad Codeblocks & Circuits: Page 7
  • 8. Step 7: Part 2 Step 3 - Starting Our Code 1. connecting the black wire and the resistor into the same column connects them together 2. placing the resistor and LED cathode in the same row connects them together 3. connect the anode to Pin 13 of the arduino Next, we are going to program our red LED to blink on an o as we begin to put our code together! Start by clicking on the "Code" button to open your programming window. You are able to program your Arduino using both block-based and script-based methods, but we'll be focusing on blocks in this Instructable. Like Codeblocks or other block-based languages, there are categories we can choose our blocks from to assemble our programs. Tinkercad Circuits has six categories: 1. Output - This category of blocks allows us to send power to components out through our pins 2. Input - This category of blocks allows us to read signals coming from components through our pins 3. Control - This category of blocks allows us to manipulate our programs with delays, loops, or logic statements 4. Math - This category of blocks allows us to utilize operators to enhance our logic functions 5. Variables - This category of blocks allows us create variables as placeholders to increase complexity and function in our programs 6. Notation - This category of blocks allows us to add comments or titles to our programs To turn our LED on, we simply need to drag and drop a "Set Pin _ to HIGH"block from the Output category into our programming window. HIGH sends a high signal, or 5 volts, through whatever pin is selected in the block. Select Pin 13 as that is the pin we have connected our red LED to and 5V would turn the LED on. Press Start Simulation and your red LED should turn on! To make our red LED turn on and o , we need to rst add a "Wait" block from the Control category and snap it in place below our set to HIGH block. For now, the time delay isn't important, but the duration set in your wait block will be how 1 2 3 Code a Traffic Light in Tinkercad Codeblocks & Circuits: Page 8
  • 9. Step 8: Part 2 Step 4 - Adding LEDs long the LED stays on, then o , then on again for. Lastly, drag and drop another "Set Pin _ to HIGH"block from the Output category into our program. Again, select Pin 13 for the red LED, but this time select LOW. Low sends a low signal or theoretically no volts to our LED which would turn it o . Press Start Simulation and your red LED should blink on and o repeatedly! 1. HIGH = on 2. LOW = off 3. 13 is the pin we connected our red LED to Now that we've completed a proof of concept with one LED, we can add our remaining two LEDs and complete our circuit! Drag in two more LEDs, set one to be yellow and one to be green. Match the order of a tra c light by placing the yellow light below the red one, then the green light at the bottom. Like the red LED, we need to run part of our circuit through a resistor to prevent our LED from failing under too much current. You could add a resistor for each LED by matching the wiring method we used with our red LED in the second step. Alternatively, you could share the red LEDs resistor by connecting each cathode (ground) signal together. In a typical circuit, all components share a common ground. As a result, running ground through three resistors, one per LED, or one resistor shared among them would have the same e ect. Next, we will connect the anode of the yellow LED to Pin 12 and the anode of the green LED to Pin 11. Like before, the pin we choose is insigni cant for this purpose, but I've chosen to use Pins 12 and 11 to keep our circuit organized. Next, we need to program our LEDs to turn on and o by completing our code! 1 2 3 Code a Traffic Light in Tinkercad Codeblocks & Circuits: Page 9
  • 10. Step 9: Part 2 Step 5 - Completing Our Code 1. connecting resistors to each LED works, but is not the most efficient way to create your circuit 1. you can share one resistor across a common ground To complete our tra c light circuit, we need to add code blocks that control our yellow and green LEDs like we have for our red one. First, let's analyze the behavior of a tra c light. 1. Red light is on, Yellow and Green are o , typically for a longerduration 2. Green light is on, Yellow and Red are o , typically for a longerduration 3. Yellow light is on, Red and Green are o , typically for a shorterduration In the real-world, longer durations typically span two to ve minutes while shorter durations last for ten to thirty seconds. In our prototype, we will use 3 seconds for our longer duration and 1 second for our shorter duration. First, let's add two "Set Pin _ to HIGH"block from the Output category below our 13 HIGH block. Set one for Pin 12 LOW to turn o the yellow light, and the other to be Pin 11 LOW to turn o the green light. Next, set the Wait block to be 3 secondsto create a longer duration. This will have only our Red light on for a longer duration, as listed in step 1 of our tra c light behavior. Next, let's duplicate all four code blocks we currently have by right clicking on our rst block and selecting duplicate. Drag these four new blocks in place under our wait block. For this section, Pin 13 = LOW, Pin 12 = LOW,and Pin 11 = HIGH for 3 seconds. This will have only our Green light on for a longer duration, as listed in step 2 of our tra c light behavior. Lastly, let's duplicate the four code blocks again by right clicking on our rst block and selecting duplicate. Drag these four new blocks in place under our wait block. For this section, Pin 13 = LOW, Pin 12 = HIGH, and Pin 11 = LOWfor 1 seconds. This will have only our Yellow light on for a shorter duration, as listed in step 3 of our tra c light behavior. Press Start Simulation and your three LEDs should blink on and o like a real tra c light! 1 1 Code a Traffic Light in Tinkercad Codeblocks & Circuits: Page 10
  • 11. Step 10: Code Files and Conclusion And that concludes Part 2, Coding a Tra c Light inspired circuit using Tinkercad Circuits! 1. each LED needs its own block to set it to be HIGH or LOW 2. each stage is separated by a wait block Tinkercad's Codeblocks and Circuit features are incredibly powerful tools for anyone looking to develop skills in computer science! With user friendly interfaces, Codeblocks and Circuits makes learning how to create programs simple and fun. See the sample project from Part 1 - Modeling a Tra c Light using Codeblocks here. See the sample project from Part 2 - Creating a Tra c Light circuit and program in Circuitshere. And if you're curious as to how the Tra c Light circuit would look like if you used a script-based language instead of a block-based one, check out this project. Moving into script-based programming languages are made easy in Tinkercad Circuits as you can utilize both simultaneously. For an added challenge, try to make your tra c light into a smart circuit by adding sensors that would detect a car to trigger when it should change from red to green! Tinkercad is a powerful tool in all aspects of my classroom, whether it be for 3D modeling, circuit design, fundamentals of programming, or advanced programming. This tra c light project is one of my personal favorites and I hope you enjoy it too! Thanks for reading, happy making! 1 2 Code a Traffic Light in Tinkercad Codeblocks & Circuits: Page 11
  • 12. Awesome! Code a Traffic Light in Tinkercad Codeblocks & Circuits: Page 12