
Recommended
More Related Content
Similar to Methods of protyping-1.pptx
Similar to Methods of protyping-1.pptx (20)
Recently uploaded
Recently uploaded (20)
Methods of protyping-1.pptx
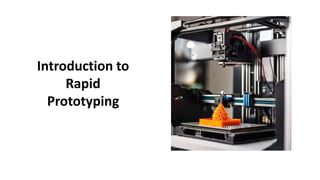
- 2. Introduction to Rapid Prototyping • Rapid prototyping is a method of quickly creating physical prototypes of a product using 3D printing. • It allows for the testing and iteration of designs in a much faster and cost-effective manner than traditional methods of prototyping. • Rapid prototyping is an essential tool in product development as it allows for the identification and resolution of design flaws early on in the process, ultimately leading to a better final product.
- 3. Methods of Prototyping 1. fused deposition modelling (FDM), 2. stereolithography (SLA), ` 3. selective laser sintering (SLS).
- 4. fused deposition modelling (FDM), • What is fused deposition modelling (FDM), Fused Deposition Modeling (FDM) is a 3D printing technology that creates objects layer by layer by melting and extruding thermoplastic filaments.
- 5. How it Works : 1.Designing the 3D Model: 1. Create a 3D model using computer-aided design (CAD) software. 2. Ensure the model is manifold and suitable for 3D printing. 2.Slicing the Model: 1. Use slicing software to divide the 3D model into thin, horizontal layers. 2. This software generates a toolpath that the 3D printer will follow. 3.Preparing the 3D Printer: 1. Load the 3D printer with the filament material (commonly PLA or ABS). 2. Set the printing temperature according to the filament's specifications. 4.Calibrating the Printer: 1. Ensure the printer bed is leveled to provide a flat surface for printing. 2. Calibrate the extruder to ensure proper filament flow. 5.Printing the Model: 1. The 3D printer starts building the object layer by layer. 2. The extruder heats the filament, which is then deposited in the specified pattern.
- 6. How it Works : 5.Cooling and Solidification: 1. The printed layers are cooled quickly to solidify the material. 2. Cooling fans may be used to improve layer adhesion. 6.Removing Supports (if used): 1. Some complex models may require support structures during printing. 2. After printing, these supports are removed manually or with additional tools 7.Post-Processing: 1. Remove the printed object from the build plate carefully. 2. Perform any additional post-processing steps, such as sanding or painting. 8.Quality Check: 1. Inspect the printed model for any defects or imperfections. 2. Ensure that the dimensions and details match the original design. 9.Final Product: 1. The completed 3D-printed object is ready for use or further assembly.
- 7. Visuals :
- 8. stereolithography (SLA), ` • What is stereolithography (SLA) • Stereolithography (SLA) is a 3D printing technology that uses a liquid resin cured by ultraviolet (UV) light to create detailed and high-resolution objects layer by layer.
- 9. How it works : 1.Designing the 3D Model: 1. Begin by creating a 3D model of the object you want to print using computer-aided design (CAD) software. Ensure that the model is water-tight and suitable for 3D printing. 2.Slicing the Model: 1. Use slicing software to divide the 3D model into thin layers, typically ranging from 25 to 100 microns in thickness. This step generates a set of 2D images corresponding to each layer of the object. 3.Preparation of the Printer: 1. Ensure that the SLA 3D printer is calibrated and leveled. Fill the resin tank with the liquid photopolymer resin, and make sure the build platform is in the starting position. 4.Layer-by-Layer Printing: 1. The 3D printing process begins by lowering the build platform into the liquid resin. A UV laser then selectively solidifies the resin according to the cross-section of the current layer, based on the sliced data.
- 10. How it works : 5.Lifting and Curing: 1. Once a layer is completed, the build platform moves slightly upward, and the resin surface is exposed again. The laser traces the pattern for the next layer, and the process repeats until the entire object is printed. 6.Post-Curing: 1. After the printing is complete, the object is not fully cured and may have a sticky residue. Post- curing is necessary to complete the hardening process. This is often done using a UV light chamber or other curing methods specified by the resin manufacturer. 7.Support Structure Removal: 1. Some SLA prints may require support structures to prevent sagging during printing. After curing, these support structures need to be removed. This can be done manually or with the help of tools. 8.Cleaning: 1. The printed object is typically rinsed in a solvent, such as isopropyl alcohol, to remove any uncured resin residues. This step helps in achieving a smooth and clean surface finish. 9.Final Finishing: 1. Depending on the application, additional finishing steps such as sanding, painting, or coating may be required to achieve the desired appearance and properties.
- 11. Visuals :
- 12. 3. selective laser sintering (SLS). • What is Selective laser sintering (SLS)? • Selective laser sintering (SLS) is a 3-D printing process (additive manufacturing) that uses high-powered lasers to sinter, or bind, finely powdered material together into a solid structure.
- 13. How it Works : 1. Digital Design: Start with a digital design of the object you want to create. This design is typically made using computer software. 2. Convert to Printable Format: Convert this digital design into a format that a 3D printer can understand. The common format is called .STL. 3. Printing Material: Instead of using ink like regular printers, SLS uses a special material in powdered form, often a type of plastic or nylon.
- 14. 4. Layer by Layer Building: • The 3D printer doesn't create the object all at once. It builds it layer by layer. Think of it like making a stack of very thin pancakes. • 5. Laser Magic: • Here's the cool part. A powerful laser is used to melt and fuse the powdered material together. The laser precisely targets and binds the powder according to the shape of the object's layer. • 6. Repeat the Layers: • After one layer is done, a new layer of powdered material is spread, and the laser works its magic again. This repeats until the entire 3D object is formed.
- 15. • 7. Cool Down: • Once the printing is done, the object needs a bit of time to cool down and solidify. • 8. Clean Up: • After printing, there might be some extra powder around the finished object. This is cleaned off to reveal the final 3D-printed creation. Your 3D Object is ready …!
- 16. Visuals
- 18. Refrence 1. fused deposition modelling (FDM), • What is FDM (fused deposition modeling) 3D printing? | Hubs 2. stereolithography (SLA), • https://formlabs.com/asia/blog/ultimate-guide-to-stereolithography-sla-3d- printing/ 3. selective laser sintering (SLS). • https://www.youtube.com/watch?v=sRC8W77MlrY • Selective Laser Sintering (SLS) Overview | 3D Systems