9953056974 Call Girls In South Ex, Escorts (Delhi) NCR.pdf
INFLUENCE LINES.pdf
1. 5
Influence Lines
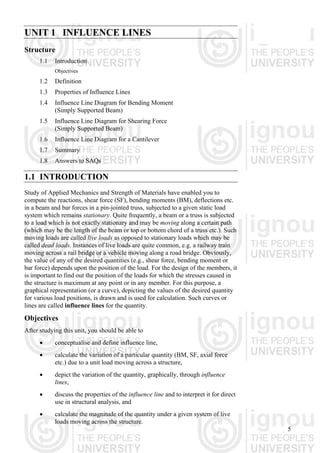
UNIT 1 INFLUENCE LINES
Structure
1.1 Introduction
Objectives
1.2 Definition
1.3 Properties of Influence Lines
1.4 Influence Line Diagram for Bending Moment
(Simply Supported Beam)
1.5 Influence Line Diagram for Shearing Force
(Simply Supported Beam)
1.6 Influence Line Diagram for a Cantilever
1.7 Summary
1.8 Answers to SAQs
1.1 INTRODUCTION
Study of Applied Mechanics and Strength of Materials have enabled you to
compute the reactions, shear force (SF), bending moments (BM), deflections etc.
in a beam and bar forces in a pin-jointed truss, subjected to a given static load
system which remains stationary. Quite frequently, a beam or a truss is subjected
to a load which is not exactly stationary and may be moving along a certain path
(which may be the length of the beam or top or bottom chord of a truss etc.). Such
moving loads are called live loads as opposed to stationary loads which may be
called dead loads. Instances of live loads are quite common, e.g. a railway train
moving across a rail bridge or a vehicle moving along a road bridge. Obviously,
the value of any of the desired quantities (e.g., shear force, bending moment or
bar force) depends upon the position of the load. For the design of the members, it
is important to find out the position of the loads for which the stresses caused in
the structure is maximum at any point or in any member. For this purpose, a
graphical representation (or a curve), depicting the values of the desired quantity
for various load positions, is drawn and is used for calculation. Such curves or
lines are called influence lines for the quantity.
Objectives
After studying this unit, you should be able to
• conceptualise and define influence line,
• calculate the variation of a particular quantity (BM, SF, axial force
etc.) due to a unit load moving across a structure,
• depict the variation of the quantity, graphically, through influence
lines,
• discuss the properties of the influence line and to interpret it for direct
use in structural analysis, and
• calculate the magnitude of the quantity under a given system of live
loads moving across the structure.
2. 6
Theory of Structures-I
1.2 DEFINITION
An influence line is a curve, the ordinate of which at any point is equal to the
value of some structural quantity, when a unit load is placed at that point.
The structural quantity could be external support reactions, (e.g. vertical or
horizontal reactive forces or bending moments), internal stress resultants (e.g.
axial force, SF or BM) or deformations (e.g. slope and deflections). The above
definition can be explained by the following simple examples.
A B
x
10 m
7 m
20 KN
0.3
R =
A
10 –
10
x
1
P
1.0
1.0
(a) Beam
(b) Influence Line Diagram of R
A
(c)
x
Figure 1.1
Figure 1.1(a) shows a beam which is simply supported at A and B and has a span
of 10 m. If we want to find the influence line for the reaction RA at the support A,
we have to place a unit load (e.g. 1 kN) at various points on the beam and to find
the corresponding values of RA. These values are plotted at the points where the
load is placed. For example we know that if the unit load is placed at A, the
reaction RA = 1, and if it is placed at B, RA = 0. Now if the moveable unit load is
placed at any point P on the beam, which is between A and B, at a distance of x
from A, then taking moments of all forces about B, we have
RA 10 – 1× (10 – x) = 0
ּ
⇒ giving
10
10 x
RA
−
= . . . (1.1)
Eq. (1.1), as can be seen, is the equation of a straight line shown in Figure 1.1(b).
Thus, Figure 1.1(b) is the influence line for the reaction RA of the beam.
Similarly, we may draw influence lines for bending moment or shearing forces at
a point on the beam. This will be shown in the next sections.
3. 7
Influence Lines
1.3 PROPERTIES OF INFLUENCE LINES
Here, we shall state certain important properties of an influence line, to show how
they can be utilized successfully in structural engineering.
(a) To obtain the maximum value of a structural quantity due to a single
concentrated moving load, the load should be placed at that point
where the ordinate to the influence line is maximum. (This property is
obvious from the definition.)
(b) The value of a structural quantity due to a single concentrated moving
load is equal to the product of the magnitude of the load and the value
of the corresponding ordinate of the influence line. Thus, in
Figure 1.1(c), the ordinate of the influence line for RA at a distance of
7 m from A is
10
7
10 −
= 0.3.
Now if a load of 20 kN is placed at this point the magnitude of
reaction RA will be 20 × 0.3 = 6 kN. This can be easily verified.
(c) To find the maximum value of a structural quantity due to a uniformly
distributed live load, the load should be placed over all those portions
of the structure where its influence line ordinates have the same sign.
A D
B C
q per unit length
(b) Position of for Maximum Positive Value
udl
A D
B C
q per unit length
(c) Position of for Maximum Negative Value
udl
A
B C
D
(a) Influence Line Diargam
Figure 1.2
For example, Figure 1.2(a) shows the influence line diagram of a
particular quantity for the beam ABCD. The ordinates are positive
between B and C; and are negative between A and B, and again
between C and D. Hence, for maximum positive value of the quantity
the uniformly distributed load should cover the entire portion from B
to C (Figure 1.2(b)). Similarly, for maximum negative value it should
cover the portion AB and CD (Figure 1.2(c)).
(d) The value of a structural quantity due to a uniformly distributed live
load is equal to the product of the loading intensity (q) and the net
area of the influence line diagram under that portion.
Here, in Figure 1.2, the value of the structural quantity due to the
uniformly distributed load covering portion AB only is given by
q × (area of IL diagram over AB as shown shaded).
4. 8
Theory of Structures-I
1.4 INFLUENCE LINE DIAGRAM FOR BENDING
MOMENT (SIMPLY SUPPORTED BEAM)
In the following examples, influence line diagram for bending moment and shear
force of some common structures are shown, and also how they are used in actual
practice.
Example 1.1
Draw the influence line diagram for bending moment at point P of the
simply supported beam AB, shown in Figure 1.3.
P
1
A B
(a) Unit Load between A and P
4 m
x
6 m
A B
P
(b) Unit Load between P and B
x
P″
A'
P'
B'
(c) Influence Line Diagram for M
P
2.4
Figure 1.3
Solution
Case (i) : Load between A and P (Figure 1.3 (a))
If the unit load lies between A and P taking moment of forces to left
of P, then BM at P is
MP = RA·4 – 1 × (4 – x) =
10
6
)
4
(
4
10
10 x
x
x
=
−
−
×
−
This is a straight line A΄P″ (Figure 1.3(c)) with IL ordinate = 0 at A
(where x = 0) and IL ordinate = 2.4 at point P (where x = 4 m).
Case (ii) : Load between P and B (Figure 1.3 (b))
When the load crosses the point P to the right, bending moment at P
is
MP = RA · 4 = 4
10
10
×
− x
5. 9
Influence Lines
This is again a straight line P″ B′ and the influence line ordinate is
10 4
4 2.4
10
−
× = at P; and at B the IL ordinate is 0
4
10
10
10
=
×
−
.
This is shown in Figure 1.3(c).
Example 1.2
Two connected wheels (wheel base = 3 m) cross the beam in Figure 1.4
from left to right. The front wheel is carrying a load of 20 kN and the rear
wheel 10 kN. Find the maximum bending moment at point P due to these
wheels.
A B
F
P
4 m 6 m
3 m
1 m
R
10 kN 20 kN
A' B'
P'
P'’
0.6
2.4
A B
4 m 6 m
3 m 3 m
R
10 kN 20 kN
A' B'
P'’
P'
2.4
F
P
1.2
(a) (b)
Figure 1.4
Solution
The influence line diagram is the most convenient method to solve such
problems. It is obvious that since the maximum ordinate of the IL diagram
is 2.4 (at point P), the maximum value of the bending moment will be
obtained when one of the wheels is placed on this point P. There can be two
possibilities, either the front wheel is at P (Figure 1.4 (a)) or the rear wheel
is at P (Figure 1.4 (b)). Both are discussed below :
Case (i) : Front Wheel at Point P (Figure 1.4(a))
Rear wheel R will be 3 m to left of it (i.e. 4 – 3 = 1 m to right of A).
The ordinate at R (from similar triangles) is equal to 6
.
0
1
4
4
.
2
=
× . Now by
Property (b) of the IL diagrams, the total BM at point P due to the two
wheels will be MP = 20 × 2.4 + 10 × 0.6 = 54 kN m.
Case (ii) : When Rear Wheel is at P (Figure 1.4(b))
The front wheel F will be at F, i.e. 3 m to right of it.
The ordinate at F will be
6
4
.
2
× 3 = 1.2
Hence, BM at P will be MP = 20 × 1.2 + 10 × 2.4 = 48 kN m.
Hence, Case (i) will give the bigger value of bending moment, i.e. as shown
in Figure 1.4(a) and it will be 54 kN m.
This will be the maximum bending moment at P due to the wheels crossing
across the span.
6. 10
Theory of Structures-I
Example 1.3
For the beam in Figure 1.5 if a uniformly distributed load (udl) of 3 kN/m
longer than the span crosses it from left to right, what will be the maximum
bending moment at P?
Solution
P
A'
P'
B'
6 m
4 m
2.4
q = 3 kN/m
(b) ILD for M
P
(a)
3 kN/m
A
B
Figure 1.5
In Figure 1.5, it can be seen that as the influence line diagram for bending
moment at P (MP) is positive over the whole span AB, the moving udl has to
cover the entire span for maximum value.
Hence, by Property (d) of the IL Diagram as stated above the maximum
MP = (Intensity of loading) × (Area of IL Diagram)
= 3
1
2.4 10 36 kNm
2
⎛ ⎞
× × × =
⎜ ⎟
⎝ ⎠
.
Example 1.4
If the uniformly distributed load crossing the span in Figure 1.5 is smaller
than the span, say 4 m long, find the maximum bending moment at P.
P
A'
P'
B'
6 m
4 m
(b) ILD for M
P
(a)
A B
N'
N
M'
M
x (4 – x)
2.4
P
Figure 1.6
7. 11
Influence Lines
Solution
Here, the moving load can cover only a portion of the whole span.
Obviously, the maximum value of MP will occur when the moving load is
passing over the region where the ordinates are largest, that is, near the
point P itself.
Let us assume that the load occupies a position MN covering either side of
P, such that MP = x, then PN = 4 – x (Figure 1.6(b)).
By Property (d), the bending moment at P is given by,
MP = (Intensity of load) × (Hatched area of IL diagram below the load).
Now, the hatched area of the IL diagram is composed of two trapeziums
MM΄P΄P and NN΄P΄P.
Since the ordinate PP΄ = 2.4, by similar triangles
Ordinate MM΄ =
4
4
.
2
× (4 – x) = 0.6 (4 – x) and
Ordinate NN΄ =
6
4
.
2
[6 – (4 – x)] = 0.4 (2 + x)
∴ Area MM΄N΄N = )
4
(
2
)
2
(
4
.
0
4
.
2
2
)
4
(
6
.
0
4
.
2
x
x
x
x
−
+
+
+
−
+
= 6.4 + 1.6x – 0.5x2
∴ MP = (Load intensity) × (Area of IL diagram)
= 3 × (6.4 + 1.6 x – 0.5x2
) . . . (1.2)
Now MP will be maximum when 0
P
dM
dx
=
Differentiating Eq. (1.2), we get,
3 × (1.6 – 0.5 × 2x) = 0
giving x = 1.6 m.
Hence, when the maximum BM at P occurs 1.6 m of the moving load is
towards its left and (4 – 1.6) = 2.4 m is towards its right and the value of the
maximum blending moment will be given from Eq. (1.2) above.
MP = 3 × [6.4 + 1.6 × 1.6 – 0.5 (1.6)2
] = 45.312 kNm.
It is interesting to compare the value of the two end ordinates MM΄ and NN΄
of the influence line diagram when the load occupies the maximum BM
position.
MM΄ = 0.6 (4 – x) = 0.6 (4 – 1.6) = 1.44
NN΄ = 0.4 (2 + x) = 0.4 (2 +1.6) = 1.44
Thus, we see that under the above conditions the value of the influence line
ordinates at the two ends of the loads are equal.
This hints to determine the value of x easily without going through the
process of differentiation etc. For example,
MM΄ = 0.6 (4 – x) and NN΄ = 0.4 (2 + x)
For maximizing the area, we must have MM ′ = NN ′
From the above equation, x = 1.6 m.
And then we can proceed with finding out the areas etc.
8. 12
Theory of Structures-I
1.5 INFLUENCE LINE DIAGRAM FOR SHEARING
FORCE (SIMPLY SUPPORTED BEAM)
Next, we shall study how to draw the influence line diagram for shear force in a
simply supported beam. For illustration we take the same beam and the same
point P as in Example 1.1 (Figure 1.3), for which we now proceed to draw the
shear force influence line diagram.
Example 1.5
Draw the influence line diagram for shear force at point P in the simply
supported beam AB of span 10 m. P is 4 m from the support A.
P
6 m
4 m
(a)
A B
x 1
P
6 m
4 m
(b)
A B
x
A' B'
P'
P''
+ 0.6
– 0.4
P
⊕
(c) ILD for SF at P.
Figure 1.7
Solution
Let us assume that the moving unit load is at a distance x from A. the
reactions
10
10 x
RA
−
= , and
10
x
RB = as determined earlier.
Case (a) : If the unit load is between the points A and P, then considering
forces to left of P,
Shear force at P = RA – 1 =
10
1
10
10 x
x
−
=
−
−
. By our sign convention, a
shear force is negative when the left hand portion of the beam tends to
move downward. Hence, the shear force in this case will be negative and
will depend upon the value of x (i.e. its distance from A). The ordinate of
the diagram will be zero then the load is at A (x = 0) and it will be
9. 13
Influence Lines
4
.
0
10
4
−
=
− when the rolling load is at P (i.e. x = 4). The diagram will be a
straight line A΄P΄.
Case (b) : When the unit load crosses to the right of the point P and lies
between P and B, then considering forces to left of P the shear force at
P = RA =
10
10 x
−
, which is also a straight line P˝ B such that the ordinate at
P (when the unit load has just crossed to right) is equal to
10 4
0.6
10
−
= +
and it is zero when the unit load is at B, ordinate = 0
10
10
10
=
−
.
Thus, we see that the shear force influence line consists of two parts : the
part between A and P has negative ordinates and the part between P and B
has positive ordinates, showing that the SF changes sign as the unit rolling
load crosses the point P.
Example 1.6
Find the maximum positive and negative shear force at point P in beam of
Figure 1.8 which is crossed by two connected wheel loads 3 m aparts
moving from right to left. The front wheel carries a load of 20 kN and the
rear wheel 10 kN.
P
6 m
4 m
A B
3 m
10 kN 20 kN
–0.1
A' B'
0.6
P'
–0.4
(a)
Q
A B
(b)
(c)
A' B'
+ 0.6
P'
+ 0.3
– 0.1
A' B'
+ 0.6
P'
Q’
P
10 kN 20 kN
3 m
R
P
10 kN 20 kN
3 m
R
P
Figure 1.8
10. 14
Solution
Theory of Structures-I
Maximum Negative SF
For maximum negative shear force at P, the heavier wheel (20 kN)
should be placed just to the left of P, the other wheel (10 kN) will
then lie at Q which is 3 m to left of P (Figure 1.8(a)). The ordinate of
IL diagram at P is – 0.4 and that at Q is – 0.1 (by similar triangles).
Hence, maximum negative shear force at P,
VP = 20 × (– 0.4) + 10 (– 0.1) = – 9 kN.
Maximum Positive SF
Here, two cases need to be examined
(a) When the heavier wheel 20 kN is just crossed to right of
P, and the lighter wheel (10 kN) is at Q 3 m behind it
(Figure 1.8(b)). Hence the shear force
VP = 20 × (+ 0.6) + 10 × (– 0.1) = 11 kN.
(b) When the lighter wheel (10 kN) has just crossed to right
of P and the front wheel (20 kN) is 3 m to right of it at R
as in Figure 1.8 (c).
The ordinate of IL diagram at P is + 0.6 and at R it is + 0.3.
Hence, shear force VP = 20 × (+ 0.3) + 10 × (+ 0.6) = 12 kN.
The second position gives the higher value, hence, the maximum
positive SF will be 12 kN.
SAQ 1
(a) Draw the influence line diagram for the bending moment at point P of
the simply supported beam AB in Figure 1.9.
6 m
3 m
A B
P
Figure 1.9
Using this diagram find the maximum bending moment at P, due to
following moving loads
• A uniformly distributed load of 4 kN/m longer than the
span.
• A uniformly distributed load of 4 kN/m of 3 m length.
• Two connected wheel loads of 10 kN each, 3 m apart.
(b) Draw the influence line for shear force at the same point P of the
above beam (Figure 1.9).
Determine the maximum shear force at P for the same load
combinations as given in SAQ 1(a) above.
11. 15
Influence Lines
1.6 INFLUENCE LINE DIAGRAM FOR A
CANTILEVER
In this section, we shall explain how to draw the influence line diagrams for the
support reactions and BM and SF at any point in a cantilever beam. You
should verify all the steps yourself and try to solve the numerical examples given
in the SAQ below which is based on this diagram.
In Figure 1.10, the cantilever whose free end is A and fixed end B has a span of L.
(a) Influence Line Diagram for Support Reactions
If a unit load moves from A to B along the beam, the vertical reaction
RB at B remains constant and is equal to 1.0. However, the fixed end
moment M
B
B = – 1 × (L – x) = – (L – x) and hence the influence line
coordinates for MBB varies from – L at A to 0 at B. (You should
carefully observe that it is just opposite to the BM diagram due to an
unit load at A. Why?)
The IL Diagrams are shown at Figures 1.10(b) and (c).
L
a
P
A B
x 1
MB
RB
A'
A'
B'
B'
P’
P’
B'
B'
1.0
– L
⊕
– a
1.0
(e) ILD for Shear Force VP
(d) ILD for Bending Moment MP
(c) ILD for Support Moment MB
(b) ILD for Reaction RB
(a) Cantilever with Rolling Unit Load
Figure 1.10
(b) Influence Line Diagram for Bending Moment at P
Next, we shall draw the influence line diagram for bending moment
(MP) at a point P which is at a distance ‘a’ from end A :
When the load is between A and P the BM at P is
12. 16
MP = – 1 × (a – x) = – (a – x)
Theory of Structures-I
Hence, the ordinate of the IL diagram is – a when x = 0 (at point A)
and it is 0 when x = a (at point P).
As soon as the load crosses over P to the right hand side the BM at
P = 0 and remains as such till the end, as shown in Figure 1.10(d).
(c) Influence Line Diagram for Shear Force at P
Next, we draw the influence line for shear force (VP) at P :
When the load is between A and P, the shear force (considering loads
to left of P) is VP = – 1 (downwards ∴ negative)
As soon as the load crosses P to the right of P, there is no load to left
of it, hence VP = 0. This is shown in Figure 1.10(e).
SAQ 2
A cantilever 6 m span is free at end A and fixed at B. Using influence line
diagrams for a point P, 3 m from free end A, find the maximum SF and BM
at P due to the following moving loads :
(a) A uniformly distributed load of 3 kN/m longer than the span.
(b) A set of 3 connected wheel loads, shown in Figure 1.11, moving
from left to right.
10 kN 10 kN 30 kN
1 m
1 m
Figure 1.11
1.7 SUMMARY
In this unit, you have learnt how to find the values of a structural quantity (BM,
SF, axial force support reactions etc.) for a unit moving load by means of
influence line diagrams. You have, thus, learnt the properties of the influence line
diagram and its uses.
You have also learnt to draw the IL diagrams for support reactions, BM and SF at
any point for a simply supported beam; and a cantilever.
In the next unit, we will study theorem of three moments applied to fixed and
continuous beams.
13. 17
Influence Lines
1.8 ANSWERS TO SAQs
SAQ 1
(a)
P
A B
3 m
+ 2.0
+ 2.0
+ 1.0
+ 2.0
4 kN/m
M′
M
(i)
(ii)
(iii)
N
N′
4 kN/m
3 x
−
3 x
−
x 3 + x
3 m 3 m 3 m
10 kN 10 kN
4/3 4/3
ILD for MP
6 m
+ 2.0
(i) Position of moving load for maximum Mp
(max) (Area of ) (Intensity of loading)
P
M ILD
= ×
1
2.0 9 4 36 kNm
2
⎛ ⎞
= × × × =
⎜ ⎟
⎝ ⎠
(ii) Position of load for maximum MP
Ordinate MM′ = Ordinate NN′
2 2
(3 ) (3 )
3 6
x x
− = +
giving x = 1 m and ordinates = 4/3
∴ (max) (Shaded area) × (Load intensity)
P
M =
2
4
2
3 3 4 5 m 4 kN/m 20 kNm
2
⎛ ⎞
+
⎜ ⎟
= × × = × =
⎜ ⎟
⎜ ⎟
⎜ ⎟
⎝ ⎠
14. 18
(iii) Position of connected loads for maximum MP
(max) 10 2 10 1 30 kNm
P
M = × + × =
Theory of Structures-I
(b)
3 m
3 m
10 kN
10 kN
3 m
(i)
(ii)
(iii)
3 m
+ 2/3
+ 2/3
+ 1/3
+ 2/3
− 1/3
− 1/3
− 1/3
1/3
6 m
3 m 3 m
3 m 3 m
A
A
A
B
B
B
Q
P
P
(i) For udl
VP (+) is max when PB is covered
(max)
1 2
6 4 8 kN
2 3
p
V
⎛ ⎞
= × × × = +
⎜ ⎟
⎝ ⎠
VP (–) is max when AP is covered only
(max)
1 1
3 4 2 kN
2 3
p
V
⎛ ⎞
= − × × × = −
⎜ ⎟
⎝ ⎠
(ii) For udl of 3 m length PQ is covered
(max) Area × Intensity
p
V =
1 2
2 3 3 4 6 k
2
⎛ ⎞
×
⎜ ⎟
= × × =
⎜ ⎟
⎜ ⎟
⎜ ⎟
⎝ ⎠
N
(iii) For two connected conc. loads
(max)
2 1
10 10 10 kN
3 3
p
V = × + × =
SAQ 2
15. 19
Influence Lines
P
A
A
A
B
P
P
B
B
3 m
3 m 3 m
3 m
3 m
ILD for MP
ILD for VP
3 m
– 3.0
+ 1.0
Case (a)
(max)
1
3 3 3 13.5 kNm
2
P
M
⎛ ⎞
= × × × = −
⎜ ⎟
⎝ ⎠
(max) (1 3) 3 9 kN
P
V = × × =
Case (b)
Considering the following three cases for MP
P
A
A
A
B
P
P
B
B
1 m
10 kN
10 kN
10 kN
30 kN
30 kN
30 kN
1 m
1 m 1 m
2 m 3 m
3 m
3 m
3 m
– 3
– 3
– 3
– 1
– 2
– 2
In the first case, 10 3 10 2 30 1 80 kNm
P
M = − × − × − × = −
In the second case, 10 3 30 2 90 kNm
P
M = − × − × = −
In the third case, 30 3 90 kNm
P
M = − × = −
So the second and third cases produce maximum BM of – 90 kNm.
For SF, as the diagram is rectangle, all the loads have the same result
placed anywhere between A and P.
∴ (max) 10 1 10 1 30 1 50 kN
P
V = × + × + × =