Animated Image Display and Scaling
•
0 likes•18 views

The Ring programming language version 1.6 book - Part 67 of 189

Recommended
Recommended
More Related Content
What's hot
What's hot (20)
Similar to Animated Image Display and Scaling
Similar to Animated Image Display and Scaling (18)
More from Mahmoud Samir Fayed
More from Mahmoud Samir Fayed (20)
Recently uploaded
Recently uploaded (20)
Animated Image Display and Scaling
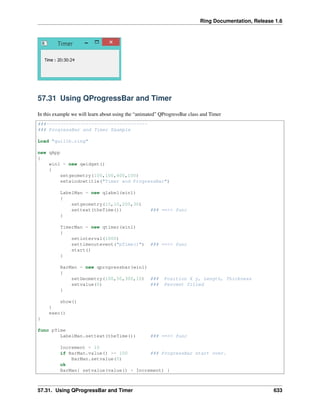
- 1. Ring Documentation, Release 1.6 57.31 Using QProgressBar and Timer In this example we will learn about using the “animated” QProgressBar class and Timer ###------------------------------------ ### ProgressBar and Timer Example Load "guilib.ring" new qApp { win1 = new qwidget() { setgeometry(100,100,400,100) setwindowtitle("Timer and ProgressBar") LabelMan = new qlabel(win1) { setgeometry(10,10,200,30) settext(theTime()) ### ==>> func } TimerMan = new qtimer(win1) { setinterval(1000) settimeoutevent("pTime()") ### ==>> func start() } BarMan = new qprogressbar(win1) { setGeometry(100,50,300,10) ### Position X y, Length, Thickness setvalue(0) ### Percent filled } show() } exec() } func pTime LabelMan.settext(theTime()) ### ==>> func Increment = 10 if BarMan.value() >= 100 ### ProgressBar start over. BarMan.setvalue(0) ok BarMan{ setvalue(value() + Increment) } 57.31. Using QProgressBar and Timer 633
- 2. Ring Documentation, Release 1.6 Func theTime return "Time : " + Time() 57.32 Display Scaled Image using QLabel In this example we will learn about displaying and scaling an image so that it looks “animated” using the QLabel widget Load "guilib.ring" #---------------------------------------------------- # REQUIRES: image = "C:RINGbinstock.jpg" # imageStock: start dimensions for growing image imageW = 200 ; imageH = 200 ; GrowBy = 4 ###---------------------------------------------------- ### Window and Box Size dimensions WinWidth = 1280 ; WinHeight = 960 BoxWidth = WinWidth -80 ; BoxHeight = WinHeight -80 ###---------------------------------------------------- New qapp { win1 = new qwidget() { setgeometry(50,50, WinWidth,WinHeight) setwindowtitle("Animated Image - Display Image Scaled and Resized") imageStock = new qlabel(win1) { image = new qpixmap("C:RINGbinstock.jpg") AspectRatio = image.width() / image.height() imageW = 200 imageH = imageH / AspectRatio ### Size-H, Size-V, Aspect, Transform setpixmap(image.scaled(imageW , imageH ,0,0)) PosLeft = (BoxWidth - imageW ) / 2 PosTop = (BoxHeight - imageH ) / 2 57.32. Display Scaled Image using QLabel 634
- 3. Ring Documentation, Release 1.6 setGeometry(PosLeft,PosTop,imageW,imageH) } TimerMan = new qtimer(win1) { setinterval(100) ### interval 100 millisecs. settimeoutevent("pTime()") ### ==>> func start() } show() } exec() } ###------------------------------------------------------ ### Fuction TimerMan: calling interval 100 milliseconds func pTime ### Stop Timer when image is size of Window area if imageW > BoxWidth TimerMan.stop() imageStock.clear() ### Will clear the image ok ### Grow image imageW += GrowBy imageH = imageW / AspectRatio ### Scaled Image: Size-H, Size-V, Aspect, Transform imageStock.setpixmap(image.scaled(imageW , imageH ,0,0)) ### Center the image PosLeft = (WinWidth - imageW ) / 2 PosTop = (WinHeight - imageH ) / 2 imageStock.setGeometry(PosLeft,PosTop,imageW,imageH) 57.33 Using the QFileDialog Class Example Load "guilib.ring" New qapp { win1 = new qwidget() { setwindowtitle("open file") setgeometry(100,100,400,400) new qpushbutton(win1) { setgeometry(10,10,200,30) settext("open file") setclickevent("pOpen()") } show() } 57.33. Using the QFileDialog Class 635
- 4. Ring Documentation, Release 1.6 exec() } Func pOpen new qfiledialog(win1) { cName = getopenfilename(win1,"open file","c:","source files(*.ring)") win1.setwindowtitle(cName) } The application during the runtime 57.34 Drawing using QPainter In this example we will learn about drawing using the QPainter class Load "guilib.ring" New qapp { win1 = new qwidget() { setwindowtitle("Drawing using QPainter") setgeometry(100,100,500,500) label1 = new qlabel(win1) { setgeometry(10,10,400,400) settext("") } new qpushbutton(win1) { setgeometry(200,400,100,30) settext("draw") setclickevent("draw()") } show() } 57.34. Drawing using QPainter 636
- 5. Ring Documentation, Release 1.6 exec() } Func draw p1 = new qpicture() color = new qcolor() { setrgb(0,0,255,255) } pen = new qpen() { setcolor(color) setwidth(10) } new qpainter() { begin(p1) setpen(pen) drawline(500,150,950,450) drawline(950,550,500,150) endpaint() } label1 { setpicture(p1) show() } The application during the runtime 57.34. Drawing using QPainter 637
- 6. Ring Documentation, Release 1.6 57.35 Printing using QPrinter In this example we will learn how to print to PDF file using QPrinter Load "guilib.ring" new qApp { win1 = new qwidget() { setwindowtitle("Printer") setgeometry(100,100,500,500) myweb = new qwebview(win1) { setgeometry(100,100,1000,500) loadpage(new qurl("http://google.com")) } new qpushbutton(win1) { setGeometry(20,20,100,30) settext("Print") setclickevent("print()") } showmaximized() 57.35. Printing using QPrinter 638
- 7. Ring Documentation, Release 1.6 } exec() } func print printer1 = new qPrinter(0) { setoutputformat(1) # 1 = pdf setoutputfilename("test.pdf") painter = new qpainter() { begin(printer1) myfont = new qfont("Times",50,-1,0) setfont(myfont) drawtext(100,100,"test") printer1.newpage() drawtext(100,100,"test2") endpaint() } } printer1 = new qPrinter(0) { setoutputformat(1) setoutputfilename("test2.pdf") myweb.print(printer1) myweb.show() } system ("test.pdf") system ("test2.pdf") 57.36 Creating More than one Window The next example demonstrates how to create more than one window Load "guilib.ring" app1 = new qapp { win1 = new qwidget() { setwindowtitle("First") setgeometry(100,100,500,500) new qpushbutton(win1) { setgeometry(100,100,100,30) settext("close") setclickevent("app1.quit()") } new qpushbutton(win1) { setgeometry(250,100,100,30) settext("Second") setclickevent("second()") } showmaximized() } exec() } 57.36. Creating More than one Window 639
- 8. Ring Documentation, Release 1.6 func second win2 = new qwidget() { setwindowtitle("Second") setgeometry(100,100,500,500) setwindowflags(Qt_dialog) show() } The application during the runtime 57.37 Playing Sound Example: Load "guilib.ring" new qapp { win1 = new qwidget() { setwindowtitle("play sound!") show() } new qmediaplayer() { setmedia(new qurl("footstep.wav")) setvolume(50) play() } exec() } 57.38 Using the QColorDialog Class Example: 57.37. Playing Sound 640
- 9. Ring Documentation, Release 1.6 Load "guilib.ring" oApp = new myapp { start() } Class MyApp oColor win1 Func start myapp = new qapp win1 = new qMainWindow() { setwindowtitle("Color Dialog") setgeometry(100,100,400,400) } new qpushbutton(win1) { setgeometry(10,10,100,30) settext("Get Color") setclickevent("oApp.pColor()") } win1.show() myapp.exec() Func pColor myobj = new qcolordialog() aColor = myobj.GetColor() r=acolor[1] g=acolor[2] b=acolor[3] win1.setstylesheet("background-color: rgb("+r+", " + g+ "," + b + ")") The application during the runtime 57.38. Using the QColorDialog Class 641
- 10. Ring Documentation, Release 1.6 57.39 Using qLCDNumber Class In this example we will learn about using the qLCDNumber class Load "guilib.ring" New qApp { win1 = new qWidget() { setwindowtitle("LCD Number") setgeometry(100,100,250,120) new qLCDNumber(win1) { setgeometry(10,10,100,40) display(100) } new qLCDNumber(win1) { setgeometry(10,60,100,40) display(80) } show() } exec() } The application during the runtime 57.40 Movable Label Example Load "guilib.ring" new qApp { win1 = new qWidget() { 57.39. Using qLCDNumber Class 642