Programming Without Coding Technology (PWCT) - Timer control
•
0 likes•124 views

This document describes how to use the timer control in an application. It outlines the steps to: 1. Add a timer component to a window and set its properties 2. Define a procedure called "mytimer" to get the system time and display it in a label 3. The application runtime will display the constantly updating system time in the label, updated by the timer.

Recommended
Recommended
More Related Content
What's hot
What's hot (20)
Similar to Programming Without Coding Technology (PWCT) - Timer control
Similar to Programming Without Coding Technology (PWCT) - Timer control (14)
More from Mahmoud Samir Fayed
More from Mahmoud Samir Fayed (20)
Recently uploaded
Recently uploaded (20)
Programming Without Coding Technology (PWCT) - Timer control
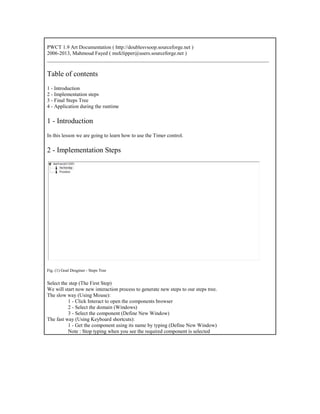
- 1. PWCT 1.9 Art Documentation ( http://doublesvsoop.sourceforge.net ) 2006-2013, Mahmoud Fayed ( msfclipper@users.sourceforge.net ) _____________________________________________________________________________________ Table of contents 1 - Introduction 2 - Implementation steps 3 - Final Steps Tree 4 - Application during the runtime 1 - Introduction In this lesson we are going to learn how to use the Timer control. 2 - Implementation Steps Fig. (1) Goal Desginer - Steps Tree Select the step (The First Step) We will start now new interaction process to generate new steps to our steps tree. The slow way (Using Mouse): 1 - Click Interact to open the components browser 2 - Select the domain (Windows) 3 - Select the component (Define New Window) The fast way (Using Keyboard shortcuts): 1 - Get the component using its name by typing (Define New Window) Note : Stop typing when you see the required component is selected
- 2. Fig. (2) Component Browser – Select the component (Define New Window) After selecting the component click Ok or press ENTER Fig. (3) Interaction page - Set the properties and enter the required data as in the image above
- 3. Fig. (4) Form Designer Fig. (5) Goal Desginer - Steps Tree Select the step (Window Controls) We will start now new interaction process to generate new steps to our steps tree. The slow way (Using Mouse): 1 - Click Interact to open the components browser 2 - Select the domain (Controls) 3 - Select the component (Label) The fast way (Using Keyboard shortcuts): 1 - Get the component using its name by typing (Label) Note : Stop typing when you see the required component is selected
- 4. Fig. (6) Component Browser – Select the component (Label) After selecting the component click Ok or press ENTER Fig. (7) Interaction page - Set the properties and enter the required data as in the image above
- 5. Fig. (8) Form Designer Fig. (9) Goal Desginer - Steps Tree Select the step (Window Controls) We will start now new interaction process to generate new steps to our steps tree. The slow way (Using Mouse): 1 - Click Interact to open the components browser 2 - Select the domain (Controls) 3 - Select the component (Timer) The fast way (Using Keyboard shortcuts): 1 - Get the component using its name by typing (Timer) Note : Stop typing when you see the required component is selected
- 6. Fig. (10) Component Browser – Select the component (Timer) After selecting the component click Ok or press ENTER Fig. (11) Interaction page - Set the properties and enter the required data as in the image above
- 7. Fig. (12) Form Designer Fig. (13) Goal Desginer - Steps Tree Select the step (Procedures) We will start now new interaction process to generate new steps to our steps tree. The slow way (Using Mouse): 1 - Click Interact to open the components browser 2 - Select the domain (Structure Programming) 3 - Select the component (Define Procedure) The fast way (Using Keyboard shortcuts): 1 - Get the component using its name by typing (Define Procedure) Note : Stop typing when you see the required component is selected
- 8. Fig. (14) Component Browser – Select the component (Define Procedure) After selecting the component click Ok or press ENTER Fig. (15) Interaction page - Set the properties and enter the required data as in the image above
- 9. Fig. (16) Goal Desginer - Steps Tree Select the step (Start Here) We will start now new interaction process to generate new steps to our steps tree. The slow way (Using Mouse): 1 - Click Interact to open the components browser 2 - Select the domain (Classes) 3 - Select the component (Label Class) The fast way (Using Keyboard shortcuts): 1 - Get the component using its name by typing (Label Class) Note : Stop typing when you see the required component is selected Fig. (17) Component Browser – Select the component (Label Class) After selecting the component click Ok or press ENTER
- 10. Fig. (18) Interaction page - Set the properties and enter the required data as in the image above Fig. (19) Interaction page - Set the properties and enter the required data as in the image above
- 11. Fig. (20) Interaction page - Set the properties and enter the required data as in the image above Fig. (21) Goal Desginer - Steps Tree Select the step (Start Here) We will start now new interaction process to generate new steps to our steps tree. The slow way (Using Mouse): 1 - Click Interact to open the components browser 2 - Select the domain (Variables) 3 - Select the component (Get Time) The fast way (Using Keyboard shortcuts): 1 - Get the component using its name by typing (Get Time) Note : Stop typing when you see the required component is selected
- 12. Fig. (22) Component Browser – Select the component (Get Time) After selecting the component click Ok or press ENTER Fig. (23) Interaction page - Set the properties and enter the required data as in the image above
- 13. Fig. (24) Goal Desginer - Final Steps Tree 3 - Final Steps Tree The First Step Define New Window ( win1 ) , Title : "Window Title" Window Events Window Properties Window Controls Define Label ( lbl1 ) , Caption : "" Label Events Label Properties Define Timer ( Timer1 ) End Of Window Activate window Procedures Define Procedure mytimer Start Here thetime = System Time win1.lbl1.Value := thetime End of Procedure 4 - Application during the runtime
- 14. Fig. (25) Application during the runtime