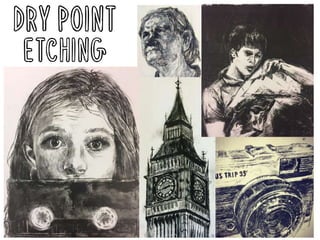
2. Etching has been around for nearly 500
years. It is a type of engraving, where ink
is forced through tiny lines and grooves
that have been applied to a copper plate
(or in our case plastic). A wet piece of
paper is laid onto the plate and forced
through a roller, which then creates a
print.
Originally etching was used to decorate
armour in Medieval times. Decorated
parts of the armour were filled in to give
the designs a contrast. Etching is the
print-making technique most closely
associated with drawing.
3. Dry point etching is the modern
equivalent to etching. It is called dry
point because you create your
image by scratching into a surface
with a dry needle.
4. 1. Draw into your plastic with a sharp
needle. This is called intaglio which
means cutting, carving or engraving
into a flat surface. You can use lots of
different mark-making techniques with
the needle to create different tones
and textures.
5. 2. You can create
rubbings on your
plastic from
anything that has a
raised surface. You
create rubbings by
using fine
sandpaper.
3. You can cut
out sections of
your plastic to
create white
spaces and cut
out your etchings
and overlap them
with other ones.
6. 4. You can also stick brown tape and
masking tape onto your etching to
create interesting textures like the
examples below…
7. 5. When applying the etching ink
it is recommended that you wear
plastic gloves. First apply a thin
layer of ink with a piece of
cardboard. Drag it over your
plastic.
6. Use a piece of fabric or tissue
and push down and turn the ink.
You want to make sure all your
scratches are loaded with ink.
7. You can use newspaper or
tissue paper to clean all ink off
certain areas of your plastic.
8. 8. Spray cartridge paper evenly with
water on both sides. Use paper
fingers to pick up your paper so
your don’t get any ink on it.
9. Sandwich your plastic (ink side
up) with your wet paper on top
between newspaper and put
through the printing press.
10. Place your finished etching
between paper and something
heavy to make sure it dries flat.
9.
10.
11.
12.
13.
14. Once your etching is
printed you can add further
detail such as adding
watercolour!
15. Once your etching is
printed you can add further
detail such as adding
brusho!
16. Deadlines:
11C: 7th October
11D: 8th October
1. You must create a double page showing
different ways you can create effects with
etching. The page should well presented
and clearly explained and annotated
2. Research an etching artist and print
images and facts (there is a Pinterest
album)