
Recommended
Recommended
More Related Content
Similar to Replace Inner Screen on Water Damaged iPad Air in Under 40 Steps
Similar to Replace Inner Screen on Water Damaged iPad Air in Under 40 Steps (20)
More from diyfix phone
More from diyfix phone (20)
Recently uploaded
Recently uploaded (20)
Replace Inner Screen on Water Damaged iPad Air in Under 40 Steps
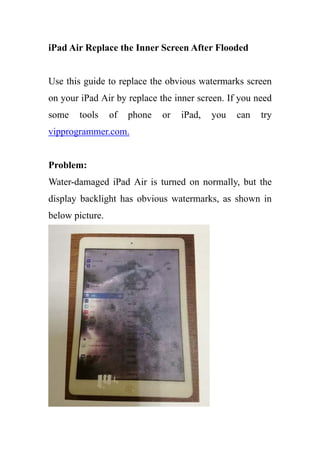
- 1. iPad Air Replace the Inner Screen After Flooded Use this guide to replace the obvious watermarks screen on your iPad Air by replace the inner screen. If you need some tools of phone or iPad, you can try vipprogrammer.com. Problem: Water-damaged iPad Air is turned on normally, but the display backlight has obvious watermarks, as shown in below picture.
- 2. Solution: 1. Prepare tools: heating platform, Silver Hawk blade and Opening Pry Tool and so on. 2. Set preheater to 80℃.The surface of preheater is aluminium sheet. I place a piece of A4 paper on it to avoid hurting the rear cover, as shown in below picture 3. Open preheater and put iPad Air on it with metal cover downwards and touch screen upwards, as shown in below picture. As iPad Air employ aluminium cover, I can heat it directly. The rear cover transmits the heat to touch screen glued places, which reduces the hurt to
- 3. LCD. Metal cover can store some heat, which also can reduce the heating times. 4. When temperature reaches 80℃, I can use Silver Hawk blade to pry touch screen from side face, as shown in below picture. Pry a 1mm gap and plug the transparent plastic film to cut the glue between touch screen and rear cover, as shown in below picture. The advantage of transparent plastic film is softness, so it will not scratch the ink layer of touch screen and can reduce the damage to flex cable if the maintenance man is not familiar with the structure of iPad.
- 4. 5. When use transparent plastic film to cut the glue, we have to notice the location of flex cable. When transparent plastic film reaches flex cable, we have to stop and lift the cut part. Use SilverHawk blade to handle the glue at flex cable, as shown in below picture.
- 5. 6. After lifting touch screen, remove LCD screws. The location of screws is shown in below picture. 7. After removing LCD screws, lift screen and remove the fixed iron plate used to fix LCD touch flex cable, as shown in below picture. The fixed iron plate is stuck with LCD flex cable. We have to be careful when removing it to avoid breaking the flex cable.
- 6. 8. After removing the faulty screen, assemble a workable screen to test functions. After making sure that display and touch functions are normal, lock fixed iron plate and fix the LCD screws. 9. Use non-dust cloth to clean the surface of LCD and touch screen. Besides, clean the remaining glue on touch screen. If during the teardown process, the frame glue is not deformed too much. We can reuse it, as shown in below picture.
- 7. 10. After finishing cleaning frame glue, assemble touch screen and rear cover. Put them on pre-heater to heat. Soften frame glue to increase the stickiness. During the heating process, I use pad pasting roller to tighten the margin area, as shown in below picture. 11. After making sure that there is no gap, put iPad on table with screen downwards and Put something heavy on it until it cools down, as shown in below picture.
- 8. When it cools down, the replacement of screen is finished. Notes: (1)When heating, the temperature should not be over 90 ℃, or it will damage battery or LCD backlight. (2)When using blade to pry screen, mind the strength. And if the temperature is not enough, it is hard to pry a gap. If in that case, we have to keep heating. (3)Before cut glue by plastic film, if you meet the machine that you are not familiar with and do not know where the flex cable is, you have to watch the online video to learn about the place of flex cable. During the cutting process, if you meet a sudden large resistance, do not increase you strength to keep cutting because you
- 9. may meet the flex cable. (4)When cleaning LCD and touch screen, you have to make sure that there is not any foreign matters. If after assembling iPad, we find the dust in it, it will be troublesome to reassemble it. (5)Try to use the original glue on screen. As long as the deformation is not too much, we do not change the frame glue, because the replacement glue in market is not as good as the original one.