1. Installing and Configuring NetScaler ADC VPX
10.1
A few weeks ago I wrote a blog about Configuring NetScaler Access Gateway VPX
and Citrix StoreFront. This blog was based on the NetScaler Access Gateway
Enterprise Edition 10.0 with Citrix StoreFront 1.2. Last week Citrix released
NetScaler ADC VPX 10.1 at Synergy 2013. Of course I want to look at it right away.
The first thing that noticed me is the improved interface and the new welcome
wizard (see screenshots below).
I know you can do a lot with the NetScaler but this blog will be limited to upload the
NetScaler VPX to a Citrix XenServer, configure the NetScaler VPX, install the SSL
Certificate, setting up the NetScaler Gateway and finally I will install and configure
the Web Interface on NetScaler.
Before you begin make sure you have Java Runtime installed and that you have a
license file for the NetScaler. The NetScaler needs a SSL certificate, make sure you
can create a key by a CA. For this blog I will use and describe the step for creating
the key by Go Daddy.
Downloading the NetScaler VPX and the Web Interface Components
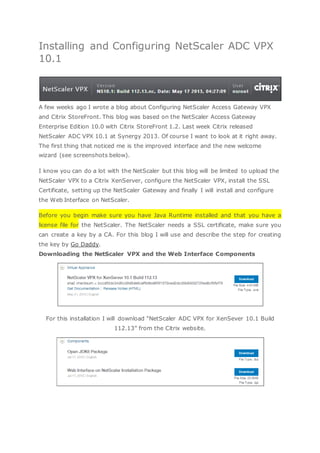
For this installation I will download “NetScaler ADC VPX for XenSever 10.1 Build
112.13” from the Citrix website.
2. For the “Web Interface on NetScaler 10” I will download the “Web Interface on
NetScaler Installation Package” and for the Java part I will use the “Open JDK6
Package”
Uploading the NetScaler VPX to the XenServer
In Citrix XenCenter, open the File menu and choose the option Import…
Browse to the NetScalerVDX and click Next
7. Start the NetScaler and go to the Console tab of the virual machine (XenCenter).
Enter the desiredIP Adress (this will be the management interface IP address a.k.a.
NSIP), Netmask and Gatewayaddress.
After entering all the network information there should be a menu to appear, but in
this version of to the NetScaler it is not the case. From earlier versions I know
option 4 is “Save and Quit”, so type in number 4 and hit Enter
8. After rebooting the Netscaler, open Internet Explorer and enter the NSIP
address (management interface IP address). Login with User Name; nsroot and
Password; nsroot
9. The new Welcome screen appears. Fill in the Subnet IP Address (will be used to
connect to the resource servers), the Hostname and the DNS server. Select the
correct time zone and optionally change the administrator password.
Click Continue.
11. Select the license file uploaded in the previous step and click Continue
12. Click Yes to reboot the NetScaler
Installing the SSL Certificate
On the Configuration tab go to the Traffic Management > SSL menu, on the
right side of the screen click on Create RSA Key
13. Fill in the following information;
Key Filename: “name”.key, anything you like
Key Size (bits): 2048
Public Exponent Value: F4
Key Format: PEM
PEM Encoding Algorithm: DES3
PEM Passphrase: A password you like
Verify Rassphrase: Same as above
Click OK and then Close
14. The next step is to create a request that needs to send over to the CA. On the right
side of the screen click Create CSR (Certificate Signing Request)
15. Fill in the following information;
Request File Name: “name”.REQ, anything you like
Key File Name: Browse to the .KEY file you just created
Key Format: PEM
PEM Passphrase (For Encrypted Key): The password you specified in the
previous step
Country: Your Country
Organization Name: The name of your organization
State or Province: You State or Province
Common Name: This is the address the users will type in their browsers
Challenge Password: A password you like
Click OK and then Close
16. The .REQ file needs to be download for importing it to the CA. Go to “Manage
Certificates / Keys / CSRs”
Select the .REQ file and click Download. Click on Browse to give a “Save in”
location, click onDownload and then Close.
17. Open the .REQ file in Notepad and copy all the text. Go to your CA (in my case Go
Daddy) to create the key or re-key an existing certificate by pasting the text from
the .REQ file.
After creating the certificate, download it. Select IIS7 as server type.
After downloading the certificate, go back to “Manage Certificates / Keys /
CSRs” under the SSLmenu of the NetScaler and Upload the .crt file.
18. Go to the menu Traffic Management > SSL > Certificates. On the upper right
side on the screen click on Install..
Fill in the following information;
Certificate-Key Pair Name: Any name you want
Certificate File Name: Browse to the .crt file you just uploaded
Key File Name: Browse to the .KEY file created earlier
Password: The password entered when creating the request
Certificate Format: PEM
19. Click on Create and Close
After the installation you can see the status and the number of days the certificate
expires.
Create the NetScaler Gateway Virtual Server
20. On the Configuration tab go to NetScaler Gateway and then on the right site
click on NetScaler Gateway wizard
Click on Next
Fill the IP Address, this is the IP address the outside IP address must point to. Fill
in port number443 and the Virtual Server Name (anything you like). After this
Wizard configure your router and/or firewall to redirect port 443 (and optionally port
80) from outside to this IP address.
21. By Certificate Options choose Use an installed certificate and private key pair.
By Server Certificate choose the certificate installed in the previous step.
Fill in the DNS Server IP Address of your DNS server, leave WINS IP Address
blank. Choose DNS as Name Lookup Priority and click next
22. Choose LDAP as authentication type. By Connection Settings fill in the requested
information as shown in the screenshot above and click on Retrieve Attributes.
Click OK
23. Set Configure Authorization to Allow. Optionally you can enable Port 80 redirection.
Click Next
Select what is applicable and click Next
Click Finish
25. The next step is to configure the LDAP server and LDAP policy and assign it to the
NetScaler Gateway. Go to menu NetScaler Gateway > Policies > Authentication
> LDAP. On the right side of the screen select the Servers tab, and then click Add.
Fill in the following information;
Name: Any name you want
IP Address: The IP address of your AD Domain Controller
Base DN (location of users): Distinguished Name of the domain
Administrator Bind DN: A domain administrator account name
Administrator Password: The password of the domain administrator account
Confirm Administrator Pass: Same as above
Click on Retrieve Attributes
Click OK
27. Go the Policies tab and click Add
Fill in the following information;
28. Name: Any name you want
Server: The LDAP server created in the previous step
Select True value and click Add Expression, then click Create and Close
Go to menu NetScaler Gateway > Virtual Servers, select the server created in
the previous steps and click Open…
29. Go to the Authentication tab and click on Insert Policy to apply the policy created
in the previous step. Click OK
At this moment you can already logon to the NetScaler with the external URL (you
must configured the router to allow the 443 traffic to the Access Gate IP Address).
Installing the Web Interface on NetScaler
Go to menu System > Web interface, on the right side of the screen click on Web
Interface Wizard
30. Click Next
Browse local to the downloaded Web Interface and Java Runtime Tar files. Set
Maximum number of sites to 3 and click Next.
31. Click OK
Select GatewayDirect as Default Access Method, Select the NetScaler Gateway
Vserver and enter the STA’s of your XenApp and/or XenDesktop controllers/brokers.
Click Next.
32. You now have to option to customize the Web Interface Site Appearance, fill in what
you want to customize and click Next
Click Next
33. Click Add
Enter the information of your XenApp Controller or XenDesktop Broker and
click Create and Close(repeat this step if you want to add more XenApp /
XenDesktop farms)
35. Click Exit
Configure the NetScaler to redirect to the Web Interface
Go to menu NetScaler Gateway and on the right side of the screen
click Published application wizard
37. Enter the Web Interface Address “http://127.0.0.1:8080/Citrix/XenApp and fill in the
Single Sign-on Domain. Click Add to add the STA’s of your XenApp server(s) and/or
XenDesktop server(s) in this format: “http(s)://<servername>.<domainname>”. In
previous versions it was needed to add “/scripts/ctxsta.dll” to this path, but with this
version of the NetScaler it’s not needed (In my case).
Click Next
Select “SETVPNPARAMS_POL” and click Next