CONTROL USER MANUAL. PIC 5+ Control for 19 Series Centrifugal Chiller. Original document.pdf
1. C O N T R O L U S E R M A N U A L
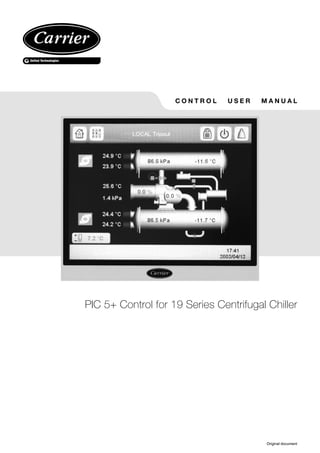
PIC 5+ Control for 19 Series Centrifugal Chiller
Original document
2. 2
CONTENTS
1 - SAFETY CONSIDERATIONS................................................................................................................................................4
1.1 - General Description.................................................................................................................................................................4
1.2 - Avoid Electrocution..................................................................................................................................................................4
2 - GENERAL DESCRIPTION.....................................................................................................................................................4
2.1 - General Description.................................................................................................................................................................4
2.2 - Abbreviations Used..................................................................................................................................................................4
3 - HARDWARE DESCRIPTION................................................................................................................................................5
3.1 - General Description.................................................................................................................................................................5
3.2 - Sensors........................................................................................................................................................................................7
3.3 - Controls Outputs.......................................................................................................................................................................8
3.4 - Connections at the User’s Terminal Block.............................................................................................................................8
3.5 - LEN/CCN Communication Cable Cequirements:..............................................................................................................11
4 - SETTING UP THE USER INTERFACE.............................................................................................................................12
4.1 - User Interface..........................................................................................................................................................................12
4.2 - Web Connection......................................................................................................................................................................12
4.3 - General Features.....................................................................................................................................................................12
4.4 - Welcome Screen......................................................................................................................................................................12
4.5 - Synoptic Screen.......................................................................................................................................................................13
4.6 - Setpoint Screen........................................................................................................................................................................13
4.7 - On/Off Screen..........................................................................................................................................................................13
4.8 - Password/Language Screen....................................................................................................................................................14
4.9 - Menu Screen............................................................................................................................................................................14
4.10 - Configuration Screen............................................................................................................................................................14
4.11 - Time Schedule Screen...........................................................................................................................................................15
4.12 - 19XR6/7 Status Display Screens.........................................................................................................................................15
4.13 - 19XR2~E/V/D Status Display Screens...............................................................................................................................17
4.14 - 19DV Status Display Screens...............................................................................................................................................18
5 - 19 SERIES PIC 5+ CONTROL OPERATION....................................................................................................................20
5.1 - Start/Stop Control ..................................................................................................................................................................20
5.2 - Compressor Run Status..........................................................................................................................................................20
5.3 - Chiller Start-up Sequence......................................................................................................................................................20
5.4 - Chiller Shutdown Sequence...................................................................................................................................................21
5.5 - Oil Lubrication Control..........................................................................................................................................................21
5.6 - Refrigerant Lubrication Control...........................................................................................................................................22
5.7 - Control Point...........................................................................................................................................................................22
5.8 - Capacity Control.....................................................................................................................................................................23
5.9 - Ramp Loading.........................................................................................................................................................................24
5.10 - Surge Correction Control.....................................................................................................................................................24
5.11 - Envelope Control Valve (EC) Control..............................................................................................................................25
5.12 - Economizer Damper Valve Control...................................................................................................................................25
5.13 - Damper Vapor Source..........................................................................................................................................................25
5.14 - Demand Limit........................................................................................................................................................................25
5.15 - Override Control...................................................................................................................................................................26
5.16 - Recycle Control.....................................................................................................................................................................27
5.17 - Running Timers and Counters.............................................................................................................................................27
5.18 - Water Pumps Control...........................................................................................................................................................27
5.19 - Controls Test..........................................................................................................................................................................28
5.20 - Swift Restart..........................................................................................................................................................................29
5.21 - Cooling Tower Control.........................................................................................................................................................29
5.22 - Head Pressure Control.........................................................................................................................................................29
5.23 - Ice Build Option....................................................................................................................................................................29
5.24 - Time Schedule........................................................................................................................................................................29
5.25 - Black Box...............................................................................................................................................................................29
5.26 - Pressure Transducer Calibration.........................................................................................................................................29
5.27 - Temperature Sensor Calibration.........................................................................................................................................29
5.28 - ISM Calibration ....................................................................................................................................................................30
5.29 - Alarm Email...........................................................................................................................................................................30
5.30 - Prognostic...............................................................................................................................................................................30
5.31 - Master Slave Control............................................................................................................................................................31
5.32 - Oil EXV Control...................................................................................................................................................................31
5.33 - Pumpdown/Lockout..............................................................................................................................................................31
5.34 - Trending..................................................................................................................................................................................31
3. 3
5.35 - Electronic Document............................................................................................................................................................32
5.36 - Hydraulic Option Control....................................................................................................................................................32
5.37 - Marine Option.......................................................................................................................................................................33
5.38 - Extended Open Protocol Connector..................................................................................................................................33
5.39 - Purge Control........................................................................................................................................................................33
5.40 - Motor Rotation Check.........................................................................................................................................................34
5.41 - Heat Reclaim UI...................................................................................................................................................................34
5.42 - Onboard Service Log............................................................................................................................................................34
5.43 - Carrier Smart Password........................................................................................................................................................34
5.44 - Heat Exchange Performance Plot.......................................................................................................................................34
6 - DIAGNOSTICS – TROUBLESHOOTING..........................................................................................................................34
6.1 - General.....................................................................................................................................................................................34
6.2 - Displaying Alarms...................................................................................................................................................................34
6.3 - Resetting Alarms.....................................................................................................................................................................34
6.4 - Alarm Codes............................................................................................................................................................................35
6.5 - Event States.............................................................................................................................................................................46
7 - COLOUR TOUCH SCREEN INTERFACE PARAMETER SETTING........................................................................47
7.1 - Main Configuration Menu......................................................................................................................................................47
7.2 - Find and Modify the Unit IP Address..................................................................................................................................47
7.3 - Configuration of the Web Connection..................................................................................................................................47
7.4 - System Configuration ............................................................................................................................................................48
7.5 - Display Configuration (Contrast, Ccreensaver, Calibration).............................................................................................49
7.6 - Languages Available for the Touch Screen Configuration.................................................................................................49
8 - DIAGNOSTICS AND COMMUNICATION PROBLEM TROUBLESHOOTING....................................................50
8.1 - Hardware Problems................................................................................................................................................................50
8.2 - Problems with the Use of the Web Interface.......................................................................................................................50
8.3 - Ethernet/IP Connection.........................................................................................................................................................50
9 - SCREEN STRUCTURE..........................................................................................................................................................53
9.1 - Detailed Menu Description...................................................................................................................................................54
4. 4
1 - SAFETY CONSIDERATIONS
1.1 - General Description
Installation, start-up and servicing of equipment can be
hazardous if certain factors particular to the installation are
not considered: operating pressures, presence of electrical
components and voltages and the installation site (elevated
plinths and built-up up structures). Only properly qualified
installation engineers and highly qualified installers and
technicians,fully trained for the product,and are authorized
to install and start-up the equipment safely. During all
servicing operations all instructions and recommendations
which appear in the installation and service instructions for
the product, as well as on tags and labels fixed to the
equipment, components and accompanying parts supplied
separately, must be read, understood and followed.
-
- Apply all standard safety codes and practices.
-
- Wear safety glasses and gloves.
-
- Use the proper tools to move heavy objects.Move units
carefully and set them down gently.
1.2 - Avoid Electrocution
Only personnel qualified in accordance with IEC
(International Electro technical Commission)
recommendations may be permitted access to electrical
components. It is particularly recommended that all sources
of electricity to the unit should be shut off before any work
is begun. Remember to shut off the main power supply at
the main circuit breaker or isolator.
CAUTION: The equipment uses and emits electromagnetic
signals. Tests have shown that the equipment conforms to
all applicable codes with respect to electromagnetic
compatibility.
RISKOFELECTROCUTION:Evenwhenthemaincircuit
breaker or isolator is switched off, certain circuits may still
be energized, since they may be connected to a separate
power source.
RISK OF BURNS: Electrical currents cause components
to get hot either temporarily or permanently. Handle power
cable, electrical cables and conduits, terminal box covers
and motor frames with great care.
2 - GENERAL DESCRIPTION
2.1 - General Description
PIC 5+ control is a control system for controlling 19 Series
which include both legacy and next generation centrifugal
water-cooled chillers. The control system monitors and
controls all operations of the chiller. The microprocessor
control system matches the cooling or heating capacity of the
chiller to the cooling or heating load while providing state-
of-the-art chiller protection. The system controls cooling or
heating load within the set point plus and minus the dead
band by sensing the water or brine temperature and regulating
the inlet guide vane via a mechanically linked actuator motor
and regulating VFD speed if the compressor is a variable
speed compressor.The guide vane is a variable flow pre-whirl
assembly that controls the refrigeration effect in the cooler
by regulating the amount of refrigerant vapor flow into the
compressor. An increase in guide vane opening increases
capacity.A decrease in guide vane opening decreases capacity.
The microprocessor-based control center protects the chiller
by monitoring the digital and analog inputs and executing
capacity overrides or safety shutdowns, if required.
PIC 5+ control also gives access to a Control Test function
covering all outputs except compressor relay outputs.
2.2 - Abbreviations Used
The following abbreviations are used frequently:
CCN Carrier Comfort Network
CCN mode Operating mode: CCN
ECDW Entering Condenser Water
ECW Entering Chilled Water
EC Envelope Control
LCDW Leaving Condenser Water
LCW Leaving Chilled Water
LED Light Emitting Diode
LEN Local Equipment Network
(internal communication linking the main board to slave boards)
RLA Rated Load Amps
VFD Variable Frequency Drive
ISM Integrated Starter Module
MCB Main Control Board
IOB Input/Output Board
5. 5
3 - HARDWARE DESCRIPTION
3.1 - General Description
The 19 Series PIC 5+ control system consists of one main
control board (SAIA board), an ISM (Integrated Starter
Module) and three basic IOBs (Input/output Board Module)
and optional IO boards per system requirements.All boards
communicate via an internal LEN bus.If a Rockwell or Eaton
Unit Mounted VFD is installed, a LEN-MODBUS protocol
converter module is required.
3.1.1 - Main Control Board
Figure 1: 19 Series PIC 5+ Control Interface
Figure 2: 19 Series PIC 5+ Control Interface
(View From Below)
B
C
D
E
F
Legend
1. Power supply connector (24 VAC)
2. LEN connector
3. CCN connector
4. Ethernet connector
5. USB connector
The main control board is supplied from a 24 VAC supply
referred to earth.
CAUTION: Maintain the correct polarity when connecting
the power supply to the boards; otherwise the boards may
be damaged.
In the event of a power supply interrupt, the unit restarts
automatically without the need for an external command.
However, any faults active when the supply is interrupted
are saved and may in certain cases prevent a circuit or unit
from restarting.
3.1.2 - ISM (Integrated Starter Module)
ISM is motor control module, and it is supplied from an
115VAC supply referred to earth.
ISM input / output description is as below:
DESCRIPTION POINT NAME TYPE PIN NUMBER
STARTER FAULT STARTFLT Dry Contact J2-7,8
COMPRESSOR START CONTACT STAR_AUX Dry Contact J2-9,10
COMPRESSOR RUN CONTACT RUN_AUX Dry Contact J2-11,12
LINE VOLTAGE V1 LN_VOLT1 0-5 Volt J3-1
LINE VOLTAGE V2 LN_VOLT2 0-5 Volt J3-2
LINE VOLTAGE V3 LN_VOLT3 0-5 Volt J3-3
LINE CURRENT C1 LN_AMPS1 0-5 Volt J4-1,2
LINE CURRENT C2 LN_AMPS2 0-5 Volt J4-3,4
LINE CURRENT C3 LN_AMPS3 0-5 Volt J4-5,6
GROUND FAULT PHASE 1 GRFLT_31 0-5 Volt J5-1,2
GROUND FAULT PHASE 2 GRFLT_23 0-5 Volt J5-3,4
GROUND FAULT PHASE 3 GRFLT_12 0-5 Volt J5-5,6
VFD SPEED FEEDBACK VFD_IN 0-10 Volt/ 0-5 Volt J6-1,2
VFD TARGET SPEED VFD_OUT 0-20 mA J8-1,2
COMPRESSOR START RELAY COMP_SR Relay J9-1,2
COMPRESSOR TRANS RELAY TRANS Relay J9-3,4
SHUNT TRIP RELAY TRIPR Relay J9-5,6
6. 6
3.1.3 - IO Board
IO Board is Input/output Board, and it is supplied from a 24VAC supply referred to earth.
For the IOB input / output description, please refer to section 3.4.
3.1.4 - LEN -> MODBUS Protocol Converter
PIC5 Port
LED1
SEND
LED2
RECEIVE
LED3
POWER
LED4
RUNNING
LED5
ERROR
LED6
SEND
LED7
RECEIVE
VFD Port
+
-
GND
+
-
Unused
Unused
GND
24V AC
GND
24V
8
7
6
5
1
ON
RS-232
RS-485
2 Wire
4 Wire
OFF
2
3
4
LEN -> MODBUS Protocol converter is connected between IOBs andVFD.Please refer the decription in the above picture.
7. 7
3.2 - Sensors
Pressure transducers:
Pressure transducers are used to measure and control the pressures in the unit.These electronic sensors deliver 0 to 5 VDC.
The transducers can be calibrated through the controller.The pressure transducers are connected to the IOBs.
Sensor Detailed Description Chiller Configuration
Evaporator pressure transducer This transducer measures the pressure of the evaporator. Standard for 19XR2~E/V/D, 19XR6/7 and 19DV
Condenser pressure transducer This transducer measures the pressure of the condenser Standard for 19XR2~E/V/D, 19XR6/7 and 19DV
Economizer pressure transducer This transducer measures the pressure of the economizer Standard for 19XR6/7
Oil supply pressure transducer This transducer measures the oil pressure in the oil discharge piping Standard for 19XR2~E/V/D and 19XR6/7
Oil sump pressure transducer This transducer measures the Oil pressure in the oil sump Standard for 19XR2~E/V/D and 19XR6/7
Pump Output Pressure This transducer measures the pressure of pump output Standard for 19DV
Bearing Outlet Pressure This transducer measures the pressure of bearing outlet Standard for 19DV
Bearing Inlet Pressure This transducer measures the pressure of bearing inlet Standard for 19DV
Pump Input Pressure This transducer measures the pressure of pump input Standard for 19DV
Evaporator water pressure difference
transducer (Option)
This optional transducer measures the evaporator pressure difference
between entering and leaving water.
Optional for 19XR2~E/V/D, 19XR6/7 and 19DV
Condenser water pressure difference
transducer (Option)
This optional transducer measures the condenser pressure difference
between entering and leaving water.
Optional for 19XR2~E/V/D, 19XR6/7 and 19DV
Evaporator entering water pressure
transducer (Option)
This is an option transducer, and it measures the pressure of evaporator
entering water
Optional for 19XR2~E/V/D, 19XR6/7 and 19DV
Evaporator leaving water pressure
transducer (Option)
This is an optional transducer, and it measures the pressure of
evaporator leaving water
Optional for 19XR2~E/V/D, 19XR6/7 and 19DV
Condenser entering water pressure
transducer (Option)
This is an optional transducer, and it measures the pressure of
condenser entering water
Optional for 19XR2~E/V/D, 19XR6/7 and 19DV
Condenser leaving water pressure
transducer (Option)
This is an optional transducer, and it measures the pressure of
condenser leaving water
Optional for 19XR2~E/V/D, 19XR6/7 and 19DV
Temperature sensors:
The system uses electronic sensors to measure and control the temperatures in the unit.
There are three types of temperature sensors, 5K thermistor, 10K thermistor and RTD (three wirings, MINCO S100308)
based on the IOB channel configurations.
Sensor Detailed Description Chiller Configuration
Entering chilled water temperature sensor measures the temperature of entering evaporator water. Standard for 19XR2~E/V/D, 19XR6/7 and 19DV
Leaving chilled water temperature sensor measures the temperature of leaving evaporator water. Standard for 19XR2~E/V/D, 19XR6/7 and 19DV
Entering condenser water temperature
sensor
measures the temperature of entering condenser water. Standard for 19XR2~E/V/D, 19XR6/7 and 19DV
Leaving condenser water temperature
sensor
measures the temperature of leaving condenser water. Standard for 19XR2~E/V/D, 19XR6/7 and 19DV
Evap refrig liquid temperature sensor measures the temperature of evaporator refrigerant liquid. Standard for 19XR2~E/V/D, 19XR6/7 and 19DV
Comp discharge temperature sensor measures the Compressor discharge temperature. Standard for 19XR2~E/V/D, 19XR6/7 and 19DV
Low speed motor end bearing temperature
sensor
measure the low speed motor end bearing temperature Standard for 19XR6/7
Low speed comp end bearing temperature
sensor
measure the low speed compressor end bearing temperature Standard for 19XR6/7
High speed motor end bearing temperature
sensor
measure the high speed motor end bearing temperature Standard for 19XR6/7
High speed comp end bearing temperature
sensor
measure the high speed compressor end bearing temperature Standard for 19XR6/7
Comp thrust bearing oil temperature sensor Measure the compressor thrust bearing oil temperature Standard for 19XR2~E/V/D
1st Stage Bearing Temp Measure the 1st stage bearing temperature Standard for 19DV
2nd Stage Bearing Temp Measure the 2nd stage bearing temperature Standard for 19DV
Bearing Ref Supply Temp Measure the bearing ref supply temperature Standard for 1-9DV
Motor winding temperature sensors The 3 sensors measure the temperature of compressor motor windings Standard for 19XR2~E/V/D, 19XR6/7 and 19DV
19XR2~E/V/D and 19DV only has 1 sensor.
Oil sump temperature sensor measures the compressor sump temperature of oil Standard for 19XR2~E/V/D and 19XR6/7
Oil supply temperature sensor measures the oil temperature in the oil discharge piping Standard for 19XR2~E/V/D and 19XR6/7
The temperature sensor range is -40 ~ +245°F.
8. 8
3.3 - Controls Outputs
Evaporator / Condenser water pump
The controller can regulate an optional evaporator /
condenser water pump.
Inlet Guide Vane
The Inlet Guide vane (IGV) is used to adjust the refrigerant
vapor flow into compressor to change in the operating
conditions of the machine.To adjust the refrigerant flow, the
guide vane moves open or close to vary the cross-section of
the refrigerant path.The high degree of accuracy with which
the guide vane is positioned ensures that the flow of
refrigerant is precisely controlled.
Economizer Damper valve (used for NGC chiller or the
chiller which is equipped with electrical damper valve)
The economizer damper control positions the economizer
damper valve open or closed to maintain a minimum
refrigerant pressure difference between the evaporator and
economizer.
Damper vapor source solenoid valve (used for 19XRC)
Damper vapor sorce solenoid valve adjusts the pressure
difference between Economizer and Evaporator according
to pressure difference between damper cap and flow passage.
EC Valve
The envelope control function is used to artificially load the
chiller and keep it running under low load conditions or to
prevent surge conditions.Since this also reduces the operating
efficiency of the machine, this is a user selectable option.
VFD
The VFD allows compressor start-up and capacity control
by modifying the motor frequency. The aviator continually
monitors many compressor parameters in order to ensure its
protection.If a problem occurs,the frequency aviator triggers
an alarm and, if necessary, stops the compressor.
3.4 - Connections at the User’s Terminal Block
The components listed below are available at the user’s
terminal block on the IOB. Some of them can only be used
if the unit operates in the remote operating type (Remote
mode).
The following table summarizes the connections at the I/O
boards.
19XR6/7 I/O Mapping:
Description Channel # Board # Option
Entering Chilled
Water Temperature
AI1 IOB1
Leaving Chilled Water
Temperature
AI2 IOB1
Entering Condenser
Water Temp
AI3 IOB1
Leaving Condenser
Water Temp
AI4 IOB1
Evap. Refrigerant
Liquid Temperature
AI5 IOB1
Comp Discharge
Temperature
AI6 IOB1
Condenser Pressure AI7 IOB1
Evaporator Pressure AI8 IOB1
Economizer Pressure AI9 IOB1
FS VFD Load Current AI10 IOB1 For Freestanding VFD
option
Chiller Status
Output mA
AO1 IOB1 User option, 4~20mA
4mA=OFF 8mA=Tripout
12mA=Shutdown
20mA=Running
Oil EXV Output
(4-20ma)
AO2 IOB1 Factory option, 4~20mA
Evap Wate
Flow Switch
DI1 IOB1 User option, dry contact,
“Closed” indicates “FLOW”
Cond Water
Flow Switch
DI2 IOB1 User option, dry contact,
“Closed” indicates “FLOW”
Remote Contact Input DI3 IOB1 User option, dry contact,
“Closed” indicates Turn ON
the chiller
Remote Emergency
Stop Input
DI4 IOB1 User option, dry contact,
“Closed” indicates chiller
emergency stop
Stage 1 IGV Increase DO1 IOB1 Used for ON/OFF type
guide vane actuator
Stage 1 IGV
Decrease
DO2 IOB1 Used for ON/OFF type
guide vane actuator
Chiller Alarm Relay DO3 IOB1 User option, 24VAC output,
recommend with external
power supply
Chiller Alert Relay DO4 IOB1 User option, 24VAC output,
recommend with external
power supply
Motor Winding
Temperature 1
AI1 IOB2
Motor Winding
Temperature 2
AI2 IOB2
Motor Winding
Temperature 3
AI3 IOB2
Oil Supply
Temperature
AI4 IOB2 Factory option
Oil Sump
Temperature
AI5 IOB2
Oil Supply Pressure AI6 IOB2
Oil Sump Pressure AI7 IOB2
Auto Demand Limit
Input
AI8 IOB2 User option, 4~20mA
Refrigerant Leak
Sensor
AI9 IOB2 User option, 4~20mA
Displacement Switch AI10 IOB2
Guide Vane1 Output AO1 IOB2
Damper Valve
Feedback Fully Open
DI1 IOB2
9. 9
Description Channel # Board # Option
Damper Valve
Feedback Fully Close
DI2 IOB2
High Pressure Switch DI3 IOB2
Ice Build Contact DI4 IOB2 User option, dry contact
Oil Heater Relay DO1 IOB2
Oil Pump Relay DO2 IOB2
Economizer Damper
Valve Open
DO3 IOB2
Economizer Damper
Valve Close
DO4 IOB2
Low Speed ME Brg
Temp
AI1 IOB3
Low Speed CE Brg
Temp
AI2 IOB3
High Speed ME Brg
Temp
AI3 IOB3
High Speed CE Brg
Temp
AI4 IOB3
Remote Reset Sensor AI5 IOB3 User option, 5K thermistor
Guide Vane 1 Actual
Pos
AI6 IOB3
Common CHWS
Temp
AI7 IOB3 Used for lead lag option
Auto Water Temp
Reset
AI8 IOB3 User option, 4~20mA
Common CHWR
Temp
AI9 IOB3 Used for lead lag option
Head Pressure
Output
AO1 IOB3 Factory option
EC Valve Feedback
Fully Open
DI1 IOB3 Factory option
EC Valve Feedback
Fully Close
DI2 IOB3 Factory option
Spare Safety DI3 IOB3 User option, dry contact,
normal open
Power Request
Feedback
DI4 IOB3 Marine option
EC Valve Solenoid /
Open
DO1 IOB3 Factory option
EC Valve Close DO2 IOB3 Factory option
Free Cooling Mode DO3 IOB3 Factory option
Power Request
Output
DO4 IOB3 Marine option
Entering Evap Water
Pressure
AI3 IOB4 User option, if IOB4
installed, same as follows
Leaving Evap Water
Pressure
AI4 IOB4 User option
Entering Cond Water
Pressure
AI5 IOB4 User option
Leaving Cond Water
Pressure
AI6 IOB4 User option
Evap Water Flow
Measurement
AI8 IOB4 User option, 4~20mA
Cond Water Flow
Measurement
AI9 IOB4 User option, 4~20mA
Chilled Water Pump
(Variable)
AO1 IOB4 User option, 4~20mA/0~5V
Condenser Water
Pump (Variable)
AO2 IOB4 User option, 4~20mA/0~5V
Tower Fan (Variable) AO3 IOB4 User option, 4~20mA/0~5V
Customer Alert DI3 IOB4 Marine option, dry contact
Free Cooling Start
Switch
DI4 IOB4 Marine option, dry contact
Chilled Water Pump DO1 IOB4 User option
Condenser Water
Pump
DO2 IOB4 User option
Tower Fan High DO3 IOB4 User option
Tower Fan Low DO4 IOB4 User option
19XR2~E/V/D I/O, 19XRC mapping:
Description Channel # Board # Option
Entering Chilled
Water Temperature
AI1 IOB1
Leaving Chilled Water
Temperature
AI2 IOB1
Entering Condenser
Water Temperature
AI3 IOB1
Leaving Condenser
Water Temperature
AI4 IOB1
Evap. Refrigerant
Liquid Temperature
AI5 IOB1
Comp Discharge
Temperature
AI6 IOB1
Condenser Pressure AI7 IOB1
Evaporator Pressure AI8 IOB1
FS VFD Load Current AI10 IOB1 For free standing VFD
Variable Speed Oil
Pump
AO1 IOB1 Factory option
Oil EXV Output AO2 IOB1 Factory option, 4~20mA
EC Valve Output mA AO3 IOB1 Factory option, 4~20mA
Chiller Lockout Input DI1 IOB1 User option, dry contact,
normal open
Spare Safety DI2 IOB1 User option, dry contact,
normal open
Remote Contact Input DI3 IOB1 User option, dry contact,
“Closed” indicates Turn ON
the chiller
Remote Emergency
Stop Input
DI4 IOB1 User option, dry contact,
“Closed” indicates chiller
emergency stop
Stage 1 IGV Increase DO1 IOB1
Stage 1 IGV
Decrease
DO2 IOB1
Chiller Alarm Relay DO3 IOB1 User option, 24VAC output,
recommend with external
power supply
Motor Winding
Temperature 1
AI1 IOB2
Thrust Bearing Oil
Temperature
AI2 IOB2
Oil Sump
Temperature
AI3 IOB2
Oil Supply
Temperature
AI4 IOB2 Factory option
Guide Vane 1 Actual
Pos
AI5 IOB2
Oil Supply Pressure AI6 IOB2
Oil Sump Pressure AI7 IOB2
EC Valve Feedback AI8 IOB2 Factory option, 4~20mA
Motor Winding
Temperature 2
AI9 IOB2 For high voltage motor
Motor Winding
Temperature 3
AI10 IOB2 For high voltage motor
Diffuser Pressure AI11 IOB2 Factory option
Guide Vane1 Output AO1 IOB2 Factory option, for 4~20mA
type guide vane
Diffuser Output AO2 IOB2 Factory option
Evap Water Flow
Switch
DI1 IOB2 User option, dry contact,
“Closed” indicates “FLOW”
Cond Water Flow
Switch
DI2 IOB2 User option, dry contact,
“Closed” indicates “FLOW”
Ice Build Contact DI4 IOB2 User option, dry contact
Oil Heater Relay DO1 IOB2
Oil Pump Relay DO2 IOB2
EC Valve Soleniod /
Open
DO3 IOB2 Factory option
Vapor Source SV DO4 IOB2 Factory option, for 19XRC
Heat Reclaim
Entering Temp
AI3 IOB3 Heat reclaim option
Heat Reclaim Leaving
Temp
AI4 IOB3 Heat reclaim option
Remote Reset Sensor AI5 IOB3 User option, 5K thermistor
10. 10
Description Channel # Board # Option
Auto Water Temp
Reset
AI6 IOB3 User option, 4~20mA
Common CHWS
Temp
AI7 IOB3 Used for lead lag option
Auto Demand Limit
Input
AI8 IOB3 User option, 4~20mA
Common CHWR
Temp
AI9 IOB3 Used for lead lag option
Refrigerant Leak
Sensor
AI10 IOB3 User option, 4~20mA
Chiller Status Output
mA
AO1 IOB3 User option, 4~20mA
4mA=OFF 8mA=Tripout
12mA=Shutdown
20mA=Running
Fire Security Interlock DI1 IOB3 User option, dry contact,
normal open
Customer Alert DI2 IOB3 Marine option, dry contact
Free Cooling Start
Switch
DI3 IOB3 Marine option, dry contact
Power Request
Feedback
DI4 IOB3 Marine option
Chiller Alert Relay DO2 IOB3 User option, 24VAC output,
recommend with external
power supply
Free Cooling Mode DO3 IOB3 Marine option
Power Request
Output
DO4 IOB3 Marine option
Entering Evap Water
Pressure
AI3 IOB4 User option, if IOB4
installed, same as follows
Leaving Evap Water
Pressure
AI4 IOB4 User option
Entering Cond Water
Pressure
AI5 IOB4 User option
Leaving Cond Water
Pressure
AI6 IOB4 User option
Evap Water Flow
Measurement
AI8 IOB4 User option, 4~20mA
Cond Water Flow
Measurement
AI9 IOB4 User option, 4~20mA
Chilled Water Pump
(Variable)
AO1 IOB4 User option, 4~20mA/0~5V
Condenser Water
Pump (Variable)
AO2 IOB4 User option, 4~20mA/0~5V
Tower Fan (Variable) AO3 IOB4 User option, 4~20mA/0~5V
Chilled Water Pump DO1 IOB4 User option, 24VAC output,
recommend with external
power supply
Condenser Water
Pump
DO2 IOB4 User option, 24VAC output,
recommend with external
power supply
Tower Fan High DO3 IOB4 User option, 24VAC output,
recommend with external
power supply
Tower Fan Low DO4 IOB4 User option, 24VAC output,
recommend with external
power supply
19DV mapping:
Description Channel # Board # Option
Entering Chilled
Water Temperature
AI1 IOB1
Leaving Chilled Water
Temperature
AI2 IOB1
Entering Condenser
Water Temperature
AI3 IOB1
Leaving Condenser
Water Temperature
AI4 IOB1
Evap. Refrigerant
Liquid Temperature
AI5 IOB1
Comp Discharge
Temperature
AI6 IOB1
Condenser Pressure AI7 IOB1
Evaporator Pressure AI8 IOB1
FS VFD Load Current AI10 IOB1 For free standing VFD
Chiller Status Output
mA
AO1 IOB1 User option, 4~20mA
4mA=OFF 8mA=Tripout
12mA=Shutdown
20mA=Running
Evap Water Flow
Switch
DI1 IOB1 User option, dry contact,
“Closed” indicates “FLOW”
Cond Water Flow
Switch
DI2 IOB1 User option, dry contact,
“Closed” indicates “FLOW”
Remote Contact Input DI3 IOB1 User option, dry contact,
“Closed” indicates Turn ON
the chiller
Remote Emergency
Stop Input
DI4 IOB1 User option, dry contact,
“Closed” indicates chiller
emergency stop
Economizer Bypass
Valve
DO1 IOB1 x
Refrigerant Pump DO2 IOB1
Chiller Alarm Relay DO3 IOB1 User option, 24VAC output,
recommend with external
power supply
Vapor Venting Line SV DO4 IOB1 x
Motor Winding
Temperature 1
AI1 IOB2
EC Valve Feedback AI3 IOB2 Factory option
Pump Outlet Pressure AI5 IOB2
Bearing Outlet
Pressure
AI6 IOB2
Bearing Inlet Pressure AI7 IOB2
Auto Demand Limit
Input
AI8 IOB2 User option, 4~20mA
Refrigerant Leak
Sensor
AI9 IOB2 User option, 4~20mA
Pump Inlet Pressure AI10 IOB2
Guide Vane1 Output AO1 IOB2
EC Valve Output mA AO3 IOB2 Factory option
Liquid Level Switch DI2 IOB2
High Pressure Switch DI3 IOB2
Ice Build Contact DI4 IOB2 User option, dry contact
Condenser Control
Valve
DO1 IOB2 x
Evaporator Control
Valve
DO2 IOB2 x
Condenser Filling
Valve
DO3 IOB2 x
Economizer Isolation
Valve
DO4 IOB2 x
1st Stage Bearing
Temp
AI1 IOB3
2nd Stage Bearing
Temp
AI2 IOB3
Bearing Ref Supply
Temp
AI3 IOB3
Guide Vane 2 Actual
Pos
AI4 IOB3
Remote Reset Sensor AI5 IOB3 User option, 5K thermistor
Guide Vane 1 Actual
Pos
AI6 IOB3
11. 11
Description Channel # Board # Option
Common CHWS
Temp
AI7 IOB3 Used for lead lag option
Auto Water Temp
Reset
AI8 IOB3 User option, 4~20mA
Common CHWR
Temp
AI9 IOB3 Used for lead lag option
Head Pressure
Output
AO1 IOB3 Factory option
Guide Vane 2 Output AO3 IOB3
Spare Safety DI3 IOB3 User option, dry contact,
normal open
Power Request
Feedback
DI4 IOB3 Marine option
Evaporator Drain
Valve
DO1 IOB3
Condenser Drain
Valve
DO2 IOB3
Free Cooling Mode DO3 IOB3 Factory option
Power Request
Output
DO4 IOB3 Marine option
Entering Evap Water
Pressure
AI3 IOB4 User option, if IOB4
installed, same as follows
Leaving Evap Water
Pressure
AI4 IOB4 User option
Entering Cond Water
Pressure
AI5 IOB4 User option
Leaving Cond Water
Pressure
AI6 IOB4 User option
Evap Water Flow
Measurement
AI8 IOB4 User option, 4~20mA
Conde Water Flow
Measurement
AI9 IOB4 User option, 4~20mA
Chilled Water
Pump(Variable)
AO1 IOB4 User option, 4~20mA/0~5V
Condenser Water
Pump(Variable)
AO2 IOB4 User option, 4~20mA/0~5V
Tower Fan(Variable) AO3 IOB4 User option, 4~20mA/0~5V
Customer Alert DI3 IOB4 Marine option, dry contact
Free Cooling Start
Switch
DI4 IOB4 Marine option, dry contact
Chilled Water Pump DO1 IOB4 User option
Condenser Water
Pump
DO2 IOB4 User option
Tower Fan High DO3 IOB4 User option
Tower Fan Low DO4 IOB4 User option
Purge Level Switch
Low
cDI-01 SIOB User option
Purge Level Switch
High
cDI-02 SIOB User option
Purge Comp Suction
Temp
AI-01 SIOB User option
Purge Cond Valve DO-01 SIOB User option
Purge Comp Valve DO-02 SIOB User option
Purge Pumpout Valve DO-03 SIOB User option
Purge Drainage Valve DO-04 SIOB User option
Purge Regeneration
Valve
cDO-05 SIOB User option
Purge Discharge
Valve
cDO-06 SIOB User option
Purge Vaccum Pump DO-07 SIOB User option
Purge Compressor DO-08 SIOB User option
Purge Heater DO-10 SIOB User option
3.5 - LEN/CCN Communication Cable Cequirements:
The electrical characteristics of the transmission Cables shall
be comprised of three conductors,(1.5 Pairs) two signals and
one ground of 20 AWG or larger with 100% shield plus a
tinned copper braid (65% coverage),embodied as one of the
following types is recommended by Carrier:
-
- Belden #8772 (for intra building, 60 deg C)
-
- Belden #85240 (high temperature, 150 deg C)
-
- Belden #89418 (plenum cable, 200 deg C)
When LEN-MODBUS gateway which described in section
3.1.4 is used in the system,the communication cable for LEN
and MODBUS sides should also follow this requirement.
The communication cable between ISM and IOB should be
as far away from high voltage cable and other disturbance
equipment as possible.The communication cable should be
as short as possible and should be separated from other
cables. Making the communication cable go through metal
shield conduct is preferred.
12. 12
4 - SETTING UP THE USER INTERFACE
4.1 - User Interface
The user interface is a colorful 10.4” TFT touch screen.
Navigation is either direct from the touch screen interface
or by connecting to a web interface via the Ethenert IP port
of the controller.
The navigation menus are the same for both connection
methods. Please note that only two web connections may be
authorized at the same time.
4.2 - Web Connection
Connection from a PC is using a web browser with Java.
In order to access the HMI , the operator should enter the
IP address of the unit in the address bar of the web browser.
The IP address can be viewed or changed from the screen
(see also section 8.2).
Minimum web browser configuration:
• Microsoft Internet Explorer (version 8 or higher) or
MozillaFirefox(version3.5.2orhigher).Intheadvanced
connection options add the unit address to the address
list. Do not use a proxy server.
• Javaplatform(version6orhigher).(Inthecontrolpanel,
click the option that allows storing temporary internet
files and use a direct connection.)
For more information on the web browser and Java platform
configuration, please refer to section 8 “Diagnostics and
communication problem trouble shooting”and contact your
network administrator.
NOTE:Two users can be connected simultaneously with no
priority between users;the last modification will take effect.
4.3 - General Features
4.3.1 - Buttons
Unit is
running
Unit is off Home
Main menu Logged off Logged in
No alarms Alarm/ Alert
Back* Up & Down
* Note that the “Back” button is not present in the main menu.
4.3.2 - Screens
The interface includes the following screens:
• Welcome screen,
• Synoptic screen with direct display of the main
parameters,
• Menu screens for navigation,
• Data/configuration screens listing the parameters by
type,
• Operating mode selection screen,
• Password entry and language selection screen,
• Parameter modification screen,
• Time schedule screen.
NOTE: If the interface is not used for a long period, it will
go into screen saver mode with black screen. The control is
always active, the operating mode remains unchanged. The
interface screen is re-animated when the user presses the
screen. The welcome screen is displayed.
4.4 - Welcome Screen
The welcome screen is the first screen shown after switching
the unit on or after the re-animation of the screen.It displays
the application name as well as current software version
number.
To exit from this screen press the following button:
Go to Home
Screen
Software version number
13. 13
4.5 - Synoptic Screen
1 Synoptic screen access button
2 Main Menu access button
3 User Login screen access button
4 Unit Start/Stop access button
5 Alarm menu access button
6 Setpoint
7 Unit capacity percentage (motor load current percentage)
8 Guide Vane Position percentage
9 Oil temperature
10 Oil pressure delta
11 Condenser pump status (hydraulic System option is Enabled)
12 Evaporator pump status (hydraulic System option is Enabled)
13 Condenser water inlet and outlet temperature
14 Evaporator water inlet and outlet temperature
15 Condenser saturated temperature and pressure
16 Evaporator saturated temperature and pressure
Message: all screens described below can display an
information message in the band at the bottom.
MESSAGE STATUS
COMMUNICATION
FAILURE!
Equipment controller did not respond while reading the
table content.
ACCESS DENIED! Equipment controller does not allow accessing one of the
table data blocks.
LIMIT EXCEEDED! The value entered exceeds the table limits.
Save changes? Modifications have been made.The web interface waits to
confirm exit by pressing Save or Cancel.
HIGHER FORCE IN
EFFECT!
Force or Auto command was rejected by the equipment
controller because the interface force level is lower than the
equipment controller’s.
4.6 - Setpoint Screen
4.7 - On/Off Screen
The On/Off screen allows users to select the unit operating
mode.
4.7.1 - Unit Start-up
With the unit in the Local Off mode,press the button
to display the list of operating modes. Select the expected
mode to startup the chiller
Shows the
last mode
selected
Operating
mode list
4.7.2 - Unit Stop
To Stop the unit - press the following button:
Confirm the unit shut-down or return to the previous screen.
14. 14
4.8 - Password/Language Screen
B
D
E
F
C
1 Cursor showing the activated language
2 Log in
3 Unit of measurement selection: Metric/Imperial
4 Enter the password
5 Log off
NOTE: Password validation is effective after pressing the
Log-in button.
4.9 - Menu Screen
To access Main menu, press the following button:
N av i g a t i o n
through tables
Touch the items to access the corresponding table/menu.
4.10 - Configuration Screen
B
D
E F
C
1 Save
2 Cancel
3 Message
4 Previous page
5 Next page
Below is an example to show how to force a point.
B
1 Forcible point
Forced value
Force Auto
The Auto button cancels the force action on the point.
15. 15
4.11 - Time Schedule Screen
B
D E F G
C
1 Selection of the applicable days for the time schedule
2 Modification of the period start and end schedules
3 Save
4 Cancel
5 Previous period
6 Next period
4.12 - 19XR6/7 Status Display Screens
The following screens are designed for end user to check the
components status.
4.12.1 - System Overview
The following screen is the system overview screen (default
screen), by clicking the component in this screen, user can
enter the specific component screen.
4.12.2 - Condenser Status
4.12.3 - Evaporator Status
4.12.4 - Compressor Status
16. 16
4.12.5 - Motor Status
4.12.6 - Economizer Status
The pressure difference shown in this screen is the pressure
difference between economizer pressure and evaporator
pressure.
4.12.7 - Transmission Status
4.12.8 - Envelope Control Status
4.12.9 - VFD Status
4.12.10 - Startup Sequence
The following screen shows the sequence of startup check
items. Touch the mode title of main screen to access this
screen. Users are able to see which items has been checked
in startup process.
17. 17
4.13 - 19XR2~E/V/D Status Display Screens
The following screens are designed for end user to check the
components status.
4.13.1 - System Overview
The following screen is the system overview screen (default
screen), by clicking the component in this screen, user can
enter the specific component screen.
4.13.2 - Condenser Status
4.13.3 - Evaporator Status
4.13.4 - Compressor Status – Single Stage
4.13.5 - Compressor Status – Dual Stage
4.13.6 - Motor Status
18. 18
4.13.7 - Transmission Status
4.13.8 - Envelope Control Status
4.13.9 - VFD Status
4.13.10 - Startup Sequence
The following screen is showing the startup sequence after
user push the startup button. User can check where we are
in the startup process.
4.14 - 19DV Status Display Screens
4.14.1 - System Overview
4.14.2 - Condenser Status
19. 19
4.14.3 - Evaporator Status
4.14.4 - Compressor Status
4.14.5 - Motor Status
4.14.6 - Envelope Control Status
4.14.7. VFD Status
4.14.8. Startup Sequence
20. 20
4.14.9. Purge System Status 5 - 19 SERIES PIC 5+ CONTROL OPERATION
5.1 - Start/Stop Control
This function determines the chiller STATSTOP command.
There are 4 control modes (LOCAL,LOCAL SCHEDULE,
REMOTE,NETWORK) can be selected.In a certain control
mode, only appropriate control sources are valid to start or
stop chiller.
Local
When control mode is LOCAL, the chiller can be started by
“Local ON” button on UI screen and be shut down by
“Confirm Stop”buttons on screen,EMSTOP software point.
Network
When control mode is NETWORK, chiller can be started and
stopped by the CHIL_S_S and CHIL_OCC software point
which is written by other equipment through network command
and network schedule. Only when both points are written as
“YES”
, the chiller will start up. Also, chiller can be shut down
by EMSTOP software point, STOP button on UI screen.
Local Schedule
When control mode is LOCAL SCHEDULE, chiller will be
automatically started if configurable local schedule is
occupied and be shut down by unoccupied schedule,
EMSTOP software point, STOP button on UI screen.
Remote
When control mode is REMOTE,chiller will be started and shut
down by the remote discrete input (IOB1_DI3: REM_CON)
located on the I/O board. Also, chiller can be shut down by
EMSTOP point, STOP button on UI screen.
NOTE: there is a STOP OVERRIDE point in GENUNIT
table, if this point is enabled, the chiller cannot be started
and chiller should be stopped if it is running.
5.2 - Compressor Run Status
Compressor Run Status is shown on the top of default screen.
STATUS # STATUS NAME DESCRIPTION
0 OFF STATSTOP is STOP, no alarm.
1 CTLTEST Control test is active
2 PUMPDOWN Pump down is active
3 LOCKOUT Lockout in is active
4 RECYCLE Recycle shutdown completed on low load in effect until
the need for cooling resumes; non-fault condition
5 TRIPOUT Shutdown completed due to alarm fault condition.
6 TIMEOUT The control is delaying the start sequence until the
Start to Start and Stop to Start timers have elapsed
7 PRESTART The chiller is in the process of the checks prior to
energizing the compressor motor
8 STARTUP Normal Startup in progress
9 AUTORST Auto Restart in pending
10 RAMPING Ramp loading in progress. The chiller has started
and is slowly increasing its load to control electrical
demand charges
11 RUNNING The chiller has completed ramp loading following
start up. Normal running mode, no override or
demand limit
12 OVERRIDE Running with Override active
13 DEMAND Running with Demand Limit Active; The chiller is
prevented from loading further because it has
reached the an AVERAGE LOAD CURRENT Limit or
a MOTOR KILOWATTS Limit
14 SHUTDOWN Shutdown compressor in progress
15 FREECOOL Free Cooling in progress
16 CONDFLSH Condenser Flush in progress
21. 21
5.3 - Chiller Start-up Sequence
5.3.1 - Prestart Check
Once start-up begins, the controller performs a series of
pre-start tests to verify that all pre-start alerts and safeties
are within the limits.
PRESTART ALERTCONDITION
State
Number
Alarm
or Alert
STARTS IN 12 HOURS >= 8 100 Alert
OIL SUMP TEMP <= 140F AND OIL SUMP TEMP
<= EVAP_SAT + 50F
101 Alert
CONDENSER PRESSURE >= COND PRESS OVERRIDE
- 20 PSI
102 Alert
Number of recycle restart in the last 4 hours is greater than 5 103 Alert
COMP BEARING TEMP >= COMP BEARING ALERT- 10F 230 Alarm
COMP MOTOR WINDING TEMP >= MOTOR TEMP
OVERRIDE - 10F
231 Alarm
COMP DISCHARGE TEMP >= COMP DISCHARGE
ALERT- 10F
232 Alarm
EVAP_SAT < Evap trip point + EVAP OVERRIDE DELTA T
OR
EVAP REFRIG LIQUID TEMP < Evap trip point + EVAP
OVERRIDE DELTA T
NOTE: Evap trip point = 33F(water) or EVAP REFRIG
TRIPPOINT(brine)
233 Alarm
ACTUAL LINE VOLTAGE <= UNDERVOLTAGE
THRESHOLD
(N/A for Eaton/Rockwell UM VFDs) 234 Alarm
ACTUAL LINE VOLTAGE >= OVERVOLTAGE THRESHOLD
(N/A for Eaton/Rockwell UM VFDs) 235 Alarm
Guide vane 1 has not been calibrated successfully 236 Alarm
The compressor RUN STATUS parameter on the default
screen line now reads PRESTART. If one test is not
successful, the start-up is delayed or aborted. If all the tests
are successful, the chilled water pump relay energizes, and
the main screen line now reads STARTUP.
5.3.2 - Startup
One second later, the chilled and condenser water pump
relays are energized.
Five seconds later the control monitors the chilled water and
condenser water flow devices and waits until the WATER
FLOWVERIFYTIME (service-configured,default 5 minutes)
expires to confirm water flow.
After water flow is verified, the water temperature will be
compared to CONTROL POINT plus 1/2 CHILLED
WATER DEADBAND. If the temperature is less than or
equal to this value,the control turns off the condenser pump
relay and goes into a RECYCLE mode.
If the RECYCLE condition is not satisfied, the start-up
sequence continues and checks the guide vane position. For
single-stage compressor ( Comp(Single=0,Dual=1)=0 in
FACTORY configuration ), if the guide vanes are more than
GUIDEVANE CLOSUREAT STARTUP,the start-up waits
until the controller closes the vanes.For dual-stage compressor
(Comp(Single=0,Dual=1)=1 in FACTORY configuration ),
guide vane is to be opened to the initial position“GV1 Closure
at Startup” at “Option Configuration” menu.
If EC valve or Economizer damper valve is equipped and
enabled,control checks the status of these valves position to
be fully closed.
If the vanes and valves position are verified.
When chiller type is 19XR, the oil pump pressure difference
is less than 6 psi (41.4 kPa), the oil pump relay will be
energized.The control then waits until the oil pressure
difference (OIL PRESS VERIFY TIME, operator-
configured, default of 40 seconds) reaches a maximum of 18
psi (124 kPa).After oil pressure is verified, the control waits
40 seconds for oil prelube.
When chiller type is 19XR6/7, and oil pump kept OFF for
over 50 hours.The oil prelube time will be 6 minutes instead
of 40 seconds.
When chiller type is 19DV, The control will check the
refrigerant pump pressure difference, refrigerant pump will
be turned ON if it passed. Then controller waits until the
refrigerant pump pressure difference reaches 12 psi (82.7
kPa).After ref pressure is verified,if high side float chamber
with liquid level, refrigerant pump will be kept ON for 20
seconds; if not, refrigerant pump will be kept ON until there
is liquid level, and then kept on 10 seconds after that.
The compressor start relay energizes to start the compressor.
5.4 - Chiller Shutdown Sequence
Chiller shutdown begins if any of the following occurs:
-
- Local OFF button is pressed
-
- Arecycleconditionispresent(seeRecycleModesection)
-
- Thetimeschedulehasgoneintounoccupiedmodewhen
in Network or Local Schedule control mode
-
- The chiller protective limit has been reached and chiller
is in alarm
-
- The start/stop status (CHIL_S_S) is overridden to stop
from the network when in Network mode
If the chiller is normally shutdown from running, soft stop
shutdown will be performed.The soft stop feature closes the
guide vanes of the compressor automatically if a non-alarm
stopsignaloccursbeforethecompressormotorisdeenergized.
Any time the compressor is directed to STOP (except in the
cases of a fault shutdown), the guide vanes are directed to
close and VFD will be command to minimum speed for
variable speed compressor, and the compressor shuts off
when any of the following is true:
-
- PERCENT LOAD CURRENT (%) drops below the
SOFT STOP AMPS THRESHOLD
-
- ACTUALGUIDEVANEPOSITIONdropsbelow4%
-
- 4 minutes have elapsed after initinize the stop
When any one of the above condition is true, the shutdown
sequence stops the compressor by deactivating the
compressor start relay.
Then the guide vane shall be closed and stay at the fully
closed position.
When chiller type is 19XR2~E, the oil pump relay will be
Turned OFF after 60 seconds post lube.
When chiller type is 19XR6/7, the oil pump relay will be
Turned OFF after 120 seconds post lube.
When chiller type is 19DV, the refrigerant pump relay will
be Turne OFF after 120 seconds post lube.
And then the chilled water/brine pump and condenser water
pump will be shutdown.
22. 22
5.5 - Oil Lubrication Control
As part of the pre-start checks executed by the controls, the
oil sump temp is compared to evaporator saturated
refrigerant temperature. If the oil temperature is less than
140° F (60° C) and less than evaporator saturated refrigerant
temperature plus 50 ^ F (27
.8^ C),the start-up will be delayed
until either of these conditions is no longer true. Once this
temperature is confirmed, the startup continues.
The oil heater relay is energized whenever the chiller
compressor is off and the oil sump temperature is less than
140° F (60.0° C) or the oil sump temperature is less than the
evaporator saturated refrigerant temperature plus 53^ F
(29.4^ C). The oil heater is turned off when either of the
following conditions is true:
Oil sump temperature is more than 152° F (66.7° C)
Oil sump temperature is more than 144° F (62.2° C) and more
than the evaporator saturated refrigerant temperature plus
55^ F (30.6^ C).
The oil heater is always off when the compressor is running.
For chiller type 19XR2~E/V/D, oil pump will be energized
for 30 seconds after each 30 minutes of oil heat relay being
energized in order to stir the oil for more evenly distributed
heating.
For chiller type 19XR6/7, 30sec/30min time interval is
configurable in Service Parameters table->Oil Stir
Cycle(19XR6/7):
Option 0(No stir), there will be no oil stir;
Option 1(30s/30m),oil pump will be energized for 30 seconds
after each 30 minutes of oil heat relay being energized;
Option 2(1m/4h), oil pump will be energized for 1 minute
after each 4 hours of oil heat relay being energized;
Option3(Comb.0&1), for the first 50 hours of chiller in not
running status,oil stir will execute as option1.After 50 hours
elapses, there will be no oil stir.
PIC 5+ can support variable oil pump control and this option
is only available for 19XR2~E currently.The terminal channel
is located in IOB1 AO1, and it is a 4~20mA signal. During
operation, PIC 5+ control system will modulate the VFD
speed to control the lubrication system oil pressure difference
to between 25psi and 35psi.
5.6 - Refrigerant Lubrication Control
For the 19DV system,refrigerant is used to lubricate and cool
the compressor bearings.The refrigerant lubrication system
mainly includes refrigerant pump, four control valves,
evaporator and condenser filter,moisture removal desiccant,
bearing filter,liquid level switch and additive reclaim system.
When the chiller is powered on,the controller will maintains
liquid level in condenser float chamber.Once operator push
start button, the system will go into prestart check process.
After prestart check ok, when refrigerant pump request is
on for pre-lube and the bearing pressure difference is less
than 5psi,if Liquid Level is not satisfy,then pump refrigerant
from evaporator to condenser until Liquid Level is satisfied.
Then,if evaporator temp plus leaving condenser water is less
than 10F, pump refrigerant from evaporator to condenser,
after bearing pressure difference reaches 12psi, keep lasting
for 20s unitil compressor is on; else if evaporator temp plus
leaving condenser water is equal or larger than 10F, pump
refrigerant from condenser to bearing and drain to condenser,
if refrigerant pump didn’t open for pumping liquid when
start, open refrigerant pump after 10s, and after then, when
bearing pressure difference reaches 12psi, keep lasting this
process for 10s until compressor is on..During pre-lubrication,
if the bearing pressure difference is less than 8 psi for
continuously 8 seconds, the chiller will shutdown.
The compressor will run after the pre-lubrication process.
Refrigerant will be pumped to bearing and drain to
evaporator from condenser float chamber. When chiller
shutdown,the condenser control valve will be closed and the
refrigerant will be pumped from evaporator to bearing and
drain to condenser.
When the chiller is off ,always open evaporator control valve.
If liquid level is low, refrigerant will be pumped from
evaporator to condenser float chamber until the liquid level
swith is on and last 1 minutes after that.
5.7 - Control Point
5.7.1 - Set Point
Set point can be configured at menu “Setpoint” at “USER”
access level.
The SETPOINT is determined by the HEAT/COOL MODE,
EWT OPTION,and ICE BUILD OPTION in the below table.
Setpoint Determination
EWT Control Option: Heat/Cool Mode = Cooling Heat/Cool Mode = Heating
Disable Cooling LCW Setpoint Heating LCDW Setpoint
Enable Cooling ECW Setpoint Heating ECDW Setpoint
NOTE: Ice Build Option is Disabled when Heat/Cool Mode is set to Heating.
When Ice Build Option is Enabled and ice build is active, the control point is the Ice
Build Setpoint and the controlled water temperature is leaving chilled water
temperature.
5.7.2 - Control Point
Capacity control is based on achieving and maintaining a
CONTROL POINT temperature, which is the sum of the
valid set point (from the SETPOINT screen) and a
temperature reset value.
In cooling mode, Control Point is equal to the set point plus
temperature reset, while in heating Control Point will be set
point minus temperature reset.
The control point can be viewed directly on the main screen
or “General Parameters” menu.
5.7.3 - Temperature Reset
Three types of chilled water or brine reset are available and
can be viewed or modified on the “Reset Configuration”
screen.
The default screen indicates when the chilled water reset is
active. Control point Reset on the “General Parameters”
screen indicates the amount of reset.
To activate a reset type, access the RESETCFG screen and
input all configuration information for that reset type.
RESET TYPE 1: 4 to 20 mA TEMPERATURE RESET
Reset Type 1 is an “automatic” reset utilizing a 4 to 20 mA
23. 23
analog input signal provided from any external sensor,
controller,or other device which is appropriately configured.
At this type, Degrees Reset At 20 mA shall be configured in
RESETCFG table.
RESET TYPE 2: REMOTE TEMPERATURE RESET
Reset Type 2 is an automatic water temperature reset based
on a remote temperature sensor input signal. This function
can be accessed by the following configurations:
-
- Configure the remote temperature at no reset occurs
(Remote temp –> NO RESET).
-
- Configure the remote temperature at full reset occurs
(remote temp –> FULL RESET).
Finally, enter the amount of reset (Deg reset water DT full).
RESET TYPE 3 — CONTROLLED WATER TEMP
DELTA RESET
Reset Type 3 is an automatic controlled water temperature
reset based on heat exchanger temperature difference.This
function can be accessed by the following configurations:
-
- Configure the Controlled water temperature delta T at
no reset occurs (Controlled Water DELTA T NO
RESET).
-
- Configure the Controlled water temperature delta T at
full reset occurs (Controlled Water DELTA T FULL
RESET).
-
- Finally,entertheamountofreset(DegresetwaterDTfull).
5.8 - Capacity Control
Capacity control shall provide chilled or condenser water temperature control by modulating the position of the inlet guide
vane 1, and VFD speed for variable speed compressor based.
If VFD OPTION is set to with VFD, when need to increase capacity, the control will first try to increase IGV TARGET
POSITION if it has not reached the travel limit,otherwise increaseVFDTARGET SPEED;when need to decrease capacity,
the control will first try to decreaseVFDTARGET SPEED if it has not reached the minimumVFD speed,otherwise decrease
IGV TARGET POSITION.
100
TRAVEL LIMIT
GUIDE VANES % POSITION
GUIDE VANES AT MAX.
MODULATE VFD
VFD AT START-UP SPEED.
MODULATE GUIDE VANES
STARTUP;
VFD TO START-UP SPEED,
GUIDE VANES CLOSED
GUIDE VANES
VFD
START
MIN.
MAX.
VFD% SPEED
0
Guide vane control
The control regulates the guide vane position as determined
by the Capacity Control function in normal condition and
other functions in abnormal conditions which include
capacity inhibit request,capacity decrease request.The guide
vane actuator is driven by guide vane target position and
comparing to the actual feedback value.. Guide vane actual
position is limited to between zero and “GV1 TRAVEL
LIMIT”which is configured at“Service Configuration”menu.
When chiller is shutting down or off, guide vane is always
driven to zero.
VFD speed control
If VFD option is set to NO VFD, or compressor relay is not
closed,VFD TARGET SPEED will be 0.
From compressor relay is commanded to be closed to the
end of ramp loading, VFD TARGET SPEED will be set to
startup speed.
When chiller is running normally, the control will get input
from capacity control to see whether to change VFD
TARGET SPEED and how much to change.
When chiller is in shut down process,VFDTARGET SPEED
will be set to minimum VFD speed.
After the compressor relay is cut off,VFDTARGET SPEED
will be set to 0.
24. 24
5.9 - Ramp Loading
The ramp loading control slows down the rate at which the
compressor loads up.This control can prevent the compressor
from loading up during the short period of time when the
chiller is started and the chilled water loop has to be brought
down to CONTROL POINT (Setpoint Table). This helps
reduce electrical demand charges by slowly bringing the
chilled water to CONTROL POINT. The total power draw
during this period remains almost unchanged.
There are two methods of ramp loading:
Temperature ramp loading shall limit the rate at which the
controlled water temperature decreases for cooling and
increase for heating during ramping by reducing on cooling
mode and increasing on heating the Pulldown Set Point
(Maintenance Menu - Capacity) at the configured rate until
the pulldown setpoint is less than for cooling mode Control
point or greater than Control point for heating mode
Pull down ramp type shall be configured to 0 for temperature
ramping.
Motor load ramp loading shall limit the rate at which either
the percent load current or motor percent kilowatts increases
by incrementing the ramp demand limit at the configured
rate.
Pull down ramp type shall be configured to 1 for load
ramping.
PULLDOWN RAMP TYPE (Configuration Menu – General
Configuration) is configured to 1 then motor load shall
determine the ramp rate. If DEMAND LIMIT SOURCE
(Configuration Menu – General Configuration) is set toAMPS
then PERCENT LOAD CURRENT shall be used as motor
load.IfDEMANDLIMITSOURCEissettokWthenMOTOR
PERCENT KILOWATTS shall be used as motor load
The motor load ramp algorithm shall be deactivated when
the Ramp Demand Limit is greater than or equal to the
ACTIVE DEMAND LIMIT (General Parameters). It shall
also be deactivated when Ramp Demand Limit is greater or
equal to 80%. There shall be one minute delay for the
compressor to be uploaded to target load after ramping load
demand limit is set to 80%.
If the power outage more than 3 hours, then Temperature
Ramp Loading will be used regardless user configuration.
And the minimum loading rate (1^F/min) will be used.
5.10 - Surge Correction Control
There are two stages for surge correction, surge prevention
control and surge protection control.
Lift is defined as the difference between the saturated
temperature at the impeller eye and at the impeller discharge.
The maximum lift a particular impeller wheel can perform
varies with the gas flow across the impeller and the size of
the wheel.
A surge condition occurs when the lift becomes so high that
the gas flow across the impeller reverses. This condition can
eventually cause compressor damage. The envelope control
algorithm notifies the operator that chiller operating conditions
are marginal and to take action to help prevent compressor
damagesuchasloweringenteringcondenserwatertemperature.
A high sound condition occurs in low guide vane position
case,envelope control valve can be used to decrease the sound
level by opening this valve in low guide vane position case.
To enable this function, we need configure “high efficiency
mode” to “disable” in CFGSURGE table.The default is low
noise mode(this mode is only valid for 19XR6&7)
5.10.1 - Surge Prevention Control
The surge prevention control algorithm is an operator-
configurable feature that can determine if lift conditions are
too high for the compressor and then take corrective action.
If Actual Lift is higher than reference lift, a capacity inhibit
signal will be sent; If Actual Lift is higher than reference lift
plus surge line Upper Deadband, a capacity decrease signal
will be sent; If Actual Lift is lower than reference lift minus
surge line Lower Deadband, these 2 signals will be canceled.
Capacity Control will respond to these 2 signals and make
correction onVFDTARGET SPEED,EC valve actuator IGV1
TARGET POSITION with the priority from high to low.
Before surge protection event occurs, if there is no surge
prevention in the past 5 min, SURGE PROFILE OFFSET
will increment by 1. Reference lift will minus SURGE
PROFILE OFFSET before comparing to actual lift.SURGE
PROFILE OFFSET is configurable in Surge Correction
Configuration Table.
5.10.2 - Surge Protection
The Surge Protection algorithm will run after SURGE
DELAY TIME elapsed when compressor has been
commanded to turn ON. It will compare the present
PERCENT LOAD CURRENT value with the previous value
once every second. If the difference exceeds the maximum
AMPS change value (SURGE DELTA % AMPS +
(PERCENT LOAD CURRENT / 10)),an incidence of surge
has occurred, and surge protection signal will be sent.
When an incidence of surge determined in this manner has
occurred,the SURGE COUNTS will be incremented by one.
On receiving surge protection signal, Capacity Control will
do correction by modulating VFD TARGET SPEED, EC
valve actuator IGV1TARGET POSITION with the priority
from high to low.
When correction is in effective, Surge Protection Count will
be increased by 1 when either one of IGV, VFD or EC
actuator is operated to do correction.
Guide vane should be inhibited for 1 minute after surge
protection ends.
Chiller will do alarm shutdown under following conditions:
-
- IfSURGEPROTECTIONCOUNTSexceed20within
aSURGETIMEPERIODandVFDspeedhasreached
the maximum speed
-
- If IGV,VFD and EC are not able to be operated to do
surge protection, when surge count is greater than 4.
25. 25
5.11 - Envelope Control Valve (EC) Control
The envelope control function is used to artificially load the
chiller and keep it running under low load conditions or to
prevent surge conditions. Since this also reduces the
performance of the machine, this is a user selectable option.
There are 3 types of EC valve.
-
- Continuous:A valve controlled by 2 contactors, one to
open valve, the other to close valve. If both contractors
are opened,the valve will hold its position.This kind of
valvehas feedbacksignaloffullyclosedorfullyopened.
-
- On/Off:Avalvecontrolledbyonly1contactor.Itcan’thold
its current position, and has no position feedback signal.
-
- mA: A valve controlled by 4-20mA signal. It has the
most precise control and feedback.
-
- Envelope Control Valve operation will have three
different modes when installed (hgbp_opt>0) and
enabled (hgbp_sel>0).
-
- Envelope Control for surge correction
Most of the inputs to the function are required for determining
theoperatingregionforthecompressormap.Eachcompressor
has unique lift characteristics that can be plotted to determine
performance. The controller will determine operating
conditions that could result in surging of the compressor and
activate the Envelope Control valve to prevent surge until
the chillers operating parameters are in a safe area on the
curve where the valve may be closed again.
-
- Envelope Control for low load operation
In this condition, envelope control valve will be opened to
prevent a recycle shutdown from occurring. The envelope
control valve will remain open until this minimal loading
condition has passed and there is no surge condition present.
-
- Combinationforsurgecorrectionandlowloadoperation
When this option is selected, both EC for surge correction
and EC for Low Load Operation will be performed. Surge
condition will take higher priority if both conditions are
satisfied.
5.12 - Economizer Damper Valve Control
The economizer damper control is to maintain the pressure
difference between Evaporator Pressure and Economizer
Pressure. Pressure in economizer should be always kept
higher than the pressure in evaporator.
IftheChillerType(ConfigurationMenu–FactoryParameters)
is configured to 19XR2~E/V/D and without this electrical
damper valve, this function shall be bypassed.
When the chiller is initially powered ON, the damper valve
will be commanded to close.When compressor shuts down,
the damper valve will be commanded to close.
The damper valve shall be acted based on the following table:
Condition Economizer Damper Valve Status
Chiller initially Power ON Fully Close
Compressor shutdown Fully Close
During Damper Valve Act Delay Fully Close
Economizer Pressure > Evaporator
Pressure + Damper Valve Open DB
Open
Economizer Pressure < Evaporator
Pressure + Damper Valve Close DB
Close
Otherwise Keep the current position
Economizer Damper Control - 1
If the damper valve has been command to open for a
continuous 5 minutes, and the Damper Valve Full Opened
is still not TRUE, then control system should generate an
alert 154.
If the damper valve has been command to close for a continuous
5 minutes,and the DamperValve Full Closed is still notTRUE,
then control system should generate an alert 154.
If compressor is running and if economizer pressure becomes
less than or equal to evaporator pressure, alarm 268 shall be
tripped and compressor shall be shutdown.
5.13 - Damper Vapor Source
For 19XRC improvement unit,there is vapor source damper
which is controlled by a NC(normal closed when valve coil
is deenergized) solenoid valve and the pressure difference
between damper cap and flow passage.
The SV is closed when chiller is not running,and keep closed
until a delay period after chiller starts up(delay timer vssv_dly
is configurable in CONF_OPT table).And after this timer is
timeout, the SV should be energized.
5.14 - Demand Limit
The 19 Series PIC 5+ controls provide a feature for limiting
AVERAGE LOAD CURRENT or Motor KILOWATTS by
limiting capacity via guide vane control/VFD control. The
limit applied is called ACTIVE DEMAND LIMIT, which is
equal to a BASE DEMAND LIMIT value (set in the
SETPOINT Screen, default value 100%), or be determined
byAUTO DEMAND LIMIT INPUT (an optional 4-20 mA
input, described below). ACTIVE DEMAND LIMIT may
also be forced to be different from BASE DEMAND LIMIT
by manually overriding the value (forcing) writing a value
via a CCN network device.
If the DEMAND LIMIT SOURCE exceeds the ACTIVE
DEMAND LIMIT by 5% or less, capacity will be inhibited.
If the DEMAND LIMIT SOURCE exceeds the ACTIVE
DEMAND LIMIT by more than 5%, capacity will be
decreased.
Demand Limit Control Option — the demand limit control
option (4-20 mA DEMAND LIMIT TYPE) is externally
controlled by a 4 to 20 mA signal.The option is set up on the
C O N F I G U R A T I O N M E N U / G E N E R A L
CONFIGURATION screen. When enabled, 4 mA will set
ACTIVE DEMAND LIMIT to 100% of the DEMAND
LIMIT SOURCE (regardless of the value of BASE
DEMAND LIMIT),and 20 mA will setACTIVE DEMAND
LIMIT to the value configured as “DEMAND LIMIT AT
20 mA” in the CONFIGURATION MENU/SERVICE
PARAMETERS screen.
26. 26
5.15 - Override Control
Capacity overrides can prevent some safety shutdowns caused by exceeding the motor amperage limit,evaporator refrigerant
low temperature safety limit, motor high temperature safety limit, and condenser high pressure limit. In all cases there are
2 stages of capacity control.
1. When the value of interest crosses the First Stage Set Point into the Override Region, the capacity are prevented from
increasing further, and the status line on the 19 Series PIC 5+ controller indicates the reason for the override. Normal
capacity control operation is restored when the value crosses back over the First Stage Set Point, leaving the Override
Region.
2. When the value of interest is in the Override Region and further crosses the Second Stage Set Point, the capacity shall
be decreased until the value meets the Override Termination Condition.The 19 Series PIC 5+ controls resume normal
capacity control operation after the override termination condition has been satisfied. (In the case of high discharge
superheat, there is an intermediate stage.)
Besides the above overrides, other types of override will not override control guide vane or VFD. Only override events are
reported.
High Compressor Discharge Temperature Override
If the COMP DISCHARGE TEMP is greater than the COMP DISCHARGE ALERT threshold then high discharge
temperature override will be displayed in the main screen until the COMP DISCHARGE TEMP is less than the COMP
DISCHARGE ALERT threshold – 2F.
High Compressor Bearing Temperature Override
For 19XR6/7 and 19DV, if one of the compressor bearing temperature is greater than the compressor bearing temperature
Alert threshold then High Bearing Temperature Override will be active until all of the compressor bearing temperature is
less than Comp Bearing Temp Alert minus 2F.
For 19XR2~E/V/D chiller, if the calculated bearing temperature is greater than the bearing temperature alert threshold,
then high bearing temperature override will be active until the calculated bearing temperature is less than the threshold
minus 2F.
Low Discharge Superheat Temperature Override
Ignore low discharge superheat override during first 5 minutes after chiller startup completed. After 5 minutes elapse, for
two stage 19XRE chiller, keep ignoring it until the first time (Cond pressure – Evap pressure)>10psid; for 19XR6/7, keep
ignoring it until the first time Damper becomes not fully closed for a consecutive 20 seconds; for 19DV, Ignore low discharge
superheat override during first 5 minutes after chiller startup completed.
Override Condition Override Parameter First Stage Capacity Inhibit
Configurable Range
Value
Second Stage Capacity
Decrease
Override Termination
High Condenser
Pressure OVERRIDE
(185Psi condenser)
CONDENSER
PRESSURE
> COND PRESS OVERRIDE
LOW
For low condenser type
140psig (90 - 157 psig)
> COND PRESS OVERRIDE
HIGH + 2.4 psi
< COND PRESS
OVERRIDE HIGH - 1 psi
High Condenser
Pressure OVERRIDE
(300Psi Condenser)
CONDENSER
PRESSURE
> COND PRESS OVERRIDE
HIGH
For high condenser type
250 psig (200 – 265 psig)
> COND PRESS OVERRIDE LOW
+ 2.4 psi
< COND PRESS
OVERRIDE LOW - 1 psi
High Condenser
Pressure OVERRIDE
(44Psi condenser)
CONDENSER
PRESSURE
> COND PRESS OVERRIDE
DV 44
For low condenser
type20psig (18 - 25psig)
> COND PRESS OVERRIDE
HIGH + 2.4 psi
< COND PRESS
OVERRIDE HIGH - 1 psi
High Condenser
Pressure OVERRIDE
(72Psi Condenser)
CONDENSER
PRESSURE
> COND PRESS OVERRIDE
DV 72
For high condenser type
55 psig (20 – 56 psig)
> COND PRESS OVERRIDE LOW
+ 2.4 psi
< COND PRESS
OVERRIDE LOW - 1 psi
Low Evaporator
Temperature override
CALC EVAP SAT TEMP
or
EVAP REFRIG LIQUID
TEMP
< EVAP SAT OVERRIDE
TEMP
Note: EVAP SAT OVERRIDE
TEMP = EVAP TRIPPOINT +
EVAP OVERRIDE DELTA T
< EVAP SAT OVERRIDE TEMP – 1F
> EVAP SAT OVERRIDE
TEMP
High Motor
Temperature
OVERRIDE
COMP MOTOR
WINDING TEMP
> COMP MOTOR TEMP
OVERRIDE
200 F
150 to 200 F
COMP MOTOR WINDING TEMP
> COMP MOTOR TEMP
OVERRIDE + 10 F (5.6 C)
COMPR MOTOR
WINDING TEMP < COMP
MOTOR TEMP OVERRIDE
- 2 F (1.1 C)
High CURRENT
override
PERCENT LINE
CURRENT
PERCENT LINE CURRENT
> 100%
or RECTIFIER OVERLOAD
(Only for 32VS VFD) > 100%
PERCENT LINE CURRENT >
105%
(If 32VS VFD is installed,
PERCENT LINE CURRENT or
RECTIFIER OVERLOAD > 102%)
PERCENT LINE
CURRENT <= 100%
Low Discharge
Superheat Override
Discharge Superheat < DSH REQUIRED + 1 < DSH REQUIRED – 3 > DSH REQUIRED + 2
Low Source Temp
Protection Override
Leaving chilled water
temperature (Heating
mode)
< LWT Protection Setpoint
(Protective Limit Config)– 2F
> LWT Protection Setpoint
(Protective Limit Config)– 2F
27. 27
5.16 - Recycle Control
Recycle Mode —The chiller may cycle off and wait until the
load is increased to meet restart requirements when the
compressor is running in a lightly loaded condition. This
cycling is normal and is known as “recycle.” A recycle
shutdown is initiated when any of the following conditions
are true:
Cooling Mode
-
- Leaving chilled water temperature (or entering chilled
water temperature, if the EWT CONTROL OPTION
is enabled) is more than 5° F (2.8° C) below the
CONTROL POINT.
-
- Leaving chilled water temperature (or entering chilled
water temperature, if the EWT CONTROL OPTION
is enabled) is below the CONTROL POINT, and the
chilled water temperature difference is less than the
RECYCLE SHUTDOWN DELTA T.
Heating Mode
-
- Leaving condenser water temperature (or entering
condenser water temperature, if the EWT CONTROL
OPTION is enabled) is more than 5° F (2.8° C) above
the CONTROL POINT.
-
- Leaving condenser water temperature (or entering
condenser water temperature, if the EWT CONTROL
OPTION is enabled) is above the CONTROL POINT,
and the condenser water temperature difference is less
than the RECYCLE SHUTDOWN DELTA T.
NOTE: Recycle shutdown will not occur if the CONTROL
POINT has been changed by more than one degree F within
the previous 5 minutes of operation.
When the chiller is in RECYCLE mode, the chilled water
pump relay remains energized so the chilled water
temperature can be monitored for increasing load. The
recycle control uses RECYCLE RESTART DELTA T to
check when the compressor should be restarted. The
compressor will restart when the chiller is:
Cooling Mode
-
- Leaving chilled water temperature (or entering chilled
water temperature, if the EWT CONTROL OPTION
is enabled) is greater than the CONTROL POINT plus
theRECYCLERESTARTDELTATfor5consecutive
seconds.
Heating Mode
-
- Leaving condenser water temperature (or entering
condenser water temperature, if the EWT CONTROL
OPTIONisenabled)islessthantheCONTROLPOINT
minus the RECYCLE RESTART DELTA T for 5
consecutive seconds.
5.17 - Running Timers and Counters
19 Series PIC 5+ control maintains two run time clocks:
COMPRESSOR ONTIME and SERVICE ONTIME.
COMPRESSOR ONTIME indicates the total lifetime
compressor run hours. SERVICE ONTIME is a resettable
timer that can be used to indicate the hours since the last
service visit or any other event. A separate counter tallies
compressor starts asTOTAL COMPRESSOR STARTS.All
of these can be viewed on the RUN TIMES screen on the
HMI. Both Ontime counters roll over to 0 at 500,000 hours.
Manual changes to SERVICE ONTIME from the screen are
permitted at any time.
The chiller also maintains a start-to-start timer and a stop-
to-start timer.These timers limit how soon the chiller can be
started. TIMERs are displayed on the RUNTIMES screen
and can be configured in CONFIGURATION MENU/
GENERAL CONFIGURATION screen.
These timers must expire before the chiller starts.If the timers
have not expired the RUN STATUS parameter on the
Default and GENERAL PARAMETERS screen reads
TIMEOUT.
The other two timers displayed on the RUNTIME screen
are ‘swift restarts in 1 hour’ and‘recy startup in 4 hours’
.The
first defines a maximum of 4 times of swift restarts can be
applied for the chiller in 1 hour.The other clarifies that recycle
restarts should be less than 5 times in 4 hours, otherwise
system will not pass prestart check.
5.18 - Water Pumps Control
NOTE: In order to energize the chilled and condenser pump
to prevent evaporator and condenser tube freeze-up, the
Hydraulic System should be enabled first (this can be
configuredinCONFIGUATIONMENU/FACTORYscreen).
Evaporator Freeze Prevention
When the evaporator saturated refrigerant temperature or
evaporator refrigerant temperature is less than the EVAP
REFRIG TRIPPOINT plus the REFRIG OVERRIDE
DELTA T (configurable from 2^F to 5^ F (1.1^C to 2.8^C)
in CONFIGURATION MENU/ PROTECTIVE LIMIT
CONFIG screen), event “OVERRIDE – LOW EVAP
REFRIG TEMP” will occur.
In all running status, if either of the following conditions is
true:
-
- evaporator saturated refrigerant temperature or
evaporator refrigerant temperature is equal to or less
than the EVAP REFRIG TRIPPOINT (33° F or 0.6°
Cforwater,configurableforbrineinCONFIGURATION
MENU/ PROTECTIVE LIMIT CONFIG screen) plus
one degree F.
-
- Leaving chilled water temperature or entering chilled
water temperature is less than EVAP REFRIG
TRIPPOINT plus 1 degree F.
28. 28
Then Protective Limit Alarm evaporator freeze will be
displayed,the unit will shut down,if chiller is in recycle mode
then it will transition to TRIPOUT, and the CHILLED
WATER PUMP will remain on.The alarm will be clearable
when evaporator saturated refrigerant temperature,
evaporator refrigerant temperature, Leaving chilled water
temperature and entering chilled water temperature rise 5^F
(2.8^C) above the EVAP REFRIG TRIPPOINT.
Condenser Pump Control
The chiller will monitor the condenser pressure and may turn
on the condenser pump
If the condenser pressure is greater than or equal to the
COND PRESS OVERRIDE, and the entering condenser
water temperature is less than 115 ° F (46.1 ° C), the
condenser pump will energize to try to decrease the pressure
and alert 157 will be generated.The pump will turn off when
the condenser pressure is 3.5 psi (24.1 kPa) less than the
pressure override and the condenser refrigerant temperature)
is less than or equal to the entering condenser water
temperature plus 3^ F (1.7^ C).
NOTE: COND PRESS OVERRIDE is found in the
CONFIGURATION MENU/ PROTECTIVE LIMIT
CONFIG screen. The default value is 140 psig (965 kPa)
for 185PSI condenser and 250 psig (1724 kPa) for 300PSI
condenser; default value is 10 psig (137.9kPa) for 44PSI
condenser and 55 psig (379.2 kPa) for 72PSI condenser.
Condenser Freeze Prevention — This control helps prevent
condenser tube freeze-up by energizing the condenser pump
relay.The 19 Series PIC 5+ controls the pump and,by starting
it,helps to prevent the water in the condenser from freezing.
When the chiller is off and condenser saturated refrigerant
temperature is less than or equal to the condenser freeze
point, the condenser water pump will be energized (Alarm
State 262, PROTECTIVE LIMIT - CONDENSER
FREEZE).The fault state will clear and the pump will turn
off when the condenser saturated refrigerant temperature is
more than 5^ F (2.7^ C) above the condenser freeze point
and the entering condenser water temperature is greater than
the condenser freeze point. If the chiller is in recycle
shutdown Mode when the condition occurs,the controls will
transition to a non-recycle shutdown.
5.19 - Controls Test
This function is used to test all controlled outputs except
compressor output.The test function will only be allowed to
run when the unit is Off.
User password is required to active this test function. All
control test parameters shall be accessible in the table
“QCK_TEST”
.To perform the control test function, the first
item “Quick Test Enable” in the “QCK_TST” table shall be
set to enable. The “Quick Test Enable” item will be
automatically disabled in one hour in order to make the
controls go back to normal if someone forget to disable it.
Unless otherwise noted, all protective limits shall remain
active during Controls Test.
5.19.1 - Discrete Outputs
When control test is enabled, the following discrete outputs
can be enabled to be forced to ON by setting the according
points to Yes in the quick test table.
GuideVane Increase,GuideVane Decrease,Oil Pump Relay,
Oil Heater Relay, EC Valve Open, EC Valve Close,
Economizer DamperValve Open,Economizer DamperValve
Close,Alarm relay,Alert relay and Refrigerant Pump relay.
NOTE: the following outputs cannot be force to ON at the
same time
Guide Vane Increase and Guide Vane Decrease;
EC Valve Open and EC Valve Close;
Economizer Damper Valve Open and Economizer Damper
Valve Close
For oil pressure, a value >= 18 psi within 40 seconds after oil
pump is turn ON will indicate a confirmation of pressure (Oil
Pres Test Passed=YES).
For Refrigerant Pump, a value >=10 psi within 15 seconds
after refrigerant pump is turn ON will indicate a confirmation
of pressure.
5.19.2 - Analog Output
When control test is enabled, the following analog outputs
can be enabled to be driven to the commanded positions
which input in the quick test table.
Head PressureValve,DiffuserActuator,Oil EXV and chiller
status output (Q_CHST)
5.19.3 - Guide Vane Calibration
Guide vane position should be calibrated before startup
chiller.
Guide vane calibration can be started by setting“QuickTest
Enable”to Enable and“GV1 calibration Enable”to Enable.
If the actuator type is digital, then
-
- The fully closed guide vane feedback resistance will be
in the range of 62.5 Ohms to 688 Ohms
-
- The fully opened guide vane feedback resistance will
be in the range of 6190 Ohms to 11496 Ohms
Else if the actua.tor type is analog, then
-
- The fully closed guide vane feedback mA value will be
in the range of 3mA to 5mA
-
- The fully opened guide vane feedback mA value will
be in the range of 19mA to 20.8mA
When chiller type is 19DV,guide vane 2 also need calibration,
same as guide vane 1.
29. 29
5.20 - Swift Restart
This function is designed for data center application, and it
allows the chiller to be restarted swiftly to meet the building
load requirements.
To enable this function, the “auto restart option” point in
CONF_OPT table should be set to “ENABLE”
.
The water flow verification time, oil prelube time and other
delays will be decreased accordingly. If the control system
and oil system are equipped UPS (uninterrupted power
supply), the startup time will be decreased accordingly.
5.21 - Cooling Tower Control
If“waterpressureoption”inCONF_OPTtableisENABLED,
there will be another optional hydraulic control I/O board
in the PIC 5+ control system to allow PIC 5+ control the
water pumps and cooling tower fans (high speed and low
speed).
The cooling tower fans are controlled by the pressure
difference between condenser and evaporator and entering
water temperature of condenser,the objective is to maintain
the entering condenser water temperature is the optimal
range.
5.22 - Head Pressure Control
If the chiller system is equipped with head pressure control
valve, and head pressure valve option in CONF_OPT table
is ENABLED, then PIC 5+ control system will control the
opening of head pressure valve to maintain the pressure
difference between condenser and evaporator. The output
of this valve is 4-20mA type.
Before using this function, the appropriate configurations
should be in place. They are pressure difference value for
20mA and pressure difference for 4mA.
The head pressure valve should be in fully closed position
when chiller is in OFF mode.
5.23 - Ice Build Option
PIC 5+ control provides ice build option based on efficiency
improving point,.
“ice build option” in CONF_OPT table should be set to
ENABLED to make ice build active, and another two
configurable parameters should be configured.
Ice_recy indicates whether recycle option is enabled in ice
build mode or not.
Ice_term indicates how the ice build is terminated.There are
threetypes,temperature,drycontactorcombinedtemperature
and dry contactor.
5.24 - Time Schedule
PIC 5+ control provides three schedules, they are:
Local schedule, Ice build schedule and Network schedule
There are 8 time segments in each schedule, if there is an
overlap on the two time segments, then occupied time
segment takes the high priority.
There are 16 holiday time segments in Holiday Menu, and
each time segment is determined by three parameters,month,
start date and holiday days. The controller will be in
unoccupied mode when holiday is active.
PIC 5+ also provides Daylight Saving function. Broadcast
Menu, enable this function and set the Daylight Saving start
time and end time.
5.25 - Black Box
The black box task continuously stores operation parameters
in the memory every 5 seconds. Reporting of chiller
operation alarm would trigger the controller to generate a
collection of the records. Each collection contains up to 180
records (15 minutes) which consist of 168 records (14
minutes) before the alarm and 12 records (1 minute) after.
Each record is associated with a time stamp.These collections
are saved as csv files. 20 files can be stored in total.
The black box file can be uploaded with Carrier S-Service
tool. Once the upload is done, the original files saved in
controller will be erased.
5.26 - Pressure Transducer Calibration
When pressure transducer calibration is performaned,
entering value shall result in a recalculation for the slope and
intercept of the 2 values. Thereafter, the new slope and
intercept values shall be used for voltage ratio to pressure
conversions.
• Step 1: Set CALIBRATION ENABLE for certain
pressure transducer
• Step 2: Put the transducer at atmosphere and enter 0
PSIG (0 kPa) to CALIB PRESS1
• Step 3: Give the transducer a known pressure (100-250
PSI (690-1700 kPa)) via Tool and enter this pressure to
CALIB PRESS2
• Step 4: Recalculate calibrated Slope and Intercept
5.27 - Temperature Sensor Calibration
The four water temperature sensors can be calibrated per
the following steps:
• Step 1: Place the temperature sensor at 32 °F (0 °C)
Drop each temperature sensor in a 32 °F (0 °C) water
solution.
• Step2:Readthesensorrawtemperatureinmaintenance
screen
Go to maintenance screen, read the corresponding sensor
raw temp
Calculate the offset to be applied = 32 - sensor raw temp
30. 30
Example:
ECW sensor raw temp reads 32.6 °F
ECW temperature offset must be configured to -0.6 ^F (32–
32.6 = -0.6)
• Step 3: Configure the sensor offset
In temperature calibration screen, set the corresponding
sensor temperature offset calculated in step 2.
Note, the offset cannot exceed +/- 2 ^F.
Example:
ECW temperature offset must be configured to -0.6 ^F (32-
32.6= -0.6)
• Step 4: (optional) Verify that the sensor offset is
configured correctly
Verify the following:
-
- Sensor raw temp has not changed.
-
- Sensor temperature offset now shows the configured
value.
-
- Sensor control value is calibrated,and now shows 32 °F.
Example:
“ECW sensor raw temp” still reads 32.6 °F
“ECW temperature offset” now shows -0.6 ^F
“Entering Chilled Water” now shows 32 °F.
5.28 - ISM Calibration
5.28.1 - ISM Calibration on J8B 4-20mA Output
• Step 1: Input a test output mA value on the touchscreen
UI
The controller will make ISM output this mA value.
• Step 2: Input the actual reading of mA value fromVFD
or mA meter
• Step 3: Recalculate calibration factor
Calibration Factor = 1000 * (Actual Reading mA -
output mA)
Range: 0-2000.
5.28.2 - ISM Calibration on J6 0-10v Input
• Step1:Whenchillerisrunning,recordtheVFDfeedback
voltage and the actual reading on ISM.
• Step 2: Shut down the chiller, enable ISM Calibration
• Step 3: Input the VFD feedback voltage
• Step 4: Input the actual reading of ISM
• Step 5: Recalculate calibration factor
Calibration Factor = 1000 * (VFD feedback voltage / ISM
actual reading voltage)
Range: 800-1200
5.29 - Alarm Email
The purpose of the alarm email is to send e-mails to service
for remote maintenance.
A service configuration table EMAILCFG is used for
network properties configuration. Once the EMAILCFG
table configuration is changed, a test email will be sent for
checking configuration.
This task is checking the status of alarms. Once there is any
alarm switches on, it would send the email with relative
information. When all alarms go back to normal, an e-mail
would be sent too.
The e-mail provides the unit description and location stored
in the CTRL_ID table.
5.30 - Prognostic
This prognostic function is designed for service trouble
shooting, can be access from Alarm Menu. The prognostic
function enables the service engineer to resolve the problem
before they affected the operating efficiency and the chiller
bottom life.
The following functions could be active only if the prognostic
function is enabled (prog_en=YES)
The following screen is designed for prognostic. For each
items, there are three different colors of traffic lamps to
indicate the status. Green lamp indicate it is normal, red
indicate there is problem and yellow lamp indicate it is near
the problem region.
31. 31
5.31 - Master Slave Control
The control shall provide the capability to operate 2 chillers
in Master/Slave mode. Slave chiller should be set to
NETWORK mode and controlled by Master chiller.
The two chillers in Master/Slave control can be configured
to be in parallel or in series mode. When they are in series
mode, master chiller’s evaporator must be in downstream,
and user is able to configure which one’s condenser is in
downstream. The master chiller shall monitor all external
commands as start/stop, demand limiting or setpoint
configuration.
The master slave function shall provide the ability to select
a lead chiller among the master and the slave chillers.
Selection shall be based on the delta between the master and
the slave run hours and shall try to optimize the runtime
hours. If this function is unused then, the lead chiller shall
always the master and should be changed to lag when it failed.
The lead chiller shall always be started firstly and the lag
chiller shall be maintained at zero percent capacity. When
the lead chiller cannot be loaded anymore then the lag start
timer is started.
The lag chiller shall always be stopped prior to lead chiller.
If a communication failure is detected between the master
and the slave then,all master/slave functions shall be disabled
and chillers shall return to standalone operations until
communication is reestablished.
If Middle sensor is installed,user can configure Middle Sensor
Option in Master Slave Config table.
5.32 - Oil EXV Control
If the chiller system is equipped with Oil EXV control valve,
and Oil EXV valve option in CONF_OPT table is
ENABLED, then PIC 5+ control system will control the
opening of Oil EXV valve to maintain the oil supply
temperature.The output of this valve is 4-20mA type.
Before using this function, the appropriate configurations
should be in place. They are Oil Temp High Threshold and
Oil Temp Low Threshold.
1 minute after compressor starts, if oil supply temperature >
Oil Temp High Threshold, oil EXV valve should be in fully
opened position; if oil supply temperature < Oil Temp low
Threshold, oil EXV valve should be in fully closed position;
otherwise,oil EXV valve position will be calculated according
to oil supply temperature.
During 1 minute after compressor starts or shutdown
completed, the oil EXV valve should be in fully closed
position
5.33 - Pumpdown/Lockout
The Pumpdown/Lockout feature prevents compressor start-
up when there is no refrigerant in the chiller. This function
is password-protected, user can access to this function via
maintenance menu
When using Pumpdown/Lockout function,will observe freeze
up precautions whiling using external pumpout to remove
refrigerant from chiller:
-
- Start water pumps and confirm flows
-
- Monitor Evaporator pressure, Condenser pressure,
Evaporator refrigerant temperature during pumpout
procedures
-
- Turn pumps off after pumpdown
-
- Proceed to locks out compressor
TheTerminate Lockout feature ends the Pumpdown/Lockout
after refrigerant is added:
-
- Starts pumps and confirm flows
-
- Monitor Evaporator pressure, Condenser pressure,
Evaporator temperature during charging process
-
- Terminates compressor lockout
5.34 - Trending
Accessing trending configuration screen does not require any
specific login level.
Just browse to Main Menu - > Trendings
Configuration is saved using the appropriate button:
The Trending screens are made to adjust and display the
trending curves recorded by the system.