SlideShare a Scribd company logo
1 of 36
Download to read offline
Indoor Unit
Model name:
4-way Cassette Type
RAV-SM564UTP Series
RAV-SM804UTP Series
RAV-SM1104UTP Series
RAV-SM1404UTP Series
RAV-SM1604UTP Series
AIR CONDITIONER (SPLIT TYPE)
Owner’s Manual
For commercial use
English
Owner’s Manual 1
Pedoman Pemilik 17
Bahasa
indonesia
Untuk keperluan komersil
1115350201-1_cover.indd 1
1115350201-1_cover.indd 1 3/6/14 10:17 AM
3/6/14 10:17 AM
– 1 –
Original instruction
ADOPTION OF NEW REFRIGERANT
This Air Conditioner uses R410A an environmentally friendly refrigerant.
This appliance is not intended for use by person (including children) with reduced physical, sensory or mental
capabilities, or lack of experience and knowledge, unless they have been given supervision or instruction
concerning use of the appliance by a person responsible for their safety.
Contents
1 Precautions for safety . . . . . . . . . . . . . . . . . . . . . . . . . . . . . . . . . . . . . . . . . . . . . . . . . . 3
2 Part names . . . . . . . . . . . . . . . . . . . . . . . . . . . . . . . . . . . . . . . . . . . . . . . . . . . . . . . . . . . 5
3 Wired remote controller. . . . . . . . . . . . . . . . . . . . . . . . . . . . . . . . . . . . . . . . . . . . . . . . . 5
4 Correct usage. . . . . . . . . . . . . . . . . . . . . . . . . . . . . . . . . . . . . . . . . . . . . . . . . . . . . . . . . 7
5 Timer operation . . . . . . . . . . . . . . . . . . . . . . . . . . . . . . . . . . . . . . . . . . . . . . . . . . . . . . . 8
6 Adjustment of wind direction . . . . . . . . . . . . . . . . . . . . . . . . . . . . . . . . . . . . . . . . . . . . 8
7 Power saving mode . . . . . . . . . . . . . . . . . . . . . . . . . . . . . . . . . . . . . . . . . . . . . . . . . . . 10
8 Self clean mode . . . . . . . . . . . . . . . . . . . . . . . . . . . . . . . . . . . . . . . . . . . . . . . . . . . . . . 10
9 Advanced settings . . . . . . . . . . . . . . . . . . . . . . . . . . . . . . . . . . . . . . . . . . . . . . . . . . . . 11
How to set up swing type
Setting the louver lock
Releasing the louver lock
10 Maintenance . . . . . . . . . . . . . . . . . . . . . . . . . . . . . . . . . . . . . . . . . . . . . . . . . . . . . . . . . 13
11 Troubleshooting. . . . . . . . . . . . . . . . . . . . . . . . . . . . . . . . . . . . . . . . . . . . . . . . . . . . . . 14
12 Operations and performance . . . . . . . . . . . . . . . . . . . . . . . . . . . . . . . . . . . . . . . . . . . 15
13 Installation . . . . . . . . . . . . . . . . . . . . . . . . . . . . . . . . . . . . . . . . . . . . . . . . . . . . . . . . . . 15
14 Specifications. . . . . . . . . . . . . . . . . . . . . . . . . . . . . . . . . . . . . . . . . . . . . . . . . . . . . . . . 16
1-EN 2-EN
1115350201-1_EN.indd 1
1115350201-1_EN.indd 1 3/6/14 10:15 AM
3/6/14 10:15 AM
– 2 –
EN
EN
ID
Thank you for purchasing this Toshiba air conditioner.
Please read carefully through these instructions that contain important information which complies with the “Machinery”
Directive (Directive 2006 / 42 / EC), and ensure that you understand them.
After reading these instructions, be sure to keep them in a safe place together with the Owner’s Manual and Installation Manual
supplied with your product.
Generic Denomination: Air Conditioner
Definition of Qualified Installer or Qualified Service Person
The air conditioner must be installed, maintained, repaired and removed by a qualified installer or qualified service person.
When any of these jobs is to be done, ask a qualified installer or qualified service person to do them for you.
A qualified installer or qualified service person is an agent who has the qualifications and knowledge described in the table
below.
Agent Qualifications and knowledge which the agent must have
Qualified installer ‡ The qualified installer is a person who installs, maintains, relocates and removes the air conditioners made
by Toshiba Carrier Corporation. He or she has been trained to install, maintain, relocate and remove the air
conditioners made by Toshiba Carrier Corporation or, alternatively, he or she has been instructed in such
operations by an individual or individuals who have been trained and is thus thoroughly acquainted with the
knowledge related to these operations.
‡ The qualified installer who is allowed to do the electrical work involved in installation, relocation and removal
has the qualifications pertaining to this electrical work as stipulated by the local laws and regulations, and
he or she is a person who has been trained in matters relating to electrical work on the air conditioners made
by Toshiba Carrier Corporation or, alternatively, he or she has been instructed in such matters by an
individual or individuals who have been trained and is thus thoroughly acquainted with the knowledge
related to this work.
‡ The qualified installer who is allowed to do the refrigerant handling and piping work involved in installation,
relocation and removal has the qualifications pertaining to this refrigerant handling and piping work as
stipulated by the local laws and regulations, and he or she is a person who has been trained in matters
relating to refrigerant handling and piping work on the air conditioners made by Toshiba Carrier Corporation
or, alternatively, he or she has been instructed in such matters by an individual or individuals who have been
trained and is thus thoroughly acquainted with the knowledge related to this work.
‡ The qualified installer who is allowed to work at heights has been trained in matters relating to working at
heights with the air conditioners made by Toshiba Carrier Corporation or, alternatively, he or she has been
instructed in such matters by an individual or individuals who have been trained and is thus thoroughly
acquainted with the knowledge related to this work.
Qualified service
person
‡ The qualified service person is a person who installs, repairs, maintains, relocates and removes the air
conditioners made by Toshiba Carrier Corporation. He or she has been trained to install, repair, maintain,
relocate and remove the air conditioners made by Toshiba Carrier Corporation or, alternatively, he or she
has been instructed in such operations by an individual or individuals who have been trained and is thus
thoroughly acquainted with the knowledge related to these operations.
‡ The qualified service person who is allowed to do the electrical work involved in installation, repair,
relocation and removal has the qualifications pertaining to this electrical work as stipulated by the local laws
and regulations, and he or she is a person who has been trained in matters relating to electrical work on the
air conditioners made by Toshiba Carrier Corporation or, alternatively, he or she has been instructed in such
matters by an individual or individuals who have been trained and is thus thoroughly acquainted with the
knowledge related to this work.
‡ The qualified service person who is allowed to do the refrigerant handling and piping work involved in
installation, repair, relocation and removal has the qualifications pertaining to this refrigerant handling and
piping work as stipulated by the local laws and regulations, and he or she is a person who has been trained
in matters relating to refrigerant handling and piping work on the air conditioners made by Toshiba Carrier
Corporation or, alternatively, he or she has been instructed in such matters by an individual or individuals
who have been trained and is thus thoroughly acquainted with the knowledge related to this work.
‡ The qualified service person who is allowed to work at heights has been trained in matters relating to
working at heights with the air conditioners made by Toshiba Carrier Corporation or, alternatively, he or she
has been instructed in such matters by an individual or individuals who have been trained and is thus
thoroughly acquainted with the knowledge related to this work.
Warning indications on the air conditioner unit
Warning indication Description
WARNING
ELECTRICAL SHOCK HAZARD
Disconnect all remote electric power supplies before servicing.
WARNING
Moving parts.
Do not operate unit with grille removed.
Stop the unit before the servicing.
CAUTION
High temperature parts.
You might get burned when removing this panel.
CAUTION
Do not touch the aluminum fins of the unit.
Doing so may result in injury.
CAUTION
BURST HAZARD
Open the service valves before the operation, otherwise there might be the
burst.
WARNING
ELECTRICAL SHOCK HAZARD
Disconnect all remote
electric power supplies
before servicing.
WARNING
Moving parts.
Do not operate unit with grille
removed.
Stop the unit before the servicing.
CAUTION
High temperature parts.
You might get burned
when removing this panel.
CAUTION
Do not touch the aluminum
fins of the unit.
Doing so may result in injury.
CAUTION
BURST HAZARD
Open the service valves before
the operation, otherwise there
might be the burst.
3-EN 4-EN
1115350201-1_EN.indd 2
1115350201-1_EN.indd 2 3/6/14 10:15 AM
3/6/14 10:15 AM
– 3 –
1 Precautions for safety
The manufacturer shall not assume any liability for the damage caused by not observing the description of this manual.
WARNING
General
‡ Carefully read Owner’s Manual before starting the air conditioner. There are many important things to keep in mind
for daily operation.
‡ Ask for installation to be performed by the dealer or a professional. Only a qualified installer (*1) is able to install an
air conditioner. If a non-qualified person installs an air conditioner, it may result in problems such as fire, electric
shock, injury, water leakage, noise and vibration.
‡ Do not use any refrigerant different from the one specified for complement or replacement. Otherwise, abnormally
high pressure may be generated in the refrigeration cycle, which may result in a failure or explosion of the product or
an injury to your body.
‡ Places where the operation sound of the outdoor unit may cause a disturbance. (Especially at the boundary line with
a neighbour, install the air conditioner while considering the noise.)
Transportation and storage
‡ To transport the air conditioner, wear shoes with protective toe caps, protective gloves, and other protective clothing.
‡ To transport the air conditioner, do not take hold of the bands around the packing carton. You may injure yourself if
the bands should break.
‡ Before stacking the packing cartons for storage or transportation, heed the precautions written on the packing
cartons. Failure to heed the precautions may cause the stack to collapse.
‡ The air conditioner must be transported in stable condition. If any part of the product broken, contact your dealer.
‡ When the air conditioner must be transported by hand, carry it by two or more people.
Installation
‡ Only a qualified installer(*1) or qualified service person(*1) is allowed to carry out the electrical work of the air
conditioner. Under no circumstances must this work be done by an unqualified individual since failure to carry out the
work properly may result in electric shocks and/or electrical leaks.
‡ After the installation work has been completed, have the installer explain about the circuit breaker positions. In the
event that trouble has occurred in the air conditioner, set the circuit breaker to the OFF position, and contact a service
person.
‡ If the unit is installed in a small room, take appropriate measures to prevent the refrigerant from exceeding the limit
concentration even if it leaks. Consult the dealer from whom you purchased the air conditioner when you implement
the measures. Accumulation of highly concentrated refrigerant may cause an oxygen deficiency accident.
‡ Do not install the air conditioner in a location that may be subject to a risk of expire to a combustible gas. If a
combustible gas leaks and becomes concentrated around the unit, a fire may occur.
‡ Use the company-specified products for the separately purchased parts. Use of non-specified products may result in
fire, electric shock, water leakage or other trouble. Have the installation performed by a professional.
‡ Confirm that earthing is performed correctly.
Operation
‡ Before opening the intake grille of the indoor unit or service panel of the outdoor unit, set the circuit breaker to the
OFF position. Failure to set the circuit breaker to the OFF position may result in electric shocks through contact with
the interior parts. Only a qualified installer(*1) or qualified service person(*1) is allowed to remove the intake grille of
the indoor unit or service panel of the outdoor unit and do the work required.
‡ Inside the air conditioner are high-voltage areas and rotating parts. Due to the danger of electric shocks or of your
fingers or physical objects becoming trapped in the rotating parts, do not remove service panel of the outdoor unit.
When work involving the removal of these parts is required, contact a qualified installer or a qualified service person.
‡ Do not move or repair any unit by yourself. Since there is high voltage inside the unit, you may get electric shock
when removing the cover and main unit.
‡ Use of a stand more than 50 cm high to clean the filter of the indoor unit or to carry out other such jobs constitutes
working at heights. Due to the danger of falling off the stand and injuring yourself while working at heights, this kind
of work should not be done by unqualified individuals. When this kind of work must be carried out, do not do it yourself
but ask a qualified installer or a qualified service person to do it for you.
‡ Do not touch the aluminum fin of the outdoor unit. You may injure yourself if you do so. If the fin must be touched, do
not touch it yourself but contact a qualified installer or a qualified service person.
‡ Do not climb onto or place objects on top of the outdoor unit. You may fall or the objects may fall off of the outdoor
unit and result in injury.
‡ Do not place any combustion appliance in a place where it is directly exposed to the wind of air conditioner, otherwise
it may cause imperfect combustion.
‡ When the air conditioner is operated with a combustion appliance in the same place, ventilate the room sufficiently.
Poor ventilation causes oxygen shortage.
‡ When the air conditioner is used in a closed room, sufficiently ventilate the room. Poor ventilation causes oxygen
shortage.
‡ Do not expose your body to cool air directly for a long time and do not cool yourself excessively.
Doing so may result in deteriorated physical condition and ill health.
‡ Do not insert your finger or a stick into the air intake or discharge.
Doing so may result injury as the fan is rotating at high speed inside the unit.
‡ Consult the shop where you purchased the air conditioner if air conditioning (cooling and heating) is not performed
properly as a refrigerant leakage may be the cause. Confirm the repair details with a qualified service person(*1)
when the repair includes additional charging of the refrigerant.
‡ Stop running the air conditioner and turn off the breaker before cleaning.
Otherwise, injury may result as the fan is rotating at high speed inside the unit.
Repairs
‡ If there is any kind of trouble (such as when an error display has appeared, there is a smell of burning, abnormal
sounds are heard, the air conditioner fails to cool or heat or water is leaking) has occurred in the air conditioner, do
not touch the air conditioner yourself but set the circuit breaker to the OFF position, and contact a qualified service
person. Take steps to ensure that the power will not be turned on (by marking “out of service” near the circuit breaker,
for instance) until qualified service person arrives. Continuing to use the air conditioner in the trouble status may
cause mechanical problems to escalate or result in electric shocks or other trouble.
‡ If the fan grille is damaged, do not approach the outdoor unit but set the circuit breaker to the OFF position, and
contact a qualified service person to have the repairs done. Do not set the circuit breaker to the ON position until the
repairs are completed.
‡ If there is a danger of the indoor unit’s falling, do not approach the indoor unit but set the circuit breaker to the OFF
position, and contact a qualified installer or a qualified service person to refit the unit. Do not set the circuit breaker
to the ON position until the unit has been refitted.
‡ If there is a danger of the outdoor unit’s toppling over, do not approach the outdoor unit but set the circuit breaker to
the OFF position, and contact a qualified installer or a qualified service person to have the improvements or refitting
done. Do not set the circuit breaker to the ON position until the improvements or refitting is completed.
‡ Do not customize the unit. Doing so may result in fire, electric shock or other trouble.
Relocation
‡ When the air conditioner is to be relocated, do not relocate it yourself but contact a qualified installer or a qualified
service person. Failure to relocate the air conditioner properly may result in electric shocks and/or a fire.
5-EN 6-EN
1115350201-1_EN.indd 3
1115350201-1_EN.indd 3 3/6/14 10:15 AM
3/6/14 10:15 AM
– 4 –
EN
EN
ID
CAUTION
To disconnect the appliance from the mains supply.
‡ This appliance must be connected to the mains by means of a switch with a contact separation of at least 3 mm.
The installation fuse (all types can be used) must be used for the power supply line of this air conditioner.
Installation
‡ Certainly lay the drain hose for perfect draining. Improper drainage may cause flooding in the house and getting
furniture wet.
‡ Connect the air conditioner to an exclusive power supply of the rated voltage, otherwise the unit may break down or
cause a fire.
‡ Confirm that the outdoor unit are fixed on the base. Otherwise, falling down of the units or other accidents may occur.
Operation
‡ Do not use this air conditioner for special purpose such as preserving food, precision instruments, art objects,
breeding animals, car, vessel.
‡ Do not touch any switches with wet finger, otherwise you may get an electric shock.
‡ If the air conditioner will not be used for a considerably long time, turn off the main switch or the circuit breaker, for
safety.
‡ To make the air conditioner operate in its original performance, operate it within the range of the operating
temperature specified in the instructions. Otherwise it may cause a malfunction, or water leak from the unit.
‡ Prevent any liquid from falling into the remote controller. Do not spill juice, water or any kind of liquid.
‡ Do not wash the air conditioner. Doing so may result in electric shock.
‡ Check whether the installation base and other equipment have become deteriorated after being used for a long time.
Leaving them such condition may result in the unit’s falling down and causing injury.
‡ Do not leave flammable sprays or other flammable materials near the air conditioner, and do not spray flammable
aerosol directly to the air conditioner. They may catch fire.
‡ Stop running the air conditioner and turn off the breaker before cleaning.
Otherwise, injury may result as the fan is rotating at high speed inside the unit.
‡ Ask for cleaning of the air conditioner to be performed by the dealer.
Cleaning the air conditioner in an improper manner may cause damage to plastic parts, insulation failure of electric
parts or other parts, and result in a malfunction. In the worst case, it may result in water leakage, electric shock,
smoke emission or fire.
‡ Do not put a water container such as a vase on the unit.
Water intrusion into the unit may occur and it may cause deterioration of electric insulation and result in electric shock.
‡ Do not wash air conditioners with pressure washers.
Electric leaks may cause electric shocks or fires.
(*1) Refer to the “Definition of Qualified Installer or Qualified Service Person.”
Information on the transportation, handling and storage of the
carton
Examples of indication on the carton
Symbol Description Symbol Description
Keep dry Do not drop
Fragile Do not lay down
Stacking height
(12 cartons can be stacked in this
case)
Do not walk on this carton
This side up Do not step
Handle with care
Other cautions Description
CAUTION
Injury possibility.
Don’t handle with packing band, or may get injured in case of broken band.
Stacking notice.
In case that cardboard boxes protrude out of pallet when stacking.
Lay a 10 mm thick plywood over the pallet.
11 cartons
7-EN 8-EN
1115350201-1_EN.indd 4
1115350201-1_EN.indd 4 3/6/14 10:15 AM
3/6/14 10:15 AM
– 5 –
2 Part names
Indoor unit
Outdoor unit (The design varies depending on the outdoor unit.
The following illustration shows an example.)
Knob
Knob to open / close
the suction port.
Provided in the electrical control
box.
Earth screw
Air filter
Removes dust or trash.
(Provided on the suction port.)
Change the direction of the air
to be discharged according to
cool / heat mode.
Discharge louver
of discharge port
The air in the room is sucked in
from this port.
Suction air port
Projection of
air filter
Air intake
(Side and rear)
Panel
There is an earth screw, valves,
and electric parts inside.
Air discharge
Piping panel
Wiring hole
Refrigerant pipe outlet
Fixing leg
3 Wired remote controller
This remote controller can control the operation of up to 8 indoor units.
Display section
In the display illustration below all the icons are shown. When the unit is in operation,
only relevant icons will be displayed.
‡ When the leak breaker is turned on for the first time, flashes on the display
part of the remote controller.
‡ While this icon is flashing, the model is being automatically confirmed.
Wait till icon has disappeared to use the remote controller.
1 Operation mode
The selected operation mode is displayed.
2 Error display
Displayed while the protective device works or a error
occurs.
3 SETTING display
Displayed during setup of the timer or other settings.
4 TEST run display
Displayed during a test run.
5 Timer display
When an error occurs, error code is displayed.
6 Timer mode display
The selected timer mode is displayed.
7 Louver position display
Displays louver position.
8 Swing display
Displayed during up / down movement of the louver.
9 Filter display
Reminder to clean the air filter.
10 Fan speed display
The selected fan speed mode is displayed.
11 Set temperature display
The selected set temperature is displayed.
12 Power saving mode display
Limits compressor speed (capacity) to save energy.
SET
TIME
TIMER SET
TEST
FILTER
RESET
TEMP.
CL
FAN
SAVE
SWING/FIX
VENT
MODE
ON / OFF
UNIT LOUVER
Display
section
Operation
section
19
21
22
1
6
2
5
9
10
15
17
16
20
11
14 13
12
18
(Auto)
(High)
(Med.)
(Low)
3 4 7 8
9-EN 10-EN
1115350201-1_EN.indd 5
1115350201-1_EN.indd 5 3/6/14 10:15 AM
3/6/14 10:15 AM
– 6 –
EN
EN
ID
13 UNIT No. display
Displays the number of the indoor unit selected.
Also displays error code of indoor and outdoor units.
14 Central control display
Displayed when the air conditioner is used under the
central control in combination with a central control
remote controller.
In case the remote controller is disabled by the central
control system, flashes.
The button operation is not accepted.
Even when ON / OFF, MODE, or TEMP. button is
pushed, and the button operation is not accepted.
(Settings made by the remote controller vary with the
central control mode. For details, refer to the Owner’s
Manual of the central control remote controller.)
15 Remote controller sensor display
Displayed while the sensor of the remote controller is
used.
16 Pre-heat display
Displayed when the heating mode is energized or
defrost cycle is initiated.
While this icon is displayed, the indoor fan stops.
17 No function display
Displayed when the function requested is not available
on that model.
18 Self clean operation display
Displayed during self clean operation to dry the indoor
heat exchanger.
19 Service display
20 Operation ready display
This display appears on some models.
21 Louver Number display.
(exapmle:01, 02, 03, 04)
22 Louver lock display
Displayed when there is a louver-locked unit in the
group (including 1 indoor unit by 1 outdoor unit).
1
6
2
3 7 8
5
9 15
17
16
11
14 13
12
20
18
19
21
22
4
10
Operation section
Push each button to select a desired operation.
‡ The control saves commands in memory and after the initial setting, there is no need for any additional
settings unless changes are desired. The air conditioner can be operated by pushing the button.
1 button (Temperature set button)
Adjusts the set point.
Select the desired set point by pushing TEMP.
or TEMP. .
2 button (Timer set button)
Use to setup the timer.
3 button (Filter reset button)
Resets “ ” display after cleaning filter.
4 button (Test button)
Use only for service.
(During normal operation, do not use this button.)
5 button
When the button is pushed, the operation starts, and it
stops by pushing the button again.
When the operation has stopped, the operation lamp and
all the displays disappear.
6 Operation lamp
Green light illuminates when unit is on.
Although it flashes when operating the protection device
or an error occurs.
7 button (Operation mode button)
Selects desired operation mode.
8 button (Fan speed button)
Selects the desired Fan speed.
9 button (Ventilation button)
Use when a power ventilation kit (locally procured) is
connected.
‡ If “ ” is displayed on the remote controller when
this button is pushed, no vent kit connected.
10 button (Power save operation)
Use to initiate power saving mode.
11 button (Unit / Louver select button)
Selects a unit number (left) and louver number (right).
UNIT:
Selects an indoor unit when adjusting wind direction
multiple indoor units are controlled with one remote
controller.
LOUVER:
Selects a louver when setting wind direction
adjustment independently.
12 button (Swing / Louver direction
button)
Selects automatic swing or setting the louver
direction.
OPTION :
Remote controller sensor
Usually the temperature sensor of the indoor unit senses the
temperature. The temperature on the surrounding of the
remote controller can also be sensed.
For details, contact the dealer from which you have
purchased the air conditioner.
8
6
4
3
2
5
7
10
12
1
9
11
11-EN 12-EN
1115350201-1_EN.indd 6
1115350201-1_EN.indd 6 3/6/14 10:15 AM
3/6/14 10:15 AM
– 7 –
4 Correct usage
When the air conditioner is used for the first time or when the setting is changed, follow the steps below. Settings are saved in
memory and are displayed anytime the unit is turned on by pushing the button.
Preparation
‡ When the circuit breaker is turned on, the partition lines are displayed on the remote controller.
* After the circuit breaker is turned on, the remote controller does not accept any commands for approx.
* When these indoor units are connected to the
outdoor units of RAV-SM**4AP-IN, heating mode
and auto mode will not able to operate.
1 minute, this is not a failure.
REQUIREMENT
When the air conditioner is re-powered after it has not been used for a long period, turn on the circuit breaker at least 12 hours
before starting the air conditioner.
Start
1 Push button.
The operation lamp illuminates, and the operation
starts.
2 Select an operation mode with the “ ”
button.
One push of the button, and the display changes
in the order shown below.
3 Select fan speed with “ ” button.
One push of the button, and the display changes
in the order shown below.
‡ When fan is in “ Auto”, fan speed is
adjusted based on difference between set point
and room temperature.
‡ In heating operation, if the room temperature is
not heated sufficiently with speed “ Low”
operation, select “ Med.” or “ High”
operation.
‡ The temperature sensor detects the return air
temperature at the indoor unit, which differs
from the room temperature depending on the
installation condition.
Set point is a target of room temperature.
( “Auto” is not selectable in the Fan
mode.)
4 Select the set point temperature by pushing
the “TEMP. ” or “TEMP. ” buttons.
Stop
Push button.
The operation lamp goes off, and the operation stops.
In the Cool, Dry, or Auto (cooling) mode, the fan runs
for 10 minutes (or more) for self clean operation.
SET
TIME
TIMER SET
TEST
FILTER
RESET
TEMP.
CL
FAN
SAVE
SWING/FIX
VENT
MODE
ON / OFF
UNIT LOUVER
1
3
2
4
Auto Heat Dry Fan
Cool
Auto High Med. Low
NOTE
Auto Changeover
‡ When in Auto Mode, the unit selects the operating mode (cooling, heating or fan only) based on the user set point
temperature.
‡ If the Auto mode is uncomfortable, you can select the desired conditions manually.
Cooling
‡ If there is a demand for cooling, unit will start approximately 1 minute after mode is selected.
Heating
‡ If there is a demand for heating, unit will start approximately 3 to 5 minutes after the mode is selected.
‡ After the heating operation has stopped, fan may continue to run for approx. 30 seconds.
‡ When the room temperature reaches the set temperature, the outdoor unit stops and the indoor unit fan runs at extremely
low speed.
During defrost operation, the fan stops so that cool air is not discharged. (“ ” Pre-heat is displayed.)
When restarting the operation after stop
When the unit is attempted to restart immediately after it was stopped, the unit can not start for approx. 3 minutes this is to
protect the compressor.
8 °C operation (For object pre-heating)
(SDI 4series and DI 4series (RAV-SP***4AT / RAV-SM***4AT) only)
The air conditioner can control the heating temperature to about 8 °C in the heating mode.
The 8 °C heating operation requires settings with the wired remote controller. Ask the installer or dealer for the settings
according to the installation manual of the indoor unit.
Start
1 Set the displayed temperature to 18 °C in the heating mode by pushing TEMP. button.
2 Set the displayed temperature to 8 °C by pushing TEMP. button for at least four seconds.
Stop
1 Set the displayed temperature to 18 °C by pushing TEMP. button.
‡ The air conditioner returns to the normal Heat mode. Select a desired temperature and operation mode.
NOTE
‡ The discharged air temperature is lower than that in the normal heating operation.
‡ The room temperature may not be heated evenly depending on the remote controller installation location.
‡ The room temperature may not reach 8 °C depending on the room size or the installation conditions.
‡ Setting for fan speed is available during the 8 °C heating operation.
The 8 °C heating operation is cancelled in the following cases.
‡When operation is stopped with button
‡When another operation mode is selected with button
‡When temperature setting or operation mode is changed or operation is started / stopped by the wireless remote controller
or the central control remote controller.
‡ When this operation mode is used, observe proper operating hours and periodic maintenance by service staff is
recommended.
13-EN 14-EN
1115350201-1_EN.indd 7
1115350201-1_EN.indd 7 3/6/14 10:15 AM
3/6/14 10:15 AM
– 8 –
EN
EN
ID
5 Timer operation
‡ Three timer modes are available: (Setting of up to 168 hours is enabled.)
Set
1 Push button.
The timer mode changes with every push of the button.
‡ and timer display flashes.
2 Push to select “set time”.
‡ With every push of button, the set time increases
by 0.5 hr (30 minutes).
When setting a time more than 24 hours for timer
operation, timer can be set in increments of 1 hr.
The maximum set time is 168 hr (7 days).
The remote control displays the set time with time
(between 0.5 and 23.5 hours) (*1
) or number of days
and time (24 hours or more) (*2
) as shown below.
‡ With every push of button, the set time decreases
by 0.5 hr (30 minutes) (0.5 - 23.5 hours) or 1 hr (24 -
168 hours).
Example of remote control display
‡ 23.5 hours (*1
)
‡ 34 hours (*2
)
3 Push button.
‡ icon disappears and time display goes on,
and or icon flashes.
(When On timer is activated, time and On timer
are icons and other icons disappear.)
4 Cancel timer operation
Push button.
Timer icon disappears.
NOTE
‡ When the operation stops after the timer reached the preset
time, the Repeat Off timer resumes the operation by
pushing button and stops the operation after the
time of the timer has reached the set time.
‡ When is pushed while the Off timer function of the
air conditioner is active, the indication of the timer function
disappears and then appears again after about 5
seconds.
This is due to normal processing of the remote controller.
Off timer : The unit stops when the set time is reached.
Repeat Off timer : The unit stops daily when the set time is reached.
On timer : The unit starts when the set time is reached.
1
3
2
4
shows 1 day (24 hours).
shows 10 hours. (Total 34 hours)
(Off timer) (On timer)
(Repeat Off timer)
No display
Off Off On
Number of days Time
6 Adjustment of wind direction
For best cooling and heating performance, adjust the louvers (adjustment plates of up / down wind direction)
appropriately. Cold air descends and warm air rises, so to heat a room tilt the louvers downward, and to cool a
room tilt them horizontally.
CAUTION
Direct the louvers horizontally for cooling.
If the louvers stay pointed downward when cooling, condensation may form on the discharge port and / then drops from
the louvers.
NOTE
If the louvers stay pointed straight out horizontally when heating, the room temperature may be unevenly
distributed.
‡ When the air conditioner is not working, the louvers are directed horizontally automatically.
‡ The louvers are directed horizontally when heating begins, during defrost operation, or during the minimum
operation after reaching the set temperature.
When a swing or louver direction setting is made at this time, the remote controller display varies with the setting,
but the louvers stay pointed straight out horizontally.
When the air conditioner starts heating, the louvers are directed to the set direction.
For cooling (COOL)
Direct the louvers horizontally.
For heating (HEAT)
Direct the louvers downward.
15-EN 16-EN
1115350201-1_EN.indd 8
1115350201-1_EN.indd 8 3/6/14 10:15 AM
3/6/14 10:15 AM
– 9 –
How to set up the louver direction
1 Push during operation.
The louver direction changes for every push of the
button.
In HEAT operation
Direct the louver (adjustment plate of up / down wind
direction) downward. If directing at horizontally, hot air
may not come to the foot.
In COOL / DRY operation
Direct the louver (adjustment plate of up / down wind
direction) horizontally. If directing it downward, the dew
may form on the surface of the air discharge port and
may drop down.
In FAN operation
Select a desired louver direction.
How to start swinging
1 Push , set the louver (adjustment plate
of up / down wind direction) direction to the
lowest position, and then push again.
SWING is displayed and the up / down louver
direction is automatically selected.
Display during swinging
How to stop swinging
1 Push at a desired position while the
louver is swinging.
‡ When is pushed after that, wind
direction can be set again from the highest
position.
Display when swinging is stopped
In this case, push again two seconds later.
‡ In Cool / Dry operation, the louver does not stop
as it directs downward. If stopping the louver as
it directs downward during swing operation, it
stops after moving to the third position from the
highest position.
Display when stopping the swing
1
Unit select button
Initial setup
Initial setup
Initial setup
* However, even if is pushed while the
louver is swinging, the louver position is
displayed as follows and highest position of the
louver may not be selected.
Repeat
Fan / Heat
operation
Cool / Dry
operation
Fan / Heat
operation
Cool / Dry
operation
Unit select button
‡ When multiple indoor units are controlled with one
remote controller, louver direction can be set for
each indoor unit by selecting individually.
‡ To set louver direction individually, push
button to display an indoor unit number in the control
group. Then set the wind direction of the displayed
indoor unit.
‡ When no indoor unit number is displayed, all indoor
units in the control group can be controlled
simultaneously.
‡ Each time button is pushed, the display
changes as follows:
How to set louver wind
direction individually
1 Select an indoor unit to be set by pushing
(left side of the button) during
operation.
‡ The indoor unit number changes each time you
push the button.
* When no unit number is displayed, all indoor units
are selected.
2 Select a louver you want to adjust change by
pushing (right side of the button).
‡ Each time you push the button, the display on
the left of the remote controller changes as
follows:
* When no louver number is displayed, all four louvers
are selected.
3 Determine wind direction of the selected
louver by pushing .
‡ Each time you push the button, the display
changes as follows:
* During COOL (DRY) mode, (4) and (5) are not
displayed.
Not
display
UNIT No.
1-1
UNIT No.
1-2
UNIT No.
1-3
UNIT No.
1-4
Not
display
1-1 1-2 1-3
1-4
Not
display
Louver No.
03
01
02
04
Refrigerant
pipe
Drain pipe
Electrical control box
(1) (2) (3) (4)
(7) (6) (5)
UNIT No. UNIT No. UNIT No.
UNIT No.
17-EN 18-EN
1115350201-1_EN.indd 9
1115350201-1_EN.indd 9 3/6/14 10:15 AM
3/6/14 10:15 AM
– 10 –
EN
EN
ID
7 Power saving mode
The power saving mode saves energy by limiting the maximum current which will effect cooling capacity that the unit can
generate.
Push button during operation.
‡ The air conditioner enters power saving mode.
‡ appears on the display.
Power saving mode will stay in effect until it is
cancelled.
To cancel the power saving mode, push
button again.
‡ disappears.
To configure the power saving mode settings
1 Push button for at least four seconds when the air conditioner is not working.
‡ , symbol, and numbers flash.
2 Push (left side of the button) to select an indoor unit to be set.
‡ Each time the button is pushed, UNIT No. change as follows:
3 Push TIME buttons, to adjust the
power saving mode setting.
‡ Each push of the button changes the power level by
1 % within the range from 100 % to 50 %.
‡ The factory default is 75 %.
4 Push button.
5 Push button to complete the setting.
NOTE
‡ When other electric appliances are used at the same time, to avoid triggering the circuit breaker, power saving mode is
recommended. Of course power saving mode can be used to save energy as well.
‡ Power saving mode consumes less energy, but may not cool the room as much as normal mode. (The maximum current is
limited to approximately 75 % (factory default) of the normal mode.)
‡ Even when operation start / stop, operation mode change, or power reset is performed during the power saving mode, the
power saving mode is retained until the next operation.
4
3
1
5 2
UNIT No.
1-1
UNIT No.
2-1
UNIT No.
3-1
UNIT No.
4-1
The fan of the selected unit runs.
Setting of power level in
power saving mode
8 Self clean mode
This function is provided to dry the inside of the indoor unit by the FAN operation after running the cooling
/ dry / AUTO (cooling) mode to keep the indoor unit clean.
‡ The self clean time varies with the cooling / dry / Auto (cooling) operation time as follows.
‡ “ ” is displayed on the remote controller during self clean operation.
To stop self clean forcibly, push button twice in succession.
CAUTION
‡ The fan continues to run even after button is pushed to stop operation in some modes.
This is normal because the self clean mode is in progress.
‡ The louvers open slightly and are directed horizontally during self clean, and they close when the self clean is
completed.
‡ The operation lamp (LED) does not light during the self clean mode (function).
‡ The self clean mode (function) cannot clean the room or remove the already existing mold and dust inside the indoor
unit.
‡ To cancel the self clean function, consult the dealer.
Cooling / dry / Auto (cooling) operation time self clean time
Less than 10 minutes No self clean operation
10 minutes to less than 1 hour 1 hour
More than 1 hour 2 hours
19-EN 20-EN
1115350201-1_EN.indd 10
1115350201-1_EN.indd 10 3/6/14 10:15 AM
3/6/14 10:15 AM
– 11 –
9 Advanced settings
How to set up swing type
1 Push for at least four seconds when
the air conditioner is not working.
‡ , symbol, and numbers flash.
2 Select an indoor unit to be set by pushing
(left side of the button).
‡ Each time you push the button, unit numbers
change as follows:
The fan of the selected unit runs and the louvers
start swinging.
3 Select a swing type by pushing TIME
buttons.
CAUTION
Do not set the swing setup code to “0000”.
(This setting may cause a failure of the louvers.)
4 Push the button.
5 Push the button to finish the setting.
2
1
4
5
3
Swing setup code Swing of louvers
0001
Standard swing
(Factory default)
0002 Dual swing
0003 Cycle swing
Not
display
1-1 2-1 3-1
4-1
Swing setup code
Standard swing
All four louvers swing simultaneously at the same
angle.
Dual swing
Adjoining louver alternately swing horizontally and
downward.
Cyclic swing (Recommended for cooling)
All four louvers swing at different times like waves.
Swing
Horizontal
Downward
Downward
Horizontal
Downward
Downward
Horizontal
Horizontal
UNIT No. UNIT No. UNIT No.
UNIT No.
21-EN 22-EN
1115350201-1_EN.indd 11
1115350201-1_EN.indd 11 3/6/14 10:15 AM
3/6/14 10:15 AM
– 12 –
EN
EN
ID
Setting the louver lock
1 Push and hold the button (right side of
the button) for at least 4 seconds while
running is stopped.
blinks.
‡ When no unit number is displayed, all units are
selected.
2 Push the button (left side of the button)
to select a unit.
The unit number changes each time you push the
button.
The fan of the selected unit runs, and the louver
swings.
3 Push the “TEMP. ” buttons to
display the number of the louver to fix its
direction.
The selected louver swings.
4 Push the buttons to select the
direction of the louver you do not want to
swing.
* If (4) or (5) is selected, condensation may occur
during cooling.
5 Push the button to confirm the setting.
When the setting is confirmed, the mark lights
up.
(To set the louver lock of another unit, repeat from
Step 2. To set another louver lock of the same unit,
repeat from Step 3.)
6 Push the button to finish the setting.
* F1 appears in the CODE No. section on the
remote controller. This indicates that the louver
01 shown in the following figure is selected.
NOTE
Even in louver lock mode, the louver temporarily
moves in the following cases:
‡ When the air conditioner is stopped
UNIT LOUVER
UNIT No.
1-1
UNIT No.
2-1
UNIT No.
3-1
UNIT No.
4-1
(1)
0001
(2)
0002
(3)
0003
(5)
0005
(4)
0004
0001 - 0005
(Louver position
code)
Louver No.
03
01
02
04
Refrigerant
pipe
Drain pipe
Electrical control box
Releasing the louver lock
Set “0000” in Step 4 of “Setting the louver lock”.
The mark disappears.
* Steps 1 - 3 and 5, 6 of “Setting
the louver lock” also apply to
releasing the lock.
Adjusting the horizontal direction
1 Push and hold the and “TEMP. ”
buttons for at least 4 seconds while running
is stopped.
blinks.
“01” appears in CODE No.
2 Push the button (left side of the button)
to select a unit
The unit number changes each time you push the
button.
The fan of the selected unit runs, and the louver
swings.
3 Push the “TEMP. ” buttons to
change the CODE No. to “45”.
4 Push the “TIME ”buttons to select a
direction.
5 Push the button to check the settings.
The indicator stops blinking and stays lit, and the
settings are confirmed.
6 Push button to finish the setting.
* If the cold draft position is selected, the ceiling
smudging reduction effect will be reduced.
Direction SET
DATA Direction setting
“0000”
Smudging reduction position
(reduces ceiling smudging)
“0002”
Cold draft position
(Less directly expose your body to
cool air)
(factory default)
0000
SET DATA
UNIT No.
1-1
UNIT No.
2-1
UNIT No.
3-1
UNIT No.
4-1
No
display
23-EN 24-EN
1115350201-1_EN.indd 12
1115350201-1_EN.indd 12 3/6/14 10:15 AM
3/6/14 10:15 AM
– 13 –
10Maintenance
WARNING
Cleaning the air filter and other parts of the air filter involves dangerous work in high places, so be sure
to have a qualified installer or qualified service person to do it.
Do not attempt it by yourself.
After the cooling or dry auto (cooling) operation has finished, the dry operation is performed and the fan
starts running. When cleaning the unit, stop the drying operation forcibly and turn off the circuit breaker
to avoid electric shock.
Cleaning air filters
Clogged air filters will reduce the cooling and heating performance.
(1) If “ ” is displayed on the remote controller, clean the air filters.
(2) When the cleaning of air filters has been completed, push button.
“ ” disappears.
When the unit will not be used for a long time
1. Perform the fan operation for a couple of hours to dry inside.
2. Press on the remote controller to stop running, and turn off the circuit breaker.
3. Clean the air filters and reinstall them.
Before the cooling season
Clean the drain pan
‡ Contact the dealer where you purchased the product.
(Drain does not work if the drain pan or vent is clogged. In some cases the drain may overflow and wet the wall or floor. Be
sure to clean the drain pan before the cooling season.)
(1)
(2)
Check periodically
‡ If the unit is used for a long time, parts may deteriorate and cause malfunction or bad drainage of dehumidified water
depending on the heat, humidity, or dust.
‡ In addition to the usual maintenance, it is recommended that you have the unit checked and maintained by the dealer where
you purchased it.
NOTE
For environmental conservation, it is strongly recommended that the indoor and outdoor units of the air conditioner in
use be cleaned and maintained regularly to ensure efficient operation of the air conditioner.
When the air conditioner is operated for a long time, periodic maintenance (once a year) is recommended.
Furthermore, regularly check the outdoor unit for rust and scratches, and remove them or apply rustproof treatment, if
necessary.
As a general rule, when an indoor unit is operated for 8 hours or more daily, clean the indoor unit and outdoor unit at
least once every 3 months. Ask a professional for this cleaning / maintenance work.
Such maintenance can extend the life of the product though it involves the owner’s expense.
Failure to clean the indoor and outdoor units regularly will result in poor performance, freezing, water leakage, and even
compressor failure.
Maintenance List
Part Unit Check (visual / auditory) Maintenance
Heat exchanger Indoor / outdoor Dust / dirt clogging, scratches Wash the heat exchanger when it is clogged.
Fan motor Indoor / outdoor Sound
Take appropriate measures when abnormal sound
is generated.
Filter Indoor Dust / dirt, breakage
‡ Wash the filter with water when it is contaminated.
‡ Replace it when it is damaged.
Fan Indoor
‡ Vibration, balance
‡ Dust / dirt, appearance
‡ Replace the fan when vibration or balance is
terrible.
‡ Brush or wash the fan when it is contaminated.
Air intake / discharge
grilles Indoor / outdoor Dust / dirt, scratches
Fix or replace them when they are deformed or
damaged.
Drain pan Indoor Dust / dirt clogging, drain
contamination
Clean the drain pan and check the downward slope
for smooth drainage.
Ornamental panel,
louvers
Indoor Dust / dirt, scratches
Wash them when they are contaminated or apply
repair coating.
Exterior Outdoor
‡ Rust, peeling of insulator
‡ Peeling / lift of coat
Apply repair coating.
25-EN 26-EN
1115350201-1_EN.indd 13
1115350201-1_EN.indd 13 3/6/14 10:15 AM
3/6/14 10:15 AM
– 14 –
EN
EN
ID
11Troubleshooting
Check the points described below before requesting repair.
If there is something unusual even after checking the above, stop running the unit, turn off the circuit breaker, and inform the
dealer where you purchased the product of the product number and symptom. Do not attempt to repair the unit by yourself as
doing so is dangerous. If the check indicator ( , , , etc.) is displayed on the remote controller LCD, inform the dealer
of its content as well.
If any of the following occur, stop running the unit immediately, turn off the circuit breaker, and contact the dealer where you
purchased the product.
‡ The switch does not work properly.
‡ The circuit breaker often blows out.
‡ You unintentionally put a foreign object or water inside.
‡ The unit cannot be run even after the cause of the protective device activation is removed.
‡ Other unusual conditions are found.
Symptom Cause
It
is
not
a
malfunction.
Outdoor unit
‡ White, misty, cold air or water comes out
‡ Sometimes the noise of air leaking is heard.
‡ A noise is heard when the power is turned
on.
‡ The fan of the outdoor unit is automatically stopped and
defrosting is performed.
‡ The solenoid valve works when defrosting starts or stops.
‡ The outdoor unit is preparing for running.
Indoor unit
‡ Sometimes a swishing is heard.
‡ A clacking sound is heard.
‡ Discharged air smells unusual.
‡ The fan continues running even after the
unit operation is stopped.
‡ When the unit starts running, during operation, or
immediately after the unit stops running, a sound such as
water flowing may be heard, or the operation sound may
become louder for a couple of minutes immediately after
the unit starts running. This is the sound of the refrigerant
flowing or the dehumidifier draining.
‡ This is a sound generated when the heat exchanger, etc.
expands and contracts slightly due to temperature
change.
‡ Various smells from the walls, carpet, clothes, cigarette,
cosmetics, etc. adhere to the air conditioner.
‡ The fan keeps running to self clean operation the heat
exchanger during drying.
?
d
e
r
r
u
c
c
o
t
u
o
k
c
a
l
b
a
s
a
H
‡
n
u
r
t
o
n
s
e
o
d
t
i
n
u
e
h
T
‡
‡ Has the circuit breaker blown?
‡ Has the protective device been activated? (The operation
indicator and on the remote controller are blinking.)
Check
again.
The room does not cool down or warm up.
‡ Is the air intake or discharge of the outdoor unit clogged?
‡ Is a door or window open?
‡ Is the air filter clogged with dust?
‡ Is the air volume set to “Low”? Or is the operation mode
set to “Fan”?
‡ Is the setup temperature appropriate?
Confirmation and check
When an error occurred in the air conditioner, an error code
and indoor UNIT No. appear on the display part of the remote
controller.
The error code is only displayed during the operation.
If the display disappears, operate the air conditioner
according to the following “Confirmation of error log” for
confirmation.
Confirmation of error log
When an error occurred on the air conditioner, the error log
can be confirmed with the following procedure. (The error log
is stored in memory up to 4 errors.)
The log can be confirmed from both operating status and stop
status.
1 When and buttons are pushed at the
same time for 4 seconds or more, the
following display appears.
If is displayed, the mode enters in the
error log mode.
‡ [01: Order of error log] is displayed in CODE No..
‡ [Error code] is displayed in CHECK.
‡ [Indoor unit address in which an error occurred] is
displayed in Unit No.
.
2 Every pushing of button used to set
temperature, the error log stored in memory
is displayed in order.
The numbers in CODE No. indicate CODE
No. [01] (latest) ĺ [04] (oldest).
REQUIREMENT
Do not push button because all the error log of the indoor
unit will be deleted.
3 After confirmation, push button to return
to the usual display.
Error code Indoor UNIT No. in
which an error occurred
3
2
1
27-EN 28-EN
1115350201-1_EN.indd 14
1115350201-1_EN.indd 14 3/6/14 10:15 AM
3/6/14 10:15 AM
– 15 –
12Operations and performance
Check before running
‡ Check whether the earth wire is cut or disconnected.
‡ Check whether the air filter is installed.
‡ Turn on the circuit breaker 12 hours or more before starting
operation.
3 minutes protection function
3-minutes protection function prevents the air conditioner
from starting for initial 3 minutes after the main power switch
/ circuit breaker is turned on for re-starting the air conditioner.
Power failure
Power failure during operation will stop the unit completely.
‡ To restart the operation, push the ON / OFF button on the
remote controller.
‡ Lightning or a wireless car telephone operating nearby
may cause the unit to malfunction. Turn off the main power
switch or circuit breaker and then turn them on again. Push
the ON / OFF button on the remote controller to restart.
Defrosting operation
If the outdoor unit is frosted during the heating operation,
defrosting starts automatically (for approximately 2 to 10
minutes) to maintain the heating capacity.
‡ The fans in both indoor and outdoor units will stop during
the defrosting operation.
‡ During the defrosting operation, the defrosted water will be
drained from the bottom plate of the outdoor unit.
Heating capacity
In the heating operation, the heat is absorbed from the
outside and brought into the room. This way of heating is
called heat pump system. When the outside temperature is
too low, it is recommended to use another heating apparatus
in combination with the air conditioner.
Protective device
‡ Stops operation when the air-conditioner is overloaded.
‡ If the protective device is activated, the unit stops running,
and the operation indicator and check indicator on the
remote controller blink.
If the protective device is activated
‡ Turn off the circuit breaker and perform a checkup.
Continued running may cause a malfunction.
‡ Check whether the air filter is installed. If not, the heat
exchanger may be clogged with dust and water leakage
may occur.
During cooling
‡ The air intake or discharge of the outdoor unit is clogged.
‡ Strong wind continuously blows against the discharge of
the outdoor unit.
During heating
‡ The air filter is clogged with a large amount of dust.
‡ The air intake or discharge of the indoor unit is clogged.
Do not turn off the circuit breaker
During the air-conditioning season, leave the circuit breaker
turned on, and use the ON / OFF key on the remote
controller.
Attention to snowfall and freeze on the
outdoor unit
‡ In snowy areas, the air intake and air discharge of the
outdoor unit are often covered with snow or frozen up.
If snow or freeze on the outdoor unit is left as it is, it may
cause machine failure or poor warming.
‡ In cold areas, pay attention to the drain hose so that it
perfectly drains water without water remaining inside for
freeze prevention. If water freezes in the drain hose or
inside the outdoor unit, it may cause machine failure or
poor warming.
Air conditioner operating conditions
For proper performance, operate the air conditioner under the following temperature conditions:
If air conditioner is used outside of the above conditions, safety protection may work.
Cooling operation
Outdoor temperature : –15 °C to 43 °C (Dry bulb temp.)
Room temperature : 21 °C to 32 °C (Dry bulb temp.), 15 °C to 24 °C (Wet bulb temp.)
[CAUTION]
Room relative humidity – less than 80 %. If the air conditioner operates in excess of this
figure, the surface of the air conditioner may cause dewing.
Heating operation
Outdoor temperature : –15 °C to 15 °C (Wet bulb temp.)
Room temperature : 15 °C to 28 °C (Dry bulb temp.)
13Installation
Do not install the air conditioner in the following places
‡ Do not install the air conditioner in any place within 1 m from a TV, stereo, or radio set. If the unit is installed in such place,
noise transmitted from the air conditioner affects the operation of these appliances.
‡ Do not install the air conditioner near a high frequency appliance (sewing machine or massager for business use, etc.),
otherwise the air conditioner may malfunction.
‡ Do not install the air conditioner in locations where iron or other metal dust is present. If iron or other metal dust adheres to
or collects on the interior of the air conditioner, it may spontaneously combust and start a fire.
‡ Do not install the air conditioner in a humid or oily place, or in a place where steam, soot, or corrosive gas is generated.
‡ Do not install the air conditioner in a salty place such as seaside area.
‡ Do not install the air conditioner in a place where a great deal of machine oil is used.
‡ Do not install the air conditioner in a place where it is usually exposed to strong wind such as in seaside area.
‡ Do not install the air conditioner in a place where sulfureous gas generated such as in a spa.
‡ Do not install the air conditioner in a vessel or mobile crane.
‡ Do not install the air conditioner in an acidic or alkaline atmosphere (in a hot-spring area or near a chemicals factory, or in a
place subject to combustion emissions). Corrosion may be generated on the aluminum fin and copper pipe of the heat
exchanger.
‡ Do not install the air conditioner near an obstacle (air vent, lighting equipment, etc.) that disturbs discharge air. (Turbulent
airflow may reduce the performance or disable devices.)
‡ Do not use the air conditioner for special purposes such as preserving food, precision instruments, or art objects, or where
breeding animals or growing plants are kept.
(This may degrade the quality of preserved materials.)
‡ Do not install the air conditioner over an object that must not get wet. (Condensation may drop from the indoor unit at a
humidity of 80 % or more or when the drain port is clogged.)
‡ Do not install the air conditioner in a place where an organic solvent is used.
‡ Do not install the air conditioner near a door or window subject to humid outside air.
Condensation may form on the air conditioner.
‡ Do not install the air conditioner in a place where special spray is used frequently.
Be careful with noise or vibrations
‡ Do not install the air conditioner in a place where noise by outdoor unit or hot air from its air discharge annoys your neighbors.
‡ Install the air conditioner on a solid and stable foundation so that it prevents transmission of resonating, operation noise and
vibration.
‡ If one indoor unit is operating, some sound may be audible from other indoor units that are not operating.
29-EN 30-EN
1115350201-1_EN.indd 15
1115350201-1_EN.indd 15 3/6/14 10:15 AM
3/6/14 10:15 AM
– 16 –
EN
EN
ID
14Specifications
* Under 70 dBA
Model
Sound power level (dBA) Weight (Kg)
Main unit (Ceiling panel)
Cooling Heating
RAV-SM564UTP Series * * 20 (4.2)
RAV-SM804UTP Series * * 20 (4.2)
RAV-SM1104UTP Series * * 24 (4.2)
RAV-SM1404UTP Series * * 24 (4.2)
RAV-SM1604UTP Series * * 24 (4.2)
31-EN 32-EN
1115350201-1_EN.indd 16
1115350201-1_EN.indd 16 3/6/14 10:15 AM
3/6/14 10:15 AM
– 17 –
Petunjuk asli
PENGGUNAAN REFRIGERAN BARU
AC ini menggunakan R410A, yang merupakan refrigeran ramah lingkungan.
Alat ini tidak ditujukan untuk digunakan oleh orang (termasuk anak-anak) berkekurangan fisik, daya tanggap,
atau kemampuan mental, atau kurang pengalaman dan pengetahuan, kecuali mereka telah diberi pengarahan
atau petunjuk mengenai penggunaan alat oleh orang yang bertanggung jawab atas keselamatan mereka.
Isi
1 Petunjuk keselamatan . . . . . . . . . . . . . . . . . . . . . . . . . . . . . . . . . . . . . . . . . . . . . . . . 19
2 Nama komponen . . . . . . . . . . . . . . . . . . . . . . . . . . . . . . . . . . . . . . . . . . . . . . . . . . . . 21
3 Remote control berkabel . . . . . . . . . . . . . . . . . . . . . . . . . . . . . . . . . . . . . . . . . . . . . . 21
4 Penggunaan yang benar . . . . . . . . . . . . . . . . . . . . . . . . . . . . . . . . . . . . . . . . . . . . . . 23
5 Pengoperasian timer . . . . . . . . . . . . . . . . . . . . . . . . . . . . . . . . . . . . . . . . . . . . . . . . . 24
6 Penyetelan arah angin . . . . . . . . . . . . . . . . . . . . . . . . . . . . . . . . . . . . . . . . . . . . . . . . 24
7 Mode penghematan daya . . . . . . . . . . . . . . . . . . . . . . . . . . . . . . . . . . . . . . . . . . . . . 26
8 Mode pembersihan sendiri . . . . . . . . . . . . . . . . . . . . . . . . . . . . . . . . . . . . . . . . . . . . 26
9 Pengaturan lanjutan . . . . . . . . . . . . . . . . . . . . . . . . . . . . . . . . . . . . . . . . . . . . . . . . . . 27
10 Perawatan . . . . . . . . . . . . . . . . . . . . . . . . . . . . . . . . . . . . . . . . . . . . . . . . . . . . . . . . . . 29
11 Pemecahan masalah . . . . . . . . . . . . . . . . . . . . . . . . . . . . . . . . . . . . . . . . . . . . . . . . . 30
12 Pengoperasian dan kinerja . . . . . . . . . . . . . . . . . . . . . . . . . . . . . . . . . . . . . . . . . . . . 31
13 Pemasangan . . . . . . . . . . . . . . . . . . . . . . . . . . . . . . . . . . . . . . . . . . . . . . . . . . . . . . . . 31
14 Spesifikasi . . . . . . . . . . . . . . . . . . . . . . . . . . . . . . . . . . . . . . . . . . . . . . . . . . . . . . . . . 32
1-ID 2-ID
1115350201-1_ID.indd 17
1115350201-1_ID.indd 17 3/6/14 10:17 AM
3/6/14 10:17 AM
– 18 –
EN
EN
ID
3-ID 4-ID
Terima kasih telah membeli AC Toshiba ini.
Bacalah dengan cermat petunjuk ini yang berisi informasi penting yang mematuhi Direktif “Mesin” (Direktif 2006 /
42 / EC), dan pastikan bahwa Anda memahaminya.
Setelah membacanya, simpan petunjuk ini di tempat yang aman bersama dengan Pedoman Pemilik dan Petunjuk
Pemasangan yang disertakan bersama produk Anda.
Penamaan Umum: Air Conditioner
Definisi Pemasang yang Berkualifikasi atau Teknisi Servis yang Berkualifikasi
AC ini harus dipasang, dirawat, diperbaiki, dan dilepas oleh pemasang berkualifikasi atau teknisi servis yang
berkualifikasi.
Jika salah satu pekerjaan ini perlu dilakukan, mintalah pemasang berkualifikasi atau teknisi servis berkualifikasi
untuk melakukannya.
Pemasang berkualifikasi atau teknisi servis berkualifikasi adalah agen yang memiliki kualifikasi dan pengetahuan
yang diuraikan dalam tabel di bawah ini.
Agen Kualifikasi dan pengetahuan yang harus dimiliki agen
Pemasang
berkualifikasi
• Pemasang berkualifikasi adalah orang yang memasang, merawat, memindahkan, dan melepas
AC yang dibuat oleh Toshiba Carrier Corporation. Mereka telah dilatih untuk memasang,
merawat, memindahkan, dan melepas AC yang dibuat oleh Toshiba Carrier Corporation atau,
bila tidak, mereka telah mendapat petunjuk dalam hal pengoperasian demikian oleh orang atau
orang-orang yang terlatih sehingga telah sangat menguasai pengetahuan yang terkait dengan
operasi ini.
• Pemasang berkualifikasi yang diizinkan untuk melakukan pekerjaan kelistrikan yang ada dalam
pemasangan, pemindahan, dan pelepasan memiliki kualifikasi yang sesuai dengan pekerjaan
kelistrikan ini sebagaimana diatur dalam hukum dan peraturan setempat, dan dia sudah
mendapatkan pelatihan dalam hal-hal yang terkait dengan pekerjaan kelistrikan pada AC yang
dibuat oleh Toshiba Carrier Corporation atau, sebagai alternatif, dia telah diberi petunjuk dalam
hal ini oleh orang atau orang-orang yang terlatih sehingga telah sangat menguasai pengetahuan
yang terkait dengan pekerjaan ini.
• Pemasang berkualifikasi yang diizinkan untuk bekerja pada ketinggian telah dilatih dalam hal-
hal yang terkait dengan bekerja pada ketinggian dengan AC yang dibuat oleh Toshiba Carrier
Corporation atau, bila tidak, mereka telah diberi petunjuk dalam hal ini oleh orang atau orang-
orang yang telah dilatih dan karena itu sangat mengenali pengetahuan yang terkait pekerjaan ini.
Teknisi servis
yang berkualifikasi
• Teknisi servis yang berkualifikasi adalah orang yang memasang, memperbaiki, merawat,
memindahkan, dan melepas AC yang dibuat oleh Toshiba Carrier Corporation. Mereka telah
dilatih untuk memasang, merawat, memindahkan, dan melepas AC yang dibuat oleh Toshiba
Carrier Corporation atau, bila tidak, mereka telah mendapat petunjuk dalam hal pengoperasian
demikian oleh orang atau orang-orang yang terlatih sehingga telah sangat menguasai
pengetahuan yang terkait dengan operasi ini.
• Teknisi servis yang berkualifikasi yang diizinkan untuk melakukan pekerjaan kelistrikan yang
ada dalam pemasangan, pemindahan, dan pelepasan memiliki kualifikasi yang sesuai dengan
pekerjaan kelistrikan ini sebagaimana diatur dalam hukum dan peraturan setempat, dan dia
sudah mendapatkan pelatihan dalam hal-hal yang terkait dengan pekerjaan kelistrikan pada AC
yang dibuat oleh Toshiba Carrier Corporation atau, sebagai alternatif, dia telah diberi petunjuk
dalam hal ini oleh orang atau orang-orang yang terlatih sehingga telah sangat menguasai
pengetahuan yang terkait dengan pekerjaan ini.
• Teknisi servis yang berkualifikasi yang diizinkan untuk melakukan pekerjaan kelistrikan yang
ada dalam pemasangan, pemindahan, dan pelepasan memiliki kualifikasi yang sesuai dengan
pekerjaan kelistrikan ini sebagaimana diatur dalam hukum dan peraturan setempat, dan dia
sudah mendapatkan pelatihan dalam hal-hal yang terkait dengan pekerjaan kelistrikan pada AC
yang dibuat oleh Toshiba Carrier Corporation atau, sebagai alternatif, dia tela diberi petunjuk
dalam hal ini oleh orang atau orang-orang yang terlatih sehingga telah sangat menguasai
pengetahuan yang terkait dengan pekerjaan ini.
• Teknisi servis yang berkualifikasi yang diizinkan untuk bekerja pada ketinggian telah dilatih dalam
hal-hal yang terkait dengan bekerja pada ketinggian dengan AC yang dibuat oleh Toshiba Carrier
Corporation atau, bila tidak, mereka telah diberi petunjuk dalam hal ini oleh orang atau orang-
orang yang telah dilatih dan karena itu sangat mengenali pengetahuan yang terkait pekerjaan ini.
■ Pesan Peringatan pada Unit AC
Pesan peringatan Penjelasan
WARNING
ELECTRICAL SHOCK HAZARD
Disconnect all remote
electric power supplies
before servicing.
PERINGATAN
BAHAYA TERSENGAT LISTRIK
Lepas sambungan semua catu daya listrik sebelum melakukan
servis.
WARNING
Moving parts.
Do not operate unit with grille
removed.
Stop the unit before the servicing.
PERINGATAN
Komponen bergerak.
Jangan mengoperasikan unit tanpa kisi-kisi terpasang.
Matikan unit sebelum diservis.
CAUTION
High temperature parts.
You might get burned
when removing this panel.
AWAS
Komponen panas.
Anda dapat mengalami luka bakar saat melepas panel ini.
CAUTION
Do not touch the aluminum
fins of the unit.
Doing so may result in injury.
AWAS
Jangan menyentuh sirip-sirip aluminium unit.
Melakukannya mungkin mengakibatkan cedera.
CAUTION
BURST HAZARD
Open the service valves before
the operation, otherwise there
might be the burst.
AWAS
BAHAYA SEMBURAN
Buka katup servis sebelum mengoperasikan unit untuk
mencegah terjadinya semburan.
1115350201-1_ID.indd 18
1115350201-1_ID.indd 18 3/6/14 10:17 AM
3/6/14 10:17 AM
– 19 –
1 Petunjuk keselamatan
Produsen tidak bertanggung jawab atas kerusakan akibat tidak mematuhi penjelasan dalam petunjuk ini.
PERINGATAN
Umum
• Baca Pedoman Pemilik secara saksama sebelum menyalakan AC. Ada banyak hal penting yang harus
diperhatikan untuk pengoperasian sehari-hari.
• Mintalah agar pemasangan dilakukan oleh dealer atau teknisi resmi. Hanya pemasang berkualifikasi (*1) yang
dapat memasang AC. Pemasangan AC oleh orang yang tidak berkualifikasi akan mengakibatkan masalah
seperti kebakaran, sengatan listrik, cedera, kebocoran air, suara berisik, dan getaran.
• Jangan menggunakan refrigeran selain yang ditentukan sebagai pelengkap atau pengganti. Penggunaan
refrigeran semacam itu dapat menimbulkan tekanan tidak normal dalam siklus refrigerasi, yang dapat
mengakibatkan produk tidak berfungsi atau meledak serta mencederai Anda.
• Tempat yang menimbulkan bunyi operasi unit outdoor dapat menyebabkan ketidaknyamanan. (Terutama di
tempat yang berbatasan dengan tetangga, pasang AC dengan mempertimbangkan suara berisiknya.)
Pengangkutan dan penyimpanan
• Untuk mengangkut AC, kenakan sepatu dengan tutup pelindung ibu jari, sarung tangan pengaman, dan pakaian
pelindung lainnya.
• Untuk mengangkut AC, jangan memegangi tali karton kemasan. Jika tali patah, Anda dapat cidera.
• Sebelum menumpuk karton kemasan untuk penyimpanan atau pengangkutan, perhatikan petunjuk peringatan
yang tertera pada kemasan karton. Kelalaian memperhatikan petunjuk peringatan dapat menyebabkan
tumpukan terjatuh.
• AC harus diangkut dengan kondisi stabil. Jika ada komponen produk yang rusak, hubungi dealer Anda.
• Bila AC harus diangkut dengan tangan, angkut AC dengan dua orang atau lebih.
Pemasangan
• Pengerjaan sistem kelistrikan AC ini hanya boleh dilakukan oleh pemasang (*1) atau teknisi servis yang
berkualifikasi (*1). Pekerjaan ini sama sekali tidak boleh dilakukan oleh orang yang bukan ahlinya karena
pekerjaan yang tidak sempurna berisiko menimbulkan sengatan listrik dan/atau kebocoran arus.
• Setelah pekerjaan pemasangan selesai, mintalah penjelasan kepada pemasang tentang posisi pemutus arus.
Jika timbul masalah pada AC, matikan pemutus arus, dan hubungi petugas.
• Jika unit dipasang di dalam ruangan kecil, ambil tindakan yang diperlukan untuk mencegah refrigeran
melampaui ambang batas konsentrasi bahkan jika mengalami kebocoran. Konsultasikan langkah-langkah yang
akan diambil dengan toko tempat Anda membeli AC tersebut. Konsentrasi refrigeran dalam jumlah tinggi dapat
mengakibatkan kecelakaan akibat kurang oksigen.
• Jangan memasang AC di lokasi yang rawan terjadi kebocoran gas mudah terbakar. Jika gas mudah terbakar
bocor dan terkonsentrasi di sekitar unit, kebakaran dapat terjadi.
• Gunakan produk yang ditentukan perusahaan untuk suku cadang yang dibeli terpisah. Penggunaan produk
yang tidak sesuai dengan spesifikasi dapat menimbulkan kebakaran, sengatan listrik, kebocoran air, atau
masalah lainnya. Lakukan pemasangan hanya oleh teknisi resmi.
• Pastikan kabel ground dipasang dengan benar.
Pengoperasian
• Sebelum membuka kisi isap unit indoor atau panel servis unit outdoor, MATIKAN pemutus arus. Jika pemutus
rangkaian tidak DIMATIKAN, kontak dengan komponen interior dapat menimbulkan bahaya tersengat listrik.
Hanya pemasang berkualifikasi(*1) atau petugas servis berkualifikasi(*1) yang diizinkan untuk melepaskan kisi-
kisi isap unit indoor atau panel servis unit outdoor dan melakukan pekerjaan yang diperlukan.
• Bagian dalam AC merupakan area tegangan tinggi dan komponen yang berputar. Jangan membuka panel servis
unit outdoor karena bahaya sengatan listrik atau jari Anda atau anggota tubuh lainnya dapat terperangkap di
dalam komponen yang berputar. Ketika melibatkan pekerjaan pelepasan komponen ini, hubungi pemasang yang
berkualifikasi atau petugas servis yang berkualifikasi.
• Jangan memindahkan atau memperbaiki sendiri unit AC. Anda dapat tersengat listrik, karena terdapat tegangan
tinggi di dalam unit saat melepaskan penutup dan unit utama.
• Gunakan tangga penyangga dengan tinggi lebih dari 50 cm untuk membersihkan filter unit indoor atau minta
orang lain untuk melakukan pekerjaan di ketinggian. Karena risiko bahaya terjatuh dari tangga dan mencederai
diri Anda ketika melakukan pekerjaan di ketinggian, pekerjaan jenis ini jangan dilakukan oleh orang yang tidak
berkualifikasi. Jika pekerjaan ini harus dilakukan, jangan melakukannya secara sendiri tetapi mintalah bantuan
kepada pemasang yang berkualifikasi atau petugas servis yang berkualifikasi.
• Jangan menyentuh sirip-sirip aluminium unit outdoor. Menyentuh sirip tersebut dapat membuat Anda terluka.
Jika harus menyentuh bagian sirip, jangan menyentuhnya sendiri tetapi hubungi pemasang yang berkualifikasi
atau petugas servis yang berkualifikasi.
• Jangan memanjat ke atau menaruh benda apa pun di atas unit outdoor. Anda dapat jatuh atau benda tersebut
dapat jatuh dari unit outdoor dan menimbulkan cidera.
• Jangan menaruh peralatan pembakar di lokasi yang terkena embusan angin AC secara langsung, kalau tidak
akan membuat pembakaran yang tidak sempurna.
• Ketika AC dioperasikan dengan peralatan pemanas dalam satu ruangan, berikan sirkulasi udara yang cukup di
dalam ruangan. Kurangnya sirkulasi udara menyebabkan kurangnya oksigen.
• Ketika AC digunakan di ruang tertutup, sirkulasi udara di ruangan berkurang.
Kurangnya sirkulasi udara menyebabkan kurangnya oksigen.
• Jangan biarkan tubuh Anda terpajan udara dingin secara langsung dan jangan mendinginkan diri Anda secara
berlebihan. Melakukannya dapat mengakibatkan kondisi fisik memburuk dan sakit.
• Jangan memasukkan jari Anda atau batang kayu ke dalam masukan udara atau lubang buangan.
Melakukannya dapat menyebabkan cedera ketika kipas berputar dengan kecepatan tinggi di dalam unit.
• Tanyakan ke toko tempat Anda membeli AC jika pengondisian udara (pendinginan dan pemanasan) tidak
berfungsi dengan baik seperti kebocoran refrigeran yang mungkin menjadi penyebabnya. Konfirmasikan detail
perbaikan kepada petugas servis berkualifikasi(*1) bila perbaikan mencakup pengisian tambahan refigeran.
• Hentikan fungsi AC dan matikan pemutus arus sebelum pembersihan. Jika tidak, dapat mengakibatkan cedera
ketika kipas berputar dengan kecepatan tinggi di dalam unit.
Perbaikan
• Jika ada masalah apa saja (misalnya pesan kesalahan muncul, ada bau terbakar, bunyi tidak biasa, AC tidak
dingin atau panas atau air bocor) terjadi pada AC, jangan sentuh AC sendiri tetapi MATIKAN terlebih dahulu
pemutus arus kemudian hubungi teknisi servis yang berkualifikasi. Ambil langkah untuk memastikan bahwa daya
tidak menyala (dengan memasang tanda “rusak” di dekat pemutus rangkaian, misalnya) sampai teknisi servis
tersebut datang. Terus menggunakan AC yang bermasalah dapat mengakibatkan gangguan mekanis yang
dapat memperparah kerusakan atau menimbulkan sengatan listrik atau masalah lain.
• Jika kisi-kisi kipas rusak, jangan dekati unit outdoor tetapi MATIKAN dulu pemutus rangkaian lalu hubungi
teknisi servis berkualifikasi untuk melakukan perbaikan. Jangan HIDUPKAN pemutus rangkaian sampai proses
perbaikan selesai.
• Jika terdapat risiko bahaya dari unit indoor terjatuh, jangan mendekati unit indoor tetapi MATIKAN pemutus arus,
dan hubungi pemasang yang berkualifikasi, atau teknisi yang berkualifikasi untuk memperbaiki unit. Jangan
HIDUPKAN pemutus arus sampai proses perbaikan selesai.
• Jika terdapat risiko bahaya dari unit indoor terjatuh, jangan mendekati unit indoor tetapi MATIKAN pemutus arus,
dan hubungi pemasang yang berkualifikasi, atau teknisi yang berkualifikasi untuk memperbaiki atau memasang
ulang. Jangan HIDUPKAN pemutus arus sampai proses perbaikan atau pemasangan ulang selesai.
• Dilarang memodifikasi unit. Melakukannya dapat menyebabkan kebakaran, sengatan listrik, atau masalah
lainnya.
Pemindahan
• Ketika AC perlu dipindahkan, jangan memindahkannya sendiri tetapi hubungi pemasang yang berkualifikasi atau
petugas servis yang berkualifikasi. Kelalaian memindahkan AC dengan benar dapat mengakibatkan sengatan
listrik dan/atau kebakaran.
5-ID 6-ID
1115350201-1_ID.indd 19
1115350201-1_ID.indd 19 3/6/14 10:17 AM
3/6/14 10:17 AM
– 20 –
EN
EN
ID
AWAS
Memutus peralatan ini dari catu daya utama.
• Peralatan ini harus terhubung ke listrik dengan sakelar dengan pemisah kontak sedikitnya 3 mm.
Sekering pemasangan (semua tipe dapat digunakan) harus digunakan untuk catu daya AC.
Pemasangan
• Letakkan selang dengan benar untuk pembuangan yang sempurna. Saluran pembuangan yang tidak benar
akan menimbulkan genangan di dalam rumah dan furnitur menjadi basah.
• Hubungkan AC ke catu daya khusus dengan tegangan stabil, jika tidak, unit mungkin rusak atau menyebabkan
kebakaran.
• Pastikan unit outdoor stabil di atas dudukannya. Jika tidak, unit bisa terjatuh atau menimbulkan kecelakaan
lainnya.
Pengoperasian
• Jangan gunakan AC untuk tujuan khusus seperti mengawetkan makanan, instrumen presisi, benda seni,
binatang ternak, mobil, kapal laut.
• Jangan menyentuh sakelar dengan jari basah jika tidak, Anda akan tersengat listrik.
• Jika AC tidak akan digunakan untuk waktu yang lama, matikan sakelar utama atau pemutus arus, untuk
keselamatan.
• Untuk membuat AC beroperasi dengan performa aslinya, operasikan dengan kisaran suhu pengoperasian yang
dijelaskan dalam petunjuk. Jika tidak, hal tersebut dapat menyebabkan gangguan fungsi atau kebocoran pada
unit.
• Cegah masuknya cairan ke dalam remote control. Hindarkan percikan dari jus, air atau cairan lainnya.
• Jangan mencuci AC. Melakukannya dapat menimbulkan sengatan listrik.
• Periksa apakah pemasangan dudukan dan perlengkapan lainnya telah rusak setelah digunakan dalam jangka
waktu lama. Membiarkannya dengan kondisi tersebut mungkin mengakibatkan unit terjatuh dan menyebabkan
cedera.
• Jangan meninggalkan semprotan yang mudah terbakar atau material yang mudah terbakar di dekat AC, dan
jangan menyemprotkan aerosol yang mudah terbakar secara langsung ke AC. Zat tersebut dapat memicu api.
• Hentikan fungsi AC dan matikan pemutus arus sebelum pembersihan.
Jika tidak, dapat mengakibatkan cedera ketika kipas berputar dengan kecepatan tinggi di dalam unit.
• Hubungi toko Anda untuk melakukan pembersihan AC.
Membersihkan AC dengan cara yang tidak benar dapat menyebabkan kerusakan pada komponen plastik,
kerusakan isolasi komponen listrik atau komponen lain, dan mengakibatkannya tidak berfungsi. Pada kasus
terburuk, hal tersebut dapat mengakibatkan kebocoran, sengatan listrik, keluar asap atau kebakaran.
• Jangan menaruh wadah berisi air seperti vas bunga di atas unit.
Air dapat masuk ke dalam unit dan menyebabkan kerusakan isolasi listrik sehingga dapat mengakibatkan
sengatan listrik.
• Jangan cuci AC dengan pencuci bertekanan.
Kebocoran listrik mungkin menyebabkan sengatan listrik atau kebakaran.
(*1) Rujuk ke “Pemasang yang Berkualifikasi atau Teknisi Servis yang Bekualifikasi.”
■ Informasi pengangkutan, penanganan dan penyimpanan karton
kemasan
Contoh petunjuk mengenai karton kemasan
Simbol Penjelasan Simbol Penjelasan
Jaga agar tetap kering Jangan dijatuhkan
Mudah pecah Jangan direbahkan
11 karton
Ketingian penumpukan
(12 karton dapat ditumpuk
pada hal ini)
Jangan berjalan di atas
karton
Sisi atas Jangan diinjak
Tangani dengan hati-hati
Petunjuk peringatan lainnya Penjelasan
Awas
Kemungkinan kecelakaan.
Jangan angkat dengan menggunakan tali karton, atau Anda
dapat cedera jika tali karton putus.
Peringatan tumpukan.
Jika boks karton menonjol keluar dari palet saat ditumpuk.
Rebahkan tripleks setebal 10 mm di atas palet.
7-ID 8-ID
1115350201-1_ID.indd 20
1115350201-1_ID.indd 20 3/6/14 10:17 AM
3/6/14 10:17 AM
– 21 –
2 Nama komponen
■ Unit indoor
Kenop
Kenop untuk membuka/
menutup port isap.
Filter udara
Membuang debu dan kotoran.
(Disediakan pada port isap.)
Sekrup ground
Disediakan di dalam
boks kontrol listrik.
Kisi-kisi buangan
pada port buangan
Mengubah arah udara yang
dibuang sesuai dengan
mode pendingin / pemanas.
■ Unit outdoor (Desainnya bervariasi tergantung pada unit outdoor.
Ilustrasi berikut ini menunjukkan contohnya.)
Arah pemasangan
filter udara
Masukan udara
(Samping dan
belakang)
Kaki pemancang
Buangan udara
Panel pipa
Lubang kabel
Keluaran pipa refrigeran
Panel
Terdapat sekrup ground,
katup, dan komponen listrik
di dalamnya.
Port isap udara
Udara di dalam ruangan
diisap dari port ini.
3 Remote control berkabel
Remote control ini dapat mengendalikan pengoperasian hingga 8 unit indoor.
■ Bagian tampilan
Di gambar tampilan di bawah semua ikon ditunjukkan. Ketika unit
dioperasikan, hanya ikon terkait yang akan ditampilkan.
• Ketika pemutus kebocoran diaktifkan untuk pertama kali, berkedip
pada bagian tampilan remote control.
• Saat ikon ini berkedip, model dikonfirmasikan secara otomatis.
Tunggu hingga ikon hilang sebelum menggunakan remote control.
SET
TIME
TIMER SET
TEST
FILTER
RESET
TEMP.
CL
FAN
SAVE
SWING/FIX
VENT
MODE
ON / OFF
UNIT LOUVER
Bagian
tampilan
Bagian
pengoperasian
19
21
22
1
6
2
5
9
10
15
17
16
20
11
14 13
12
18
3 4 7 8
1 Mode Pengoperasian
Mode pengoperasian yang dipilih ditampilkan.
2 Tampilan Error
Ditampilkan ketika perangkat pelindung bekerja
atau kesalahan terjadi.
3 Tampilan SETTING
Ditampilkan selama pengaturan timer atau
pengaturan lainnya.
4 Tampilan TEST run
Ditampilkan selama menguji pengoperasian.
5 Tampilan Timer
Ketika terjadi kesalahan, kode kesalahan
ditampilkan.
6 Tampilan mode Timer
Mode timer yang dipilih ditampilkan.
7 Tampilan posisi Kisi-kisi
Menampilkan posisi kisi-kisi.
8 Tampilan Swing
Ditampilkan selama gerakan kisi-kisi ke atas/ke
bawah.
9 Tampilan Filter
Pengingat untuk membersihkan filter udara.
10 Tampilan kecepatan kipas
Mode kecepatan kipas yang dipilih ditampilkan.
(Auto)
(Tinggi)
(Sedang)
(Rendah)
11 Mengatur tampilan suhu
Suhu pengaturan yang dipilih ditampilkan.
12 Tampilan mode penghematan daya
Pembatasan kecepatan kompresor (kapasitas)
untuk menghemat energi.
9-ID 10-ID
1115350201-1_ID.indd 21
1115350201-1_ID.indd 21 3/6/14 10:17 AM
3/6/14 10:17 AM
– 22 –
EN
EN
ID
1
6
2
3 7 8
5
9 15
17
16
11
14 13
12
20
18
19
21
22
4
10
13 Tampilan UNIT No.
Menampilkan nomor unit indoor yang dipilih.
Juga menampilkan kode kesalahan unit indoor
dan outdoor.
14 Tampilan kontrol pusat
Ditampilkan saat AC digunakan pada kontrol
pusat dikombinasikan dengan remote control
untuk kontrol pusat.
Jika remote control dinonaktifkan oleh sistem
kontrol pusat, berkedip.
Tombol pengoperasian tidak diterima.
Bahkan bila tombol ON / OFF, MODE, atau
TEMP. ditekan, dan tombol pengoperasian tidak
diterima. (Pengaturan yang dibuat oleh remote
control bervariasi dengan mode kontrol pusat.
Untuk perinciannya, rujuk ke Pedoman Pemilik
dari remote control untuk kontrol pusat.)
15 Tampilan sensor remote control
Ditampilkan ketika sensor remote control
digunakan.
16 Tampilan pra-panas
Ditampilkan saat mode pemanasan diberi energi
atau siklus pembuangan bunga es dimulai.
Saat ikon ditampilkan, kipas indoor berhenti.
17 Tampilan tidak berfungsi
Ditampilkan ketika fungsi yang diminta tidak
tersedia pada model itu.
18 Tampilan pengoperasian pembersihan
sendiri
Ditampilkan selama pengoperasian pembersihan
sendiri untuk mengeringkan heat exchanger
indoor.
19 Tampilan Service
20 Tampilan Siap Operasi
Tampilan ini muncul di beberapa model.
21 Tampilan Nomor Kisi-kisi.
(contoh: 01, 02, 03, 04)
22 Tampilan pengunci kisi-kisi
Ditampilkan ketika terdapat unit dengan kisi-kisi
terkunci di grup (termasuk unit indoor 1 oleh unit
outdoor 1).
■ Bagian pengoperasian
Tekan setiap tombol untuk memilih pengoperasian yang diinginkan.
• Kontrol menyimpan perintah di memori dan setelah pengaturan awal, tidak dibutuhkan pengaturan tambahan
kecuali menginginkan penggantian. AC dapat dioperasikan dengan menekan tombol .
8
6
4
3
2
5
7
10
12
1
9
11
1 tombol (Tombol set suhu)
Menyetel nilai pengaturan.
Pilih nilai pengaturan yang diinginkan dengan
menekan TEMP. atau TEMP. .
2 tombol (Tombol set timer)
Gunakan untuk mengatur timer.
3 tombol (Tombol reset filter)
Mengatur ulang tampilan “ ” setelah
membersihkan filter.
4 tombol (Tombol test)
Gunakan hanya untuk servis.
(Selama pengoperasian normal, jangan gunakan
tombol ini.)
5 tombol
Ketika tombol ditekan, pengoperasian dimulai,
dan dihentikan dengan menekan kembali tombol
tersebut.
Ketika pengoperasian telah dihentikan, lampu
pengoperasian dan semua tampilan menghilang.
6 Lampu pengoperasian
Lampu hijau menyala saat unit dihidupkan.
Namun akan berkedip ketika mengoperasikan
perangkat pelindung atau kesalahan terjadi.
7 tombol (Tombol mode pengoperasian)
Memilih mode pengoperasian yang diinginkan.
8 tombol (Tombol kecepatan kipas)
Memilih kecepatan Kipas yang diinginkan.
9 tombol (Tombol ventilasi)
Digunakan bila kit ventilasi daya (tersedia di
wilayah Anda) dihubungkan.
• Jika “ ” ditampilkan pada remote control saat
tombol ini ditekan, tidak ada kit ventilasi yang
terhubung.
10 tombol (Pengoperasian hemat daya)
Gunakan untuk memulai mode hemat daya.
11 tombol (Tombol pemilihan unit/
Kisi-kisi)
Memilih nomor unit (kiri) dan nomor kisi (kanan).
UNIT:
Memilih unit indoor ketika menyesuaikan arah
angin beberapa unit indoor dikontrol dengan satu
remote control.
KISI-KISI:
Memilih kisi-kisi ketika mengatur penyetelan
arah angin secra independen.
12 tombol (Tombol arah ayun / Kisi-kisi)
Pilih swing otomatis atau pengaturan arah
kiri-kisi.
OPSI:
Sensor remote control
Biasanya sensor suhu unit indoor mengindera suhu.
Penginderaan suhu di sekitar remote control juga
dapat dilakukan.
Untuk perincian, hubungi dealer tempat Anda membeli
AC.
11-ID 12-ID
1115350201-1_ID.indd 22
1115350201-1_ID.indd 22 3/6/14 10:17 AM
3/6/14 10:17 AM
– 23 –
4 Penggunaan yang benar
Ketika AC digunakan untuk pertama kali atau ketika pengaturan diubah, ikuti langkah-langkah di bawah.
Pengaturan disimpan di memori dan ditampilkan ketika unit dihidupkan dengan menekan tombol .
■ Persiapan
• Ketika pemutus arus dinyalakan, garis partisi ditampilkan pada remote control.
* Setelah pemutus arus dinyalakan, remote control tidak menerima perintah untuk selama kurang lebih 1
menit, ini bukan merupakan kegagalan.
KETENTUAN
Ketika AC dihidupkan kembali setelah tidak digunakan dalam waktu lama, hidupkan pemutus arus sekurangnya 12
jam sebelum menghidupkan AC.
SET
TIME
TIMER SET
TEST
FILTER
RESET
TEMP.
CL
FAN
SAVE
SWING/FIX
VENT
MODE
ON / OFF
UNIT LOUVER
1
3
2
4
Penyalaan
1 Tekan tombol
Lampu pengoperasian menyala, dan
pengoperasian dimulai
2 Pilih mode pengoperasian dengan tombol
“ ”.
Satu kali menekan tombol tersebut, dan tampilan
berubah dalam urutan yang ditunjukkan di bawah.
Otomatis Panas Kering Dingin Kipas
3 Pilih kecepatan kipas dengan tombol
“ ”.
Satu kali menekan tombol tersebut, dan tampilan
berubah dalam urutan yang ditunjukkan di bawah.
Otomatis Tinggi Sedang Rendah
• Bila kipas pada posisi “ Otomatis”,
kecepatan kipas disetel berdasarkan perbedaan
antara suhu pengaturan dan suhu ruang.
• Pada operasi pemanasan, jika suhu ruang
tidak dipanaskan dengan cukup dengan
kecepatan pengoperasian “ Rendah”,
pilih pengoperasian “ Sedang” atau “
Tinggi”.
• Sensor suhu mendeteksi suhu udara balik di
unit indoor, yang berbeda dari suhu ruangan
tergantung kondisi pemasangan.
Nilai pengaturan harus mencapai suhu ruangan.
( “Otomatis” tidak dapat dipilih pada mode
Kipas.)
4 Pilih suhu pengaturan dengan menekan
tombol “TEMP. ” atau “TEMP. ”.
Berhenti
Tekan tombol .
Lampu pengoperasian padam dan pengoperasian
berhenti. Dalam mode Dingin, Kering, atau Otomatis
(pendinginan), kipas beroperasi 10 menit (atau lebih)
untuk operasi pembersihan sendiri.
CATATAN
Pergantian Otomatis
• Ketika mengunakan Mode Otomatis, unit memilih mode pengoperasian (pendinginan, pemanasan atau hanya
kipas) berdasarkan suhu yang diatur penguna.
• Jika mode Auto tidak nyaman, Anda dapat memilih kondisi yang diinginkan secara manual.
Pendinginan
• Jika ada permintaan pendinginan, unit akan dijalankan sekurangnya 1 menit setelah mode dipilih.
Pemanasan
• Jika ada permintaan pemanasan, unit akan dijalankan sekitar 3 hingga 5 menit setelah mode dipilih.
• Setelah operasi pemanasan berhenti, kipas mungkin terus bekerja sekitar 30 detik.
• Bila suhu ruang mencapai suhu setelan, unit outdoor berhenti dan kipas unit indoor bekerja dengan kecepatan
sangat rendah.
Selama operasi penghilangan bunga es, kipas berhenti sehingga udara dingin tidak dikeluarkan. (“ ” Pra-
panas ditampilkan.)
Ketika memulai ulang pengoperasian setelah berhenti
Ketika unit diminta untuk dijalankan ulang dengan segera setelah berhenti, unit tidak dapat dijalankan selama 3 menit
untuk melindungi kompresor.
■ Pengoperasian 8 °C (Untuk objek prapemanasan)
(Hanya seri SDI 4 dan seri DI 4 (RAV-SP***4AT / RAV-SM***4AT))
AC dapat mengontrol suhu pemanasan ke sekitar 8 °C pada mode pemanasan.
Operasi pemanasan 8 °C memerlukan pengaturan dengan remote control berkabel. Tanyakan pemasang
atau dealer untuk pengaturan menurut petunjuk pemasangan untuk unit indoor.
Penyalaan
1 Atur suhu yang ditampilkan ke 18 °C pada mode pemanasan dengan menekan tombol
TEMP. .
2 Atur suhu yang ditampilkan ke 8 °C dengan menekan tombol TEMP. sedikitnya empat detik.
Berhenti
1 Atur suhu yang ditampilkan ke 18 °C dengan menekan tombol TEMP. .
• AC kembali ke mode Panas normal. Pilih suhu dan mode operasi yang diinginkan.
CATATAN
• Suhu udara yang dikeluarkan lebih rendah daripada pengoperasian pemanasan normal.
• Suhu ruang mungkin tidak dipanaskan merata tergantung dari lokasi pemasangan remote control.
• Suhu ruang mungkin tidak mencapai 8 °C tergantung ukuran ruangan dan kondisi pemasangan.
• Pengaturan untuk kecepatan kipas tersedia selama pengoperasian pemanasan 8 °C.
Pengoperasian pemanasan 8 °C dibatalkan karena kondisi berikut.
•Bila pengoperasian dihentikan dengan tombol
•Bila mode pengoperasian lain dipilih dengan tombol
•Bila pengaturan suhu atau mode pengoperasian diubah atau pengoperasian dimulai / dihentikan oleh remote
control nirkabel atau remote control untuk kontrol pusat.
• Bila mode pengoperasian ini digunakan, pengamatan jam pengoperasian yang benar dan perawatan berkala oleh
staf servis direkomendasikan.
13-ID 14-ID
1115350201-1_ID.indd 23
1115350201-1_ID.indd 23 3/6/14 10:17 AM
3/6/14 10:17 AM
– 24 –
EN
EN
ID
5 Pengoperasian timer
• Tiga mode timer tersedia: (Pengaturan hingga 168 jam diaktifkan.)
Timer Mati : Unit berhenti ketika waktu pengaturan dicapai.
Mengulang timer Mati: Unit berhenti ketika waktu pengaturan dicapai.
Timer Hidup : Unit dijalankan ketika waktu pengaturan dicapai.
1
3
2
4
Set
1 Tekan tombol
Mode timer berubah setiap kali tombol ditekan.
(Timer Mati) (Timer Hidup)
(Ulangi timer Mati)
Mati Mati Hidup
Tidak ada tampilan
• dan tampilan timer berkedip.
2 Tekan untuk memilih “set time”.
• Dengan setiap penekanan tombol , waktu
pengaturan meningkat dengan 0,5 jam
(30 menit).
Ketika mengatur waktu lebih dari 24 jam
untuk pengoperasian timer, timer dapat diatur
dengan pertambahan 1 jam. Waktu pengaturan
maksimum adalah 168 jam (7 hari). Remote
control menampilkan pengaturan waktu (antara
0,5 dan 23,5 jam) (*1
) atau jumlah hari dan
waktu (24 jam atau lebih) (*2
) sebagaimana
ditunjukkan di bawah ini.
• Setiap penekanan tombol pengaturan waktu
berkurang 0,5 jam (30 menit) (0,5 - 23,5 jam),
atau 1 jam (24 -168 jam).
Contoh tampilan remote control
• 23,5 jam (*1
)
• 34 jam (*2
)
Jumlah hari Waktu
menunjukkan 1 hari (24 jam).
menunjukkan 10 jam. (Total 34 jam)
3 Tekan tombol
• ikon menghilang dan tampilan waktu
menyala, dan ikon atau berkedip.
(Bila Hidup timer diaktifkan, waktu dan
timer Hidup adalah ikon dan ikon lain
menghilang.)
4 Membatalkan pengoperasian timer
Tekan tombol .
Ikon timer menghilang.
CATATAN
• Bila pengoperasian berhenti setelah timer mencapai
waktu preset,Repeat Off timer melanjutkan
pengoperasian dengan menekan tombol
dan menghentikan pengoperasian setelah waktu
dari timer mencapai waktu pengaturan.
• Bila ditekan saat fungsi Mati timer AC aktif,
indikasi fungsi timer menghilang dan kemudian
muncul lagi setelah sekitar 5 detik.
Ini dikarenakan pemrosesan normal remote control.
6 Penyetelan arah angin
Untuk pendinginan dan kinerja pemanasan terbaik, setel kisi-kisi (pelat penyetel ke atas / ke bawah arah
angin) sesuai yang diperlukan. Udara dingin menurun dan udara hangat menaik, jadi untuk memanaskan
ruangan miringkan kisi-kisi ke arah bawah, dan untuk mendinginkan ruangan miringkan kisi-kisi secara
horizontal.
AWAS
Arahkan kisi-kisi secara horizontal untuk pendinginan.
Jika kisi-kisi tetap menunjuk ke bawah saat mendinginkan, kondensasi mungkin terbentuk pada port pengeluaran
dan / kemudian menetes dari kisi-kisi.
CATATAN
Jika kisi-kisi tetap menunjuk lurus secara horizontal saat memanaskan, suhu ruang mungkin didistribusikan tidak
merata.
• Ketika AC tidak berfungsi, kisi-kisi diarahkan horizontal secara otomatis.
• Kisi-kisi diarahkan secara horizontal saat pemanasan dimulai, selama pengoperasian penghilangan bunga es,
atau selama pengoperasian minimum setelah mencapai suhu pengaturan.
Saat pengaturan arah ayun atau kisi-kisi dibuat saat ini, tampilan remote control berubah terhadap pengaturan
tetapi kisi-kisi tetap menunjuk lurus secara horizontal.
Ketika AC mulai memanaskan, kisi-kisi diarahkan ke arah yang ditetapkan.
Mendinginkan (DINGIN)
Arahkan kisi-kisi secara horizontal.
Untuk pemanasan (PANAS)
Arahkan kisi-kisi ke bawah.
15-ID 16-ID
1115350201-1_ID.indd 24
1115350201-1_ID.indd 24 3/6/14 10:17 AM
3/6/14 10:17 AM
– 25 –
1
Cara mengatur arah kisi-kisi
1 Tekan selama pengoperasian.
Arah kisi-kisi berubah untuk setiap penekanan
tombol.
Pada pengoperasian PANAS
Arahkan kisi-kisi (pelat penyetel arah angin ke atas/ke
bawah) ke bawah. Jika diarahkan secara horizontal,
udara panas mungkin tidak sampai ke kaki.
Pada pengoperasian COOL (Dingin)/DRY (Kering)
Arahkan kisi-kisi (pelat penyetel arah angin ke atas/ke
bawah) secara horizontal. Jika diarahkan ke bawah,
embun mungkin terbentuk pada permukaan port
pembuangan udara dan mungkin menetes.
Pada pengoperasian FAN (Kipas)
Pilih arah kisi-kisi yang diinginkan.
Cara menjalankan ayun
1 Tekan , atur arah kisi-kisi (pelat penyetal
arah angin ke atas / ke bawah) ke posisi
terendah dan kemudian tekan kembali .
SWING ditampilkan dan arah kisi-kisi ke atas/
ke bawah dipilih secara otomatis.
Tampilan selama mengayun
Cara menghentikan ayunan
1 Tekan pada posisi yang diinginkan
saat kisi-kisi mengayun.
• Bila ditekan setelah itu, arah angin
dapat diatur kembali dari posisi tertinggi.
* Namun, meski ditekan saat kisi-kisi
mengayun, posisi kisi-kisi ditampilkan sebagai
berikut dan posisi tertinggi dari kisi-kisi mungkin
tidak dipilih.
Tampilan ketika ayunan dihentikan
Dalam hal ini, tekan kembali dua detik
kemudian.
• Pada pengoperasian Dingin / Kering, kisi-kisi
tidak berhenti saat mengarah ke bawah. Jika
menghentikan kisi-kisi saat mengarah ke bawah
selama pengoperasian ayun, kisi-kisi berhenti
setelah bergerak ke posisi ketiga dari posisi
tertinggi.
Tampilan ketika menghentikan ayunan
Pengoperasian
Kipas/Panas
Pengoperasian
Kipas/Panas
Pengoperasian
Dingin/Kering
Pengoperasian
Dingin/Kering
Pengaturan awal
Pengaturan awal
Tombol pemilihan unit
• Ketika beberapa unit indoor dikontrol dengan satu
remote control, arah kisi-kisi dapat diatur untuk
setiap unit indoor dengan memilih masing-masing.
• Untuk mengatur arah kisi-kisi satu per satu, tekan
tombol untuk menampilkan jumlah unit indoor
pada grup kontrol. Kemudian atur arah angin unit
indoor yang ditampilkan.
• Ketika tidak ada nomor unit indoor yang ditampilkan,
semua unit indoor di grup kontrol dapat dikontrol
secara bersamaan.
• Setiap kali tombol ditekan, tampilan berubah
seperti berikut:
Tidak
ditampilkan
UNIT No.
1-1
UNIT No.
1-2
UNIT No.
1-3
UNIT No.
1-4
■ Cara mengatur arah angin
kisi-kisi
1 Pilih unit indoor yang akan diatur dengan
menekan (sisi kiri tombol) selama
pengoperasian.
• Nomor unit indoor berubah setiap kali Anda
menekan tombol tersebut.
1-1 1-2 1-3
1-4
UNIT No. UNIT No. UNIT No.
UNIT No.
Tidak
ditampilkan
* Ketika tidak ada nomor unit yang ditampilkan, semua
unit indoor dipilih.
2 Pilih kisi-kisi yang ingin Anda setel dengan
menekan (sisi kanan tombol).
• Setiap kali Anda menekan tombol, tampilan di
kiri remote control berubah seperti berikut:
Tidak
ditampilkan
* Ketika tidak ada nomor kisi-kisi yang ditampilkan,
keempat kisi-kisi dipilih.
No. Kisi-kisi
03
01
02
04
Pipa
refrigeran
Pipa
penguras
Kotak kontrol listrik
3 Menentukan arah angin dari kisi-kisi yang
dipilih dengan menekan
• Setiap kali Anda menekan tombol, tampilan
berubah seperti berikut:
* Selama mode COOL (DRY), (4) dan (5) tidak
ditampilkan.
Ulangi
Pengaturan awal
Tombol pemilihan unit
17-ID 18-ID
1115350201-1_ID.indd 25
1115350201-1_ID.indd 25 3/6/14 10:17 AM
3/6/14 10:17 AM
– 26 –
EN
EN
ID
■ Untuk mengonfigurasikan mode penghematan daya
4
3
1
5 2
1 Tekan tombol sekurangnya empat detik ketika AC tidak bekerja.
• , simbol, dan nomor berkedip.
2 Tekan (sisi kiri tombol) untuk memilih unit indoor yang akan diatur.
• Setiap kali tombol ditekan, UNIT No. berubah seperti berikut:
UNIT No.
1-1
UNIT No.
2-1
UNIT No.
3-1
UNIT No.
4-1
3 Tekan tombol TIME , untuk menyetel
pengaturan mode penghematan daya.
• Setiap kali tombol ditekan akan mengubah
tingkat daya 1 % dalam kisaran mulai 100 %
hingga 50 %.
• Pengaturan pabrik adalah 75 %.
4 Tekan tombol .
5 Tekan tombol untuk menyelesaikan pengaturan.
CATATAN
• Saat peralatan listrik lain digunakan secara bersamaan, untuk menghindari pemicuan pemutus arus, mode
penghematan daya direkomendasikan. Mode penghematan daya dapat juga berguna untuk menghemat energi.
• Mode penghematan daya menghabiskan hanya sedikit energi, tetapi tidak menghasilkan pendinginan ruangan
sebanyak mode normal. (Arus maksimum dibatasi hingga sekitar 75 % (pengaturan pabrik) dari mode normal.)
• Bahkan ketika pengoperasian dimulai / dihentikan, mode pengoperasian berubah, atau reset daya dilakukan
selama mode penghematan daya, mode penghematan daya dipertahankan hingga operasi berikutnya.
7 Mode penghematan daya
Mode penghematan daya menghemat energi dengan membatasi arus maksimum yang akan memengaruhi
kapasitas pendinginan yang dapat dihasilkan unit.
Tekan tombol selama pengoperasian.
• AC memasuki mode hemat daya.
• muncul pada tampilan.
Mode penghematan daya akan tetap berlaku
sampai dibatalkan.
Untuk membatalkan mode penghematan daya,
tekan kembali tombol .
• menghilang.
Kipas dari unit yang dipilih dijalankan.
Pengaturan tingkat daya dalam
mode penghematan daya
8 Mode pembersihan sendiri
Fungsi ini disediakan untuk mengeringkan bagian dalam unit indoor melalui pengoperasian FAN
(Kipas) setelah menjalankan mode pendinginan / kering / OTOMATIS (pendinginan) untuk menjaga
unit indoor tetap bersih.
• Waktu pembersihan sendiri bervariasi terhadap waktu pengoperasian pendinginan / kering / Otomatis
(pendinginan) sebagai berikut.
Waktu pengoperasian pendinginan / kering /
Otomatis (pendinginan)
waktu pembersihan sendiri
Kurang dari 10 menit Tidak ada pengoperasian sendiri
10 menit hingga kurang dari 1 jam 1 jam
Lebih dari 1 jam 2 jam
• “ ” ditampilkan pada remote control selama pengoperasian pembersihan sendiri.
Untuk memaksa menghentikan pembersihan sendiri, tekan tombol dua kali berurutan.
AWAS
• Kipas tetap bekerja meski setelah tombol ditekan untuk menghentikan pengoperasian di beberapa
mode. Ini normal karena mode pembersihan sendiri sedang berlangsung.
• Kisi-kisi terbuka dengan perlahan dan diarahkan secara horizontal selama pembersihan sendiri, dan menutup
ketika pembersihan sendiri selesai.
• Lampu pengoperasian (LED) tidak menyala selama mode (fungsi) pembersihan sendiri.
• Mode (fungsi) pembersihan sendiri tidak dapat membersihkan ruangan atau membuang kerak dan debu yang
ada di dalam unit.
• Untuk membatalkan fungsi pembersihan sendiri, tanyakan ke toko Anda.
19-ID 20-ID
1115350201-1_ID.indd 26
1115350201-1_ID.indd 26 3/6/14 10:17 AM
3/6/14 10:17 AM
– 27 –
9 Pengaturan lanjutan
■ Cara mengatur tipe ayun
2
1
4
5
3
1 Tekan selama sekurangnya empat
detik ketika AC tidak bekerja.
• , simbol, dan nomor berkedip.
2 Pilih unit indoor yang akan diatur dengan
menekan (sisi kiri tombol) selama
pengoperasian.
• Setiap kali Anda menekan tombol, nomor unit
berubah sebagai berikut:
Tidak
ditampilkan
1-1 2-1 3-1
4-1
UNIT No. UNIT No. UNIT No.
UNIT No.
Kipas pada unit yang dipilih berputar dan kisi-
kisinya mulai mengayun.
3 Pilih tipe ayun dengan menekan tombol
TIME .
Kode pengaturan ayun Ayun kisi-kisi
0001 Ayun standar
(Pengaturan pabrik)
0002 Ayunan ganda
0003 Ayun putar
AWAS
Jangan mengatur kode pengaturan ayun ke “0000”.
(Pengaturan ini dapat menyebabkan gangguan pada
kisi-kisi.)
4 Tekan tombol .
5 Tekan tombol untuk menyelesaikan
pengaturan.
▼Ayunan standar
Keempat kisi-kisi mengayun secara bersamaan pada
sudut yang sama.
▼Ayunan ganda
Menggabungkan ayunan kisi-kisi berurutan secara
horizontal dan ke bawah.
▼Ayunan siklis (Disarankan untuk
pendinginan)
Keempat kisi-kisi dengan waktu yang berbeda seperti
gelombang.
Kode pengaturan ayun
Ayun
Horizontal
Horizontal
Horizontal
Horizontal
Ke bawah
Ke bawah
Ke bawah
Ke bawah
21-ID 22-ID
1115350201-1_ID.indd 27
1115350201-1_ID.indd 27 3/6/14 10:17 AM
3/6/14 10:17 AM
Indoor Unit
Indoor Unit
Indoor Unit
Indoor Unit
Indoor Unit
Indoor Unit
Indoor Unit
Indoor Unit

More Related Content

Similar to Indoor Unit

Service dan Maintenance AC Split - Troubleshooting Praktikum
Service dan Maintenance AC Split - Troubleshooting PraktikumService dan Maintenance AC Split - Troubleshooting Praktikum
Service dan Maintenance AC Split - Troubleshooting PraktikumSenia Firlania
 
Logam mesin maintenance and diagnostic mechanical 2 (10)
Logam mesin maintenance and diagnostic mechanical 2 (10)Logam mesin maintenance and diagnostic mechanical 2 (10)
Logam mesin maintenance and diagnostic mechanical 2 (10)Eko Supriyadi
 
adoc.pub_keselamatan-kerja-segi-mekanik-dan-elektrik-kuliah.pptx
adoc.pub_keselamatan-kerja-segi-mekanik-dan-elektrik-kuliah.pptxadoc.pub_keselamatan-kerja-segi-mekanik-dan-elektrik-kuliah.pptx
adoc.pub_keselamatan-kerja-segi-mekanik-dan-elektrik-kuliah.pptxAndrianS5
 
Contoh oke mantap sip paling oke good gaming
Contoh oke mantap sip paling oke good gamingContoh oke mantap sip paling oke good gaming
Contoh oke mantap sip paling oke good gamingPutraWicaksana3
 
Tugas Besar Kelaikan Udara - Evacuation Slide
Tugas Besar Kelaikan Udara - Evacuation SlideTugas Besar Kelaikan Udara - Evacuation Slide
Tugas Besar Kelaikan Udara - Evacuation SlideFirza Ekadj
 
3. Operatio & Safety Kalmar DRU 450-62 S5.pptx
3.  Operatio & Safety  Kalmar DRU 450-62 S5.pptx3.  Operatio & Safety  Kalmar DRU 450-62 S5.pptx
3. Operatio & Safety Kalmar DRU 450-62 S5.pptxMulyono930383
 
Opkr30 001 b power train (5)
Opkr30 001 b power train (5)Opkr30 001 b power train (5)
Opkr30 001 b power train (5)Eko Supriyadi
 
Logam mesin machine and process operation 7.18 a, v1 rev (13)
Logam mesin machine and process operation 7.18 a, v1 rev (13)Logam mesin machine and process operation 7.18 a, v1 rev (13)
Logam mesin machine and process operation 7.18 a, v1 rev (13)Eko Supriyadi
 
Logam mesin machine and process operation 7.18 a, v1 rev (19)
Logam mesin machine and process operation 7.18 a, v1 rev (19)Logam mesin machine and process operation 7.18 a, v1 rev (19)
Logam mesin machine and process operation 7.18 a, v1 rev (19)Eko Supriyadi
 
Berhubung dengan jabatan
Berhubung dengan jabatanBerhubung dengan jabatan
Berhubung dengan jabatanAzlifa Aziz
 
01 perawatan rutin
01 perawatan rutin01 perawatan rutin
01 perawatan rutinmultiabd
 
01. Work Habit.ppt
01. Work Habit.ppt01. Work Habit.ppt
01. Work Habit.pptSudyatno1
 
Laporan ts mjjk
Laporan ts mjjkLaporan ts mjjk
Laporan ts mjjkisan sell
 
Laporan ts mjjk
Laporan ts mjjkLaporan ts mjjk
Laporan ts mjjkisan sell
 
Modul Bengkel (Part I).ppt
Modul Bengkel (Part I).pptModul Bengkel (Part I).ppt
Modul Bengkel (Part I).pptIntan806390
 
Materi-operation-kupang-amp-sumbagut.pdf
Materi-operation-kupang-amp-sumbagut.pdfMateri-operation-kupang-amp-sumbagut.pdf
Materi-operation-kupang-amp-sumbagut.pdfyusuf699644
 

Similar to Indoor Unit (20)

Equipment comissioning proc
Equipment comissioning procEquipment comissioning proc
Equipment comissioning proc
 
Service dan Maintenance AC Split - Troubleshooting Praktikum
Service dan Maintenance AC Split - Troubleshooting PraktikumService dan Maintenance AC Split - Troubleshooting Praktikum
Service dan Maintenance AC Split - Troubleshooting Praktikum
 
Logam mesin maintenance and diagnostic mechanical 2 (10)
Logam mesin maintenance and diagnostic mechanical 2 (10)Logam mesin maintenance and diagnostic mechanical 2 (10)
Logam mesin maintenance and diagnostic mechanical 2 (10)
 
adoc.pub_keselamatan-kerja-segi-mekanik-dan-elektrik-kuliah.pptx
adoc.pub_keselamatan-kerja-segi-mekanik-dan-elektrik-kuliah.pptxadoc.pub_keselamatan-kerja-segi-mekanik-dan-elektrik-kuliah.pptx
adoc.pub_keselamatan-kerja-segi-mekanik-dan-elektrik-kuliah.pptx
 
Contoh oke mantap sip paling oke good gaming
Contoh oke mantap sip paling oke good gamingContoh oke mantap sip paling oke good gaming
Contoh oke mantap sip paling oke good gaming
 
Tugas Besar Kelaikan Udara - Evacuation Slide
Tugas Besar Kelaikan Udara - Evacuation SlideTugas Besar Kelaikan Udara - Evacuation Slide
Tugas Besar Kelaikan Udara - Evacuation Slide
 
3. Operatio & Safety Kalmar DRU 450-62 S5.pptx
3.  Operatio & Safety  Kalmar DRU 450-62 S5.pptx3.  Operatio & Safety  Kalmar DRU 450-62 S5.pptx
3. Operatio & Safety Kalmar DRU 450-62 S5.pptx
 
LOTO TRAINING.ppt
LOTO TRAINING.pptLOTO TRAINING.ppt
LOTO TRAINING.ppt
 
Opkr30 001 b power train (5)
Opkr30 001 b power train (5)Opkr30 001 b power train (5)
Opkr30 001 b power train (5)
 
Logam mesin machine and process operation 7.18 a, v1 rev (13)
Logam mesin machine and process operation 7.18 a, v1 rev (13)Logam mesin machine and process operation 7.18 a, v1 rev (13)
Logam mesin machine and process operation 7.18 a, v1 rev (13)
 
Logam mesin machine and process operation 7.18 a, v1 rev (19)
Logam mesin machine and process operation 7.18 a, v1 rev (19)Logam mesin machine and process operation 7.18 a, v1 rev (19)
Logam mesin machine and process operation 7.18 a, v1 rev (19)
 
Berhubung dengan jabatan
Berhubung dengan jabatanBerhubung dengan jabatan
Berhubung dengan jabatan
 
01 perawatan rutin
01 perawatan rutin01 perawatan rutin
01 perawatan rutin
 
01. Work Habit.ppt
01. Work Habit.ppt01. Work Habit.ppt
01. Work Habit.ppt
 
akta mesin dan jentera ICE
akta mesin dan jentera ICEakta mesin dan jentera ICE
akta mesin dan jentera ICE
 
Laporan ts mjjk
Laporan ts mjjkLaporan ts mjjk
Laporan ts mjjk
 
Laporan ts mjjk
Laporan ts mjjkLaporan ts mjjk
Laporan ts mjjk
 
DEA 3333
DEA 3333DEA 3333
DEA 3333
 
Modul Bengkel (Part I).ppt
Modul Bengkel (Part I).pptModul Bengkel (Part I).ppt
Modul Bengkel (Part I).ppt
 
Materi-operation-kupang-amp-sumbagut.pdf
Materi-operation-kupang-amp-sumbagut.pdfMateri-operation-kupang-amp-sumbagut.pdf
Materi-operation-kupang-amp-sumbagut.pdf
 

Indoor Unit

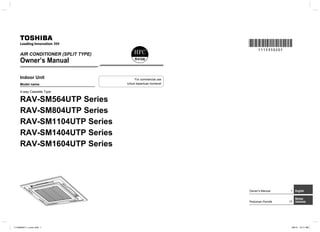
  • 1. Indoor Unit Model name: 4-way Cassette Type RAV-SM564UTP Series RAV-SM804UTP Series RAV-SM1104UTP Series RAV-SM1404UTP Series RAV-SM1604UTP Series AIR CONDITIONER (SPLIT TYPE) Owner’s Manual For commercial use English Owner’s Manual 1 Pedoman Pemilik 17 Bahasa indonesia Untuk keperluan komersil 1115350201-1_cover.indd 1 1115350201-1_cover.indd 1 3/6/14 10:17 AM 3/6/14 10:17 AM
  • 2. – 1 – Original instruction ADOPTION OF NEW REFRIGERANT This Air Conditioner uses R410A an environmentally friendly refrigerant. This appliance is not intended for use by person (including children) with reduced physical, sensory or mental capabilities, or lack of experience and knowledge, unless they have been given supervision or instruction concerning use of the appliance by a person responsible for their safety. Contents 1 Precautions for safety . . . . . . . . . . . . . . . . . . . . . . . . . . . . . . . . . . . . . . . . . . . . . . . . . . 3 2 Part names . . . . . . . . . . . . . . . . . . . . . . . . . . . . . . . . . . . . . . . . . . . . . . . . . . . . . . . . . . . 5 3 Wired remote controller. . . . . . . . . . . . . . . . . . . . . . . . . . . . . . . . . . . . . . . . . . . . . . . . . 5 4 Correct usage. . . . . . . . . . . . . . . . . . . . . . . . . . . . . . . . . . . . . . . . . . . . . . . . . . . . . . . . . 7 5 Timer operation . . . . . . . . . . . . . . . . . . . . . . . . . . . . . . . . . . . . . . . . . . . . . . . . . . . . . . . 8 6 Adjustment of wind direction . . . . . . . . . . . . . . . . . . . . . . . . . . . . . . . . . . . . . . . . . . . . 8 7 Power saving mode . . . . . . . . . . . . . . . . . . . . . . . . . . . . . . . . . . . . . . . . . . . . . . . . . . . 10 8 Self clean mode . . . . . . . . . . . . . . . . . . . . . . . . . . . . . . . . . . . . . . . . . . . . . . . . . . . . . . 10 9 Advanced settings . . . . . . . . . . . . . . . . . . . . . . . . . . . . . . . . . . . . . . . . . . . . . . . . . . . . 11 How to set up swing type Setting the louver lock Releasing the louver lock 10 Maintenance . . . . . . . . . . . . . . . . . . . . . . . . . . . . . . . . . . . . . . . . . . . . . . . . . . . . . . . . . 13 11 Troubleshooting. . . . . . . . . . . . . . . . . . . . . . . . . . . . . . . . . . . . . . . . . . . . . . . . . . . . . . 14 12 Operations and performance . . . . . . . . . . . . . . . . . . . . . . . . . . . . . . . . . . . . . . . . . . . 15 13 Installation . . . . . . . . . . . . . . . . . . . . . . . . . . . . . . . . . . . . . . . . . . . . . . . . . . . . . . . . . . 15 14 Specifications. . . . . . . . . . . . . . . . . . . . . . . . . . . . . . . . . . . . . . . . . . . . . . . . . . . . . . . . 16 1-EN 2-EN 1115350201-1_EN.indd 1 1115350201-1_EN.indd 1 3/6/14 10:15 AM 3/6/14 10:15 AM
  • 3. – 2 – EN EN ID Thank you for purchasing this Toshiba air conditioner. Please read carefully through these instructions that contain important information which complies with the “Machinery” Directive (Directive 2006 / 42 / EC), and ensure that you understand them. After reading these instructions, be sure to keep them in a safe place together with the Owner’s Manual and Installation Manual supplied with your product. Generic Denomination: Air Conditioner Definition of Qualified Installer or Qualified Service Person The air conditioner must be installed, maintained, repaired and removed by a qualified installer or qualified service person. When any of these jobs is to be done, ask a qualified installer or qualified service person to do them for you. A qualified installer or qualified service person is an agent who has the qualifications and knowledge described in the table below. Agent Qualifications and knowledge which the agent must have Qualified installer ‡ The qualified installer is a person who installs, maintains, relocates and removes the air conditioners made by Toshiba Carrier Corporation. He or she has been trained to install, maintain, relocate and remove the air conditioners made by Toshiba Carrier Corporation or, alternatively, he or she has been instructed in such operations by an individual or individuals who have been trained and is thus thoroughly acquainted with the knowledge related to these operations. ‡ The qualified installer who is allowed to do the electrical work involved in installation, relocation and removal has the qualifications pertaining to this electrical work as stipulated by the local laws and regulations, and he or she is a person who has been trained in matters relating to electrical work on the air conditioners made by Toshiba Carrier Corporation or, alternatively, he or she has been instructed in such matters by an individual or individuals who have been trained and is thus thoroughly acquainted with the knowledge related to this work. ‡ The qualified installer who is allowed to do the refrigerant handling and piping work involved in installation, relocation and removal has the qualifications pertaining to this refrigerant handling and piping work as stipulated by the local laws and regulations, and he or she is a person who has been trained in matters relating to refrigerant handling and piping work on the air conditioners made by Toshiba Carrier Corporation or, alternatively, he or she has been instructed in such matters by an individual or individuals who have been trained and is thus thoroughly acquainted with the knowledge related to this work. ‡ The qualified installer who is allowed to work at heights has been trained in matters relating to working at heights with the air conditioners made by Toshiba Carrier Corporation or, alternatively, he or she has been instructed in such matters by an individual or individuals who have been trained and is thus thoroughly acquainted with the knowledge related to this work. Qualified service person ‡ The qualified service person is a person who installs, repairs, maintains, relocates and removes the air conditioners made by Toshiba Carrier Corporation. He or she has been trained to install, repair, maintain, relocate and remove the air conditioners made by Toshiba Carrier Corporation or, alternatively, he or she has been instructed in such operations by an individual or individuals who have been trained and is thus thoroughly acquainted with the knowledge related to these operations. ‡ The qualified service person who is allowed to do the electrical work involved in installation, repair, relocation and removal has the qualifications pertaining to this electrical work as stipulated by the local laws and regulations, and he or she is a person who has been trained in matters relating to electrical work on the air conditioners made by Toshiba Carrier Corporation or, alternatively, he or she has been instructed in such matters by an individual or individuals who have been trained and is thus thoroughly acquainted with the knowledge related to this work. ‡ The qualified service person who is allowed to do the refrigerant handling and piping work involved in installation, repair, relocation and removal has the qualifications pertaining to this refrigerant handling and piping work as stipulated by the local laws and regulations, and he or she is a person who has been trained in matters relating to refrigerant handling and piping work on the air conditioners made by Toshiba Carrier Corporation or, alternatively, he or she has been instructed in such matters by an individual or individuals who have been trained and is thus thoroughly acquainted with the knowledge related to this work. ‡ The qualified service person who is allowed to work at heights has been trained in matters relating to working at heights with the air conditioners made by Toshiba Carrier Corporation or, alternatively, he or she has been instructed in such matters by an individual or individuals who have been trained and is thus thoroughly acquainted with the knowledge related to this work. Warning indications on the air conditioner unit Warning indication Description WARNING ELECTRICAL SHOCK HAZARD Disconnect all remote electric power supplies before servicing. WARNING Moving parts. Do not operate unit with grille removed. Stop the unit before the servicing. CAUTION High temperature parts. You might get burned when removing this panel. CAUTION Do not touch the aluminum fins of the unit. Doing so may result in injury. CAUTION BURST HAZARD Open the service valves before the operation, otherwise there might be the burst. WARNING ELECTRICAL SHOCK HAZARD Disconnect all remote electric power supplies before servicing. WARNING Moving parts. Do not operate unit with grille removed. Stop the unit before the servicing. CAUTION High temperature parts. You might get burned when removing this panel. CAUTION Do not touch the aluminum fins of the unit. Doing so may result in injury. CAUTION BURST HAZARD Open the service valves before the operation, otherwise there might be the burst. 3-EN 4-EN 1115350201-1_EN.indd 2 1115350201-1_EN.indd 2 3/6/14 10:15 AM 3/6/14 10:15 AM
  • 4. – 3 – 1 Precautions for safety The manufacturer shall not assume any liability for the damage caused by not observing the description of this manual. WARNING General ‡ Carefully read Owner’s Manual before starting the air conditioner. There are many important things to keep in mind for daily operation. ‡ Ask for installation to be performed by the dealer or a professional. Only a qualified installer (*1) is able to install an air conditioner. If a non-qualified person installs an air conditioner, it may result in problems such as fire, electric shock, injury, water leakage, noise and vibration. ‡ Do not use any refrigerant different from the one specified for complement or replacement. Otherwise, abnormally high pressure may be generated in the refrigeration cycle, which may result in a failure or explosion of the product or an injury to your body. ‡ Places where the operation sound of the outdoor unit may cause a disturbance. (Especially at the boundary line with a neighbour, install the air conditioner while considering the noise.) Transportation and storage ‡ To transport the air conditioner, wear shoes with protective toe caps, protective gloves, and other protective clothing. ‡ To transport the air conditioner, do not take hold of the bands around the packing carton. You may injure yourself if the bands should break. ‡ Before stacking the packing cartons for storage or transportation, heed the precautions written on the packing cartons. Failure to heed the precautions may cause the stack to collapse. ‡ The air conditioner must be transported in stable condition. If any part of the product broken, contact your dealer. ‡ When the air conditioner must be transported by hand, carry it by two or more people. Installation ‡ Only a qualified installer(*1) or qualified service person(*1) is allowed to carry out the electrical work of the air conditioner. Under no circumstances must this work be done by an unqualified individual since failure to carry out the work properly may result in electric shocks and/or electrical leaks. ‡ After the installation work has been completed, have the installer explain about the circuit breaker positions. In the event that trouble has occurred in the air conditioner, set the circuit breaker to the OFF position, and contact a service person. ‡ If the unit is installed in a small room, take appropriate measures to prevent the refrigerant from exceeding the limit concentration even if it leaks. Consult the dealer from whom you purchased the air conditioner when you implement the measures. Accumulation of highly concentrated refrigerant may cause an oxygen deficiency accident. ‡ Do not install the air conditioner in a location that may be subject to a risk of expire to a combustible gas. If a combustible gas leaks and becomes concentrated around the unit, a fire may occur. ‡ Use the company-specified products for the separately purchased parts. Use of non-specified products may result in fire, electric shock, water leakage or other trouble. Have the installation performed by a professional. ‡ Confirm that earthing is performed correctly. Operation ‡ Before opening the intake grille of the indoor unit or service panel of the outdoor unit, set the circuit breaker to the OFF position. Failure to set the circuit breaker to the OFF position may result in electric shocks through contact with the interior parts. Only a qualified installer(*1) or qualified service person(*1) is allowed to remove the intake grille of the indoor unit or service panel of the outdoor unit and do the work required. ‡ Inside the air conditioner are high-voltage areas and rotating parts. Due to the danger of electric shocks or of your fingers or physical objects becoming trapped in the rotating parts, do not remove service panel of the outdoor unit. When work involving the removal of these parts is required, contact a qualified installer or a qualified service person. ‡ Do not move or repair any unit by yourself. Since there is high voltage inside the unit, you may get electric shock when removing the cover and main unit. ‡ Use of a stand more than 50 cm high to clean the filter of the indoor unit or to carry out other such jobs constitutes working at heights. Due to the danger of falling off the stand and injuring yourself while working at heights, this kind of work should not be done by unqualified individuals. When this kind of work must be carried out, do not do it yourself but ask a qualified installer or a qualified service person to do it for you. ‡ Do not touch the aluminum fin of the outdoor unit. You may injure yourself if you do so. If the fin must be touched, do not touch it yourself but contact a qualified installer or a qualified service person. ‡ Do not climb onto or place objects on top of the outdoor unit. You may fall or the objects may fall off of the outdoor unit and result in injury. ‡ Do not place any combustion appliance in a place where it is directly exposed to the wind of air conditioner, otherwise it may cause imperfect combustion. ‡ When the air conditioner is operated with a combustion appliance in the same place, ventilate the room sufficiently. Poor ventilation causes oxygen shortage. ‡ When the air conditioner is used in a closed room, sufficiently ventilate the room. Poor ventilation causes oxygen shortage. ‡ Do not expose your body to cool air directly for a long time and do not cool yourself excessively. Doing so may result in deteriorated physical condition and ill health. ‡ Do not insert your finger or a stick into the air intake or discharge. Doing so may result injury as the fan is rotating at high speed inside the unit. ‡ Consult the shop where you purchased the air conditioner if air conditioning (cooling and heating) is not performed properly as a refrigerant leakage may be the cause. Confirm the repair details with a qualified service person(*1) when the repair includes additional charging of the refrigerant. ‡ Stop running the air conditioner and turn off the breaker before cleaning. Otherwise, injury may result as the fan is rotating at high speed inside the unit. Repairs ‡ If there is any kind of trouble (such as when an error display has appeared, there is a smell of burning, abnormal sounds are heard, the air conditioner fails to cool or heat or water is leaking) has occurred in the air conditioner, do not touch the air conditioner yourself but set the circuit breaker to the OFF position, and contact a qualified service person. Take steps to ensure that the power will not be turned on (by marking “out of service” near the circuit breaker, for instance) until qualified service person arrives. Continuing to use the air conditioner in the trouble status may cause mechanical problems to escalate or result in electric shocks or other trouble. ‡ If the fan grille is damaged, do not approach the outdoor unit but set the circuit breaker to the OFF position, and contact a qualified service person to have the repairs done. Do not set the circuit breaker to the ON position until the repairs are completed. ‡ If there is a danger of the indoor unit’s falling, do not approach the indoor unit but set the circuit breaker to the OFF position, and contact a qualified installer or a qualified service person to refit the unit. Do not set the circuit breaker to the ON position until the unit has been refitted. ‡ If there is a danger of the outdoor unit’s toppling over, do not approach the outdoor unit but set the circuit breaker to the OFF position, and contact a qualified installer or a qualified service person to have the improvements or refitting done. Do not set the circuit breaker to the ON position until the improvements or refitting is completed. ‡ Do not customize the unit. Doing so may result in fire, electric shock or other trouble. Relocation ‡ When the air conditioner is to be relocated, do not relocate it yourself but contact a qualified installer or a qualified service person. Failure to relocate the air conditioner properly may result in electric shocks and/or a fire. 5-EN 6-EN 1115350201-1_EN.indd 3 1115350201-1_EN.indd 3 3/6/14 10:15 AM 3/6/14 10:15 AM
  • 5. – 4 – EN EN ID CAUTION To disconnect the appliance from the mains supply. ‡ This appliance must be connected to the mains by means of a switch with a contact separation of at least 3 mm. The installation fuse (all types can be used) must be used for the power supply line of this air conditioner. Installation ‡ Certainly lay the drain hose for perfect draining. Improper drainage may cause flooding in the house and getting furniture wet. ‡ Connect the air conditioner to an exclusive power supply of the rated voltage, otherwise the unit may break down or cause a fire. ‡ Confirm that the outdoor unit are fixed on the base. Otherwise, falling down of the units or other accidents may occur. Operation ‡ Do not use this air conditioner for special purpose such as preserving food, precision instruments, art objects, breeding animals, car, vessel. ‡ Do not touch any switches with wet finger, otherwise you may get an electric shock. ‡ If the air conditioner will not be used for a considerably long time, turn off the main switch or the circuit breaker, for safety. ‡ To make the air conditioner operate in its original performance, operate it within the range of the operating temperature specified in the instructions. Otherwise it may cause a malfunction, or water leak from the unit. ‡ Prevent any liquid from falling into the remote controller. Do not spill juice, water or any kind of liquid. ‡ Do not wash the air conditioner. Doing so may result in electric shock. ‡ Check whether the installation base and other equipment have become deteriorated after being used for a long time. Leaving them such condition may result in the unit’s falling down and causing injury. ‡ Do not leave flammable sprays or other flammable materials near the air conditioner, and do not spray flammable aerosol directly to the air conditioner. They may catch fire. ‡ Stop running the air conditioner and turn off the breaker before cleaning. Otherwise, injury may result as the fan is rotating at high speed inside the unit. ‡ Ask for cleaning of the air conditioner to be performed by the dealer. Cleaning the air conditioner in an improper manner may cause damage to plastic parts, insulation failure of electric parts or other parts, and result in a malfunction. In the worst case, it may result in water leakage, electric shock, smoke emission or fire. ‡ Do not put a water container such as a vase on the unit. Water intrusion into the unit may occur and it may cause deterioration of electric insulation and result in electric shock. ‡ Do not wash air conditioners with pressure washers. Electric leaks may cause electric shocks or fires. (*1) Refer to the “Definition of Qualified Installer or Qualified Service Person.” Information on the transportation, handling and storage of the carton Examples of indication on the carton Symbol Description Symbol Description Keep dry Do not drop Fragile Do not lay down Stacking height (12 cartons can be stacked in this case) Do not walk on this carton This side up Do not step Handle with care Other cautions Description CAUTION Injury possibility. Don’t handle with packing band, or may get injured in case of broken band. Stacking notice. In case that cardboard boxes protrude out of pallet when stacking. Lay a 10 mm thick plywood over the pallet. 11 cartons 7-EN 8-EN 1115350201-1_EN.indd 4 1115350201-1_EN.indd 4 3/6/14 10:15 AM 3/6/14 10:15 AM
  • 6. – 5 – 2 Part names Indoor unit Outdoor unit (The design varies depending on the outdoor unit. The following illustration shows an example.) Knob Knob to open / close the suction port. Provided in the electrical control box. Earth screw Air filter Removes dust or trash. (Provided on the suction port.) Change the direction of the air to be discharged according to cool / heat mode. Discharge louver of discharge port The air in the room is sucked in from this port. Suction air port Projection of air filter Air intake (Side and rear) Panel There is an earth screw, valves, and electric parts inside. Air discharge Piping panel Wiring hole Refrigerant pipe outlet Fixing leg 3 Wired remote controller This remote controller can control the operation of up to 8 indoor units. Display section In the display illustration below all the icons are shown. When the unit is in operation, only relevant icons will be displayed. ‡ When the leak breaker is turned on for the first time, flashes on the display part of the remote controller. ‡ While this icon is flashing, the model is being automatically confirmed. Wait till icon has disappeared to use the remote controller. 1 Operation mode The selected operation mode is displayed. 2 Error display Displayed while the protective device works or a error occurs. 3 SETTING display Displayed during setup of the timer or other settings. 4 TEST run display Displayed during a test run. 5 Timer display When an error occurs, error code is displayed. 6 Timer mode display The selected timer mode is displayed. 7 Louver position display Displays louver position. 8 Swing display Displayed during up / down movement of the louver. 9 Filter display Reminder to clean the air filter. 10 Fan speed display The selected fan speed mode is displayed. 11 Set temperature display The selected set temperature is displayed. 12 Power saving mode display Limits compressor speed (capacity) to save energy. SET TIME TIMER SET TEST FILTER RESET TEMP. CL FAN SAVE SWING/FIX VENT MODE ON / OFF UNIT LOUVER Display section Operation section 19 21 22 1 6 2 5 9 10 15 17 16 20 11 14 13 12 18 (Auto) (High) (Med.) (Low) 3 4 7 8 9-EN 10-EN 1115350201-1_EN.indd 5 1115350201-1_EN.indd 5 3/6/14 10:15 AM 3/6/14 10:15 AM
  • 7. – 6 – EN EN ID 13 UNIT No. display Displays the number of the indoor unit selected. Also displays error code of indoor and outdoor units. 14 Central control display Displayed when the air conditioner is used under the central control in combination with a central control remote controller. In case the remote controller is disabled by the central control system, flashes. The button operation is not accepted. Even when ON / OFF, MODE, or TEMP. button is pushed, and the button operation is not accepted. (Settings made by the remote controller vary with the central control mode. For details, refer to the Owner’s Manual of the central control remote controller.) 15 Remote controller sensor display Displayed while the sensor of the remote controller is used. 16 Pre-heat display Displayed when the heating mode is energized or defrost cycle is initiated. While this icon is displayed, the indoor fan stops. 17 No function display Displayed when the function requested is not available on that model. 18 Self clean operation display Displayed during self clean operation to dry the indoor heat exchanger. 19 Service display 20 Operation ready display This display appears on some models. 21 Louver Number display. (exapmle:01, 02, 03, 04) 22 Louver lock display Displayed when there is a louver-locked unit in the group (including 1 indoor unit by 1 outdoor unit). 1 6 2 3 7 8 5 9 15 17 16 11 14 13 12 20 18 19 21 22 4 10 Operation section Push each button to select a desired operation. ‡ The control saves commands in memory and after the initial setting, there is no need for any additional settings unless changes are desired. The air conditioner can be operated by pushing the button. 1 button (Temperature set button) Adjusts the set point. Select the desired set point by pushing TEMP. or TEMP. . 2 button (Timer set button) Use to setup the timer. 3 button (Filter reset button) Resets “ ” display after cleaning filter. 4 button (Test button) Use only for service. (During normal operation, do not use this button.) 5 button When the button is pushed, the operation starts, and it stops by pushing the button again. When the operation has stopped, the operation lamp and all the displays disappear. 6 Operation lamp Green light illuminates when unit is on. Although it flashes when operating the protection device or an error occurs. 7 button (Operation mode button) Selects desired operation mode. 8 button (Fan speed button) Selects the desired Fan speed. 9 button (Ventilation button) Use when a power ventilation kit (locally procured) is connected. ‡ If “ ” is displayed on the remote controller when this button is pushed, no vent kit connected. 10 button (Power save operation) Use to initiate power saving mode. 11 button (Unit / Louver select button) Selects a unit number (left) and louver number (right). UNIT: Selects an indoor unit when adjusting wind direction multiple indoor units are controlled with one remote controller. LOUVER: Selects a louver when setting wind direction adjustment independently. 12 button (Swing / Louver direction button) Selects automatic swing or setting the louver direction. OPTION : Remote controller sensor Usually the temperature sensor of the indoor unit senses the temperature. The temperature on the surrounding of the remote controller can also be sensed. For details, contact the dealer from which you have purchased the air conditioner. 8 6 4 3 2 5 7 10 12 1 9 11 11-EN 12-EN 1115350201-1_EN.indd 6 1115350201-1_EN.indd 6 3/6/14 10:15 AM 3/6/14 10:15 AM
  • 8. – 7 – 4 Correct usage When the air conditioner is used for the first time or when the setting is changed, follow the steps below. Settings are saved in memory and are displayed anytime the unit is turned on by pushing the button. Preparation ‡ When the circuit breaker is turned on, the partition lines are displayed on the remote controller. * After the circuit breaker is turned on, the remote controller does not accept any commands for approx. * When these indoor units are connected to the outdoor units of RAV-SM**4AP-IN, heating mode and auto mode will not able to operate. 1 minute, this is not a failure. REQUIREMENT When the air conditioner is re-powered after it has not been used for a long period, turn on the circuit breaker at least 12 hours before starting the air conditioner. Start 1 Push button. The operation lamp illuminates, and the operation starts. 2 Select an operation mode with the “ ” button. One push of the button, and the display changes in the order shown below. 3 Select fan speed with “ ” button. One push of the button, and the display changes in the order shown below. ‡ When fan is in “ Auto”, fan speed is adjusted based on difference between set point and room temperature. ‡ In heating operation, if the room temperature is not heated sufficiently with speed “ Low” operation, select “ Med.” or “ High” operation. ‡ The temperature sensor detects the return air temperature at the indoor unit, which differs from the room temperature depending on the installation condition. Set point is a target of room temperature. ( “Auto” is not selectable in the Fan mode.) 4 Select the set point temperature by pushing the “TEMP. ” or “TEMP. ” buttons. Stop Push button. The operation lamp goes off, and the operation stops. In the Cool, Dry, or Auto (cooling) mode, the fan runs for 10 minutes (or more) for self clean operation. SET TIME TIMER SET TEST FILTER RESET TEMP. CL FAN SAVE SWING/FIX VENT MODE ON / OFF UNIT LOUVER 1 3 2 4 Auto Heat Dry Fan Cool Auto High Med. Low NOTE Auto Changeover ‡ When in Auto Mode, the unit selects the operating mode (cooling, heating or fan only) based on the user set point temperature. ‡ If the Auto mode is uncomfortable, you can select the desired conditions manually. Cooling ‡ If there is a demand for cooling, unit will start approximately 1 minute after mode is selected. Heating ‡ If there is a demand for heating, unit will start approximately 3 to 5 minutes after the mode is selected. ‡ After the heating operation has stopped, fan may continue to run for approx. 30 seconds. ‡ When the room temperature reaches the set temperature, the outdoor unit stops and the indoor unit fan runs at extremely low speed. During defrost operation, the fan stops so that cool air is not discharged. (“ ” Pre-heat is displayed.) When restarting the operation after stop When the unit is attempted to restart immediately after it was stopped, the unit can not start for approx. 3 minutes this is to protect the compressor. 8 °C operation (For object pre-heating) (SDI 4series and DI 4series (RAV-SP***4AT / RAV-SM***4AT) only) The air conditioner can control the heating temperature to about 8 °C in the heating mode. The 8 °C heating operation requires settings with the wired remote controller. Ask the installer or dealer for the settings according to the installation manual of the indoor unit. Start 1 Set the displayed temperature to 18 °C in the heating mode by pushing TEMP. button. 2 Set the displayed temperature to 8 °C by pushing TEMP. button for at least four seconds. Stop 1 Set the displayed temperature to 18 °C by pushing TEMP. button. ‡ The air conditioner returns to the normal Heat mode. Select a desired temperature and operation mode. NOTE ‡ The discharged air temperature is lower than that in the normal heating operation. ‡ The room temperature may not be heated evenly depending on the remote controller installation location. ‡ The room temperature may not reach 8 °C depending on the room size or the installation conditions. ‡ Setting for fan speed is available during the 8 °C heating operation. The 8 °C heating operation is cancelled in the following cases. ‡When operation is stopped with button ‡When another operation mode is selected with button ‡When temperature setting or operation mode is changed or operation is started / stopped by the wireless remote controller or the central control remote controller. ‡ When this operation mode is used, observe proper operating hours and periodic maintenance by service staff is recommended. 13-EN 14-EN 1115350201-1_EN.indd 7 1115350201-1_EN.indd 7 3/6/14 10:15 AM 3/6/14 10:15 AM
  • 9. – 8 – EN EN ID 5 Timer operation ‡ Three timer modes are available: (Setting of up to 168 hours is enabled.) Set 1 Push button. The timer mode changes with every push of the button. ‡ and timer display flashes. 2 Push to select “set time”. ‡ With every push of button, the set time increases by 0.5 hr (30 minutes). When setting a time more than 24 hours for timer operation, timer can be set in increments of 1 hr. The maximum set time is 168 hr (7 days). The remote control displays the set time with time (between 0.5 and 23.5 hours) (*1 ) or number of days and time (24 hours or more) (*2 ) as shown below. ‡ With every push of button, the set time decreases by 0.5 hr (30 minutes) (0.5 - 23.5 hours) or 1 hr (24 - 168 hours). Example of remote control display ‡ 23.5 hours (*1 ) ‡ 34 hours (*2 ) 3 Push button. ‡ icon disappears and time display goes on, and or icon flashes. (When On timer is activated, time and On timer are icons and other icons disappear.) 4 Cancel timer operation Push button. Timer icon disappears. NOTE ‡ When the operation stops after the timer reached the preset time, the Repeat Off timer resumes the operation by pushing button and stops the operation after the time of the timer has reached the set time. ‡ When is pushed while the Off timer function of the air conditioner is active, the indication of the timer function disappears and then appears again after about 5 seconds. This is due to normal processing of the remote controller. Off timer : The unit stops when the set time is reached. Repeat Off timer : The unit stops daily when the set time is reached. On timer : The unit starts when the set time is reached. 1 3 2 4 shows 1 day (24 hours). shows 10 hours. (Total 34 hours) (Off timer) (On timer) (Repeat Off timer) No display Off Off On Number of days Time 6 Adjustment of wind direction For best cooling and heating performance, adjust the louvers (adjustment plates of up / down wind direction) appropriately. Cold air descends and warm air rises, so to heat a room tilt the louvers downward, and to cool a room tilt them horizontally. CAUTION Direct the louvers horizontally for cooling. If the louvers stay pointed downward when cooling, condensation may form on the discharge port and / then drops from the louvers. NOTE If the louvers stay pointed straight out horizontally when heating, the room temperature may be unevenly distributed. ‡ When the air conditioner is not working, the louvers are directed horizontally automatically. ‡ The louvers are directed horizontally when heating begins, during defrost operation, or during the minimum operation after reaching the set temperature. When a swing or louver direction setting is made at this time, the remote controller display varies with the setting, but the louvers stay pointed straight out horizontally. When the air conditioner starts heating, the louvers are directed to the set direction. For cooling (COOL) Direct the louvers horizontally. For heating (HEAT) Direct the louvers downward. 15-EN 16-EN 1115350201-1_EN.indd 8 1115350201-1_EN.indd 8 3/6/14 10:15 AM 3/6/14 10:15 AM
  • 10. – 9 – How to set up the louver direction 1 Push during operation. The louver direction changes for every push of the button. In HEAT operation Direct the louver (adjustment plate of up / down wind direction) downward. If directing at horizontally, hot air may not come to the foot. In COOL / DRY operation Direct the louver (adjustment plate of up / down wind direction) horizontally. If directing it downward, the dew may form on the surface of the air discharge port and may drop down. In FAN operation Select a desired louver direction. How to start swinging 1 Push , set the louver (adjustment plate of up / down wind direction) direction to the lowest position, and then push again. SWING is displayed and the up / down louver direction is automatically selected. Display during swinging How to stop swinging 1 Push at a desired position while the louver is swinging. ‡ When is pushed after that, wind direction can be set again from the highest position. Display when swinging is stopped In this case, push again two seconds later. ‡ In Cool / Dry operation, the louver does not stop as it directs downward. If stopping the louver as it directs downward during swing operation, it stops after moving to the third position from the highest position. Display when stopping the swing 1 Unit select button Initial setup Initial setup Initial setup * However, even if is pushed while the louver is swinging, the louver position is displayed as follows and highest position of the louver may not be selected. Repeat Fan / Heat operation Cool / Dry operation Fan / Heat operation Cool / Dry operation Unit select button ‡ When multiple indoor units are controlled with one remote controller, louver direction can be set for each indoor unit by selecting individually. ‡ To set louver direction individually, push button to display an indoor unit number in the control group. Then set the wind direction of the displayed indoor unit. ‡ When no indoor unit number is displayed, all indoor units in the control group can be controlled simultaneously. ‡ Each time button is pushed, the display changes as follows: How to set louver wind direction individually 1 Select an indoor unit to be set by pushing (left side of the button) during operation. ‡ The indoor unit number changes each time you push the button. * When no unit number is displayed, all indoor units are selected. 2 Select a louver you want to adjust change by pushing (right side of the button). ‡ Each time you push the button, the display on the left of the remote controller changes as follows: * When no louver number is displayed, all four louvers are selected. 3 Determine wind direction of the selected louver by pushing . ‡ Each time you push the button, the display changes as follows: * During COOL (DRY) mode, (4) and (5) are not displayed. Not display UNIT No. 1-1 UNIT No. 1-2 UNIT No. 1-3 UNIT No. 1-4 Not display 1-1 1-2 1-3 1-4 Not display Louver No. 03 01 02 04 Refrigerant pipe Drain pipe Electrical control box (1) (2) (3) (4) (7) (6) (5) UNIT No. UNIT No. UNIT No. UNIT No. 17-EN 18-EN 1115350201-1_EN.indd 9 1115350201-1_EN.indd 9 3/6/14 10:15 AM 3/6/14 10:15 AM
  • 11. – 10 – EN EN ID 7 Power saving mode The power saving mode saves energy by limiting the maximum current which will effect cooling capacity that the unit can generate. Push button during operation. ‡ The air conditioner enters power saving mode. ‡ appears on the display. Power saving mode will stay in effect until it is cancelled. To cancel the power saving mode, push button again. ‡ disappears. To configure the power saving mode settings 1 Push button for at least four seconds when the air conditioner is not working. ‡ , symbol, and numbers flash. 2 Push (left side of the button) to select an indoor unit to be set. ‡ Each time the button is pushed, UNIT No. change as follows: 3 Push TIME buttons, to adjust the power saving mode setting. ‡ Each push of the button changes the power level by 1 % within the range from 100 % to 50 %. ‡ The factory default is 75 %. 4 Push button. 5 Push button to complete the setting. NOTE ‡ When other electric appliances are used at the same time, to avoid triggering the circuit breaker, power saving mode is recommended. Of course power saving mode can be used to save energy as well. ‡ Power saving mode consumes less energy, but may not cool the room as much as normal mode. (The maximum current is limited to approximately 75 % (factory default) of the normal mode.) ‡ Even when operation start / stop, operation mode change, or power reset is performed during the power saving mode, the power saving mode is retained until the next operation. 4 3 1 5 2 UNIT No. 1-1 UNIT No. 2-1 UNIT No. 3-1 UNIT No. 4-1 The fan of the selected unit runs. Setting of power level in power saving mode 8 Self clean mode This function is provided to dry the inside of the indoor unit by the FAN operation after running the cooling / dry / AUTO (cooling) mode to keep the indoor unit clean. ‡ The self clean time varies with the cooling / dry / Auto (cooling) operation time as follows. ‡ “ ” is displayed on the remote controller during self clean operation. To stop self clean forcibly, push button twice in succession. CAUTION ‡ The fan continues to run even after button is pushed to stop operation in some modes. This is normal because the self clean mode is in progress. ‡ The louvers open slightly and are directed horizontally during self clean, and they close when the self clean is completed. ‡ The operation lamp (LED) does not light during the self clean mode (function). ‡ The self clean mode (function) cannot clean the room or remove the already existing mold and dust inside the indoor unit. ‡ To cancel the self clean function, consult the dealer. Cooling / dry / Auto (cooling) operation time self clean time Less than 10 minutes No self clean operation 10 minutes to less than 1 hour 1 hour More than 1 hour 2 hours 19-EN 20-EN 1115350201-1_EN.indd 10 1115350201-1_EN.indd 10 3/6/14 10:15 AM 3/6/14 10:15 AM
  • 12. – 11 – 9 Advanced settings How to set up swing type 1 Push for at least four seconds when the air conditioner is not working. ‡ , symbol, and numbers flash. 2 Select an indoor unit to be set by pushing (left side of the button). ‡ Each time you push the button, unit numbers change as follows: The fan of the selected unit runs and the louvers start swinging. 3 Select a swing type by pushing TIME buttons. CAUTION Do not set the swing setup code to “0000”. (This setting may cause a failure of the louvers.) 4 Push the button. 5 Push the button to finish the setting. 2 1 4 5 3 Swing setup code Swing of louvers 0001 Standard swing (Factory default) 0002 Dual swing 0003 Cycle swing Not display 1-1 2-1 3-1 4-1 Swing setup code Standard swing All four louvers swing simultaneously at the same angle. Dual swing Adjoining louver alternately swing horizontally and downward. Cyclic swing (Recommended for cooling) All four louvers swing at different times like waves. Swing Horizontal Downward Downward Horizontal Downward Downward Horizontal Horizontal UNIT No. UNIT No. UNIT No. UNIT No. 21-EN 22-EN 1115350201-1_EN.indd 11 1115350201-1_EN.indd 11 3/6/14 10:15 AM 3/6/14 10:15 AM
  • 13. – 12 – EN EN ID Setting the louver lock 1 Push and hold the button (right side of the button) for at least 4 seconds while running is stopped. blinks. ‡ When no unit number is displayed, all units are selected. 2 Push the button (left side of the button) to select a unit. The unit number changes each time you push the button. The fan of the selected unit runs, and the louver swings. 3 Push the “TEMP. ” buttons to display the number of the louver to fix its direction. The selected louver swings. 4 Push the buttons to select the direction of the louver you do not want to swing. * If (4) or (5) is selected, condensation may occur during cooling. 5 Push the button to confirm the setting. When the setting is confirmed, the mark lights up. (To set the louver lock of another unit, repeat from Step 2. To set another louver lock of the same unit, repeat from Step 3.) 6 Push the button to finish the setting. * F1 appears in the CODE No. section on the remote controller. This indicates that the louver 01 shown in the following figure is selected. NOTE Even in louver lock mode, the louver temporarily moves in the following cases: ‡ When the air conditioner is stopped UNIT LOUVER UNIT No. 1-1 UNIT No. 2-1 UNIT No. 3-1 UNIT No. 4-1 (1) 0001 (2) 0002 (3) 0003 (5) 0005 (4) 0004 0001 - 0005 (Louver position code) Louver No. 03 01 02 04 Refrigerant pipe Drain pipe Electrical control box Releasing the louver lock Set “0000” in Step 4 of “Setting the louver lock”. The mark disappears. * Steps 1 - 3 and 5, 6 of “Setting the louver lock” also apply to releasing the lock. Adjusting the horizontal direction 1 Push and hold the and “TEMP. ” buttons for at least 4 seconds while running is stopped. blinks. “01” appears in CODE No. 2 Push the button (left side of the button) to select a unit The unit number changes each time you push the button. The fan of the selected unit runs, and the louver swings. 3 Push the “TEMP. ” buttons to change the CODE No. to “45”. 4 Push the “TIME ”buttons to select a direction. 5 Push the button to check the settings. The indicator stops blinking and stays lit, and the settings are confirmed. 6 Push button to finish the setting. * If the cold draft position is selected, the ceiling smudging reduction effect will be reduced. Direction SET DATA Direction setting “0000” Smudging reduction position (reduces ceiling smudging) “0002” Cold draft position (Less directly expose your body to cool air) (factory default) 0000 SET DATA UNIT No. 1-1 UNIT No. 2-1 UNIT No. 3-1 UNIT No. 4-1 No display 23-EN 24-EN 1115350201-1_EN.indd 12 1115350201-1_EN.indd 12 3/6/14 10:15 AM 3/6/14 10:15 AM
  • 14. – 13 – 10Maintenance WARNING Cleaning the air filter and other parts of the air filter involves dangerous work in high places, so be sure to have a qualified installer or qualified service person to do it. Do not attempt it by yourself. After the cooling or dry auto (cooling) operation has finished, the dry operation is performed and the fan starts running. When cleaning the unit, stop the drying operation forcibly and turn off the circuit breaker to avoid electric shock. Cleaning air filters Clogged air filters will reduce the cooling and heating performance. (1) If “ ” is displayed on the remote controller, clean the air filters. (2) When the cleaning of air filters has been completed, push button. “ ” disappears. When the unit will not be used for a long time 1. Perform the fan operation for a couple of hours to dry inside. 2. Press on the remote controller to stop running, and turn off the circuit breaker. 3. Clean the air filters and reinstall them. Before the cooling season Clean the drain pan ‡ Contact the dealer where you purchased the product. (Drain does not work if the drain pan or vent is clogged. In some cases the drain may overflow and wet the wall or floor. Be sure to clean the drain pan before the cooling season.) (1) (2) Check periodically ‡ If the unit is used for a long time, parts may deteriorate and cause malfunction or bad drainage of dehumidified water depending on the heat, humidity, or dust. ‡ In addition to the usual maintenance, it is recommended that you have the unit checked and maintained by the dealer where you purchased it. NOTE For environmental conservation, it is strongly recommended that the indoor and outdoor units of the air conditioner in use be cleaned and maintained regularly to ensure efficient operation of the air conditioner. When the air conditioner is operated for a long time, periodic maintenance (once a year) is recommended. Furthermore, regularly check the outdoor unit for rust and scratches, and remove them or apply rustproof treatment, if necessary. As a general rule, when an indoor unit is operated for 8 hours or more daily, clean the indoor unit and outdoor unit at least once every 3 months. Ask a professional for this cleaning / maintenance work. Such maintenance can extend the life of the product though it involves the owner’s expense. Failure to clean the indoor and outdoor units regularly will result in poor performance, freezing, water leakage, and even compressor failure. Maintenance List Part Unit Check (visual / auditory) Maintenance Heat exchanger Indoor / outdoor Dust / dirt clogging, scratches Wash the heat exchanger when it is clogged. Fan motor Indoor / outdoor Sound Take appropriate measures when abnormal sound is generated. Filter Indoor Dust / dirt, breakage ‡ Wash the filter with water when it is contaminated. ‡ Replace it when it is damaged. Fan Indoor ‡ Vibration, balance ‡ Dust / dirt, appearance ‡ Replace the fan when vibration or balance is terrible. ‡ Brush or wash the fan when it is contaminated. Air intake / discharge grilles Indoor / outdoor Dust / dirt, scratches Fix or replace them when they are deformed or damaged. Drain pan Indoor Dust / dirt clogging, drain contamination Clean the drain pan and check the downward slope for smooth drainage. Ornamental panel, louvers Indoor Dust / dirt, scratches Wash them when they are contaminated or apply repair coating. Exterior Outdoor ‡ Rust, peeling of insulator ‡ Peeling / lift of coat Apply repair coating. 25-EN 26-EN 1115350201-1_EN.indd 13 1115350201-1_EN.indd 13 3/6/14 10:15 AM 3/6/14 10:15 AM
  • 15. – 14 – EN EN ID 11Troubleshooting Check the points described below before requesting repair. If there is something unusual even after checking the above, stop running the unit, turn off the circuit breaker, and inform the dealer where you purchased the product of the product number and symptom. Do not attempt to repair the unit by yourself as doing so is dangerous. If the check indicator ( , , , etc.) is displayed on the remote controller LCD, inform the dealer of its content as well. If any of the following occur, stop running the unit immediately, turn off the circuit breaker, and contact the dealer where you purchased the product. ‡ The switch does not work properly. ‡ The circuit breaker often blows out. ‡ You unintentionally put a foreign object or water inside. ‡ The unit cannot be run even after the cause of the protective device activation is removed. ‡ Other unusual conditions are found. Symptom Cause It is not a malfunction. Outdoor unit ‡ White, misty, cold air or water comes out ‡ Sometimes the noise of air leaking is heard. ‡ A noise is heard when the power is turned on. ‡ The fan of the outdoor unit is automatically stopped and defrosting is performed. ‡ The solenoid valve works when defrosting starts or stops. ‡ The outdoor unit is preparing for running. Indoor unit ‡ Sometimes a swishing is heard. ‡ A clacking sound is heard. ‡ Discharged air smells unusual. ‡ The fan continues running even after the unit operation is stopped. ‡ When the unit starts running, during operation, or immediately after the unit stops running, a sound such as water flowing may be heard, or the operation sound may become louder for a couple of minutes immediately after the unit starts running. This is the sound of the refrigerant flowing or the dehumidifier draining. ‡ This is a sound generated when the heat exchanger, etc. expands and contracts slightly due to temperature change. ‡ Various smells from the walls, carpet, clothes, cigarette, cosmetics, etc. adhere to the air conditioner. ‡ The fan keeps running to self clean operation the heat exchanger during drying. ? d e r r u c c o t u o k c a l b a s a H ‡ n u r t o n s e o d t i n u e h T ‡ ‡ Has the circuit breaker blown? ‡ Has the protective device been activated? (The operation indicator and on the remote controller are blinking.) Check again. The room does not cool down or warm up. ‡ Is the air intake or discharge of the outdoor unit clogged? ‡ Is a door or window open? ‡ Is the air filter clogged with dust? ‡ Is the air volume set to “Low”? Or is the operation mode set to “Fan”? ‡ Is the setup temperature appropriate? Confirmation and check When an error occurred in the air conditioner, an error code and indoor UNIT No. appear on the display part of the remote controller. The error code is only displayed during the operation. If the display disappears, operate the air conditioner according to the following “Confirmation of error log” for confirmation. Confirmation of error log When an error occurred on the air conditioner, the error log can be confirmed with the following procedure. (The error log is stored in memory up to 4 errors.) The log can be confirmed from both operating status and stop status. 1 When and buttons are pushed at the same time for 4 seconds or more, the following display appears. If is displayed, the mode enters in the error log mode. ‡ [01: Order of error log] is displayed in CODE No.. ‡ [Error code] is displayed in CHECK. ‡ [Indoor unit address in which an error occurred] is displayed in Unit No. . 2 Every pushing of button used to set temperature, the error log stored in memory is displayed in order. The numbers in CODE No. indicate CODE No. [01] (latest) ĺ [04] (oldest). REQUIREMENT Do not push button because all the error log of the indoor unit will be deleted. 3 After confirmation, push button to return to the usual display. Error code Indoor UNIT No. in which an error occurred 3 2 1 27-EN 28-EN 1115350201-1_EN.indd 14 1115350201-1_EN.indd 14 3/6/14 10:15 AM 3/6/14 10:15 AM
  • 16. – 15 – 12Operations and performance Check before running ‡ Check whether the earth wire is cut or disconnected. ‡ Check whether the air filter is installed. ‡ Turn on the circuit breaker 12 hours or more before starting operation. 3 minutes protection function 3-minutes protection function prevents the air conditioner from starting for initial 3 minutes after the main power switch / circuit breaker is turned on for re-starting the air conditioner. Power failure Power failure during operation will stop the unit completely. ‡ To restart the operation, push the ON / OFF button on the remote controller. ‡ Lightning or a wireless car telephone operating nearby may cause the unit to malfunction. Turn off the main power switch or circuit breaker and then turn them on again. Push the ON / OFF button on the remote controller to restart. Defrosting operation If the outdoor unit is frosted during the heating operation, defrosting starts automatically (for approximately 2 to 10 minutes) to maintain the heating capacity. ‡ The fans in both indoor and outdoor units will stop during the defrosting operation. ‡ During the defrosting operation, the defrosted water will be drained from the bottom plate of the outdoor unit. Heating capacity In the heating operation, the heat is absorbed from the outside and brought into the room. This way of heating is called heat pump system. When the outside temperature is too low, it is recommended to use another heating apparatus in combination with the air conditioner. Protective device ‡ Stops operation when the air-conditioner is overloaded. ‡ If the protective device is activated, the unit stops running, and the operation indicator and check indicator on the remote controller blink. If the protective device is activated ‡ Turn off the circuit breaker and perform a checkup. Continued running may cause a malfunction. ‡ Check whether the air filter is installed. If not, the heat exchanger may be clogged with dust and water leakage may occur. During cooling ‡ The air intake or discharge of the outdoor unit is clogged. ‡ Strong wind continuously blows against the discharge of the outdoor unit. During heating ‡ The air filter is clogged with a large amount of dust. ‡ The air intake or discharge of the indoor unit is clogged. Do not turn off the circuit breaker During the air-conditioning season, leave the circuit breaker turned on, and use the ON / OFF key on the remote controller. Attention to snowfall and freeze on the outdoor unit ‡ In snowy areas, the air intake and air discharge of the outdoor unit are often covered with snow or frozen up. If snow or freeze on the outdoor unit is left as it is, it may cause machine failure or poor warming. ‡ In cold areas, pay attention to the drain hose so that it perfectly drains water without water remaining inside for freeze prevention. If water freezes in the drain hose or inside the outdoor unit, it may cause machine failure or poor warming. Air conditioner operating conditions For proper performance, operate the air conditioner under the following temperature conditions: If air conditioner is used outside of the above conditions, safety protection may work. Cooling operation Outdoor temperature : –15 °C to 43 °C (Dry bulb temp.) Room temperature : 21 °C to 32 °C (Dry bulb temp.), 15 °C to 24 °C (Wet bulb temp.) [CAUTION] Room relative humidity – less than 80 %. If the air conditioner operates in excess of this figure, the surface of the air conditioner may cause dewing. Heating operation Outdoor temperature : –15 °C to 15 °C (Wet bulb temp.) Room temperature : 15 °C to 28 °C (Dry bulb temp.) 13Installation Do not install the air conditioner in the following places ‡ Do not install the air conditioner in any place within 1 m from a TV, stereo, or radio set. If the unit is installed in such place, noise transmitted from the air conditioner affects the operation of these appliances. ‡ Do not install the air conditioner near a high frequency appliance (sewing machine or massager for business use, etc.), otherwise the air conditioner may malfunction. ‡ Do not install the air conditioner in locations where iron or other metal dust is present. If iron or other metal dust adheres to or collects on the interior of the air conditioner, it may spontaneously combust and start a fire. ‡ Do not install the air conditioner in a humid or oily place, or in a place where steam, soot, or corrosive gas is generated. ‡ Do not install the air conditioner in a salty place such as seaside area. ‡ Do not install the air conditioner in a place where a great deal of machine oil is used. ‡ Do not install the air conditioner in a place where it is usually exposed to strong wind such as in seaside area. ‡ Do not install the air conditioner in a place where sulfureous gas generated such as in a spa. ‡ Do not install the air conditioner in a vessel or mobile crane. ‡ Do not install the air conditioner in an acidic or alkaline atmosphere (in a hot-spring area or near a chemicals factory, or in a place subject to combustion emissions). Corrosion may be generated on the aluminum fin and copper pipe of the heat exchanger. ‡ Do not install the air conditioner near an obstacle (air vent, lighting equipment, etc.) that disturbs discharge air. (Turbulent airflow may reduce the performance or disable devices.) ‡ Do not use the air conditioner for special purposes such as preserving food, precision instruments, or art objects, or where breeding animals or growing plants are kept. (This may degrade the quality of preserved materials.) ‡ Do not install the air conditioner over an object that must not get wet. (Condensation may drop from the indoor unit at a humidity of 80 % or more or when the drain port is clogged.) ‡ Do not install the air conditioner in a place where an organic solvent is used. ‡ Do not install the air conditioner near a door or window subject to humid outside air. Condensation may form on the air conditioner. ‡ Do not install the air conditioner in a place where special spray is used frequently. Be careful with noise or vibrations ‡ Do not install the air conditioner in a place where noise by outdoor unit or hot air from its air discharge annoys your neighbors. ‡ Install the air conditioner on a solid and stable foundation so that it prevents transmission of resonating, operation noise and vibration. ‡ If one indoor unit is operating, some sound may be audible from other indoor units that are not operating. 29-EN 30-EN 1115350201-1_EN.indd 15 1115350201-1_EN.indd 15 3/6/14 10:15 AM 3/6/14 10:15 AM
  • 17. – 16 – EN EN ID 14Specifications * Under 70 dBA Model Sound power level (dBA) Weight (Kg) Main unit (Ceiling panel) Cooling Heating RAV-SM564UTP Series * * 20 (4.2) RAV-SM804UTP Series * * 20 (4.2) RAV-SM1104UTP Series * * 24 (4.2) RAV-SM1404UTP Series * * 24 (4.2) RAV-SM1604UTP Series * * 24 (4.2) 31-EN 32-EN 1115350201-1_EN.indd 16 1115350201-1_EN.indd 16 3/6/14 10:15 AM 3/6/14 10:15 AM
  • 18. – 17 – Petunjuk asli PENGGUNAAN REFRIGERAN BARU AC ini menggunakan R410A, yang merupakan refrigeran ramah lingkungan. Alat ini tidak ditujukan untuk digunakan oleh orang (termasuk anak-anak) berkekurangan fisik, daya tanggap, atau kemampuan mental, atau kurang pengalaman dan pengetahuan, kecuali mereka telah diberi pengarahan atau petunjuk mengenai penggunaan alat oleh orang yang bertanggung jawab atas keselamatan mereka. Isi 1 Petunjuk keselamatan . . . . . . . . . . . . . . . . . . . . . . . . . . . . . . . . . . . . . . . . . . . . . . . . 19 2 Nama komponen . . . . . . . . . . . . . . . . . . . . . . . . . . . . . . . . . . . . . . . . . . . . . . . . . . . . 21 3 Remote control berkabel . . . . . . . . . . . . . . . . . . . . . . . . . . . . . . . . . . . . . . . . . . . . . . 21 4 Penggunaan yang benar . . . . . . . . . . . . . . . . . . . . . . . . . . . . . . . . . . . . . . . . . . . . . . 23 5 Pengoperasian timer . . . . . . . . . . . . . . . . . . . . . . . . . . . . . . . . . . . . . . . . . . . . . . . . . 24 6 Penyetelan arah angin . . . . . . . . . . . . . . . . . . . . . . . . . . . . . . . . . . . . . . . . . . . . . . . . 24 7 Mode penghematan daya . . . . . . . . . . . . . . . . . . . . . . . . . . . . . . . . . . . . . . . . . . . . . 26 8 Mode pembersihan sendiri . . . . . . . . . . . . . . . . . . . . . . . . . . . . . . . . . . . . . . . . . . . . 26 9 Pengaturan lanjutan . . . . . . . . . . . . . . . . . . . . . . . . . . . . . . . . . . . . . . . . . . . . . . . . . . 27 10 Perawatan . . . . . . . . . . . . . . . . . . . . . . . . . . . . . . . . . . . . . . . . . . . . . . . . . . . . . . . . . . 29 11 Pemecahan masalah . . . . . . . . . . . . . . . . . . . . . . . . . . . . . . . . . . . . . . . . . . . . . . . . . 30 12 Pengoperasian dan kinerja . . . . . . . . . . . . . . . . . . . . . . . . . . . . . . . . . . . . . . . . . . . . 31 13 Pemasangan . . . . . . . . . . . . . . . . . . . . . . . . . . . . . . . . . . . . . . . . . . . . . . . . . . . . . . . . 31 14 Spesifikasi . . . . . . . . . . . . . . . . . . . . . . . . . . . . . . . . . . . . . . . . . . . . . . . . . . . . . . . . . 32 1-ID 2-ID 1115350201-1_ID.indd 17 1115350201-1_ID.indd 17 3/6/14 10:17 AM 3/6/14 10:17 AM
  • 19. – 18 – EN EN ID 3-ID 4-ID Terima kasih telah membeli AC Toshiba ini. Bacalah dengan cermat petunjuk ini yang berisi informasi penting yang mematuhi Direktif “Mesin” (Direktif 2006 / 42 / EC), dan pastikan bahwa Anda memahaminya. Setelah membacanya, simpan petunjuk ini di tempat yang aman bersama dengan Pedoman Pemilik dan Petunjuk Pemasangan yang disertakan bersama produk Anda. Penamaan Umum: Air Conditioner Definisi Pemasang yang Berkualifikasi atau Teknisi Servis yang Berkualifikasi AC ini harus dipasang, dirawat, diperbaiki, dan dilepas oleh pemasang berkualifikasi atau teknisi servis yang berkualifikasi. Jika salah satu pekerjaan ini perlu dilakukan, mintalah pemasang berkualifikasi atau teknisi servis berkualifikasi untuk melakukannya. Pemasang berkualifikasi atau teknisi servis berkualifikasi adalah agen yang memiliki kualifikasi dan pengetahuan yang diuraikan dalam tabel di bawah ini. Agen Kualifikasi dan pengetahuan yang harus dimiliki agen Pemasang berkualifikasi • Pemasang berkualifikasi adalah orang yang memasang, merawat, memindahkan, dan melepas AC yang dibuat oleh Toshiba Carrier Corporation. Mereka telah dilatih untuk memasang, merawat, memindahkan, dan melepas AC yang dibuat oleh Toshiba Carrier Corporation atau, bila tidak, mereka telah mendapat petunjuk dalam hal pengoperasian demikian oleh orang atau orang-orang yang terlatih sehingga telah sangat menguasai pengetahuan yang terkait dengan operasi ini. • Pemasang berkualifikasi yang diizinkan untuk melakukan pekerjaan kelistrikan yang ada dalam pemasangan, pemindahan, dan pelepasan memiliki kualifikasi yang sesuai dengan pekerjaan kelistrikan ini sebagaimana diatur dalam hukum dan peraturan setempat, dan dia sudah mendapatkan pelatihan dalam hal-hal yang terkait dengan pekerjaan kelistrikan pada AC yang dibuat oleh Toshiba Carrier Corporation atau, sebagai alternatif, dia telah diberi petunjuk dalam hal ini oleh orang atau orang-orang yang terlatih sehingga telah sangat menguasai pengetahuan yang terkait dengan pekerjaan ini. • Pemasang berkualifikasi yang diizinkan untuk melakukan pekerjaan kelistrikan yang ada dalam pemasangan, pemindahan, dan pelepasan memiliki kualifikasi yang sesuai dengan pekerjaan kelistrikan ini sebagaimana diatur dalam hukum dan peraturan setempat, dan dia sudah mendapatkan pelatihan dalam hal-hal yang terkait dengan pekerjaan kelistrikan pada AC yang dibuat oleh Toshiba Carrier Corporation atau, sebagai alternatif, dia telah diberi petunjuk dalam hal ini oleh orang atau orang-orang yang terlatih sehingga telah sangat menguasai pengetahuan yang terkait dengan pekerjaan ini. • Pemasang berkualifikasi yang diizinkan untuk bekerja pada ketinggian telah dilatih dalam hal- hal yang terkait dengan bekerja pada ketinggian dengan AC yang dibuat oleh Toshiba Carrier Corporation atau, bila tidak, mereka telah diberi petunjuk dalam hal ini oleh orang atau orang- orang yang telah dilatih dan karena itu sangat mengenali pengetahuan yang terkait pekerjaan ini. Teknisi servis yang berkualifikasi • Teknisi servis yang berkualifikasi adalah orang yang memasang, memperbaiki, merawat, memindahkan, dan melepas AC yang dibuat oleh Toshiba Carrier Corporation. Mereka telah dilatih untuk memasang, merawat, memindahkan, dan melepas AC yang dibuat oleh Toshiba Carrier Corporation atau, bila tidak, mereka telah mendapat petunjuk dalam hal pengoperasian demikian oleh orang atau orang-orang yang terlatih sehingga telah sangat menguasai pengetahuan yang terkait dengan operasi ini. • Teknisi servis yang berkualifikasi yang diizinkan untuk melakukan pekerjaan kelistrikan yang ada dalam pemasangan, pemindahan, dan pelepasan memiliki kualifikasi yang sesuai dengan pekerjaan kelistrikan ini sebagaimana diatur dalam hukum dan peraturan setempat, dan dia sudah mendapatkan pelatihan dalam hal-hal yang terkait dengan pekerjaan kelistrikan pada AC yang dibuat oleh Toshiba Carrier Corporation atau, sebagai alternatif, dia telah diberi petunjuk dalam hal ini oleh orang atau orang-orang yang terlatih sehingga telah sangat menguasai pengetahuan yang terkait dengan pekerjaan ini. • Teknisi servis yang berkualifikasi yang diizinkan untuk melakukan pekerjaan kelistrikan yang ada dalam pemasangan, pemindahan, dan pelepasan memiliki kualifikasi yang sesuai dengan pekerjaan kelistrikan ini sebagaimana diatur dalam hukum dan peraturan setempat, dan dia sudah mendapatkan pelatihan dalam hal-hal yang terkait dengan pekerjaan kelistrikan pada AC yang dibuat oleh Toshiba Carrier Corporation atau, sebagai alternatif, dia tela diberi petunjuk dalam hal ini oleh orang atau orang-orang yang terlatih sehingga telah sangat menguasai pengetahuan yang terkait dengan pekerjaan ini. • Teknisi servis yang berkualifikasi yang diizinkan untuk bekerja pada ketinggian telah dilatih dalam hal-hal yang terkait dengan bekerja pada ketinggian dengan AC yang dibuat oleh Toshiba Carrier Corporation atau, bila tidak, mereka telah diberi petunjuk dalam hal ini oleh orang atau orang- orang yang telah dilatih dan karena itu sangat mengenali pengetahuan yang terkait pekerjaan ini. ■ Pesan Peringatan pada Unit AC Pesan peringatan Penjelasan WARNING ELECTRICAL SHOCK HAZARD Disconnect all remote electric power supplies before servicing. PERINGATAN BAHAYA TERSENGAT LISTRIK Lepas sambungan semua catu daya listrik sebelum melakukan servis. WARNING Moving parts. Do not operate unit with grille removed. Stop the unit before the servicing. PERINGATAN Komponen bergerak. Jangan mengoperasikan unit tanpa kisi-kisi terpasang. Matikan unit sebelum diservis. CAUTION High temperature parts. You might get burned when removing this panel. AWAS Komponen panas. Anda dapat mengalami luka bakar saat melepas panel ini. CAUTION Do not touch the aluminum fins of the unit. Doing so may result in injury. AWAS Jangan menyentuh sirip-sirip aluminium unit. Melakukannya mungkin mengakibatkan cedera. CAUTION BURST HAZARD Open the service valves before the operation, otherwise there might be the burst. AWAS BAHAYA SEMBURAN Buka katup servis sebelum mengoperasikan unit untuk mencegah terjadinya semburan. 1115350201-1_ID.indd 18 1115350201-1_ID.indd 18 3/6/14 10:17 AM 3/6/14 10:17 AM
  • 20. – 19 – 1 Petunjuk keselamatan Produsen tidak bertanggung jawab atas kerusakan akibat tidak mematuhi penjelasan dalam petunjuk ini. PERINGATAN Umum • Baca Pedoman Pemilik secara saksama sebelum menyalakan AC. Ada banyak hal penting yang harus diperhatikan untuk pengoperasian sehari-hari. • Mintalah agar pemasangan dilakukan oleh dealer atau teknisi resmi. Hanya pemasang berkualifikasi (*1) yang dapat memasang AC. Pemasangan AC oleh orang yang tidak berkualifikasi akan mengakibatkan masalah seperti kebakaran, sengatan listrik, cedera, kebocoran air, suara berisik, dan getaran. • Jangan menggunakan refrigeran selain yang ditentukan sebagai pelengkap atau pengganti. Penggunaan refrigeran semacam itu dapat menimbulkan tekanan tidak normal dalam siklus refrigerasi, yang dapat mengakibatkan produk tidak berfungsi atau meledak serta mencederai Anda. • Tempat yang menimbulkan bunyi operasi unit outdoor dapat menyebabkan ketidaknyamanan. (Terutama di tempat yang berbatasan dengan tetangga, pasang AC dengan mempertimbangkan suara berisiknya.) Pengangkutan dan penyimpanan • Untuk mengangkut AC, kenakan sepatu dengan tutup pelindung ibu jari, sarung tangan pengaman, dan pakaian pelindung lainnya. • Untuk mengangkut AC, jangan memegangi tali karton kemasan. Jika tali patah, Anda dapat cidera. • Sebelum menumpuk karton kemasan untuk penyimpanan atau pengangkutan, perhatikan petunjuk peringatan yang tertera pada kemasan karton. Kelalaian memperhatikan petunjuk peringatan dapat menyebabkan tumpukan terjatuh. • AC harus diangkut dengan kondisi stabil. Jika ada komponen produk yang rusak, hubungi dealer Anda. • Bila AC harus diangkut dengan tangan, angkut AC dengan dua orang atau lebih. Pemasangan • Pengerjaan sistem kelistrikan AC ini hanya boleh dilakukan oleh pemasang (*1) atau teknisi servis yang berkualifikasi (*1). Pekerjaan ini sama sekali tidak boleh dilakukan oleh orang yang bukan ahlinya karena pekerjaan yang tidak sempurna berisiko menimbulkan sengatan listrik dan/atau kebocoran arus. • Setelah pekerjaan pemasangan selesai, mintalah penjelasan kepada pemasang tentang posisi pemutus arus. Jika timbul masalah pada AC, matikan pemutus arus, dan hubungi petugas. • Jika unit dipasang di dalam ruangan kecil, ambil tindakan yang diperlukan untuk mencegah refrigeran melampaui ambang batas konsentrasi bahkan jika mengalami kebocoran. Konsultasikan langkah-langkah yang akan diambil dengan toko tempat Anda membeli AC tersebut. Konsentrasi refrigeran dalam jumlah tinggi dapat mengakibatkan kecelakaan akibat kurang oksigen. • Jangan memasang AC di lokasi yang rawan terjadi kebocoran gas mudah terbakar. Jika gas mudah terbakar bocor dan terkonsentrasi di sekitar unit, kebakaran dapat terjadi. • Gunakan produk yang ditentukan perusahaan untuk suku cadang yang dibeli terpisah. Penggunaan produk yang tidak sesuai dengan spesifikasi dapat menimbulkan kebakaran, sengatan listrik, kebocoran air, atau masalah lainnya. Lakukan pemasangan hanya oleh teknisi resmi. • Pastikan kabel ground dipasang dengan benar. Pengoperasian • Sebelum membuka kisi isap unit indoor atau panel servis unit outdoor, MATIKAN pemutus arus. Jika pemutus rangkaian tidak DIMATIKAN, kontak dengan komponen interior dapat menimbulkan bahaya tersengat listrik. Hanya pemasang berkualifikasi(*1) atau petugas servis berkualifikasi(*1) yang diizinkan untuk melepaskan kisi- kisi isap unit indoor atau panel servis unit outdoor dan melakukan pekerjaan yang diperlukan. • Bagian dalam AC merupakan area tegangan tinggi dan komponen yang berputar. Jangan membuka panel servis unit outdoor karena bahaya sengatan listrik atau jari Anda atau anggota tubuh lainnya dapat terperangkap di dalam komponen yang berputar. Ketika melibatkan pekerjaan pelepasan komponen ini, hubungi pemasang yang berkualifikasi atau petugas servis yang berkualifikasi. • Jangan memindahkan atau memperbaiki sendiri unit AC. Anda dapat tersengat listrik, karena terdapat tegangan tinggi di dalam unit saat melepaskan penutup dan unit utama. • Gunakan tangga penyangga dengan tinggi lebih dari 50 cm untuk membersihkan filter unit indoor atau minta orang lain untuk melakukan pekerjaan di ketinggian. Karena risiko bahaya terjatuh dari tangga dan mencederai diri Anda ketika melakukan pekerjaan di ketinggian, pekerjaan jenis ini jangan dilakukan oleh orang yang tidak berkualifikasi. Jika pekerjaan ini harus dilakukan, jangan melakukannya secara sendiri tetapi mintalah bantuan kepada pemasang yang berkualifikasi atau petugas servis yang berkualifikasi. • Jangan menyentuh sirip-sirip aluminium unit outdoor. Menyentuh sirip tersebut dapat membuat Anda terluka. Jika harus menyentuh bagian sirip, jangan menyentuhnya sendiri tetapi hubungi pemasang yang berkualifikasi atau petugas servis yang berkualifikasi. • Jangan memanjat ke atau menaruh benda apa pun di atas unit outdoor. Anda dapat jatuh atau benda tersebut dapat jatuh dari unit outdoor dan menimbulkan cidera. • Jangan menaruh peralatan pembakar di lokasi yang terkena embusan angin AC secara langsung, kalau tidak akan membuat pembakaran yang tidak sempurna. • Ketika AC dioperasikan dengan peralatan pemanas dalam satu ruangan, berikan sirkulasi udara yang cukup di dalam ruangan. Kurangnya sirkulasi udara menyebabkan kurangnya oksigen. • Ketika AC digunakan di ruang tertutup, sirkulasi udara di ruangan berkurang. Kurangnya sirkulasi udara menyebabkan kurangnya oksigen. • Jangan biarkan tubuh Anda terpajan udara dingin secara langsung dan jangan mendinginkan diri Anda secara berlebihan. Melakukannya dapat mengakibatkan kondisi fisik memburuk dan sakit. • Jangan memasukkan jari Anda atau batang kayu ke dalam masukan udara atau lubang buangan. Melakukannya dapat menyebabkan cedera ketika kipas berputar dengan kecepatan tinggi di dalam unit. • Tanyakan ke toko tempat Anda membeli AC jika pengondisian udara (pendinginan dan pemanasan) tidak berfungsi dengan baik seperti kebocoran refrigeran yang mungkin menjadi penyebabnya. Konfirmasikan detail perbaikan kepada petugas servis berkualifikasi(*1) bila perbaikan mencakup pengisian tambahan refigeran. • Hentikan fungsi AC dan matikan pemutus arus sebelum pembersihan. Jika tidak, dapat mengakibatkan cedera ketika kipas berputar dengan kecepatan tinggi di dalam unit. Perbaikan • Jika ada masalah apa saja (misalnya pesan kesalahan muncul, ada bau terbakar, bunyi tidak biasa, AC tidak dingin atau panas atau air bocor) terjadi pada AC, jangan sentuh AC sendiri tetapi MATIKAN terlebih dahulu pemutus arus kemudian hubungi teknisi servis yang berkualifikasi. Ambil langkah untuk memastikan bahwa daya tidak menyala (dengan memasang tanda “rusak” di dekat pemutus rangkaian, misalnya) sampai teknisi servis tersebut datang. Terus menggunakan AC yang bermasalah dapat mengakibatkan gangguan mekanis yang dapat memperparah kerusakan atau menimbulkan sengatan listrik atau masalah lain. • Jika kisi-kisi kipas rusak, jangan dekati unit outdoor tetapi MATIKAN dulu pemutus rangkaian lalu hubungi teknisi servis berkualifikasi untuk melakukan perbaikan. Jangan HIDUPKAN pemutus rangkaian sampai proses perbaikan selesai. • Jika terdapat risiko bahaya dari unit indoor terjatuh, jangan mendekati unit indoor tetapi MATIKAN pemutus arus, dan hubungi pemasang yang berkualifikasi, atau teknisi yang berkualifikasi untuk memperbaiki unit. Jangan HIDUPKAN pemutus arus sampai proses perbaikan selesai. • Jika terdapat risiko bahaya dari unit indoor terjatuh, jangan mendekati unit indoor tetapi MATIKAN pemutus arus, dan hubungi pemasang yang berkualifikasi, atau teknisi yang berkualifikasi untuk memperbaiki atau memasang ulang. Jangan HIDUPKAN pemutus arus sampai proses perbaikan atau pemasangan ulang selesai. • Dilarang memodifikasi unit. Melakukannya dapat menyebabkan kebakaran, sengatan listrik, atau masalah lainnya. Pemindahan • Ketika AC perlu dipindahkan, jangan memindahkannya sendiri tetapi hubungi pemasang yang berkualifikasi atau petugas servis yang berkualifikasi. Kelalaian memindahkan AC dengan benar dapat mengakibatkan sengatan listrik dan/atau kebakaran. 5-ID 6-ID 1115350201-1_ID.indd 19 1115350201-1_ID.indd 19 3/6/14 10:17 AM 3/6/14 10:17 AM
  • 21. – 20 – EN EN ID AWAS Memutus peralatan ini dari catu daya utama. • Peralatan ini harus terhubung ke listrik dengan sakelar dengan pemisah kontak sedikitnya 3 mm. Sekering pemasangan (semua tipe dapat digunakan) harus digunakan untuk catu daya AC. Pemasangan • Letakkan selang dengan benar untuk pembuangan yang sempurna. Saluran pembuangan yang tidak benar akan menimbulkan genangan di dalam rumah dan furnitur menjadi basah. • Hubungkan AC ke catu daya khusus dengan tegangan stabil, jika tidak, unit mungkin rusak atau menyebabkan kebakaran. • Pastikan unit outdoor stabil di atas dudukannya. Jika tidak, unit bisa terjatuh atau menimbulkan kecelakaan lainnya. Pengoperasian • Jangan gunakan AC untuk tujuan khusus seperti mengawetkan makanan, instrumen presisi, benda seni, binatang ternak, mobil, kapal laut. • Jangan menyentuh sakelar dengan jari basah jika tidak, Anda akan tersengat listrik. • Jika AC tidak akan digunakan untuk waktu yang lama, matikan sakelar utama atau pemutus arus, untuk keselamatan. • Untuk membuat AC beroperasi dengan performa aslinya, operasikan dengan kisaran suhu pengoperasian yang dijelaskan dalam petunjuk. Jika tidak, hal tersebut dapat menyebabkan gangguan fungsi atau kebocoran pada unit. • Cegah masuknya cairan ke dalam remote control. Hindarkan percikan dari jus, air atau cairan lainnya. • Jangan mencuci AC. Melakukannya dapat menimbulkan sengatan listrik. • Periksa apakah pemasangan dudukan dan perlengkapan lainnya telah rusak setelah digunakan dalam jangka waktu lama. Membiarkannya dengan kondisi tersebut mungkin mengakibatkan unit terjatuh dan menyebabkan cedera. • Jangan meninggalkan semprotan yang mudah terbakar atau material yang mudah terbakar di dekat AC, dan jangan menyemprotkan aerosol yang mudah terbakar secara langsung ke AC. Zat tersebut dapat memicu api. • Hentikan fungsi AC dan matikan pemutus arus sebelum pembersihan. Jika tidak, dapat mengakibatkan cedera ketika kipas berputar dengan kecepatan tinggi di dalam unit. • Hubungi toko Anda untuk melakukan pembersihan AC. Membersihkan AC dengan cara yang tidak benar dapat menyebabkan kerusakan pada komponen plastik, kerusakan isolasi komponen listrik atau komponen lain, dan mengakibatkannya tidak berfungsi. Pada kasus terburuk, hal tersebut dapat mengakibatkan kebocoran, sengatan listrik, keluar asap atau kebakaran. • Jangan menaruh wadah berisi air seperti vas bunga di atas unit. Air dapat masuk ke dalam unit dan menyebabkan kerusakan isolasi listrik sehingga dapat mengakibatkan sengatan listrik. • Jangan cuci AC dengan pencuci bertekanan. Kebocoran listrik mungkin menyebabkan sengatan listrik atau kebakaran. (*1) Rujuk ke “Pemasang yang Berkualifikasi atau Teknisi Servis yang Bekualifikasi.” ■ Informasi pengangkutan, penanganan dan penyimpanan karton kemasan Contoh petunjuk mengenai karton kemasan Simbol Penjelasan Simbol Penjelasan Jaga agar tetap kering Jangan dijatuhkan Mudah pecah Jangan direbahkan 11 karton Ketingian penumpukan (12 karton dapat ditumpuk pada hal ini) Jangan berjalan di atas karton Sisi atas Jangan diinjak Tangani dengan hati-hati Petunjuk peringatan lainnya Penjelasan Awas Kemungkinan kecelakaan. Jangan angkat dengan menggunakan tali karton, atau Anda dapat cedera jika tali karton putus. Peringatan tumpukan. Jika boks karton menonjol keluar dari palet saat ditumpuk. Rebahkan tripleks setebal 10 mm di atas palet. 7-ID 8-ID 1115350201-1_ID.indd 20 1115350201-1_ID.indd 20 3/6/14 10:17 AM 3/6/14 10:17 AM
  • 22. – 21 – 2 Nama komponen ■ Unit indoor Kenop Kenop untuk membuka/ menutup port isap. Filter udara Membuang debu dan kotoran. (Disediakan pada port isap.) Sekrup ground Disediakan di dalam boks kontrol listrik. Kisi-kisi buangan pada port buangan Mengubah arah udara yang dibuang sesuai dengan mode pendingin / pemanas. ■ Unit outdoor (Desainnya bervariasi tergantung pada unit outdoor. Ilustrasi berikut ini menunjukkan contohnya.) Arah pemasangan filter udara Masukan udara (Samping dan belakang) Kaki pemancang Buangan udara Panel pipa Lubang kabel Keluaran pipa refrigeran Panel Terdapat sekrup ground, katup, dan komponen listrik di dalamnya. Port isap udara Udara di dalam ruangan diisap dari port ini. 3 Remote control berkabel Remote control ini dapat mengendalikan pengoperasian hingga 8 unit indoor. ■ Bagian tampilan Di gambar tampilan di bawah semua ikon ditunjukkan. Ketika unit dioperasikan, hanya ikon terkait yang akan ditampilkan. • Ketika pemutus kebocoran diaktifkan untuk pertama kali, berkedip pada bagian tampilan remote control. • Saat ikon ini berkedip, model dikonfirmasikan secara otomatis. Tunggu hingga ikon hilang sebelum menggunakan remote control. SET TIME TIMER SET TEST FILTER RESET TEMP. CL FAN SAVE SWING/FIX VENT MODE ON / OFF UNIT LOUVER Bagian tampilan Bagian pengoperasian 19 21 22 1 6 2 5 9 10 15 17 16 20 11 14 13 12 18 3 4 7 8 1 Mode Pengoperasian Mode pengoperasian yang dipilih ditampilkan. 2 Tampilan Error Ditampilkan ketika perangkat pelindung bekerja atau kesalahan terjadi. 3 Tampilan SETTING Ditampilkan selama pengaturan timer atau pengaturan lainnya. 4 Tampilan TEST run Ditampilkan selama menguji pengoperasian. 5 Tampilan Timer Ketika terjadi kesalahan, kode kesalahan ditampilkan. 6 Tampilan mode Timer Mode timer yang dipilih ditampilkan. 7 Tampilan posisi Kisi-kisi Menampilkan posisi kisi-kisi. 8 Tampilan Swing Ditampilkan selama gerakan kisi-kisi ke atas/ke bawah. 9 Tampilan Filter Pengingat untuk membersihkan filter udara. 10 Tampilan kecepatan kipas Mode kecepatan kipas yang dipilih ditampilkan. (Auto) (Tinggi) (Sedang) (Rendah) 11 Mengatur tampilan suhu Suhu pengaturan yang dipilih ditampilkan. 12 Tampilan mode penghematan daya Pembatasan kecepatan kompresor (kapasitas) untuk menghemat energi. 9-ID 10-ID 1115350201-1_ID.indd 21 1115350201-1_ID.indd 21 3/6/14 10:17 AM 3/6/14 10:17 AM
  • 23. – 22 – EN EN ID 1 6 2 3 7 8 5 9 15 17 16 11 14 13 12 20 18 19 21 22 4 10 13 Tampilan UNIT No. Menampilkan nomor unit indoor yang dipilih. Juga menampilkan kode kesalahan unit indoor dan outdoor. 14 Tampilan kontrol pusat Ditampilkan saat AC digunakan pada kontrol pusat dikombinasikan dengan remote control untuk kontrol pusat. Jika remote control dinonaktifkan oleh sistem kontrol pusat, berkedip. Tombol pengoperasian tidak diterima. Bahkan bila tombol ON / OFF, MODE, atau TEMP. ditekan, dan tombol pengoperasian tidak diterima. (Pengaturan yang dibuat oleh remote control bervariasi dengan mode kontrol pusat. Untuk perinciannya, rujuk ke Pedoman Pemilik dari remote control untuk kontrol pusat.) 15 Tampilan sensor remote control Ditampilkan ketika sensor remote control digunakan. 16 Tampilan pra-panas Ditampilkan saat mode pemanasan diberi energi atau siklus pembuangan bunga es dimulai. Saat ikon ditampilkan, kipas indoor berhenti. 17 Tampilan tidak berfungsi Ditampilkan ketika fungsi yang diminta tidak tersedia pada model itu. 18 Tampilan pengoperasian pembersihan sendiri Ditampilkan selama pengoperasian pembersihan sendiri untuk mengeringkan heat exchanger indoor. 19 Tampilan Service 20 Tampilan Siap Operasi Tampilan ini muncul di beberapa model. 21 Tampilan Nomor Kisi-kisi. (contoh: 01, 02, 03, 04) 22 Tampilan pengunci kisi-kisi Ditampilkan ketika terdapat unit dengan kisi-kisi terkunci di grup (termasuk unit indoor 1 oleh unit outdoor 1). ■ Bagian pengoperasian Tekan setiap tombol untuk memilih pengoperasian yang diinginkan. • Kontrol menyimpan perintah di memori dan setelah pengaturan awal, tidak dibutuhkan pengaturan tambahan kecuali menginginkan penggantian. AC dapat dioperasikan dengan menekan tombol . 8 6 4 3 2 5 7 10 12 1 9 11 1 tombol (Tombol set suhu) Menyetel nilai pengaturan. Pilih nilai pengaturan yang diinginkan dengan menekan TEMP. atau TEMP. . 2 tombol (Tombol set timer) Gunakan untuk mengatur timer. 3 tombol (Tombol reset filter) Mengatur ulang tampilan “ ” setelah membersihkan filter. 4 tombol (Tombol test) Gunakan hanya untuk servis. (Selama pengoperasian normal, jangan gunakan tombol ini.) 5 tombol Ketika tombol ditekan, pengoperasian dimulai, dan dihentikan dengan menekan kembali tombol tersebut. Ketika pengoperasian telah dihentikan, lampu pengoperasian dan semua tampilan menghilang. 6 Lampu pengoperasian Lampu hijau menyala saat unit dihidupkan. Namun akan berkedip ketika mengoperasikan perangkat pelindung atau kesalahan terjadi. 7 tombol (Tombol mode pengoperasian) Memilih mode pengoperasian yang diinginkan. 8 tombol (Tombol kecepatan kipas) Memilih kecepatan Kipas yang diinginkan. 9 tombol (Tombol ventilasi) Digunakan bila kit ventilasi daya (tersedia di wilayah Anda) dihubungkan. • Jika “ ” ditampilkan pada remote control saat tombol ini ditekan, tidak ada kit ventilasi yang terhubung. 10 tombol (Pengoperasian hemat daya) Gunakan untuk memulai mode hemat daya. 11 tombol (Tombol pemilihan unit/ Kisi-kisi) Memilih nomor unit (kiri) dan nomor kisi (kanan). UNIT: Memilih unit indoor ketika menyesuaikan arah angin beberapa unit indoor dikontrol dengan satu remote control. KISI-KISI: Memilih kisi-kisi ketika mengatur penyetelan arah angin secra independen. 12 tombol (Tombol arah ayun / Kisi-kisi) Pilih swing otomatis atau pengaturan arah kiri-kisi. OPSI: Sensor remote control Biasanya sensor suhu unit indoor mengindera suhu. Penginderaan suhu di sekitar remote control juga dapat dilakukan. Untuk perincian, hubungi dealer tempat Anda membeli AC. 11-ID 12-ID 1115350201-1_ID.indd 22 1115350201-1_ID.indd 22 3/6/14 10:17 AM 3/6/14 10:17 AM
  • 24. – 23 – 4 Penggunaan yang benar Ketika AC digunakan untuk pertama kali atau ketika pengaturan diubah, ikuti langkah-langkah di bawah. Pengaturan disimpan di memori dan ditampilkan ketika unit dihidupkan dengan menekan tombol . ■ Persiapan • Ketika pemutus arus dinyalakan, garis partisi ditampilkan pada remote control. * Setelah pemutus arus dinyalakan, remote control tidak menerima perintah untuk selama kurang lebih 1 menit, ini bukan merupakan kegagalan. KETENTUAN Ketika AC dihidupkan kembali setelah tidak digunakan dalam waktu lama, hidupkan pemutus arus sekurangnya 12 jam sebelum menghidupkan AC. SET TIME TIMER SET TEST FILTER RESET TEMP. CL FAN SAVE SWING/FIX VENT MODE ON / OFF UNIT LOUVER 1 3 2 4 Penyalaan 1 Tekan tombol Lampu pengoperasian menyala, dan pengoperasian dimulai 2 Pilih mode pengoperasian dengan tombol “ ”. Satu kali menekan tombol tersebut, dan tampilan berubah dalam urutan yang ditunjukkan di bawah. Otomatis Panas Kering Dingin Kipas 3 Pilih kecepatan kipas dengan tombol “ ”. Satu kali menekan tombol tersebut, dan tampilan berubah dalam urutan yang ditunjukkan di bawah. Otomatis Tinggi Sedang Rendah • Bila kipas pada posisi “ Otomatis”, kecepatan kipas disetel berdasarkan perbedaan antara suhu pengaturan dan suhu ruang. • Pada operasi pemanasan, jika suhu ruang tidak dipanaskan dengan cukup dengan kecepatan pengoperasian “ Rendah”, pilih pengoperasian “ Sedang” atau “ Tinggi”. • Sensor suhu mendeteksi suhu udara balik di unit indoor, yang berbeda dari suhu ruangan tergantung kondisi pemasangan. Nilai pengaturan harus mencapai suhu ruangan. ( “Otomatis” tidak dapat dipilih pada mode Kipas.) 4 Pilih suhu pengaturan dengan menekan tombol “TEMP. ” atau “TEMP. ”. Berhenti Tekan tombol . Lampu pengoperasian padam dan pengoperasian berhenti. Dalam mode Dingin, Kering, atau Otomatis (pendinginan), kipas beroperasi 10 menit (atau lebih) untuk operasi pembersihan sendiri. CATATAN Pergantian Otomatis • Ketika mengunakan Mode Otomatis, unit memilih mode pengoperasian (pendinginan, pemanasan atau hanya kipas) berdasarkan suhu yang diatur penguna. • Jika mode Auto tidak nyaman, Anda dapat memilih kondisi yang diinginkan secara manual. Pendinginan • Jika ada permintaan pendinginan, unit akan dijalankan sekurangnya 1 menit setelah mode dipilih. Pemanasan • Jika ada permintaan pemanasan, unit akan dijalankan sekitar 3 hingga 5 menit setelah mode dipilih. • Setelah operasi pemanasan berhenti, kipas mungkin terus bekerja sekitar 30 detik. • Bila suhu ruang mencapai suhu setelan, unit outdoor berhenti dan kipas unit indoor bekerja dengan kecepatan sangat rendah. Selama operasi penghilangan bunga es, kipas berhenti sehingga udara dingin tidak dikeluarkan. (“ ” Pra- panas ditampilkan.) Ketika memulai ulang pengoperasian setelah berhenti Ketika unit diminta untuk dijalankan ulang dengan segera setelah berhenti, unit tidak dapat dijalankan selama 3 menit untuk melindungi kompresor. ■ Pengoperasian 8 °C (Untuk objek prapemanasan) (Hanya seri SDI 4 dan seri DI 4 (RAV-SP***4AT / RAV-SM***4AT)) AC dapat mengontrol suhu pemanasan ke sekitar 8 °C pada mode pemanasan. Operasi pemanasan 8 °C memerlukan pengaturan dengan remote control berkabel. Tanyakan pemasang atau dealer untuk pengaturan menurut petunjuk pemasangan untuk unit indoor. Penyalaan 1 Atur suhu yang ditampilkan ke 18 °C pada mode pemanasan dengan menekan tombol TEMP. . 2 Atur suhu yang ditampilkan ke 8 °C dengan menekan tombol TEMP. sedikitnya empat detik. Berhenti 1 Atur suhu yang ditampilkan ke 18 °C dengan menekan tombol TEMP. . • AC kembali ke mode Panas normal. Pilih suhu dan mode operasi yang diinginkan. CATATAN • Suhu udara yang dikeluarkan lebih rendah daripada pengoperasian pemanasan normal. • Suhu ruang mungkin tidak dipanaskan merata tergantung dari lokasi pemasangan remote control. • Suhu ruang mungkin tidak mencapai 8 °C tergantung ukuran ruangan dan kondisi pemasangan. • Pengaturan untuk kecepatan kipas tersedia selama pengoperasian pemanasan 8 °C. Pengoperasian pemanasan 8 °C dibatalkan karena kondisi berikut. •Bila pengoperasian dihentikan dengan tombol •Bila mode pengoperasian lain dipilih dengan tombol •Bila pengaturan suhu atau mode pengoperasian diubah atau pengoperasian dimulai / dihentikan oleh remote control nirkabel atau remote control untuk kontrol pusat. • Bila mode pengoperasian ini digunakan, pengamatan jam pengoperasian yang benar dan perawatan berkala oleh staf servis direkomendasikan. 13-ID 14-ID 1115350201-1_ID.indd 23 1115350201-1_ID.indd 23 3/6/14 10:17 AM 3/6/14 10:17 AM
  • 25. – 24 – EN EN ID 5 Pengoperasian timer • Tiga mode timer tersedia: (Pengaturan hingga 168 jam diaktifkan.) Timer Mati : Unit berhenti ketika waktu pengaturan dicapai. Mengulang timer Mati: Unit berhenti ketika waktu pengaturan dicapai. Timer Hidup : Unit dijalankan ketika waktu pengaturan dicapai. 1 3 2 4 Set 1 Tekan tombol Mode timer berubah setiap kali tombol ditekan. (Timer Mati) (Timer Hidup) (Ulangi timer Mati) Mati Mati Hidup Tidak ada tampilan • dan tampilan timer berkedip. 2 Tekan untuk memilih “set time”. • Dengan setiap penekanan tombol , waktu pengaturan meningkat dengan 0,5 jam (30 menit). Ketika mengatur waktu lebih dari 24 jam untuk pengoperasian timer, timer dapat diatur dengan pertambahan 1 jam. Waktu pengaturan maksimum adalah 168 jam (7 hari). Remote control menampilkan pengaturan waktu (antara 0,5 dan 23,5 jam) (*1 ) atau jumlah hari dan waktu (24 jam atau lebih) (*2 ) sebagaimana ditunjukkan di bawah ini. • Setiap penekanan tombol pengaturan waktu berkurang 0,5 jam (30 menit) (0,5 - 23,5 jam), atau 1 jam (24 -168 jam). Contoh tampilan remote control • 23,5 jam (*1 ) • 34 jam (*2 ) Jumlah hari Waktu menunjukkan 1 hari (24 jam). menunjukkan 10 jam. (Total 34 jam) 3 Tekan tombol • ikon menghilang dan tampilan waktu menyala, dan ikon atau berkedip. (Bila Hidup timer diaktifkan, waktu dan timer Hidup adalah ikon dan ikon lain menghilang.) 4 Membatalkan pengoperasian timer Tekan tombol . Ikon timer menghilang. CATATAN • Bila pengoperasian berhenti setelah timer mencapai waktu preset,Repeat Off timer melanjutkan pengoperasian dengan menekan tombol dan menghentikan pengoperasian setelah waktu dari timer mencapai waktu pengaturan. • Bila ditekan saat fungsi Mati timer AC aktif, indikasi fungsi timer menghilang dan kemudian muncul lagi setelah sekitar 5 detik. Ini dikarenakan pemrosesan normal remote control. 6 Penyetelan arah angin Untuk pendinginan dan kinerja pemanasan terbaik, setel kisi-kisi (pelat penyetel ke atas / ke bawah arah angin) sesuai yang diperlukan. Udara dingin menurun dan udara hangat menaik, jadi untuk memanaskan ruangan miringkan kisi-kisi ke arah bawah, dan untuk mendinginkan ruangan miringkan kisi-kisi secara horizontal. AWAS Arahkan kisi-kisi secara horizontal untuk pendinginan. Jika kisi-kisi tetap menunjuk ke bawah saat mendinginkan, kondensasi mungkin terbentuk pada port pengeluaran dan / kemudian menetes dari kisi-kisi. CATATAN Jika kisi-kisi tetap menunjuk lurus secara horizontal saat memanaskan, suhu ruang mungkin didistribusikan tidak merata. • Ketika AC tidak berfungsi, kisi-kisi diarahkan horizontal secara otomatis. • Kisi-kisi diarahkan secara horizontal saat pemanasan dimulai, selama pengoperasian penghilangan bunga es, atau selama pengoperasian minimum setelah mencapai suhu pengaturan. Saat pengaturan arah ayun atau kisi-kisi dibuat saat ini, tampilan remote control berubah terhadap pengaturan tetapi kisi-kisi tetap menunjuk lurus secara horizontal. Ketika AC mulai memanaskan, kisi-kisi diarahkan ke arah yang ditetapkan. Mendinginkan (DINGIN) Arahkan kisi-kisi secara horizontal. Untuk pemanasan (PANAS) Arahkan kisi-kisi ke bawah. 15-ID 16-ID 1115350201-1_ID.indd 24 1115350201-1_ID.indd 24 3/6/14 10:17 AM 3/6/14 10:17 AM
  • 26. – 25 – 1 Cara mengatur arah kisi-kisi 1 Tekan selama pengoperasian. Arah kisi-kisi berubah untuk setiap penekanan tombol. Pada pengoperasian PANAS Arahkan kisi-kisi (pelat penyetel arah angin ke atas/ke bawah) ke bawah. Jika diarahkan secara horizontal, udara panas mungkin tidak sampai ke kaki. Pada pengoperasian COOL (Dingin)/DRY (Kering) Arahkan kisi-kisi (pelat penyetel arah angin ke atas/ke bawah) secara horizontal. Jika diarahkan ke bawah, embun mungkin terbentuk pada permukaan port pembuangan udara dan mungkin menetes. Pada pengoperasian FAN (Kipas) Pilih arah kisi-kisi yang diinginkan. Cara menjalankan ayun 1 Tekan , atur arah kisi-kisi (pelat penyetal arah angin ke atas / ke bawah) ke posisi terendah dan kemudian tekan kembali . SWING ditampilkan dan arah kisi-kisi ke atas/ ke bawah dipilih secara otomatis. Tampilan selama mengayun Cara menghentikan ayunan 1 Tekan pada posisi yang diinginkan saat kisi-kisi mengayun. • Bila ditekan setelah itu, arah angin dapat diatur kembali dari posisi tertinggi. * Namun, meski ditekan saat kisi-kisi mengayun, posisi kisi-kisi ditampilkan sebagai berikut dan posisi tertinggi dari kisi-kisi mungkin tidak dipilih. Tampilan ketika ayunan dihentikan Dalam hal ini, tekan kembali dua detik kemudian. • Pada pengoperasian Dingin / Kering, kisi-kisi tidak berhenti saat mengarah ke bawah. Jika menghentikan kisi-kisi saat mengarah ke bawah selama pengoperasian ayun, kisi-kisi berhenti setelah bergerak ke posisi ketiga dari posisi tertinggi. Tampilan ketika menghentikan ayunan Pengoperasian Kipas/Panas Pengoperasian Kipas/Panas Pengoperasian Dingin/Kering Pengoperasian Dingin/Kering Pengaturan awal Pengaturan awal Tombol pemilihan unit • Ketika beberapa unit indoor dikontrol dengan satu remote control, arah kisi-kisi dapat diatur untuk setiap unit indoor dengan memilih masing-masing. • Untuk mengatur arah kisi-kisi satu per satu, tekan tombol untuk menampilkan jumlah unit indoor pada grup kontrol. Kemudian atur arah angin unit indoor yang ditampilkan. • Ketika tidak ada nomor unit indoor yang ditampilkan, semua unit indoor di grup kontrol dapat dikontrol secara bersamaan. • Setiap kali tombol ditekan, tampilan berubah seperti berikut: Tidak ditampilkan UNIT No. 1-1 UNIT No. 1-2 UNIT No. 1-3 UNIT No. 1-4 ■ Cara mengatur arah angin kisi-kisi 1 Pilih unit indoor yang akan diatur dengan menekan (sisi kiri tombol) selama pengoperasian. • Nomor unit indoor berubah setiap kali Anda menekan tombol tersebut. 1-1 1-2 1-3 1-4 UNIT No. UNIT No. UNIT No. UNIT No. Tidak ditampilkan * Ketika tidak ada nomor unit yang ditampilkan, semua unit indoor dipilih. 2 Pilih kisi-kisi yang ingin Anda setel dengan menekan (sisi kanan tombol). • Setiap kali Anda menekan tombol, tampilan di kiri remote control berubah seperti berikut: Tidak ditampilkan * Ketika tidak ada nomor kisi-kisi yang ditampilkan, keempat kisi-kisi dipilih. No. Kisi-kisi 03 01 02 04 Pipa refrigeran Pipa penguras Kotak kontrol listrik 3 Menentukan arah angin dari kisi-kisi yang dipilih dengan menekan • Setiap kali Anda menekan tombol, tampilan berubah seperti berikut: * Selama mode COOL (DRY), (4) dan (5) tidak ditampilkan. Ulangi Pengaturan awal Tombol pemilihan unit 17-ID 18-ID 1115350201-1_ID.indd 25 1115350201-1_ID.indd 25 3/6/14 10:17 AM 3/6/14 10:17 AM
  • 27. – 26 – EN EN ID ■ Untuk mengonfigurasikan mode penghematan daya 4 3 1 5 2 1 Tekan tombol sekurangnya empat detik ketika AC tidak bekerja. • , simbol, dan nomor berkedip. 2 Tekan (sisi kiri tombol) untuk memilih unit indoor yang akan diatur. • Setiap kali tombol ditekan, UNIT No. berubah seperti berikut: UNIT No. 1-1 UNIT No. 2-1 UNIT No. 3-1 UNIT No. 4-1 3 Tekan tombol TIME , untuk menyetel pengaturan mode penghematan daya. • Setiap kali tombol ditekan akan mengubah tingkat daya 1 % dalam kisaran mulai 100 % hingga 50 %. • Pengaturan pabrik adalah 75 %. 4 Tekan tombol . 5 Tekan tombol untuk menyelesaikan pengaturan. CATATAN • Saat peralatan listrik lain digunakan secara bersamaan, untuk menghindari pemicuan pemutus arus, mode penghematan daya direkomendasikan. Mode penghematan daya dapat juga berguna untuk menghemat energi. • Mode penghematan daya menghabiskan hanya sedikit energi, tetapi tidak menghasilkan pendinginan ruangan sebanyak mode normal. (Arus maksimum dibatasi hingga sekitar 75 % (pengaturan pabrik) dari mode normal.) • Bahkan ketika pengoperasian dimulai / dihentikan, mode pengoperasian berubah, atau reset daya dilakukan selama mode penghematan daya, mode penghematan daya dipertahankan hingga operasi berikutnya. 7 Mode penghematan daya Mode penghematan daya menghemat energi dengan membatasi arus maksimum yang akan memengaruhi kapasitas pendinginan yang dapat dihasilkan unit. Tekan tombol selama pengoperasian. • AC memasuki mode hemat daya. • muncul pada tampilan. Mode penghematan daya akan tetap berlaku sampai dibatalkan. Untuk membatalkan mode penghematan daya, tekan kembali tombol . • menghilang. Kipas dari unit yang dipilih dijalankan. Pengaturan tingkat daya dalam mode penghematan daya 8 Mode pembersihan sendiri Fungsi ini disediakan untuk mengeringkan bagian dalam unit indoor melalui pengoperasian FAN (Kipas) setelah menjalankan mode pendinginan / kering / OTOMATIS (pendinginan) untuk menjaga unit indoor tetap bersih. • Waktu pembersihan sendiri bervariasi terhadap waktu pengoperasian pendinginan / kering / Otomatis (pendinginan) sebagai berikut. Waktu pengoperasian pendinginan / kering / Otomatis (pendinginan) waktu pembersihan sendiri Kurang dari 10 menit Tidak ada pengoperasian sendiri 10 menit hingga kurang dari 1 jam 1 jam Lebih dari 1 jam 2 jam • “ ” ditampilkan pada remote control selama pengoperasian pembersihan sendiri. Untuk memaksa menghentikan pembersihan sendiri, tekan tombol dua kali berurutan. AWAS • Kipas tetap bekerja meski setelah tombol ditekan untuk menghentikan pengoperasian di beberapa mode. Ini normal karena mode pembersihan sendiri sedang berlangsung. • Kisi-kisi terbuka dengan perlahan dan diarahkan secara horizontal selama pembersihan sendiri, dan menutup ketika pembersihan sendiri selesai. • Lampu pengoperasian (LED) tidak menyala selama mode (fungsi) pembersihan sendiri. • Mode (fungsi) pembersihan sendiri tidak dapat membersihkan ruangan atau membuang kerak dan debu yang ada di dalam unit. • Untuk membatalkan fungsi pembersihan sendiri, tanyakan ke toko Anda. 19-ID 20-ID 1115350201-1_ID.indd 26 1115350201-1_ID.indd 26 3/6/14 10:17 AM 3/6/14 10:17 AM
  • 28. – 27 – 9 Pengaturan lanjutan ■ Cara mengatur tipe ayun 2 1 4 5 3 1 Tekan selama sekurangnya empat detik ketika AC tidak bekerja. • , simbol, dan nomor berkedip. 2 Pilih unit indoor yang akan diatur dengan menekan (sisi kiri tombol) selama pengoperasian. • Setiap kali Anda menekan tombol, nomor unit berubah sebagai berikut: Tidak ditampilkan 1-1 2-1 3-1 4-1 UNIT No. UNIT No. UNIT No. UNIT No. Kipas pada unit yang dipilih berputar dan kisi- kisinya mulai mengayun. 3 Pilih tipe ayun dengan menekan tombol TIME . Kode pengaturan ayun Ayun kisi-kisi 0001 Ayun standar (Pengaturan pabrik) 0002 Ayunan ganda 0003 Ayun putar AWAS Jangan mengatur kode pengaturan ayun ke “0000”. (Pengaturan ini dapat menyebabkan gangguan pada kisi-kisi.) 4 Tekan tombol . 5 Tekan tombol untuk menyelesaikan pengaturan. ▼Ayunan standar Keempat kisi-kisi mengayun secara bersamaan pada sudut yang sama. ▼Ayunan ganda Menggabungkan ayunan kisi-kisi berurutan secara horizontal dan ke bawah. ▼Ayunan siklis (Disarankan untuk pendinginan) Keempat kisi-kisi dengan waktu yang berbeda seperti gelombang. Kode pengaturan ayun Ayun Horizontal Horizontal Horizontal Horizontal Ke bawah Ke bawah Ke bawah Ke bawah 21-ID 22-ID 1115350201-1_ID.indd 27 1115350201-1_ID.indd 27 3/6/14 10:17 AM 3/6/14 10:17 AM