2. PASCO 012-15871A
SE-7260 Hall Effect Experiment Page 2 of 22
Table of Contents
Equipment List.....................................................................................................................3
Safety Information................................................................................................................4
Hall Effect Apparatus ...........................................................................................................6
Maintenance ........................................................................................................................7
Experiment...........................................................................................................................8
Appendix A: General Specifications ..................................................................................16
Appendix B: Teacher’s Notes ............................................................................................17
Appendix C: Product End of Life Disposal Instructions.....................................................21
Appendix D: Technical Support Information ......................................................................22
3. PASCO 012-15871A
SE-7260 Hall Effect Experiment Page 3 of 22
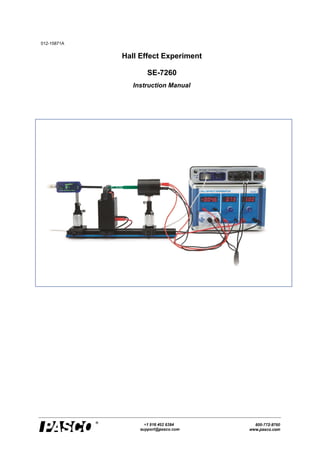
Hall Effect Experiment
SE-7260
Equipment List
No. Material list Quantity
1 Hall probe, n-semiconductor (n-GaAs) 1
2 Hall Effect Apparatus 1
3 U-Core Electromagnetic Coil, 1A, 1000 turns 1
4 Track, 400 mm 1
5 Adjustable Post Holder, 25 mm 2
6 Optical Carrier, 50 mm 2
7 Post, 90 mm 2
8 Power Cord 1
9 Connecting Cable, red, 1 m 1
10 Connecting Cable, black, 1 m 1
11 Connecting Cable, banana plug, red, 0.8 m 2
12 Connecting Cable, banana plug, black, 0.8 m 2
13 User’s Manual 1
Required but not included in SE-7260
14 2-Axis Magnetic Field Sensor PS-2162 1
15 PASCO 850 or 550 Universal Interface UI-5000/UI-5001 1
PASCO Capstone software See www.pasco.com 1
1
2
7
3
5
6 4
15
14
7
4. PASCO 012-15871A
SE-7260 Hall Effect Experiment Page 4 of 22
Safety Information
Warning:
To avoid possible electric shock or personal injury, follow these guidelines:
• Do not clean the equipment with a wet cloth.
• Before use, verify that the apparatus is not damaged.
• Do not defeat power cord safety ground feature.
• Plug in to a grounded (earthed) outlet.
• Do not use product in any manner not specified by the manufacturer.
• Do not install substitute parts or perform any unauthorized modification to the product.
• Line and Current Protection Fuses: For continued protection against fire, replace the line
fuse and the current-protection fuse only with fuses of the specified type and rating.
• Main Power and Test Input Disconnect: Unplug instrument from wall outlet, remove
power cord, and remove all probes from all terminals before servicing. Only qualified,
service-trained personnel should remove the cover from the instrument.
• Do not use the equipment if it is damaged. Before you use the equipment, inspect the
case. Pay particular attention to the insulation surrounding the connectors.
• Do not use the equipment if it operates abnormally. Protection may be impaired. When in
doubt, have the equipment serviced.
• Do not operate the equipment where explosive gas, vapor, or dust is present. Do not use it
in wet conditions.
• Do not apply more than the rated voltage, as marked on the apparatus, between terminals
or between any terminal and earth ground.
• When servicing the equipment, use only specified replacement parts.
• Use caution when working with voltage above 30V AC rms, 42V peak, or 60V DC. Such
voltages pose a shock hazard.
• To avoid electric shock, do not touch any bare conductor with hand or skin.
• Adhere to local and national safety codes. Individual protective equipment must be used
to prevent shock and arc blast injury where hazardous live conductors are exposed.
• Remaining endangerment: When an input terminal is connected to dangerous live
potential it is to be noted that this potential at all other terminals can occur!
5. PASCO 012-15871A
SE-7260 Hall Effect Experiment Page 5 of 22
Electrical Symbols
Alternating Current
Direct Current
Caution, risk of danger, refer to the operating manual before use.
Caution, possibility of electric shock
Earth (ground) Terminal
Protective Conductor Terminal
Chassis Ground
Conforms to European Union directives.
WEEE, Waste Electric and Electronic Equipment
Fuse
On (Power)
Off (Power)
In position of a bi-stable push control
Out position of a bi-stable push control
6. PASCO 012-15871A
SE-7260 Hall Effect Experiment Page 6 of 22
Hall Effect Apparatus
• Power switch: Turns the power to the instrument ON or OFF.
• Current Adjust: Adjust the current supplied to the electromagnet.
• Input: Connected to the Hall Probe to read the Hall voltage (0 to 2 V DC)
• Hall Current Output: Adjust the current flowing through the semi-conductor.
• Excitation Current Output: Adjust the current through the electromagnet to change the
magnetic field strength.
• Display Window: Displays the current or voltage value.
• Interface: Connect to a PASCO 550 or 850 Universal Interface to collect data.
Note: Before connecting any cords or cables, be sure that both switches on
the Power Supply are in the OFF position.
Note: The input power connector can be operated at 115VAC or 230VAC.
Please select the right setting according to your AC voltage level.
DATA interface
Power switch Output 0-10 mA
Hall Current Display Window
Current
Adjust
Output 0-1000 mA
Input
0-2 VDC
Electromagnet Current Display
Hall Voltage Display Window
110-120V~/220-240~
Please make sure you
select the right setting
according to your AC
voltage level.
7. PASCO 012-15871A
SE-7260 Hall Effect Experiment Page 7 of 22
Maintenance
Fuse Replacement
WARNING:
To reduce the risk of electric shock or damage to the instrument, turn the
power switch off and disconnect the power cord before replacing a fuse.
1. Disconnect the power cord from the instrument.
2. Open the fuse cover and remove the fuse.
3. Replace the fuse(s). Use the same type fuses.
4. Reconnect the power cord and turn on the instrument.
5. If the problem persists, contact PASCO for service.
Note: Replace the burned fuses with new fuses of the same type, or buy them
from the manufacturer.
Open cover to
remove fuse.
8. PASCO 012-15871A
SE-7260 Hall Effect Experiment Page 8 of 22
Experiment
Using a PASCO 550 or 850 Universal Interface and Capstone Software
Introduction
The Hall Effect is the production of a voltage difference (the Hall voltage) across an
electrical conductor, transverse to an electric current in the conductor and a magnetic
field perpendicular to the current. It was discovered by Edwin Hall (1855-1938) in
1879. The Hall effect was discovered in 1879 by Edwin Herbert Hall while he was
working on his doctoral degree (research on current-carrying metal forced in magnetic
field) at Johns Hopkins University in Baltimore, Maryland. His measurements of the
tiny effect produced in the apparatus he used were an experimental tour de force,
accomplished 18 years before the electron was discovered.
Since the magnitude of the Hall voltage depends on the charge density, the voltage is grater
in a semi-conductor than in a pure metal conductor. This version of the experiment uses and
n-doped germanium semi-conductor. The magnitude of the Hall voltage is also dependent on
the magnitude of the magnetic field. In modern day electronics, the Hall Effect is used to
measure the magnitude and direction of magnetic fields.
Theory
Fig. 1b
Fig. 1: Hall Effect in a rectangular sample of thickness d, height b and length w. At
equilibrium conditions the Lorentz force FL acting on the moving charge carriers is balanced
by the electrical force Fe which is due to the electric field of the Hall Effect.
The Hall Effect is an important experimental method of investigation to determine the
microscopic parameters of the charge transport in metals or doped semiconductors.
To investigate the Hall Effect in this experiment a rectangular strip of n-doped semiconductor
is placed in a uniform magnetic field B as shown in Fig. 1. When a current I flows through
the rectangular shaped sample an electrical voltage (Hall voltage) is set up perpendicular to
Fig. 1a
Uo Uo
9. PASCO 012-15871A
SE-7260 Hall Effect Experiment Page 9 of 22
the magnetic field B and the current I due to the Hall Effect.
The Hall Effect experiment determines the sign of the charge carriers in current flow. A
current can be thought of as a negative charge moving in one direction (Fig. 1a) or as a
positive charge moving in the opposite direction (Fig. 1b). To determine which it actually is,
the semiconductor is immersed in the magnetic field transverse to the direction of flow of
current. The moving charge experiences a Lorentz force:
𝐹𝐹𝐿𝐿
���⃗ = 𝑞𝑞𝑣𝑣
���⃗ × 𝐵𝐵
���⃗
causing a charge build-up on one side of the semiconductor (creating an electric field), which
in turn leads to a Coulomb force
𝐹𝐹
𝑒𝑒
���⃗ = 𝑞𝑞𝐸𝐸
���⃗.
The direction of the electric field will depend on the sign of the charge carriers and the
polarity of the Hall voltage across the semiconductor reveals this sign. At equilibrium, the
Lorentz force equals the Coulomb force:
𝑞𝑞𝑞𝑞𝑞𝑞 = 𝑞𝑞𝑞𝑞 (1)
where q is the magnitude of the charge of the charge carrier, v is the drift speed of the charge
carrier, B is the magnitude of the magnetic field, and E is the magnitude of the induced
electric field.
The drift speed of the charge carrier is related to the current flowing through the semi-
conductor.
𝐼𝐼 =
𝑐𝑐ℎ𝑎𝑎𝑎𝑎𝑎𝑎𝑎𝑎
∆𝑡𝑡
=
(𝑣𝑣𝑣𝑣𝑣𝑣𝑣𝑣𝑣𝑣𝑣𝑣 𝑐𝑐ℎ𝑎𝑎𝑎𝑎𝑔𝑔𝑒𝑒 𝑑𝑑𝑑𝑑𝑑𝑑𝑑𝑑𝑑𝑑𝑑𝑑𝑑𝑑)(𝑣𝑣𝑣𝑣𝑣𝑣𝑣𝑣𝑣𝑣𝑣𝑣)𝑒𝑒
∆𝑡𝑡
=
𝑛𝑛(𝑏𝑏𝑏𝑏𝑏𝑏)𝑒𝑒
∆𝑡𝑡
= 𝑛𝑛𝑛𝑛𝑛𝑛𝑛𝑛𝑛𝑛
since the drift speed is w/Δt and n is the charge per unit volume. Therefore, the drift speed is
given by
𝑣𝑣 =
𝐼𝐼
𝑛𝑛𝑛𝑛𝑛𝑛𝑛𝑛
(2)
Substituting for the drift speed into equation (1) gives
𝐼𝐼𝐼𝐼
𝑛𝑛𝑛𝑛𝑛𝑛𝑛𝑛
= 𝐸𝐸 (3)
But E is related to the Hall voltage, UH,
𝐸𝐸 =
𝑈𝑈𝐻𝐻
𝑏𝑏
(4)
Substituting for E into equation (3) gives
𝑈𝑈𝐻𝐻 =
𝐼𝐼𝐼𝐼
𝑛𝑛𝑛𝑛𝑛𝑛
(5)
𝑈𝑈𝐻𝐻 =
𝑅𝑅𝐻𝐻𝐼𝐼𝐼𝐼
𝑑𝑑
(6)
Where RH is the Hall coefficient (=1/ne) which depends on the material and the temperature.
At equilibrium conditions (Fig. 1) for weak magnetic fields, the Hall coefficient RH can be
expressed as function of the charge density (carrier concentration) and the mobility of
electrons and holes:
𝑅𝑅𝐻𝐻 =
𝑝𝑝𝜇𝜇𝑝𝑝
2−𝑛𝑛𝜇𝜇𝑛𝑛
2
𝑒𝑒(𝑝𝑝𝜇𝜇𝑝𝑝+𝑛𝑛𝜇𝜇𝑛𝑛)2
(7)
10. PASCO 012-15871A
SE-7260 Hall Effect Experiment Page 10 of 22
e = 1.602⋅10-19
C (elementary charge)
n: density of electrons
p: density of holes
μp: mobility of holes
μn: mobility of electrons
The mobility is a measure of the interaction between the charge carriers and the crystal
lattice. The mobility is defined as:
𝜇𝜇𝑛𝑛 =
𝑣𝑣
𝐸𝐸𝑜𝑜
(8)
v: drift velocity.
Eo: electric field due to the voltage drop.
The electric field Eo can be determined by the voltage drop Uo and the length w of the n-
semiconductor strip:
𝐸𝐸𝑜𝑜 =
𝑈𝑈𝑜𝑜
𝑤𝑤
(9)
The drift velocity v can be determined from the equilibrium condition, where the Lorentz
force compensates the electrical force which is due to the Hall field (Fig. 1). From Equation
(1):
𝑣𝑣 =
𝐸𝐸
𝐵𝐵
Which can be expressed using the relation EH = UH / b as:
𝑣𝑣 =
𝑈𝑈𝐻𝐻
𝑏𝑏𝑏𝑏
(10)
Substituting equation (9) and (10) in equation (8), the mobility μn of holes can be estimated at
room temperatures as follows:
𝜇𝜇𝑛𝑛 =
𝑈𝑈𝐻𝐻𝑤𝑤
𝑏𝑏𝑏𝑏𝑈𝑈𝑜𝑜
(11)
11. PASCO 012-15871A
SE-7260 Hall Effect Experiment Page 11 of 22
Equipment
Qty Part # Item
1 SE-7260 Hall Effect Apparatus
1
UI-5000 or
UI-5001
850 or 550 Universal Interface
1 UI-5401 PASCO Capstone Software
2 UI-5218 8-pin DIN Extension Cable
1 PS-2162 2-Axis Magnetic Field Sensor with PASPORT Extension Cable
Fig. 2: Electrical setup of the Hall Effect experiment, schematically.
Hardware Setup
Note: Before connecting any cords or cables, be sure that all power switches on the
interface and power supplies are in the OFF position and all current controls are
turned fully counterclockwise.
1. Screw the steel rod into the Hall probe unit. Fix the
adjustable holder on the optical carrier. Put the post
into the adjustable holder.
2. Connect the electromagnet to the banana jacks
labeled Excitation Current (Im) on the Hall Effect
Apparatus.
3. On the back of the Hall Effect Probe, connect the
ports labeled Is to the banana jacks labeled Hall
Current (Is) on the Hall Effect Apparatus.
4. On the back of the Hall Effect Probe, connect the
ports labeled UH to the banana jacks labeled Hall
Voltage (UH) on the Hall Effect Apparatus.
Adjustable
holder
Optical carrier
Post
Hall probe
12. PASCO 012-15871A
SE-7260 Hall Effect Experiment Page 12 of 22
5. Connect the steel rod to the 2-Axis Magnetic Field Sensor and install it on the optical
carrier on the track.
6. Connect a PASPORT Extension Cable (PS-2500) between the 2-Axis Magnetic Field
Sensor (PS-2162) and a PASPORT port on the 550 or 850 Universal Interface. Keep the
default sample rate.
7. Connect the 8-pin DIN Extension Cable (UI-5218) between the port marked ‘Interface-
Hall Voltage’ on the Hall Effect Apparatus and the Analog Input A on the 550 or 850
Universal Interface. (Note: The Hall Voltage UH is proportional to the output voltage of
the 8-pin DIN connector, 0 to 2000 mV vs. 0 to 2 V. When using a 550 or 850 Universal
Interface, the Hall Voltage is automatically calibrated in the software.)
8. Connect the 8-pin DIN Extension Cable (UI-5218) between the port marked “Interface-
Hall Current” on the Hall Effect Apparatus and the Analog Input B on the 550 or 850
Universal Interface. (Note: The Hall Current is proportional to the output voltage of the
8-pin DIN connector, 0 to10 mA vs. 0 to 1 V. When using a 550 or 850 Universal
Interface, the Hall Current is automatically calibrated in the software.)
9. Push the optical carrier slowly, and adjust the adjustable holder until the end of Hall
probe is centered in the magnetic field.
10. Turn ON the power for the Universal Interface and Hall Effect Apparatus.
11. Rotate the Excitation Current (IM) 0–1000mA adjust knob until the ammeter reads zero.
12. Rotate the Hall current (Is) 0–10mA adjust knob until the
ammeter reads zero.
Software Setup
1. Open the PASCO Capstone program and in the Hardware
Setup, the Hall Current, Hall Voltage, and Magnetic Field
sensors should be auto-recognized.
2. Create a graph of Hall Voltage “UH” vs. Hall Current “Is”.
Choose units of mV for the voltage and mA for the current.
In the graph properties, turn off connected lines.
3. Create a Digits display of the Magnetic Field Strength
(Perpendicular).
4. Create a table with the Hall Voltage (mV) and the Hall Current (mA).
5. Change the
sampling mode to
Keep.
13. PASCO 012-15871A
SE-7260 Hall Effect Experiment Page 13 of 22
Procedure I: Constant Magnetic Field
In this part of the experiment, the magnetic field will be held constant and the current through
the semi-conductor will be varied.
1. Set the Excitation Current (IM) 0-1000mA to a desired value (e.g., 500 mA) so the
magnetic field strength will be constant.
2. Make sure the Hall Current “Is” 0-10mA is zero.
3. Click Preview and adjust the Hall Current to 0.5 mA. Press Keep to record the voltage
and current. Then increase the Hall Current by increments of 0.5 mA, pressing Keep for
each, until the Hall Current is 5.5 mA. Then press Stop. Return the Hall Current to zero.
4. Move the Hall Probe out of the magnet. Press the tare button on the side of the Magnetic
Field Sensor. Move the end of the Magnetic Field Sensor into the center of the magnet.
Click Preview and Keep to record the magnetic field strength. Then press Stop.
5. Set the current 0-1000mA to another value (e.g., 800 mA), and then record data again,
repeating Steps 2 through 4.
6. On the graph, apply a linear fit to the V vs. I data.
7. Hall Voltage Compensation: Because the leads that measure the
Hall Voltage may not be exactly opposite each other across the
semi-conductor, a voltage may appear that is due to the
potential difference along the direction of the current. To
measure this and compensate for it, slide the Hall Probe
completely out of the magnet, set the magnet current to zero,
and perform Step 3 to record the Hall Voltage without any
magnetic field. Apply a linear fit to the V vs. I data. The slope
of this line will be subtracted from the slopes of the other lines
to compensate for the offset of the Hall Voltage due to
misalignment of the leads.
Procedure II: Constant Current through the Semi-Conductor
In this part of the experiment, the magnetic field will be varied by varying the current through
the electromagnet while the current through the semi-conductor will be held constant. Rather
than measuring the magnetic field for each data point, we will first characterize the magnetic
field as a function of the current.
1. To discover the relationship between the magnetic field strength and the current through
the magnet coils, create a table of Magnetic Field Strength (Perpendicular). In the second
column, create a User-Entered data set called Magnet Current (with units of mA). Pre-fill
the column with values from 50 to 900 mA in steps of 50 mA. Create a graph of
Misalignment of Hall Voltage
Leads
14. PASCO 012-15871A
SE-7260 Hall Effect Experiment Page 14 of 22
Magnetic Field Strength (Perpendicular) vs. Magnet Current (A).
2. With the Hall Current set to zero, press the tare button on the side of the Magnetic Field
Sensor. Move the Magnetic Field Sensor into the center of the magnet.
3. Click Preview and adjust the “Excitation Current” (the current through the electromagnet)
to 50 mA as read on the digital readout on the Hall Effect Apparatus. Then click Keep.
4. Adjust the “Excitation Current” to each value in the table and click Keep for each value.
Then click Stop. Return the “Excitation Current” to zero to prevent the magnet from
getting too hot.
5. On the graph, apply a cubic curve fit. In the Capstone calculator, create an equation for
the magnetic field, B:
B = a + b*I + c*I² + d*I³ in units of T
where I = [Magnet Current (A)] and a, b, c, and d are the cubic fit coefficients.
6. Create a graph of Hall Voltage (mV) vs. B (mT). In the graph properties, turn off
connected lines.
15. PASCO 012-15871A
SE-7260 Hall Effect Experiment Page 15 of 22
6. Create a Digits display of the Hall current Is.
7. Create a table of the Hall Voltage (mV), the calculation B, and the User-Entered set
Magnet Current (mA).
8. Set the Hall current Is (0-10mA) to a desired value (e.g., 5 mA).
9. Make sure the Excitation Current (IM) 0-1000mA is zero.
10. Set the sampling rate to 10 Hz.
11. Move the Magnetic Field Sensor out of the magnet and move the Hall Effect Probe into
the center of the magnet.
12. Click Preview and increase the Excitation Current to 50 mA and click Keep. Continue to
increase the Excitation Current by steps of 50 mA up to 900 mA, clicking Keep for each
current setting. Then click Stop.
13. Set the Hall Current 0-10mA to another value (e.g., 8 mA), then record data again,
repeating Steps 10 through 13.
14. On the graph, apply a linear fit to the V vs. B data.
Analysis
The dimensions of the n-semiconductor strip: w = 3.9mm, b = 2.3mm, d = 1.2mm
1. For the constant magnetic field data, use the slope of the graph and equation (5) to
determine the density of charge carriers (n). Remember to compensate by subtracting the
slope of the graph for zero magnetic field from the slope of the run with the magnetic
field.
𝑈𝑈𝐻𝐻 = �
𝐵𝐵
𝑛𝑛𝑛𝑛𝑛𝑛
� 𝐼𝐼 (5)
2. Determine the sign of the charge carriers by using the sign of the Hall voltage and
making a diagram showing the direction of the magnetic field, drift velocity, and the
Lorentz force.
3. For the constant current data, use the slope of the graph and equation (5) to determine
the density of charge carriers (n)
𝑈𝑈𝐻𝐻 = �
𝐼𝐼
𝑛𝑛𝑛𝑛𝑛𝑛
� 𝐵𝐵 (5)
4. For the constant current data, calculate the drift speed from equation (10) using the slope
of the Hall Voltage vs. B graph:
𝑣𝑣 =
𝑈𝑈𝐻𝐻
𝑏𝑏𝑏𝑏
(10)
𝑈𝑈𝐻𝐻 = (𝑣𝑣𝑣𝑣)𝐵𝐵
16. PASCO 012-15871A
SE-7260 Hall Effect Experiment Page 16 of 22
Appendix A: General Specifications
Dimensions of the n-semiconductor strip: w = 3.9mm, b = 2.3mm, d = 1.2mm
Supply voltage: 110-120V~/220-240V~
Mains supply voltage fluctuations: ±10%
Frequency: 50/60Hz
Fuse Protection for inputs: 250 V T2A
Display: 3-1/2 Digit Display and 4-1/2 Digit Display
Temperature: Operating: 0°C to 40 °C, Storage: -20 °C to 50 °C
Operating Altitude: 0 to 2000 meters
Relative Humidity: Noncondensing < 10 °C, 90% from 10 °C to 30 °C; 75% from 30 °C to
40 °C
Certifications: CE
Safety Compliance: IEC/EN 61010-1
Overvoltage category: Ⅱ
Degree of protection: IP20
Normal energy protection: 5J
Item Description
Hall probe, n-semiconductor
Control current: <10mA
Semiconductor material: GaAs (gallium arsenic)
Hall sensitivity: ≥150mV/(mA·T)
Hall Effect Apparatus
0~1000mA dc, V ≤ 20V (ripple < 1%); 3.5 Digit Display;
0-10mA dc, V ≤ 12V (ripple < 1%), 3.5 Digit Display
Hall voltage: 4-1/2 Digit Display
Electromagnetic coil
Number of turns: 1000
Current to the coils: ≤ 1A
17. PASCO 012-15871A
SE-7260 Hall Effect Experiment Page 17 of 22
Appendix B: Teacher’s Notes
Sample Data
Procedure I: Constant Magnetic Field
Dimensions of the n-semiconductor strip: w = 3.9 mm, b = 2.3 mm, d = 1.2mm
Table I: Constant Magnetic Field
Run #2 Run #3 No B-field
Imag = 500 mA; B = -0.0361 T Imag = 750 mA; B = -0.0532 T Imag = 0; B = 0
Hall Voltage
(mV)
Current Is
(mA)
Hall Voltage
(mV)
Current Is
(mA)
Hall Voltage
(mV)
Current Is
(mA)
-5.6 0.51 -7.7 0.51 -3.0 1.02
-11.1 1.02 -15.0 1.02 -6.0 2.02
-16.5 1.52 -22.2 1.52 -8.9 3.02
-21.7 2.02 -29.4 2.02 -11.9 4.02
-27.1 2.52 -36.6 2.51 -14.8 5.02
-32.3 3.02 -44.1 3.02 -17.6 6.01
-37.6 3.52 -51.2 3.51 -20.5 7.02
-43.0 4.02 -58.5 4.02 -23.4 8.02
-48.4 4.52 -65.7 4.51 -26.3 9.01
-53.6 5.02 -73.1 5.02 -29.2 10.01
-58.8 5.51 -80.2 5.51
-64.2 6.01 -87.3 6.01
-69.5 6.51 -94.4 6.51
-74.8 7.01 -101.6 7.01
-79.8 7.51 -108.6 7.51
-85.1 8.01 -115.7 8.01
-90.3 8.51 -122.7 8.51
-95.4 9.01 -129.8 9.01
-100.6 9.51 -136.9 9.51
-105.7 10.00 -143.9 10.01
18. PASCO 012-15871A
SE-7260 Hall Effect Experiment Page 18 of 22
𝑈𝑈𝐻𝐻 =
𝐼𝐼𝐼𝐼
𝑛𝑛𝑛𝑛𝑛𝑛
(5)
[𝑆𝑆𝑆𝑆𝑆𝑆𝑆𝑆𝑆𝑆 𝑜𝑜𝑜𝑜 𝑈𝑈𝐻𝐻 𝑣𝑣𝑣𝑣. 𝐼𝐼] =
𝐵𝐵
𝑛𝑛𝑛𝑛𝑛𝑛
For Run #2:
𝑛𝑛 =
𝐵𝐵
[𝑠𝑠𝑠𝑠𝑠𝑠𝑠𝑠𝑠𝑠]𝑑𝑑𝑑𝑑
=
0.0361𝑇𝑇
(10.6 − 2.9𝑉𝑉/𝐴𝐴)(0.0012𝑚𝑚)(1.60 × 10−19𝐶𝐶)
= 2.44 × 10¹⁹
/𝑚𝑚3
For Run #3:
𝑛𝑛 =
𝐵𝐵
[𝑠𝑠𝑠𝑠𝑠𝑠𝑠𝑠𝑠𝑠]𝑑𝑑𝑑𝑑
=
0.0361𝑇𝑇
(14.4 − 2.9𝑉𝑉/𝐴𝐴)(0.0012𝑚𝑚)(1.60 × 10−19𝐶𝐶)
= 2.41 × 10¹⁹
/𝑚𝑚3
Determining the Sign of the Charge Carriers:
For the experimental setup, the direction of B and v relative to the Hall Probe are shown in
Figure 2. If the charge carriers were positive, the Lorentz Force would force them to the left
in Figure 2 and the Hall Voltage would read positive. However, in this experiment, the Hall
Voltage is negative, thus the charge carriers must be negative and the velocity is in the
opposite direction as shown in Figure 3.
Figure 1: Hall Voltage as Current is Varied
19. PASCO 012-15871A
SE-7260 Hall Effect Experiment Page 19 of 22
Figure 2: Negative Hall Voltage Figure 3: Positive Hall Voltage
Procedure II: Constant Current through Semi-Conductor
Table II: Magnetic Field vs. Magnet Current
Magnetic Field Strength
(Perpendicular)
(T)
Magnet
Current
(mA)
-0.0035 50
-0.0071 100
-0.0106 150
-0.0142 200
-0.0177 250
-0.0213 300
-0.0248 350
-0.0283 400
-0.0319 450
-0.0354 500
-0.0389 550
-0.0424 600
-0.0459 650
-0.0494 700
-0.0529 750
-0.0564 800
-0.0598 850
-0.0632 900
Equation for B
B = -0.0000163 - 0.0710 I - 0.000311 I² + 0.00126 I³
Figure 4: Magnetic Field as a Function of Coil Current
20. PASCO 012-15871A
SE-7260 Hall Effect Experiment Page 20 of 22
Table III: Constant Current through Semi-Conductor
Run #7: I = 5.06 mA; Run #9: I = 7.52 mA
Run #7 Run #9 Set Set
Hall Voltage
(mV)
Hall Voltage
(mV)
B
(T)
Magnet Current
(mA)
-19.0 -28.3 0.00 50
-22.8 -34.0 -0.01 100
-26.7 -39.6 -0.01 150
-30.4 -45.3 -0.01 200
-34.2 -51.0 -0.02 250
-38.0 -56.7 -0.02 300
-42.0 -62.5 -0.02 350
-45.7 -68.2 -0.03 400
-49.6 -73.9 -0.03 450
-53.4 -79.6 -0.04 500
-57.3 -85.4 -0.04 550
-61.1 -91.0 -0.04 600
-65.0 -96.9 -0.05 650
-68.9 -102.7 -0.05 700
-72.8 -108.4 -0.05 750
-76.6 -114.1 -0.06 800
-80.6 -119.9 -0.06 850
-84.4 -125.7 -0.06 900
Figure 5: Hall Voltage as Magnetic Field Varies
21. PASCO 012-15871A
SE-7260 Hall Effect Experiment Page 21 of 22
𝑈𝑈𝐻𝐻 =
𝐼𝐼𝐼𝐼
𝑛𝑛𝑛𝑛𝑛𝑛
(5)
[𝑆𝑆𝑆𝑆𝑆𝑆𝑆𝑆𝑆𝑆 𝑜𝑜𝑜𝑜 𝑈𝑈𝐻𝐻 𝑣𝑣𝑣𝑣. 𝐵𝐵] =
𝐼𝐼
𝑛𝑛𝑛𝑛𝑛𝑛
For Run #7:
𝑛𝑛 =
𝐼𝐼
[𝑠𝑠𝑠𝑠𝑠𝑠𝑠𝑠𝑠𝑠]𝑑𝑑𝑑𝑑
=
0.00506𝐴𝐴
(1.1𝑉𝑉/𝐴𝐴)(0.0012𝑚𝑚)(1.60 × 10−19𝐶𝐶)
= 2.40 × 10¹⁹
/𝑚𝑚3
For Run #9:
𝑛𝑛 =
𝐼𝐼
[𝑠𝑠𝑠𝑠𝑠𝑠𝑠𝑠𝑠𝑠]𝑑𝑑𝑑𝑑
=
0.00752𝐴𝐴
(1.62𝑉𝑉/𝐴𝐴)(0.0012𝑚𝑚)(1.60 × 10−19𝐶𝐶)
= 2.42 × 10¹⁹
/𝑚𝑚3
According to equation (10):
𝑈𝑈𝐻𝐻 = (𝑣𝑣𝑣𝑣)𝐵𝐵
[𝑠𝑠𝑠𝑠𝑠𝑠𝑠𝑠𝑠𝑠 𝑜𝑜𝑜𝑜 𝑈𝑈𝐻𝐻𝑣𝑣𝑣𝑣. 𝐵𝐵] = 𝑣𝑣𝑣𝑣
For Run #7:
𝑣𝑣 =
𝑠𝑠𝑠𝑠𝑠𝑠𝑠𝑠𝑠𝑠
𝑏𝑏
=
1.1𝑉𝑉/𝑇𝑇
0.0023𝑚𝑚
= 480𝑚𝑚/𝑠𝑠
For Run #9:
𝑣𝑣 =
𝑠𝑠𝑠𝑠𝑠𝑠𝑠𝑠𝑠𝑠
𝑏𝑏
=
1.62𝑉𝑉/𝑇𝑇
0.0023𝑚𝑚
= 704𝑚𝑚/𝑠𝑠
Appendix C: Product End of Life Disposal Instructions
This electronic product is subject to disposal and recycling regulations that vary by country
and region. It is your responsibility to recycle your electronic equipment per your local
environmental laws and regulations to ensure that it will be recycled in a manner that protects
human health and the environment. To find out where you can drop off your waste equipment
for recycling, please contact your local waste recycle/disposal service, or the place where you
purchased the product.
The European Union WEEE (Waste Electronic and Electrical Equipment) symbol (above)
and on the product or on its packaging indicates that this product must not be disposed of in a
standard waste container.
Appendix D: Technical Support
For assistance with any PASCO product, contact PASCO at:
22. PASCO 012-15871A
SE-7260 Hall Effect Experiment Page 22 of 22
Address: PASCO scientific
10101 Foothills Blvd.
Roseville, CA 95747-7100
Web: www.pasco.com
Phone: 916-462-8384 (worldwide)
800-772-8700 (U.S.)
Email: support@pasco.com
Limited Warranty: For a description of the product warranty, see the PASCO web site.
Copyright: This PASCO scientific Instruction Manual is copyrighted with all rights
reserved. Permission is granted to non-profit educational institutions for reproduction of any
part of this manual, providing the reproductions are used only in their laboratories and
classrooms, and are not sold for profit. Reproduction under any other circumstances, without
the written consent of PASCO scientific, is prohibited. Revised 3/18.
Trademarks: PASCO and PASCO scientific are trademarks or registered trademarks of
PASCO scientific, in the United States and/or in other countries. All other brands, products,
or service names are or may be trademarks or service marks of, and are used to identify,
products or services of, their respective owners. For more information visit
www.pasco.com/legal.
Instruction Manual: To download a PDF file of the Instruction Manual, go to
www.pasco.com/manuals. Enter the product number (SE-7260) and select “Submit”.