Direction of travel on a map in Power BI.pptx
•Download as PPTX, PDF•
0 likes•3 views

Need to show the direction of travel on a map in Power BI We had a client which needed us to do this very thing This short guide shows how to do it using the Icon Map https://www.selectdistinct.co.uk/2023/10/11/direction-of-travel-on-a-map-in-power-bi/ #PowerBI #IconMap #businessintelligence

Recommended
More Related Content
Similar to Direction of travel on a map in Power BI.pptx
Similar to Direction of travel on a map in Power BI.pptx (20)
More from Select Distinct Limited
More from Select Distinct Limited (20)
Recently uploaded
Recently uploaded (20)
Direction of travel on a map in Power BI.pptx
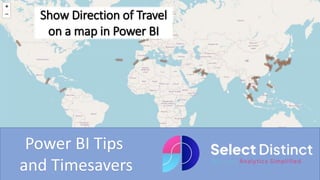
- 1. Show Direction of Travel on a map in Power BI Power BI Tips and Timesavers
- 2. A global commodity trading client of ours had a requirement to create a dashboard that presented the latest locations and headings for a range of container ships The internal BI team had been using a dashboard in Tableau which catered for this requirement quite easily, but could not find a way to replicate this in Power BI, so the task was handed over to us What follows is a simplified guide using some sample data that we have generated to make it straight forward to follow along
- 3. Getting Started The first thing you will need is some sample shipping data We created a simple spreadsheet with 49 rows to illustrate
- 4. Getting Started You will also need an appropriate icon to represent the ships In our case we used an AI image creator to represent a ship and removed the background It is important that this image faces North in its neutral position, we will be applying the heading as a rotation to illustrate the direction of travel
- 5. Load the sample data into Power BI The first step is to load the sample data into Power BI On the Home ribbon in Power BI Desktop, select get data, then Excel workbook and select your excel file If you download our sample data you will save yourself some time and not have to do anything to the field types
- 6. Load the ICON MAP V3 add in Once it is loaded you can then download the IconMapV3 from the marketplace, which is a free download select the three dots and select get more visuals
- 7. Add the map to the canvas Now select this and drag it onto your canvas
- 8. Field Settings for the icon map Field settings for the Icon Map Category - use ship name longitude = longitude latitude = latitude Size = Icon Size Add the icon Select format your visual Then go down to objects and expand the section
- 9. Choosing the ICON We will use the conditional formatting options under Image / WKT The icon field is a url which Power BI uses to download the icon
- 10. Rotate the image Then set the heading, we use the image rotation to turn the object by the correct number of degrees Select Heading from the field options
- 11. The Map is drawn
- 12. Showing the direction of travel on a map in Power BI is made much easier with this add in This just the basics to get you started, and by following along with the example you can get similar results Icon Map v3 is the latest release and has a great deal more features, some of which look very impressive
- 13. For more Tips, Tricks and Timesavers, visit our website Business Analytics Blog – Select Distinct Credit: simon.harrison@selectdistinct.co.uk