
Recommended
Recommended
More Related Content
Similar to Creating a Facebook Clone - Part XII - Transcript.pdf
Similar to Creating a Facebook Clone - Part XII - Transcript.pdf (20)
More from ShaiAlmog1
More from ShaiAlmog1 (20)
Recently uploaded
Recently uploaded (20)
Creating a Facebook Clone - Part XII - Transcript.pdf
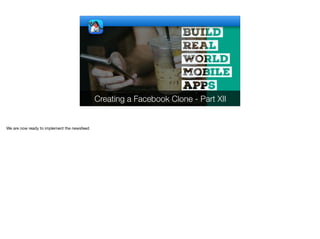
- 1. Creating a Facebook Clone - Part XII We are now ready to implement the newsfeed
- 2. © Codename One 2017 all rights reserved The NewsfeedContainer class is a bit big so I split down the functionality into smaller methods that build the various pieces of the UI. We'll use InfiniteContainer which lets us scroll an infinite list of entries and implements pull-to-refresh.
- 3. public class NewsfeedContainer extends InfiniteContainer { private long lastTime; @Override public Component[] fetchComponents(int index, int amount) { List<Component> components = new ArrayList<>(); if(index == 0) { lastTime = System.currentTimeMillis(); components.add(createPostBar()); components.add(UIUtils.createSpace()); } List<Post> response = ServerAPI.fetchTimelinePosts(lastTime, amount); if(response == null) { return null; } for(Post p : response) { components.add(createNewsItem(p.user.get(), p)); components.add(UIUtils.createHalfSpace()); lastTime = p.date.getLong(); } Component[] cmps = new Component[components.size()]; components.toArray(cmps); NewsfeedContainer Now that we have a sense of what we are building lets look at the high level class skeleton then fill in the pieces. We use the last time value when invoking fetchTimelinePosts so the latest data arrives
- 4. public class NewsfeedContainer extends InfiniteContainer { private long lastTime; @Override public Component[] fetchComponents(int index, int amount) { List<Component> components = new ArrayList<>(); if(index == 0) { lastTime = System.currentTimeMillis(); components.add(createPostBar()); components.add(UIUtils.createSpace()); } List<Post> response = ServerAPI.fetchTimelinePosts(lastTime, amount); if(response == null) { return null; } for(Post p : response) { components.add(createNewsItem(p.user.get(), p)); components.add(UIUtils.createHalfSpace()); lastTime = p.date.getLong(); } Component[] cmps = new Component[components.size()]; components.toArray(cmps); NewsfeedContainer This method is invoked when the user scrolls and needs more data or when pull-to-refresh is used
- 5. public class NewsfeedContainer extends InfiniteContainer { private long lastTime; @Override public Component[] fetchComponents(int index, int amount) { List<Component> components = new ArrayList<>(); if(index == 0) { lastTime = System.currentTimeMillis(); components.add(createPostBar()); components.add(UIUtils.createSpace()); } List<Post> response = ServerAPI.fetchTimelinePosts(lastTime, amount); if(response == null) { return null; } for(Post p : response) { components.add(createNewsItem(p.user.get(), p)); components.add(UIUtils.createHalfSpace()); lastTime = p.date.getLong(); } Component[] cmps = new Component[components.size()]; components.toArray(cmps); NewsfeedContainer It's hard to tell how many components we'll return so we'll use a list and convert it to an array when we are done
- 6. public class NewsfeedContainer extends InfiniteContainer { private long lastTime; @Override public Component[] fetchComponents(int index, int amount) { List<Component> components = new ArrayList<>(); if(index == 0) { lastTime = System.currentTimeMillis(); components.add(createPostBar()); components.add(UIUtils.createSpace()); } List<Post> response = ServerAPI.fetchTimelinePosts(lastTime, amount); if(response == null) { return null; } for(Post p : response) { components.add(createNewsItem(p.user.get(), p)); components.add(UIUtils.createHalfSpace()); lastTime = p.date.getLong(); } Component[] cmps = new Component[components.size()]; components.toArray(cmps); NewsfeedContainer If this is the first entry we reset the value of lastTime before making the request
- 7. public class NewsfeedContainer extends InfiniteContainer { private long lastTime; @Override public Component[] fetchComponents(int index, int amount) { List<Component> components = new ArrayList<>(); if(index == 0) { lastTime = System.currentTimeMillis(); components.add(createPostBar()); components.add(UIUtils.createSpace()); } List<Post> response = ServerAPI.fetchTimelinePosts(lastTime, amount); if(response == null) { return null; } for(Post p : response) { components.add(createNewsItem(p.user.get(), p)); components.add(UIUtils.createHalfSpace()); lastTime = p.date.getLong(); } Component[] cmps = new Component[components.size()]; components.toArray(cmps); NewsfeedContainer The top is always the same component: the post bar. That's where we can add a new post
- 8. public class NewsfeedContainer extends InfiniteContainer { private long lastTime; @Override public Component[] fetchComponents(int index, int amount) { List<Component> components = new ArrayList<>(); if(index == 0) { lastTime = System.currentTimeMillis(); components.add(createPostBar()); components.add(UIUtils.createSpace()); } List<Post> response = ServerAPI.fetchTimelinePosts(lastTime, amount); if(response == null) { return null; } for(Post p : response) { components.add(createNewsItem(p.user.get(), p)); components.add(UIUtils.createHalfSpace()); lastTime = p.date.getLong(); } Component[] cmps = new Component[components.size()]; components.toArray(cmps); NewsfeedContainer We check with the server if there are more posts, if we reached the end null is returned and we return that too
- 9. components.add(UIUtils.createSpace()); } List<Post> response = ServerAPI.fetchTimelinePosts(lastTime, amount); if(response == null) { return null; } for(Post p : response) { components.add(createNewsItem(p.user.get(), p)); components.add(UIUtils.createHalfSpace()); lastTime = p.date.getLong(); } Component[] cmps = new Component[components.size()]; components.toArray(cmps); return cmps; } private Container createPostBar() { Button avatar = new Button(ServerAPI.me().getAvatar(6.5f), "Label"); Button writePost = new Button("What's on your mind?", "NewPostButton"); Button gallery = new Button("Photo", "GalleryButton"); FontImage.setMaterialIcon(gallery, FontImage.MATERIAL_PHOTO_LIBRARY, 2.9f); gallery.setTextPosition(BOTTOM); Container c = BorderLayout.centerEastWest(writePost, gallery, avatar); c.setUIID("HalfPaddedContainer"); NewsfeedContainer Otherwise we loop over the responses and create a news item for each post, we add it with a space separator. Notice the usage of createNewsItem() in the code
- 10. components.add(UIUtils.createSpace()); } List<Post> response = ServerAPI.fetchTimelinePosts(lastTime, amount); if(response == null) { return null; } for(Post p : response) { components.add(createNewsItem(p.user.get(), p)); components.add(UIUtils.createHalfSpace()); lastTime = p.date.getLong(); } Component[] cmps = new Component[components.size()]; components.toArray(cmps); return cmps; } private Container createPostBar() { Button avatar = new Button(ServerAPI.me().getAvatar(6.5f), "Label"); Button writePost = new Button("What's on your mind?", "NewPostButton"); Button gallery = new Button("Photo", "GalleryButton"); FontImage.setMaterialIcon(gallery, FontImage.MATERIAL_PHOTO_LIBRARY, 2.9f); gallery.setTextPosition(BOTTOM); Container c = BorderLayout.centerEastWest(writePost, gallery, avatar); c.setUIID("HalfPaddedContainer"); NewsfeedContainer We update the lastTime value to the last element so the next request continues from the last place
- 11. components.add(UIUtils.createSpace()); } List<Post> response = ServerAPI.fetchTimelinePosts(lastTime, amount); if(response == null) { return null; } for(Post p : response) { components.add(createNewsItem(p.user.get(), p)); components.add(UIUtils.createHalfSpace()); lastTime = p.date.getLong(); } Component[] cmps = new Component[components.size()]; components.toArray(cmps); return cmps; } private Container createPostBar() { Button avatar = new Button(ServerAPI.me().getAvatar(6.5f), "Label"); Button writePost = new Button("What's on your mind?", "NewPostButton"); Button gallery = new Button("Photo", "GalleryButton"); FontImage.setMaterialIcon(gallery, FontImage.MATERIAL_PHOTO_LIBRARY, 2.9f); gallery.setTextPosition(BOTTOM); Container c = BorderLayout.centerEastWest(writePost, gallery, avatar); c.setUIID("HalfPaddedContainer"); NewsfeedContainer We convert the list to an array and return that data
- 12. Component[] cmps = new Component[components.size()]; components.toArray(cmps); return cmps; } private Container createPostBar() { Button avatar = new Button(ServerAPI.me().getAvatar(6.5f), "Label"); Button writePost = new Button("What's on your mind?", "NewPostButton"); Button gallery = new Button("Photo", "GalleryButton"); FontImage.setMaterialIcon(gallery, FontImage.MATERIAL_PHOTO_LIBRARY, 2.9f); gallery.setTextPosition(BOTTOM); Container c = BorderLayout.centerEastWest(writePost, gallery, avatar); c.setUIID("HalfPaddedContainer"); return c; } private Container createNewsTitle(User u, Post p) { Button avatar = new Button("", u.getAvatar(6.5f), "CleanButton"); Button name = new Button(u.fullName(), "PostTitle"); Button postTime = new Button(UIUtils.formatTimeAgo(p.date.get()), "PostSubTitle"); Button menu = new Button("", "Label"); FontImage.setMaterialIcon(menu, FontImage.MATERIAL_MORE_HORIZ); Container titleArea = BorderLayout.centerEastWest( FlowLayout.encloseMiddle(BoxLayout.encloseY(name, postTime)), NewsfeedContainer We referenced createPostBar() & createNewsItem() lets look at the former first, it's a relatively simple method.
- 13. Component[] cmps = new Component[components.size()]; components.toArray(cmps); return cmps; } private Container createPostBar() { Button avatar = new Button(ServerAPI.me().getAvatar(6.5f), "Label"); Button writePost = new Button("What's on your mind?", "NewPostButton"); Button gallery = new Button("Photo", "GalleryButton"); FontImage.setMaterialIcon(gallery, FontImage.MATERIAL_PHOTO_LIBRARY, 2.9f); gallery.setTextPosition(BOTTOM); Container c = BorderLayout.centerEastWest(writePost, gallery, avatar); c.setUIID("HalfPaddedContainer"); return c; } private Container createNewsTitle(User u, Post p) { Button avatar = new Button("", u.getAvatar(6.5f), "CleanButton"); Button name = new Button(u.fullName(), "PostTitle"); Button postTime = new Button(UIUtils.formatTimeAgo(p.date.get()), "PostSubTitle"); Button menu = new Button("", "Label"); FontImage.setMaterialIcon(menu, FontImage.MATERIAL_MORE_HORIZ); Container titleArea = BorderLayout.centerEastWest( FlowLayout.encloseMiddle(BoxLayout.encloseY(name, postTime)), NewsfeedContainer There are 3 buttons here none of which look like a button & each one should take us to a different Form in the finished app
- 14. Component[] cmps = new Component[components.size()]; components.toArray(cmps); return cmps; } private Container createPostBar() { Button avatar = new Button(ServerAPI.me().getAvatar(6.5f), "Label"); Button writePost = new Button("What's on your mind?", "NewPostButton"); Button gallery = new Button("Photo", "GalleryButton"); FontImage.setMaterialIcon(gallery, FontImage.MATERIAL_PHOTO_LIBRARY, 2.9f); gallery.setTextPosition(BOTTOM); Container c = BorderLayout.centerEastWest(writePost, gallery, avatar); c.setUIID("HalfPaddedContainer"); return c; } private Container createNewsTitle(User u, Post p) { Button avatar = new Button("", u.getAvatar(6.5f), "CleanButton"); Button name = new Button(u.fullName(), "PostTitle"); Button postTime = new Button(UIUtils.formatTimeAgo(p.date.get()), "PostSubTitle"); Button menu = new Button("", "Label"); FontImage.setMaterialIcon(menu, FontImage.MATERIAL_MORE_HORIZ); Container titleArea = BorderLayout.centerEastWest( FlowLayout.encloseMiddle(BoxLayout.encloseY(name, postTime)), NewsfeedContainer We lay out the entire title area in a border layout, this allows the writePost field to grow and occupy the available space
- 15. Container c = BorderLayout.centerEastWest(writePost, gallery, avatar); c.setUIID("HalfPaddedContainer"); return c; } private Container createNewsTitle(User u, Post p) { Button avatar = new Button("", u.getAvatar(6.5f), "CleanButton"); Button name = new Button(u.fullName(), "PostTitle"); Button postTime = new Button(UIUtils.formatTimeAgo(p.date.get()), "PostSubTitle"); Button menu = new Button("", "Label"); FontImage.setMaterialIcon(menu, FontImage.MATERIAL_MORE_HORIZ); Container titleArea = BorderLayout.centerEastWest( FlowLayout.encloseMiddle(BoxLayout.encloseY(name, postTime)), FlowLayout.encloseIn(menu), avatar); titleArea.setUIID("HalfPaddedContainer"); return titleArea; } private Container createPostStats(Post p) { Container stats=new Container(new BorderLayout(), "PaddedContainer"); if(p.likes.size() > 0) { Label thumbUp = new Label("", "SmallBlueCircle"); FontImage.setMaterialIcon(thumbUp, FontImage.MATERIAL_THUMB_UP); Label count = new Label("" + p.likes.size(), "SmallLabel"); stats.add(WEST, BoxLayout.encloseX(thumbUp, count)); } NewsfeedContainer Next we have the createNewsTitle() method which is very similar in some regards
- 16. Container c = BorderLayout.centerEastWest(writePost, gallery, avatar); c.setUIID("HalfPaddedContainer"); return c; } private Container createNewsTitle(User u, Post p) { Button avatar = new Button("", u.getAvatar(6.5f), "CleanButton"); Button name = new Button(u.fullName(), "PostTitle"); Button postTime = new Button(UIUtils.formatTimeAgo(p.date.get()), "PostSubTitle"); Button menu = new Button("", "Label"); FontImage.setMaterialIcon(menu, FontImage.MATERIAL_MORE_HORIZ); Container titleArea = BorderLayout.centerEastWest( FlowLayout.encloseMiddle(BoxLayout.encloseY(name, postTime)), FlowLayout.encloseIn(menu), avatar); titleArea.setUIID("HalfPaddedContainer"); return titleArea; } private Container createPostStats(Post p) { Container stats=new Container(new BorderLayout(), "PaddedContainer"); if(p.likes.size() > 0) { Label thumbUp = new Label("", "SmallBlueCircle"); FontImage.setMaterialIcon(thumbUp, FontImage.MATERIAL_THUMB_UP); Label count = new Label("" + p.likes.size(), "SmallLabel"); stats.add(WEST, BoxLayout.encloseX(thumbUp, count)); } NewsfeedContainer We need to format the time as something that's more human readable such as "3 minutes ago"
- 17. Container c = BorderLayout.centerEastWest(writePost, gallery, avatar); c.setUIID("HalfPaddedContainer"); return c; } private Container createNewsTitle(User u, Post p) { Button avatar = new Button("", u.getAvatar(6.5f), "CleanButton"); Button name = new Button(u.fullName(), "PostTitle"); Button postTime = new Button(UIUtils.formatTimeAgo(p.date.get()), "PostSubTitle"); Button menu = new Button("", "Label"); FontImage.setMaterialIcon(menu, FontImage.MATERIAL_MORE_HORIZ); Container titleArea = BorderLayout.centerEastWest( FlowLayout.encloseMiddle(BoxLayout.encloseY(name, postTime)), FlowLayout.encloseIn(menu), avatar); titleArea.setUIID("HalfPaddedContainer"); return titleArea; } private Container createPostStats(Post p) { Container stats=new Container(new BorderLayout(), "PaddedContainer"); if(p.likes.size() > 0) { Label thumbUp = new Label("", "SmallBlueCircle"); FontImage.setMaterialIcon(thumbUp, FontImage.MATERIAL_THUMB_UP); Label count = new Label("" + p.likes.size(), "SmallLabel"); stats.add(WEST, BoxLayout.encloseX(thumbUp, count)); } NewsfeedContainer Again we place the elements in a border layout but this time we wrap them in flow layouts within so they vertically align properly. This is subtle and hard to notice in the image. Notice that the name jots up just a little bit in the unaligned version but this can be more obvious when the font is smaller or the icon is larger. Also notice the placement of the menu button.
- 18. FlowLayout.encloseIn(menu), avatar); titleArea.setUIID("HalfPaddedContainer"); return titleArea; } private Container createPostStats(Post p) { Container stats=new Container(new BorderLayout(), "PaddedContainer"); if(p.likes.size() > 0) { Label thumbUp = new Label("", "SmallBlueCircle"); FontImage.setMaterialIcon(thumbUp, FontImage.MATERIAL_THUMB_UP); Label count = new Label("" + p.likes.size(), "SmallLabel"); stats.add(WEST, BoxLayout.encloseX(thumbUp, count)); } if(p.comments.size() > 0) { stats.add(EAST,new Label(p.comments.size() + " comments","SmallLabel")); } return stats; } private Container createNewsItem(User u, Post p) { Container titleArea = createNewsTitle(u, p); Component body; if(p.content.get().indexOf('<') > -1) { body = new RichTextView(p.content.get()); } else { body = new SpanLabel(p.content.get()); } NewsfeedContainer Next up is createPostStats it's again a very simple method. I broke it out just to keep the code size smaller so we can review the blocks more easily.
- 19. FlowLayout.encloseIn(menu), avatar); titleArea.setUIID("HalfPaddedContainer"); return titleArea; } private Container createPostStats(Post p) { Container stats=new Container(new BorderLayout(), "PaddedContainer"); if(p.likes.size() > 0) { Label thumbUp = new Label("", "SmallBlueCircle"); FontImage.setMaterialIcon(thumbUp, FontImage.MATERIAL_THUMB_UP); Label count = new Label("" + p.likes.size(), "SmallLabel"); stats.add(WEST, BoxLayout.encloseX(thumbUp, count)); } if(p.comments.size() > 0) { stats.add(EAST,new Label(p.comments.size() + " comments","SmallLabel")); } return stats; } private Container createNewsItem(User u, Post p) { Container titleArea = createNewsTitle(u, p); Component body; if(p.content.get().indexOf('<') > -1) { body = new RichTextView(p.content.get()); } else { body = new SpanLabel(p.content.get()); } NewsfeedContainer The stats bar appears above the like button. It's only there if there are likes or comments otherwise it shouldn't show.
- 20. FlowLayout.encloseIn(menu), avatar); titleArea.setUIID("HalfPaddedContainer"); return titleArea; } private Container createPostStats(Post p) { Container stats=new Container(new BorderLayout(), "PaddedContainer"); if(p.likes.size() > 0) { Label thumbUp = new Label("", "SmallBlueCircle"); FontImage.setMaterialIcon(thumbUp, FontImage.MATERIAL_THUMB_UP); Label count = new Label("" + p.likes.size(), "SmallLabel"); stats.add(WEST, BoxLayout.encloseX(thumbUp, count)); } if(p.comments.size() > 0) { stats.add(EAST,new Label(p.comments.size() + " comments","SmallLabel")); } return stats; } private Container createNewsItem(User u, Post p) { Container titleArea = createNewsTitle(u, p); Component body; if(p.content.get().indexOf('<') > -1) { body = new RichTextView(p.content.get()); } else { body = new SpanLabel(p.content.get()); } NewsfeedContainer I could have made this code better so it will write "1 comment" and "2 comments" etc. but I wanted to keep the code simple
- 21. " comments","SmallLabel")); } return stats; } private Container createNewsItem(User u, Post p) { Container titleArea = createNewsTitle(u, p); Component body; if(p.content.get().indexOf('<') > -1) { body = new RichTextView(p.content.get()); } else { body = new SpanLabel(p.content.get()); } body.setUIID("HalfPaddedContainer"); Button like = new Button("Like", "CleanButton"); Button comment = new Button("Comment", "CleanButton"); Button share = new Button("Share", "CleanButton"); FontImage.setMaterialIcon(like, FontImage.MATERIAL_THUMB_UP); FontImage.setMaterialIcon(comment, FontImage.MATERIAL_COMMENT); FontImage.setMaterialIcon(share, FontImage.MATERIAL_SHARE); Container buttonBar = GridLayout.encloseIn(3, like, comment, share); buttonBar.setUIID("HalfPaddedContainer"); return BoxLayout.encloseY(titleArea, body, createPostStats(p), buttonBar); } } NewsfeedContainer With that we are ready for the final method in this class createNewsItem
- 22. " comments","SmallLabel")); } return stats; } private Container createNewsItem(User u, Post p) { Container titleArea = createNewsTitle(u, p); Component body; if(p.content.get().indexOf('<') > -1) { body = new RichTextView(p.content.get()); } else { body = new SpanLabel(p.content.get()); } body.setUIID("HalfPaddedContainer"); Button like = new Button("Like", "CleanButton"); Button comment = new Button("Comment", "CleanButton"); Button share = new Button("Share", "CleanButton"); FontImage.setMaterialIcon(like, FontImage.MATERIAL_THUMB_UP); FontImage.setMaterialIcon(comment, FontImage.MATERIAL_COMMENT); FontImage.setMaterialIcon(share, FontImage.MATERIAL_SHARE); Container buttonBar = GridLayout.encloseIn(3, like, comment, share); buttonBar.setUIID("HalfPaddedContainer"); return BoxLayout.encloseY(titleArea, body, createPostStats(p), buttonBar); } } NewsfeedContainer This method assembles the post entry from the pieces we already built, the title entry. The rich text view or span label etc.
- 23. " comments","SmallLabel")); } return stats; } private Container createNewsItem(User u, Post p) { Container titleArea = createNewsTitle(u, p); Component body; if(p.content.get().indexOf('<') > -1) { body = new RichTextView(p.content.get()); } else { body = new SpanLabel(p.content.get()); } body.setUIID("HalfPaddedContainer"); Button like = new Button("Like", "CleanButton"); Button comment = new Button("Comment", "CleanButton"); Button share = new Button("Share", "CleanButton"); FontImage.setMaterialIcon(like, FontImage.MATERIAL_THUMB_UP); FontImage.setMaterialIcon(comment, FontImage.MATERIAL_COMMENT); FontImage.setMaterialIcon(share, FontImage.MATERIAL_SHARE); Container buttonBar = GridLayout.encloseIn(3, like, comment, share); buttonBar.setUIID("HalfPaddedContainer"); return BoxLayout.encloseY(titleArea, body, createPostStats(p), buttonBar); } } NewsfeedContainer The three like/comment/share buttons are packaged in a grid so they will have the same size and align properly
- 24. " comments","SmallLabel")); } return stats; } private Container createNewsItem(User u, Post p) { Container titleArea = createNewsTitle(u, p); Component body; if(p.content.get().indexOf('<') > -1) { body = new RichTextView(p.content.get()); } else { body = new SpanLabel(p.content.get()); } body.setUIID("HalfPaddedContainer"); Button like = new Button("Like", "CleanButton"); Button comment = new Button("Comment", "CleanButton"); Button share = new Button("Share", "CleanButton"); FontImage.setMaterialIcon(like, FontImage.MATERIAL_THUMB_UP); FontImage.setMaterialIcon(comment, FontImage.MATERIAL_COMMENT); FontImage.setMaterialIcon(share, FontImage.MATERIAL_SHARE); Container buttonBar = GridLayout.encloseIn(3, like, comment, share); buttonBar.setUIID("HalfPaddedContainer"); return BoxLayout.encloseY(titleArea, body, createPostStats(p), buttonBar); } } NewsfeedContainer Everything else is packaged together on a Y axis Container with good padding
- 25. © Codename One 2017 all rights reserved We have quite a few UIID’s we didn’t cover in CSS yet so lets go into those…
- 26. NewPostButton { border: 1px #cccccc cn1-pill-border; background-color: white; padding: 1mm 2mm 1mm 2mm; margin: 1mm; color: black; font-family: "native:MainLight"; font-size: 2.6mm; } GalleryButton { color: #4B4F56; font-family: "native:MainLight"; font-size: 1.5mm; text-align: center; padding: 0px 2mm 0px 2mm; margin: 0px; } HalfPaddedContainer { padding: 1.5mm; margin: 0mm; background: transparent; } theme.css The button looks like a text field, when we press it we go directly to the post editing form
- 27. NewPostButton { border: 1px #cccccc cn1-pill-border; background-color: white; padding: 1mm 2mm 1mm 2mm; margin: 1mm; color: black; font-family: "native:MainLight"; font-size: 2.6mm; } GalleryButton { color: #4B4F56; font-family: "native:MainLight"; font-size: 1.5mm; text-align: center; padding: 0px 2mm 0px 2mm; margin: 0px; } HalfPaddedContainer { padding: 1.5mm; margin: 0mm; background: transparent; } theme.css The gallery button has small font and padding so it can fit in the same row as the other elements
- 28. color: #4B4F56; font-family: "native:MainLight"; font-size: 1.5mm; text-align: center; padding: 0px 2mm 0px 2mm; margin: 0px; } HalfPaddedContainer { padding: 1.5mm; margin: 0mm; background: transparent; } CleanButton { cn1-derive: BaseButton; font-family: "native:MainLight"; font-size: 2.5mm; margin: 0px; color: #4B4F56; } PostTitle { font-family: "native:MainRegular"; font-size: 3.5mm; } PostSubTitle { font-family: "native:MainRegular"; theme.css The PaddedContainer UIID is often too heavily padded for some UI elements, this uses 1.5mm instead of 3mm in the standard padding
- 29. color: #4B4F56; font-family: "native:MainLight"; font-size: 1.5mm; text-align: center; padding: 0px 2mm 0px 2mm; margin: 0px; } HalfPaddedContainer { padding: 1.5mm; margin: 0mm; background: transparent; } CleanButton { cn1-derive: BaseButton; font-family: "native:MainLight"; font-size: 2.5mm; margin: 0px; color: #4B4F56; } PostTitle { font-family: "native:MainRegular"; font-size: 3.5mm; } PostSubTitle { font-family: "native:MainRegular"; theme.css We'll use this in several places as we go on, here it doesn't matter as much as it mostly shows an icon
- 30. cn1-derive: BaseButton; font-family: "native:MainLight"; font-size: 2.5mm; margin: 0px; color: #4B4F56; } PostTitle { font-family: "native:MainRegular"; font-size: 3.5mm; } PostSubTitle { font-family: "native:MainRegular"; font-size: 2mm; color: #aaaaaa; } SmallBlueCircle { border: cn1-round-border; background-color: blue; padding: 0.5mm; margin: 0px 2mm 0px 1mm; color: white; font-family: "native:MainLight"; font-size: 2mm; } SmallLabel { theme.css The title and subtitle use regular font which makes them standout next to the light font used in the rest of the app
- 31. color: #4B4F56; } PostTitle { font-family: "native:MainRegular"; font-size: 3.5mm; } PostSubTitle { font-family: "native:MainRegular"; font-size: 2mm; color: #aaaaaa; } SmallBlueCircle { border: cn1-round-border; background-color: blue; padding: 0.5mm; margin: 0px 2mm 0px 1mm; color: white; font-family: "native:MainLight"; font-size: 2mm; } SmallLabel { font-family: "native:MainLight"; font-size: 2mm; } theme.css This is literally a round blue circle with enough padding to show the thumb within the circle
- 32. color: #4B4F56; } PostTitle { font-family: "native:MainRegular"; font-size: 3.5mm; } PostSubTitle { font-family: "native:MainRegular"; font-size: 2mm; color: #aaaaaa; } SmallBlueCircle { border: cn1-round-border; background-color: blue; padding: 0.5mm; margin: 0px 2mm 0px 1mm; color: white; font-family: "native:MainLight"; font-size: 2mm; } SmallLabel { font-family: "native:MainLight"; font-size: 2mm; } theme.css I just need a label with a font small enough to fit. That's all the CSS entries we need so we can lean back, press play in the IDE and watch the first form element in the application come to life!