
Recommended
More Related Content
What's hot
What's hot (20)
Similar to Importance of CT Simulation in Radiotherapy Planning
Similar to Importance of CT Simulation in Radiotherapy Planning (20)
Recently uploaded
Recently uploaded (20)
Importance of CT Simulation in Radiotherapy Planning
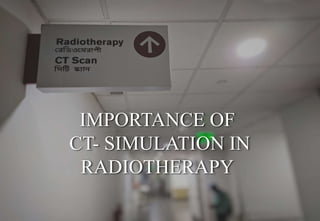
- 1. IMPORTANCE OF CT- SIMULATION IN RADIOTHERAPY
- 2. WHAT IS SIMULATION ? • A simulation is an approximate imitation of the operation of a process or system that represents its operation over time. SIMULATOR O B J E C T R E P L I C A SIMULATION PROCESS
- 3. SIMULATION TYPE IN RADIOTHERAPY 2D 3D 4D
- 4. 2D / CONVENTIONAL SIMULATION Radiotherapy field determination unit using X-ray machine. The Geometrical,Mechanical and Optical properties are same as actual teletherapy unit. Consists of following parts : 1) Gantry. 2) Simulator head. 3) X-ray generator. 4) Imager/ detector. 5) Couch
- 5. 2D / CONVENTIONAL SIMULATION ADVANTAGE DISADVANTAGE Cheapest among rest Less radiation exposure than CT Fast and Efficient Generate verification radiograph No limitation in patient positioning. Planning limited to only 2D method. Difficult to visualize anatomy. Radiation exposure.
- 6. 3D / CT SIMULATION The CT scanner is used to acquire a volumetric CT-Scan of a patients which represents the “virtual” replica of patient. CT-SIM COMPONANTS 1) Flat Couch, 2) Laser system(with external laser) , 3) X-ray tube, 4) X-ray Detectors, 5) Large Bore aperture (80cm-GE Light speed Xtra) 6) Larger Field of View (65cm-GE Light speed Xtra) 7) Collimators and attenuator, 8) Display monitor and work station, 9) Control Console.
- 7. 3D / CT SIMULATION PROCEDURE SETUP IMMOBILIZATION IMAGING
- 8. SETUP PROCEDURE IN CT SIMULATION DIAGNOSIS AREA OF INTEREST FOR IMAGING SUITABLE SETUP FOR TREATMENT
- 9. SETUP PROCEDURE IN CT SIMULATION THORAX SETUP HEAD AND NECK SETUP BREAST SETUP PELVIC REGION SETUP MOTION MANAGEMENT SPECIFIC SETUP MODIFIED/CUSTOM SETUP
- 10. IMMOBILIZATION IN CT SIMULATION “Immobilization are said to be the most crucial parts of radiation therapy treatment.” Why we need Immobilization? To position target accurately. To minimize the dose to surrounding normal tissue as far as possible. Reduces the time in daily patient setup . Makes the patient feel more secure and less apprehensive. Reduces the reliance on patient cooperation and alertness..
- 11. IMMOBILIZATION DEVICES A. Thermoplastic cast ( 3 Pts./5 Pts.) B. Index Bar. C. All in One Base plate (AIO) D. Foam wedge ( 0°,5°,10° and 15° Cushion wedge) E. Lateral Support (0° and 5°) F. Head Rest(Supine) Low Density ( With lateral neck Flap : A-1/B-3/C-5 , With out Lateral Neck Flap : A-2/B-4/C-5 and “U” Pillow) G. Head Rest (Prone) H. Low Density Positioning Blocks ( 20 mm and 40 mm) I. Low Density Positioning Wedge (9° and 18° ) J. Arm Support / Rest (Low and High) K. Hand Grip pole and Holder. L. Knee Rest / Knee support. M. Leg separator. N. Base plate extension
- 12. VISUAL OVERVIEW OF SOME IMMOBILIZATION DEVICE Thermoplastic cast: Head – 3 Point Head,Neck and Shoulders – 5 point Index Bar/Locating Bar:
- 13. VISUAL OVERVIEW OF SOME IMMOBILIZATION DEVICE All In One Base plate:
- 14. VISUAL OVERVIEW OF SOME IMMOBILIZATION DEVICE Foam Wedge: 0° Wedge Thorax and Abdomen 5° Wedge Thorax and Abdomen 10° Wedge Thorax and Abdomen 15° Wedge Thorax and Abdomen
- 15. VISUAL OVERVIEW OF SOME IMMOBILIZATION DEVICE Arm Rest: Low Arm Rest High Arm Rest
- 16. VISUAL OVERVIEW OF SOME IMMOBILIZATION DEVICE Lateral supports: Lateral support 0° Lateral support 5° Lateral support 10° Lateral support 15°
- 17. VISUAL OVERVIEW OF SOME IMMOBILIZATION DEVICE
- 18. VISUAL OVERVIEW OF SOME IMMOBILIZATION DEVICE Head Rest(Supine) Low Density With Lateral Neck Support : Head Rest(Supine) Low Density Without Lateral Neck Support :
- 19. VISUAL OVERVIEW OF SOME IMMOBILIZATION DEVICE Head Rest(Prone)
- 20. VISUAL OVERVIEW OF SOME IMMOBILIZATION DEVICE Low Density Positioning Blocks: 20 mm 40 mm Low Density Positioning Wedge: 9° 18°
- 21. VISUAL OVERVIEW OF SOME IMMOBILIZATION DEVICE Knee rest: Base Plate Extension:
- 22. VISUAL OVERVIEW OF SOME IMMOBILIZATION DEVICE Vac Lock:
- 23. IMAGING IN CT-SIMULATION Why we use CT image for Radiotherapy Planning? a. The CT images excellent soft tissue contrast allowing for greatly improved tumor localization and defining in comparison to conventional simulator. b. Patient contour may be obtained easily from CT data in particular the patients skin contains target and any organs of interest. c. The target volume and its position are identified with relative case of each CT slice.
- 24. IMAGING IN CT-SIMULATION Important Parameters for simulation Imaging via CT scan a) Scan type. b) Scan Length. c) Number of Images. d) Thick speed. e) Interval. f) Field of View. g) Energy(kV). h) Gun current rate(mA). i) Scan Protocol. Parameter inputs are different for different Setups or point of anatomical site, which we discuss later.
- 26. PRACTICAL OVERVIEW OF SETUP,IMMOBILIZATION AN IMAGING TECHNIQUE IN DIFFERENT DIAGNOSIS. All parameters are as per my departmental observation at Tata Medical Center.
- 27. BRAIN,HEAD AND NECK SETUP SUITABLE SETUP,IMMOBILIZATION AND IMAGINE ACCRODING TO DIAGNOSIS SITE SETUP MODALITY(FOR SUPINE POSITION): SETUP SHEET
- 28. BRAIN,HEAD AND NECK SETUP SUITABLE SETUP,IMMOBILIZATION AND IMAGINE ACCRODING TO DIAGNOSIS SITE IMMOBILIZATION MODALITY For brain 3 point/for Head,Neck and shoulder 5 point. Suitable Head rest according to patient comfort. Wedge and Blocks under head rest according to patient comfort. Index bar. AIO board Cushion extension. IMAGING MODALITY After taking coronal and sagittal scout. Scan Length : as per instruction. Slice Thickness : 2.5 mm ( WEBRT/PALL – 5 mm) Interval : same as slice thickness. Gun current(mA) : Auto
- 29. BRAIN,HEAD AND NECK SETUP SUITABLE SETUP,IMMOBILIZATION AND IMAGINE ACCRODING TO DIAGNOSIS SITE IV CONTRAST MODALITY (If Doctor Prescribe) SITE CONTRAST DOSE MAXIMUM DOSE INJECTION RATE DELAY TIME Brain 1.5 ml/kg 80 ml 1.2 ml/sec 60 sec Head and Neck 2 ml / kg 100 ml 1.5 ml/sec 60 sec Depends upon Creatinine Clearance. IMPORTANT POINTS TO NOTE ON RECORD 1. Table to Isocenter distance. 2. CSD 3. No. of points in mould. 4. Head rest/wedge/Block. 5. Date. 6. Other specific instruction. 7. CT Isocenter Marking on Cast or Body. TI
- 30. SUITABLE SETUP,IMMOBILIZATION AND IMAGINE ACCRODING TO DIAGNOSIS SITE SETUP MODALITY(FOR SUPINE POSITION): SETUP SHEET PELVIC REGION SETUP
- 31. PELVIC REGION SETUP SUITABLE SETUP,IMMOBILIZATION AND IMAGINE ACCRODING TO DIAGNOSIS SITE IMMOBILIZATION MODALITY Index bar. AIO board Cushion extension. 0° Foam wedge cushion. leg separator/knee rest/knee support/lateral knee support. IMAGING MODALITY After taking coronal and sagittal scout. Scan Length : as per instruction. Slice Thickness : Standard – 2.5 mm / palliative – 5 mm Interval : same as slice thickness. Gun current(mA) : Auto
- 32. PELVIC REGION SETUP SUITABLE SETUP,IMMOBILIZATION AND IMAGINE ACCRODING TO DIAGNOSIS SITE IV CONTRAST MODALITY (If Doctor Prescribe) Depends upon Creatinine Clearance. IMPORTANT POINTS TO NOTE ON RECORD 1. Table to Isocenter distance. 2. Knee distance. 3. Knee rest,leg separator position. 4. Lateral knee support position. 5. Date. 6. CT Iso center Marking on Cast or Body(Patient specific tattoo) . 7. Other specific instruction. SITE CONTRAST DOSE MAXIMUM DOSE INJECTION RATE DELAY TIME ABDOMEN 2 ml/kg 100 ml 1.7 ml/sec 60 sec PANCREAS 2 ml/kg 100 ml 2.5 ml/sec 40 sec PELVIS 2 ml/kg 100 ml 1.7 ml/sec 80 sec
- 33. SUITABLE SETUP,IMMOBILIZATION AND IMAGINE ACCRODING TO DIAGNOSIS SITE SETUP MODALITY(FOR SUPINE POSITION): SETUP SHEET THORAX SETUP
- 34. THOEAX SETUP SUITABLE SETUP,IMMOBILIZATION AND IMAGINE ACCRODING TO DIAGNOSIS SITE IMMOBILIZATION MODALITY Index bar. AIO board Cushion extension. Head rest / U Pillow 0° Foam wedge cushion. Arm rest high/low. Grip holder- Grip pole. Lateral arm support as per patient comfort. IMAGING MODALITY After taking coronal and sagittal scout. Scan type : For Lung only Helical and Axial (For overview tumor movement) Scan Length : as per instruction. Slice Thickness : Standard – 2.5 mm / palliative – 5 mm Interval : same as slice thickness or modified by system itself. Gun current(mA) : Auto
- 35. THORAX SETUP SUITABLE SETUP,IMMOBILIZATION AND IMAGINE ACCRODING TO DIAGNOSIS SITE IV CONTRAST MODALITY (If Doctor Prescribe) Depends upon Creatinine Clearance. IMPORTANT POINTS TO NOTE ON RECORD 1. Table to Isocenter distance. 2. CSD 3. Hand grip pole number and position 4. Arm rest type(High or Low) 5. Date. 6. CT Iso center Marking on Cast or Body(Patient specific tattoo) 7. Other specific instruction. SITE CONTRAST DOSE MAXIMUM DOSE INJECTION RATE DELAY TIME THORAX 1.5 ml/kg 80 ml 1.5 ml/sec 60 sec
- 36. SUITABLE SETUP,IMMOBILIZATION AND IMAGINE ACCRODING TO DIAGNOSIS SITE SETUP MODALITY(FOR SUPINE POSITION): SETUP SHEET BREAST SETUP
- 37. BREAST SETUP SUITABLE SETUP,IMMOBILIZATION AND IMAGINE ACCRODING TO DIAGNOSIS SITE IMMOBILIZATION MODALITY Index bar. AIO board Cushion extension. Head rest / U Pillow 0°/5°/10°/15° Foam wedge cushion. Arm rest high/low. Grip holder- Grip pole. Lateral arm support as per patient comfort. IMAGING MODALITY After taking coronal and sagittal scout. Scan Length : as per instruction. Slice Thickness : Standard – 2.5 mm / palliative – 5 mm Interval : same as slice thickness or modified by system itself. Gun current(mA) : Auto.
- 38. BREAST SETUP SUITABLE SETUP,IMMOBILIZATION AND IMAGINE ACCRODING TO DIAGNOSIS SITE IV CONTRAST MODALITY (If Doctor Prescribe) Depends upon Creatinine Clearance. IMPORTANT POINTS TO NOTE ON RECORD 1. Table to Isocenter distance. 2. CSD 3. Hand grip pole number and position. 4. Cushion wedge type. 5. Arm rest type(High or Low) 6. Specific bolus, 7. Scar marking with Radiodensity wire marker. 8. Scar position note on record file. 9. Date. 10. CT Iso center Marking on Cast or Body(Patient specific tattoo) 11. Other specific instruction. Same as thorax protocol.
- 39. DIBH FOR LEFT BREAST DIBH- Deep Inspiration Breath Hold Technique. Mostly used in Left Breast Irradiation. 1. Using Deep Inspiration to move Heart out of the irradiating field 2. Using RPM to track as an external marker block surrogate for internal movement. 3. Placing the marker in Xiphisternum midline. 4. Marking(Tattoo) the Free Breath,Breath hold and four corners of the marker. 5. At least 3 Practice sessions. 6. Have to note down distance between BH and FB tattoo. Free Breath marking Breath Hold marking
- 40. DIBH FOR LEFT BREAST WITHOUT DIBH WITH DIBH
- 41. SUITABLE SETUP,IMMOBILIZATION AND IMAGINE ACCRODING TO DIAGNOSIS SITE SETUP MODALITY(FOR SUPINE POSITION): MODIFIED/CUSTOM SETUP For different type of diagnosis area or sites with different immobilization and imaging modality. Example: Vaclock,Frog Leg,swimers position,Prone setup etc.
- 42. IMPORTANT POINTS FOR CT-SIM OPARATOR A. Patient consent confirmation before procedure. B. Verify Patient Identity. C. Always follow Oncologist’s instruction. D. Always aware about patient comfort. E. Choosing perfect setup as per diagnosis. F. Using suitable Immobilization device as per patient comfort and treatment site. G. Before injecting IV Contrast should aware about patient allergic reaction. H. Post IV Contrast record. I. Doctor consent confirmation of IV contrast procedure. J. Using Exact delay time during with contrast scan. K. Always ready for Emergency situation during IV contrast scan. L. Choosing right Imaging protocol as per treatment site or Instruction. M. Choosing right parameter inputs during imaging. N. Measuring TI and CSD after setup done and note down in patient record file. O. Note down other inputs in patient record file . P. Verify ROB position in correct plane. Q. Verify correct bolus and wire marker position and site. R. Verify patient scan image via doctor or physicist. S. Record images in DICOM.
- 43. THANK YOU Saikat Roy Intern – DRT Department of Radiation Oncology. Tata Medical Center.