
Recommended
More Related Content
Similar to IM,IV,IA.pptx
Similar to IM,IV,IA.pptx (20)
Recently uploaded
Recently uploaded (20)
IM,IV,IA.pptx
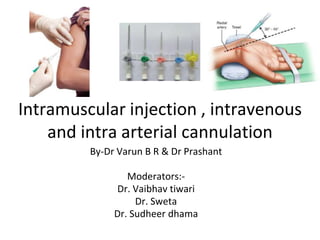
- 1. Intramuscular injection , intravenous and intra arterial cannulation By-Dr Varun B R & Dr Prashant Moderators:- Dr. Vaibhav tiwari Dr. Sweta Dr. Sudheer dhama
- 3. HISTORY The first injection was given in 1920, but became popular only after second world war. Now injections are probably the most common percutaneous procedure practiced worldwide
- 4. DEFINITION Intramuscular injections are a common yet complex technique used to deliver medication deep into the large muscles of the body It may be for curative, diagnostic or recreational purpose
- 5. Site Selection • The most common injection site is anterolateral thigh into Vastus Lateralis muscle • Never use gluteal muscle in children • The other site in adult and in older children is deltoid muscle 5
- 7. Deltoid
- 9. Skin preparation • Avoid site with oozing dermatitis or infection • If the skin is clean than no use of disinfection • Clean the site with single use spirit or alcohol swab in a circular motion in an area 5-8 cms • Pre wetted cotton swabs are better to be avoided • If spirit is not available normal saline can be used • Never use Savlon or Dettol • Let the site be dry before injection 9
- 10. Preparing Syringe • The area for preparing injection should be clean • Clean your hands with alcohol based hand wash • If you have cut or injury on fingers, cover it with water proof adhesive • No need to use gloves routinely 10
- 11. Preparing syringe • Remember to use new equipment • Observe aseptic precautions • No need to change the needle after withdrawing medication • Do not ever wipe the needle with swab • Do not keep the air bubble inside the syringe 11
- 12. Giving injection • We have found giving injection necessary • We have selected the site • We have prepared the syringe So now comes giving injection 12
- 13. Giving injection • Make the patient comfortable and give him a proper position so as to identify the proper site for injection • Properly hold the child • Hold the syringe in your hand as if holding a pen • Remove needle cap immediately before giving injection…not earlier 13
- 14. Giving injection • Ensure smooth and steady insertion of the needle at 90 degree with a dart technique • No need to aspirate • Slowly push the medication allowing muscle fiber to stretch and accommodate the injected volume • Wait for a while and remove the needle in the same direction as it was pushed • Apply gentle pressure with a dry gauze 14
- 15. Z technique 15
- 16. Preventing Needle Stick Injury • Anticipate abrupt movement of the patient and take care • More the used needle is handled or carried, the greater is the risk of sharp injury • Never try to recap, bend or manually remove needle from syringe • Do not move around with used equipment in hand • Keep needle destroyer near by only • Properly dispose it 16
- 17. Multiple injections • Some times multiple injections are to be given in a single visit especially for vaccines • Any no of injections can be given in a single visit • Use different anatomical site • If same limb is to be used than separate two injections by 1-2” 17
- 18. COMPLICATIONS • The most common one is transmission of blood borne infections mainly Hepatitis B, Hepatitis C and HIV • Abscess • Muscle or fat necrosis • Muscle fibrosis and contracture • Gangrene • Nerve Injury
- 19. Post Injection Syncope – This is known side effect especially in adolescents. So it is better to observe the patient for 10-15 minutes 19
- 20. • According to WHO Use injections only when necessary – oral medicines are effective in most cases. 20
- 23. Objectives Having completed the IV cannulation workshop you will beable to: • Describe the basic anatomy and physiology of the superficial veins of the arms and hands • Locate and assemble required equipment for IV cannulation or venepuncture • Perform a successful IV cannulation on the training arm • Demonstrate awareness of Infection Control guidelines and O H & S practices as per organisation policy • Be aware of documentation requirements in relation to cannulation • Demonstrate critical thinking relevant to managing the risks and complications of IV cannulation • Identify patient education requirements
- 24. Anatomy and physiology • Approximately 2/3 of total blood volume is in the veins which transport deoxygenated blood to the heart from the tissues • Veins are thin-walled, fibrous, have a large diameter and low pressure • Veins contract to propel the blood through the vein towards the heart • Some veins contain valves to regulate the one way flow to the heart (usually lower limbs) • The skeletal muscle pump influences venous return • Superficial and deep veins
- 25. Anatomy and physiologycont Blood vessel walls have three layers • Tunic Intima innermost, epithelial lining • Tunic Media Elastic and Smooth muscle fibres and nerve supply • Tunic Externa Outer coat
- 26. Anatomy and physiologycont Major veins of the arm • Dorsal • Cephalic • Basilic • Cubital Fossa
- 29. Cannulae • 14G • 16G • 18G • 20G • 22G • 24G • Large volume replacement • Rapid transfusion of whole blood or blood components • IV maintenance, NBM patients • IV analgesia • Paediatrics, elderly, chemotherapy patients • Paediatrics, neonates
- 31. Equipment • Dressing/IV trolley with sharps container and waste bag • Dressing pack • Gloves (sterile) • Alcoholic chlorhexidine • Transparent semi permeable dressing • Cannula (size depending on need) • Giving and Extension set (and prescribed IV fluids) • Water proof protective cover • Syringe 10ml with 0.9% Normal saline • Tourniquet • Fluid balance sheet
- 32. Assessing & preparing the patient • Check patient for baseline vital signs, diagnosis and allergies to medications, cleansing fluids & dressings • Provide a clear explanation of the procedure including potential adverse and side effects • A relaxed patient is generally easier to cannulate • Assess the dominant/non-dominant side and check the veins for status and suitability
- 33. Preparing equipment • Equipment should be gathered on trolley in treatment room with sharps container • IV fluids should be prepared by priming the giving set • The equipment should not be opened until in the patient’s room and patient education, assessment of vein and appropriate positioning has been attended
- 34. Positioning the patient • If possible use the non dominant arm • Raise bed prior to procedure • Place the arm in a supported comfortable position • Use a tourniquet to find vein but release it while you are getting equipment ready • Position patient with pillows or towels • Have IV trolley close by
- 35. Preparing vein Warm veins by • Rubbing • Washing client’s hands under warm water • Apply warmed towel • If limb is warm ask the patient to gently clench and unclench their hand • Or gently rub up and down the vein
- 36. Before inserting cannula • The tourniquet is applied above the IV insertion site and should not be left on for more than 2-3 minutes • Don gloves and clean site with appropriate solution using a circular outward movement • Allow site to air dry or dry with sterile swab
- 37. Inserting the cannula • Hold cannula and rotate the barrel 360 degrees • Apply skin traction to immobilise the vein • Ensure cannula has bevel side UP and insert at approximately 30 degree angle • You will see a flashback of blood in the chamber once you have pierced the vein • Then advance the cannula a few more millimetres and then flatten the cannula, stabilise the device and advance the cannula until at skin level • Remove the stylet and apply pressure just beyond the catheter tip
- 38. Inserting the cannulacont • Gently stabilise the cannula hub • Release the tourniquet • Attach the extension line • Apply dressing and secure cannula • Flush cannula with 5-10ml 0.9% sodium chloride to ensure patency • Connect to IV fluid • Dispose of sharps and waste • Document in patient notes
- 39. Dressing • A transparent sterile occlusive dressing is the optimal dressing to use • Before applying dressing, ensure site is clean of blood and moisture • Check with patient re allergies to dressings
- 40. Documentation • Site of insertion-vein and arm/hand • Type and gauge of cannula • Date and time of insertion • Type and amount of IV solution • Reason for IV therapy “Because of the invasive nature of I.V. therapy, patients may experience unexpected problems, even with diligent nursing care. Your careful documentation helps prove that the care you provided met the standard of care…” (Rosenthal, 2005, p.28)
- 41. Potential complications • Extravasation • Haematoma • Phlebitis • Venous Spasm • Occlusion • Thrombophlebitis • Infection
- 42. Extravasation The infiltration of a drug from an I.V. line into surrounding tissue. Causes • Catheter erodes through the vessel wall at a second point, • Increased venous pressure causes leakage around the venepuncture site • When a needle pulls out of the vein. • Vesicant drugs/solutions may cause severe tissue injury Signs & Symptoms • Oedema and changes in the site's appearance • Coolness of the skin. • Slowing of infusion • Pain or a feeling of tightness around the site. • Possible consequences include necrotic ulcers, infection, disfigurement, and loss of function. Intervention • Remove cannula • Elevate affected arm • Apply ice pack (early) or warm compress (late)
- 43. Haematoma Localised collection of extravasated blood, usually clotted, in an organ or tissue. Cause • Blood leaking out of the vein into the tissue due to puncture or trauma Signs & Symptoms • Swelling, tenderness and discolouration Prevention • Proper device insertion •Pressure over site on removal of cannula Intervention • Apply appropriate pressure bandage, monitor the site
- 44. Phlebitis Inflammation of the vein Cause • Poor aseptic technique • High osmolarity I.V. infusions or drugs • Trauma to the vein during insertion/incorrect cannula gauge • Prolonged use of the same site Signs & Symptoms • Tenderness, redness, heat and oedema • Advanced-induration, palpable venous cord Intervention • Remove cannula • Apply warm compress • Observe for signs of infection • If phlebitis is advanced antibiotics may be required
- 45. Venous spasm Spasm of the vein wall Cause • Patient anxiety • Cold I.V. fluids • Drug irritation • Trauma to the vein during cannula insertion Signs & Symptoms • Pain • Slowing of the I.V. infusion • Blanching at the insertion site • Vein difficult to palpate Intervention • Apply warm compress • Slow the infusion rate • Reassure the patient
- 46. Occlusion • Slowing orcessation of fluid infusion due to: • Fibrin formation in or around the tip of the cannula • Mechanical occlusion (kink) of the cannula Cause • Cannula not flushed • Kinking of the cannula • Back flow or interrupted flow Signs & Symptoms • I.V. not running • Blood in the line • Discomfort Intervention • Check for kinks in cannula • Raise IV higher • Remove cannula
- 47. Thrombophlebitis Formation of a thrombus and inflammation in the vein, usually occurs after phlebitis. Cause • Injury to the vein • Infection • Chemical irritation •Prolonged use of the same vein Signs & Symptoms • Tenderness/redness • Heat/oedema • Cordlike appearance of the vein • Slowing of the IV infusion Intervention • Remove cannula • Observe for signs of infection • Change cannula frequently (48-72hrs)
- 48. Infection Pathogen in the surrounding tissue of the I.V. site. Cause • Lack of asepsis •Prolonged use of the same site Signs & Symptoms • Tenderness and swelling • Erythema/purulent drainage Intervention • Remove cannula • Antibiotics may be required • Documentation
- 50. Preventing complications • Know your organisation’s policy on IV therapy • Check and inspect the IV site regularly as per your facility policy • Ask the patient how the IV site feels • Document • Troubleshoot at first sign • Report any problems
- 51. Hints Successful peripheral intravenous cannulation increases with •Meticulous attention to proper technique •The use of proper equipment •Familiarity with anatomy •Knowledge of a variety of approaches to accessing peripheral veins •Knowledge of the latest evidence in the area (this should drive your organisation’s policies around cannulation and IV management)
- 52. IV access decision tree Edwards,A., Muir,Y.,Grieves,L.,& Willis, K 2010.
- 54. INVASIVE ARTERIAL BLOOD PRESSURE MONITORING INDICATIONS : • Induced current / Anticipated hypotension • Wide BP fluctuations • End organ disease necessitating precise beat to beat pressure regulation • The need for multiple arterial blood gas or other blood analyses. CONTRAINDICATIONS : If possible , catheterization should be avoided in smaller end arteries lacking collateral blood flow or in extremities where there is a suspicion of pre existing vascular insufficiency
- 55. SELECTION OF ARTERY FOR CANULATON : RADIAL ARTERY : commonly used -- superficial location and substantial collateral flow(in most patients the ulnar artery is larger than the radial artery and there are connections between the two via the palmar arches ). • Allen’s test is simple but not reliable , method for assessing the safety of radial artery cannulation.
- 56. ULNAR ARTERY : Difficult to cannulate as it is deep and tortuous, and usually not considered because of the risk of compromising blood flow to the hand. BRACHIAL ARTERY :Large and easily identifiable in antecubital fossa. Its proximity to the aorta provides less wave form distortion. However , being near the elbow predisposes brachial artery catheters to kinking. FEMORAL ARTERY :Prone to atheroma formation and pseudoaneurysm but often provides excellent access. Femoral site has been associated with increased incidence of infectious complications and arterial thrombosis.
- 57. DORSALIS PEDIS AND POSTERIOR TIBIAL arteries are some distance from the aorta and therefore have the most distorted waveforms. AXILLARY ARTERY :surrounded by axillary plexus, nerve damage can result from a hematoma or traumatic cannulation. Air and thrombi can quickly gain access to the cerebral circulation during vigorous retrograde flushing of axillary artery catheters
- 58. NORMAL WAVEFORM OF ARTERIAL BP :
- 59. Normal Arterial Pressure Waveform • Waveform result from ejection of blood from the left ventrical during systole followed by peripheral run of during dyastole • Systolic wave follow ECG R wave • Steep pressure upstroke, peak ensure decline down slope interrupted by dicrotic knotch • Decline during diastole after ECG T wave reach nadir at end diastole
- 60. Abnormal Arterial Pressure Waveform • Aortic Stenosis – Pulsus Parvus (Narrow pulse pressure), Pulsus tardus (delayed upstroke) • Aortic Regurgitation – Bisferience Pulse (Double Peak) Wide Pulse Pressure. • Hypertrophic Cardiomyopathy – Spike and dome (Mid systolic Obstruction • Systolic Left Ventricular Failure – Pulses alterans (Alternate Pulse pressure amplitude • Cardiac Tamponade – Pulsus paradoxus (Exaggerated decrease in systolic BP during spontaneous inspiration more than 10 to 12 mmhg
- 61. Arterial Pressure Monitoring and Waveform Analysis for Prediction of Volume Responsiveness Inspiratory Phase Increase Intrathorac ic Pressure and Decrease left ventricle after load Increase Total Lung Volume and Displays Blood from Pulmonary Venus Reservoir to Left Side Increase Left Ventricle preload Increase Stroke Volume
- 62. • During Expiration – Situation reverse – Stroke Volume Decrease - Systemic Arterial BP decrease • This Cycle of increase and decrease in BP and stroke volume in response to inspiration and expiration is known as systolic pressure variation (SPV) • In mechanically ventilated patient normal SPV – 7 to 10 mmhg with up change 2 to 4 mmhg and down change 5 to 6 mmhg values greater than this indicate hypovolemia • Preload Reserve –physiological state in which volume expansion or fluid challenge shift the patient upward on the frank starling curve ,which lead to increase in stroke volume and increase in CO
- 63. • PULSE PRESSURE VARIATION- normally less then 13 -17 % • values more then 10-13% positive response to volume expansion
- 64. Technical Aspect of Direct BP Measure • Factor Including Extension Tubing, Stop Cock, Flush Device, Recorder, Amplifier and Transducer may confound the measured way form • Mostly invasive BP monitoring system are underdamped second order dynamic system that demonstrate simple harmonic motion dependent upon elasticity, friction and mass. These properties determine frequency response or dynamic response • Natural Frequency – How rapidly system oscillate after a pertubation • Damping Coefficient – How rapidly it return to its prior resting state • Original Pressure Wave is charactersied by its fundamental frequency clinical as a pulse rate and expressed as cycle per second ( Example – If pulse rate 120/minute, frequency = 2hz)
- 65. • 6 to 10 harmonics of fundamental frequency (Pulse rate) are required to provide distortion free reproduction of most arterial pressure waveform • If natural frequency is to low pressure Wave form recorded on the monitor will Be exaggerated or amplified
- 66. • Overdamped Waveform - Slurred upstroke absent dicrotic notch and loss of fine details • Lower the natural frequency narrower the range of acceptable damping coefficient • Adding bubble to the monitoring system increase damping and decrease its natural frequency
- 67. Transducer Setup – Zeroing & Leveling • Transducer zeroing and leveling are distinct and separate • Zeroing establishes the zero reference point as ambient atmospheric pressure while leveling align this reference point relative to the patient body • Transducer should be placed best to estimate aortic root pressure, it is 5 cm posterior to the sternal border. • However Conventional Location – Mid thoracic level, which correspond most closely to mid left atreal position • During sitting neurosurgical procedure, It is more informative to place it at level of ear which approximate to circle of willis
- 68. Complications : Complications of intra aterial monitoring include : Hematoma ,bleeding (particularly with catheter tubing disconnections ) , vasospasm , arterial thrombosis , embolization of air bubbles or thrombi , pseudoaneurysm formation , necrosis of skin overlying the catheter , nerve damage , infection ,necrosis of extremities or digits and un intentional intra arterial drug injection. Factors associated with an increased rate of complications include prolonged cannulation , hyperlipidemia , repeated insertion attempts , female gender , extra corporeal circulation, the use of larger catheters in small vessels and use of vasopressors . RISK is reduced with good aseptic techniques , when the ratio of catheter to artery size is small , when saline is continously infused through the catheter at a rate of 2-3 mL/hr and when flushing of the catheter is limited.
- 69. THANK YOU