
Recommended
More Related Content
What's hot
What's hot (20)
Similar to #Laryngoscopes face mask-airway & endotracheal tubes
Similar to #Laryngoscopes face mask-airway & endotracheal tubes (20)
More from Nisar Arain
More from Nisar Arain (20)
Recently uploaded
Recently uploaded (20)
#Laryngoscopes face mask-airway & endotracheal tubes
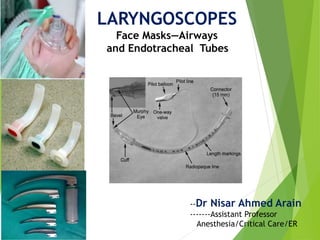
- 1. LARYNGOSCOPES Face Masks—Airways and Endotracheal Tubes --Dr Nisar Ahmed Arain -------Assistant Professor Anesthesia/Critical Care/ER
- 2. FACE MASK
- 3. INTRODUCTION 1-It is the device which allows administration of gases to the patient from the breathing system without introducing any apparatus to the patients mouth
- 4. DESCRIPTION OF MASK ---A Face mask can be made up of Black rubber, clear Plastics, Elastomeric material or combination of these Parts of the Face Mask BODY -It constitutes the main part of the mask. This Transparent body allows observation of Moisture, Vomitus, and secretions etc.
- 5. SEAL:- ---This comes in contact with the Face. Two types are available a-Pad or Cushion:-Inflated with air b-Flap:-Flexible extension of the body CONNECTOR:- (Orifice / collar ) a-Opposite to the seal b-Thickened fitting of 22 mm ID c-Ring with hooks helps in strapping the Mask
- 6. SPECIFIC MASKS -This can be moulded to conform to the Anatomy of Face -It has slightly Malleable rubber body, a sharp notch for the nose and a curved chin section -- 1-Anatomical Mask
- 7. 2-RANDELL-BAKER-SOUCEK (RBS) mask -It is designed for Pediatric patients < then 10 years -It has a triangular body and Low dead space -It is used in Tracheostomy and Acromegaly patients
- 8. Size Age group Dead space 0 preterm 3 cu.mm 1 infant 4 cu.mm 2 1 to 3 years 8 cu.mm 3 4 to 10 years 12 cu.mm
- 9. 3-ENDOSCOPY MASK -Designed to allow mask ventilation during Endoscopy -It has a port or Diaphragm in the body to allow Fibro scope insertion
- 10. 4-SCENTED MASK -Scent incorporated into the Mask by the manufacturer or Anesthetic provider -Added for better acceptability and pleasant experience during induction -Its Disadvantage is Ethyl Alcohol in some flavours may affect accuracy of Gas monitors -
- 11. TECHNIQUES OF USE -The face mask should form tight seal on the patients face while fitting comfortably in the user’s hands -The smallest mask is most desirable because It will cause least increase in dead space -It is easy to hold and less likely to result in pressure on Eyes -There are several methods of holding Mask
- 12. ONE HAND METHOD -The Thumb and the index finger of the Left hand are placed on mask body on opposite sides of connecter to push it downward to prevent Leak -The remaining three fingers are placed on the mandible such that middle finger is applied to the mentum, the ring finger on the body of the mandible and little finger at angle of the mandible to give Jaw thrust anteriorly.
- 13. ONE HAND METHOD TECHNIQUE
- 14. TWO HANDED METHOD TECHNIQUE -As it requires both hands, a second person is necessary for assisted or controlled ventilation -Here thumbs are placed on the either side of the body of masks, and index fingers are placed under the angles of the Jaw, Mandible is lifted and head is extended -If a leak is present, downward pressure on mask can be increased by Anesthiologist’s chin on the mask elbow
- 16. TWO HANDED METHOD TECHNIQUE Two Handed Jaw Thrust One person stands at head end of patient and performs jaw thrust with his left hand at angle of left mandible while his right hand compresses the reservoir bag. The 2nd person stands at the patients shoulder facing 1st person. This persons Rt hand covers the Lt hand of the 1st person and the Lt hand Achieves Rt sided Jaw thrust and mask seal.
- 17. Claw Hand Technique -It is useful for children undergoing short duration procedures. -The Anesthesiologists stands at the side of bed facing the child. -The face mask is applied to face by using the Rt hand with the palmar surface facing upwards. The ring & middle finger are placed under the angle of jaw & the index finger & thumb encircle the body of mask.
- 18. Dead space in face masks -Face mask and its adaptor increase dead space and it may contribute 30% or more of tidal volume in neonates and infants. - It can be reduced by a- using smaller size mask b- increasing pressure on mask c- blowing a jet of fresh gas into the mask d- changing the volume of the seal cushion
- 19. Advantages -Lower incidence of sore throat - requires less anesthetic depth than tracheal tube or supraglottic device - No need of muscle relaxants - The face mask may be the most cost efficient method for short cases
- 20. Disadvantages -Anesthesiologist`s hands are tied up -Higher fresh gas flows are often needed -During remote anesthesia, airway access is difficult (CT & MRI) -Often more episodes of oxygen desaturation & require more intraoperative airway manipulations
- 21. Complications -Skin problems- dermatitis, pressure necrosis - Nerve injury -Eye injury – conjunctival chemosis, eyelid edema & corneal injuries. -Gastric Inflation -Latex allergy - Lack of co-relation between arterial & end tidal CO2 -Environmental Pollution with anesthetic gases -Jaw Pain & User fatigue.
- 22. AIRWAY
- 23. Introduction -A fundamental responsibility of anesthesia providers is to maintain a patent airway -The airway passage has a rigid posterior wall and a collapsible anterior wall consisting of the tongue and epiglottis -Under anesthesia the tongue & epiglottis falls back into the posterior pharynx occluding the airway -The purpose of airway is to lift the tongue and epiglottis away from the posterior pharyngeal wall & maintain a patent airway
- 25. Terminology Artificial airway -Any device that aims to maintain oral or nasal air passages. It may be -Simple supraglottic device such as oropharyngeal or nasopharyngeal airways. These may not be sufficient to maintain the patency of airway on their own and may require patients jaw to be supported as well - Augmented supraglottic device such as LMA and airway management -Infraglottic devices such as Endotracheal tubes, tracheostomy tubes, jet ventilation catheters.
- 26. Oropharyngeal Airways Description -It extends from lips to pharynx, fitting between tongue and posterior pharyngeal wall. Made up of elastomeric or plastic materials. Parts are -Flange it is at buccal end to prevent it from moving deeper into mouth & may also serve to fix airway in place. -Bite Portion it is straight & fits between teeth or gums -Curved portion extends backwards to correspond the shape of tongue & palate.
- 27. size colour length(cm) 000 Violet 3.5 00 Blue 4.5 0 Black 5.5 1 White 6.5 2 Green 7.5 3 Orange 8.5 4 Red 9.5 5 Yellow 10.5 SIZES --The American National Standard specifies that the size of oral airways be designated by a no. i.e the length in cms.
- 28. SPECIFIC AIRWAYS Most frequently used airway & has large flange & reinforced bite portion with tubular channel for air exchange & suctioning. --Guedel Airway
- 29. Cuffed Oro-Pharyngeal Airway -It is Guedel`s Airway with an inflatable cuff designed to seal the oropharynx. It has an integral bite block & a 15mm connector for attachment of the breathing circuit. -The cuff is inflated with air to displace the base of tongue and form a low pressure seal with the pharynx & provide an open airway.
- 30. Patil-Syracuse Endoscopic Airway -It was designed to aid fiber-optic intubation. It is made of aluminum - It has lateral channels & a central groove on the lingual surface to allow passage of fiberscope. A slit in distal end allows fiberscope to be manipulated in antero-posterior direction but limits lateral movements.
- 31. Berman Intubating Airway --It is tubular along its entire length. It is open on one side so that it can be split & removed from around a tracheal tube. It can be used as an oral airway or as an aid to fiberoptic or blind oro-tracheal intubation
- 32. Williams Airway Intubator -It is designed for blind tracheal intubation and can also be used for fiberoptic intubation or as an oral airway. -It is available in 2 sizes #9 and #10 which will admit upto 8 and 8.5 mm tracheal tube respectively. -The proximal half is cylindrical while distal half is open on lingual surface
- 33. Ovassapian Fiberoptic Intubating Airway -Designed for fiberoptic intubation -Has a flat lingual surface which gradually widens at distal end and 2 vertical sidewalls at the buccal end between the sidewalls are a pair of guide walls that curve towards each other which are flexible and permit removal of airways around the tracheal tube - The proximal half is tubular & acts as bite block. The distal half is opened posteriorly & it can accommodate tracheal tube upto 9 mm id
- 34. . METHODS OF INSERTION OF AIRWAYS - Pharyngeal and laryngeal reflexes should be depressed before an airway is inserted to avoid coughing and laryngospasm. - Selecting the correct size of airway is important correct size is estimated by holding the airway next to pts mouth & the tip should be at the angle of mandible -The best criteria for proper size & position is unobstructed gas exchange
- 35. Oral airway may be inserted in two ways --The jaw opened with left hand --The airway is inserted with its concave side towards the upper lip and when the junction of bite portion and curved section is near the incisors, the airway is rotated 180° and slipped behind the tongue in the final position
- 36. A tongue blade is used to push forward and depress the tongue & the airway is inserted with concave side towards the tongue & is advanced. Oral airway may be insertion
- 37. OTHER USES -May be used to prevent patient from biting and occluding ETT -Protect the tongue from biting -To facilitate suctioning -To obtain better mask fit
- 38. NASOPHARYNGEAL AIRWAY (nasal trumpet/ nasal airway) -It extends from nose to pharynx, the pharyngeal end should be below base of tongue but above the epiglottis. -A nasal airway is better tolerated than oral airway if the pt has intact airway reflexes. Description -It resembles a shortened tracheal tube with a flange at the outer end to prevent it from completely passing into the naris. It is made up of plastic or rubber and the size is designated by the inner diameter in mm
- 40. Nasopharyngeal airway specific types -It is plastic with large flange and flat distal end and is supplied with an introducer which has balloon on its tip -Before insertion, the introducer is inserted into the airway until the tip of balloon is just past the end -Air is injected until the balloon tip is inflated to approx outer diameter of tube -The complete assembly is lubricated and inserted through the nostril after it is in place, the balloon is deflated & introducer is removed -- Linder Nasopharyngeal Airway
- 41. Cuffed Nasopharyngeal Airway It is similar to a short, cuffed tracheal tube. It is inserted through the nose into the pharynx; cuff inflated & then is pulled back until resistance is felt. Binasal Airway It consists of 2 nasal airways joined together by an adaptor for attachment to the breathing system. Can be used to administer anesthesia
- 42. INSERTION The diameter of nasal airway should be the same as needed to insert the tracheal tube (0.5-1.0mm smaller than oral tracheal tube). Before insertion it should be lubricated thoroughly along its entire length. The airway is held with the bevel against septum & gently advanced posteriorly while being rotated back & forth.
- 43. COMPLICATIONS 1-Airway obstruction 2-Epistaxis 3-Ulceration & Necrosis 4-Dental Damage 5-CNS trauma 6-Laryngospasm & Coughing 7-Aspiration or Swallowing of part or all of the airway 8-Latex Allergy 9-Gastric distension
- 44. LARYNGOSCOPES
- 45. --A laryngoscope is an instrument used to view larynx and adjacent structures, most commonly for introducing tube into the trachea --Laryngoscopes can be considered under two broad headings --Retractor type like the Macintosh laryngoscope --Fibreoptic Laryngoscope Two types are available - Rigid fiberoptic laryngoscope - Flexible fiberoptic laryngoscope Introduction of Laryngoscopes
- 46. RIGID LARYNGOSCOPES -These are manufactured either as single piece or separate detachable blade and handle. -For detachable handle & blade the light source is energized when blade & handle are locked in operating position. A single piece laryngoscope has a switch on handle that controls power to lamp. Rigid Laryngoscope has 2 parts 1. Handle 2. Blade
- 47. Handle -The handle is the part that is held in the hand during use. It provides the power source for the light. Most often this is from disposable batteries -Fiberoptic illuminated laryngoscope may use a remote electrically operated light source. -The handle is fitted with a hinge pin that fits a slot on the base of the blade
- 48. Handles are available in variable sizes and have rough surface for improved grip
- 49. -Although most blades form right angle with the handle when ready to use. The angle may also be acute or obtuse. - An adapter may be fitted between the handle and the blade to allow angled to be altered. Howland lock is such an example. -The patil-syracuse handle can be positioned and locked in four different positions (45°, 90°, 135° and 180°)
- 51. size Intended use 000 Small premature infant 00 Premature infant 0 Neonate 1 Small child 2 Child 3 Adult 4 Large adult 5 Extra large adult Blade -The blade is a component that is inserted into the mouth -When a blade is available in more than one size, blades are numbered, with the number increasing with size.
- 52. Parts of the blade include 1. base 2. spatula/tongue 3. heel 4. flange 5. web 6. tip 7. light source
- 53. Types of Blades -There are several types of blades which may be advantageous in some particular situations. -- Macintosh Blade --The Macintosh blade is one of the most popular. The tongue has a smooth, gentle curve that extends from the base to the tip. In cross- section, the tongue, web. and flange form a reverse 'Z'. Cervical spine movement is greater compared to the Miller blade.
- 54. Left handed Macintosh Blade -- The left handed Macintosh blade has the flange on the opposite side from the usual Macintosh blade. This blade may be useful for the abnormalities of right side of the face or oropharynx, left handed persons, intubating in the right lateral position, and positioning a tracheal tube directly on the left side of the mouth.
- 55. Improved Vision Macintosh Blade The Improved Vision (IV) Macintosh blade is similar to the standard version except that the mid portion of the tongue is concave to allow greater visualization of the larynx
- 56. Polio Blade -The blade is offset from the handle at an obtuse angle to allow intubation of patients in iron lung respirators or body jackets - Patients with obesity, breast hypertrophy, kyphosis with severe barrel chest deformity, short neck, or restricted neck mobility. -Disadvantages of this blade are that little force can be applied and control is minimal
- 57. Oxiport Macintosh (Mac/port) The Oxiport Macintosh blade a conventional Macintosh blade with a tube added to deliver oxygen
- 58. Tull Macintosh The Tull (suction) blade is a modified Macintosh that has a suction port near the tip. The suction channel extends next to the handle and has a finger controlled valves so that suction can be controlled by the laryngoscopist.
- 59. Fink Blade -The Fink blade is another modification of the Macintosh -The tongue is wider and has a sharper curve at the distal end. The height of the flange is reduced, especially at the proximal end The light bulb is placed farther forward than on the Macintosh
- 60. Bizarri-Guiffrida Blade -The Bizarri-Guiffrida blade is a modified Macintosh. The flange is removed except for a small part that encases the light bulb. -This was made to limit damage to the upper teeth -The blade is useful for patients with a limited mouth opening, prominent incisors, receding mandible, short and thick neck or anterior larynx
- 61. Miller Blade -The tongue is straight with a slight upward curve near the tip -In cross-section the flange web, and tongue form a C with the top fattened -The lamp may be either on the right or left side of the blade.
- 62. Oxiport Miller Blade =The Oxiport Miller (also called Miller/port, oxyscope) blade has a built- in tube that allows delivery of oxygen or other gases during intubation. The tube also may be used for suction. =Insufflation of oxygen during intubation using this blade has been found to decrease oxygen desaturation in spontaneously breathing anesthetized patients
- 63. Tull Miller Blade =Tull (suction) Miller blade is a standard Miller blade with a suction tube whose port ends near the tip of the blade =Near the handle is a finger-controlled port that allows control of suction with a finger.
- 64. Mathews Blade -The Mathews blade is a straight blade with a wide and flattened petaloid configuration tip. It is designed for difficult nasotracheal intubations
- 65. Alberts Blade =It has a cut-away flange to increase the visibility. There is recess to facilitate tracheal tube insertion. The blade forms a 67° angle with the handle. It is used for pediatric pts
- 66. Double Angle Blade =The spatula of double angle blade has 2 angulations 20° and 30°, to improve lifting of the epiglottis. =The flange has been eliminated. The bulb is located at left edge of the blade between the 2 curvatures. The blade may be useful for the patient with anterior larynx.
- 67. Flexible tip blade =It has a hinged tip that is controlled by lever attached to the proximal end of the blade =When the lever is pushed towards the handle the tip of the blade is flexed eg: Mc-Coy, flipper flex tip etc. =It may improve the chances of successful intubation by elevating the epiglottis particularly in case of difficult intubation. =Less force and less stress response.
- 68. Mc Coy blade
- 69. Techniques of use positioning the head The head should be positioned so that the passage- way to the larynx is brought into a straight line for the best possible view of the vocal cords. The optimal position for most patients is flexion of 35° of the lower cervical spine and extension of the head of 85-90° at the atlanto-occipital level, the so- called sniffing position. In children, it may be unnecessary to flex the lower cervical vertebrae, and in neonates it may be necessary to elevate the shoulders because the head is relatively larger.
- 70. =The laryngoscope handle is held in the left hand. The fingers of the right hand are used to open the mouth and spread the lips apart. =The blade is inserted at the right side of the mouth =This reduces the likelihood of incisor teeth damage and helps push the tongue to the left. =The blade is advanced on the side of the tongue toward the right tonsillar fossa, so that the tongue lies on the left side of the blade =When the right tonsillar fossa is visualized, the tip of the blade is moved toward the midline. The blade is then advanced behind the base of the tongue elevating it, until the epiglottis comes into view.
- 71. =There are two methods for elevating the epiglottis, depending on whether a straight or curved blade is being used. Straight Blade Technique =The blade is made to scoop under the epiglottis and lift it anteriorly. The vocal cords should be identified. =If the blade is advanced too far, it will result in elevation of the larynx as a whole rather than exposure of the vocal cords. =The straight blade can also be inserted into the vallecula and used in the same manner as a curved blade.
- 72. Curved Blade =After the epiglottis is seen, the blade is advanced until the tip fits into the vallecula =Traction is then applied along the handle at right angles to the blade to carry the base of the tongue and the epiglottis forward. =The glottis should come into view
- 73. The Curved and Straight Blades
- 74. Bullard laryngoscope RIGID FIBEROPTIC LARYNGOSCOPES =Description It has a rigid metal blade specially shaped to follow the contour of the oropharynx. =Fiberoptic bundles for illumination & operatory viewing are housed in a sheath on the posterior aspect of blade =A viewing arm with eye-piece extends at a 45°angle from the handle. A video camera can be attached to eyepiece for remote viewing. =A working channel extends from the scope body to the point where the light bundles end at the tip. It can be used for suction, oxygen insufflations, administration of L.A/ Saline, or jet ventilation catheter.
- 75. a-Pediatric b-Pediatric long – for babies upto 8-10yrs of age c-Adult version – for children more than 10yrs & adults Advantages =It causes less cervical spine movement than conventional laryngoscopy. =Requires mouth opening of only 7mm =Rapidity of intubation = Low risk of failed intubation or trauma to lips or teeth -- SIZES --3 sizes are available
- 76. Disadvantages =Requires experience & Maintenance of skills & is somewhat expensive =Intubation with ETT >7.5mm may be more difficult. =Certain ETT & Double lumen tubes will not fit the stylet
- 77. Wu-Scope It combines a rigid, tubular blade & a flexible fiberscope. Flexible Fiberscope portion The fiberscope has short light & image transmitting fiberoptic bundles & tip deflection control Blade portion It has 3 detachable metal parts handle, main blade & bivalve element. Details
- 78. Handle =cone shaped tube that receives the fiberscope at the top & connects to the main blade at the base. The handle to blade angle is 110° Main blade & bivalve element are anatomically shaped When positioned together, they form 2 passage ways- a larger 1 for suction catheter or ETT & a smaller 1 for fiberscope. =An oxygen channel is alongside the slot for fiberscope =Different sizes of blades & bivalve element can be used with the handle =The adult blade can accommodate ETT upto 8.5mm
- 80. Advantages =Can be used successfully to place both tracheal & double lumen bronchial tubes in difficult-to-intubate pts =No forceps or stylet is needed so risk of airway injury is low =Suctioning & oxygen administration can done simultaneously. Unlike flexible fiberoptic endoscopy, one can view ETT passing through glottis into trachea. =There is no need for head extension or tongue lifting.
- 81. Disadvantages =Requires experience or Maintenance of skills & high initial cost =Time required to assemble or disassemble the device is more =Application of cricoids pressure decreases the ease of intubation while using this device.
- 82. Upsher-Scope Details =It consists of C-shaped metal blade, shaped to approximate curve of oropharynx. =The distal part has an upward curve. To the left are 2 tubes that carry fiberoptic bundles Proximally the viewing bundle terminates in the eye piece while the light bundle makes contact with the light source at the handle.. It is presently available only in adult size
- 83. Advantages =It can be used with all size of adult ETT =Useful to intubate pts with difficult airways in a reasonable time Disadvantages =Not suitable for naso-tracheal intubation =In routine intubation this scope has demonstrated no advantages over the conventional laryngoscopes
- 84. VIDEO LARYNGOSCOPE =It can be created by attaching video system to a flexible laryngoscope or an optical stylet. It has many advantages =The displayed anatomy is magnified & a larger viewing angle is provided =In addition to allowing laryngoscopy & intubation to be visualized, it can be used to observe vocal cord movements after thyroid surgery, verify tracheal tube position & aid in tracheal tube exchange = Results in less neck movement than conventional laryngoscopy =By projecting the image it makes a good teaching tool =Limitations of these device is the need for a video endoscopy monitoring system
- 85. =It has Macintosh blade attached to the handle = The image- light bundle is threaded through a small guide in the blade & advanced 2/3 of the length of the blade =Provides better view than traditional Macintosh Laryngoscope VIDEO MACINTOSH INTUBATING LARYNGOSCPE
- 86. GLIDE SCOPE Description =It has a miniature digital camera underside of a plastic blade. A light emitting device( LED) mounted beside the camera provides illumination =Blade has a 60° bend at the midpoint The Glide Scope is available in adult & pediatric sizes =Studies shows this scope yields a comparable or superior glottis view compared to direct laryngoscopy =It causes less cervical movements than Macintosh blade
- 87. FLEXIBLE FIBEROPTIC LARYNGOSCOPE Introduction =The 1st use of flexible fiberoptic technology in the airway management can be credited to Dr P Murphy who in 1967 invented Choledochoscope for intubation of trachea =The flexibility of these devices means that they can be made to follow virtually any anatomical space to return an image of the objective. The technique of flexible fibreoptic intubation has become a gold standard for management of difficult laryngoscopy. =This has tended to create the impression that the technique is solution to all difficult airways, but this is patently not so.
- 88. Principles & Design =The pathway through which the illumination & the image pass consists of thousands of very fine glass fibers, each typically of 10µm in diameter Each fiber consists of a central glass core surrounded by a thin cladding of another type of glass with different refractive index. As a result of difference in refractive indices, light entering the glass fiber undergoes total internal reflection along the length of the fiber to emerge at the other end For image transmission, the arrangement of fibers relative to one another must be identical at either end of the bundle, as each fiber carries tiny portion of the overall image. This is called a COHERENT BUNDLE.
- 90. Parts =It is composed of several parts, a light source, handle & flexible insertion portion. The handle is the part to be held in hand during use. It includes the eyepiece, focusing ring, working channel port & the tip control lever. The insertion tube carries 2 light bundles 1 image bundle 1 working or biopsy channel 2 angulation wires, which control the more flexible tip of device
- 91. = These are held together with a stainless steel spiral wrap followed by a stainless steel braid & covered by waterproof material, to give a rigid cross section while allowing overall flexibility. The fiberscope is axially rigid to twisting forces thus rotation of the control handle results in similar rotation of the tip. =The fiberscope uses a powerful external cold light source so that the tissues are not damaged by radiant heat.
- 92. Usage =The intubating fiberscopes are available with insertion tubes ranging in size from 2.5mm external diameter to over 6mm with proportionately larger working channels =A device with external diameter of 3.5mm is optimal for use in adults. The advent of the miniature video camera has revolutionized fiberoptic endoscopy
- 93. Fiberoptic Intubation =It can be performed via oral or nasal route =The fiberscope is inserted & advanced behind the tongue & into the larynx. Once in the trachea, a tracheal tube which has been previously loaded onto the fiberscope is advanced off the scope into the trachea & then the fiberscope is removed. =Oral intubation is considered more difficult than nasal intubation
- 94. Advantages =Reliable approach to the difficult airway management. =Facility to record images for review & documentation. =Improvements in teaching techniques. Disadvantages =More expensive & fragile & difficult to use than rigid laryngoscope. =Requires more time than rigid laryngoscopy. =Requires considerable experience & skill Maintenance =Laryngeal trauma may occur.
- 95. Complications of laryngoscopy 1. Dental injury 2. damage to soft tissue and nerves 3. Injury to cervical spinal cord 4. Circulatory changes 5. Swallowing or aspiration of foreign body. 6. Shock or Burns 7. Laryngoscope malfunctions 8. Disease transmission 9. TMJ Dislocation.
- 97. DESCRIPTION =An endotracheal tube is one through which anesthetic gases and respiratory gases are conveyed into and out of the trachea. =It has tracheal & machine end =The bevel is defined as the slanted part of the tube at the tracheal end. =When, an opening in the tube is present on the opposite side of the bevel it is designated as Murphy’s tip endotracheal tube.
- 98. REQUIREMENTS OF AN IDEAL ET TUBE 1) Inertness 2) Smoothness of outer surface to avoid damage to mucosa 3) Inner surface should be smoothed and non-wettable to prevent building of secretions. 4) Non-inflammable 5) Transparent 6) Easily sterilized 7) Non kinking
- 99. 8) Sufficient strength to allow thin wall construction 9) Thermo plasticity to confirm to anatomic passage and to be self centering within the trachea. 10) Non reactive with lubricants or anesthetic agents 11) Latex free 12) Non injurious catheter tip Currently used tubes are manufactured from synthetic rubber, plastic materials and silicone.
- 100. GENERAL PRINCIPLES RESISTANCE AND WORK OF BREATHING =A tracheal tube places a mechanical burden on spontaneously breathing patient. It is a source of more resistance and is an important factor in determining the work of breathing. The factors determining the resistance include: 1) Internal diameter: The tube with thick wall decreases the ID and thereby increases the resistance and vice-versa. 2) Length: Decreasing the length of the tube decreases the resistance. 3) Configuration: Abrupt change in the diameter and direction increases the resistance. Gentle curve connectors offer less resistance than right-angled ones as there will be increased resistance because of turbulent flow of gases.
- 101. DEAD SPACE =The volume of tracheal tube and connector is usually less than that of the natural passage. =Dead space is normally reduced by intubation. =In pediatric patients long tubes and connectors may increase the dead space considerably.
- 102. STANDARD MARKING OF ETT =The markings are situated on the bevel side above the cuff & are read from pt end to machine end =Type of the tube: Oral or nasal or oral/nasal Size: ID in mm =External diameter may also be indicated. =Manufacturer's name or trade mark
- 103. =Tube has Graduated markings, showing the distance in cms from the patient end. =Precautions are usually noted: Disposable/Do not reuse =Implantation tests (IT) or Z-79 indicating the tube has been tested for tissue toxicity & accomplish ANSI standard. =Opaque lines may also be included at the patient end or along full length.
- 104. CUFF SYSTEM =A Cuff system consists of the cuff & inflation system. =The purpose of cuff system is to provide a seal between tube & tracheal wall to prevent passage of pharyngeal contents into the trachea & ensure no gas leaks past the cuff. =The cuff also serves to center the tube in trachea.
- 105. INFLATION SYSTEM 1)Inflation valve: When a syringe tip is inserted, a plunger is displaced from its seat & gas can be injected into the cuff. Upon removal of the syringe the valve seals and gas cannot escape. 2) Pilot balloon: Its function is to give an indication of inflation or deflation of the cuff and a rough idea of the cuff pressure.
- 106. 3) External inflation tube: The standard specifies , a)The external diameter should not exceed 2.5mm b) The inflation tube should be attached to the ETT at a small angle. c) The tube should extend at least 3cm beyond the machine end of the ETT before a pilot balloon or inflation valve is incorporated. 4) Inflation lumen: This connects the inflation tube to the cuff. It is located within the wall of the tracheal tube.
- 107. CUFF The cuff is a inflatable sleeve near the patient end of ETT. The cuff material should be strong and tear resistant but thin, soft and pliable. Cuffs are usually made of the same material as the ETT.
- 108. CUFF PRESSURE Intracuff pressure and pressure on tracheal wall =It is desirable that cuff seals the airway without extending so much pressure on the trachea so that its circulation is not compromised or trachea is dilated. =When cuff is inflated in the trachea, there is a linear decrease in the perfusion. It is reduced when the lateral pressure on the tracheal wall attains 30cm of H20 (22mmHg) and ceases completely at 50cm of H20 (42mmHg). =So it is recommended that the pressure on the lateral tracheal wall should be kept between 25-34cm of H20.
- 109. Intracuff pressure and use of nitrous oxide The resting intracuff pressure and volume of the cuff inflated with air rise during nitrous oxide anesthesia, which results in ischaemia of the tracheal mucosa or compression of the tube, and increase in volume may lead to cuff herniation.
- 110. to prevent the increasing pressure includes the following a) Filling the cuff with gas mixture to be used for anesthesia or saline b) Fitting the cuff system with pressure relief valve or pressure regulating devices. c) Use of special system e.g. Lanz pressure regulating valve, sponge cuff and special tubes like Brandt tubes. d) Monitoring cuff pressure and deflating the cuff as needed. --Steps
- 111. Types of cuffs Low volume high pressure cuff = They have a small diameter at rest and low residual volume. =It requires a high intra-cuff pressure to achieve a seal with the trachea. =It has a small area of contact with the trachea and distends and deforms the trachea to a circular shape. =The intra-cuff pressure and lateral pressure on the tracheal wall increase sharply as increments of air are added to the cuff. For this reason use of largest ETT has been advised, so that the cuff will be minimally inflated when a seal is created a) Low volume high pressure b) High volume low pressure
- 112. Advantages =Usually reused, =Less expensive =Offers better protection against aspiration =Better visibility during intubation than low pressure cuffs. =There is also low incidence of sore throat. Disadvantages =The most serious risk associated with these cuffs is ischemic damage to the trachea following prolonged use.
- 113. High volume low pressure cuffs =They have a high resting volume, large diameter and a thin competent wall. =As it is inflated, it first touches the trachea at its narrow point. As cuff inflation continues the area of contact become larger and the cuff adopts itself to irregular tracheal surface. =If the cuff inflation is continued the area in contact will be subjected to increasing pressure and trachea will be distorted to a circular cross section similar to high pressure cuff.
- 115. Advantage =It is relatively easy to pass devices such as esophageal stethoscope, temperature probes, nasogastric tubes around a low pressure cuffs Disadvantage =These tubes are more difficult to insert, =Obscure the view of the tube tip and larynx =The cuff is more friable and thus more likely to be torn during intubation. =Incidence of sore throats is greater with these tubes. =It may not effectively prevent fluid leakage into lower airway.
- 116. THE GUIDELINES TO DETERMINE THE SIZE OF ETT Ideal tube in average Adult male = 8.5mm ID Ideal tube in an average Adult female = 7.5mm ID. Age is recognized as the most reliable indicator of appropriate ETT size for children. 3 months & less ------ 3 mm ID 3 - 9 months ------ 3.5 mm ID Older than 1 year ------ ID in mm = (16 + age in years)/4
- 117. Younger than 6 years ---3.5 + age in years/3 = ID in mm Older than 6years ---- 4.5 + age in years / 4 = ID in mm Infants below 1kg ----- 2.5mm Infants 1-2 kg ------ 3.0 mm Infants 2-3 kg ------ 3.5 mm Infants 3 kg ---------- 4.0 mm Choosing a tube whose external diameter is same width as the patient's distal little finger
- 118. Patients age Size( mm ID) Premature neonate 2.5 to 3.0 Full term neonate 3.0 to 3.5 3 months to 1 year 4.0 2 years 4.5 4 years 5.0 6 years 5.5 8 years 6.0 10 years 6.5 12 years 7.0 Other recommendations for size of ET tubes
- 119. DEPTH OF INSERTION The tube should be in the middle third of the trachea with the head in natural position. The following calculations can be used. 1) Length in cm = age/2 + 12 2) Length in cm = weight in kg/5 + 12 3) Length in cm = height in cms/10 + 5 4) Length in cm = 3 × ID (mm)
- 120. In adults, the tube should be passed until the cuff is 2.25 to 2.5cm below the vocal cord In average size adult patients, securing the tube at the anterior incisor at 23cm in males and 21cm in females will usually avoid endobronchial intubation. For nasal intubation 5cm should be added to these length for positioning at the nares.
- 121. SPECIFIC ET TUBES Cole tube =It is uncuffed ETT, designed for pediatric patients. The patient end is smaller in diameter than the rest of the tube =They are sized according to the internal diameter of the tracheal portion. It ranges from 2mm to 5mm.. =It is recommended for neonatal resuscitation but not for long term intubation. =Disadvantage of this tube is that it cannot be used nasally
- 122. Spiral embedded tubes =Also known as Armored tube. =These tubes have a metal or nylon spiral woven reinforcing wire covered both internally and externally by rubber, PVC or silicone. =A stylet is often needed for intubation. =These tubes are esp useful in situations where the tube is likely to be bent or compressed as in head & neck surgery
- 123. Advantages ----Primary advantage of tube is resistance to kinking and compression. --The portion of the tube outside the patient can be easily angled away from the surgical field without kinking -- Can be used for patients with Tracheostomies Disadvantages ----Tube may rotate on the stylet during intubation. -- Insertion through nose & intubating LMA is difficult. -- Fixation of these tubes are more difficult. --If the patient bites the tube it will cause permanent deformity resulting in obstruction of the tube.
- 124. =It is preformed to facilitate the head & neck surgeries. =The tubes are available in cuffed uncuffed ,nasal and oral version =There is a preformed bend in the tube that may be temporarily straightened for suctioning. =Each tube has a rectangular mark at the center of the bend. =Distance from this mark to the distal tip is printed on each tube. Preformed tubes/Ring-Adair-Elwyn (RAE)
- 125. =Oral RAE tubes are shorter than the nasal ones. The external portion is bent at an acute angle so that when in place it rests on patients chin & the connector over the pts chest. =Nasal RAE has a curve opposite to the curvature of the oral tube, so that when in place the outer portion of the tube is directed towards patient's forehead
- 126. Advantages =Easy to secure and reduce the risk of unintended extubation. =Breathing system remains away from surgical field Disadvantages =It offers more resistance than conventional tubes. =Suctioning is difficult
- 127. Laryngectomy tube =Designed for insertion into a tracheostomy site. =The tube is preformed in a J configuration at the pt end =This allows the part of the tube external to the patient to be directed away from the surgical field. =The tip may be short and/or without a bevel to avoid inadvertent advancement into a bronchus.
- 128. Injectoflex Tube =It is used for laryngeal microsurgery. =It is a short cuffed silicone tube designed to be placed below the vocal cords. =The tube has an embedded wire spiral to prevent kinking and compression. The cuff inflation lumen and the inflation tube are integrally joined in a sheath with a malleable introducer.
- 129. Microlaryngeal tracheal surgery tube It is available with an ID of 4, 5 or 6mm, each of which has the same length and cuff diameter as a standard 8mm ID tube. Designed for microlaryngeal tracheal surgery. The small diameter provides better surgical access The problems with this tube are incomplete exhalation & occlusion.
- 130. Endotrol tubes A tip control system is incorporated in this tracheal tube to change the direction of the tip. This tube has a ring loop at the machine end that is connected to the tip with a cable Pulling the ring causes the tip of the tube to move anteriorly. This is useful when laryngoscopy is difficult and only epiglottis is seen.
- 131. Tubes with extra lumens Tubes are available with one or more separate lumens terminating near the tip. They are useful for respiratory gas sampling, airway pressure monitoring, injection of fluids and drugs & jet ventilation.
- 132. The LITA (Laryngotracheal Instillation of Topical anesthesia) Has additional small bore channel within the concave surface of the tube. 10 small holes at the distal 13cm of the tube allows the injected medication to be spread both above & below the cuffs. This can provide a smooth emergence from anesthesia without coughing in most cases.
- 133. EMG Reinforced Tube This tube is designed to monitor recurrent laryngeal nerve electromyogram activity during surgery. The tube is wire-reinforced & has 4 stainless steel electrodes above the cuff. The electrodes are connected to a monitor.
- 134. Laser-shield II Tracheal Tube It is designed for use with CO2 and KTP lasers. Made from silicone with an inner aluminium wrap and a smooth Teflon outer coating. The cuff is not laser resistant & contains methylene blue crystals. It should be inflated with water or saline solution.
- 135. Cottonoids for wrapping around the cuff are supplied with each tube. These must be moistened and kept moist during the entire procedure Disadvantage Exposure of unprotected parts of the tube proximal & distal to cuff can result in rapid combustion. The methylene blue crystals may not fully dissolve & may obstruct the pilot tube, making it impossible to deflate.
- 136. Laser-Flex Tubes Laser flex tube is a flexible stainless steel tube with a smooth surface designed for used with C02 and KTP (potassium-titanyl-phosphate) lasers. Adult version has two PVC cuffs and PVC tips with Murphy eye. The tube cuffs are inflated by two separate inflation tubes. The distal cuff can be used if proximal one is damage by laser.
- 137. The cuff should be filled with saline. The distal cuff should be filled first until sealing occurs, then the proximal cuff is filled with saline coloured with methylene blue. Problems with the laser flex tube include stiffness, roughness, cannot be trimmed. The double cuff adds to the time of intubation and extubation.
- 138. Laser-tubes This is made of white rubber & has a cuff-within-a cuff design. If the outer cuff is perforated by a laser beam, the trachea will still be sealed by inner cuff. The inner cuff is filled with air & outer with water or saline. The shaft above the cuff is covered by a corrugated silver foil, which is covered by merocel sponge that should be moistened with saline before use. It is recommended for use with argon, NdYAG, CO2 lasers.
- 139. Hi-Lo Evac Tube It incorporates dedicated channel which can be used to clear secretions below the vocal cords but above the cuff. The lumen may be blocked by secretions.
- 140. Hi-Lo Jet Tube It is an uncuffed tube with additional lumen that can be used for Jet ventilation, monitoring airway pressure, sampling respiratory gases or administering local anesthetics.
- 141. THANK YOU