
Recommended
More Related Content
What's hot
What's hot (19)
Viewers also liked
Similar to Filming Techniques and Editing Transitions
Similar to Filming Techniques and Editing Transitions (20)
More from LivThomas
More from LivThomas (20)
Recently uploaded
Recently uploaded (20)
Filming Techniques and Editing Transitions
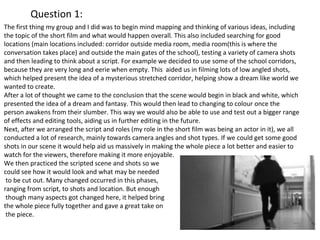
- 1. Question 1: The first thing my group and I did was to begin mind mapping and thinking of various ideas, including the topic of the short film and what would happen overall. This also included searching for good locations (main locations included: corridor outside media room, media room(this is where the conversation takes place) and outside the main gates of the school), testing a variety of camera shots and then leading to think about a script. For example we decided to use some of the school corridors, because they are very long and eerie when empty. This aided us in filming lots of low angled shots, which helped present the idea of a mysterious stretched corridor, helping show a dream like world we wanted to create. After a lot of thought we came to the conclusion that the scene would begin in black and white, which presented the idea of a dream and fantasy. This would then lead to changing to colour once the person awakens from their slumber. This way we would also be able to use and test out a bigger range of effects and editing tools, aiding us in further editing in the future. Next, after we arranged the script and roles (my role in the short film was being an actor in it), we all conducted a lot of research, mainly towards camera angles and shot types. If we could get some good shots in our scene it would help aid us massively in making the whole piece a lot better and easier to watch for the viewers, therefore making it more enjoyable. We then practiced the scripted scene and shots so we could see how it would look and what may be needed to be cut out. Many changed occurred in this phases, ranging from script, to shots and location. But enough though many aspects got changed here, it helped bring the whole piece fully together and gave a great take on the piece.
- 2. Question 2 The rule states that the camera should remain the same side of an imaginary line The line is drawn perpendicular the camera’s viewpoint in the establishing shot of the scene The rule enforces continuity of the film An example is that in a car chase scene, if the car is travelling from right to left, the next shot must also be shot from the same side, meaning the car has to enter the frame right to left again The same applies for football matches and other sport The rule should never be broken, the only defence for breaking the rule is ‘for effect’. Breaking the rule will confuse the audience, especially in scenes of chase, conversation or sport, so the camera must always be on one side of the line. We ensured that we didn’t break this as by doing so it could result in the confusion of the audience, the audience losing focus, the scene becoming disorientated or people missing vital parts of the film(scene). We made sure we kept one character on one side and another on the other, this mainly occurred in conversation scenes.
- 3. The male character was always on the left…. …and the female was always on the right.
- 4. Question 3 We used a ‘Bird’s eye view shot’ near the start of the short film, this added a different view and perspective to the shot. This is a completely different and somewhat unnatural point of view which can be used for dramatic effect or for showing a different spatial perspective. In a dramatic setting like we have made in our shot, it can be used to show the positions and motions of different characters and objects, enabling the viewer to see things the characters can't. Another shot that was used was the ‘Over the shoulder shot’. This shot helped allow the audience an insight into what the character sees and from their point of view. In this case the audience is aware that the female character is confronting and talking to the male character. This shot can also add realism to the shot as the audience adopt the same view as the character. A high angle shot was another shot we used. This was used at the start of the film when the character appears to be running away from something in fear. We used this shot as it helps show the subject from above, i.e. the camera is angled down towards the subject., this has the effect of diminishing the subject, making them appear less powerful, less significant or even submissive. Which is what was needed as the character was the one frightened and afraid.
- 5. One of the last shots we used was the slanted or tilt shot. This is where the camera is purposely tilted to one side so the horizon is on an angle. This creates an interesting and dramatic effect. We used this shot as the male character awakens and sees the girl opposite him, this helped create and interesting scene, while also showing the characters point of view as he tilts his head up. Therefore putting the audience in his position. (Famous examples include Carol Reed's The Third Man, Orson Welles' Citizen Kane and the Batman series.)
- 6. Question 4 The main effect that was used throughout the editing stages was the dissolve transitions: fading to black and to white. We used fading to black as it helped create tension and suspense to the scene, fading to white was also used but for a different reason, which was to help emphasise the colour change in transitions. Around half way through the film, the main character awakens from his sleep. Every thing up to that point was in black and white to help create a unreal and strange, colourless world; like in a dream. By fading to white it helped show the sudden change from dark to light and from dream into reality. Fade to black Fade to white This was the first time I had used that software and wasn’t sure how to use certain aspects of it, a feature I particularly struggled with was the editing if audio. It took a while for me to gain confidence and understanding of how to use it. For example I wasn’t sure how to add in just the sound from a video, without that actual video being there. But after some support and help by friends and teachers I soon got the hang of it and understood the process a lot more. Now I know how to use this, I am much more confident to use it and create a lot more creative and interesting videos and films.
- 7. Question 4 The main effect that was used throughout the editing stages was the dissolve transitions: fading to black and to white. We used fading to black as it helped create tension and suspense to the scene, fading to white was also used but for a different reason, which was to help emphasise the colour change in transitions. Around half way through the film, the main character awakens from his sleep. Every thing up to that point was in black and white to help create a unreal and strange, colourless world; like in a dream. By fading to white it helped show the sudden change from dark to light and from dream into reality. Fade to black Fade to white This was the first time I had used that software and wasn’t sure how to use certain aspects of it, a feature I particularly struggled with was the editing if audio. It took a while for me to gain confidence and understanding of how to use it. For example I wasn’t sure how to add in just the sound from a video, without that actual video being there. But after some support and help by friends and teachers I soon got the hang of it and understood the process a lot more. Now I know how to use this, I am much more confident to use it and create a lot more creative and interesting videos and films.