Muse workshop notes
•
0 likes•308 views

From a workshop on video portraits. www.zerotheone.com

Recommended
More Related Content
What's hot
Viewers also liked
Viewers also liked (20)
Similar to Muse workshop notes
Similar to Muse workshop notes (20)
Recently uploaded
Recently uploaded (20)
Muse workshop notes
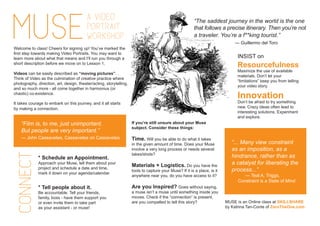
- 1. Welcome to class! Cheers for signing up! You’ve marked the first step towards making Video Portraits. You may want to learn more about what that means and I’ll run you through a short description before we move on to Lesson 1. Videos can be easily described as “moving pictures”. . Think of Video as the culmination of creative practice where photography, direction, art, design, theater/acting, storytelling, and so much more - all come together in harmonius (or chaotic) co-existence. * Schedule an Appointment. Approach your Muse, tell them about your project and schedule a date and time, mark it down on your agenda/calendar. “The saddest journey in the world is the one that follows a precise itinerary. Then you’re not a traveler. You’re a f**king tourist.” ― Guillermo del Toro “Film is, to me, just unimportant. But people are very important.” ― John Cassavetes, Cassavetes on Cassavetes “... Many view constraint as an imposition, as a hindrance, rather than as a catalyst for liberating the process...” ― Teal A. Triggs, Constraint is a State of Mind * Tell people about it. Be accountable. Tell your friends, family, boss - have them support you or even invite them to take part as your assistant - or muse! It takes courage to embark on this journey, and it all starts by making a connection. connect If you’re still unsure about your Muse subject. Consider these things: Time. Will you be able to do what it takes in the given amount of time. Does your Muse involve a very long process or needs several takes/shots? Materials + Logistics. Do you have the tools to capture your Muse? If it is a place, is it anywhere near you, do you have access to it? Are you Inspired? Goes without saying, a muse isn’t a muse until something inside you moves. Check if the “connection” is present, are you compelled to tell this story? INSIST on Resourcefulness Maximize the use of available materials. Don’t let your “limitations” keep you from telling your video story. Innovation Don’t be afraid to try something new. Crazy ideas often lead to interesting solutions. Experiment and explore. MUSE is an Online class at SKILLSHARE by Katrina Tan-Conte of ZeroTheOne.com
- 2. mo·tif • A recurrent thematic element in an artistic or literary work. • A dominant theme or central idea. “Storytelling reveals meaning without committing the error of defining it.” ― Hannah Arendt As humans we naturally try and make sense out of any series or group of things together (remember those domino logic tests?). Making sense of the world is part of survival and we are masters of making connections even when it is not called for, we can’t help but make A point to B. That is also called creativity. While it is fun to go wild with our imagination having a bit of focus can help us convey our video portrait in a clearer and more profound way. Recording an interview can be easy or impossible depending on both you and your subject. Asking someone to talk on camera and be comfortable + natural can be demanding but if you can be confident, comfortable, and natural with your Muse then you might get them to be themselves and more on camera. Start by engaging in a conversation, be present with them first. Copper carving depicting a Sámi shaman with his magic drum MUSE is an Online class at SKILLSHARE by Katrina Tan-Conte of ZeroTheOne.com The basic formula for an interview involves the questions Who, What, Why, and How? Storyboarding is essential for any serious film-maker. However, in this approach we are making space for the unexpected, allowing our Muse to naturaly unravel before us without too much manipulation. The intent is not to stage a show or performance but to make an honest connection with our subject and build from the relationship that develops as we converse and shoot. Therefore a storyboard may be useful but the story itself can change depending on what happens in the actual meeting with our subject. Finding a Motif helps us narrow down the conversation topics and choice of shots while allowing us to remain open/spontaneous to other events that might arise. This is also good discipline for letting go of assumptions and to make use of what is available (aka resourcefulness + innovation). To storyboard or not to storyboard? “To survive, you must tell stories.” - Umberto Eco Finding a Motif is like a finding a pattern, a common thread to bring all the different elements of your story together. You’ll want to consider topics you’re curious about discussing. You’ll also want to consider the feel or sensation of your video - are you fascinated by the environment of your Muse, the textures or materials, the weather, etc. Write your thoughts down on paper and then distill the top three keywords you’ll want to keep in mind as a guide for your interview/shoot. Some people seriously don’t want to speak on camera. Interviews are not absolutely neccessary for making Video Portriats. You can, instead, film parts about this person and what they do, give a sense of what makes this person your Muse through visual clues (refer to your Motif for ideas). “Everything you possess of skill, and wealth, and handicraft, wasn’t it first merely a thought and a quest?” ― Rumi
- 3. basic shot typesExtreme Wide Shot is often used as an “establishing shot” - the first shot of a new scene that shows the audience where the action is taking place. Very Wide Shot is closer than EWS and it shows the subject in the environment. It can be useful if an action like running or moving is involved. Wide Shot shows all of your sub- ject and some of the environment. Make sure to make space above and below to avoid cutting parts if they move. Medium Close Up is common for interviews, it gives a more intimate feel to the conversation without being too close. Hand-gestures and expressions are visible. Close Up is useful for capturing details of the face, an emotional moment or the subject’s expressions. Cutaway shows something other than the action/subject, it adds dimension and depth to what is happening while a Cut-In shows parts of the subject in detail. Mid Shot is an approximation of how we naturally perceive people in the flesh. It gives the feeling of talking with the subject in person. MUSE is an Online class at SKILLSHARE by Katrina Tan-Conte of ZeroTheOne.com Stock photos taken from SXC.hu and DeviantArt “In order to give meaning to the world, one has to feel oneself involved in what he frames. This attitude requires concentration, a discipline of mind, sensitivity, and a sense of geometry.” - Henri Cartier-Bresson Shooting is more than just pointing your camera at your subject and hitting the record button. It is also about framing or positioning your subject on the screen in a way that best tells your story.
- 4. MUSE is an Online class at SKILLSHARE by Katrina Tan-Conte of ZeroTheOne.com basic shot angles High Angle is when the camera points down on the subject. It makes your subject appear smaller (like hobbits) and can also be used to show action like footwork/dance or handiwork/craft. Image from Alfred Hitchcock’s North by Northwest Low Angle is a shot taken from below and it makes the subject appear bigger or more powerful. Image from Quentin Tarantino’s Inglorious Basterds Eye Level shows the subject as you would see them in real-life. A common and neutral shot. Image from Jean Luc Godard’s Alphaville Everything we shoot, everything we see is light. Find a well-lighted space near a window if indoors or shoot either early morning or late afternoon outdoors. Direct sunlight from a mid-day sun will cast sharp shadows on your subject’s face and/or make them squint which can look UGLEH. You can avoid this by shooting in semi-shade like under a tree. Prioritize the illumination of your subject/Muse but also pay attention to the contrast of the environment - is the background too bright or too dark? You may want to turn on a few indoor lights to balance background and foreground and/or reposition your subject in a more balanced contrast if outdoors. light “There is only you and your camera. The limitations in your photography are in yourself, for what we see is what we are.” - Ernst Haas Handheld or Tripod? Using the Tripod is undoubtedly the standard and it is also safest way to shoot your video especially for those who have difficulty in keeping their grip steady. Jittery shots are difficult to watch and worse when you’re using the zoom function, resulting terrible things like eye stroke. So please check your handheld shots first and avoid zooming in to make shots less jittery. I personally prefer to use handheld because it is fast and easy to set up and start shooting. Again it is important to keep in mind your INTENTION. In terms of effect, handheld shots feel more organic or even intimate when done well. This can also be considered a photo-journalistic approach to film-making. A good compromise between handheld and tripod is the use of a MONOPOD. This is also a way to avoid jittery movement as it adds balance to your grip. You can even do extended high angle shots or a mock crane shot which could look cinematic in a big social event like a wedding or music festival.
- 5. Crane Shot is usually reserved for feature film-makers who can afford to use a crane but you can mimic this movement by using your Monopod and lifting it. “The function of camera movement is to assist the storytelling. That’s all it is. It cannot be there just to demonstrate itself.” ― Mike Figgis, Digital Filmmaking basic camera movements Panning Shot is an easy way of showing the surrounding area much like the way you would view a place by twisting your head from left to right. Instead of shooting several shots of a place you can have just one shot using this technique. You can also use this to follow your subject as they move. Tilt Shot is similar to the Panning shot but instead of twisting the camera horizontally AKA left to right, you twist vertically from top to bottom (or vice versa) much like how you would look up or down on something. Tracking or Dolly shot is commonly used to follow a subject as they move. Unlike the Panning shot, the camera is not staying in one position but instead moving with your subject on a horizontal plane from point A to B. REMINDER: Please be aware of the area where you will be conducting your camera movements especially if it is a Tracking or Crane shot. Tracking your subject and focusing on getting a good shot out in the street can be dangerous for things like moving cars or people or potholes you might trip on. Either test your shot or the path you’ll be tracking or get someone to watch your back while you shoot. MUSE is an Online class at SKILLSHARE by Katrina Tan-Conte of ZeroTheOne.com
- 6. editing tips 1.file organization As soon as you start transfering video files into your computer, make sure you sort and label by date, subject/location. Adding other details like names or keywords can help for reference and future projects. 2.start by cutting your interview This takes the most time and you’ll want to distill the absolute essentials before getting started on the “storytelling” or the arranging and adding of supporting shots later. This is practical if you don’t have a fast computer and overloading your editing software with hours of video footage will just make it impossible to work. So go bit by bit, starting with the meat or content of your video. 3. collect the best Review your footages and take out the very best shots (other than the interview) to support your story. Consider visual clues - ask, how can I bring the viewer into this experience? 4.assemble the puzzle Once you have all the shots you need for your video, you can start lining them up on your editing board or timeline. This is where the actual storytelling happens. Normally, a story has a beginning, middle and end. You’ll want to consider the experience of your viewer like building up your story using momentum or rhythm especially if some music is involved. 5.avoid too short or overly long shots Unless you’re making a stop-motion sequence, there is no reason you should cut your clips down to a few seconds sequence unless you are trying to stage a visual seizure. Ask, do you absolutely need that 2 second shot of a cat? Practicing zen in your editing and letting go can greatly improve your storytelling AND make this whole process less stressful. Overly long shots can also be a drag for your viewer. Ask, what is your intention? Will this help your story? 7. transitions Tread softly in these grounds because it’s easy to lose yourself and end up with a video from the 80s. Transitions are useful for 2 main things: to divide your video into parts (to transition from one scene/mood to the next) and to add either movement or drama as a way to strengthen your story. Basic transitions include: Simple cut - the most common is the cut between your shots. Fade into black or white - useful for dramatic beginnings or endings. Crossfade - another dramatic and soft way for clips to transition. Too much of this effect can look tacky. 8. adding text First it is important to add credits at the beginning or end of your video to mention/thank those involved. This is also a way for the viewer to find and connect with you and your subject soon after they watch your video. Adding subtitles can also help your video reach more viewers. Adding a quote or dedication at the beginning can also assist in getting your audience in the right mood or frame of mind for your video. 9. music/audio It’s important to consciously pair your video/shots with music that matches or compliments the mood or feeling you are trying to convey. Try out your software’s available audio tools like noise reduction if your recording is too noisy or try High Pass to amplify higher pitch sounds or Low Pass to amplify lower pitch sounds. 10. improving image The priority is to keep your subject visible so adjusting the brightness or contrast can be useful. You may also want to adjust the hue to keep your shots and the mood consistent throughout the video. 11. export Export your file in high quality Quicktime format (.mov) and adjust settings to Photo-Jpeg for backup and/or export another file for online viewing on youtube or vimeo. Most editing software have this option. MUSE is an Online class at SKILLSHARE by Katrina Tan-Conte of ZeroTheOne.com
- 7. shareAfter making your video portrait it’s time to go back to step one or to re- Connect. This time we give back to our Muse, our source of inspiration. Paying it forward or sharing is such an infectuous joy that it easily opens up people and hearts. It feels so good you’ll want to do more of it - and why not together with your friends and loves? If you know it’s important and it makes your heart sing, shout it out loud, throw a party! Get some of your friends together for a viewing night or surprise your Muse with a screening of their video portrait with their friends and family. Things like these build and strengthen relationships, it makes life all the merrier. So, go out and share and be the beauty you see in the world. Shine bright! credits Workshop + Materials Katrina Tan-Conte ZeroTheOne.com Assistance, Support Francesco Conte FranAtopos.com Insight, Assistance, Support Ruben Lagattolla Ruben FilmsSpiral Out, Keep Going by ~ceremonially-unclean via DeviantArt.com You can find all of your classmate’s video portraits at this link: http://www.zerotheone. com/muse-march-2013/ http://www.skillshare.com/