3. 3
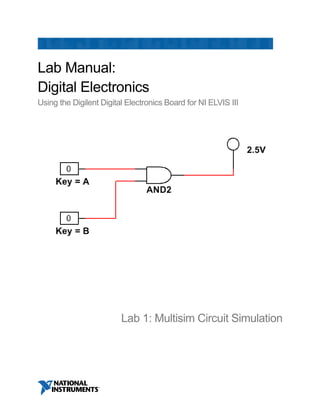
Lab 1: Multisim Circuit Simulation
In this lab, you will learn to use simulation software to simulate the behavior of digital
circuits. Using the Multisim environment, you will be able to simulate basic and
advanced circuits to learn fundamental concepts of digital electronics without needing
physical components such as wires, probes, and chips. This offers many advantages to
the student, such as being able to experiment with circuits and components before
needing to build the circuit.
Additionally, you will learn to create digital circuits and deploy them to the NI Digital
Systems Development Board. In a later lesson, students will explore more about
Programmable Logic Devices (PLDs) and a specific type of PLD called a Filed-
Programmable Gate Array, or FPGA. FPGAs are an interesting technology that allow
circuit designers to build custom circuits on a reconfigurable piece of hardware. When a
circuit design needs to change, the designer can change the circuit in hardware and
then simply redeploy it to the FPGA instead of soldering a new circuit.
In this lab series, you will use the FPGA on the Digital Electronics Board to deploy the
circuits that you design in Multisim onto the board, allowing you to implement custom
circuits which use the peripherals on the board.
Learning Objectives
In this lab, students will:
1. Open pre-configured circuits and PLD designs in Multisim.
2. Configure and build circuits and PLD designs in Multisim.
3. Simulate simple digital circuits.
4. Deploy PLD designs to the FPGA.
4. 4
Required Tools and Technology
Platform: NI ELVIS III ✓ View User Manual:
http://www.ni.com/en-
us/support/model.ni-elvis-
iii.html
✓ View Tutorials:
https://www.youtube.com/playl
ist?list=PLvcPIuVaUMIWm8zi
aSxv0gwtshBA2dh_M
Hardware: Digilent Digital Electronics
Board for NI ELVIS III
✓ View NI DSDB Board Manual:
http://www.ni.com/pdf/manuals
/376627b.pdf
Software: NI Multisim 14.0.1 Education
Version or newer
✓ Install Multisim:
http://www.ni.com/gate/gb/GB
_ACADEMICEVALMULTISIM/
US
✓ View Help:
http://www.ni.com/multisim/tec
hnical-resources/
Software: NI LabVIEW FPGA Vivado
2014.4
✓ Install: http://www.ni.com/dow
nload/labview-fpga-module-
2015-sp1/5920/en/
Note: Digilent Driver (The installer
above automatically downloads the
installer below onto your computer)
✓ Navigate to:
C:NIFPGAprogramsVivado2
014_4dataxicomcable_drive
rsnt64digilent
✓ Install: install_digilent.exe
5. 5
Expected Deliverables
In this lab, you will collect the following deliverables:
• Analysis of gate behavior
• Comments on the inputs of LEDs
• Conclusion questions
Your instructor may expect you to complete a lab report. Refer to your instructor for
specific requirements or templates.
6. 6
1.1 Theory and Background
Figure 1-1 Video Screenshot. View the video here: https://youtu.be/hZL5O4Z8v7Q
Video Summary
• NI Multisim will be used to build circuits and observe their behavior
• Multisim is a virtual environment which allows you to build and test circuits
without needing physical components
• Circuits that have been built and tested can be deployed to hardware to be
observed
7. 7
1.2 Simulate: Circuits in Multisim
Circuit
Open the circuit file: https://cf-ts.mythinkscape.com/ckeditor/AND_Gate_2.ms14 .
• Note: the file name is AND_Gate.ms14
• Select File>>Open, and then browse to the location where the files for this lab
have been saved.
• This circuit takes two digital inputs, wires them into an AND gate, and wires the
output to a probe. Using Multisim, we can explore the behavior of this circuit.
Figure 1-2 AND gate circuit
8. 8
Testing an AND Gate
• Click the Run button to begin simulating the circuit.
Video tutorial on how to run and stop a simulation of a circuit:
Figure 1-3 Video Tutorial: https://cf-ts.mythinkscape.com/video/002_Run_and_Stop.mp4
• Press the ‘A’ key on the keyboard to change the value of that input to 1.
9. 9
Video tutorial on how to change input values:
Figure 1-4 Video Tutorial: https://cf-ts.mythinkscape.com/003__Changing_the_Input_Values_2.mp4
Check Your Understanding
Note: The following questions are meant to help you self-assess your understanding so
far. You can view the answer key for all “Check your Understanding” questions at the
end of the lab.
1-1 Does the probe turn on?
A. Yes
B. No
10. 10
AND Gate Testing
• Press the ‘A’ key again to change the top input back to 0.
• Press the ‘B’ key to change the second input to 1.
1-2 Does the probe turn on?
A. Yes
B. No
• Press the ‘A’ key, so that both inputs are equal to 1.
1-3 Does the probe turn on?
A. Yes
B. No
1-4 How would you describe the behavior of this gate?
_____________________________________________________________________
_____________________________________________________________________
_____________________________________________________________________
_____________________________________________________________________
• When you’re done, stop the simulation by clicking the Stop button.
Figure 1-5 Stop button
11. 11
1.3 Exercise: Creating a New Multisim Circuit
Create a Circuit
Now create a similar circuit for yourself, following the instructions below.
• Select File>> New
• In the menu that appears, select Blank and click Create.
Placing an OR Gate
• Click the Place Misc Digital button along the top bar.
• In the window that appears, select TIL from the Family and scroll down to find
OR2 in the Component box.
• Click OK and place the component in the middle of the diagram.
Figure 1-6 Placing gates in Multisim: https://cf-ts.mythinkscape.com/052_Placing_an_OR_Gate_2.mp4
12. 12
Placing Circuit Components
• The window will temporarily go away and then come back. When it comes back,
select Sources from the Group drop-down, then select the DIGITAL_SOURCES
family, and the INTERACTIVE_DIGITAL_CONSTANT component.
• Place two INTERACTIVE_DIGITAL_CONSTANT to the left of the OR gate.
• Select Indicators in the Group drop-down, then select the PROBE family, and the
PROBE_DIG_RED component.
• Place this to the right of the OR gate.
• Click the Close button when the window reappears.
Figure 1-7 Placing components in Multisim:
https://cfts.mythinkscape.com/006_Placing_a_Gate_and_Circuit_Components_General_2.mp4
13. 13
Wiring a Circuit
Note: To wire the components together, click the end of the wire for one component
and then for another component. This will create a wire between them.
• Wire the two Digital Constants into the OR gate and then wire the OR gate into
the Probe.
Figure 1-8 Wiring a circuit in Multisim: https://cfts.mythinkscape.com/007_Wiring_a_Circuit_3.mp4
14. 14
Configuring Digital Constants
Notice that the two constants both use the Space key to change their value. To
configure components in the diagram, double-click them to change their settings.
• Double-click the top Digital Constant.
• In the window that appears, select ‘A’ from the Key for toggle dropdown.
• Change the second constant to toggle with the ‘B’ key.
Figure 1-9 Configuring digital constants in Multisim:
https://cfts.mythinkscape.com/008_Configuring_Digital_Constants_2.mp4
Testing an OR Gate
• Click the Run button to begin simulating the circuit.
Figure 1-10 Run button
• Press the ‘A’ key on the keyboard to change the value of that input to 1.
15. 15
1-5 Does the probe turn on?
A. Yes
B. No
• Press the ‘A’ key again to change the top input back to 0.
• Press the ‘B’ key to change the second input to 1.
1-6 Does the probe turn on?
A. Yes
B. No
• Press the ‘A’ key, so that both inputs are equal to 1.
1-7 Does the probe turn on?
A. Yes
B. No
1-8 How would you describe the behavior of this gate?
_____________________________________________________________________
_____________________________________________________________________
_____________________________________________________________________
_____________________________________________________________________
• Press the ‘A’ key, so that both inputs are equal to 1.
Figure 1-11 Stop button
16. 16
1.4 Exercise: Building Circuits on the Digital Electronics Board
DE Circuit
As we saw in the previous section, it’s quite easy to build and simulate digital circuits in
Multisim. In this section, we’re going to do something similar, but this time we’ll deploy a
PLD circuit to the FPGA on the Digital Electronics Board.
• Open the circuit file https://cf-ts.mythinkscape.com/OR_gate_-_PLD.ms14 .
• Select File>>Open, and then browse to the location where the files for this
lab has been saved.
This circuit reads the values from Switch 0 and Switch 1 on the Digital Electronics
Board, inputs them to an OR gate, and sends the output to the LED 0 on the Digital
Electronics Board.
17. 17
Deploying a Circuit to the Digital Electronics Board
To run this circuit, we need to deploy it to the board
• Select Transfer>>Export to PLD
• In the window that appears, leave the default settings, as seen, and click
Next.
Figure 1-12 Deploying a circuit to the Digital Electronics Board:
https://cf-ts.mythinkscape.com/video/009_Part_1_Deploying_a_Circuit_to_the_DSDB_Board_1.mp4
Configure the second step.
• Choose the Xilinx Vivado Design Suite tool.
• Select a location for the life.
• Select the XC7Z020.
• Click the Refresh button to see if your device is detected.
• Click the Finish button to deploy to the FPGA
18. 18
Figure 1-13 Deploying a circuit to the Digital Electronics Board:
https://cf-ts.mythinkscape.com/video/009_Part_2_Deploying_a_Circuit_to_the_DSDB_Board_1.mp4
Testing an OR Gate on the Digital Electronics Board
Note: A number of steps will run to compile and deploy the code. This can take a little
while.
• When the code is finished deploying, change the value of Switch 0 on the Digital
Electronics Board.
1-9 Does the LED light up?
A. Yes
B. No
• Change the Switch 0 to the off position, then turn on Switch 1.
19. 19
1-10 Does the LED light up?
A. Yes
B. No
• Change Switch 0 to the on position, so that both switches are on.
1-11 Does the LED light up?
A. Yes
B. No
1-12 How would you describe this gate?
_____________________________________________________________________
_____________________________________________________________________
_____________________________________________________________________
_____________________________________________________________________
20. 20
1.5 Exercise: Creating a New PLD Design
Create a new PLD design.
• Select File>>New
• In the window that appears, select the PLD design and click Create.
Figure 1-14 Creating a new PLD design:
https://cf-ts.mythinkscape.com/video/010_Part_1_Creating_a_New_PLD_Design.mp4
• Use the standard configuration for the NI Digital Electronics Board.
• In the second step, name the PLD Design ‘AND Gate’, and click Next.
• In the third step, leave the default settings and click Finish.
21. 21
Figure 1-15 Creating a new PLD design:
https://cf-ts.mythinkscape.com/video/010_Part_2_Creating_a_New_PLD_Design_vs2.mp4
22. 22
1.6 Building and Testing an OR Gate on the Digital Electronics Board
Using the switches, LEDs, and logic gates, create the following circuit.
• When you’re done, deploy it to the FPGA, and observe its behavior.
Figure 1-16 OR gate circuit
• Comment on the combination of inputs that turns the LED on and the general
behaviour of the gate here:
_____________________________________________________________________
_____________________________________________________________________
_____________________________________________________________________
_____________________________________________________________________
23. 23
1.7 Conclusion
1-13 Was it faster to simulate a circuit in Multisim or run a circuit on the FPGA?
_____________________________________________________________________
_____________________________________________________________________
1-14 When you might you simulate a circuit in Multisim and when might you run it on the
FPGA?
_____________________________________________________________________
_____________________________________________________________________
_____________________________________________________________________
_____________________________________________________________________
1-15 The NI Multisim environment is used to:
A. Explore the function of only digital circuits
B. Create virtual circuits without needing all of the physical components
C. Test whether a component (such as gates) is defective
D. All of the above
1-16 What is the main advantage of creating a circuit in Programmable Logic Devices
(PLDs) ?
A. They can be deployed to the Digital Electronics Board
B. They have more components than Multisim
C. They convert digital circuits to analog ones
D. They do not require a USB connection to the NI ELVIS III
24. 24
1-17 What is the role of the interactive digital constant in the circuit?
A. Lights up when current passes through it
B. Exports the circuits from Multisim to Digital Electronics Board
C. Inverse the direction of current flow
D. Allows the user to provide a signal that can be set high or low
1-18 In Multisim, we can change the value of which component?
A. AND Gate
B. OR Gate
C. Interactive digital constant
D. Digital probe
1-19 Which of the following is a benefit of creating circuits with FPGAs?
A. They’re more power efficient
B. They allow access to intermediate nodes of the circuit for measurement
C. They’re reconfigurable
D. None of the above
25. 25
Answer Key – Check Your Understanding Questions Only
Check Your Understanding
1-1 A